1. Deployment of elasticsearch
1.1. Installation access of elasticsearch
| Installation mode | advantage | shortcoming |
|---|---|---|
| docker | 1. Easy deployment 2. run directly 3. Start quickly | 1. Knowledge of docker is required 2. Complex configuration modification 3. The data storage needs to mount the directory |
| tar | 1. Flexible deployment 2. Little encroachment on the system | 1. You need to write your own startup management file 2. The catalogue needs to be planned in advance |
| rpm | 1. Easy deployment 2. Start the script and install it immediately 3. Standardization of storage directory | 1 software components are scattered in different directories 2. The unloading may not be clean 3. The default configuration needs to be modified |
| ansible | 1. Extremely flexible 2. Fast batch deployment | 1. ansible knowledge is required 2. Prepare all documents in advance |
1.2. Deploy elasticsearch
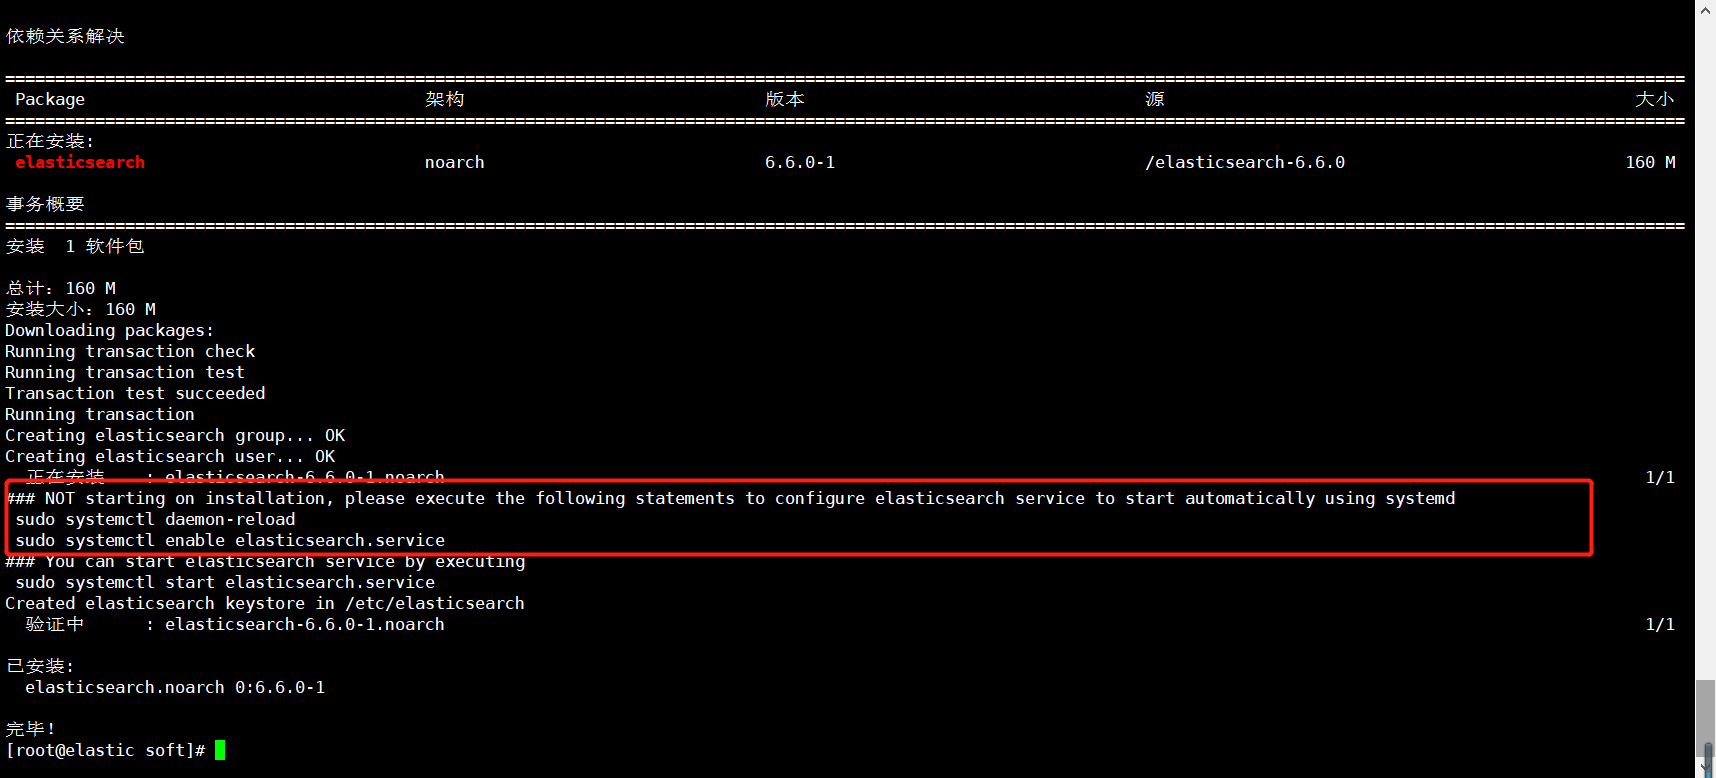
1.prepare Java environment
[root@elastic ~]# yum -y install java
[root@elastic ~]# java -version
openjdk version "1.8.0_262"
OpenJDK Runtime Environment (build 1.8.0_262-b10)
OpenJDK 64-Bit Server VM (build 25.262-b10, mixed mode)

2.download elasticsearch rpm package
[root@elastic ~]# mkdir soft
[root@elastic ~]# cd soft
[root@elastic soft]# wget https://artifacts.elastic.co/downloads/elasticsearch/elasticsearch-6.6.0.rpm
[root@elastic soft]# ll -h
-rw-r--r--. 1 root root 109M 11 August 15:58 elasticsearch-6.6.0.rpm

3.install elasticsearch
[root@elastic soft]# yum -y localinstall elasticsearch-6.6.0.rpm

4.start-up elasticsearch
[root@elastic soft]# systemctl daemon-reload
[root@elastic soft]# systemctl start elasticsearch
[root@elastic soft]# systemctl enable elasticsearch
Note that the prompt in the following figure is to reload systemctl, otherwise an error will be reported when modifying the configuration file and restarting
1.3. Verify that elasticsearch is started
1.curl At present, it can only pass 127.0.0.1 Access, because the configuration file has been written to death
[root@elastic soft]# curl 127.0.0.1:9200
{
  "name" : "MKtLqho",
  "cluster_name" : "elasticsearch",
  "cluster_uuid" : "lpRFdQbeTqyKSGph_xECfg",
  "version" : {
    "number" : "6.6.0",
    "build_flavor" : "default",
    "build_type" : "rpm",
    "build_hash" : "a9861f4",
    "build_date" : "2019-01-24T11:27:09.439740Z",
    "build_snapshot" : false,
    "lucene_version" : "7.6.0",
    "minimum_wire_compatibility_version" : "5.6.0",
    "minimum_index_compatibility_version" : "5.0.0"
  },
  "tagline" : "You Know, for Search"
}

2.View ports and processes
[root@elastic soft]# netstat -lnpt | grep 9200
[root@elastic soft]# lsof -i:9200
[root@elastic soft]# ps aux | grep elastic
1.4. Introduction to elasticsearch configuration file
[root@elastic soft]# rpm -qc elasticsearch
/etc/elasticsearch/elasticsearch.yml
/etc/elasticsearch/jvm.options
/etc/elasticsearch/log4j2.properties
/etc/elasticsearch/role_mapping.yml
/etc/elasticsearch/roles.yml
/etc/elasticsearch/users
/etc/elasticsearch/users_roles
/etc/init.d/elasticsearch
/etc/sysconfig/elasticsearch
/usr/lib/sysctl.d/elasticsearch.conf
/usr/lib/systemd/system/elasticsearch.service
| file | effect |
|---|---|
| /etc/elasticsearch/elasticsearch.yml | Master profile |
| /etc/elasticsearch/jvm.options | jvm memory tuning file |
| /etc/init.d/elasticsearch | init startup script |
| /etc/sysconfig/elasticsearch | Environment variables are relevant and do not need to be changed |
| /usr/lib/sysctl.d/elasticsearch.conf | Environmental variable correlation |
| /usr/lib/systemd/system/elasticsearch.service | systemctl startup script |
2.elasticsearch tuning
2.1.jvm tuning
Configuration file path / etc / elasticsearch / JVM options
Main modifications:
- Xms1g / / minimum memory
- Xmx1g / / maximum memory
The maximum and minimum settings are the same
Elasticsearch costs special system memory, so this configuration file tuning is necessary. Generally, half of the system memory is used by elasticsearch, but remember not to exceed 30G. After 30G, the performance will not improve, but will decline
For one thing, if the system memory is 30G, how to allocate it? First, give 8G memory. After a period of time, if you feel it is not enough, adjust it to 16G. If it is not enough, don't use it after 24G, because you need to leave part of the memory for the system
In the production environment, the data can be copied to the test environment, and the specific test memory is more appropriate
[root@elastic ~]# vim /etc/elasticsearch/jvm.options
-Xms1g
-Xmx1g
2.2.swap tuning
Officials suggest turning off swap partitions
[root@elastic ~]# free -h
              total        used        free      shared  buff/cache   available
Mem:           1.8G        1.5G         72M        9.3M        177M         55M
Swap:          2.0G        104M        1.9G
[root@elastic ~]# swapoff -a
[root@elastic ~]# free -h
              total        used        free      shared  buff/cache   available
Mem:           1.8G        1.6G         57M         16M        128M         13M
Swap:            0B          0B          0B


Permanent closing mode
[root@elastic ~]# vim /etc/fstab
/dev/mapper/centos-swap swap                    swap    defaults        0 0
 Add to the configuration file swap Just delete this line
3. Configure elasticsearch
The main configuration of the configuration file
| to configure | meaning |
|---|---|
| node.name: node-1 | Node name, used in cluster mode |
| path.data: /data/elasticsearch | Data storage path |
| path.logs: /var/log/elasticsearch | Log storage path |
| bootstrap.memory_lock: true | Lock the physical memory address to prevent es memory from being swapped out, that is, avoid es using swap to swap partitions. Frequent swapping will lead to higher IOPS. In short, lock the physical memory to make the memory configured by the jvm take effect |
| network.host: 192.168.81.240 | Host IP |
| http.port: 9200 | port |
1.Back up the configuration file first
[root@elastic ~]# cd /etc/elasticsearch/
[root@elastic elasticsearch]# cp elasticsearch.yml  elasticsearch.yml.bak

2.Modify default configuration
[root@elastic ~]# vim /etc/elasticsearch/elasticsearch.yml
node.name: node-1
path.data: /data/elasticsearch
path.logs: /var/log/elasticsearch
bootstrap.memory_lock: true
network.host: 192.168.81.210
http.port: 9200

3.Create data path and authorize
[root@elastic ~]# mkdir /data/elasticsearch -p
[root@elastic ~]# chown -R elasticsearch.elasticsearch /data/elasticsearch/

Modify the reason of ownership because elasticsearch It is managed by ordinary users, so the owner needs to be modified
 The default path is this user
[root@elastic ~]# ll -d /var/lib/elasticsearch/
drwxr-x---. 3 elasticsearch elasticsearch 19 11 September 15:01 /var/lib/elasticsearch/

4.restart elasticsearch
[root@elastic ~]# systemctl restart elasticsearch