If you are Xiaobai, this set of information can help you become a big bull. If you have rich development experience, this set of information can help you break through the bottleneck
2022web full set of video tutorial front-end architecture H5 vue node applet Video + data + code + interview questions.
preface
Generally, when we develop single page applications (what is a single page application is introduced in another article in this column), especially for students who like me intend to take the back-end development, we only need to understand the front-end. However, when we practice on projects, we often have to write the front-end things by ourselves, Therefore, the purpose of this paper is to enable students who are back-end developers like me to quickly use the web components provided by element UI to quickly build their own web pages.
Small tips
By installing a plug-in called "element" in Idea, the basic code can be quickly generated when the keyword of element component is written in Idea. For example, I now want to generate an EL button:

After installing the plug-in element, now I just need to press another Tab key to complete the code automatically and bring some common attributes:

In addition, if you want to use the ui Library of elementplus in the vue project created by vue cli scaffold, you must first install it here. The specific method is Baidu, or refer to other articles on my blog. I won't repeat it here
Forget it, I'll write it again. BAM (I'm so kind). It's very simple, just two steps:
1. Write the following installation commands in Vue cli
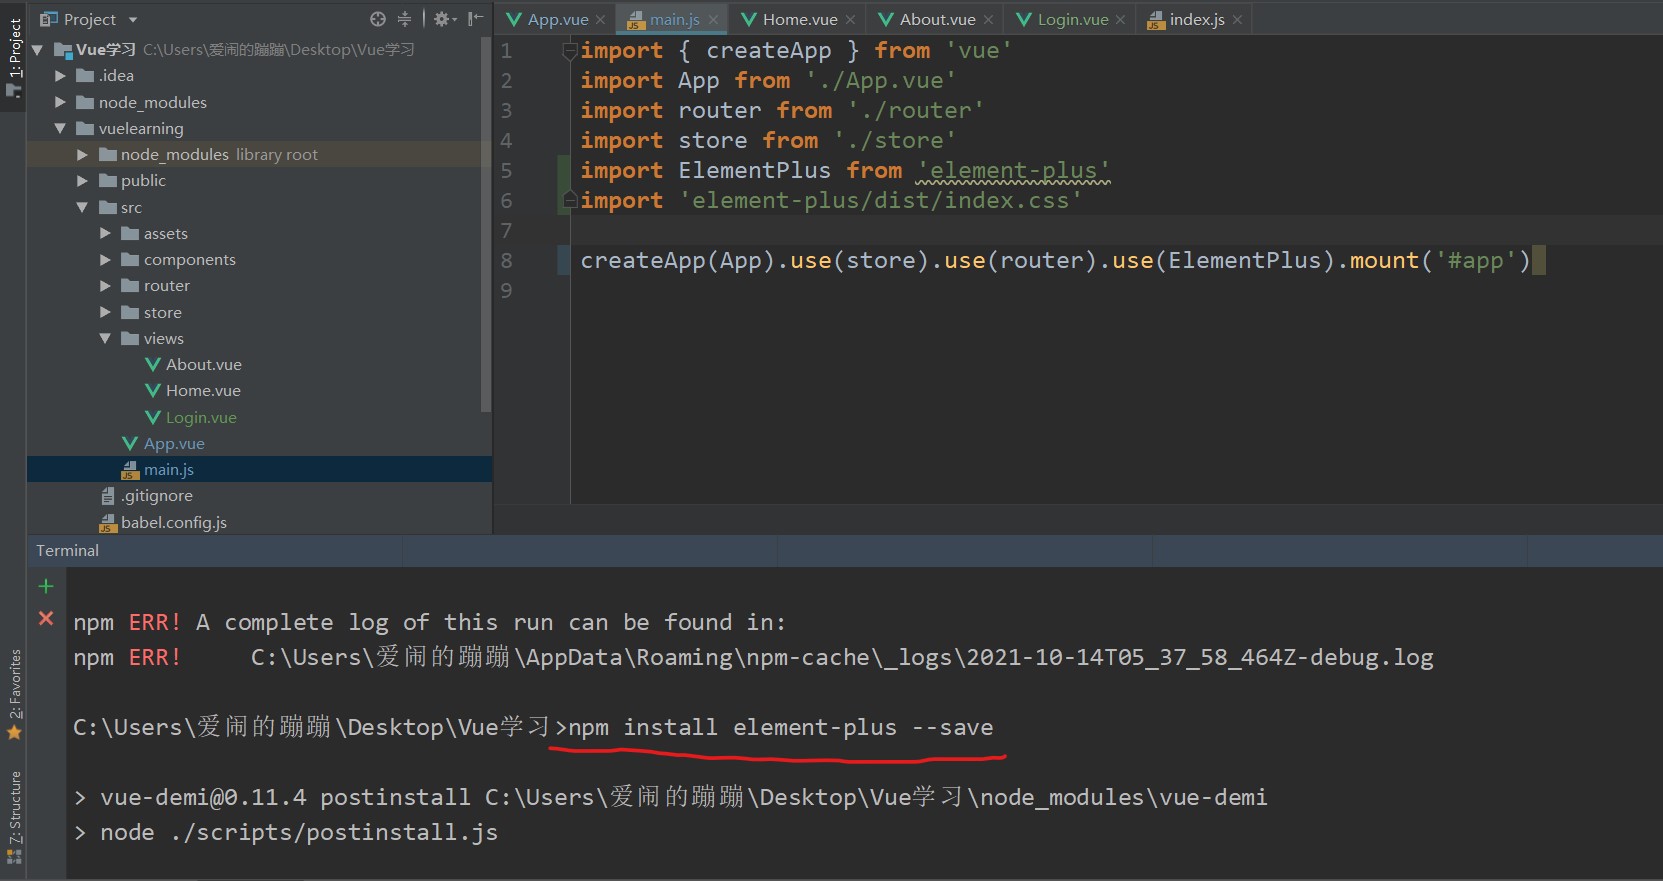
2. In main Introducing elementplus component into JS file
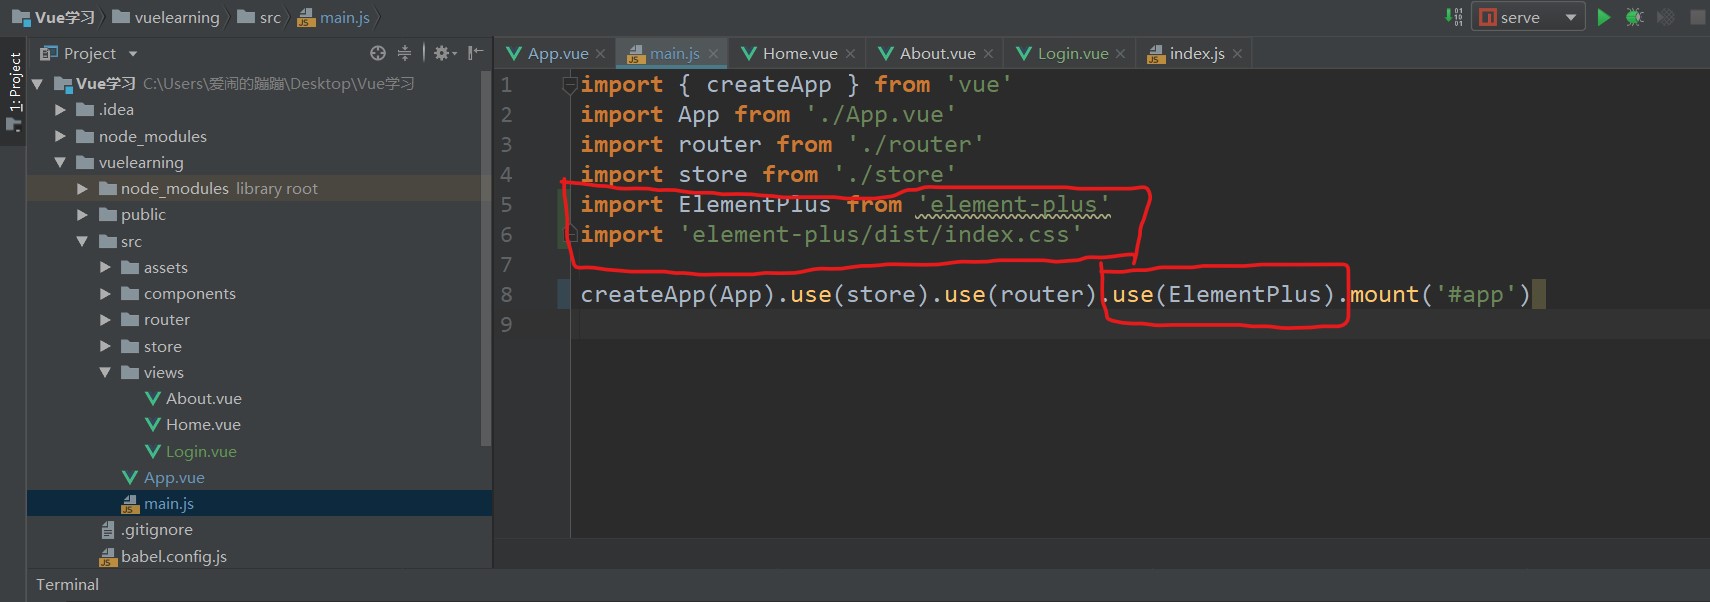
Then the introduction is completed! In fact, there are all official websites... You can go to the official website by yourself.
Quick layout of web pages
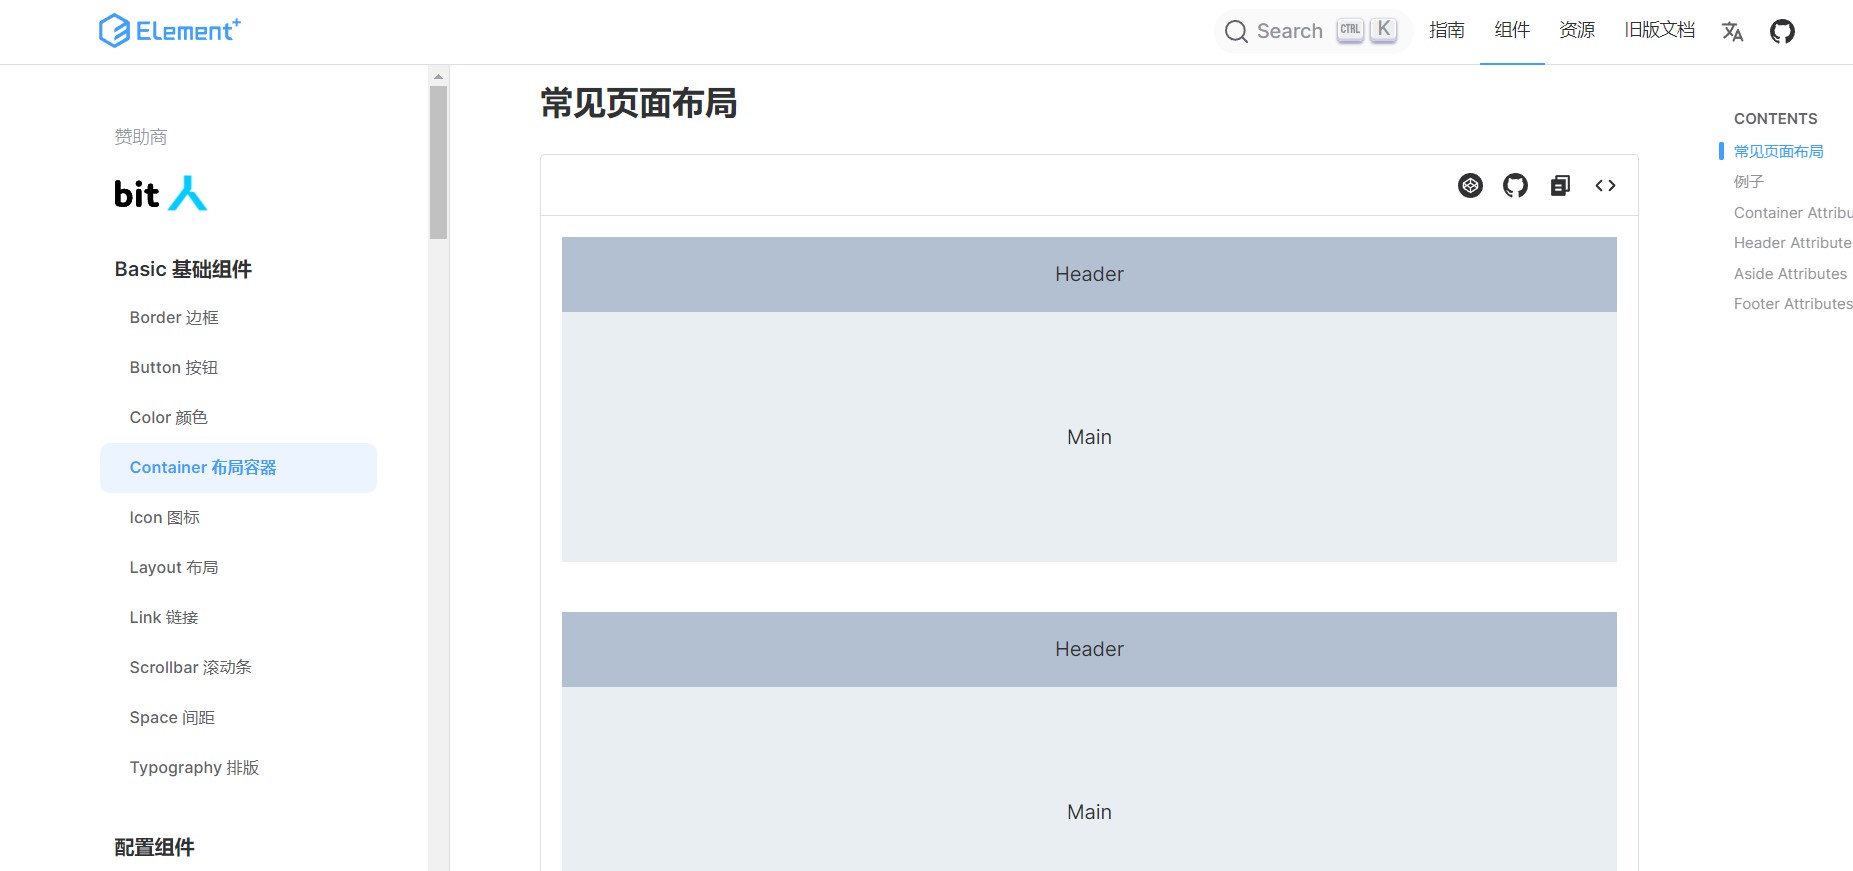
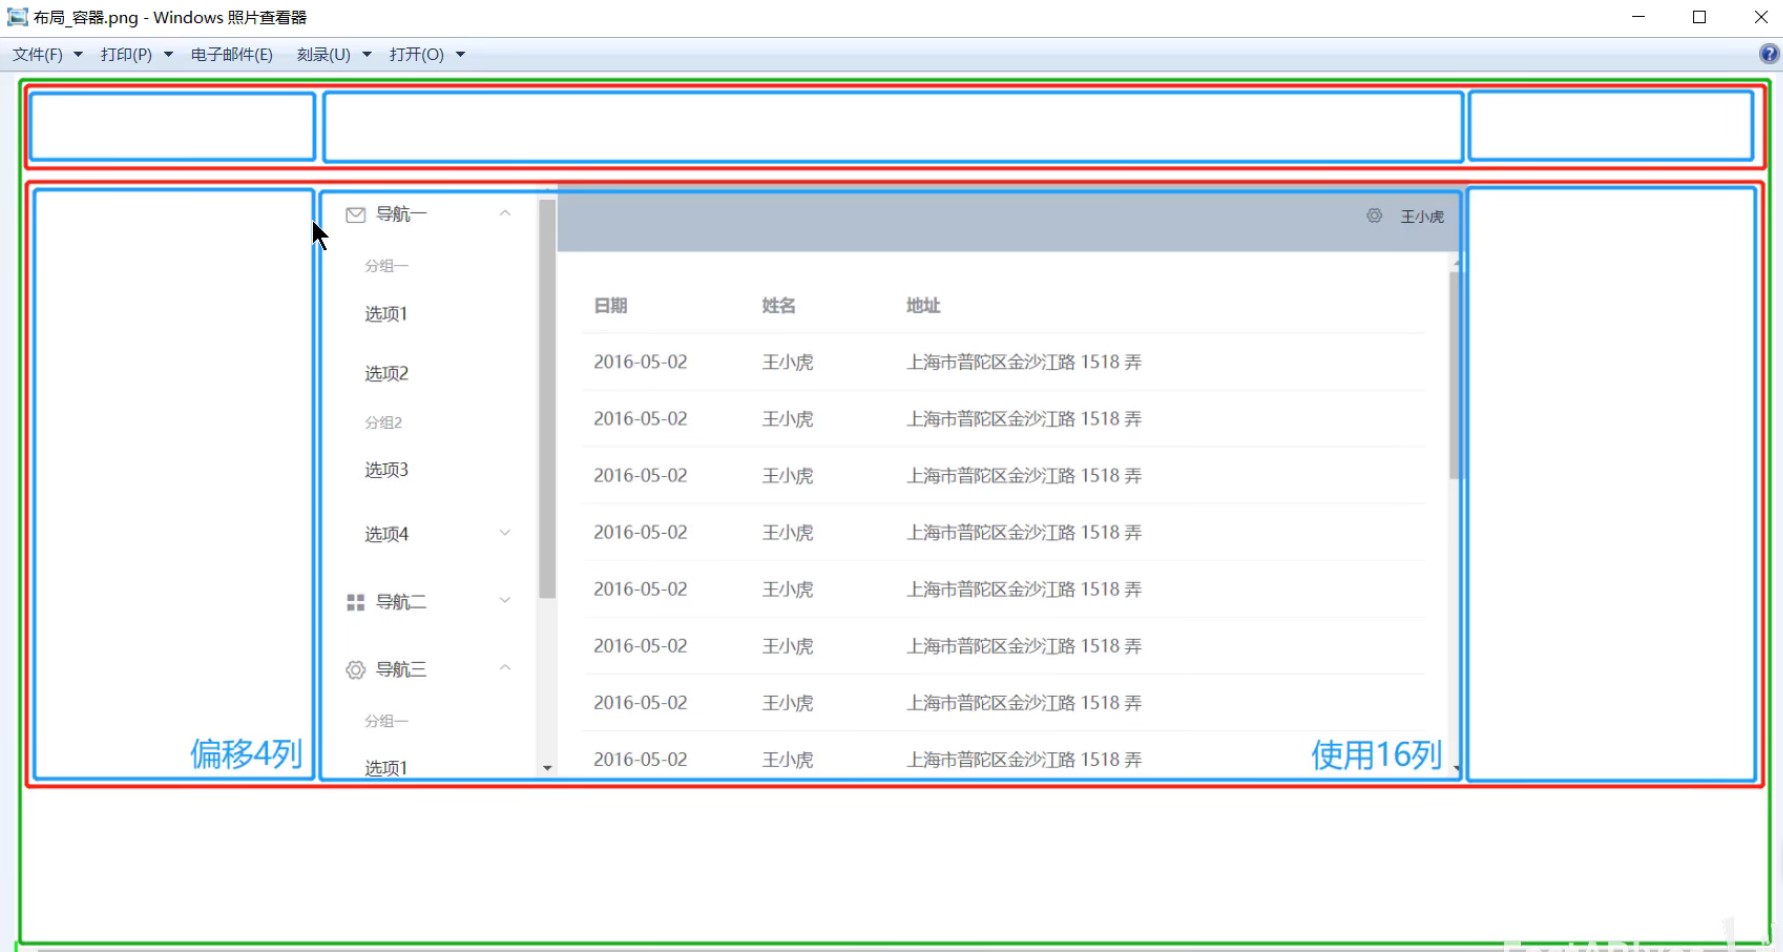
Open the official website of element plus and you can see that there are many common web page formats in the column of container layout container. Here we take the web page layout in the following figure as an example to demonstrate how to quickly build a web page layout.

In order to make the layout of the web page occupy the full screen, generally set the global style and modify the index before starting the layout HTML, add the global style code as follows.
 <style>
      html,body,#app{
        height:100%;
        margin: 0px;
        padding: 0px;
      }
    </style>
Then we can go to the official website of elementplus to find the code of this section of layout, paste it and put it in the main page container:
<el-container>
      <el-header>Header</el-header>
      <el-container>
        <el-aside width="200px">Aside</el-aside>
        <el-container>
          <el-main>Main</el-main>
          <el-footer>Footer</el-footer>
        </el-container>
      </el-container>
    </el-container>
Finally, in order to distinguish each area and let us see the layout of the web page more clearly and clearly, we can write some styles under the style tag of the page to display the web page layout:
<style>
  .el-container {
    height: 100%;
  }

  .el-header,
  .el-footer
  {
    background-color: #b3c0d1; color: #333; text-align: center; line-height: 60px;
  }

  .el-aside {
    background-color: #d3dce6; color: #333; text-align: center; line-height: 200px;
  }

  .el-main {
    background-color: #e9eef3; color: #333; text-align: center; line-height: 160px;
  }

  .el-menu {
    background-color: #d3dce6;
  }
</style>
Finally, you can see the results of web page access:

Then you can write code inside their layout!
When using elementplus for quick web page layout, it should be noted that if multiple sub containers are written in one, as follows:

By default, the three sub containers are arranged up and down in the web page, as follows:

Without the Header, there are only side and main containers. If they are wrapped in one container, they should be arranged left and right, as follows:


To sum up:
1. When there are El header or El footer child elements inside, all child elements are arranged vertically up and down
2. When horizontal left-right arrangement is required, the El container needs to be redefined to contain child elements arranged horizontally left-right
3. All the components we need, such as forms, form buttons, etc., which are provided on the official website of element, can be directly pasted and copied into our code using the above method.
router-view
Generally, for projects created by Vue cli, some Vue initial interfaces and contents will be automatically brought into the project. We can delete them all and simplify them as follows:

In the div module of templat on this page, we usually put a router view, which is the routing base of our whole project. Let this app vue becomes the root node of our route rendering. Every time we create a new vue project, the app vue had better keep the same compact layout as above.
route
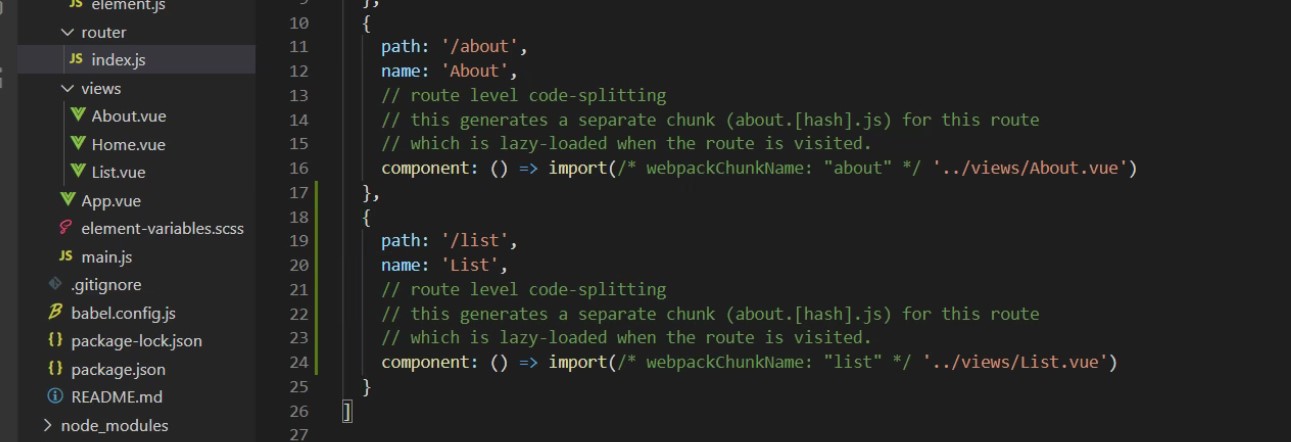
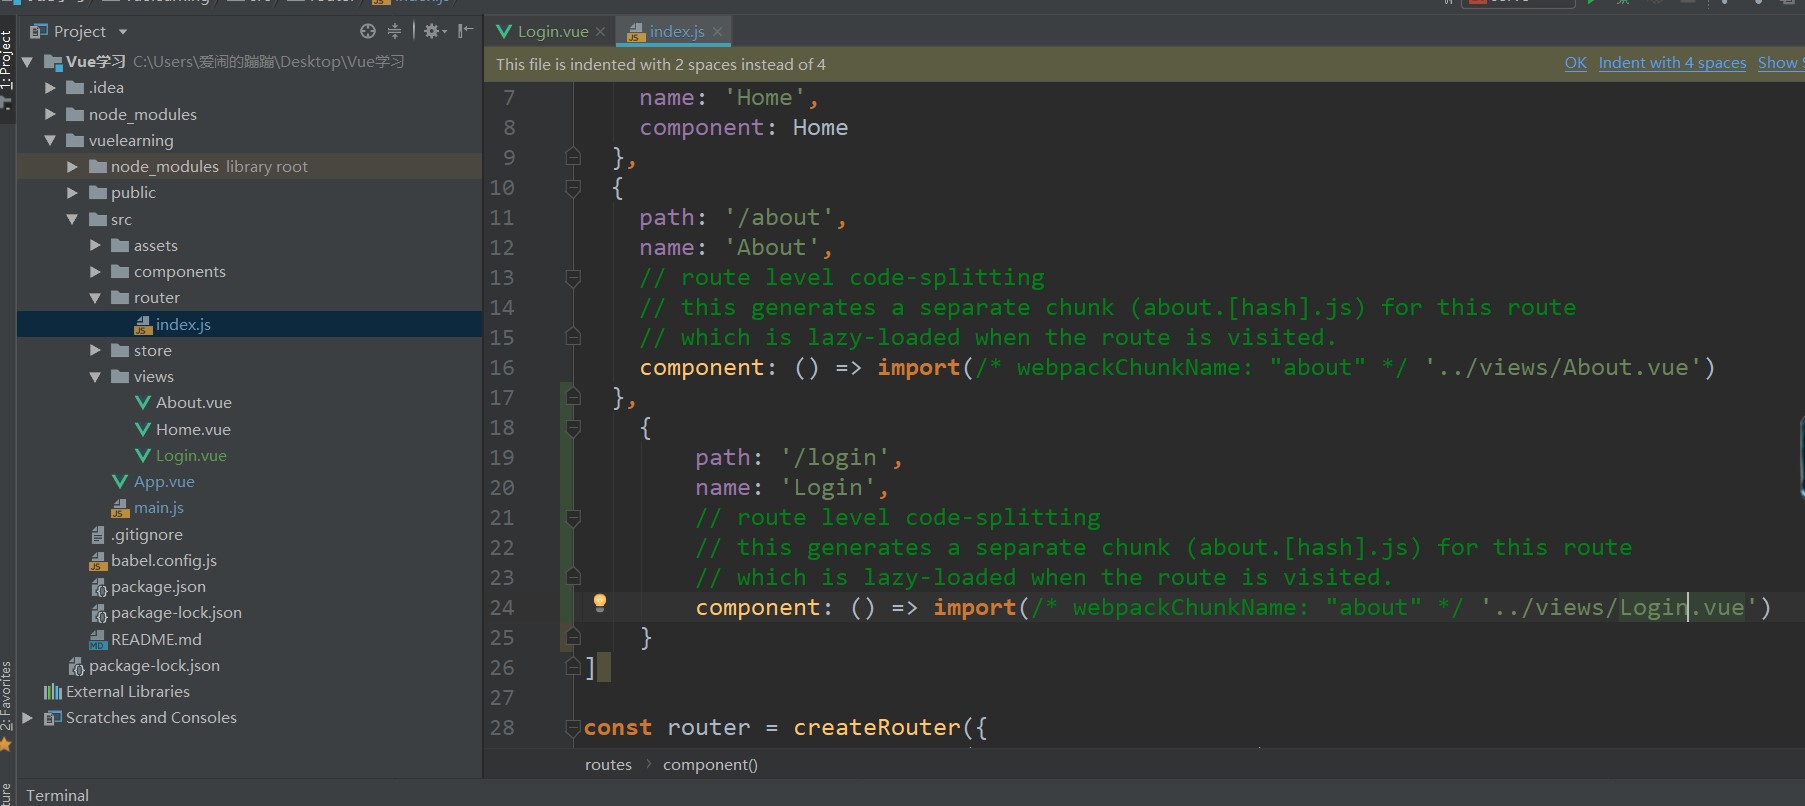
Then our routing interface is naturally the index. In the router file JS, as follows:
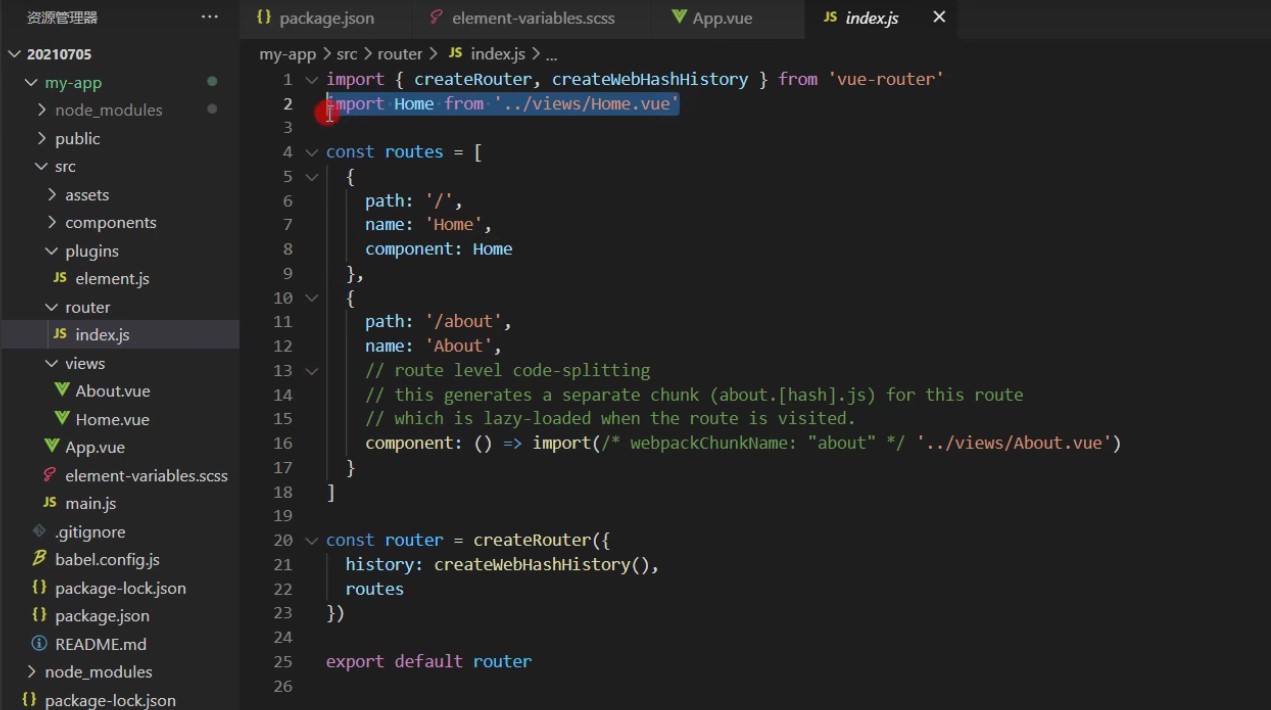
Then we can clearly see that the two routes in this page, home and about, are introduced in different ways. Home is a home component introduced through direct import, while about is loaded asynchronously (also known as lazy loading). The page will be loaded only after we enter this route (/ about), which can speed up the execution process of our whole project, which is also a point of our later optimization. Then the following paragraph in this document:

This section of code is the core of our project to generate the routing dependency of the whole project. This is the writing method of the new routing instance of the corresponding Vue3 version. This section is different from Vue2. But we don't need to care about how it is implemented, because our main code is written in the routing in the above paragraph, which has nothing to do with the code written in our project.
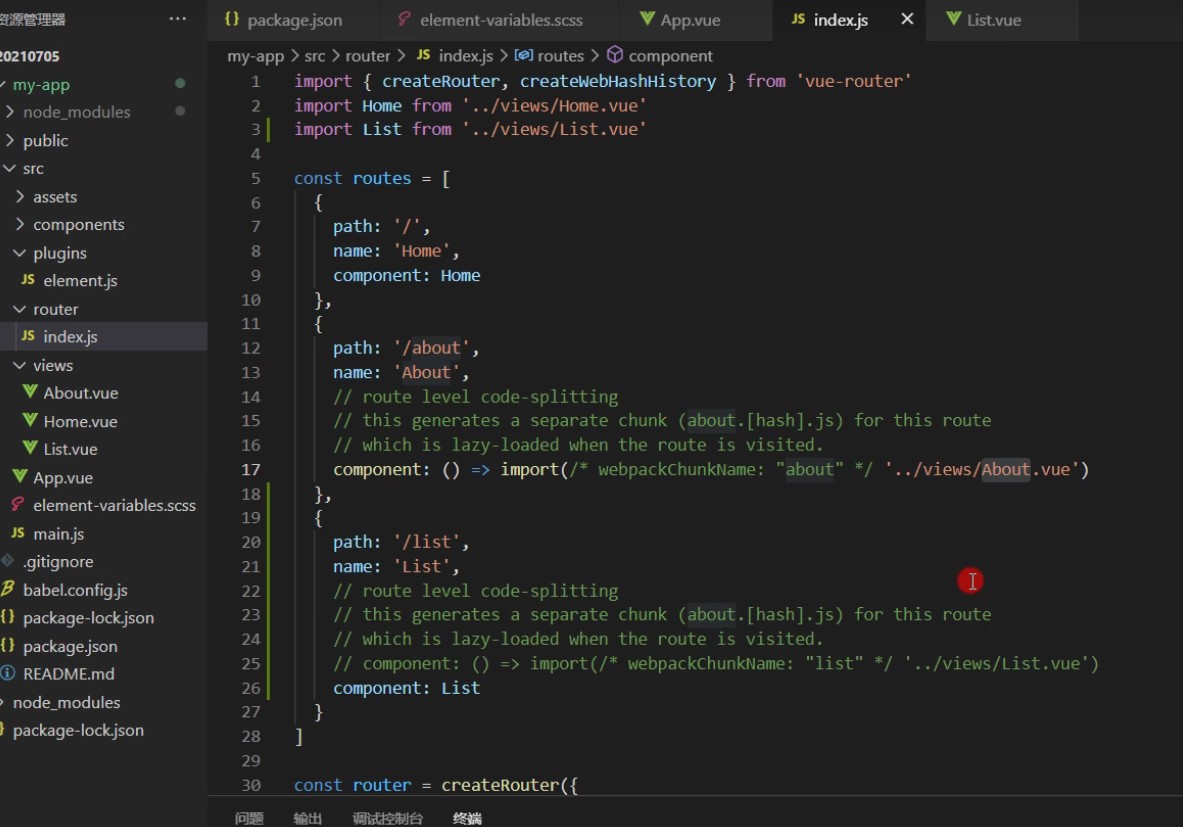
So, for example, we now create a new page file called list under the views folder Vue, so if we want this project to access this page, we just need to click index. In the router file JS, write a paragraph and list according to the previous route The code corresponding to Vue:
Also list Vue can also be imported through import. It can also be loaded and accessed:
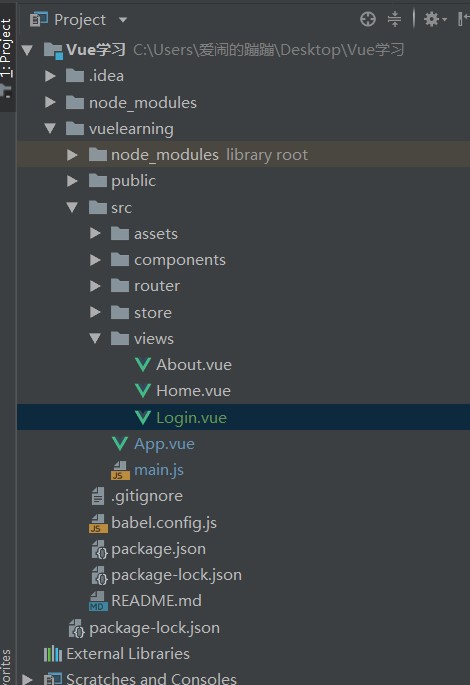
For example, here we simply write a Login page Login:
1. Write a login in the views folder vue
2. Go to the official website of elementplus to find the source code of a form component, paste and copy it into login In Vue
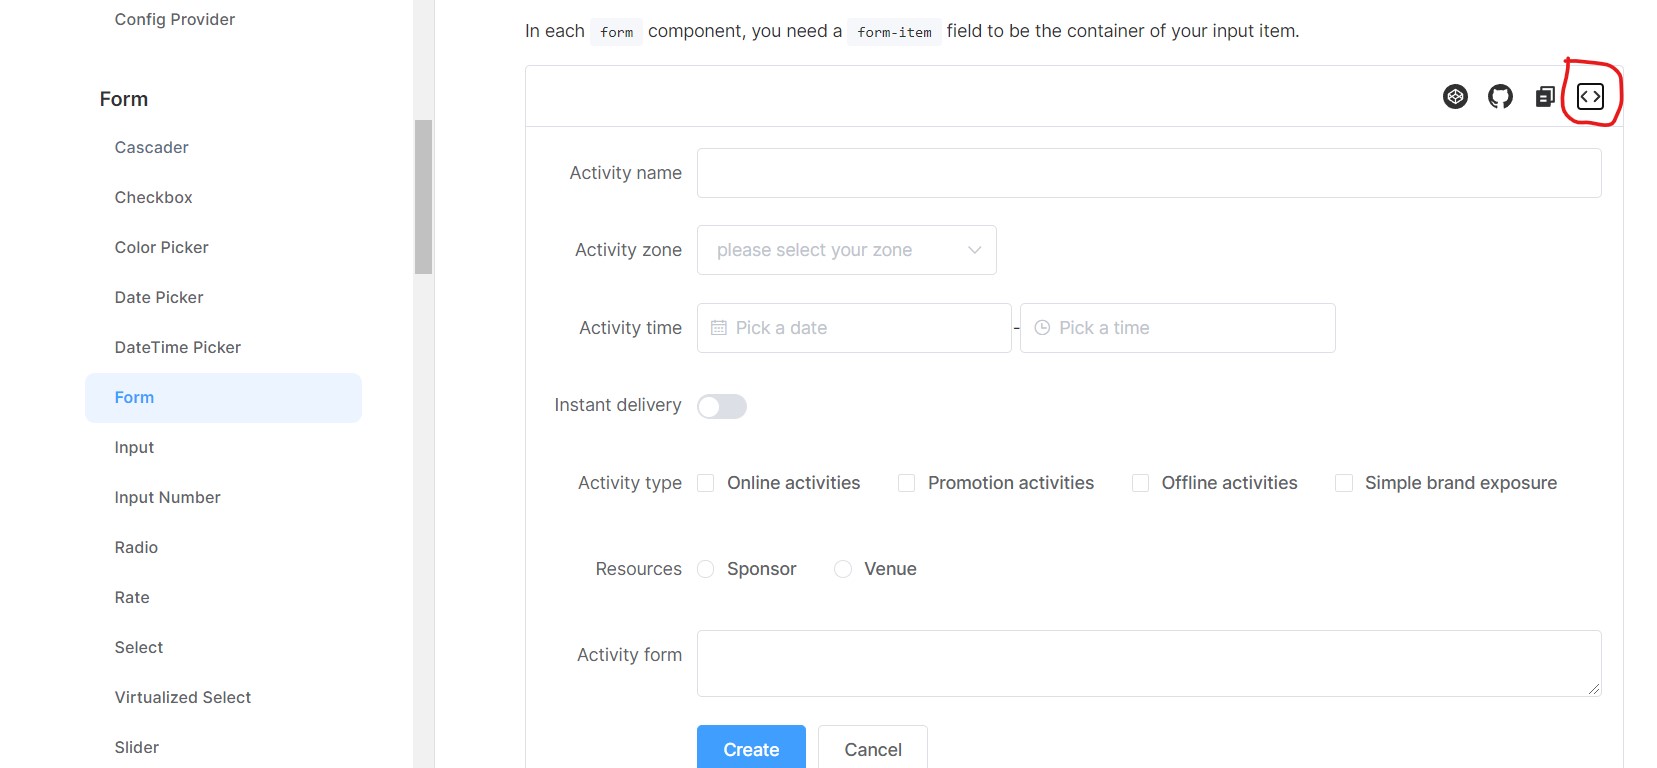
(click the red box in the upper right corner to see the source code)

3. Put our login Vue write in route
4. Access page

In this way, the four steps are completed. The rest of the work is to transform the content code of this page with my rudimentary knowledge of HTML and CSS and transform it into what we like.
Interpretation of vue components
In the source code of vue components (i.e. files ending in. vue), there are generally three structures:
template,style,script
<template>
  <!--A place for writing page content-->
</template>

<style>
  <!--Used to write page styles-->
</style>

<script>
  export default {
      data(){
        return  {
            //Used to write the data corresponding to this page
          }
      },
      created(){
        //The function is to call all the contents below this method as soon as the page is rendered
      },
      methods:{
        //Used to write the corresponding method of this page
      }
  }
</script>
layout of element
The Layout is actually that the whole page of the browser is divided into 24 columns from left to right by the element, and a container is placed in the Layout to hold the page we want to display, as shown in the following figure:
At the same time, the official website also provides El row to represent row labels and El col to represent column labels.
Here are some attribute explanations of these two tags on the official website:


Explain in Chinese:
span: number of columns occupied by the grid
Offset: the number of offset columns from left to right
The other two are not very useful, so I won't translate
For example, we now want to write the content of a web page header, which can be combined as follows:
<template>
   <div>
       <el-row>
        <div style="background: #0d84ff;height: 80px;width: 100%;line-height: 80px">
            <el-col :span="18" :offset="3">
                <!--Open another 24 column grid in this grid el-row-->
                <el-row>
                    <!--logo region-->
                 <el-col :span="6">
                     <span style="font-size: 30px;color: white;">Logo</span>
                 </el-col>

                    <!--navigation bar-->
                    <el-col :span="18" style="color: white;">
                        <div style="width: 80px;text-align: center;display: inline-block">Navigation 1</div>
                        <div style="width: 80px;text-align: center;display: inline-block">Navigation 1</div>
                    </el-col>
                </el-row>
            </el-col>
        </div>
       </el-row>
   </div>

</template>

<script>
    export default {
        name: "About"
    }
</script>

<style scoped>

</style>
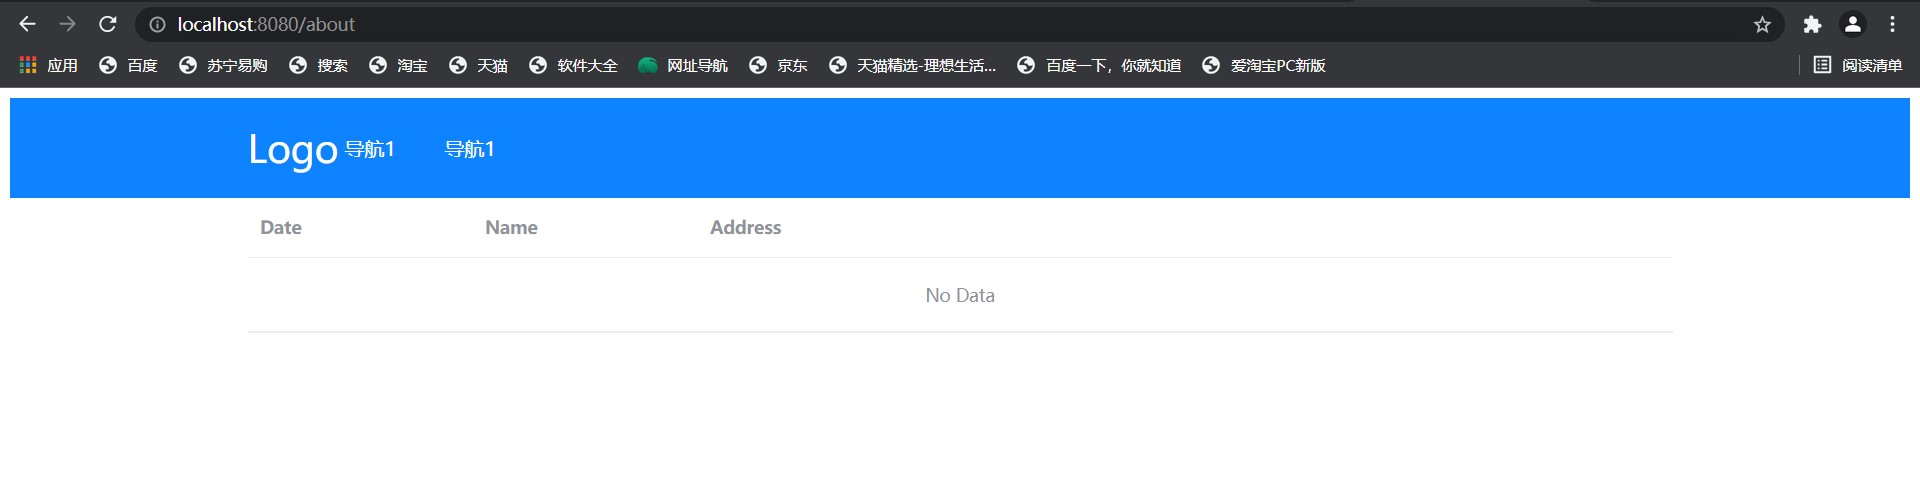
Then you can see in the renderings:

As long as it is reasonable to arrange through 24 grids, and then make the page style you want.
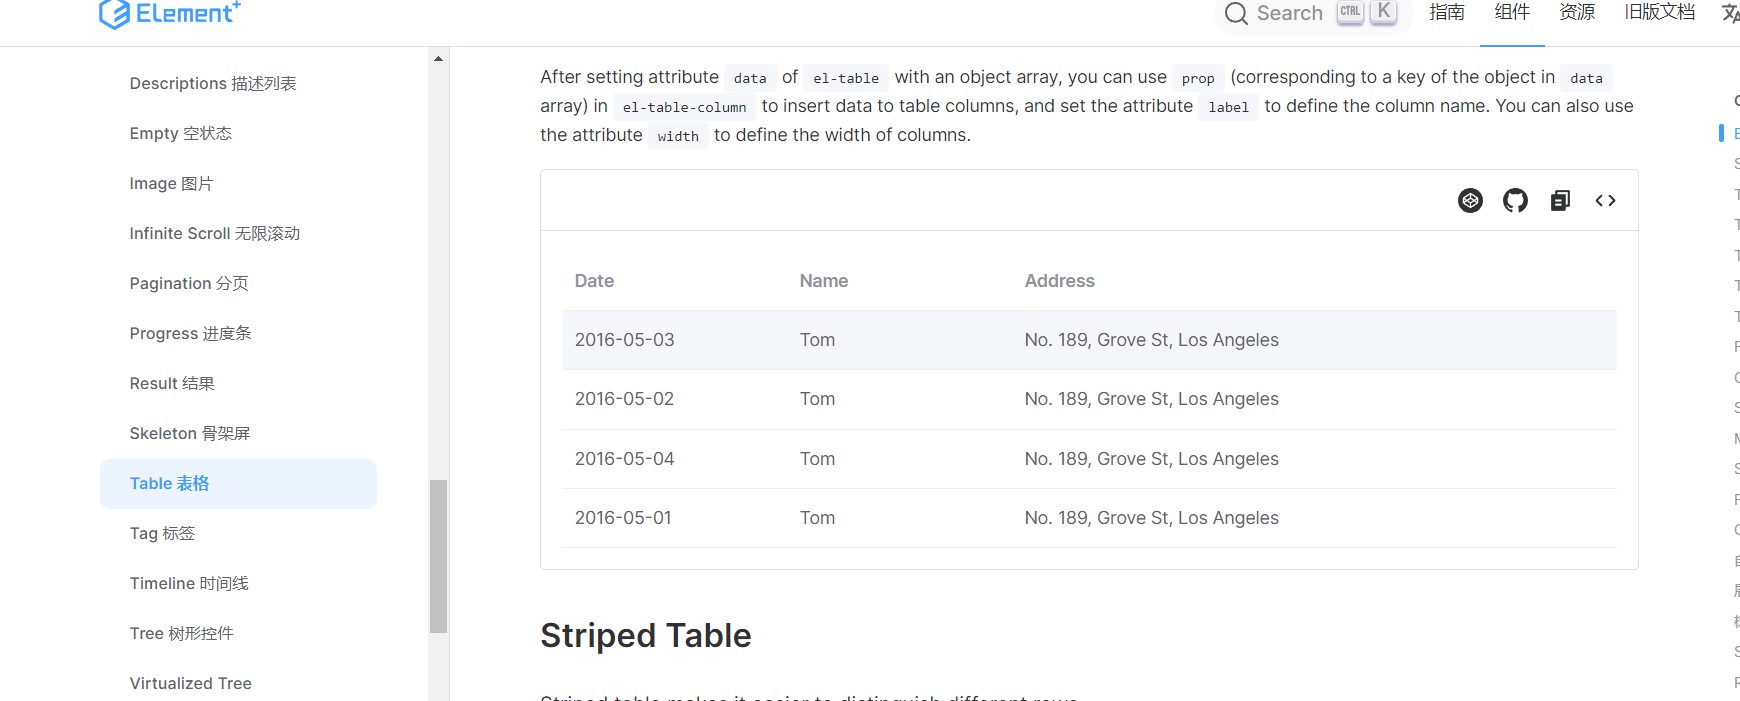
Table table
Continue to browse the official website of element and turn to the column of the form:
Copy and paste the source code of the old template row package with the method of El colrow:
visit:
Because there is no data, it is slightly ugly, but it doesn't matter. We will add it below.
Note that in the copied source code, we can see the part circled in red in the figure below:
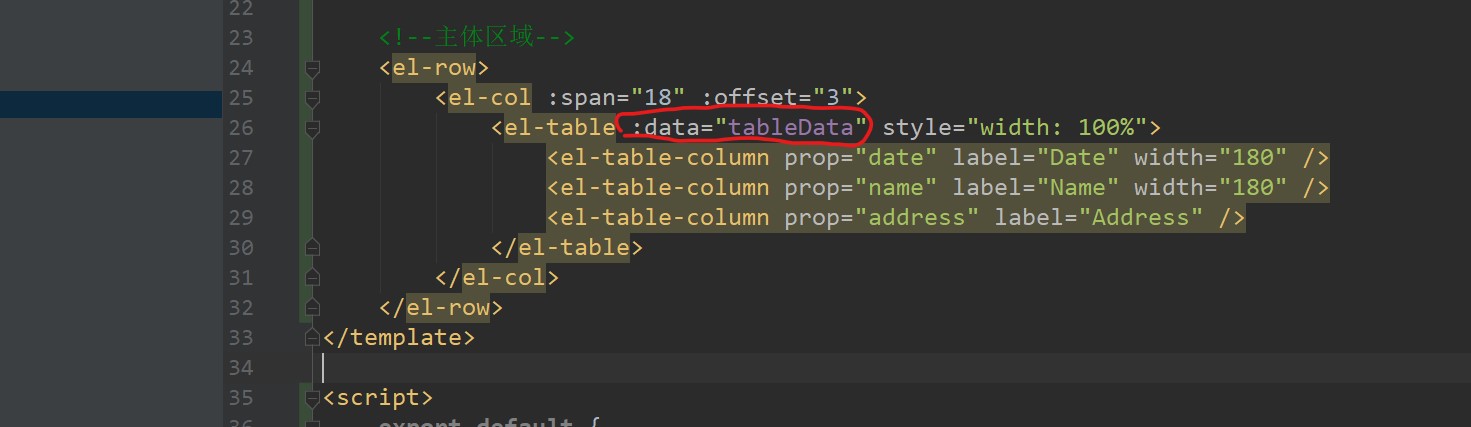
This sentence means that it can only be used by binding the attributes in vue. The colon in front of this data is actually the abbreviated v-bind.
Obviously, what we need to bind is some data, so we should declare the variable tableData in the data in vue, that is, in the script structure in the component page:
<script>
    export default {
        //Component name
        name: "About",
        data() {
            return {
                tableData: [
                    {
                        date: '2016-05-03',
                        name: 'Tom',
                        address: 'No. 189, Grove St, Los Angeles',
                    },
                    {
                        date: '2016-05-02',
                        name: 'Tom',
                        address: 'No. 189, Grove St, Los Angeles',
                    },
                    {
                        date: '2016-05-04',
                        name: 'Tom',
                        address: 'No. 189, Grove St, Los Angeles',
                    },
                    {
                        date: '2016-05-01',
                        name: 'Tom',
                        address: 'No. 189, Grove St, Los Angeles',
                    },
                ],
            }
        },
    }
</script>
data() and return are fixed structures. We only look at the tableData part in the middle. We can see that the variable tableData is an array (the array definition in JavaScript uses brackets []:
tableData:[]
Then three objects are placed in this array (the object definition in JavaScript uses curly braces {}):
tableData: [{data object 1}, {data object 2}, {data object 3}]
In this way, we can associate each data object with our table data.
Then, for the data object, take an example from the above code:
	{
         date: '2016-05-03',
         name: 'Tom',
         address: 'No. 189, Grove St, Los Angeles',
      },
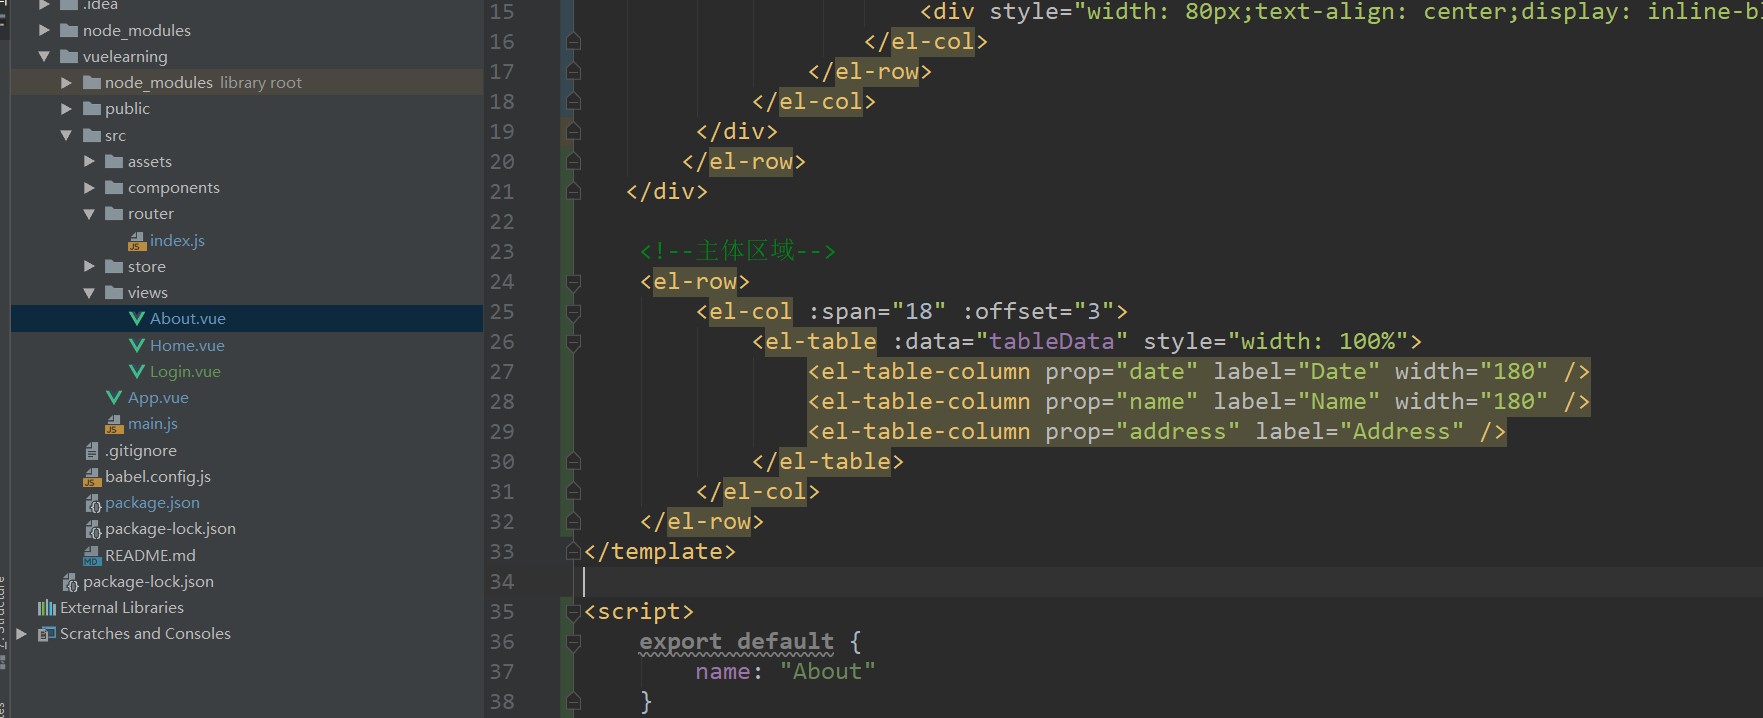
Each attribute (such as date, name, etc.) corresponds to each prop above one by one. Only in this way can the attribute be displayed in the table:
			<el-table :data="tableData" style="width: 100%">
                <el-table-column prop="date" label="Date"width="180" />
                <el-table-column prop="name" label="Name" width="180" />
                <el-table-column prop="address" label="Address" />
            </el-table>
The following labei attribute is used to display the text information in the table:
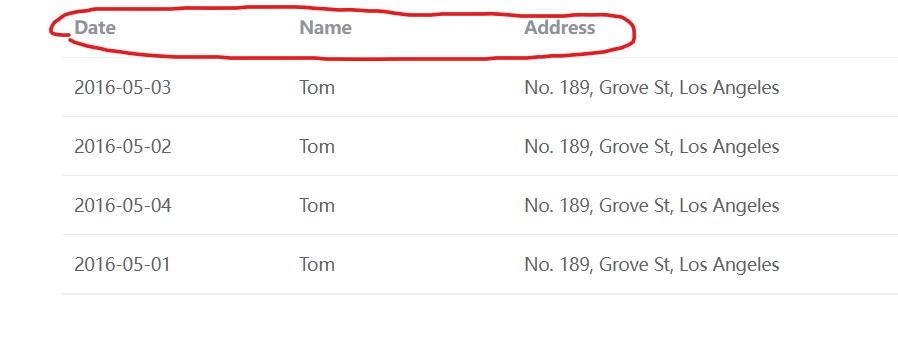
But what we are showing here is dead data. If we want to call data from the database in the back-end server, how do we do it on the form page here?
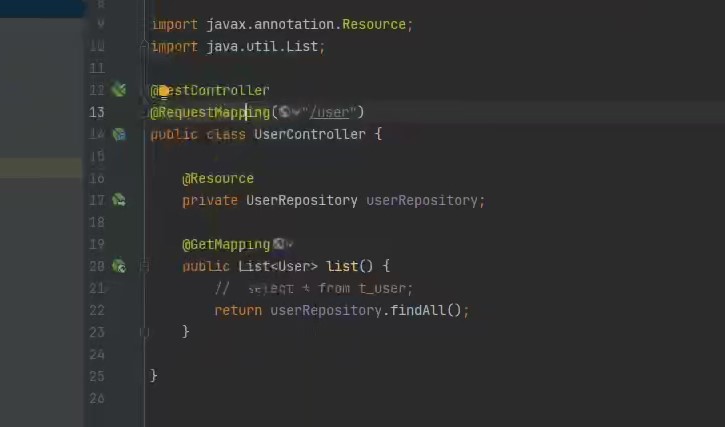
Should the springboot project itself be writable? I won't write it specifically. The logic is to write an interface in the controller layer of the background as follows. Accessing / user will return a List set containing the data we found from the database. Note that when this List set is returned to the front end, it is a set of objects in json format, Because we use @ RestController annotation and a component called jackson is integrated inside springboot for us to perform format conversion (it allows us to convert all the returned words into json format, the string is converted into json string, and the object returns json object):
Then let's access the back-end interface:
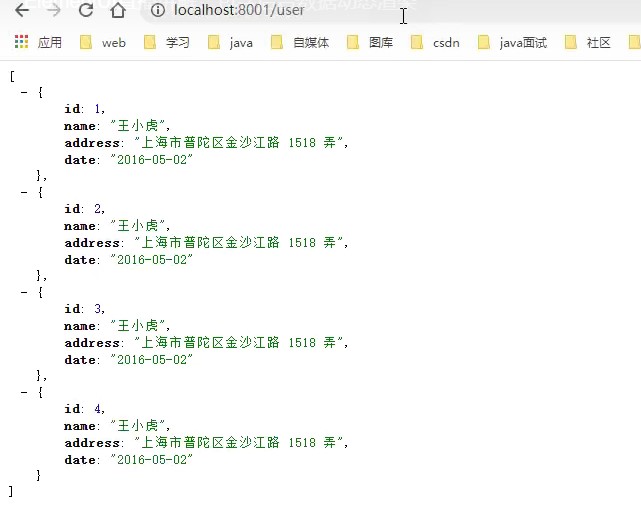
You can see the set of json objects that have been returned to the front end.
Then, if you want to have front-end and back-end interaction, you should first introduce axios components into vue project. The method of introduction is Baidu. It's really not difficult. I'm too lazy to type xdm.
After installing axios, we will write the corresponding request method in the three structures in the script tag mentioned earlier. Because it is a method, we naturally write it in methods:
<script>
    export default {
        //Component name
        name: "About",
        data() {
            return {
                tableData: [
                    {
                        date: '2016-05-03',
                        name: 'Tom',
                        address: 'No. 189, Grove St, Los Angeles',
                    },
                    {
                        date: '2016-05-02',
                        name: 'Tom',
                        address: 'No. 189, Grove St, Los Angeles',
                    },
                    {
                        date: '2016-05-04',
                        name: 'Tom',
                        address: 'No. 189, Grove St, Los Angeles',
                    },
                    {
                        date: '2016-05-01',
                        name: 'Tom',
                        address: 'No. 189, Grove St, Los Angeles',
                    },
                ],
            }
        },
        created() {
            //As soon as the page is loaded, the system will call all the methods in it by default and execute them from top to bottom
            //The load method is called when the page is refreshed
            this.load()
        },
        methods: {
            //The methods are written here
            //Now we write our request query method, such as load
            load(){
                //This axios method writes the route of your back-end interface
                //Besides the get method, there are delete, put and post
                //They correspond to the preparation of restful style code, such as get, which means query
                //axios communication backend is generally in the following fixed format
                axios.get("http://localhost:8001/user").then(res => {
                    //Print the res object information on the console
                    console.log(res)
                })
            }
        }
    }
</script>
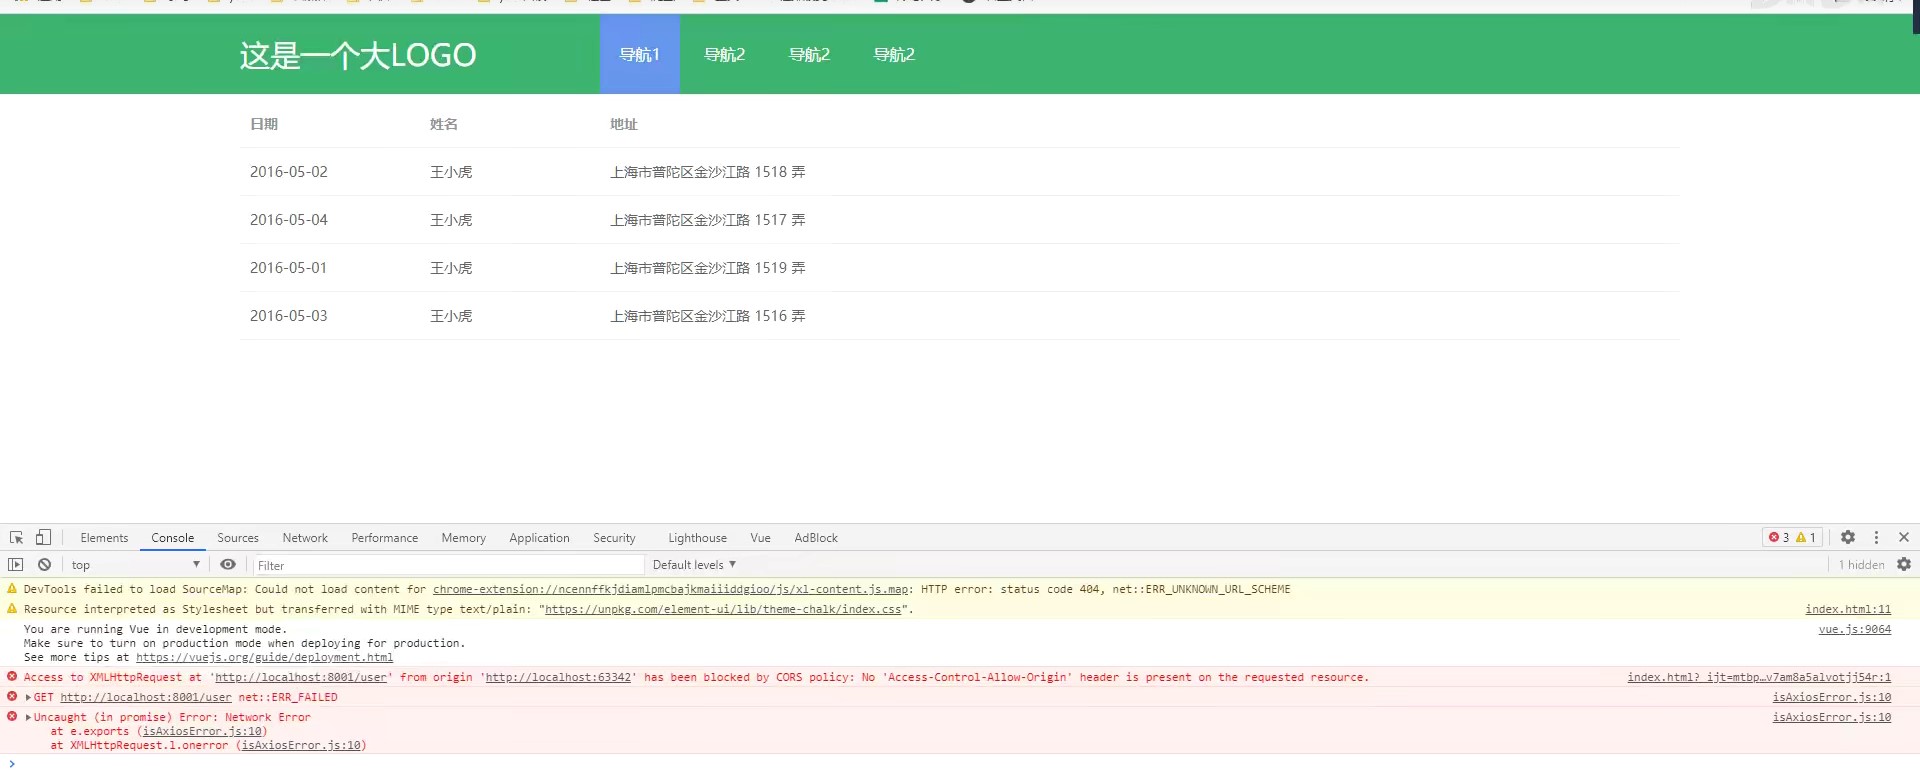
Now as soon as we enter this page, we will call this in create() {} Load () method, and then our load method will send an ajax get request to the back end to get our data. However, because the ports of the whole section are inconsistent with the back-end ports, cross domain problems will occur:
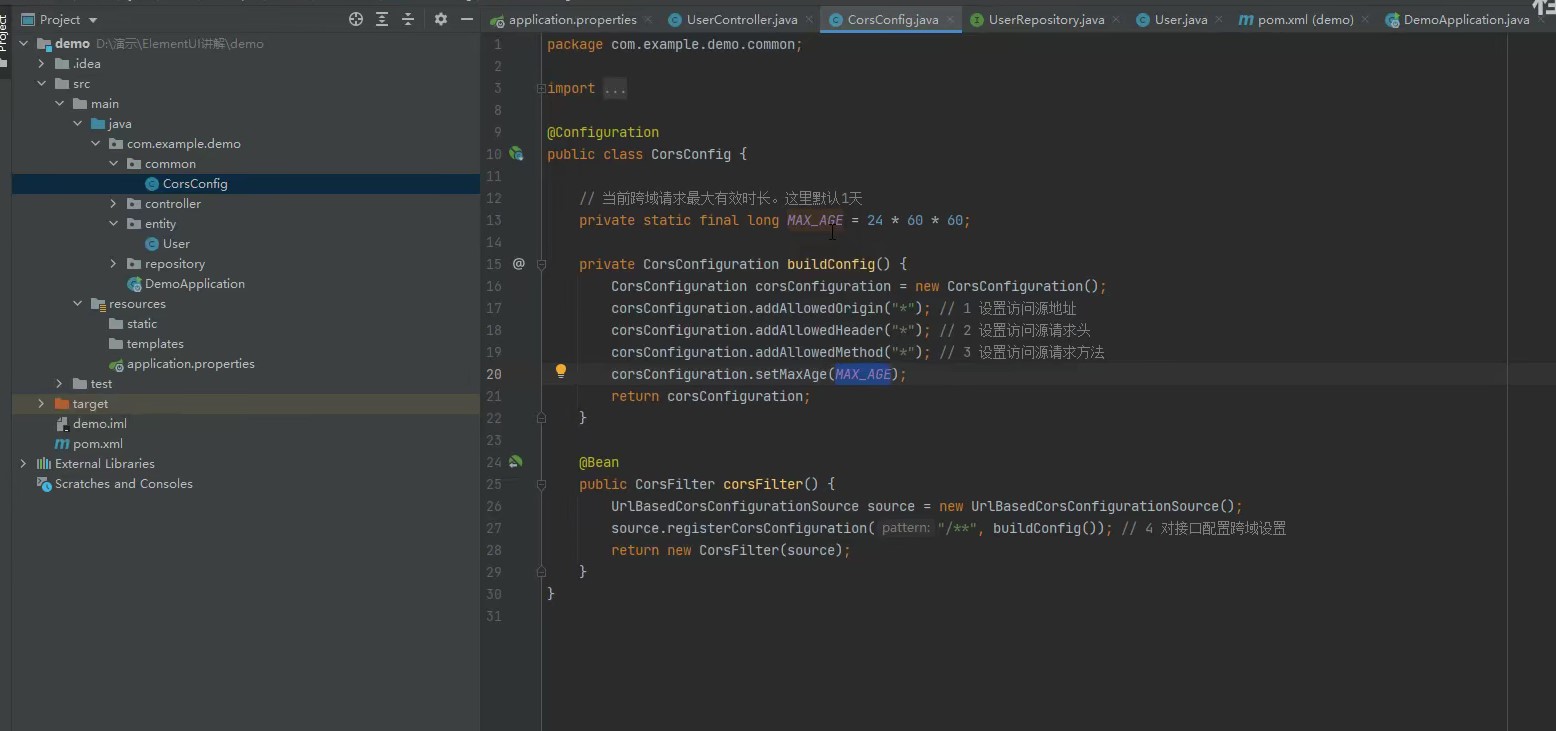
The following code is introduced in the background to solve cross domain problems:
Now we need to assign the data requested from our back end to our front-end page:
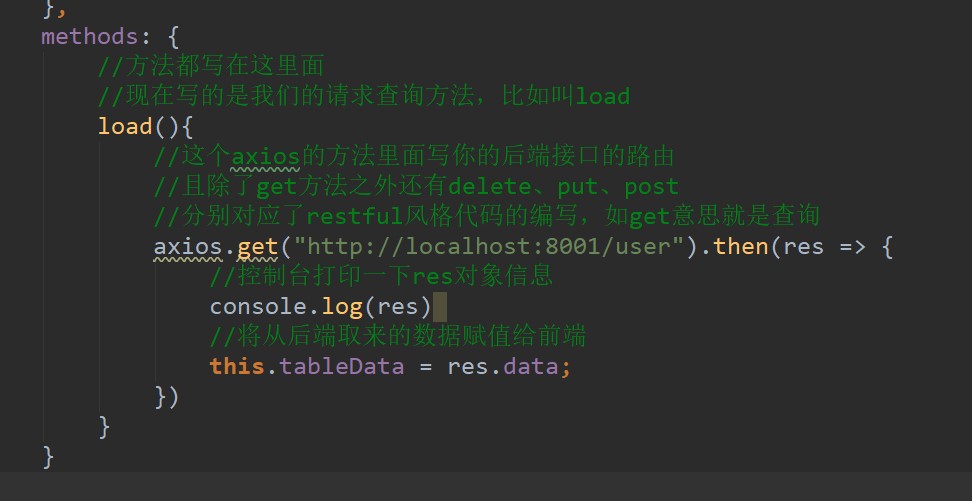
Res is the object of data returned by the back end, and data is the data in res object. Remember not to scribble.
If you want the mouse to move over the table to produce the effect of zebra stripes, just add a stripe attribute to the El table.
Rotation chart (walking lantern)
In element plus, it is called "walking lantern", which means that pictures can be rotated automatically or manually:
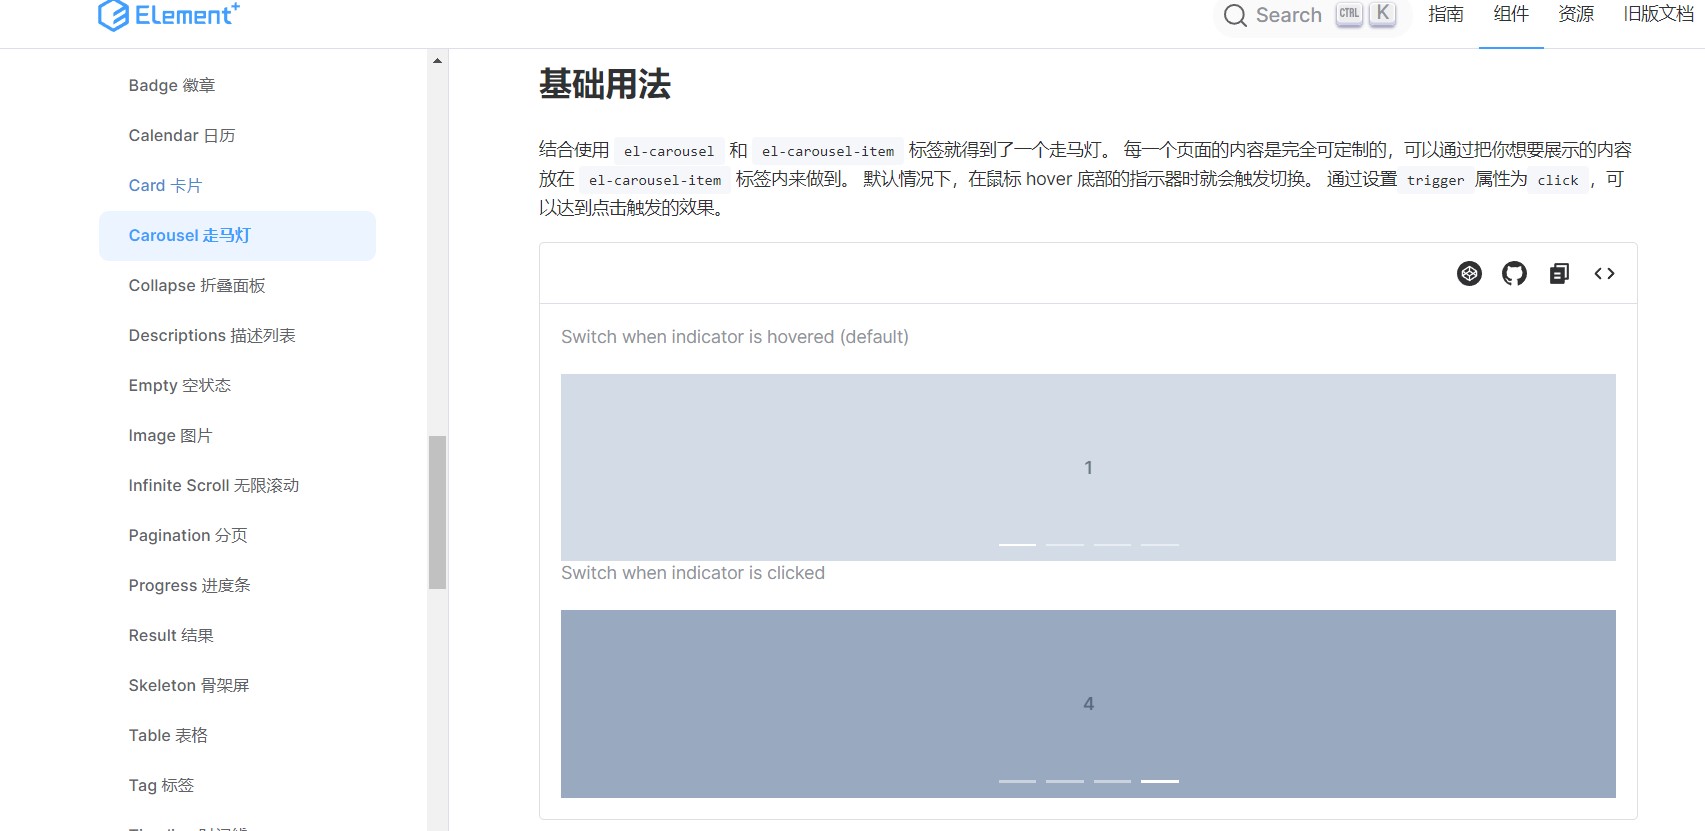
Find the source code, paste and copy it into our component:
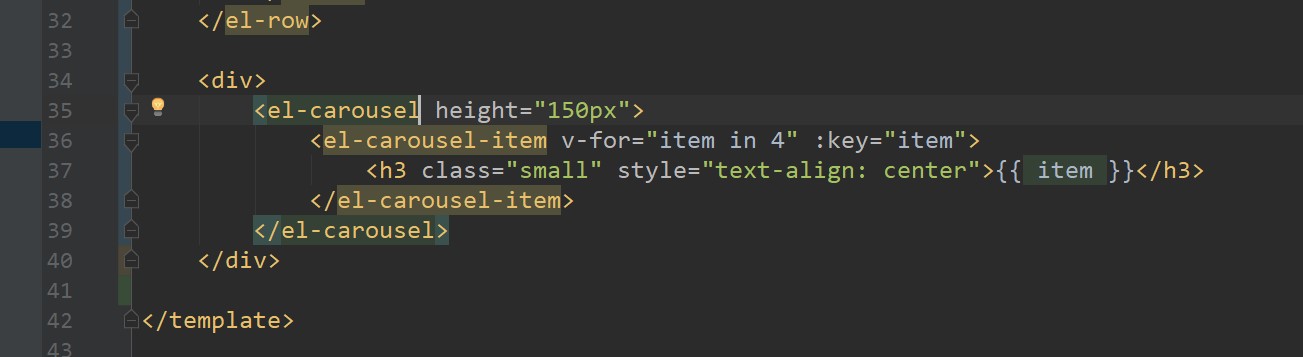
Then you can see (that's movable):
Explain the above attributes:
<el-carousel height="150px">
            <el-carousel-item v-for="item in 4" :key="item">
                <!--v-for Is to render an array, which means to loop an array
                v-for="item in 4"What I mean is item The of this variable is 1 to 4, which is played circularly as an array
                If you put an array of variables, you loop through all the variables in the array-->
                <!--:key It's every item item It's worth it. It's OK not to write this, but I usually write it-->
                <h3 class="small" style="text-align: center">{{ item }}</h3>
            </el-carousel-item>
        </el-carousel>
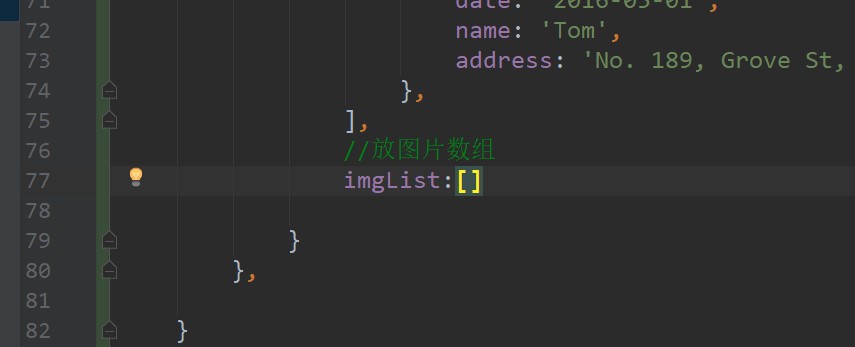
Now let's try to insert four pictures and rotate them.
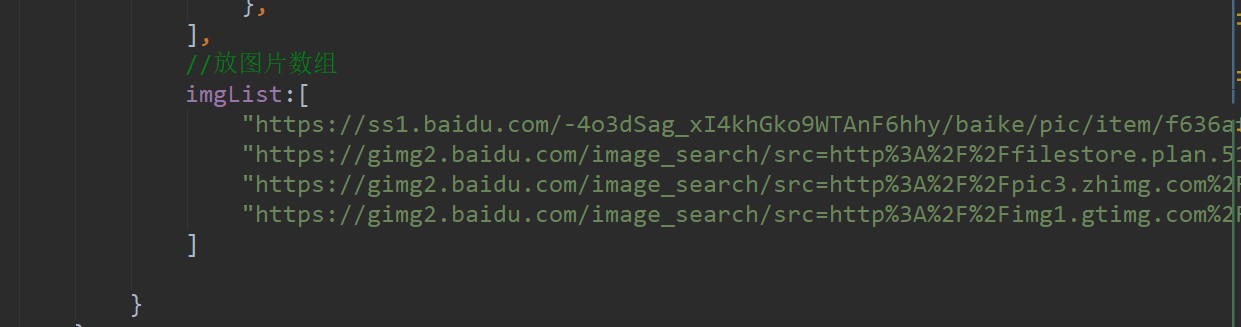
First, define an imgList array variable in data:
We went to the Internet to find four pictures and put their links as string objects:
Then write our rotation chart:
<div>
        <el-carousel trigger="click" height="760px">
            <el-carousel-item v-for="item in imgList" :key="item">
                <!--Be sure to add v-bind attribute-->
                <img :src="item" style="width: 100%">
            </el-carousel-item>
        </el-carousel>
    </div>
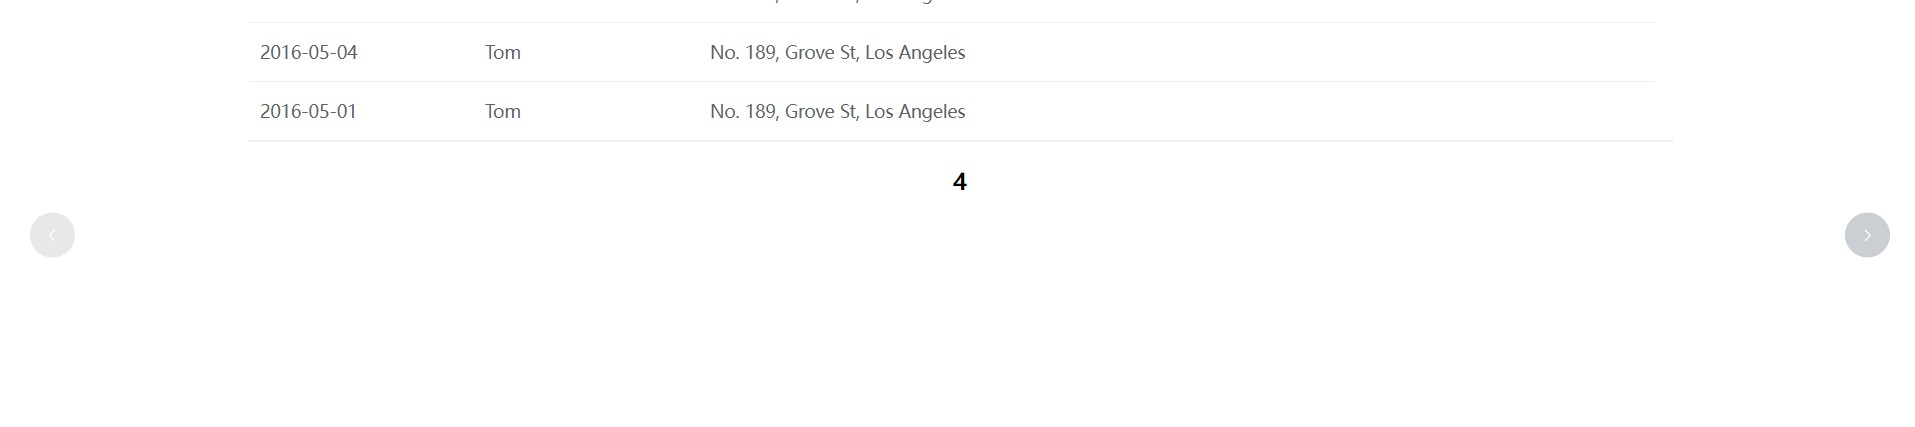
You can see from the visit that our rotation map has worked:
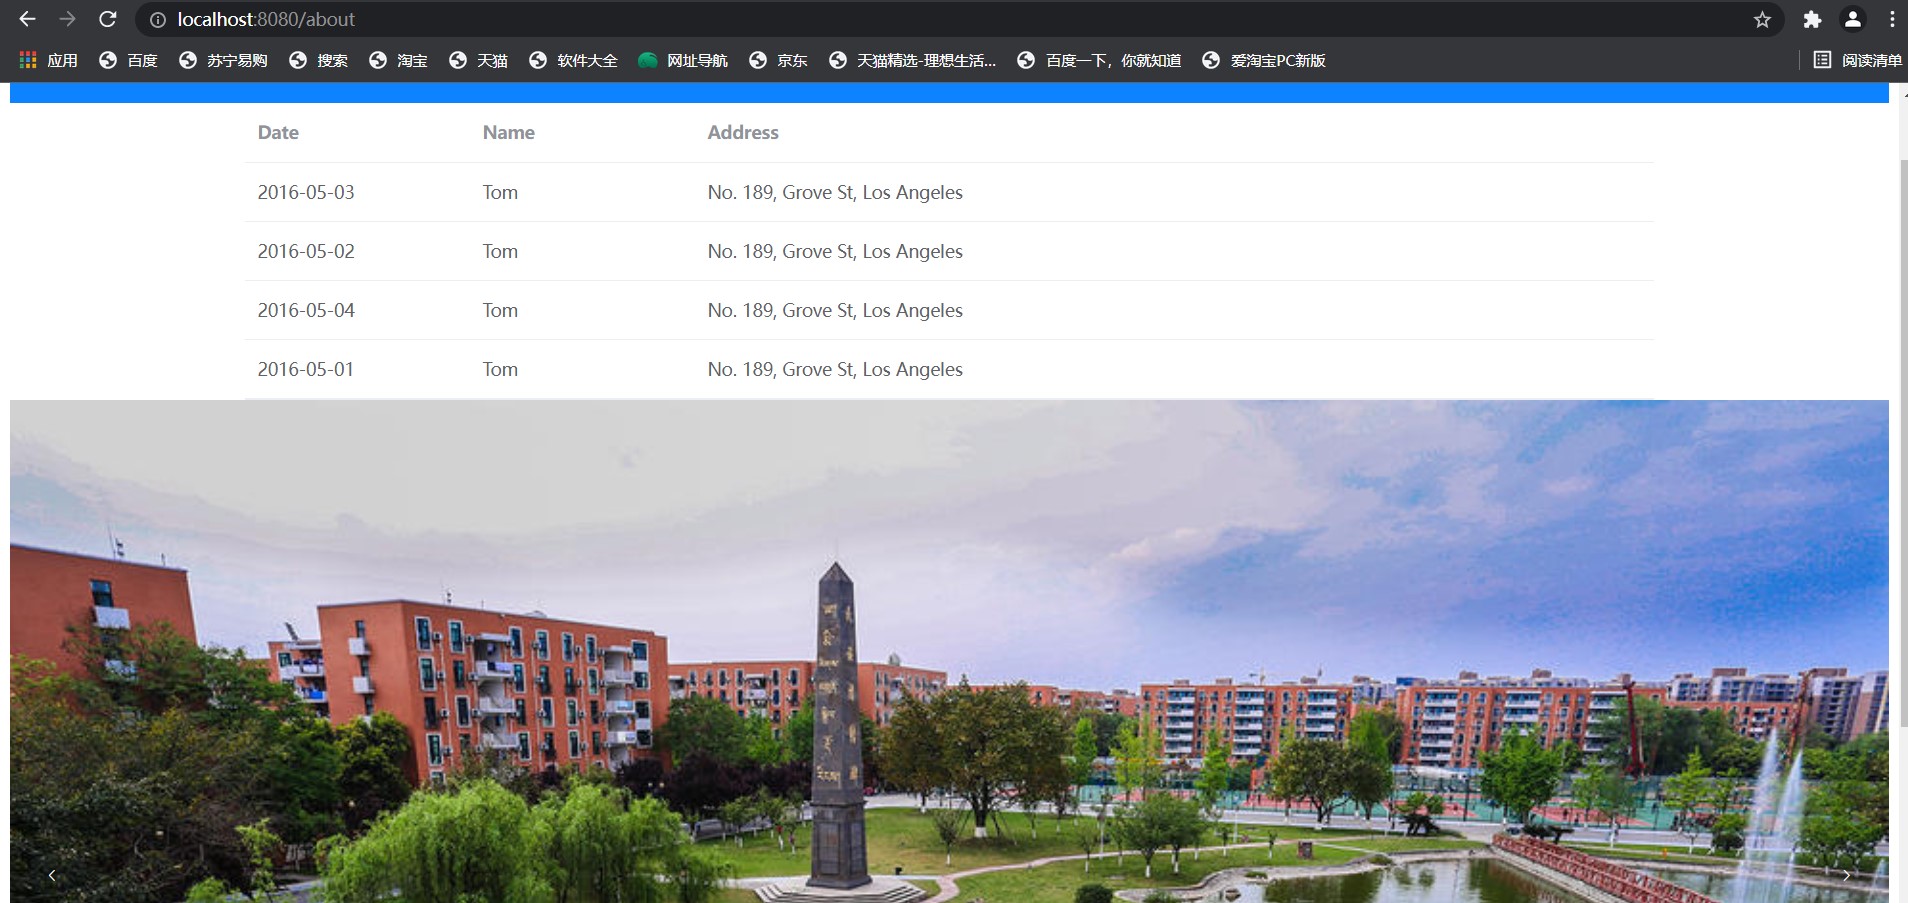
Then the rotation is finished.
summary
I feel that with these things, you can almost write your own page. These parts are used as the basis, and then you can use other element components. If you encounter problems, baidu or find solutions on csdn or b station. You can think more and use more. As a back-end, it's almost the same.