I preface
The s3c2440 equipped with Mini2440 has long been discontinued, but the platform will be outdated and the technology will not be outdated. It still has certain learning significance. Let's give full play to the waste heat of this development board for the last time.
The technology involved in U-Boot is bare metal development. In actual work, U-Boot is mainly used as a tool to download the kernel and mount the root file system by using tftp and nfs. This article only records the common methods of U-Boot, which will be studied later.
II Download U-Boot
1. Compilation
This article uses Tekkaman's open source u-boot for mini2440, which can be found at Download here.
Manually compile after decompression. You need to install the cross compilation tool in advance.
make ARCH=arm CROSS_COMPILE=arm-linux- mini2440_config
make ARCH=arm CROSS_COMPILE=arm-linux- all
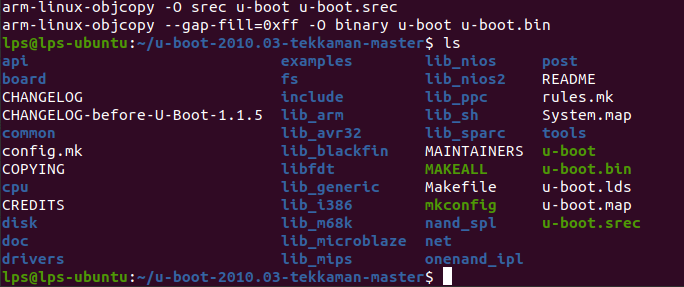
After compilation, generate u-boot.exe in the current directory bin
2. Burning
Set u-boot After bin is written into the development board, the development board buzzer will sound for 1 second after power on. At the same time, print data on the terminal. Press any key within 1 second to enter the command mode.
U-Boot 2010.03 (5 July 2021 - 14:09:38)

 modified by tekkamanninja (tekkamanninja@163.com)
 Love Linux forever!!

I2C:   ready
DRAM:  64 MB
Flash:  2 MB
NAND:  256 MiB
Video: 240x320x16 20kHz 62Hz
In:    serial
Out:   serial
Err:   serial
USB slave is enable!
Net:   dm9000
U-Boot 2010.03 (5 July 2021 - 14:09:38)
modified by tekkamanninja
(tekkamanninja@163.com)
Love Linux forever!!
Hit any key to stop autoboot:  0
[u-boot@MINI2440]#
[u-boot@MINI2440]#
III Using U-Boot
1. Set the network address
Set the IP address according to the actual situation
[u-boot@MINI2440]# setenv ipaddr 192.168.15.233
[u-boot@MINI2440]# setenv gatewayip 192.168.15.1
[u-boot@MINI2440]# setenv serverip 192.168.15.230
[u-boot@MINI2440]# setenv netmask 255.255.255.0
[u-boot@MINI2440]# saveenv
Saving Environment to NAND...
Erasing Nand...
Erasing at 0x6000000000002 --   0% complete.
Writing to Nand... done
[u-boot@MINI2440]# printenv
2. ping command
Try to ping the server (the ip address is the serverip set above)
[u-boot@MINI2440]# ping 192.168.15.230
dm9000 i/o: 0x20000300, id: 0x90000a46
DM9000: running in 16 bit mode
MAC: 08:08:11:18:12:27
operating at 100M full duplex mode
Using dm9000 device
host 192.168.15.230 is alive
Note: only u-boot can ping other machines. Other machines cannot Ping u-boot because u-boot is not processed
3. tftp command
To verify the tftp function of u-boot, the Linux server needs to install the tftp service
1. Installation services:
sudo apt install tftpd-hpa

2. establish tftp Service Directory:
mkdir /home/lps/tftp
chmod 777 /home/lps/tftp

vim /etc/default/tftpd-hpa
3. The content is revised to:
TFTP_USERNAME="tftp"
TFTP_DIRECTORY="/home/lps/tftpboot"
TFTP_ADDRESS="0.0.0.0:69"
TFTP_OPTIONS="-l -c -s"

4. Restart TFTP service
sudo service tftpd-hpa restart
Then you can use the tftp command in u-boot to download the file to the memory of the development board, and finally write it into nand flash
[u-boot@MINI2440]#
tftp 0x30008000 u-boot.bin
nand erase 0 0x60000
nand write 0x30008000 0 0x60000

tftp 0x30008000 uImage
nand erase 0x80000 0x500000
nand write 0x30008000 0x80000 0x500000

tftp 0x30008000 rootfs.img
nand erase 0x580000 $filesize
nand write.yaffs 0x30008000 0x580000 $filesize
You can also use tftp to load the kernel and start it. You need to set u-boot:
[u-boot@MINI2440]#
setenv bootcmd 'tftp 0x30008000 uImage;bootm 0x30008000'
saveenv
4. nfs command
First, the server also needs to install nfs service, which can be Refer to this article.
Then u-boot can use nfs command to download files, which is similar to tftp
The instruction format is nfs [loadAddress] [[hostIPaddr:]bootfilename]
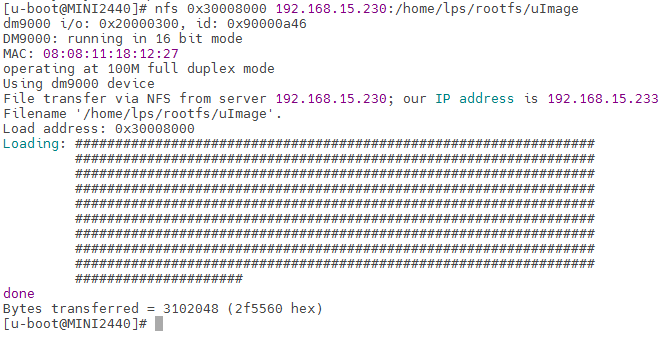
If it can be downloaded successfully, it means that there is no problem with the nfs function. At this time, setting the u-boot startup parameter can enable nfs to load the kernel and mount the root file system. The IP address needs to distinguish between the client IP and the server IP:
[u-boot@MINI2440]#
setenv bootcmd 'nfs 0x30008000 192.168.15.230:/home/lps/rootfs/uImage;bootm'
setenv bootargs noinitrd root=/dev/nfs rw nfsroot=192.168.15.230:/home/lps/rootfs,nolock ip=192.168.15.233:192.168.15.230:192.168.15.1:255.255.255.0:mini2440:eth0:off console=ttySAC0,115200 init=/linuxrc
saveenv
5. Start NAND flash
If you do not want to use the network mode to start the kernel and mount the root file system, you need to set the u-boot startup parameters:
[u-boot@MINI2440]#
setenv bootcmd 'nand read 0x30008000 0x80000 0x500000;bootm 0x30008000'
setenv bootargs noinitrd root=/dev/mtdblock3 init=/linuxrc console=ttySAC0,115200
You need to ensure that nand flash has successfully burned the kernel and root file system images. If there are bad blocks or the file system cannot be mounted, you can try to format nand flash and then burn again
[u-boot@MINI2440]# nand scrub