Spring boot case study: employee addition, deletion, modification and query page (fool teaching)
As the saying goes, no matter how many concepts you see, it's better to do a case study. This article will take you to learn and complete a Spring boot case.
To learn, we must first find the motivation before we have the perseverance to learn. If we look at the finished products first, we will have the motivation to do it. So let me first show you our case page here.
Allen's employee addition, deletion, modification and query page display
Attach the source code of the complete case
Link: https://pan.baidu.com/s/1mG3Rsj6T8KH7KREscHe5Rg
Extraction code: x9vb
After copying this content, open Baidu online disk mobile App, which is more convenient to operate
Actual combat 1: visit the login page by default and switch between Chinese and English (internationalization)
prepare documents
Attach the html files and css files we need
Link: https://pan.baidu.com/s/10nmAwLxDm6u1fl2BonN3TQ
Extraction code: cvt2
After copying this content, open Baidu online disk mobile App, which is more convenient to operate
Default access login page
Write a mymvcconfig class
package com.guo.config;
import org.springframework.context.annotation.Bean;
import org.springframework.context.annotation.Configuration;
import org.springframework.format.FormatterRegistry;
import org.springframework.web.servlet.HandlerInterceptor;
import org.springframework.web.servlet.LocaleResolver;
import org.springframework.web.servlet.config.annotation.EnableWebMvc;
import org.springframework.web.servlet.config.annotation.InterceptorRegistry;
import org.springframework.web.servlet.config.annotation.ViewControllerRegistry;
import org.springframework.web.servlet.config.annotation.WebMvcConfigurer;
@Configuration
public class MyMvcConfig implements WebMvcConfigurer {
    @Override
    public void addViewControllers(ViewControllerRegistry registry) {
        registry.addViewController("/").setViewName("index");
        registry.addViewController("/index.html").setViewName("index");
        registry.addViewController("/main.html").setViewName("dashboard");
    }
}
Pay attention to the location of the file here.
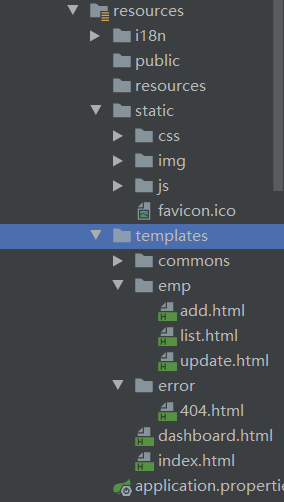
The html files not available here are the following contents. The html files are placed in the templates package and the others in the static package
Here is a fallible point. Joining you did not succeed in your visit. It may be that you haven't imported thymeleaf. As I said before, if you haven't imported thymeleaf, the web page will take effect only under these paths.
Static path:
"classpath:/META-INF/resources/",
"classpath:/resources/",
"classpath:/static/",
"classpath:/public/"
If you want to know more, you can see my article on static resource import
internationalization
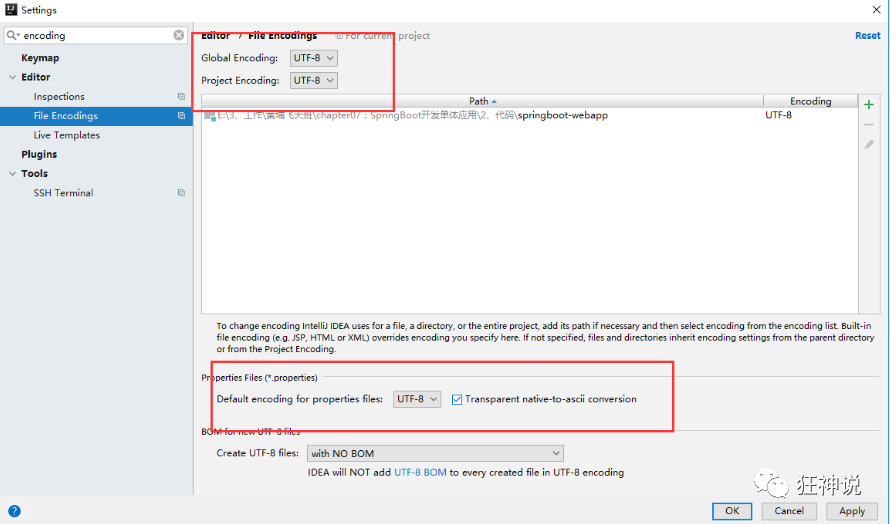
First, uniformly set the encoding of properties in the IDEA!
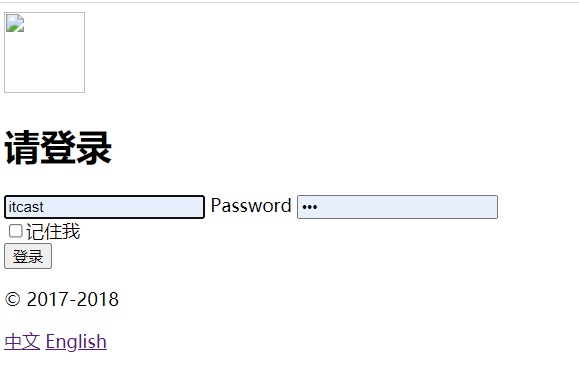
Write an internationalization configuration file and extract the internationalization page messages that need to be displayed on the page. We can go to the login page to see what we need to write international configuration!
Configuration file writing
(this part comes from the spring boot teaching of crazy God)
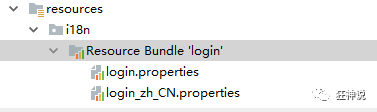
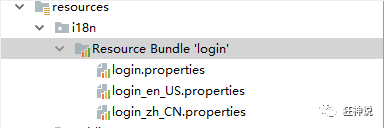
1. We create a new i18n directory under the resources resource file to store the internationalization configuration files
2. Create a login Properties file and a login_zh_CN.properties; It is found that IDEA automatically identifies the internationalization operation we want to do; The folder has changed!
3. We can create a new file on it;
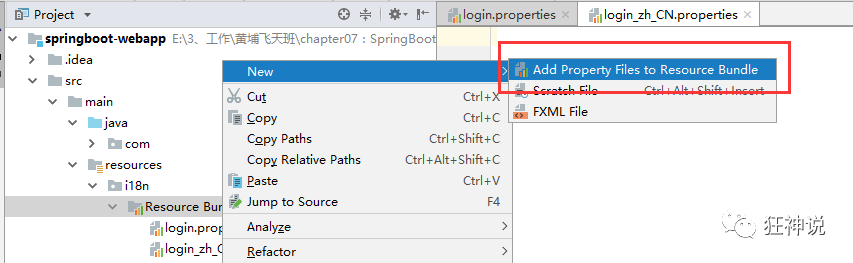
The following page pops up: let's add another one in English;
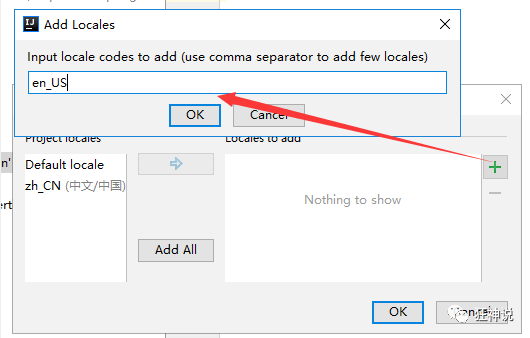
This is much faster!
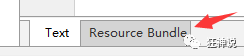
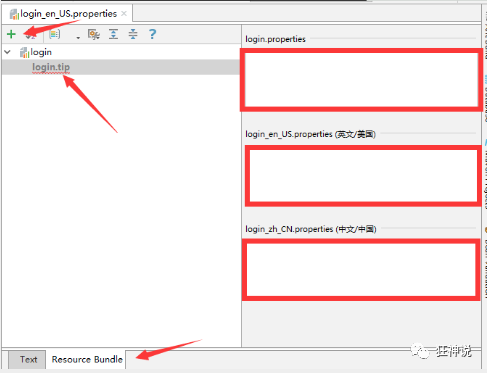
4. Next, let's write the configuration. We can see another view under the idea**
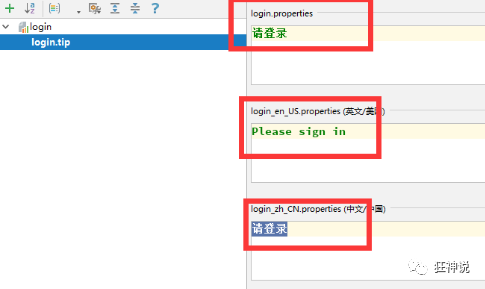
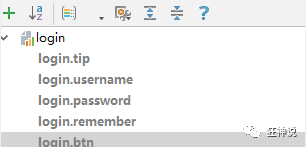
In this view, we can directly add attributes by clicking the + sign; Let's create a new login Tip, you can see that there are three file boxes on the side for input
Let's add the content of the home page!
Then add other page contents in turn!
Then check our configuration file;
login.properties: default
login.btn=Sign in
login.password=password
login.remember=Remember me
login.tip=Please login
login.username=user name
login_en_US.properties: English
login.btn=Sign in
login.password=Password
login.remember=Remember me
login.tip=Please sign in
login.username=Username
login_zh_CN.properties: Chinese
login.btn=Sign in
login.password=password
login.remember=Remember me
login.tip=Please login
login.username=user name
OK, the configuration file steps are completed!
Modify the value of the landing page to thymeleaf format
Then let's review the usage of thymeleaf
thymeleaf format:
Add one at the beginning of the html file:
<html lang="en" xmlns:th="http://www.thymeleaf.org">
The format is:
th: select = '@ {path}'
For example:
<link th:href="@{/css/bootstrap.min.css}" rel="stylesheet">
Then use the thymeleaf template in the page where we need to switch between Chinese and English (of course, you can also use others)
I take my index HTML as an example
<!DOCTYPE html>
<html lang="en-US" xmlns:th="http://www.thymeleaf.org">
	<head>
		<meta http-equiv="Content-Type" content="text/html; charset=UTF-8">
		<meta name="viewport" content="width=device-width, initial-scale=1, shrink-to-fit=no">
		<meta name="description" content="">
		<meta name="author" content="">
		<title>Signin Template for Bootstrap</title>
		<!-- Bootstrap core CSS -->
		<link th:href="@{/css/bootstrap.min.css}" rel="stylesheet">
		<!-- Custom styles for this template -->
		<link th:href="@{/css/signin.css}" rel="stylesheet">
	</head>

	<body class="text-center">
		<form class="form-signin" action="dashboard.html">
			<img class="mb-4" th:src="@{/img/bootstrap-solid.svg}" alt="" width="72" height="72">
			<h1 class="h3 mb-3 font-weight-normal" th:text="#{login.tip}">Please sign in</h1>
			<input type="text" class="form-control" th:placeholder="#{login.username}" required="" autofocus="">
			<label class="sr-only">Password</label>
			<input type="password" class="form-control" th:placeholder="#{login.password}" required="">
			<div class="checkbox mb-3">
				<label>
          <input type="checkbox" value="remember-me">[[#{login.remember}]]</label>
			</div>
			<button class="btn btn-lg btn-primary btn-block" type="submit">[[#{login.btn}]]</button>
			<p class="mt-5 mb-3 text-muted">© 2017-2018</p>
			<a class="btn btn-sm" th:href="@{/index.html(l='zh_CN')}">chinese</a>
			<a class="btn btn-sm" th:href="@{/index.html(l='en_US')}">English</a>
		</form>
	</body>
</html>
be careful:
Get value with#
Link path is@

We notice that we have prepared two Chinese and English buttons for this actual battle. A link is written in the button, which is the same in the front. However, we notice that the parameter in the brackets in thymeleaf is passed, which is equivalent to assigning a value to l. what's the use of assigning a value? We customize the LocaleResolver configuration and rewrite the methods in it
Write an internationalization class and inject it into Beans
MyLocaleResolver.class
package com.guo.config;

import org.springframework.web.servlet.LocaleResolver;
import org.thymeleaf.util.StringUtils;

import javax.servlet.http.HttpServletRequest;
import javax.servlet.http.HttpServletResponse;
import java.util.Locale;

public class MyLocaleResolver implements LocaleResolver {
    @Override
    public Locale resolveLocale(HttpServletRequest request){
        //Gets the language parameter in the request
        String language = request.getParameter("l");
        Locale locale=Locale.getDefault();
        //If requested link
        if(!StringUtils.isEmpty(language)){
            //division
            String[] split = language.split("_");
            //countries and regions
        locale=new Locale(split[0], split[1]);
        }
        return locale;
    }

    @Override
    public void setLocale(HttpServletRequest httpServletRequest, HttpServletResponse httpServletResponse, Locale locale) {

    }
}
MyMvcConfig.class
package com.guo.config;
import org.springframework.context.annotation.Bean;
import org.springframework.context.annotation.Configuration;
import org.springframework.web.servlet.LocaleResolver;
import org.springframework.web.servlet.config.annotation.EnableWebMvc;

import org.springframework.web.servlet.config.annotation.ViewControllerRegistry;
import org.springframework.web.servlet.config.annotation.WebMvcConfigurer;

@Configuration
public class MyMvcConfig implements WebMvcConfigurer {
    @Override
    public void addViewControllers(ViewControllerRegistry registry) {
        registry.addViewController("/").setViewName("index");
        registry.addViewController("/index.html").setViewName("index");
    }
    //Customized internationalization takes effect
    @Bean
    public LocaleResolver localeResolver(){
        return new MyLocaleResolver();
    }
}
The above code summary is just one sentence. If the value of l is not empty, press "" to obtain the value of l To split into two versions, the first as a country, the second as a region, and finally use these two parameters to new a locale object.
For example, if I order Chinese, l gets value zh_CN, split zh and CN, and then new object.
Actual combat 2: login implementation
Problems to be solved:
1. Determine whether the user name and password are correct
2. Redirect to main HTML page
Determine whether the user name and password are correct
Write a logincontroller class
package com.guo.controller;

import org.springframework.stereotype.Controller;
import org.springframework.ui.Model;
import org.springframework.web.bind.annotation.RequestMapping;
import org.springframework.web.bind.annotation.RequestParam;
import org.springframework.web.bind.annotation.ResponseBody;
import org.thymeleaf.util.StringUtils;

import javax.servlet.http.HttpSession;

@Controller
public class LoginController {
    @RequestMapping("/user/login")
    public String login(@RequestParam("username") String username,
                        @RequestParam("password") String password,
                        Model model, HttpSession session){

        if(!StringUtils.isEmpty(username)&&"123456".equals(password)){
            session.setAttribute("loginUser",username);
            return "redirect:/main.html";
        }
        else {
            model.addAttribute("msg","Wrong user name or password!");
            return "index";
        }

    }
}
Let's analyze it bit by bit. First
 public String login
     (@RequestParam("username")  String username,
      @RequestParam("password")  String password,
      Model model,
      HttpSession session)
Here's where we get the data
if(!StringUtils.isEmpty(username)&&"123456".equals(password))
Here, judge whether the user name is empty, and then judge whether the password is 123456. If so, execute
session.setAttribute("loginUser",username);
Assign loginUser to username
What if the user name is empty or the password is incorrect?
model.addAttribute("msg","Wrong user name or password!");
Pass msg the parameter "wrong user name or password!", But what's the use?
Let's go back to index Add one more to him in HTML
<p style="color: red" th:text="${msg}" th:if="${not #strings.isEmpty(msg)}"></p>
When msg is not empty, we display msg information in red.
Redirect to main HTML page
return "redirect:/main.html";
Some people may ask why to redirect here. That's because our form is sent out in the form of get. Our user name and password will be attached to the link bar of successful login. (of course, you can also modify the form submission method to get)
Actual combat 3: interceptor
Create interceptor
First, we build a loginhandlerinterceptor class to implement the HandlerInterceptor interface.
public class LoginHandlerIntercepter implements HandlerInterceptor
Override the preHandle method inside:
public boolean preHandle(HttpServletRequest request, HttpServletResponse response, Object handler) throws Exception
Create a new object for him to judge whether he has successfully logged in.
Object loginUser = request.getSession().getAttribute("loginUser");//Once we log in successfully, we have a loginUser
If loginUser is empty, it proves that our user name is empty or the password is wrong, then we pass the value "no permission, please log in safely first" to msg. And let him stay on the index home page. Returns false.
Returns true if you are logged in securely.
if(loginUser==null) {
    request.setAttribute("msg", "No security permission, please log in first");
    request.getRequestDispatcher("/index.html").forward(request,response);
    return false;
}
else {
    return true;
}
Register interceptor
After our class is written, we will inject it into beans. Let's go back to Mymvcconfig:
@Overridepublic void addInterceptors(InterceptorRegistry registry) { registry.addInterceptor(new LoginHandlerIntercepter()).addPathPatterns("/**").excludePathPatterns("/index.html","/","/user/login");}
Error prone point
At this time, we saw that there was no css on my web page. When we opened it, we found that the css was blocked.
So where did we go wrong? Let's go back to mymvcconfig class
@Overridepublic void addInterceptors(InterceptorRegistry registry) { registry.addInterceptor(new LoginHandlerIntercepter()).addPathPatterns("/**").excludePathPatterns("/index.html","/","/user/login");}
Therefore, we need to release it in the code. We intercept all resources under the port, except "/ index.html" and "/" and "/ user/login", so we only need to add our static resources
@Overridepublic void addInterceptors(InterceptorRegistry registry) { registry.addInterceptor(new LoginHandlerIntercepter()).addPathPatterns("/**").excludePathPatterns("/index.html","/","/user/login","/css/**","/img/**");}
If a friend finds that the css still can't be loaded, he guesses that the friends use Google browser
Clean up the cache
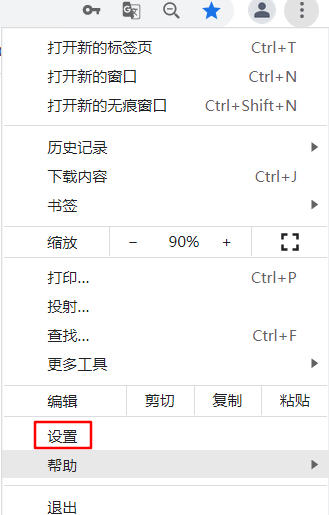
Clean up the cache
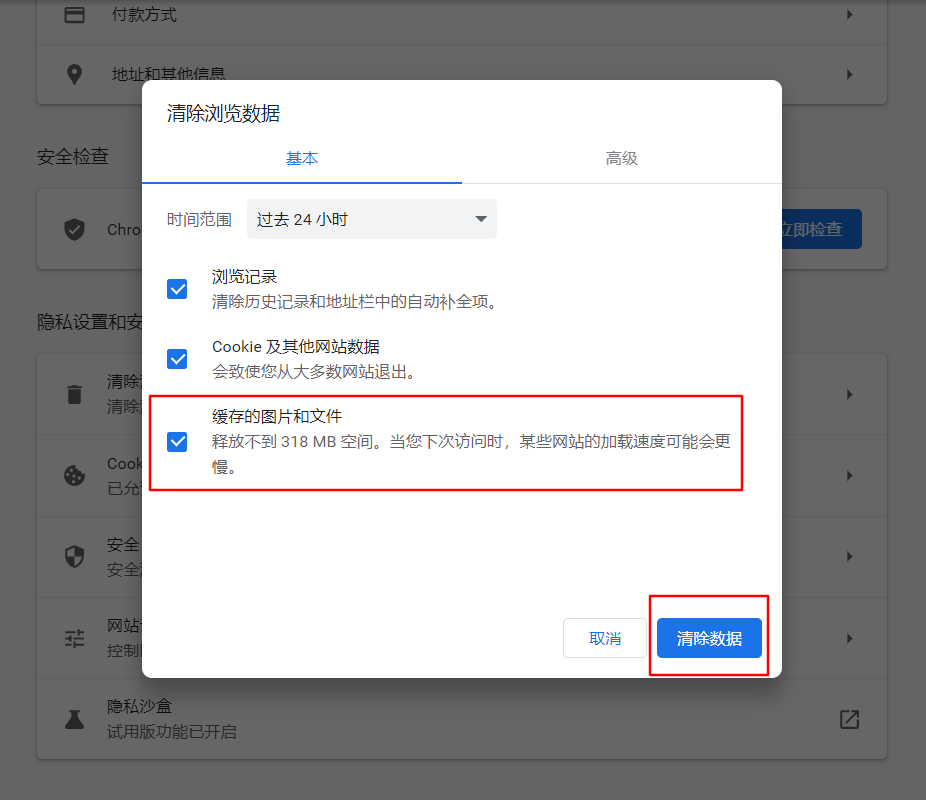
That's it.
Practice 4: public page extraction
thymeleaf public page element extraction
1. Extract public segments
<footer th:fragment="copy" id="sidebar">
©2021 The thyme virtual grocery
</footer>
Two reference methods:
~{templatename::selector}   namely"footer::#sidebar "template name:: selector
~{templatename::fragment}   namely"footer::copy"Template name::Fragment name
Three approaches:
Let's choose template name: fragment name first
<div th:insert="footer::copy"></div>
<div th:replace="footer::copy"></div>
<div th:include="footer::copy"></div>
1. Insert is an insert
effect:
<div th:insert="footer::copy">
<footer th:fragment="copy" id="sidebar">
©2021 The thyme virtual grocery
</footer>
</div>
We found that he inserted our public part in the middle of div.
2. replace is a substitute
<footer th:fragment="copy" id="sidebar"> ©2021 The thyme virtual grocery </footer>
We found that the div is missing, so replace depends directly on the part we inserted, and the original div will be replaced.
3. include is included
<div th:fragment="copy" id="sidebar"> ©2021 The thyme virtual grocery </div>
We found that we kept the original div, but the content in div was replaced by the content in footer.
Extract the top bar and side bar
Let's create a new commons package, which is placed under the new bar html

Let's go HTML and dashboard Extract the common part of HTML and put it into bar html
bar.html
<!DOCTYPE html>
<html lang="en" xmlns:th="http://www.thymeleaf.org">
<head>
    <meta charset="UTF-8">
    <title>Title</title>
</head>
<body>
<!--topbar-->
<nav class="navbar navbar-dark sticky-top bg-dark flex-md-nowrap p-0" th:fragment="topbar">
    <a class="navbar-brand col-sm-3 col-md-2 mr-0" href="http://getbootstrap.com/docs/4.0/examples/dashboard/#">[[${session.loginUser}]]</a>
    <input class="form-control form-control-dark w-100" type="text" placeholder="Search" aria-label="Search">
    <ul class="navbar-nav px-3">
        <li class="nav-item text-nowrap">
            <a class="nav-link" th:href="@{/user/logout}">cancellation</a>
        </li>
    </ul>
</nav>
<!--sidebar-->
<nav class="col-md-2 d-none d-md-block bg-light sidebar" id="sidebar">
    <div class="sidebar-sticky">
        <ul class="nav flex-column">
            <li class="nav-item">
                <a class="nav-link" th:class="${activeUri=='main.html'?'nav-link active':'nav-link'}" th:href="@{/main.html}">
                    <svg xmlns="http://www.w3.org/2000/svg" width="24" height="24" viewBox="0 0 24 24" fill="none" stroke="currentColor" stroke-width="2" stroke-linecap="round" stroke-linejoin="round" class="feather feather-home">
                        <path d="M3 9l9-7 9 7v11a2 2 0 0 1-2 2H5a2 2 0 0 1-2-2z"></path>
                        <polyline points="9 22 9 12 15 12 15 22"></polyline>
                    </svg>
                    <span class="sr-only">(current)</span>
                    Dashboard
                </a>
            </li>
            <li class="nav-item">
                <a class="nav-link" href="http://getbootstrap.com/docs/4.0/examples/dashboard/#">
                    <svg xmlns="http://www.w3.org/2000/svg" width="24" height="24" viewBox="0 0 24 24" fill="none" stroke="currentColor" stroke-width="2" stroke-linecap="round" stroke-linejoin="round" class="feather feather-file">
                        <path d="M13 2H6a2 2 0 0 0-2 2v16a2 2 0 0 0 2 2h12a2 2 0 0 0 2-2V9z"></path>
                        <polyline points="13 2 13 9 20 9"></polyline>
                    </svg>
                    Orders
                </a>
            </li>
            <li class="nav-item">
                <a class="nav-link" href="http://getbootstrap.com/docs/4.0/examples/dashboard/#">
                    <svg xmlns="http://www.w3.org/2000/svg" width="24" height="24" viewBox="0 0 24 24" fill="none" stroke="currentColor" stroke-width="2" stroke-linecap="round" stroke-linejoin="round" class="feather feather-shopping-cart">
                        <circle cx="9" cy="21" r="1"></circle>
                        <circle cx="20" cy="21" r="1"></circle>
                        <path d="M1 1h4l2.68 13.39a2 2 0 0 0 2 1.61h9.72a2 2 0 0 0 2-1.61L23 6H6"></path>
                    </svg>
                    Products
                </a>
            </li>
            <li class="nav-item">
                <a class="nav-link" th:href="@{/emps}"
                    th:class="${activeUri=='emps'?'nav-link active':'nav-link'}">
                    <svg xmlns="http://www.w3.org/2000/svg" width="24" height="24" viewBox="0 0 24 24" fill="none" stroke="currentColor" stroke-width="2" stroke-linecap="round" stroke-linejoin="round" class="feather feather-users">
                        <path d="M17 21v-2a4 4 0 0 0-4-4H5a4 4 0 0 0-4 4v2"></path>
                        <circle cx="9" cy="7" r="4"></circle>
                        <path d="M23 21v-2a4 4 0 0 0-3-3.87"></path>
                        <path d="M16 3.13a4 4 0 0 1 0 7.75"></path>
                    </svg>
                    Employee management
                </a>
            </li>
            <li class="nav-item">
                <a class="nav-link" href="http://getbootstrap.com/docs/4.0/examples/dashboard/#">
                    <svg xmlns="http://www.w3.org/2000/svg" width="24" height="24" viewBox="0 0 24 24" fill="none" stroke="currentColor" stroke-width="2" stroke-linecap="round" stroke-linejoin="round" class="feather feather-bar-chart-2">
                        <line x1="18" y1="20" x2="18" y2="10"></line>
                        <line x1="12" y1="20" x2="12" y2="4"></line>
                        <line x1="6" y1="20" x2="6" y2="14"></line>
                    </svg>
                    Reports
                </a>
            </li>
            <li class="nav-item">
                <a class="nav-link" href="http://getbootstrap.com/docs/4.0/examples/dashboard/#">
                    <svg xmlns="http://www.w3.org/2000/svg" width="24" height="24" viewBox="0 0 24 24" fill="none" stroke="currentColor" stroke-width="2" stroke-linecap="round" stroke-linejoin="round" class="feather feather-layers">
                        <polygon points="12 2 2 7 12 12 22 7 12 2"></polygon>
                        <polyline points="2 17 12 22 22 17"></polyline>
                        <polyline points="2 12 12 17 22 12"></polyline>
                    </svg>
                    Integrations
                </a>
            </li>
        </ul>

        <h6 class="sidebar-heading d-flex justify-content-between align-items-center px-3 mt-4 mb-1 text-muted">
            <span>Saved reports</span>
            <a class="d-flex align-items-center text-muted" href="http://getbootstrap.com/docs/4.0/examples/dashboard/#">
                <svg xmlns="http://www.w3.org/2000/svg" width="24" height="24" viewBox="0 0 24 24" fill="none" stroke="currentColor" stroke-width="2" stroke-linecap="round" stroke-linejoin="round" class="feather feather-plus-circle"><circle cx="12" cy="12" r="10"></circle><line x1="12" y1="8" x2="12" y2="16"></line><line x1="8" y1="12" x2="16" y2="12"></line></svg>
            </a>
        </h6>
        <ul class="nav flex-column mb-2">
            <li class="nav-item">
                <a class="nav-link" href="http://getbootstrap.com/docs/4.0/examples/dashboard/#">
                    <svg xmlns="http://www.w3.org/2000/svg" width="24" height="24" viewBox="0 0 24 24" fill="none" stroke="currentColor" stroke-width="2" stroke-linecap="round" stroke-linejoin="round" class="feather feather-file-text">
                        <path d="M14 2H6a2 2 0 0 0-2 2v16a2 2 0 0 0 2 2h12a2 2 0 0 0 2-2V8z"></path>
                        <polyline points="14 2 14 8 20 8"></polyline>
                        <line x1="16" y1="13" x2="8" y2="13"></line>
                        <line x1="16" y1="17" x2="8" y2="17"></line>
                        <polyline points="10 9 9 9 8 9"></polyline>
                    </svg>
                    Current month
                </a>
            </li>
            <li class="nav-item">
                <a class="nav-link" href="http://getbootstrap.com/docs/4.0/examples/dashboard/#">
                    <svg xmlns="http://www.w3.org/2000/svg" width="24" height="24" viewBox="0 0 24 24" fill="none" stroke="currentColor" stroke-width="2" stroke-linecap="round" stroke-linejoin="round" class="feather feather-file-text">
                        <path d="M14 2H6a2 2 0 0 0-2 2v16a2 2 0 0 0 2 2h12a2 2 0 0 0 2-2V8z"></path>
                        <polyline points="14 2 14 8 20 8"></polyline>
                        <line x1="16" y1="13" x2="8" y2="13"></line>
                        <line x1="16" y1="17" x2="8" y2="17"></line>
                        <polyline points="10 9 9 9 8 9"></polyline>
                    </svg>
                    Last quarter
                </a>
            </li>
            <li class="nav-item">
                <a class="nav-link" href="http://getbootstrap.com/docs/4.0/examples/dashboard/#">
                    <svg xmlns="http://www.w3.org/2000/svg" width="24" height="24" viewBox="0 0 24 24" fill="none" stroke="currentColor" stroke-width="2" stroke-linecap="round" stroke-linejoin="round" class="feather feather-file-text">
                        <path d="M14 2H6a2 2 0 0 0-2 2v16a2 2 0 0 0 2 2h12a2 2 0 0 0 2-2V8z"></path>
                        <polyline points="14 2 14 8 20 8"></polyline>
                        <line x1="16" y1="13" x2="8" y2="13"></line>
                        <line x1="16" y1="17" x2="8" y2="17"></line>
                        <polyline points="10 9 9 9 8 9"></polyline>
                    </svg>
                    Social engagement
                </a>
            </li>
            <li class="nav-item">
                <a class="nav-link" href="http://getbootstrap.com/docs/4.0/examples/dashboard/#">
                    <svg xmlns="http://www.w3.org/2000/svg" width="24" height="24" viewBox="0 0 24 24" fill="none" stroke="currentColor" stroke-width="2" stroke-linecap="round" stroke-linejoin="round" class="feather feather-file-text">
                        <path d="M14 2H6a2 2 0 0 0-2 2v16a2 2 0 0 0 2 2h12a2 2 0 0 0 2-2V8z"></path>
                        <polyline points="14 2 14 8 20 8"></polyline>
                        <line x1="16" y1="13" x2="8" y2="13"></line>
                        <line x1="16" y1="17" x2="8" y2="17"></line>
                        <polyline points="10 9 9 9 8 9"></polyline>
                    </svg>
                    Year-end sale
                </a>
            </li>
        </ul>
    </div>
</nav>
</body>
</html>
Of course, put the dashboard HTML and list Delete the corresponding part of HTML and change to these two codes
<!--introduce topbar-->
<div th:replace="commons/bar::topbar"></div>
<!--introduce sidebar-->
<div th:replace="commons/bar::#sidebar"></div>
Just refresh
Actual Combat 5: link highlighting and list completion
First, let's solve it
Link highlight
When we go to different pages, we also highlight the corresponding labels, but the menu bar next to the sidebar was made by common extraction, so how do we know which page he jumped to.
First, let's take a look at:
Highlighted label:<a class="nav-link active">
Unlit label<a class="nav-link">
Reference sidebar variables:
dashboard.html:
<div th:replace="commons/bar::#sidebar(activeUri='main.html')"></div>
list.html:
<div th:replace="commons/bar::#sidebar(activeUri='emps')"></div>
bar. Judgment in HTML:
dashboard label:
<a class="nav-link" th:class="${activeUri=='main.html'?'nav-link active':'nav-link'}" th:href="@{/main.html}">
Employee management label:
<a class="nav-link" th:href="@{/emps}" th:class="${activeUri=='emps'?'nav-link active':'nav-link'}">
Here I talk about a place that is easy to make mistakes. Many students asked me that after he finished, his icon is like this, which is the top to the front, and he highlights it no matter which page.
Error prone point
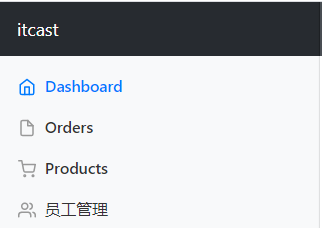
That's because you mistyped the highlighted label and the unlit label.
Please check if you have typed these two
<a class="nav-Link active">
<a class="nav-Link">
Please note that if the Link here is capitalized, it will highlight the front of the top by default.
After modification, the correct is as follows:
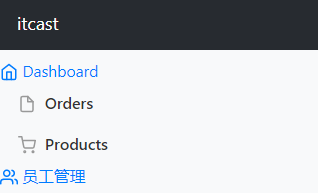
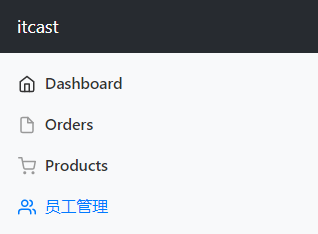
Let's solve how to judge which page it is. We can pass the value of a variable in the sidebar position of dashboard and bar, and then we can set the highlighted class or non highlighted class for our label according to its value.
Next, let's look at
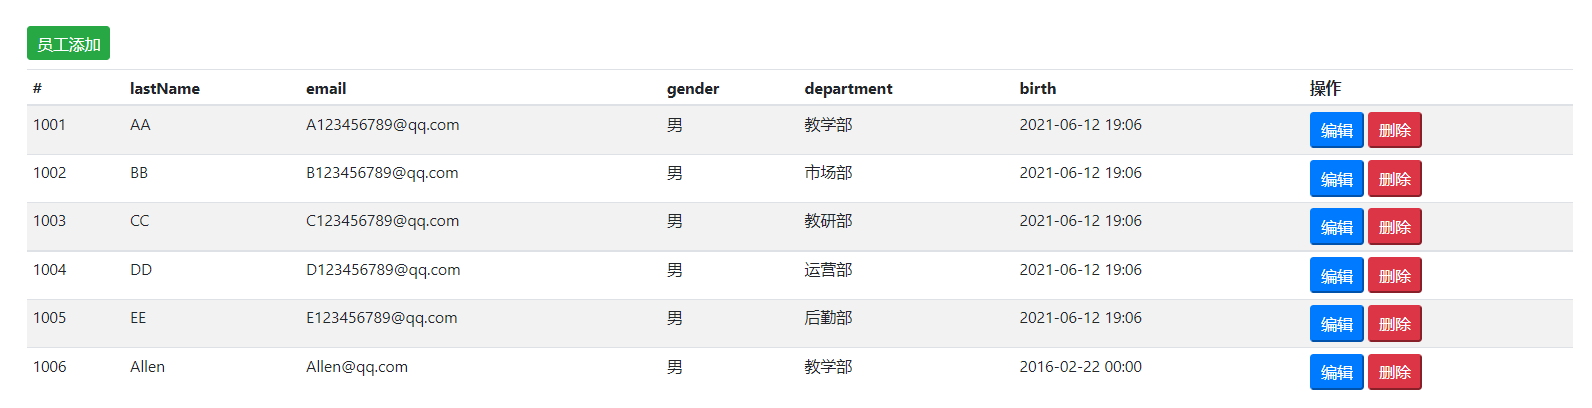
List complete
<h2><a class="btn btn-sm btn-success" th:href="@{/emp}">Employee addition</a></h2>
					<div class="table-responsive">
						<table class="table table-striped table-sm">
							<thead>
							<tr>
								<th>#</th>
								<th>lastName</th>
								<th>email</th>
								<th>gender</th>
								<th>department</th>
								<th>birth</th>
								<th>operation</th>
							</tr>
							</thead>
							<tbody>
							<tr th:each="emp:${emps}">
								<td th:text="${emp.id}"></td>
								<td >[[${emp.lastName}]]</td>
								<td th:text="${emp.email}"></td>
								<td th:text="${emp.gender==0?'female':'male'}"></td>
								<td th:text="${emp.department.departmentName}"></td>
								<td th:text="${#dates.format(emp.birth,'yyyy-MM-dd HH:mm')}"></td>
								<td>
									<button class="btn-sm btn-primary">edit</button>
									<button class="btn-sm btn-danger">delete</button>
								</td>
							</tr>
							</tbody>
						</table>
					</div>
We explain part by part:
Overhead button
<h2><a class="btn btn-sm btn-success" th:href="@{/emp}">Employee addition</a></h2>
class-sucess//Green button th:href="@{/emp}" / / link to emp
Employee list
<tbody> <tr th:each="emp:${emps}"> <td th:text="${emp.id}"></td> <td >[[${emp.lastName}]]</td> <td th:text="${emp.email}"></td> <td th:text="${emp.gender==0?'female':'male'}"></td> <td th:text="${emp.department.departmentName}"></td> <td th:text="${#dates. format(emp.birth,'yyyy-MM-dd HH:mm')}"></td> < td> < Button class = "BTN SM BTN primary" > Edit < / button > < Button class = "BTN SM BTN danger" > delete < / button > </ td> </ tr></tbody>
<tr th:each="emp:${emps}">//Each traversal takes out each individual in the emps set for emp
Pick a few key points
Gender
<td th:text="${emp.gender==0?'female':'male'}"></td>//If the value received by gender is 0, it returns female, and 1 returns male
department
<td th:text="${emp.department.departmentName}"></td>//What is returned is the departmentName in the department object in emp
Birth
<td th:text="${#dates. Format (EMP. Birth, 'yyyy MM DD HH: mm')} "> < / td > / / set the return format to yyyy MM DD HH: mm
Edit and delete buttons
<td> <button class="btn-sm btn-primary">edit</button>//Blue < Button class = "BTN SM BTN danger" > delete < / button > / / the warning button is red</td>
Practice 6: adding employees
Add page
<form th:action="@{/emp}" method="post">
	<div class="form-group">
		<label>LastName</label>
		<input name="lastName" type="text" class="form-control" placeholder="zhangsan">
    </div>
	<div class="form-group">
		<label>Email</label>
		<input name="email" type="email" 		class="form-control" placeholder="zhangsan@atguigu.com">
	</div>
	<div class="form-group">
		<label>Gender</label><br/>
		<div class="form-check form-check-inline">
			<input class="form-check-input" type="radio" name="gender"  value="1">
			<label class="form-check-label">male</label>
		</div>
		<div class="form-check form-check-inline">
			<input class="form-check-input" type="radio" name="gender"  value="0">
			<label class="form-check-label">female</label>
		</div>
	</div>
	<div class="form-group">
         <label>department</label>
		<select class="form-control" name="department.id">
<!--Submitted by Department id-->
		<option th:value="${dept.id}" th:each="dept:${depts}" th:text="${dept.departmentName}"></option>
		</select>
	</div>
	<div class="form-group">
		<label>Birth</label>
		<input name="birth" type="text" class="form-control" placeholder="zhangsan">
	</div>
	<button type="submit" class="btn btn-primary">add to</button>
</form>
We explain part by part
LastName
<div class="form-group">
	<label>LastName</label>
	<input name="lastName" type="text" class="form-control" placeholder="zhangsan">
</div>
<label>LastName</label>Label called LastName
name="lastName"//The value passed in is given to lastName
type="text"//Enter text
placeholder="zhangsan" //Prompt for expected value of input field
<div class="form-group">
	<label>Email</label>
	<input name="email" type="email" class="form-control" placeholder="zhangsan@atguigu.com">
</div>
<label>Email</label>//The label is Email
name="email"//The value passed in to email
type="eail"//Enter email. Email format is required
placeholder="zhangsan@atguigu.com" //Prompt for expected value of input field
Gender
<div class="form-group">
		<label>Gender</label><br/>
		<div class="form-check form-check-inline">
			<input class="form-check-input" type="radio" name="gender"  value="1">
			<label class="form-check-label">male</label>
		</div>
		<div class="form-check form-check-inline">
			<input class="form-check-input" type="radio" name="gender"  value="0">
			<label class="form-check-label">female</label>
		</div>
</div>
<label>Gender</label>//The label is Gender
type="radio"//Single choice
//There are male and female options
//Select male to pass the value of 1 to gender, and select female to pass the value of 0
		<div class="form-check form-check-inline">
			<input class="form-check-input" type="radio" name="gender"  value="1">
			<label class="form-check-label">male</label>
		</div>
		<div class="form-check form-check-inline">
			<input class="form-check-input" type="radio" name="gender"  value="0">
			<label class="form-check-label">female</label>
		</div>
department
<div class="form-group">
         <label>department</label>
		<select class="form-control" name="department.id">
<!--Submitted by Department id-->
		<option th:value="${dept.id}" th:each="dept:${depts}" th:text="${dept.departmentName}"></option>
		</select>
</div>
<label>department</label>//The tag is called departmentname="department" / / the value passed in is given to department ID < Select > < option > < / option > < / Select > / / drop-down selection th:each="dept:${depts}" / / each is used here, which means that the depts set is traversed through each individual, which is a deptth:text="${dept.departmentName} / / all department names are displayed in the selection th:value="${dept.id} "/ / when we select, the value is not the departmentName of dept, but the ID of the Department.
Birth
<div class="form-group"> <label>Birth</label> <input name="birth" type="text" class="form-control" placeholder="zhangsan"></div>
<label>Birth</label>//The tag is called Birthname="birth" / / the value passed in is given to birthtype="text" / / the text box type placeholder="zhangsan" / / enter the prompt of the expected value of the field
There are places to pay attention to here. Pay attention to the format of the date. The default is yyyy/MM/dd.
Change date to another format
Two methods:
1. In the configuration file application Modify on properties
spring.mvc.format.date=yyyy-MM-dd
2. Modify in the Employee class:
@DateTimeFormat(pattern = "yyyy-MM-dd")private Date birth;
The methods annotated by the two methods in the class take precedence over those modified in the configuration file
Display page
Save employee object first
At present, the last id of all employees is 1005 and the next id is 1006, so set an initId value
private static Integer initId=1006;
EmployeeDao.class
Add the following code
public void save(Employee employee){ if(employee.getId()==null){//Because the employee id is not set in our addition, there is no new addition, so it must be null employee setId(initId++);// We assign the value of initid to the newly added employee. After the assignment, initid will automatically increase to prepare for the addition of the next employee} employee setDepartment(departmentDao.getDepartmentById(employee.getDepartment(). getId()));// I'll focus on this because many students may not understand employees put(employee.getId(),employee);// Add the newly added employee object to the employees collection}
Tell me about this code
employee.setDepartment(departmentDao.getDepartmentById(employee.getDepartment().getId()));
First, we go back to the code in the department part of the form, and we find that
<div class="form-group"> <label>department</label> <select class="form-control" name="department.id"><!--Submitted by Department id--> <option th:value="${dept.id}" th:each="dept:${depts}" th:text="${dept.departmentName}"></option> </select></div>
The parameter we pass in is the id of the Department
How do we get this id?
1,employee.getDepartment() obtains a department object without department name first
public Department getDepartment() { return department; }
2. We use department Getid gets the Department id of the employee object
public Integer getId() { return id; }
3. Let's look at the department number corresponding to the id stored in the Department table. It uses departmentdao Getdepartmentbyid method
public Department getDepartmentById(Integer id){ return departments.get(id);}
departments. The get() method is the get() method of HashMap to obtain the corresponding value of the specified key pair.
department table
private static Map<Integer, Department> departments=null; static { departments=new HashMap<Integer,Department>();//Create a department table departments Put (101, new Department (101, "teaching department"); departments.put(102,new Department(102, "marketing department"); departments.put(103,new Department(103, "teaching and research department"); departments.put(104,new Department(104, "operation Department"); departments.put(105,new Department(105, "logistics department");}
4. Finally, get the assignment of department to employee Setdepartment() method
Judge whether the data is added successfully.
EmployeeController.class
Add the following code
@PostMapping("/emp") public String addEmp(Employee employee){ System.out.println("Saved employee information:"+employee);// Save employee employeedao save(employee);// Go to the employee list page / / redirect: redirect to an address / / forward: forward to an address return "redirect:/emps";}
Final effect:

Practice 7: deletion and cancellation
Delete operation
realization:
1. Click to delete the object (EmployeeDao.delete method)
2. After deletion, the employee list page remains
list.html modify the following code:
<button type="submit" class="btn btn-primary">modify</button>
become
<a class="btn-sm btn-danger" th:href="@{/delemp/}+${emp.id}">delete</a>
I can't change it to button. Why can't I change it to button
EmployeeController.class add
 @GetMapping("/delemp/{id}")
    public String deleteEmployee(@PathVariable("id") Integer id){
        employeeDao.delete(id);
        return "redirect:/emps";
    }
Logoff operation
realization:
1. Empty the session information inside
2. Jump back to landing page
Modify bar html
<a class="nav-link" th:href="@{/user/logout}">cancellation</a>
Modify LoginController
@RequestMapping("/user/logout")
public String logout(HttpSession session){
    session.invalidate();
    return "redirect:/index.html";
}
Some students may not know what session is?
When the browser requests for the first time, the server creates a session object and generates a sessionId at the same time. In this response, the sessionId will be used as a response message The whole session can be maintained by sending it back to the client browser memory or rewriting the url.
And session Invalidate() is to set the session to invalidate
Finally, redirect to the login page (index.html)
Practice 8: modify employee information
Button modification
list.html modify the following code
<button class="btn-sm btn-primary">edit</button>
become:
<a class="btn-sm btn-primary" th:href="@{/emp/}+${emp.id}">edit</a>
Jump writing
Clicking the Edit button will jump to the link of / emp / modified employee id
Let's do another getmapping and finally return to our update page
@GetMapping("/emp/{id}")
public String toEditPage(@PathVariable("id") Integer id,Model model){
    Employee employee = employeeDao.get(id);
    model.addAttribute("emp",employee);
    Collection<Department> departments = departmentDao.getDepartment();
    //Find out all departments and display them on the page
    model.addAttribute("depts",departments);
return "emp/update";
}
First, I get the employee object through this id
Let me pass this object to emp
Finally, I found out all the departments and assigned them to depts
Now I don't know why these operations are. Just look down.
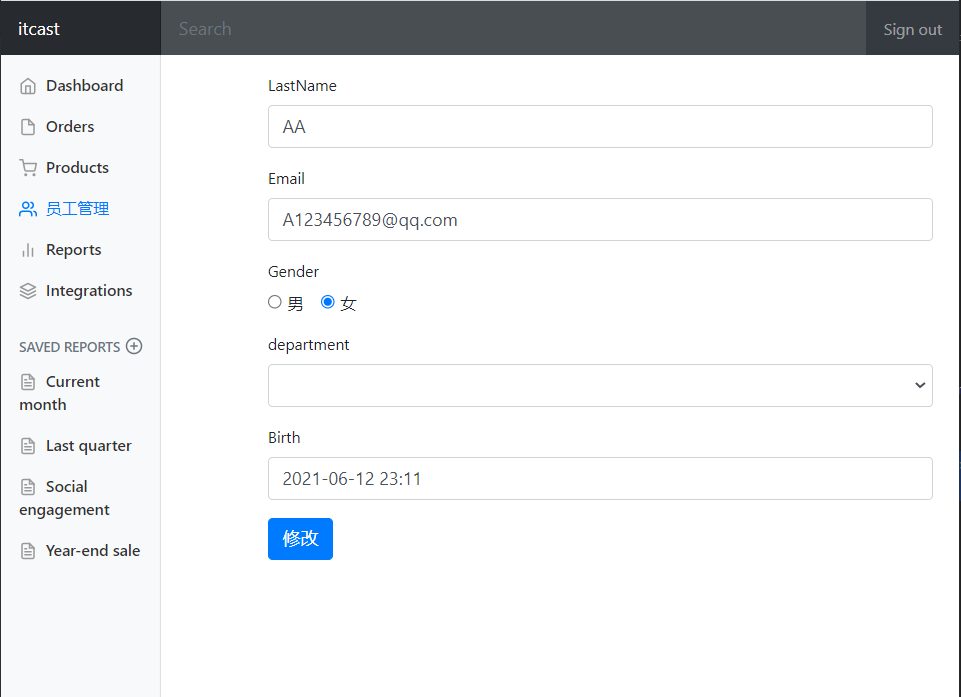
Make update page
We put add Copy HTML and put it in the same directory (under emp)
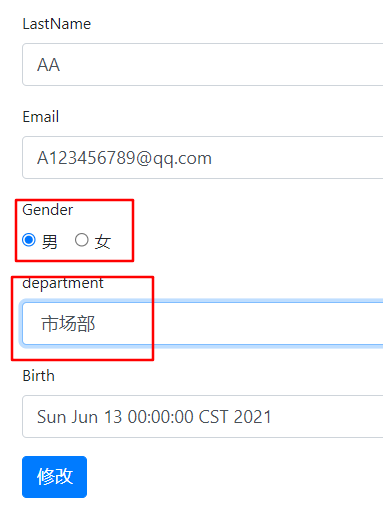
Modify the following:
<form th:action="@{/updateEmp}" method="post">
	<input type="hidden" name="id" th:value="${emp.getId()}" >
	<div class="form-group">
		<label>LastName</label>
		<input name="lastName" type="text" class="form-control" placeholder="zhangsan" th:value="${emp.lastName}">
	</div>
	<div class="form-group">
		<label>Email</label>
		<input name="email" type="email" class="form-control" placeholder="zhangsan@atguigu.com" 			th:value="${emp.email}">
	</div>
	<div class="form-group">
	  <label>Gender</label><br/>
		<div class="form-check form-check-inline">
		  <input class="form-check-input" type="radio" name="gender" value="1" th:checked="${emp.getGender()==1}">
		  <label class="form-check-label">male</label>
	    </div>
	   <div class="form-check form-check-inline">
		 <input class="form-check-input" type="radio" name="gender"  value="0" th:checked="${emp.getGender()==0}">
		 <label class="form-check-label">female</label>
	   </div>
	</div>
	<div class="form-group">
		<label>department</label>
		<select class="form-control" name="department.id">
<!--Submitted by Department id-->
			<option th:selected="${dept.id==emp.department.id}" th:value="${dept.id}" th:each="dept:${depts}" th:text="${dept.departmentName}"></option>
		</select>
	</div>
	<div class="form-group">
		<label>Birth</label>
		<input name="birth" type="text" class="form-control" placeholder="zhangsan" th:value="${#dates.format(emp.birth,'yyyy-MM-dd HH:mm')}">
	</div>
	<button type="submit" class="btn btn-primary">modify</button>
</form>
Let's choose some special ones:
Gender
 th:checked="${emp.getGender()==1}"male
 th:checked="${emp.getGender()==0}"female
th:checked checkbox echo
If gender is 1, the male label is selected and 0 is female
department
th:selected="${dept.id==emp.department.id}"
Select the department whose name is equal to the id in the department object in emp.
Some friends will ask me that there is nothing in their department box
OK, let me ask you what your dept is, and you say: my add page works normally.
That's because we passed the value of dept on the add page, but the new page partner didn't add it.
Let's go back and check the employeecontroller class
    @GetMapping("/emp/{id}")
    public String toEditPage(@PathVariable("id") Integer id,Model model){
        Employee employee = employeeDao.get(id);
        model.addAttribute("emp",employee);
        Collection<Department> departments = departmentDao.getDepartment();
        //Find out all departments and display them on the page
        model.addAttribute("depts",departments);
    return "emp/update";
    }
If we add it, we won't report an error. The correct one is just like that
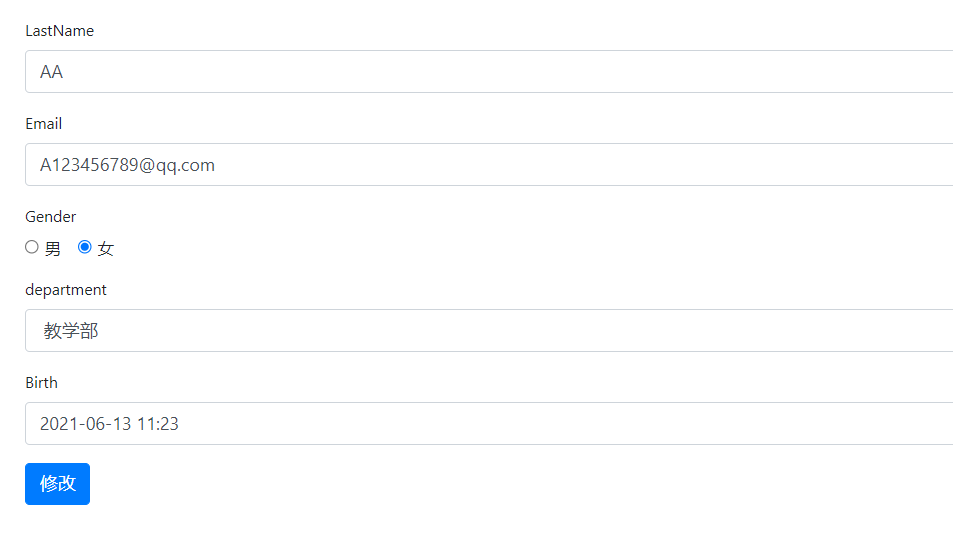
birth
<div class="form-group">
	<label>Birth</label>
	<input name="birth" type="text" class="form-control" placeholder="zhangsan" th:value="${#dates.format(emp.birth,'yyyy-MM-dd HH:mm')}">
</div>
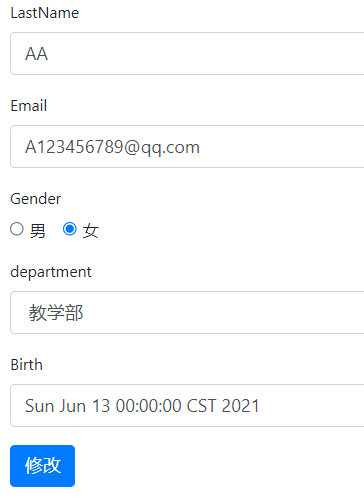
Some students will ask why not use this directly
<input name="birth" type="text" class="form-control" placeholder="zhangsan" th:value="${emp.birth}">
OK, let's run with the following one. When submitting, we report an error. Let's see the error report.
Console error
Field error in object 'employee' on field 'birth': rejected value [Sun Jun 13 00:00:00 CST 2021]; codes [typeMismatch.employee.birth,typeMismatch.birth,typeMismatch.java.util.Date,typeMismatch]; arguments [org.springframework.context.support.DefaultMessageSourceResolvable: codes [employee.birth,birth]; arguments []; default message [birth]]; default message [Failed to convert property value of type 'java.lang.String' to required type 'java.util.Date' for property 'birth'; nested exception is org.springframework.core.convert.ConversionFailedException: Failed to convert from type [java.lang.String] to type [java.util.Date] for value 'Sun Jun 13 00:00:00 CST 2021'; nested exception is java.lang.IllegalArgumentException: Parse attempt failed for value [Sun Jun 13 00:00:00 CST 2021]]]
The conclusion is just one sentence, 'Sun Jun 13 00:00:00 CST 2021' can't be passed into birth, so I'll change it back to yyyy mm DD
After modification, the modification is completed.
Error prone point
Let's modify the information and click the Modify button
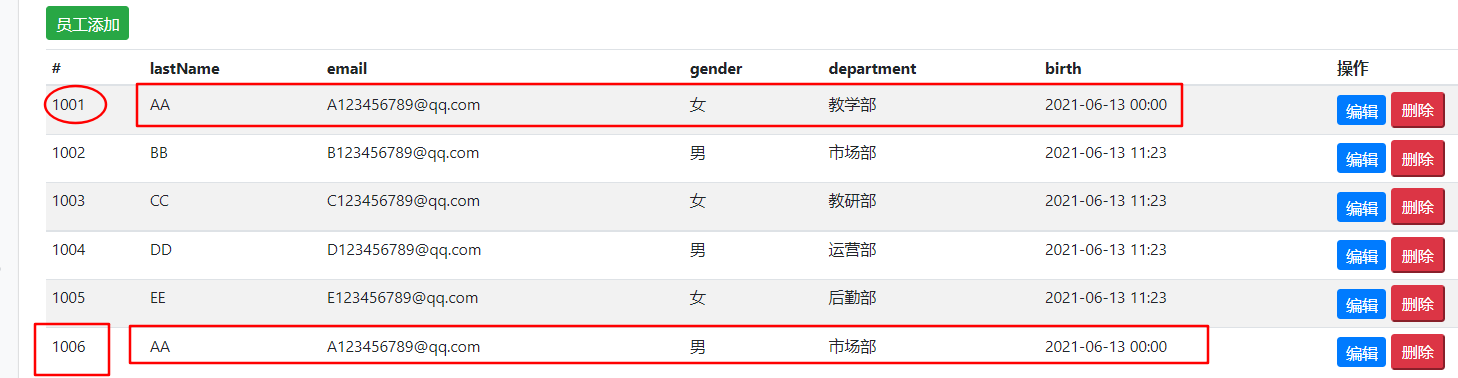
We found that he added an id, but the effect we want is to modify the original employee information. That's when you remember us
EmployeeDao class
//The primary key increases automatically! private static Integer initId=1006; // Add an employee public void save (employee) {if (employee. Getid() = = null) {employee. Setid (initid + +);} employee. setDepartment(departmentDao.getDepartmentById(employee.getDepartment(). getId())); employees. put(employee.getId(),employee); }
He didn't get his id, so null triggered the addition of a new object. Therefore, when we modify it, we should also take its original id, but the employee id is immutable and cannot be seen by the modifier. What should we do?
In update HTML add this code
<input type="hidden" name="id" th:value="${emp.getId()}" >
Finally, remember to modify his form submission method and place
update.html modification
<form th:action="@{/updateEmp}" method="post">
EmployeeController.class add
@PostMapping("/updateEmp") public String updateEmp(Employee employee){ employeeDao.save(employee); return "redirect:/emps"; }