What is openstack
OpenStack is a cloud operating system that controls a large pool of computing, storage and network resources in the entire data center, all of which are managed and configured through APIs with universal authentication mechanisms.
It also provides a dashboard that allows administrators to control and users to provide resources through the web interface.
In addition to the standard infrastructure as a service function, other components also provide services such as orchestration, fault management and service management to ensure high availability of user applications.
The purpose is to build a cloud computing platform similar to Alibaba cloud, but it is only a platform with basic functions. The expansion of more functions needs to add different components.
1 software environment
Physical machine configuration control node network
The first network card can be configured normally. The second network card first changes the network card naming format (keep the same as the first network card naming format to prevent unknown errors), and then activates the network card without assigning ip
[root@foundation ~]# cd /boot/grub2/
[root@foundation grub2]# ls
grubenv
[root@foundation grub2]# vim grubenv
net.ifnames=0  ##Add kernel parameters to make the network card naming format eth format
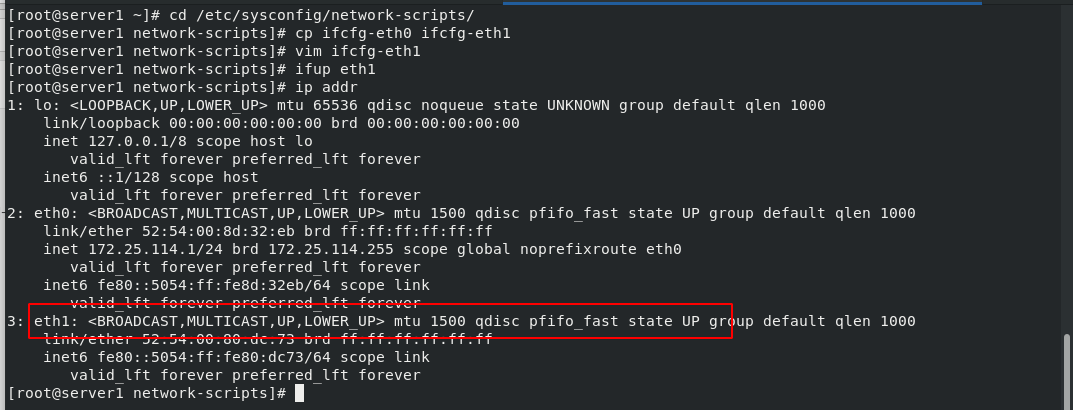
Node host server1 operation
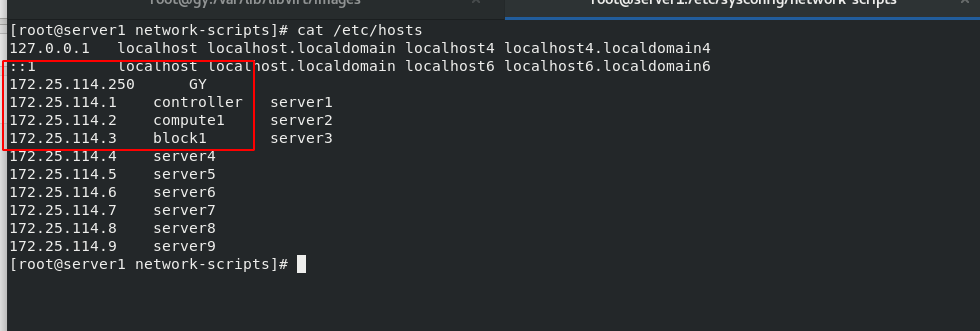
[root@server1 ~]# cd /etc/sysconfig/network-scripts/
[root@server1 network-scripts]# cp ifcfg-eth0 ifcfg-eth1
[root@server1 network-scripts]# vim ifcfg-eth1
BOOTPROTO=none
DEVICE=eth1
ONBOOT=yes
[root@server1 network-scripts]# ifup eth1 ##Activate network card
[root@server1 network-scripts]# ip addr

#Configure domain name resolution: set the node host name to controller, the computing node to compute1, and the storage node to block1
[root@server1 network-scripts]# vim /etc/hosts
172.25.114.1 controller
172.25.114.2 compute1
172.25.114.3 block1
[root@server1 network-scripts]# hostnamectl set-hostname controller
2 network time protocol (NTP)
Using chrony to ensure time synchronization between different nodes
Real machine settings
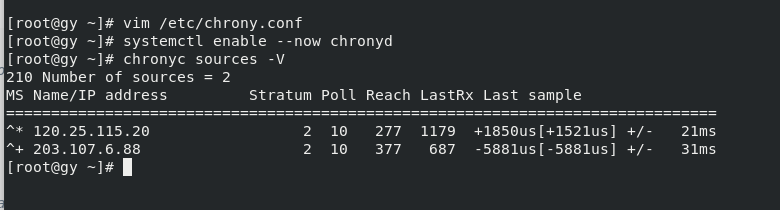
[root@gy ~]# vim /etc/chrony.conf
server ntp1.aliyun.com iburst
server ntp2.aliyun.com iburst
server ntp3.aliyun.com iburst

allow 0.0.0.0/0


[root@gy ~]# systemctl enable --now chronyd
[root@gy ~]# chronyc sources -V

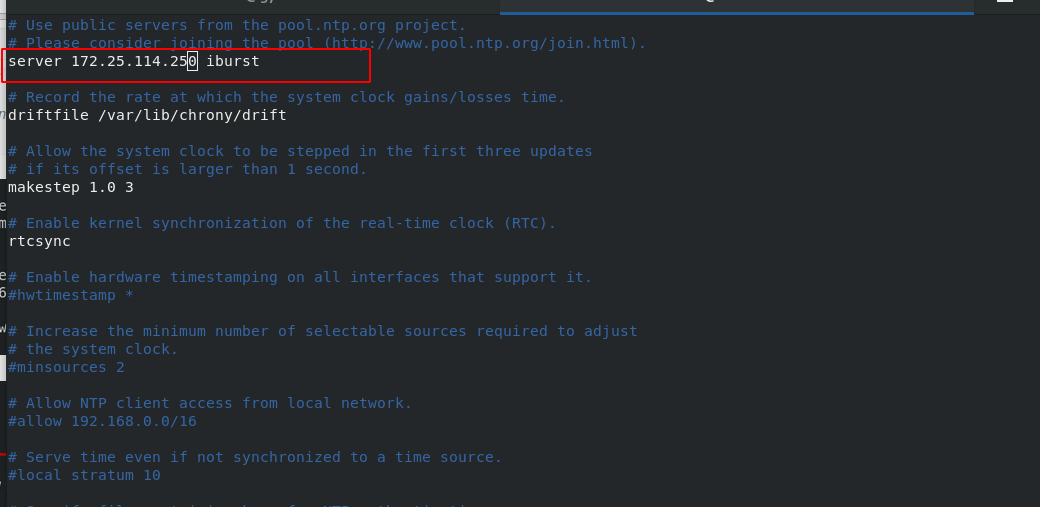
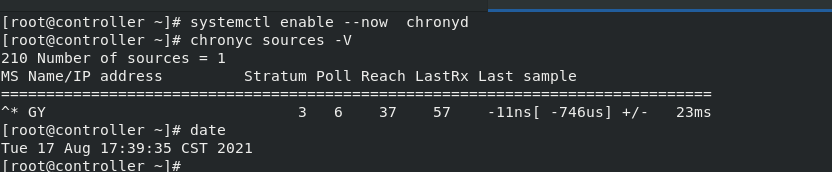
[root@controller ~]# yum install -y chrony
[root@controller ~]# vim /etc/chrony.conf
server 172.25.114.250 iburst
[root@controller ~]# systemctl enable --now chronyd
[root@controller ~]# chronyc sources -V
3 openstack
Disable selinux and firewall
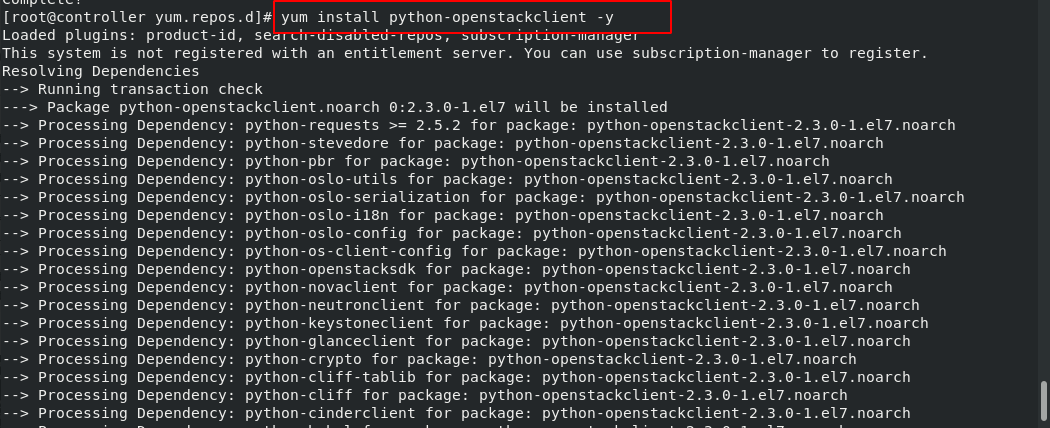
[root@controller ~]# cd /etc/yum.repos.d
[root@controller yum.repos.d]# vim openstack.repo
[root@controller yum.repos.d]# cat openstack.repo
[openstack]
name=mitaka
baseurl=http://172.25.114.250/pub/openstack/mitaka
gpgcheck=0
[root@controller yum.repos.d]# yum upgrade  #Upgrade package on host
[root@controller yum.repos.d]# yum install python-openstackclient -y  #Install OpenStack client

4 SQL database
Most OpenStack services use SQL databases to store information. Typically, the database runs on the control node. The steps in the guide use MariaDB or MySQL according to different distributions.
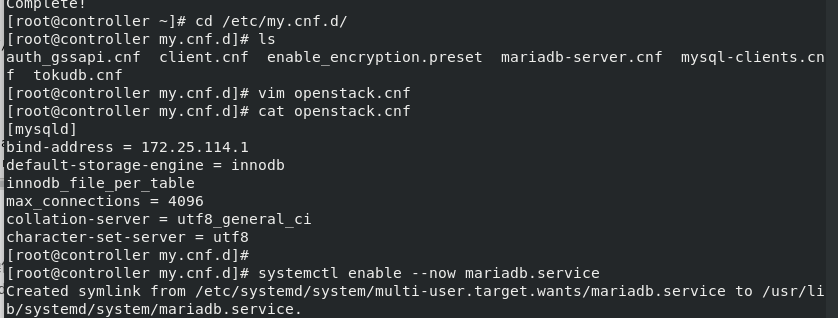
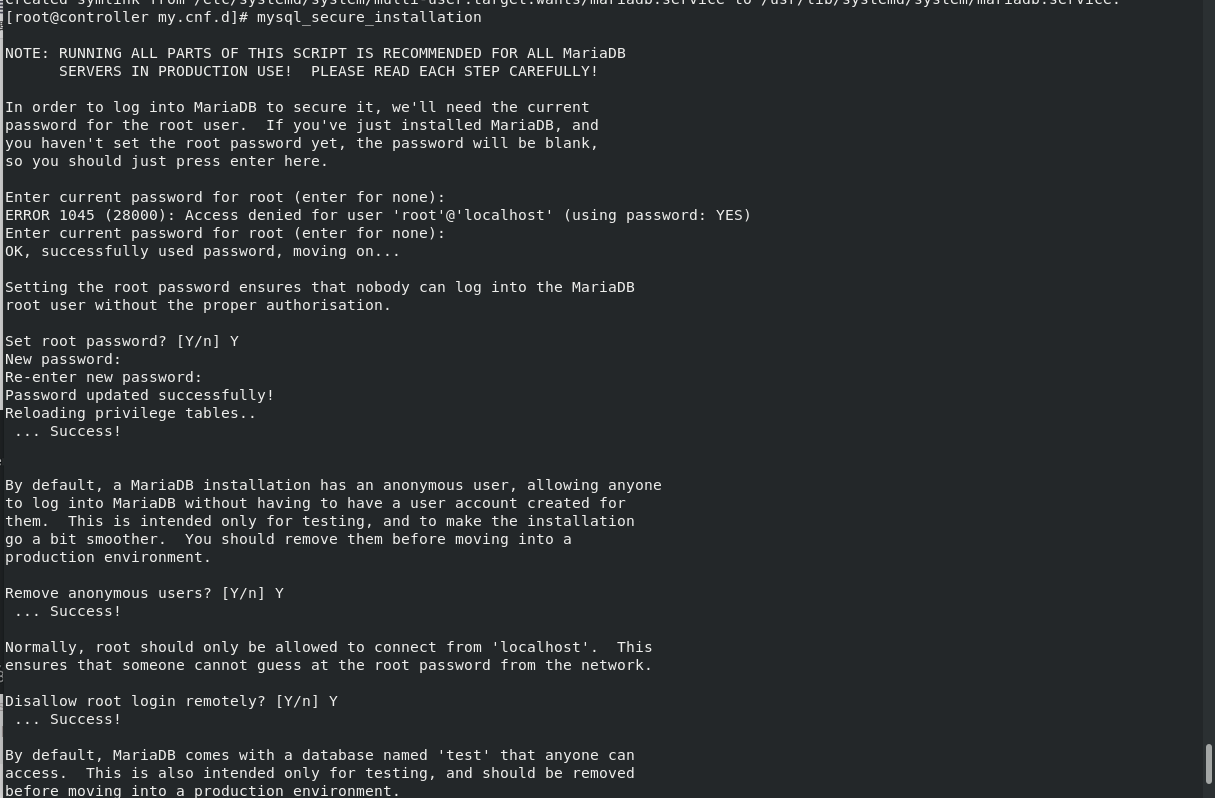
[root@controller ~]# yum install mariadb mariadb-server python2-PyMySQL -y
[root@controller ~]# cd /etc/my.cnf.d/
[root@controller my.cnf.d]# ls
auth_gssapi.cnf  client.cnf  enable_encryption.preset  mariadb-server.cnf  mysql-clients.cnf  tokudb.cnf
[root@controller my.cnf.d]# vim openstack.cnf
[root@controller my.cnf.d]# cat openstack.cnf
[mysqld]
bind-address = 172.25.114.1
default-storage-engine = innodb
innodb_file_per_table
max_connections = 4096
collation-server = utf8_general_ci
character-set-server = utf8

#Start the database service and configure it to start automatically and run mysql_ secure_ The installation script installs the database safely
[root@controller my.cnf.d]# systemctl enable --now mariadb.service
Created symlink from /etc/systemd/system/multi-user.target.wants/mariadb.service to /usr/lib/systemd/system/mariadb.service.

[root@controller my.cnf.d]# mysql_secure_installation
Enter current password for root (enter for none):
OK, successfully used password, moving on...

Setting the root password ensures that nobody can log into the MariaDB
root user without the proper authorisation.

Set root password? [Y/n] Y
New password:                            #The password is set to westos
Re-enter new password:
Password updated successfully!
Reloading privilege tables..
 ... Success!


By default, a MariaDB installation has an anonymous user, allowing anyone
to log into MariaDB without having to have a user account created for
them.  This is intended only for testing, and to make the installation
go a bit smoother.  You should remove them before moving into a
production environment.

Remove anonymous users? [Y/n] Y
 ... Success!

Normally, root should only be allowed to connect from 'localhost'.  This
ensures that someone cannot guess at the root password from the network.

Disallow root login remotely? [Y/n] Y
 ... Success!

By default, MariaDB comes with a database named 'test' that anyone can
access.  This is also intended only for testing, and should be removed
before moving into a production environment.

Remove test database and access to it? [Y/n] Y
 - Dropping test database...
 ... Success!
 - Removing privileges on test database...
 ... Success!

Reloading the privilege tables will ensure that all changes made so far
will take effect immediately.

Reload privilege tables now? [Y/n] Y
 ... Success!

Cleaning up...

All done!  If you've completed all of the above steps, your MariaDB
installation should now be secure.
5 message queue
OpenStack uses message queue to coordinate operations and status information of various services. Message queuing services generally run on the control node. OpenStack supports several message queuing services, including rabbit MQ, qpid, and ZeroMQ. However, most distributions of the OpenStack package support specific message queuing services.
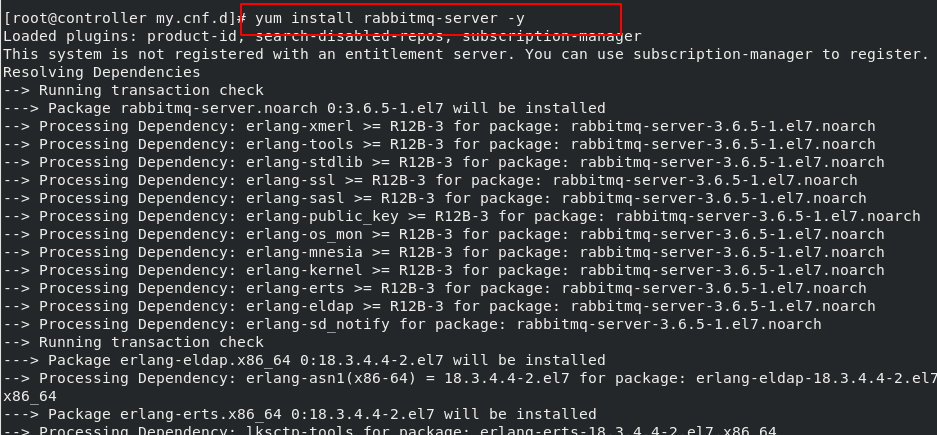
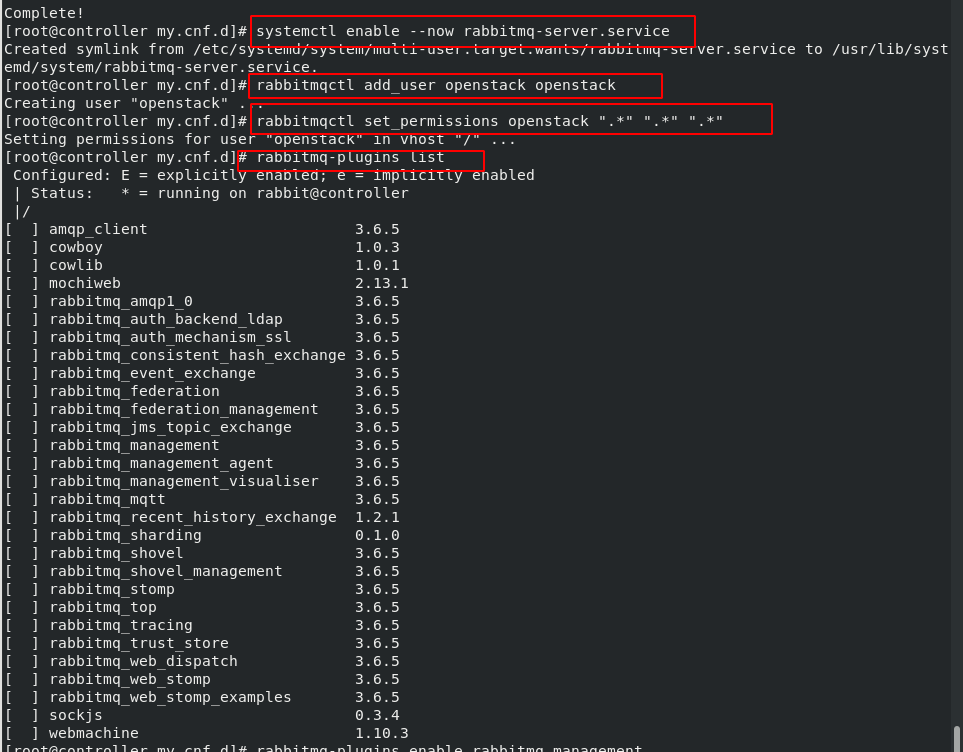
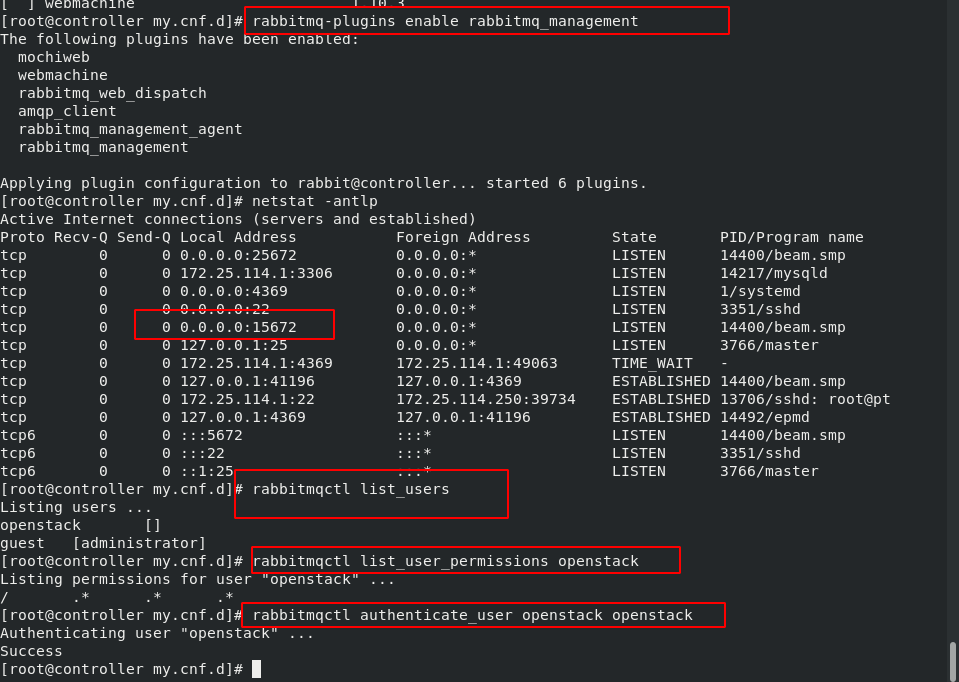
[root@controller my.cnf.d]# yum install rabbitmq-server -y
[root@controller my.cnf.d]# systemctl enable --now rabbitmq-server.service   ##Start the Message Queuing service and configure it to start with the system
[root@controller my.cnf.d]# rabbitmqctl add_user openstack openstack ##Add openstack user. The password should be consistent with the user name
Creating user "openstack" ...
[root@controller my.cnf.d]# rabbitmqctl set_permissions openstack ".*" ".*" ".*"    ##Configure write and read permissions for openstack users
Setting permissions for user "openstack" in vhost "/" ...

[root@controller ~]# rabbitmq-plugins list
[root@controller ~]# rabbitmq-plugins enable rabbitmq_management
[root@controller ~]# netstat -antlp   ##View the port. You can access the web graphical interface through port 15672

[root@controller ~]# rabbitmqctl list_users
Listing users ...
openstack	[]
guest	[administrator]
[root@controller ~]# rabbitmqctl list_user_permissions openstack
Listing permissions for user "openstack" ...
/	.*	.*	.*
[root@controller ~]# rabbitmqctl authenticate_user openstack openstack
Authenticating user "openstack" ...
Success
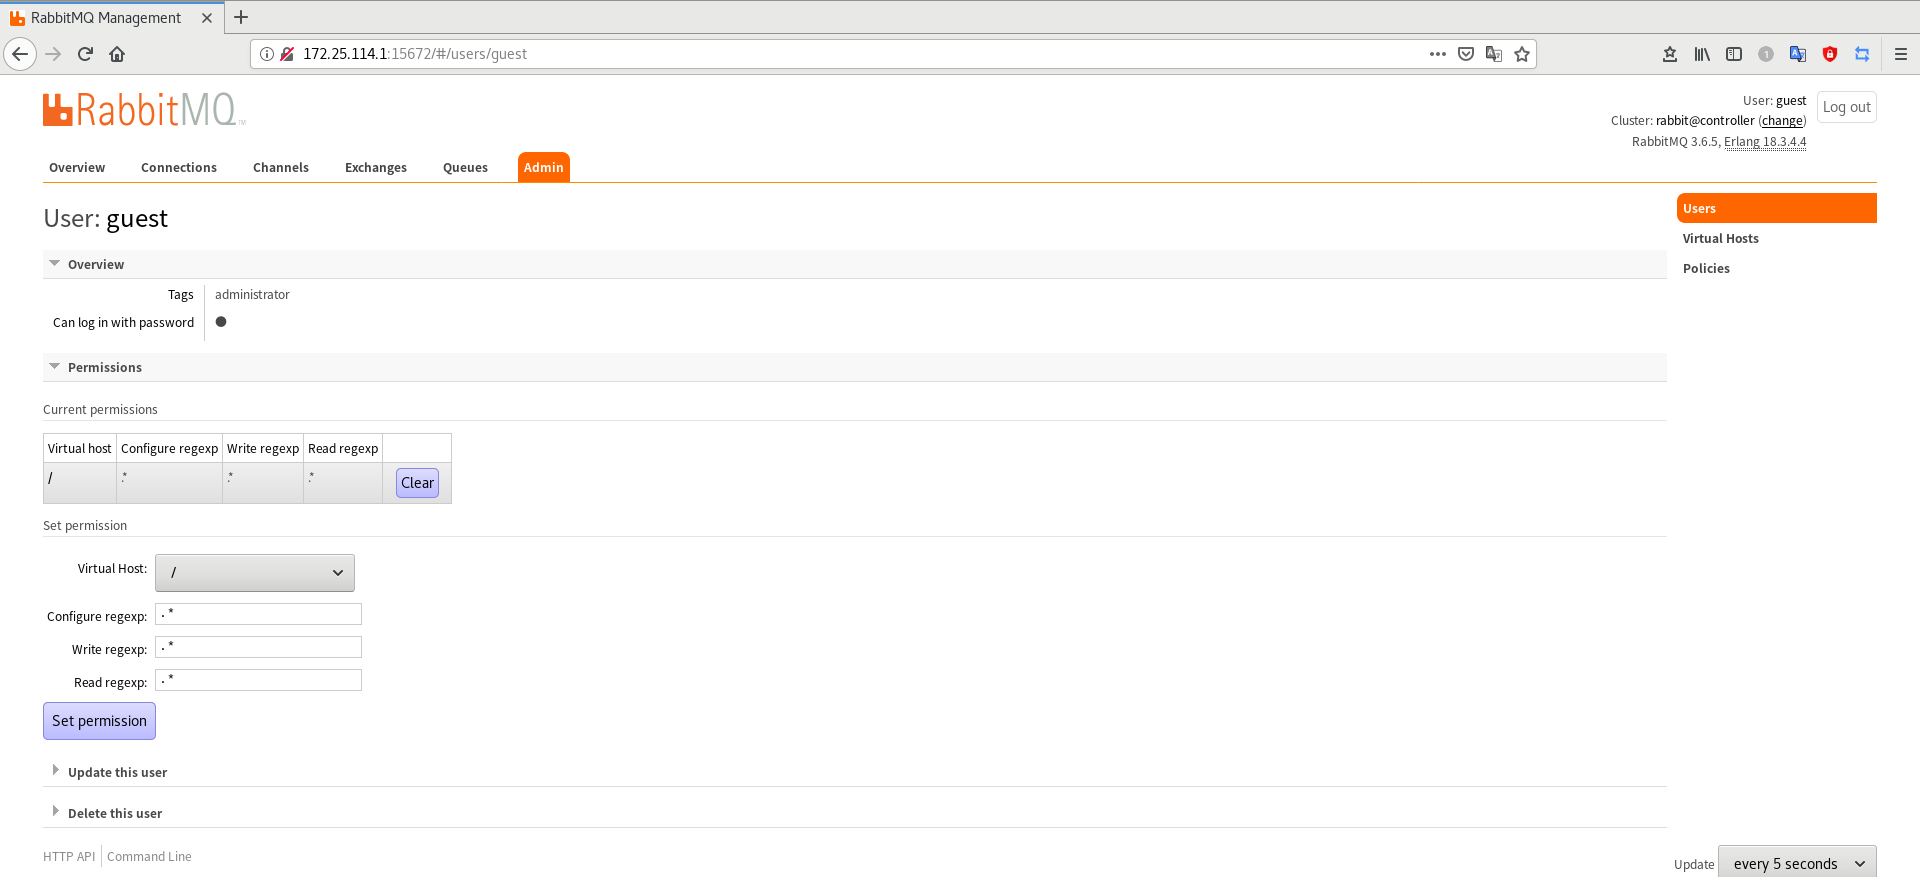
 Page visit 172.25 114.1:15672
All user passwords are guest
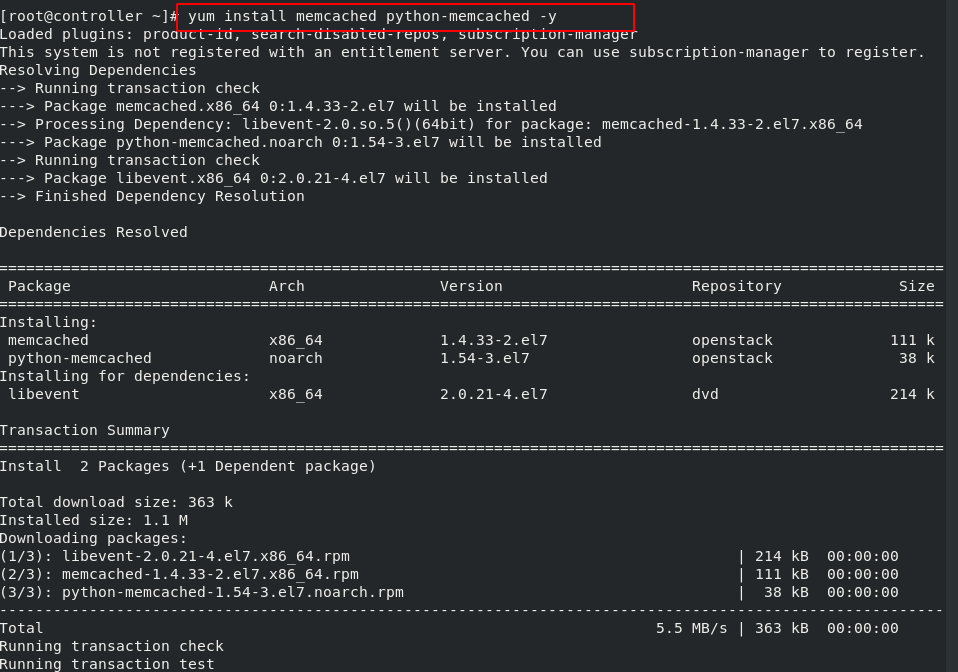
6 memcached
The authentication service uses Memcached to cache tokens. The cache service memecached runs on the control node. In production deployment, we recommend jointly enabling firewall, authentication and encryption to ensure its security.
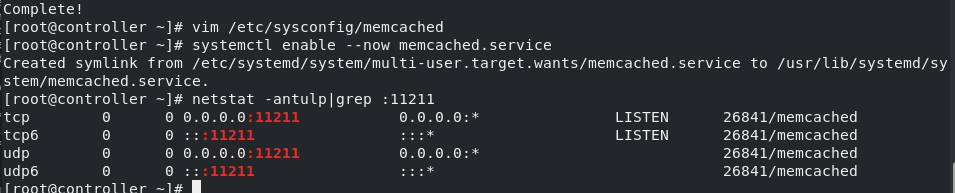
[root@controller ~]# yum install memcached python-memcached -y

[root@controller ~]# vim /etc/sysconfig/memcached
[root@controller ~]# cat /etc/sysconfig/memcached
PORT="11211"
USER="memcached"
MAXCONN="1024"
CACHESIZE="64"
#OPTIONS="-l 127.0.0.1,::1"   ##The comment line indicates that all network segments (public networks) are allowed to access
[root@controller ~]# systemctl enable --now memcached.service
Created symlink from /etc/systemd/system/multi-user.target.wants/memcached.service to /usr/lib/systemd/system/memcached.service.
[root@controller ~]# netstat -antulp|grep :11211  ##memcache11211 port on
tcp        0      0 0.0.0.0:11211           0.0.0.0:*               LISTEN      6524/memcached
tcp6       0      0 :::11211                :::*                    LISTEN      6524/memcached
udp        0      0 0.0.0.0:11211           0.0.0.0:*                           6524/memcached
udp6       0      0 :::11211                :::*                                6524/memcached