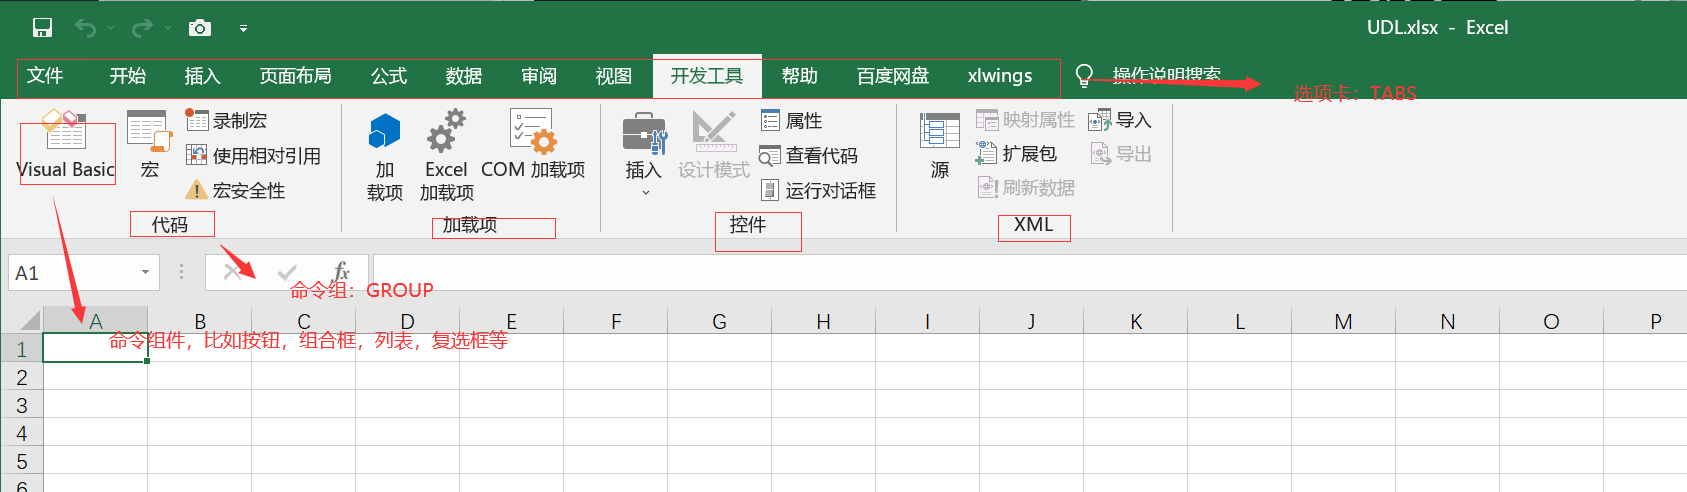
Functional area composition
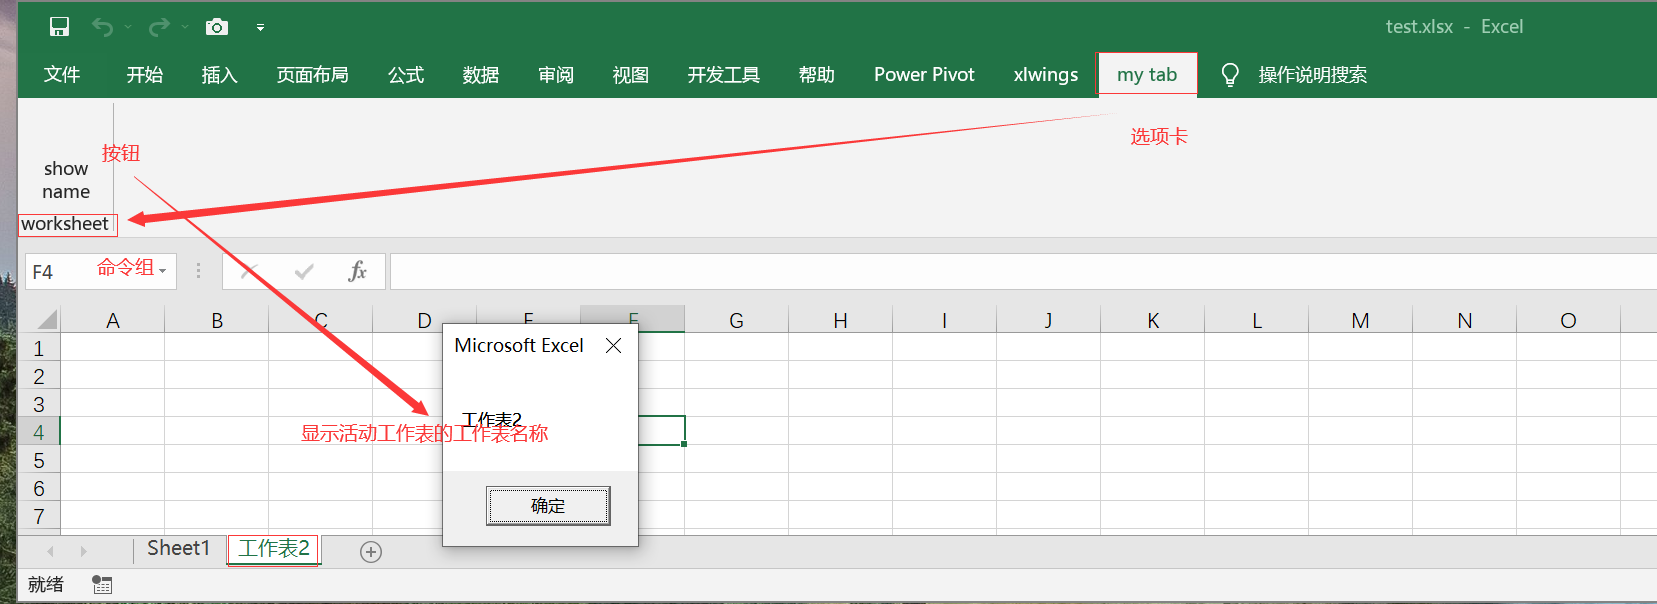
The EXCEL ribbon consists of tabs, command groups and commands, as shown in the following figure:
Excel 2010 file format
Since Microsoft Office 2007, Microsoft has introduced a new file format based on XML: Microsoft Office Open XML Formats, which is applicable to EXCEL/WORD/PPT of version 07 and above. Files in Office XML Formats are automatically compressed up to 75% smaller,. zip compression technology is generally used to store documents. When the file is opened, it can be decompressed automatically; When saving a file, it can be automatically compressed again. These decompression and compression operations are carried out in the background and transparent to the user (the user does not feel these operations).
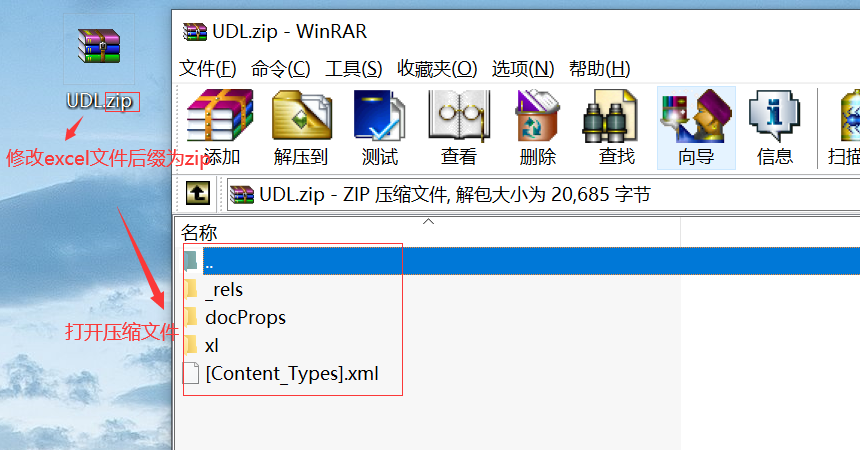
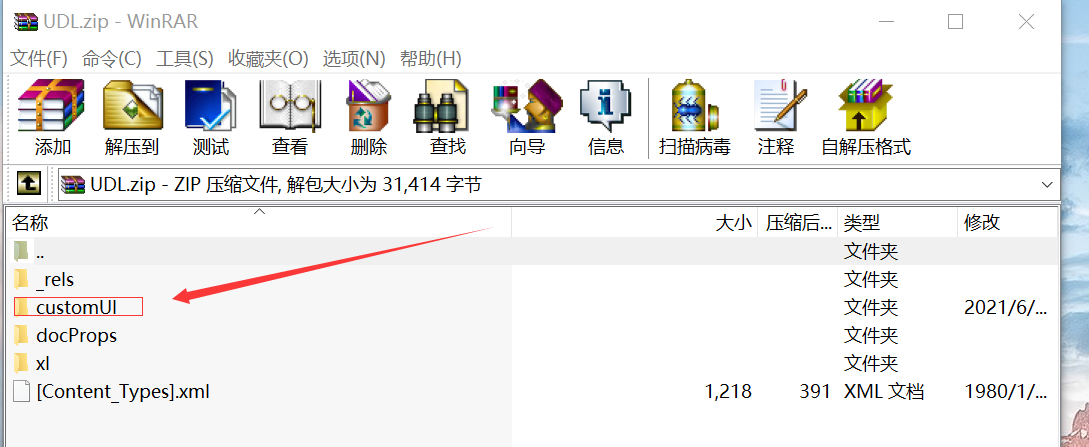
An Excel 2010 file is a compressed container containing some files and folders.
We can view the contents in the container by modifying the suffix of the EXCEL file to zip or rar and opening the compressed file:
Local and global customization ribbon
The EXCEL file format is xlsm, and the custom ribbon will only take effect in this workbook. Customize the global function, customize the xlamEXCEL plug-in, load the plug-in and take effect globally (the plug-in will be loaded automatically when any worksheet is opened in the machine, and the customized functions in the plug-in will exist and take effect)
Add the plug-in as follows:
- Create plug-in: create a new EXCEL workbook and save it as xlam format.
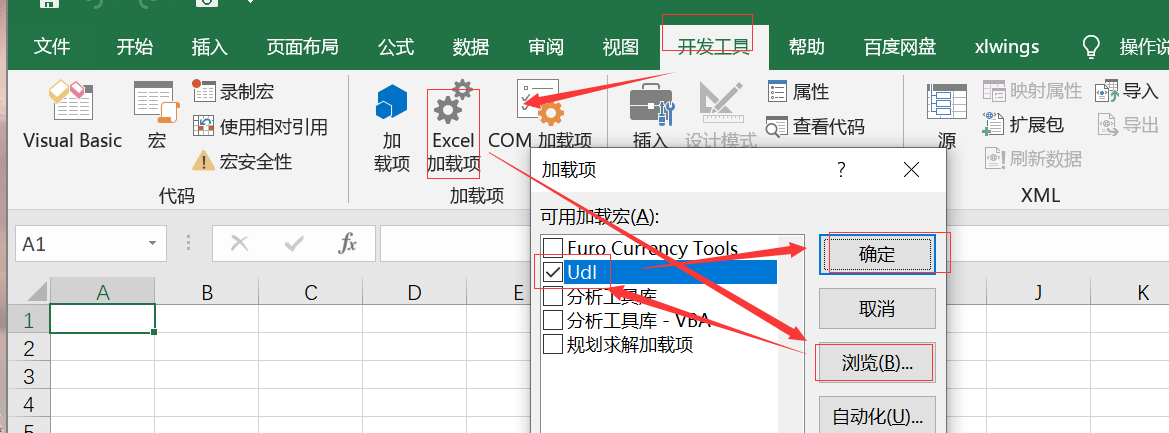
- Open any workbook, click the development tool tab - > add in command group - > excel add in, browse to find the xlam plug-in and check load;
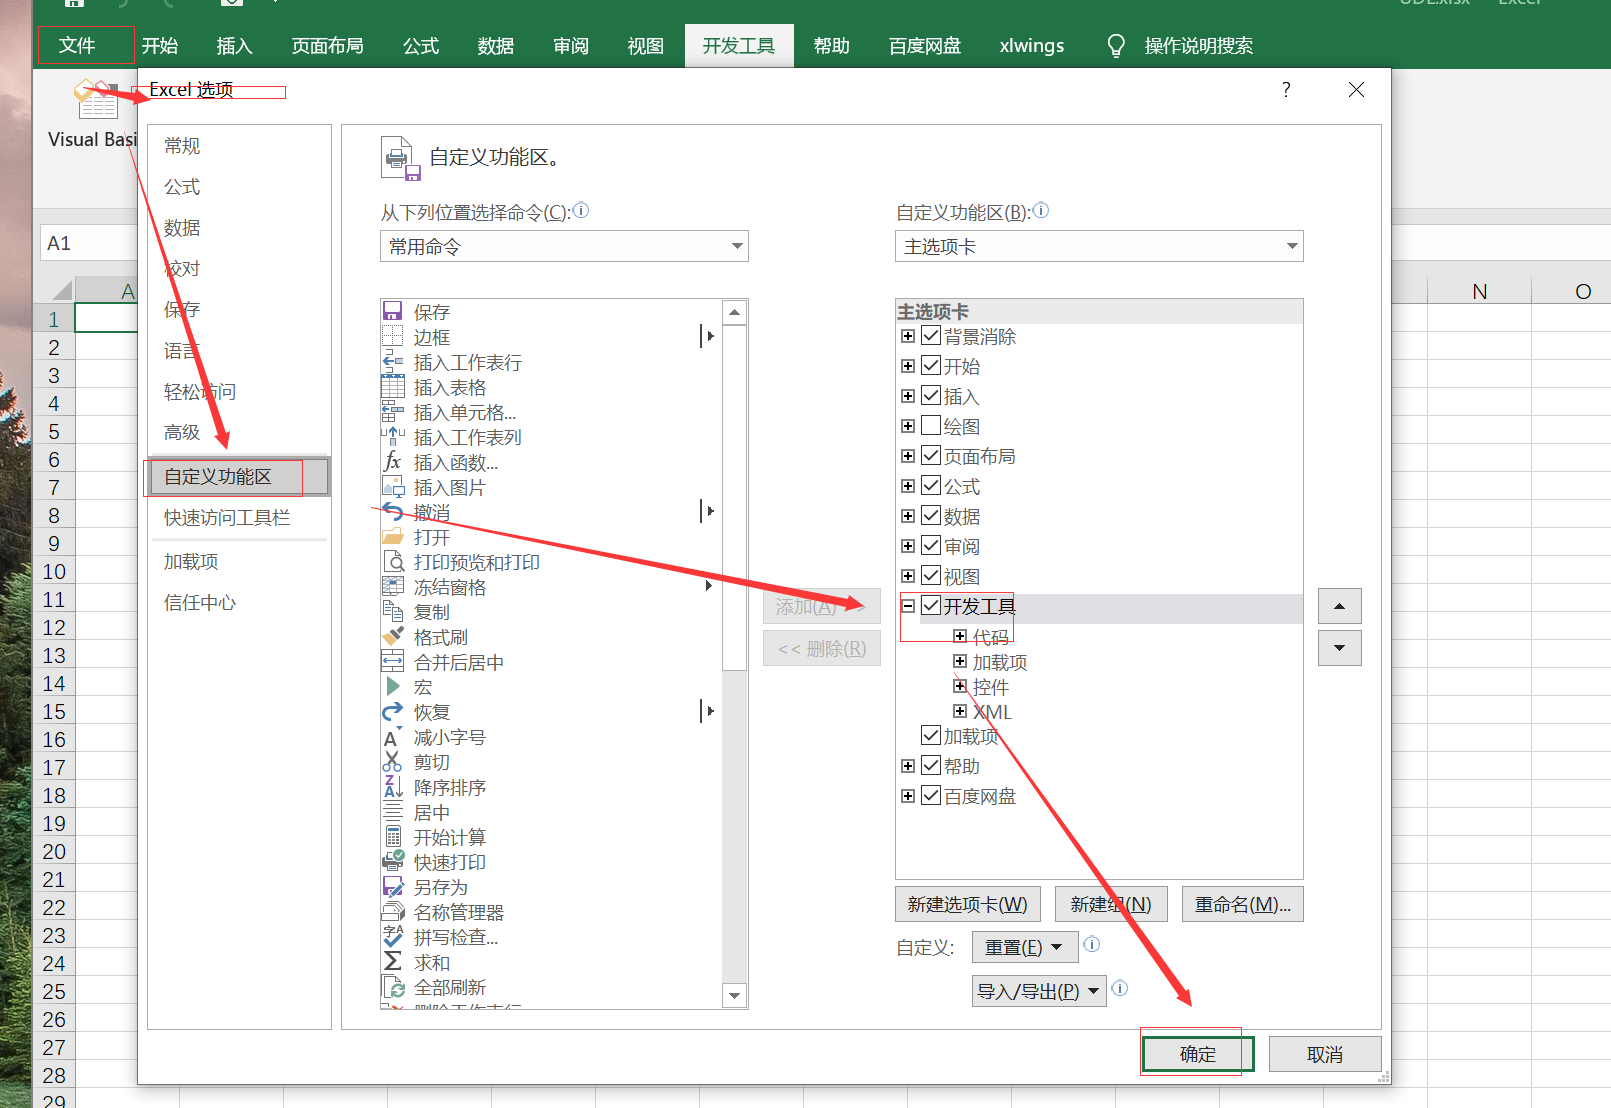
How to display the developer tab:
File - > Options - > Custom ribbon - > check development tools on the right - > OK
Customize the ribbon using XML
You can use XML tags to customize the UI Ribbon and add a custom Ribbon in two steps:
- Create the XML file required for customization
- Insert the custom XML file into the workbook file.
Method 1: manually generate XML Association
The steps are as follows:
- Write a custom procedure (insert button example here):
Create a new plug-in (xlam: UDL.xlam is used here), development tool - > Alt + F11 open VBE window - > insert [module] - [enter the following code in the module - > Save - > Exit
To load a plug-in, see loading a plug-in in the global definition ribbon
Sub show_activesheet_name(ByVal control As IRibbonControl)
' Here is to insert a button. The process must specify the formal parameters. For example, here is IRibbonControl
MsgBox ActiveSheet.Name
End Sub
- Writing custom XML files
2.1 create a new folder: customUI
2.2 create a new xml file in the folder: customui xml (you can create a new txt file and modify the suffix to xml after editing)
2.3 open the xml file and write the following contents:
<customUI xmlns="http://schemas.microsoft.com/office/2006/01/customui">
<ribbon>
    <tabs>
        <tab id="myTab" label="my tab">
            <group id="group1" label="worksheet">
                <button id="button1" label="show name" size="large" onAction="show_activesheet_name" />
            </group>
        </tab>
    </tabs>
</ribbon>
</customUI>
- Modify plug-in UDL The xlam file suffix is zip: UDL Zip, open the compressed file, and drag the customUI folder in step 2.1 to the compressed package
- Write res files and add statements associated with workbooks and custom UI files.
Open the in the compressed package_ Of the rels folder_ Rels file, add the following between the last Relationship tag and the Relationships tag:
You can put it first_ Extract the rels file, edit and save it, and delete the file in the zip_ Rels file, and then drag the modified_ From rels file to compressed package__ In the rels folder;
<Relationship Id="someID" Type="http://schemas.microsoft.com/office/2006/relationships/ui/extensibility" Target="customUI/customUI.xml" />
The completed contents are as follows:
<?xml version="1.0" encoding="UTF-8" standalone="yes"?>
<Relationships xmlns="http://schemas.openxmlformats.org/package/2006/relationships">
<Relationship Id="rId3" Type="http://schemas.openxmlformats.org/officeDocument/2006/relationships/extended-properties" Target="docProps/app.xml"/>
<Relationship Id="rId2" Type="http://schemas.openxmlformats.org/package/2006/relationships/metadata/core-properties" Target="docProps/core.xml"/>
<Relationship Id="rId1" Type="http://schemas.openxmlformats.org/officeDocument/2006/relationships/officeDocument" Target="xl/workbook.xml"/>
<Relationship Id="someID" Type="http://schemas.microsoft.com/office/2006/relationships/ui/extensibility" Target="customUI/customUI.xml" />
</Relationships>

-
UDL of step 3 The zip file suffix is restored to xlam: UDL xlam
-
Open any workbook and load UDL Xlam plug-in, click the button as shown in the figure below:
-
complete
XML statement related
- Case sensitive
- The attribute writing order can be reversed. For example, the following two statements are equivalent:
<button id="button1" label="show name" size="large" onAction="show_activesheet_name" />
<button onAction="show_activesheet_name" id="button1" size="large" label="show name"   />
- xml description used in the sample:
• the element is the root container of XML, and the namespace recognizes it as a ribbon x document.
• an element is a container that links all changes to the visible Ribbon. Element can also contain an element to reuse built-in controls.
• an element is a container that links all changes to existing or new tabs in the Ribbon. Elements can also contain, / or elements to control the corresponding parts of the Ribbon.
• elements are the beginning of true customization, creating custom tabs. Each item included in the customization must have at least one id. There are three types of id attributes: id, idMso and idQ, which specify UDFs, built-in items and items shared with multiple files respectively. In this case, because you are creating a custom tab, you use the id attribute and give it a unique name.
• elements create the first group and open the content definition in it. The groups displayed in the tab are in the same order as they are defined in the RibbonX file. Each column displays 3 rows, and then starts from the new column.
• add a button to the element, and the display name of the button is "show name". When you click this button, the show name macro in the workbook is executed.
• next, end the definition of each element with codes such as and.