The default capacity of vagrant CentOS 7.2 box is only 8G
8G?!
What can be done? This capacity will be full in a few weeks. Maybe it's for the sake of portability, but as a developer who wants to build various development environments on vagrant, the capacity of 8G can only make vagrant a chicken.
Fortunately, there are gods on the Internet who summarize how to expand the capacity of vagrant. The following is the actual operation process after I refer to the tutorial, and the capacity has been expanded to 800G, which can be used for personal test!
Preparation stage
- Shut down virtual machine
☁ centos vagrant halt
- Transform mirroring
☁  centos  cd ~/VirtualBox\ VMs/centos_default_1533259579120_24934
☁  centos_default_1533259579120_24934  VBoxManage clonehd "centos-vm-disk1.vmdk" "clone-disk1.vdi" --format vdi
- Extended mirroring
☁ centos_default_1533259579120_24934 VBoxManage modifyhd "clone-disk1.vdi" --resize 819200 # Expand to 800G
- Remount the disk to the virtual machine and start the virtual machine
☁  centos_default_1533259579120_24934  VBoxManage storageattach centos_default_1533259579120_24934 --storagectl "SATA Controller" --port 0 --device 0 --type hdd --medium clone-disk1.vdi
☁  centos  vagrant up # Turn on virtual machine
☁  centos  vagrant ssh # Enter virtual machine
Capacity expansion in virtual machine
Here's how to operate within a virtual machine
- View and format the disk
➜  ~ sudo fdisk -l
➜  ~ sudo fdisk /dev/sda
# Press p to display the partition table. The default values are sda1 and sda2.
# Press n to create a new primary partition.
# Press p to set the primary partition.
# Input 3 is set to the third partition.
# Enter two carriage returns to set the default disk start location.
# Enter t to change the partition format
# Enter 3 to select the third partition
# Input 8e format to LVM format
# Enter w to execute
- Restart virtual machine
➜ ~ sudo reboot
Log in to the virtual machine again
- Create physical volume
➜ ~ sudo pvcreate /dev/sda3
- View volume groups and expand to corresponding volume groups
➜  ~ sudo vgdisplay
➜  ~ sudo vgextend centos /dev/sda3
- Expand to the appropriate logical volume
➜ ~ sudo lvextend -l +100%FREE /dev/mapper/centos-root
- Update file system
➜ ~ sudo xfs_growfs /dev/mapper/centos-root
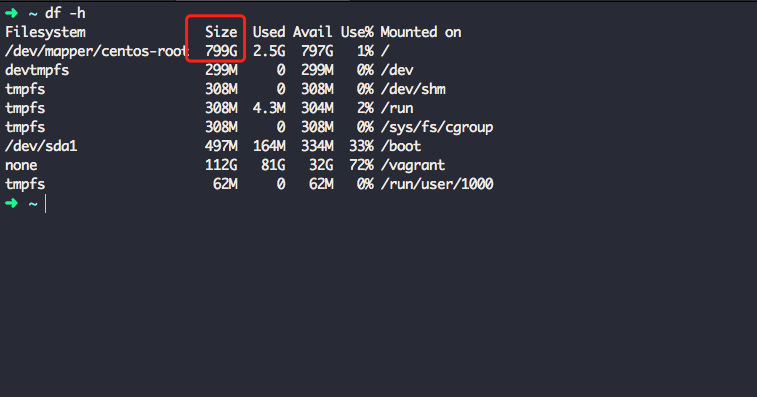
Be accomplished
So far, the extension is successful
➜  ~ df -h
Filesystem               Size  Used Avail Use% Mounted on
/dev/mapper/centos-root  799G  2.5G  797G   1% /
devtmpfs                 299M     0  299M   0% /dev
tmpfs                    308M     0  308M   0% /dev/shm
tmpfs                    308M  4.3M  304M   2% /run
tmpfs                    308M     0  308M   0% /sys/fs/cgroup
/dev/sda1                497M  164M  334M  33% /boot
none                     112G   81G   32G  72% /vagrant
tmpfs                     62M     0   62M   0% /run/user/1000
Back to the physical host, you can delete the original image
☁ centos_default_1533259579120_24934 rm -f centos-vm-disk1.vmdk
If you think this article is helpful to you, like it or enjoy a cup of coffee money, your recognition is very important to me