Basic operation example
1. LED
There are four LEDs in pyBoard, namely LED (1) - led (4). The constructor and calling method of LED are as follows:
Example code to illuminate LED(4):
from pyb import LED
LED(4).on()
2. button
There are two keys on pyBoard, one is reset key: RST, and the other is USER key. The constructor and calling method of key in MicroPython are as follows: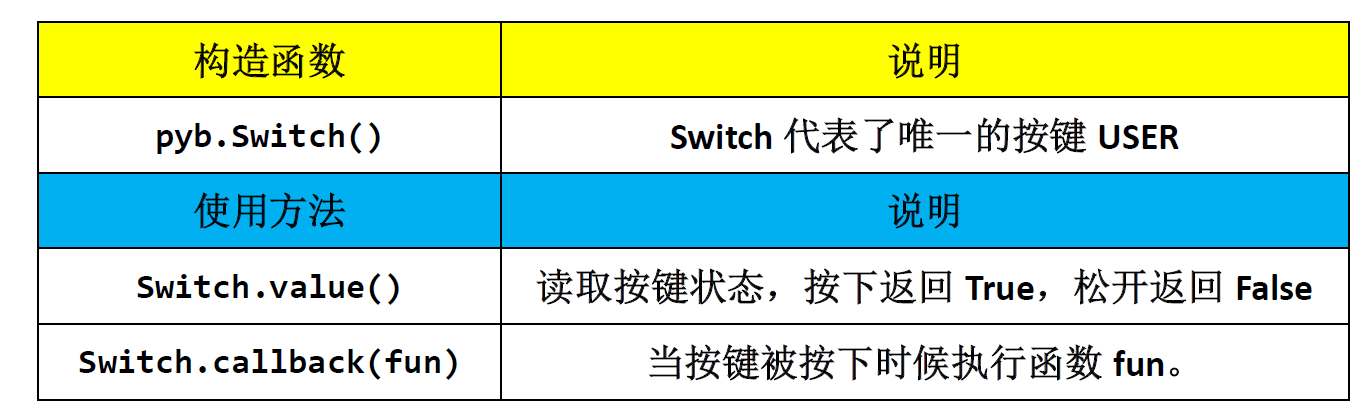
Press the key to call the sample code (press USER to light the LED):
from pyb import LED,Switch

def fun1():
    LED(4).toggle()

sw = Switch()     #Define the key object name as sw
sw.callback(fun1) #When the key is pressed, the function fun1() is executed, i.e. the LED(4) status is reversed
The use of callback functions can also be replaced by the following:
from pyb import LED,Switch

sw = Switch()     #Define the key object name as sw
sw.callback(lambda:LED(4).toggle())   #When the key is pressed, the LED(4) status reverses
3. GPIO
Almost all IO on pyBoard can be configured with GPIO. Its constructor and calling method are as follows:
GPIO sample code:
from pyb import Pin

#Configure LED(4)-"B4" to push-pull output mode
p_out=Pin('B4',Pin.OUT_PP)

#Configure USR key - "X17" as input mode
p_in = Pin('X17', Pin.IN, Pin.PULL_UP)

while True:

    if p_in.value()==0: #USR pressed to ground
        p_out.high()    #Turn on LED (4) blue light

    else:
        p_out.low()     #Turn off LED (4) blue light
'B4' and 'X17' in the example are pins corresponding to LED(4) and USR: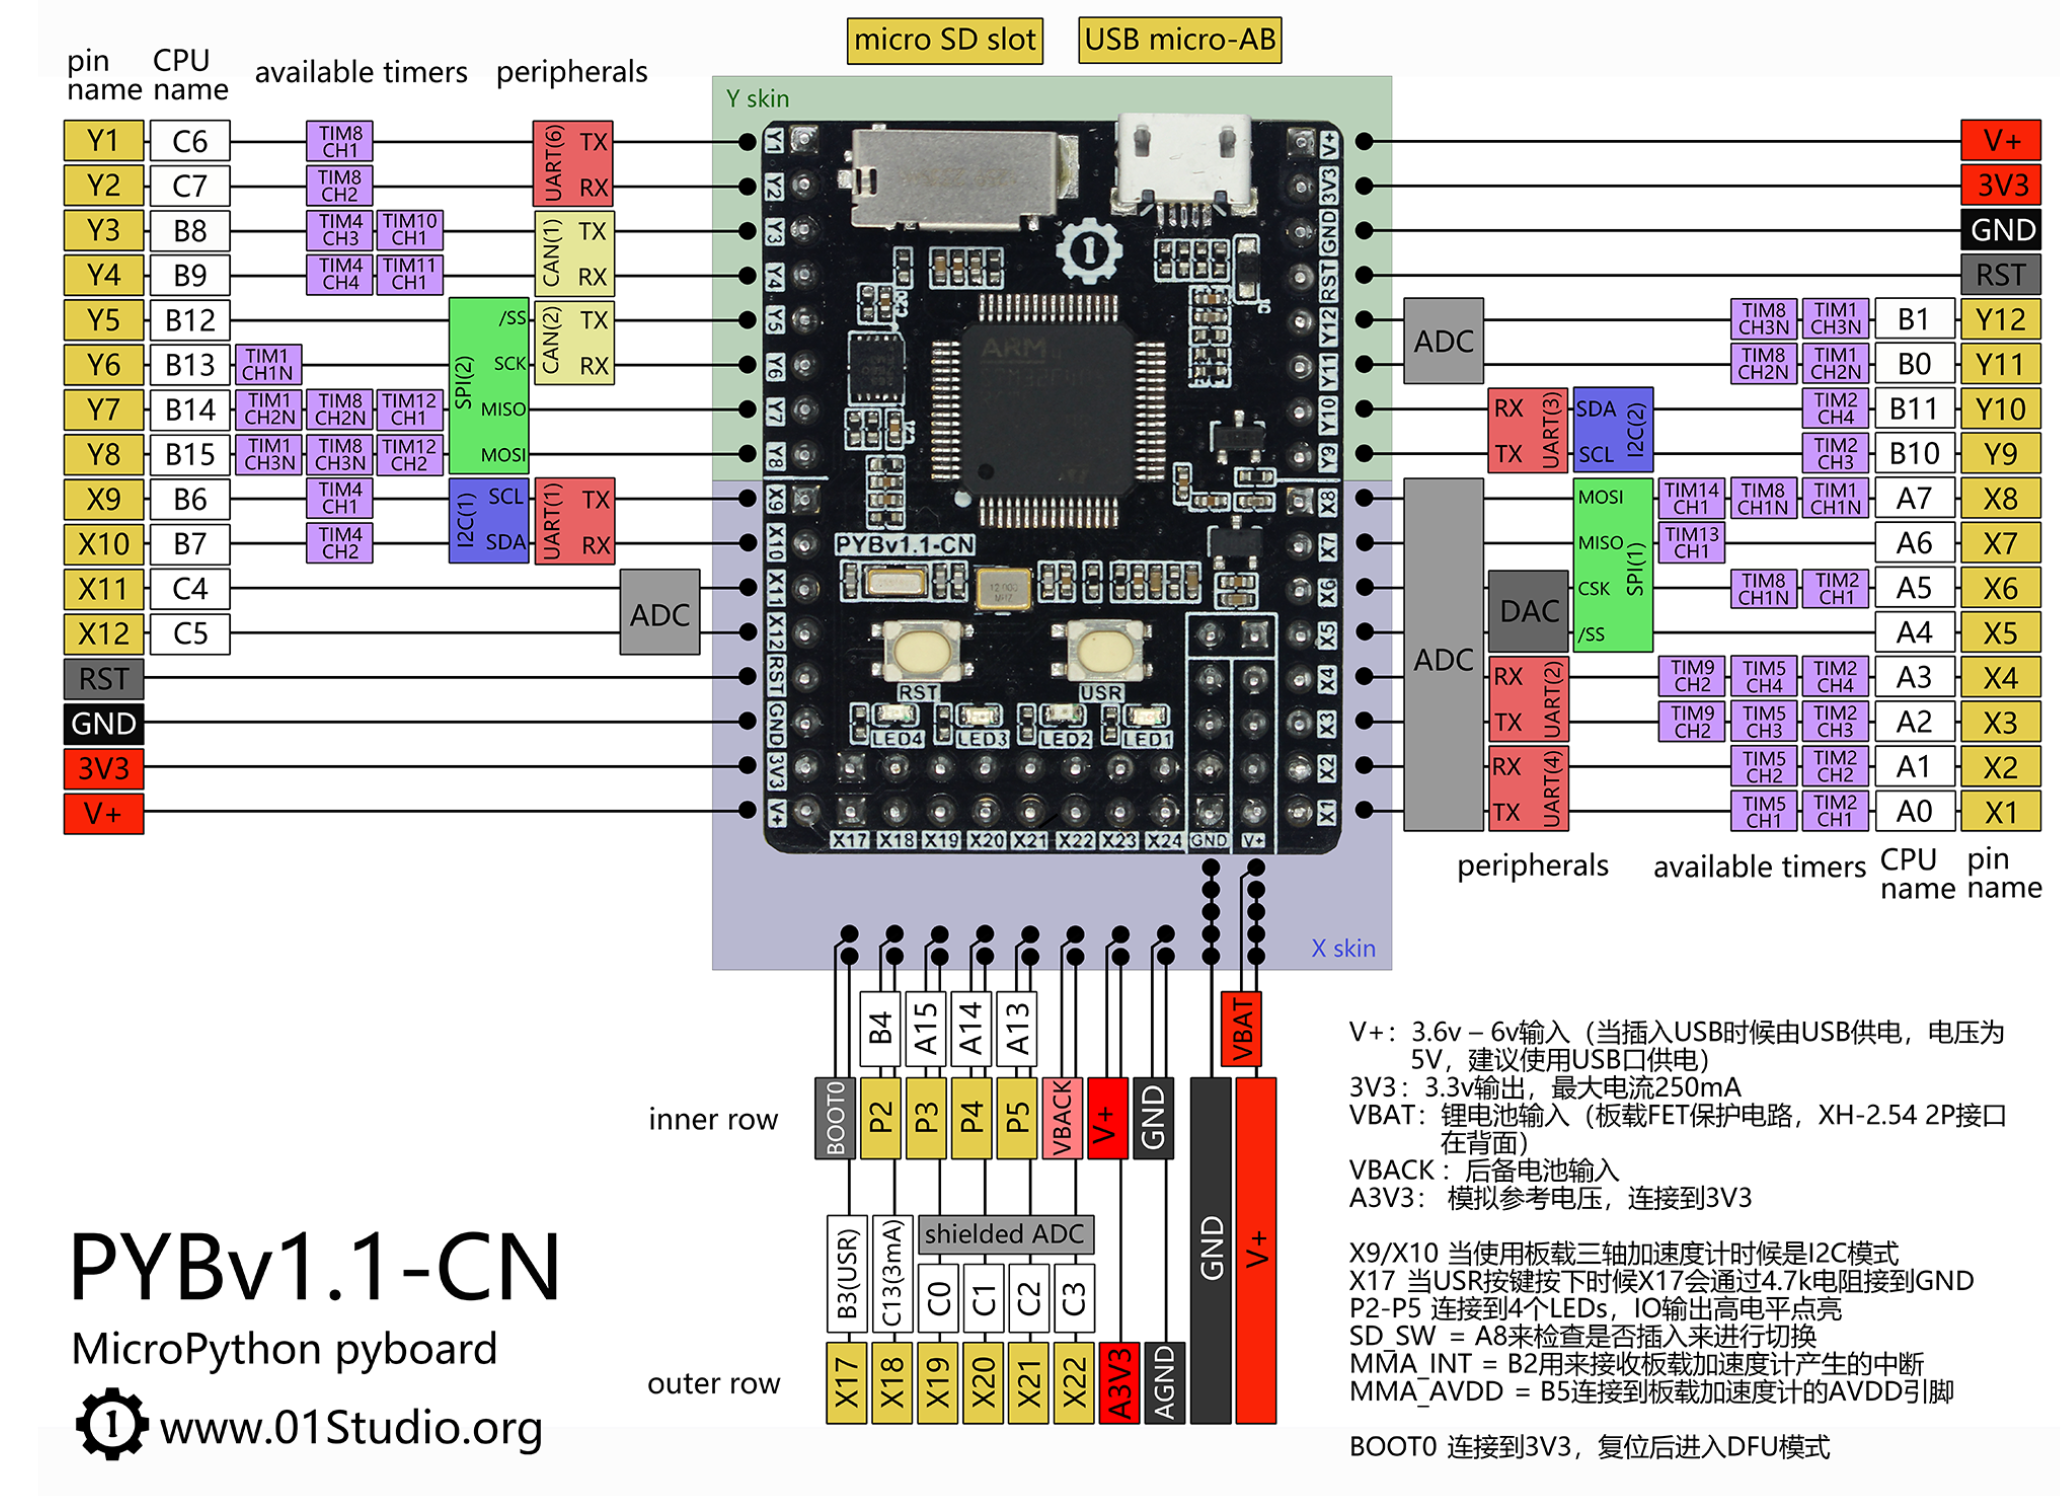
4. External interruption
The external interrupt is completed by GPIO. Every IO on pyBoard has the function of external interrupt. The constructor and calling method of external interrupt are as follows: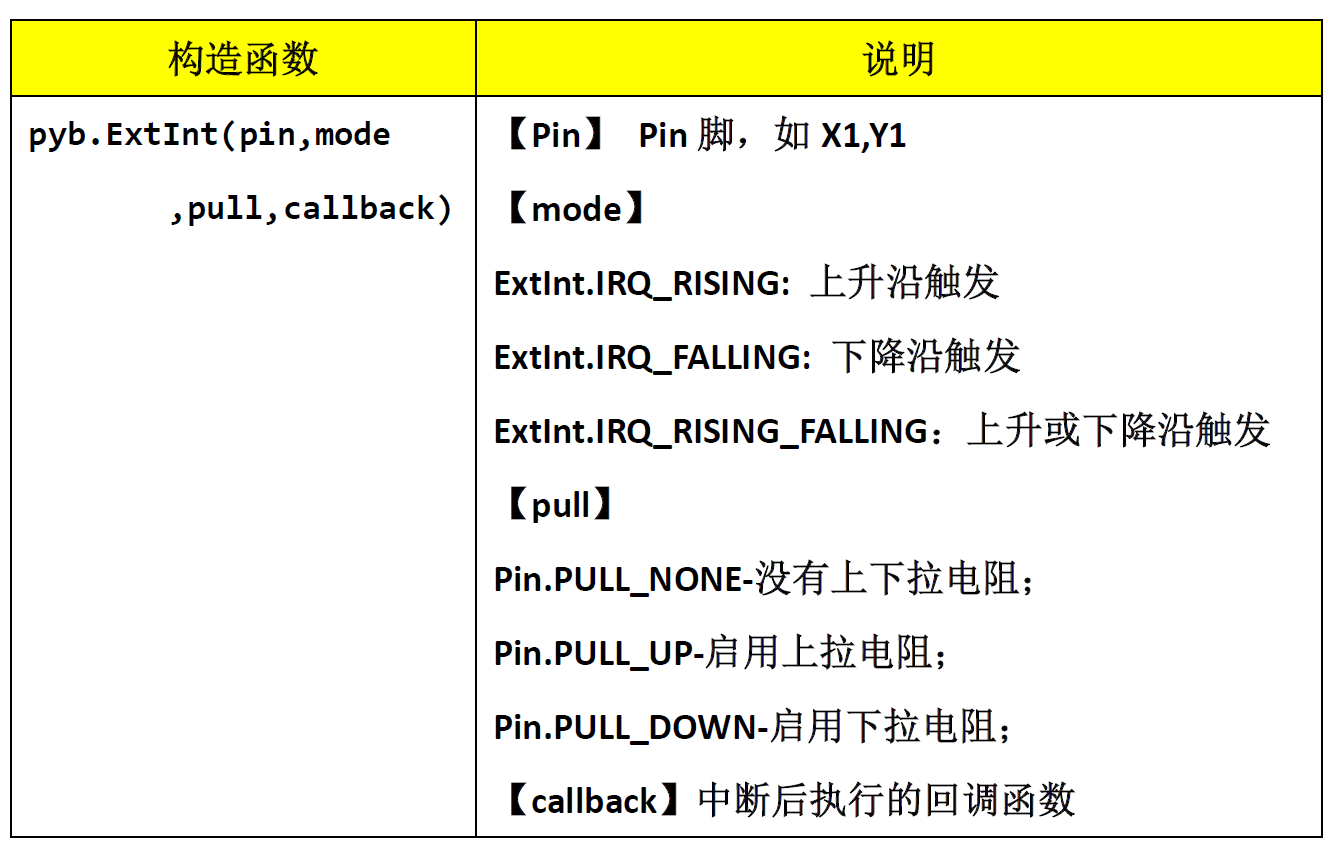
External interrupt example method:
from pyb import Pin,ExtInt,LED

callback = lambda e: LED(4).toggle()
#Falling edge trigger, turn on pull-up resistance
ext = ExtInt(Pin('Y1'), ExtInt.IRQ_FALLING, Pin.PULL_UP, callback)
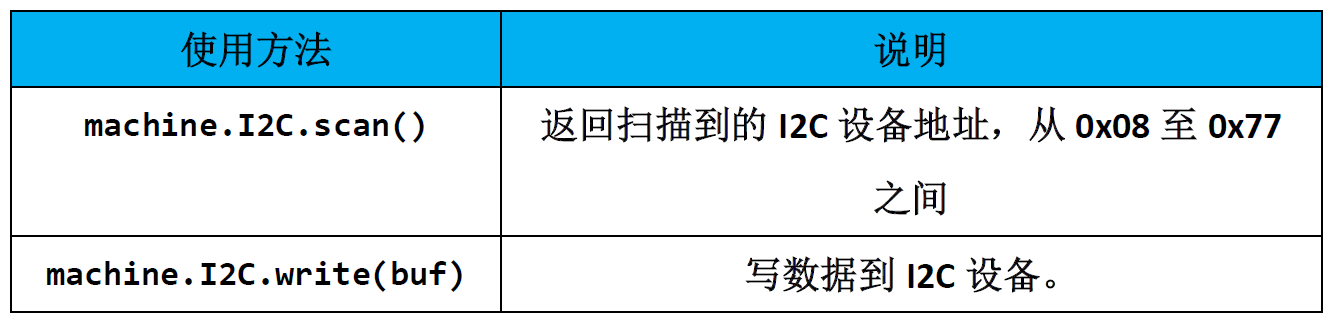
5. I2C bus
Taking I2C communication of OLED and pyBoard as an example, the pins connecting OLED are Y8(SDA) and Y6(SCL), respectively. This routine uses the Machine module of MicroPython to define the Pin port and I2C initialization.
Constructor and usage of Pin in Mchine: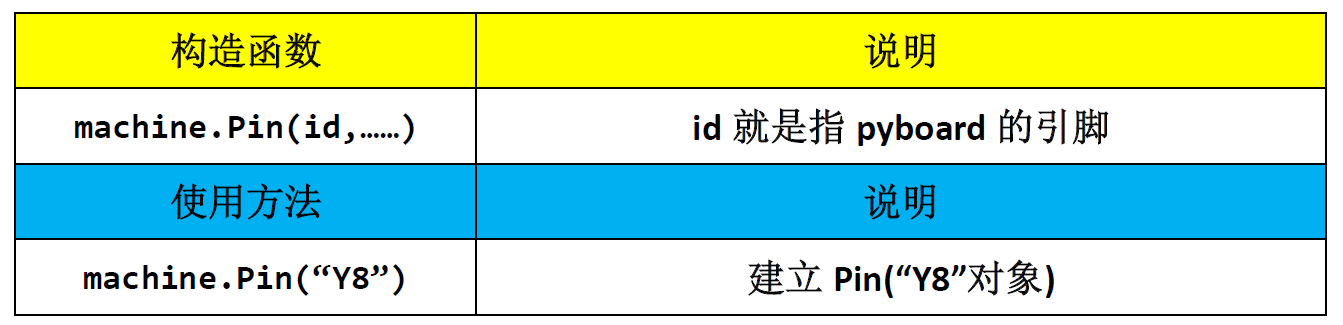
Constructor and usage of I2C in Machine:
The sample code is as follows:
from machine import I2C,Pin         #Import I2C and Pin submodules from machine module
from ssd1306 import SSD1306_I2C     #Import ssd1306 ﹣ I2C submodule from ssd1306 module

i2c = I2C(sda=Pin("Y8"), scl=Pin("Y6"))   #pyBoard I2C initialization: SDA -- > Y8, SCL -- > y6
oled = SSD1306_I2C(128, 64, i2c, addr=0x3c) #OLED display initialization: 128 * 64 resolution, the I2C address of OLED is 0x3c

oled.text("Hello World!", 0,  0)      #Write line 1
oled.text("MicroPython",  0, 20)      #Write line 2
oled.text("By 01Studio",  0, 50)      #Write line 3

oled.show()   #OLED execution display
6. ADC
The built-in ADC's constructor and calling method in pyBoard are: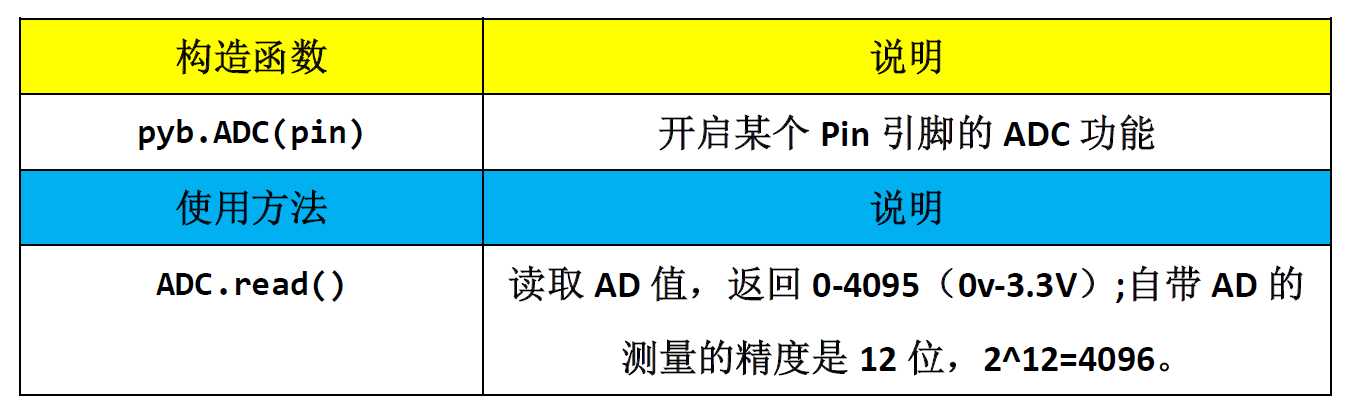
Example code:
#Import related modules
import pyb
from machine import Pin,I2C

#Initialize related modules
i2c = I2C(sda=Pin("Y8"), scl=Pin("Y6"))
adc = pyb.ADC('X7') #Pin='X7'
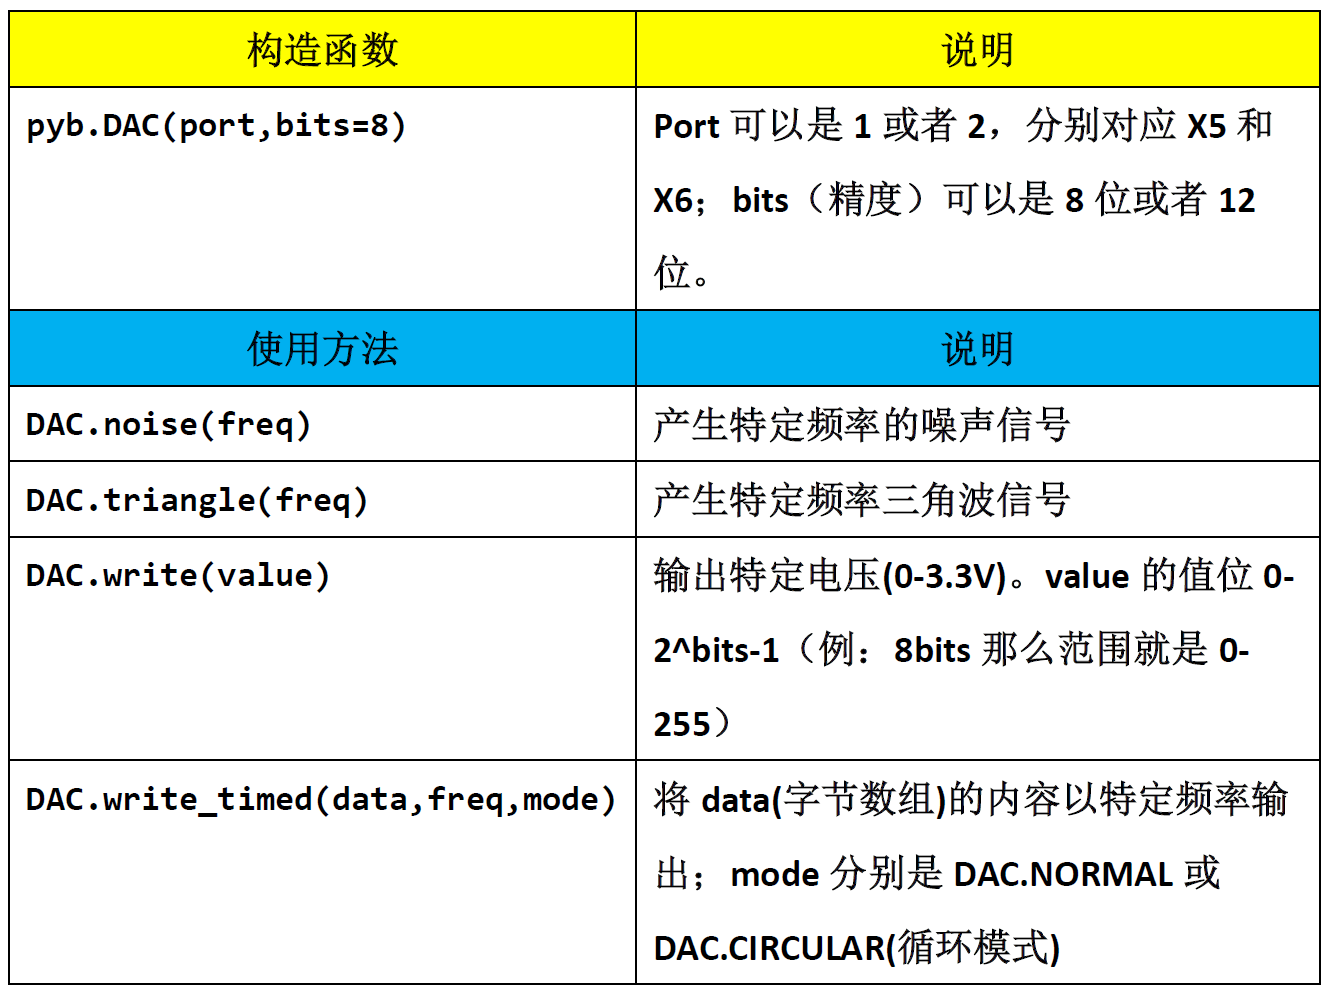
7. DAC
The constructors and calling methods of the DAC built in pyBoard are:
Example code:
from pyb import DAC,Switch
from machine import Pin,I2C


#Initialize related modules
i2c = I2C(sda=Pin("Y8"), scl=Pin("Y6"))

sw = Switch()     #Define the key object name as sw
dac = DAC(1)     #Define DAC object name as DAC and output pin as X5

#Define 4 groups of frequency values: 1Hz, 200Hz, 1000Hz, 5000Hz
freq=[1,200,1000,5000]

# Define the value of square wave with 8-bit precision. 0 and 255 respectively correspond to output 0V and 3.3V. Need to be defined as a byte array.
buf = bytearray(2)
buf[0]=0
buf[1]=255

key_node = 0  #Key flag bit
i = 0         #Used to select frequency array

#  Keys and their callback functions
def key():
    global key_node
    key_node = 1

sw.callback(key)  #When the key is pressed, execute the function key()

while True:
    if key_node==1: #Key pressed
        i = i+1
        if i == 4:
            i = 0
        key_node = 0 #Clear key flag
        #DAC output specified frequency
        dac.write_timed(buf, freq[i]*len(buf), mode=DAC.CIRCULAR)
8. UART
There are six serial ports in pyBoard, among which serial port 5 is used for REPL debugging. The serial ports and corresponding pins available for us are as follows: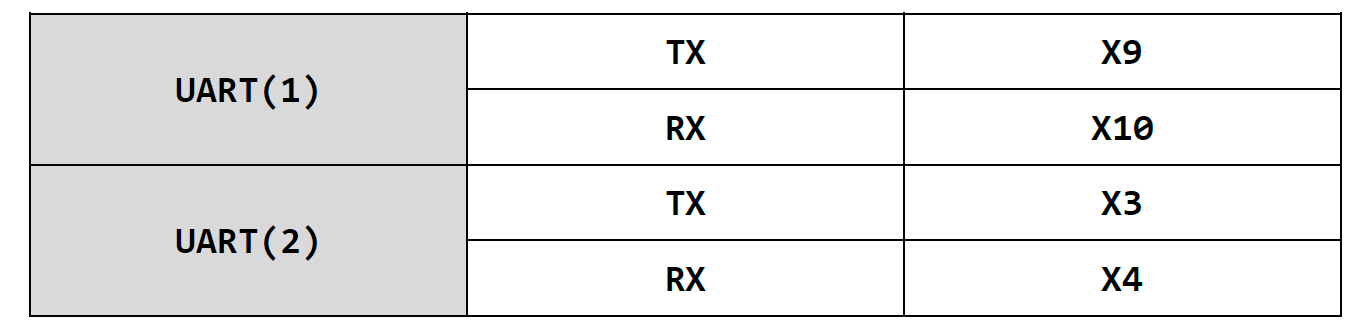
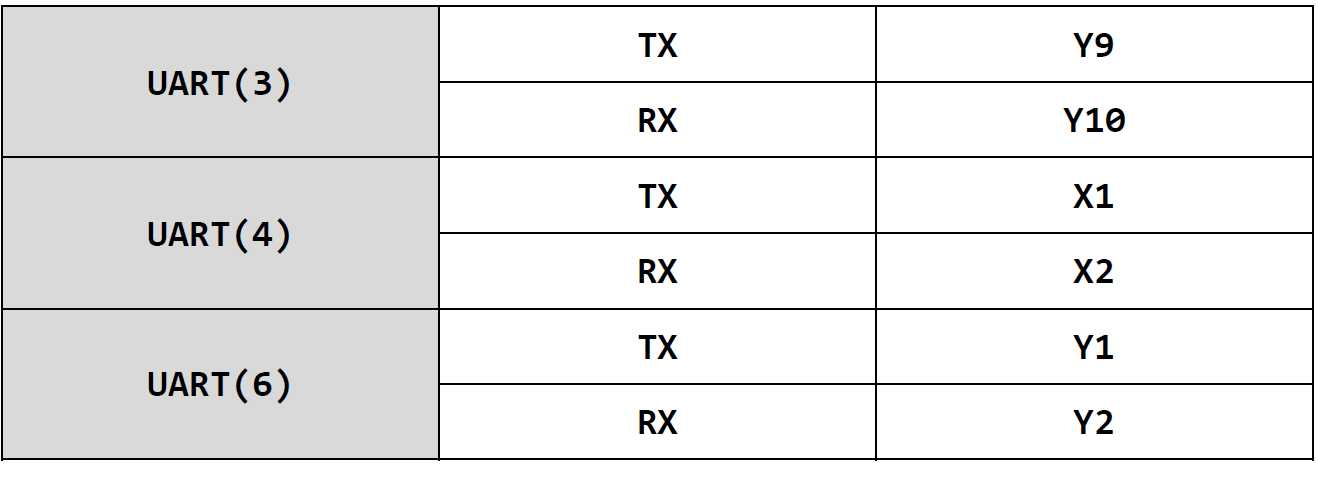
The constructor and usage of UART in pyb are as follows: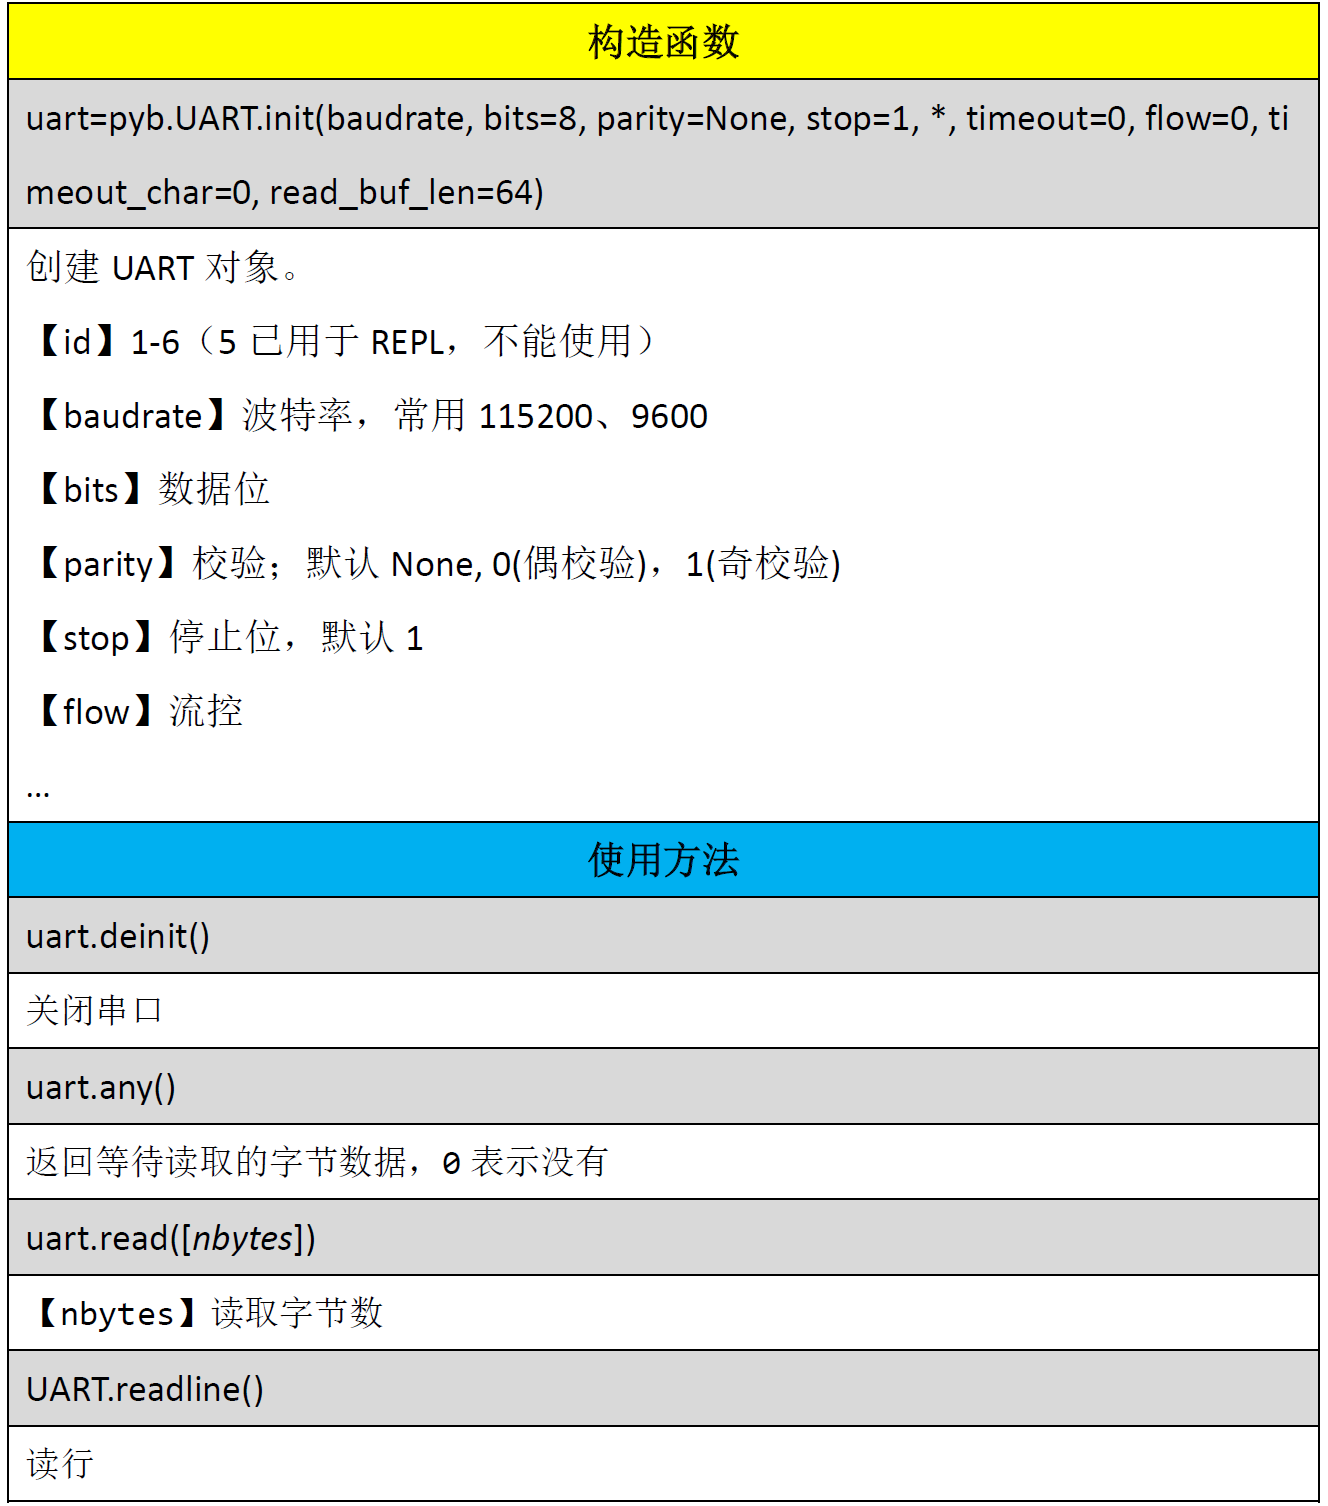

UART code example:
#Import serial port module
from pyb import UART

uart=UART(3,115200) #Set serial port number 3 and baud rate, tx-y9, rx-y10

uart.write('Hello 01Studio!')#Send a piece of data

while True:

    #Judge whether information is received
    if uart.any():
        text=uart.read(64) #Default single receive up to 64 bytes
        print(text) #Print the data received through the REPL serial port 3

