catalogue
1 functional modules involved in face recognition application
2 basic process of face recognition
2.1 dlib library installation and example analysis
2.2 face_ Installation and instance analysis of recognition library
2.2.6 obtaining image information of camera
3 monitoring system for face recognition
3.1 face recognition monitoring system
1 functional modules involved in face recognition application
- Camera call
- Face image recognition and processing
- In vivo detection
- Multithreaded applications
- Call of timer
2 basic process of face recognition
- Location and order of 68 basic feature points of human face. Judge whether 68 feature points exist and are complete on the image;
- Face detection, this step is mainly to locate the position of the face in the image, and use the target detection algorithm to output the face position rectangle;
- Face shape predictor, this step is to find out the specific points of eyes, eyebrows, nose and mouth;
- Face alignment, this step is mainly to transform a standard face through projection geometry;
- Face recognition, this step is to extract 128 dimensional feature vectors from the crowded face image, and judge and recognize according to the distance between feature vectors.
The most commonly used face recognition library in python is the dlib library developed based on C + +.
2.1 dlib library installation and example analysis
The dlib library needs to be installed separately. The currently compiled installed version of the dlib library only supports python 3.6.
Here is another dlib library whl file of Python version 3.7: link: https://pan.baidu.com/s/1Fch0AqhZTmql7MpFyEDtYA Extraction code: re7z
# -*-coding:GBK -*-
import dlib
from skimage import io

detector = dlib.get_frontal_face_detector()     # Get a face detector that contains a face detection algorithm
win = dlib.image_window()
img = io.imread('E:/girl.png')     # Read image with discrimination
# The face detector is used to read the image data to be detected. The second parameter 1 represents reading the picture pixels and doubling them so that more picture details can be collected
# The returned result is the data of a group of face regions
ders = detector(img, 1)
win.set_image(img)
win.add_overlay(ders)
dlib.hit_enter_to_continue()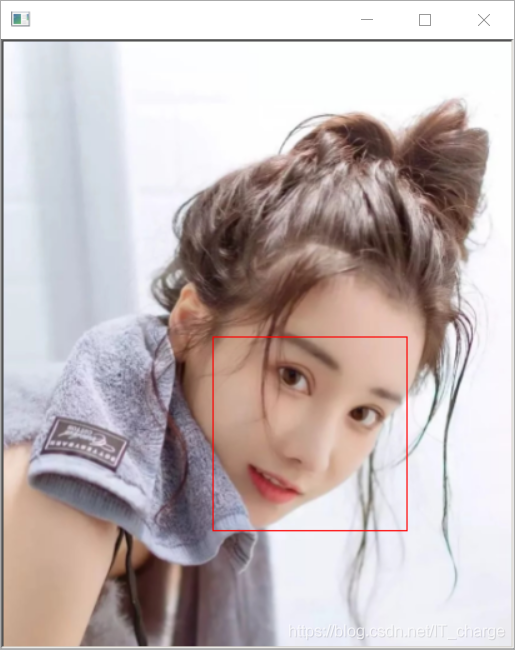
2.2 face_ Installation and instance analysis of recognition library
face_recognition library is a secondary encapsulation based on dlib, which is known as the most concise face recognition library in the world.
Training data set: Labeled Faces in the Wild, more than 13000 faces are used as training data sets, and the recognition effect depends on the number and quality of samples.
Installing on windows: PIP install - I https://pypi.douban.com/simple face_ recognition
2.2.1 load_image_file
load_image_file this method is mainly used to load the face image to be recognized. The data returned from loading is a Numpy array, which records the feature vectors of all pixels of the image.
# -*-coding:GBK -*-
import face_recognition

image = face_recognition.load_image_file('E:/girl.jpg')
print(image)
2.2.2 face_locations
face_locations locate the pixel positions of all faces in the map.
- The return value is in the form of a list. Each line in the list is the location information of a face, including [top, right, bottom, left]. It can also be considered that each face is a group of tuple information. It is mainly used to identify all face information in the image.
# -*-coding:GBK -*-
import face_recognition
from PIL import Image
import cv2

# Through load_ image_ The file method loads the image to be recognized
image = face_recognition.load_image_file('E:/girls.jpg')

# Through face_locations gets the positions of all faces in the image
face_locations = face_recognition.face_locations(image)

for face_location in face_locations:
    top, right, bottom, left = face_location   # The four position information of each face is obtained
    print("The face part has been recognized, and the speed limit area is: top{}, right{}, bottom{}, left{}".format(top, right, bottom, left))
    # face_image = image[top:bottom, left:right]
    # pil_image = Image.fromarray(face_image)
    # pil_image.show()
    start = (left, top)
    end = (right, bottom)

    # Draw a rectangle on the picture
    cv2.rectangle(image, start, end, (0,0,255), thickness=2)

cv2.imshow('window', image)
cv2.waitKey()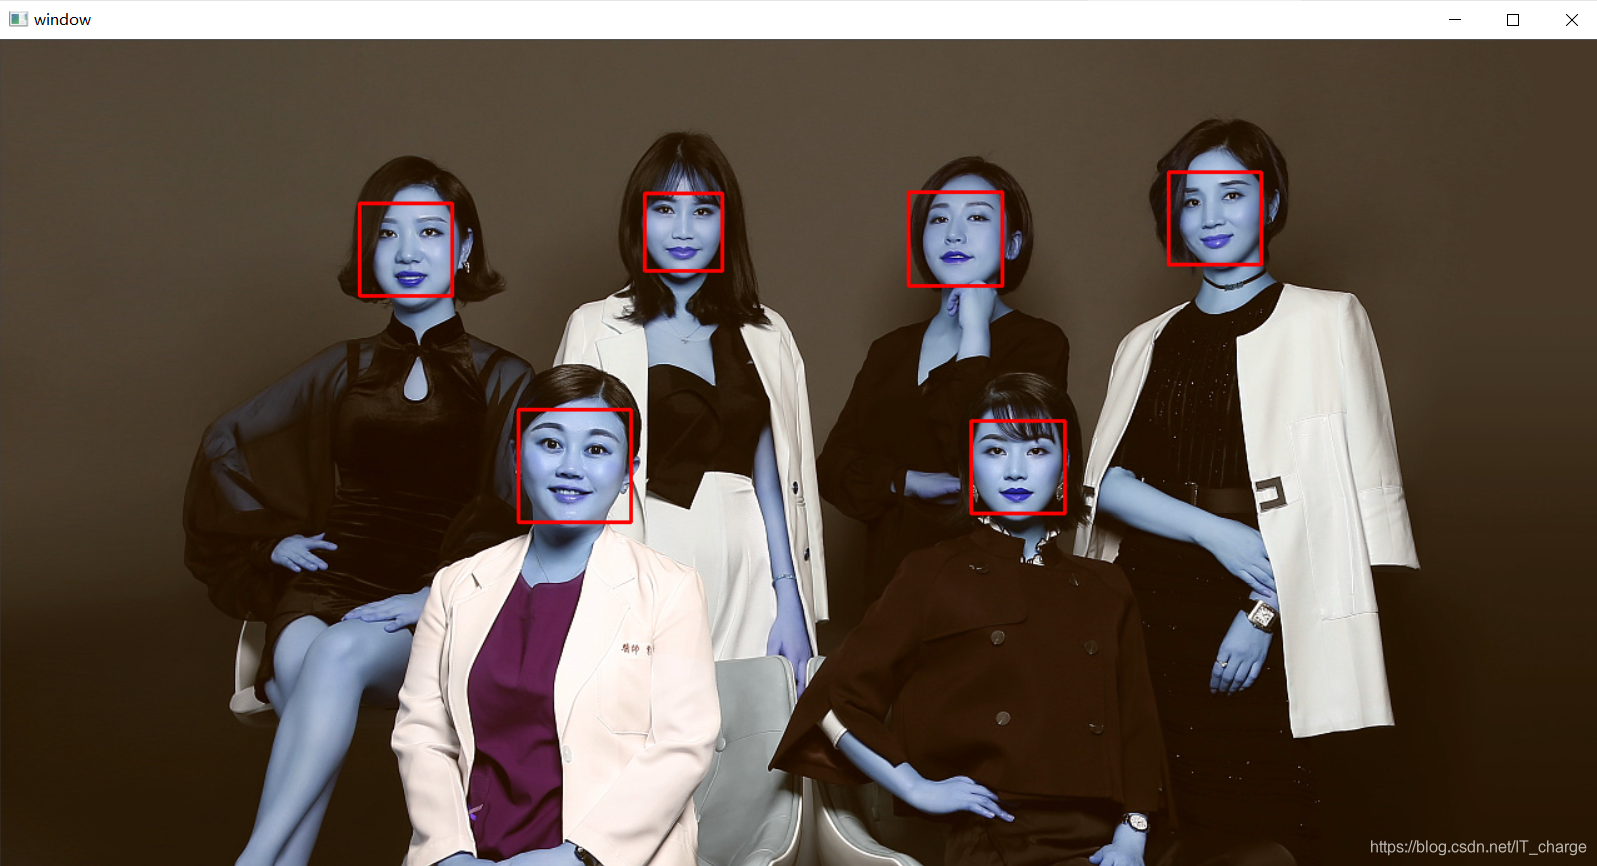

2.2.3 face_landmarks
face_landmarks recognize the key feature points of human face.
- The parameter is still the image object to be detected, and the return value is the list containing the facial feature point dictionary. The length of the list is the number of faces in the image.
- Facial features include the following parts: nose_bridge, right_ Eyebrow (right eyebrow), left_eyebrow (left eyebrow), right_eye, left_eye, chin, nose_tip (lower nose), bottom_lip (lower lip)
- Outline the general outline of the face
# -*-coding:GBK -*-
import face_recognition
from PIL import Image, ImageDraw

image = face_recognition.load_image_file('E:/boys.jpg')

face_landmarks_list = face_recognition.face_landmarks(image)

pil_image = Image.fromarray(image)
d = ImageDraw.Draw(pil_image)   # Generate a PIL image

for face_landmarks in face_landmarks_list:
    facial_features = [
        'chin',
        'left_eyebrow',
        'right_eyebrow',
        'nose_bridge',
        'nose_tip',
        'left_eye',
        'right_eye',
        'bottom_lip'
    ]
    for facial_feature in facial_features:
        # print("everyone's facial features are displayed in the following position: {}". format(facial_feature))
        d.line(face_landmarks[facial_feature], width=5)   # Directly call the line method in PIL to draw lines in PIL images to help us observe feature points

pil_image.show()
2.2.4 face_encodings
face_encodings obtains all face coding information in the image file.
- The return value is an encoding list, and the parameter is still the image object to be recognized. In case of subsequent access, you need to add index or traversal to access. The encoded information of each face is a 128 dimensional vector.
- Facial coding information is an important parameter for portrait comparison.
# -*-coding:GBK -*-
import face_recognition

image = face_recognition.load_image_file('E:/boys.jpg')

# No matter how much personal face information is in the image, the return value is a list
face_encodings = face_recognition.face_encodings(image)
for face_encoding in face_encodings:
    print("The length of information code is:{}\n The coding information is:{}".format(len(face_encoding), face_encoding))
2.2.5 compare_faces
compare_faces performs face recognition and matching from face coding information.
- It is mainly used to match two facial feature codes, use the inner product of the two feature vectors to measure the similarity, and confirm whether it is the same person according to the threshold.
- The first parameter is a face code list (many faces), and the second parameter is to give a single face code (one face), compare_faces will successively match the encoding information in the second parameter with all the encoding information in the first parameter. The return value is a Boolean list. If the matching is successful, True will be returned. If the matching fails, False will be returned. The order is consistent with the face encoding order in the first parameter.
- There is a tolerance = 0.6 in the parameter, which can be adjusted according to the actual effect. The general empirical value is 0.39. The smaller the tolerance value, the tighter the match.
# -*-coding:GBK -*-
import face_recognition

# Load a group photo
image1 = face_recognition.load_image_file('./facelib/yangmi+liukaiwei.jpeg')
# Load a single photo
image2 = face_recognition.load_image_file('./facelib/yangmi.jpg')

known_face_encodings = face_recognition.face_encodings(image1)
# face_encodings returns the list type. We only need to get the first face code
compare_face_encodings = face_recognition.face_encodings(image2)[0]

# Note that the second parameter can only be a facial feature code, not a list
matches = face_recognition.compare_faces(known_face_encodings, compare_face_encodings)
print(matches)
2.2.6 obtaining image information of camera
We can use the VideoCapture method in cv2 module, and then read one frame of image each time for processing.
# -*-coding:GBK -*-
import cv2
from PIL import Image, ImageDraw
import numpy as np

# 1. Call the camera
# 2. Read camera image information
# 3. Add text information to the image
# 4. Save image

cap = cv2.VideoCapture(0)  # Call the first camera information

while True:
    ret, frame = cap.read()
    # BGR is the image saving format of cv2 and RGB is the image saving format of PIL. Format conversion is required during conversion
    img_PIL = Image.fromarray(cv2.cvtColor(frame, cv2.COLOR_BGR2RGB))
    draw = ImageDraw.Draw(img_PIL)
    draw.text((100, 100), 'press q to exit', fill=(255, 255, 255))
    # Convert frame object to cv2 format
    frame = cv2.cvtColor(np.array(img_PIL), cv2.COLOR_RGB2BGR)
    cv2.imshow('capture', frame)

    if cv2.waitKey(1) & 0xFF == ord('q'):
        cv2.imwrite('out.jpg', frame)
        break

cap.release()
3 monitoring system for face recognition
Sort out the main functions of face recognition monitoring system:
- Open the camera to read the image ok
- Compare with the avatars of known people to identify which are known people and which are unknown people ok
- Mark the comparison result directly on the camera image ok
- Record the results of each comparison and save the images of unknown persons
- In vivo detection
3.1 face recognition monitoring system
# -*-coding:GBK -*-
import face_recognition
import os
import cv2
from PIL import Image, ImageFont, ImageDraw
import numpy as np
import datetime
import threading

class Recorder:
    pass

record_dic = {}
unknown_pic = []

flag_over = 0  # Define a flag for whether to record visits
# Save the comparison image information regularly, and save the image of the position personnel
def save_recorder(name, frame):
    global record_dic
    global flag_over
    global unknown_pic

    if flag_over == 1: return
    try:
        record = record_dic[name]
        seconds_diff = (datetime.datetime.now() - record.times[-1]).total_seconds()

        if seconds_diff < 60 * 10:
            return
        record.times.append(datetime.datetime.now())
        print('Update record', record_dic, record.times)
    except KeyError:
        newRec = Recorder()
        newRec.times = [datetime.datetime.now()]
        record_dic[name] = newRec
        print('Add record', record_dic, newRec.times)

    if name == 'Unknown Avatar':
        s = str(record_dic[name].times[-1])
        # print(s)
        # Unknown person's picture name
        filename = s[:10]+s[-6:] + '.jpg'
        cv2.imwrite(filename, frame)
        unknown_pic.append(filename)


# Analyze all photos of existing personnel and get the photo name and character face coding information
def load_img(path):
    print('Loading pictures of known people...')

    for dirpath, dirnames, filenames in os.walk(path):
        print(filenames)
        facelib = []

        for filename in filenames:
            filepath = os.sep.join([dirpath, filename])
            # Load in each picture
            face_image = face_recognition.load_image_file(filepath)
            face_encoding = face_recognition.face_encodings(face_image)[0]
            facelib.append(face_encoding)

        return facelib,filenames


facelib, facenames = load_img('facelib')
# print(facenames)

video_capture = cv2.VideoCapture(0)

while True:
    ret, frame = video_capture.read()
    # Improve contrast efficiency by reducing the picture to 1 / 4
    small_frame = cv2.resize(frame, (0,0), fx=0.25, fy=0.25)
    rgb_small_frame = small_frame[:,:,::-1]  # Convert opencv's BGR format to RGB format

    face_locations = face_recognition.face_locations(rgb_small_frame)
    face_encodings = face_recognition.face_encodings(rgb_small_frame, face_locations)

    face_names = []
    # Cycle multiple faces
    for face_encoding in face_encodings:
        matches = face_recognition.compare_faces(facelib, face_encoding, tolerance=0.39)
        name = 'Unknown Avatar'
        if True in matches:
            # If the head image in the camera matches the head image of a known person, the first True position is taken out
            first_match_index = matches.index(True)
            name = facenames[first_match_index][:-4]   # Take out the corresponding person name on the file
        face_names.append(name)

    for (top, right, bottom, left), name in zip(face_locations, face_names):

        # Restore original picture size
        top *= 4
        right *= 4
        bottom *= 4
        left *= 4

        cv2.rectangle(frame, (left, top), (right, bottom), (0,0,255), thickness=2)  # Label face information
        img_PIL = Image.fromarray(cv2.cvtColor(frame, cv2.COLOR_BGR2RGB))
        font = ImageFont.truetype('simhei.ttf', 40)
        draw = ImageDraw.Draw(img_PIL)
        draw.text((left+6, bottom-6), name, font=font, fill=(255,255,255))
        frame = cv2.cvtColor(np.asarray(img_PIL),cv2.COLOR_RGB2BGR)
        save_recorder(name, frame)

    cv2.imshow('capture', frame)

    if cv2.waitKey(1) & 0xFF == ord('q'):
        break

video_capture.release()
3.2 blink in vivo detection
# -*-coding:GBK -*-
from scipy.spatial import distance
import dlib
import cv2
from imutils import face_utils

def eye_aspect_ratio(eye):
    '''
    calculation EAR value
    :param eye: Eye feature point array
    :return: EAR value
    '''
    A = distance.euclidean(eye[1], eye[5])
    B = distance.euclidean(eye[2], eye[4])
    C = distance.euclidean(eye[0], eye[3])
    return (A+B) / (2.0*C)

detector = dlib.get_frontal_face_detector()
predictor = dlib.shape_predictor('shape_predictor_68_face_landmarks.dat')

# Sets the threshold for the aspect ratio of the eye
EAR_THRESH = 0.3
# We assume that the value of EAR for more than 3 consecutive frames is less than the threshold, and then confirm that the blinking operation occurs
EAR_CONSEC_FRAMES = 3

# The sequence numbers of the feature points corresponding to the eyes in the face feature points
RIGHT_EYE_START = 37-1
RIGHT_EYE_END = 42-1
LEFT_EYE_START = 43-1
LEFT_EYE_END = 48-1

frame_counter = 0  # Count of consecutive frames
blink_counter = 0  # Blink count

cap = cv2.VideoCapture(0)

while True:
    ret, frame = cap.read()
    gray = cv2.cvtColor(frame, cv2.COLOR_BGR2GRAY)   # Convert to grayscale image
    rects = detector(gray, 1)     # Face detection

    if len(rects) > 0:
        shape = predictor(gray, rects[0])    # Detect feature points
        points = face_utils.shape_to_np(shape)
        leftEye = points[LEFT_EYE_START:LEFT_EYE_END + 1]  # Take out the feature points of the left eye
        rightEye = points[RIGHT_EYE_START:RIGHT_EYE_END + 1]   # Take out the feature points of the right eye
        # Calculate the EAR value of left and right eyes
        leftEAR = eye_aspect_ratio(leftEye)
        rightEAR = eye_aspect_ratio(rightEye)

        # Average the EAR of left and right eyes
        ear = (leftEAR+rightEAR) / 2.0

        # It is not necessary to actually judge the eye contour code
        # Look for the contours of the left and right eyes
        leftEyeHull = cv2.convexHull(leftEye)
        rightEyeHull = cv2.convexHull(rightEye)

        # Draw left and right eye contours
        cv2.drawContours(frame, [leftEyeHull], -1, (0,255,0), 1)
        cv2.drawContours(frame, [rightEyeHull], -1, (0, 255, 0), 1)

        # If EAR is less than the threshold, start calculating consecutive frames
        if ear < EAR_THRESH:
            frame_counter += 1
        else:
            if frame_counter >= EAR_CONSEC_FRAMES:
                print('Blink detection succeeded, please enter')
                frame_counter += 1
                break
            frame_counter = 0

        cv2.putText(frame, "COUNTER: {}".format(frame_counter), (150, 30),
                    cv2.FONT_HERSHEY_SIMPLEX, 0.7, (0, 0, 255), 2)
        cv2.putText(frame, "Blinks: {}".format(blink_counter), (10, 30),
                    cv2.FONT_HERSHEY_SIMPLEX, 0.7, (0, 0, 255), 2)
        cv2.putText(frame, "EAR: {:.2f}".format(ear), (300, 30),
                    cv2.FONT_HERSHEY_SIMPLEX, 0.7, (0, 0, 255), 2)

        # cv2.putText(frame, 'blink:{}'.format(blink_counter))
    cv2.imshow('window', frame)

    if cv2.waitKey(1) & 0xFF == ord('q'):
        cv2.imwrite('out.jpg', frame)
        break

cap.release()
cv2.destroyAllWindows()