This paper mainly introduces how to use ArcGIS JS API for development in Vue project. The JS API used in this paper is the latest version of ArcGIS JS API 4.14. It mainly instantiates a two-dimensional map with JS API in Vue project demo.
summary
For a long time ago, when using ArcGIS JS API (hereinafter referred to as "JS API") to develop WebGIS system, it was still developed based on traditional front-end framework and various front-end technologies. These frameworks and technologies you have probably used: Dojo, jQuery, Bootstrap, CommonJS, etc. When developing with these traditional technical frameworks combined with JS API, we introduce JS API through < script > and < style > tags in the HTML page of the system. The usual method is to introduce it in the home page (index.html). The code is as follows:
<link rel="stylesheet" href="http://localhost/4.14/esri/themes/light/main.css" />
<script src="http://localhost/4.14/init.js"></script>
At present, with the continuous development of front-end technology, front-end development technologies such as React and Vue have become the standard configuration of a front-end developer. As GISer, we are no exception. When developing many WebGIS project systems, we will choose these mainstream development technologies, among which React and Vue are the most used. So this article mainly introduces how to use Vue combined with JS API to develop our project system.
Technical basis before start
- Have some basic knowledge of Vue and be familiar with ES6 (just be able to understand the contact before HTML tag, CSS code and JS code in a Vue file)
- The computer has installed NodeJS. I've heard of npm
Operation steps
Environmental preparation
Before today's introduction, we need to prepare the development environment. This article has two requirements for the development environment: NodeJS environment and Vue environment. If you don't have these two environments, please see the following for installation; If there are these two environments on the machine, please skip this section and read from section 2.
NodeJS environment installation
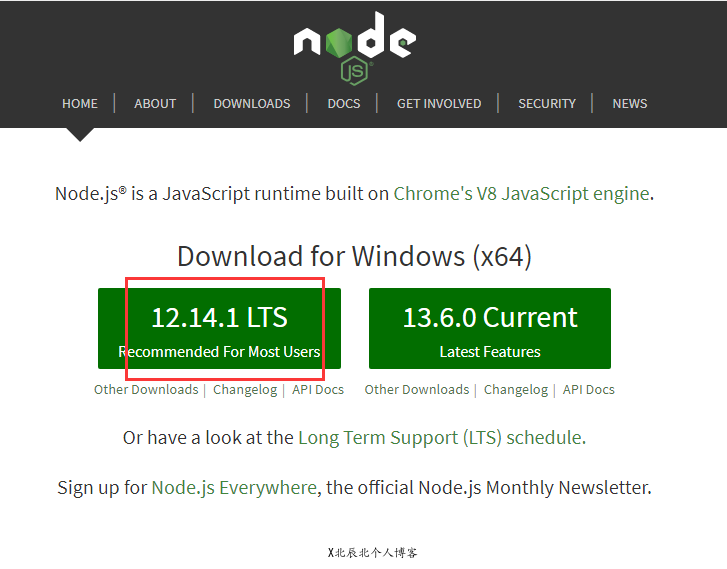
1.1.1. Enter NodeJS official website( https://nodejs.org/en/ )Download the latest version of NodeJS. It is recommended to download the LTS version, which is stable and has long-term official support for updating, as shown in the figure:
1.1.2 after downloading the installation package, double-click the installation package to pop up the installation interface. After selecting the corresponding installation directory, we can click the [Next] button all the way. There is nothing special to pay attention to in the middle process. 1.1.3 after the installation is completed, we open the command line window and check whether the installation is successful through the following commands. If the following version number information appears, it indicates that the installation and deployment of NodeJS environment is successful:
node -v
npm -v
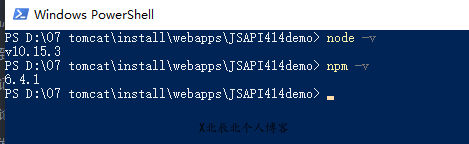
Here, someone may ask about the relationship between NodeJS and npm. In fact, NodeJS is a running environment of JavaScript. It encapsulates Google V8 engine and is a server-side JS interpreter. npm is a package manager of NodeJS. If we need to use any plug-in in development, we need to search, download and install it into NodeJS environment before we can use this plug-in to develop and complete a requirement. This process is quite cumbersome. With the npm package manager, we only need to run the command line under the project root directory, and then install the required plug-ins into the project or NodeJS environment with one click through the npm installation command. This is a very convenient thing. Moreover, many gods upload their developed wheels to the npm website, so we can directly install the plug-ins we need, There is no need to search, download and install. 1.1.4. Here we install the NodeJS environment. To put it bluntly, we only install the npm package manager.
Vue environment construction
Vue environment construction actually does two things: installing Vue and Vue scaffolding tools. These two installations are installed through npm. The detailed process is as follows: 1.2.1 open the command line tool and install Vue environment and Vue scaffold tools through the following two commands, as follows:
npm install vue
npm install -g @vue/cli
1.2.2 after installation, test through the following commands. If the version number information appears, the installation is successful:
vue --version

So far, our environment preparation has been completed. Next, let's get to today's topic and use Vue combined with JS API to develop.
Initialize project demo
2.1. Create a new folder in the appropriate directory, then open the command line tool in this folder, and create a basic Vue project demo through the following commands, as follows:
vue create vuejsapi414demo

The above command uses Vue's scaffolding tool to initialize a project demo. The demo name is "vuejsapi414demo", which can be named at will. After entering the above command and pressing enter, the project initialization window will appear. Here we need to select the plug-in used in the project. Here we can select the first default one:
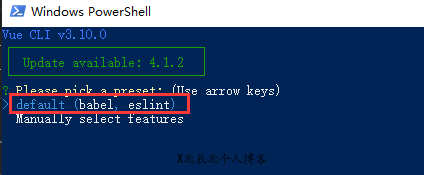
Press enter after selection to install the plug-in and initialize the project, as follows:

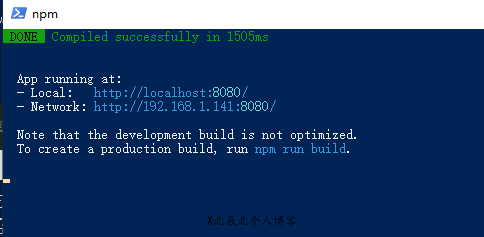
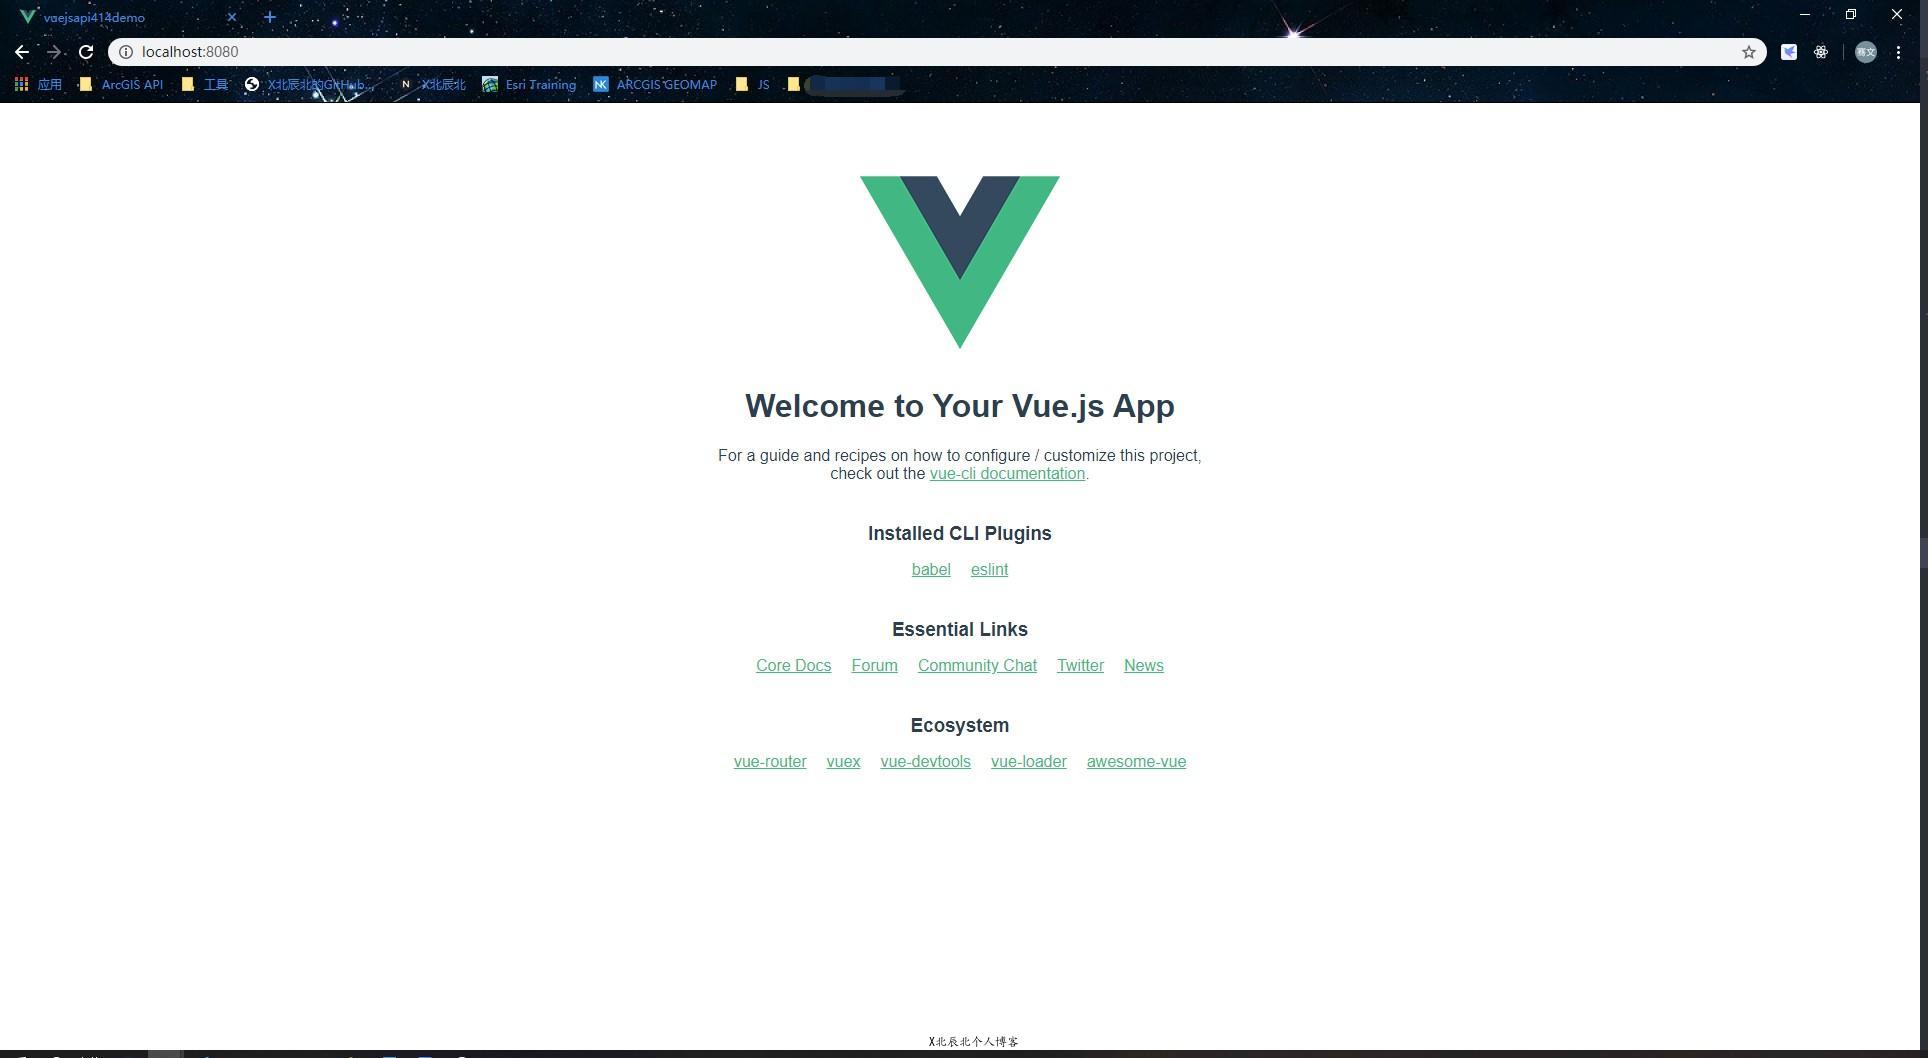
2.2 after the initialization of the project, we use the command prompt in the command line to enter the project root directory, then start the project through the prompt command, and view it in the browser through the address "localhost:8080", as follows:
cd .\vuejsapi414demo\
npm run serve
2.3. At this time, the initialization project operation has been completed. We created a basic Vue project demo through Vue scaffolding. Next, we use this demo to introduce how to develop and use JS API in combination with Vue.
Combined development of ArcGIS JS API and Vue
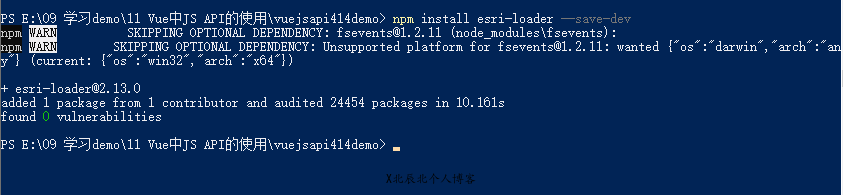
The above process has completed the environment installation, deployment and project initialization. Next, we will introduce the development of JS API. 3.1. When using JS API in Vue project, it is not like the traditional development method in index JS and CSS files are introduced into HTML to use js API. Instead, a middleware called "ESRI loader" is used to seamlessly connect our JS API with Vue project. 3.2. In the command line, use Ctrl+C to stop the project, and then use the following command to install ESRI loader, as follows:
npm install esri-loader --save-dev
3.3. After installation, restart the project with the command npm run serve, and then open the initialized project code with the editor. Here is the VS Code editor. You can use Hbuilder, SublimeText3 webStrom and other editors are not mandatory, as follows:
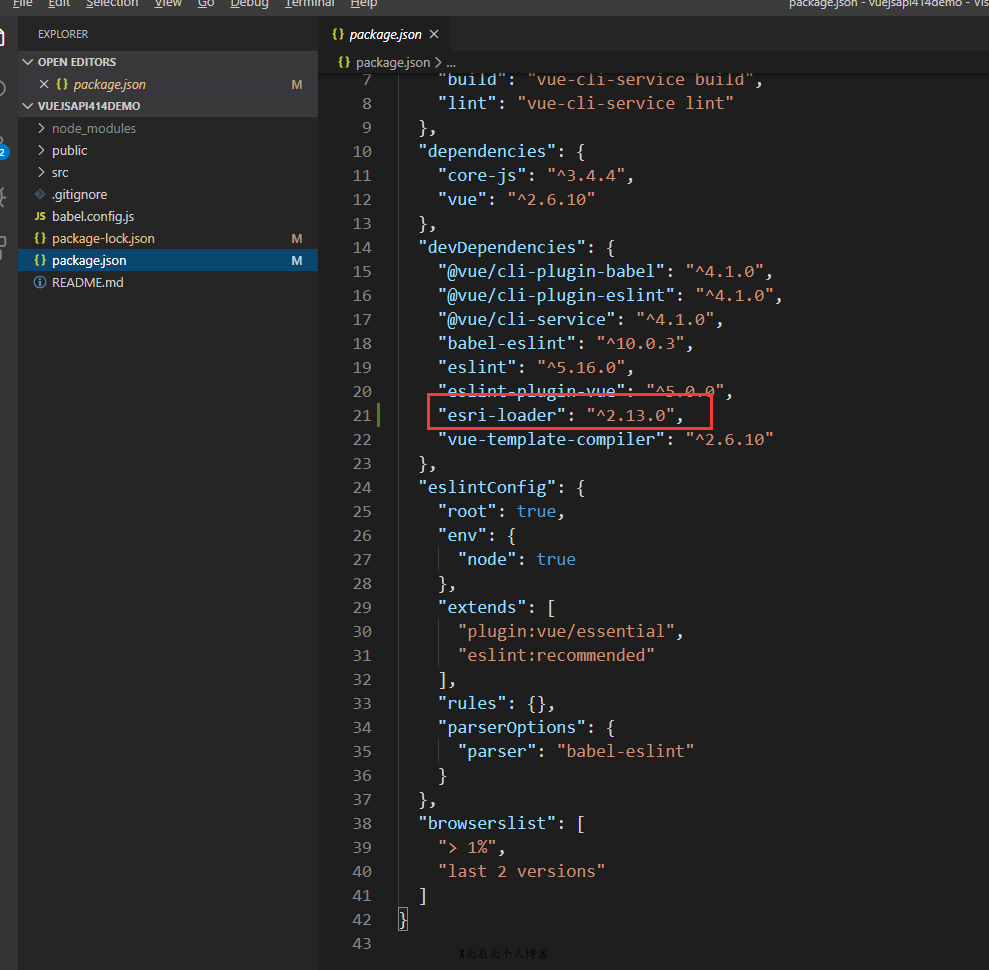
3.4. Then open package. Under the root directory of the project JSON file. In this file, we can see the ESRI loader plug-in just installed. At this time, v2.0 is used Version 13.0, as follows:
3.5. Next, in the src folder under the root directory of the project, we modify app Vue this folder to introduce how to use JS API development in Vue. As follows, let's delete app Vue this file contains redundant HTML tags and some JS codes. The final file code is as follows:
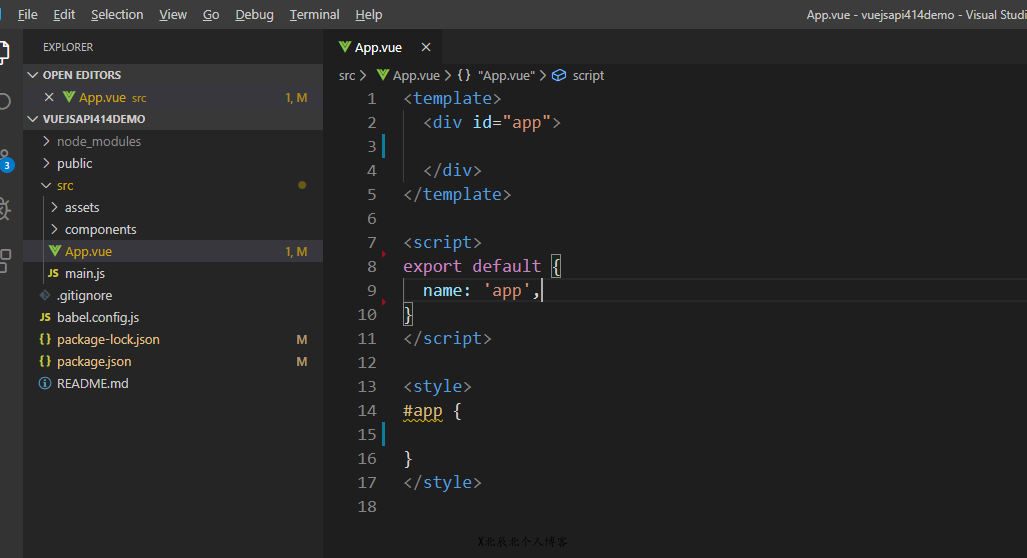
3.6. Instead of creating a new tag here, we can instantiate a map directly in the div with id "app". Next, we modify the label style of the body label and the div with id "app". The code is as follows:
body {
    margin: 0;   /**It mainly removes the default 8-pixel outer margin of Google browser */
}
#app {
    position: absolute;   /**Make the size of this div cover the whole screen */
    width: 100%;
    height: 100%;
}
3.7. Then load the ESRI loader plug-in installed by us, as follows:
import {loadModules} from 'esri-loader';3.8 after introducing ESRI loader, let's connect our project system with JS API. Here, we must understand a concept: when we use js API in Vue, the interfaces we call are those we traditionally develop. ESRI loader only acts as a bridge here, so we should not mistakenly think that ESRI loader is also a development package. In other words, the JS API development package you finally use is still the development package deployed locally or on the official website of JS API, not the development package in ESRI loader. Before connection, we first create a mounted life cycle function, and then call the map creation function in this function. The code is as follows:
import {loadModules} from 'esri-loader';
export default {
  name: 'app',
  methods: {
      //Create map
      _createMapView: function() {
            const _self = this;   //Define a_ self prevents this from being lost in subsequent operations
            const option = {      //Define an object that contains the js development package and css style file in the JS API
                url: 'http://localhost/4.14/init.js',
                css: 'http://localhost/4.14/esri/themes/light/main.css',
            };
            //Connect through loadModules
            loadModules([], option)
                .then(([]) => {

                    //Business code is written here

                }).catch((err) => {
                    _self.$message('Map creation failed,' + err);
                });
      },
  },
  mounted: function() {
      this._createMapView();
  }
}
Through the above code, we have made a connection between our project system code and JS API. In fact, JS API has been introduced into our Vue project. Next, we will develop JS API. 3.9 this paper mainly introduces how to use js API development by instantiating a map. The next operation is similar to our traditional development method. First load the corresponding JS API module, and then instantiate each module, as shown below:
//Connect through loadModules
loadModules(['esri/Map',
'esri/views/MapView'], option)
.then(([Map, MapView]) => {
//Business code is written here
const map = new Map({ //Instantiate map
basemap: "streets"
});
const view = new MapView({ //Instantiate map view
container: "app",
map: map,
zoom: 11,
center: [104.072044,30.663776]
});
view.ui.components = []; //Clear the default zoom icon in the upper left corner of the map
}).catch((err) => {
_self.$message('Map creation failed,' + err);
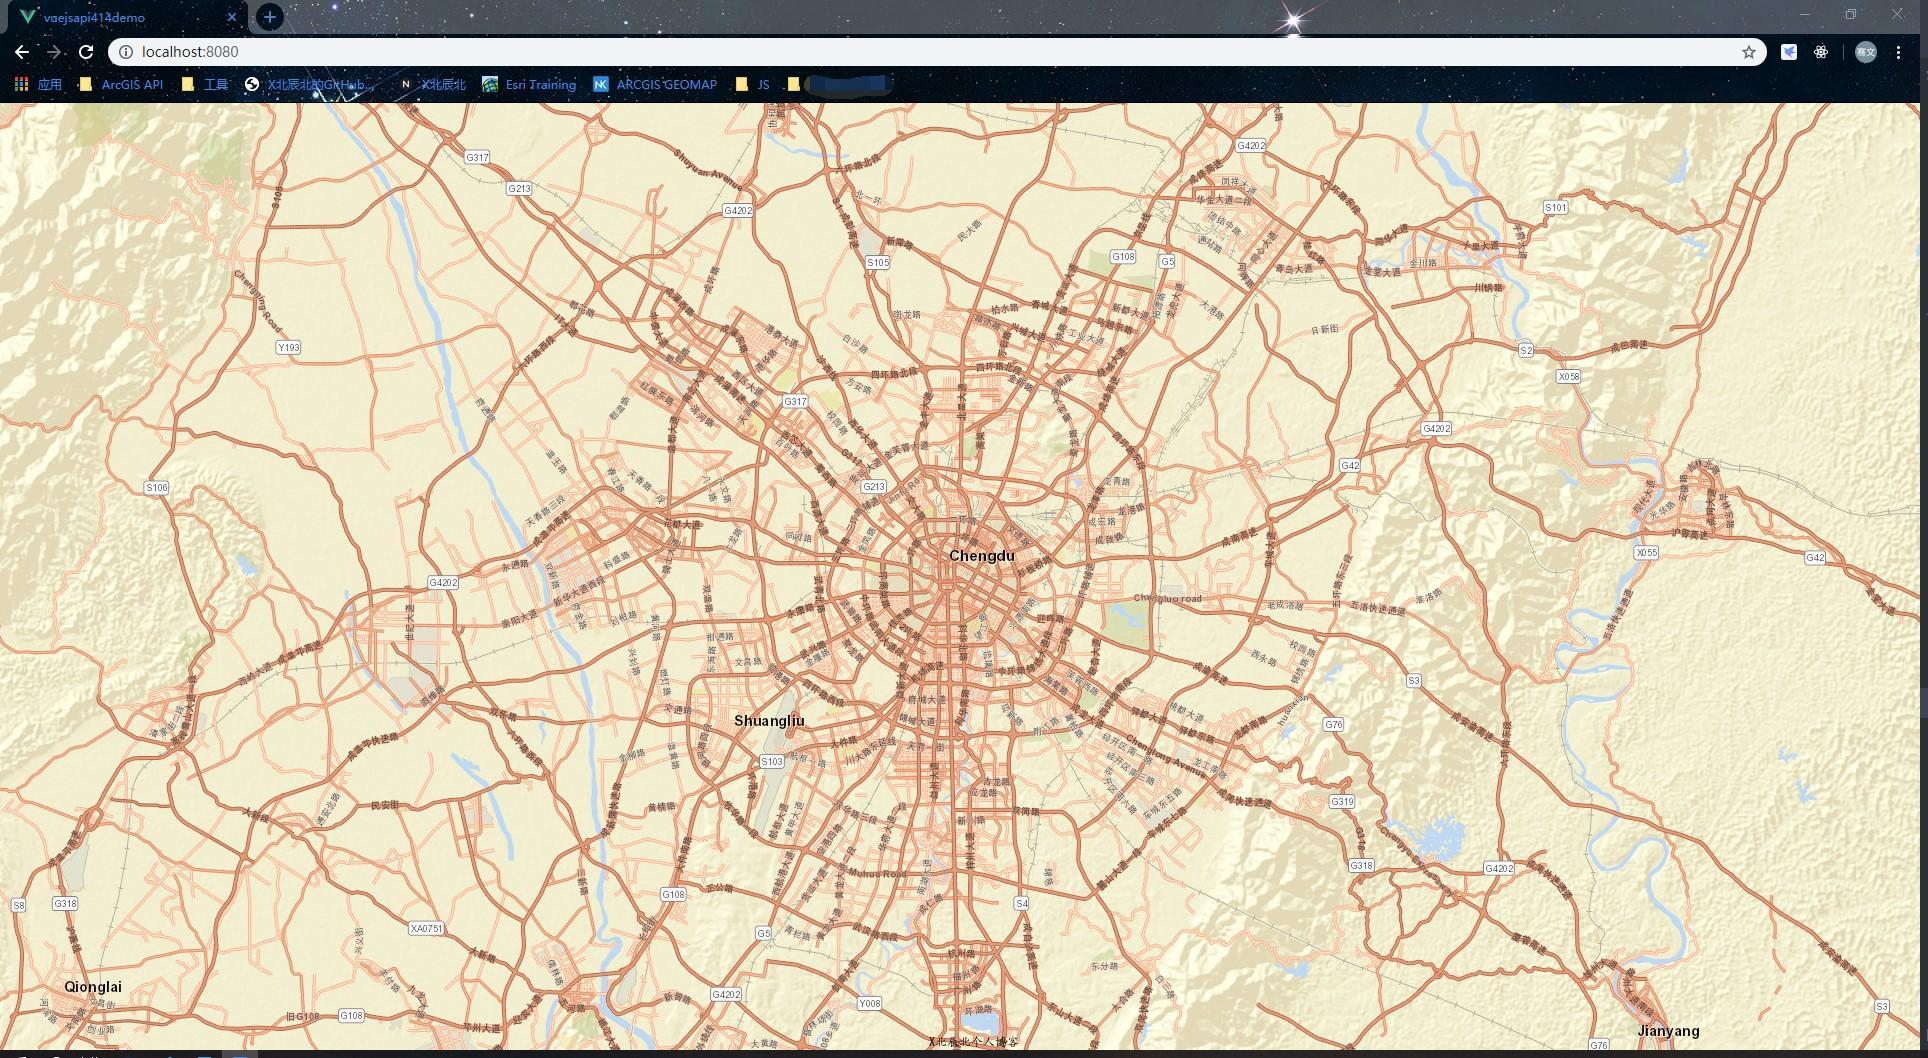
});3.10. Through the above steps, a two-dimensional map is instantiated, and the final effect is as follows:
summary
This paper introduces in detail the process of building Vue basic project demo to the introduction of JS API and finally generating a two-dimensional map. This article is suitable for those who have a certain Vue foundation and JS API development foundation. The JS API we use in this article is a locally deployed JS API. You can also change the API address to the official website. You only need to modify the attribute value of the option object, similar to the following:
const option = {      //Define an object that contains the js development package and css style file in the JS API
    url: 'https://js.arcgis.com/4.14/init.js',
    css: 'https://js.arcgis.com/4.14/esri/themes/light/main.css',
};
By modifying the above code, the reference address of the JS API is changed to the official website address, but you need to pay attention to the cross domain problem when running here. If you encounter cross domain problems, you can solve them by configuring Vue's configuration file. The specific operations are not within the scope of this article and can be solved by Baidu itself. If you encounter any questions during the combined development of Vue and JS API, please contact the blogger for answers.
Attachment:
Full code of project demo:
https://github.com/xuqwCloud/use_of_arcgis_js_api_in_vue
App.vue all codes:
<template>
  <div id="app">

  </div>
</template>
<script>
import {loadModules} from 'esri-loader';
export default {
  name: 'app',
  methods: {
      //Create map
      _createMapView: function() {
            const _self = this;   //Define a_ self prevents this from being lost in subsequent operations
            const option = {      //Define an object that contains the js development package and css style file in the JS API
                url: 'http://localhost/4.14/init.js',
                css: 'http://localhost/4.14/esri/themes/light/main.css',
            };
            //Connect through loadModules
            loadModules(['esri/Map',
            'esri/views/MapView'], option)
                .then(([Map, MapView]) => {

                    //Business code is written here
                    const map = new Map({    //Instantiate map
                        basemap: "streets"
                    });
                    const view = new MapView({   //Instantiate map view
                        container: "app",
                        map: map,
                        zoom: 11,
                        center: [104.072044,30.663776]
                    });
                    view.ui.components = [];   //Clear the default zoom icon in the upper left corner of the map
                }).catch((err) => {
                    _self.$message('Map creation failed,' + err);
                });
      },
  },
  mounted: function() {
      this._createMapView();
  }
}
</script>
<style>
body {
    margin: 0;   /**It mainly removes the default 8-pixel outer margin of Google browser */
}
#app {
    position: absolute;   /**Make the size of this div cover the whole screen */
    width: 100%;
    height: 100%;
}
</style>