1. Introduction
Official website: https://github.com/happyfish100/
Configuration document: https://github.com/happyfish100/fastdfs/wiki
FastDFS is an open source distributed file system written in c language. It fully considers redundant backup, load balancing, linear capacity expansion and other mechanisms, and pays attention to indicators such as high availability and high performance. Using FastDFS, it is easy to build a set of high-performance file server cluster and provide file upload and download services.
FastDFS supports Linux, FreeBSD and other UNIX systems such as google FS. It is not a general file system and can only be accessed through proprietary APIs. At present, it provides APIs for C, Java and PHP languages. FastDFS can be regarded as a file based key value (key value pair) storage system, which is more suitable to be called distributed file storage service.
2. Special terms
TrackerServer: tracking server. Record the status of the Storage server and do scheduling work. Like the dispatcher in the bus station, it is responsible for selecting the optimal storage node through load balancing. It is the hub connecting the client and the Storage server.
Storage server: storage server (storage node). Used to store files and file related attributes.
Group: Group (volume). The files on the servers in the same group are identical.
File ID: consists of group name and file name (including path).
meta data: file related attributes. It is stored in key value mode, such as name=filename, size=1024
3. fastDFS architecture
The fastDFS architecture is as follows:
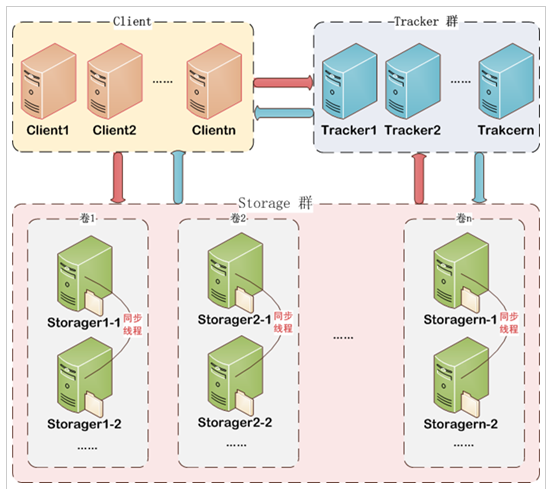
Interpretation:
Client is our java project. It is used to write java code and call FastDFS API to control the file upload and download layer. Developers only need to care about how to write this part.
For example, Client sends a demand for writing operations, and the Tracker tracker will go to Storage memory to schedule an optimal memory (memory space sufficient or no write operation at this time), and return the ip and port numbers of the available Storage memory to Client. This behavior is similar to saving a file on the computer. We need to know which disk has enough space to store the file.
The Storage cluster is composed of multiple volumes (groups). The resources between volumes are different. The resources of Storage storage are the combination of resources on all volumes. If the Storage server needs to be expanded, you can add volumes. A volume can be divided into multiple servers, and the server resources in the volume are the same. Similar to the primary and standby servers. When a file is uploaded to a volume, the servers in the volume will synchronize a copy of the file to ensure that the resources of each server in the volume are consistent to achieve the backup effect. It can be understood that Storage is our disk, and volume (Group) is a partition in the disk, such as disk C and disk D. the files between disks are different, but for backup, multiple folders can be created in Disk C, and the files in each folder are the same. One folder is broken and there are other backup folders.
4. fastDFS installation
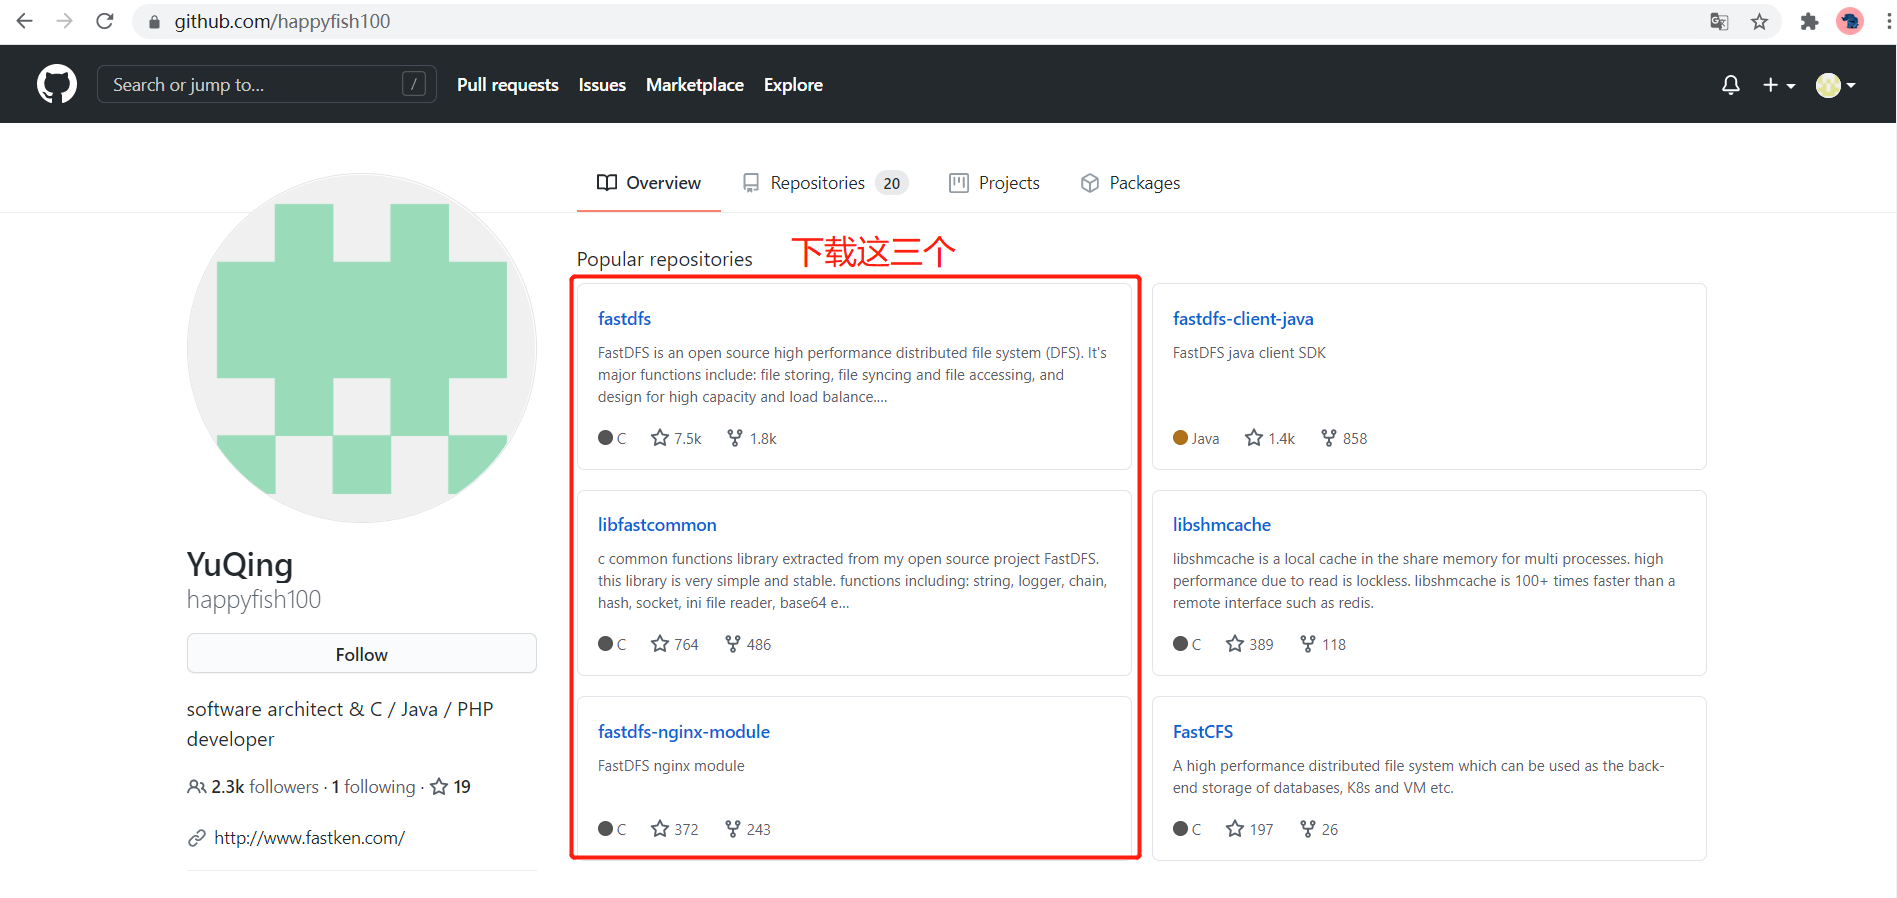
4.1 download installation package
Installation package download address: https://github.com/happyfish100/
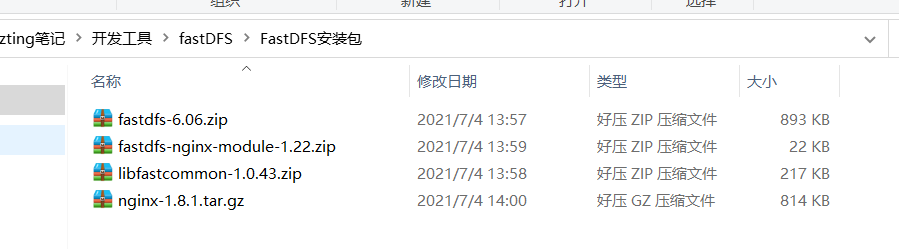
Note: don't download the latest version. The version mismatch will lead to the lack of things in the installation. It is recommended to download a stable version:
fastdfs 6.06;libfastcommon 1.0.43;fastdfs-nginx-module 1.22;nginx 1.16.1
fastdfs download address: https://github.com/happyfish100/fastdfs/tree/V6.06
libfastcommon download address: https://github.com/happyfish100/libfastcommon/tree/V1.0.43
Fastdfs nginx module download address: https://github.com/happyfish100/fastdfs-nginx-module/tree/V1.22
nginx download address: http://nginx.org/en/download.html
The prepared installation package is as follows:
4.2 environmental preparation
Since FastDFS is written in c language, we need to prepare relevant compilation dependencies.
- Install C language
[root@localhost ~]# yum install git gcc gcc-c++ make automake autoconf libtool pcre pcre-devel zlib zlib-devel openssl-devel wget vim -y
- Install the zip unzip command
[root@localhost ~]# yum -y install unzip
- Create fastdfs installation package storage directory
[root@localhost ~]# mkdir /usr/local/src/fastdfs
- Create TrackerServer information store directory for fastdfs
[root@localhost ~]# mkdir /home/dfs/tracker
- Create StorageServer information storage directory for fastdfs
[root@localhost ~]# mkdir /home/dfs/storage
- Create StorageServer file data storage directory for fastdfs
[root@localhost ~]# mkdir /home/dfs/storage/store
4.3 installation of core class library
libfastcommon is the basic library for FastDFS operations. Instead of using standard libraries, FastDFS encapsulates a set of libraries related to FastDFS.
- Enter the compressed package directory
[root@localhost ~]# cd /usr/local/src/fastdfs
- Unzip the installation package to the current directory
[root@localhost fastdfs]# unzip libfastcommon-1.0.43.zip -d /usr/local/src/fastdfs/
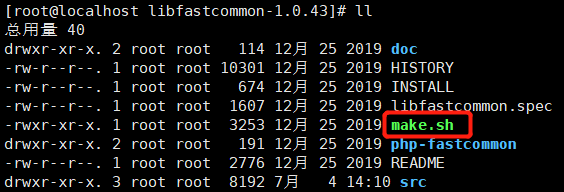
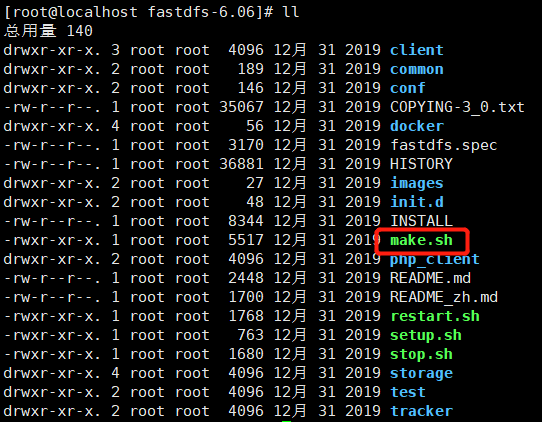
- Enter the extracted libfastcommon-1.0.43 directory and check the extracted directory. There is a make.sh file
[root@localhost fastdfs]# cd libfastcommon-1.0.43
- Enter the libfastcommon-1.0.43 directory to compile:
[root@localhost libfastcommon-1.0.43]# ./make.sh
- Install after compiling:
[root@localhost libfastcommon-1.0.43]# ./make.sh install
So far, the core class library installation is completed.
4.4 fastDFS installation
- Enter the compressed package directory
[root@localhost ~]# cd /usr/local/src/fastdfs
- Unzip the installation package to the fastdfs Directory:
[root@localhost fastdfs]# unzip fastdfs-6.06.zip -d /usr/local/src/fastdfs/
- Enter the unzipped fastdfs-6.06 directory and check the unzipped directory. There is a make.sh file
[root@localhost fastdfs]# cd fastdfs-6.06
- To compile:
[root@localhost fastdfs-6.06]# ./make.sh
- Install after compiling:
[root@localhost fastdfs-6.06]# ./make.sh install
After installation, the location of fastDFS main program is as follows:
- Executable: default /usr/bin
- Profiles: default /etc/fdfs
- Main program code: default /usr/bin
- Plug in group: default/usr/include/fastdfs
4.4.1 resource directory location
After installation, you can enter the corresponding resource location to check whether the installation is successful.
-
Service script location:
/In the directory of etc/init.d, there are script files FDFS stored and FDFS tracker

-
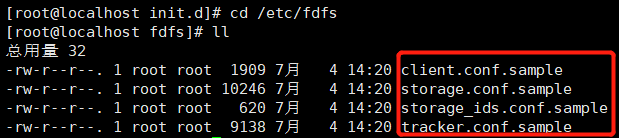
Profile location:
/In the etc/fdfs directory, there are four configuration file templates, which are
client.conf.sample: client configuration
storage.conf.sample: storage node configuration
storage_ids.conf.sample: configure this file if storage is identified by id instead of IP
tracker.conf.sample: tracker configuration
-
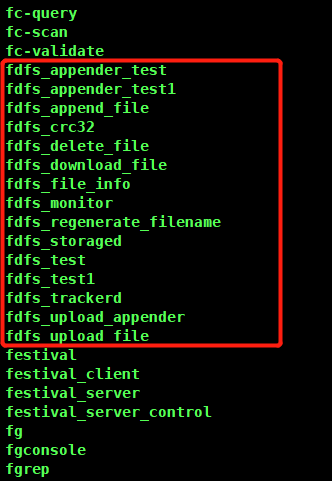
Built in command location:
/In the usr/bin directory, there are built-in commands for fastdfs.
4.5 fastdfs nginx module installation
Installing fastdfs nginx module enables files to be accessed directly in the form of IP + port + volume name + file name on the web page through http protocol.
- Enter the compressed package directory
[root@localhost ~]# cd /usr/local/src/fastdfs
- Extract to the current directory
[root@localhost fastdfs]# unzip fastdfs-nginx-module-1.22.zip -d /usr/local/src/fastdfs/
- Enter the fastdfs-nginx-module-1.22 directory
[root@localhost fastdfs]# cd fastdfs-nginx-module-1.22/src/
- Modify config configuration
[root@localhost src]# vim config
Configure the location of fastdfs module group (function library)
CORE_INCS="$CORE_INCS /usr/include/fastdfs /usr/include/fastcommon/
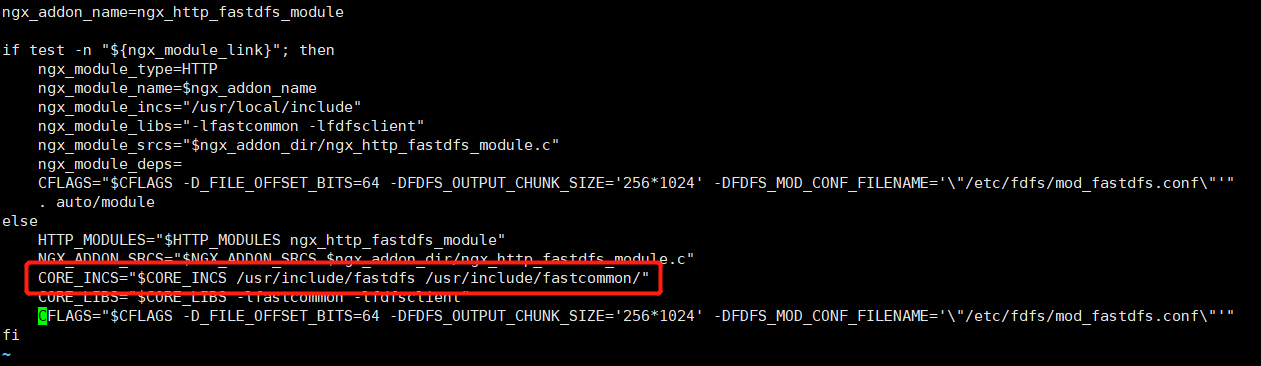
Save and exit.
4.6 nginx installation
- Enter the compressed package directory
[root@localhost ~]# cd /usr/local/src/fastdfs
- Extract to the current directory
[root@localhost fastdfs]# tar zxvf nginx-1.16.1.tar.gz -C /usr/local/src/fastdfs/
- Enter nginx-1.16.1 directory
[root@localhost fastdfs]# cd nginx-1.16.1/
- Add fastdfs nginx module to nginx
[root@localhost nginx-1.16.1]# ./configure --add-module=/usr/local/src/fastdfs/fastdfs-nginx-module-1.22/src/
- precompile
[root@localhost nginx-1.16.1]# make
- Compile and install
[root@localhost nginx-1.16.1]# make install
The nginx installation is now complete.
5. fastDFS configuration
Generally, TrackerServer tracking server and Storage server storage server are deployed on different machines. If the equipment conditions do not allow, one machine can also be used as a tracker and memory at the same time.
5.1 TrackerServer tracking server configuration
- Enter the configuration directory
[root@localhost ~]# cd /etc/fdfs
- Copy a tracker.conf as the TrackerServer configuration file, and the original tracker.conf.sample as a backup.
[root@localhost fdfs]# cp tracker.conf.sample tracker.conf
- Enter tracker.conf for configuration.
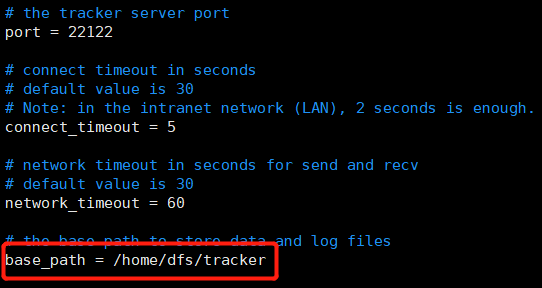
[root@localhost fdfs]# vim tracker.conf
base_path = /home/dfs/tracker
5.1.1 description of common configuration parameters of tracker
| Parameter name | explain | Default value | remarks |
|---|---|---|---|
| bind_addr | Bind IP | nothing | It is often used when a server has multiple IPS but only wants one IP to provide services. If it is not filled in, it means all (generally not filled in) |
| port | TrackerServer service port number | 22122 | |
| base_path | Stores all port and node information under the StorageServer volume | /home/yuqing/fastdfs | The root directory must exist and subdirectories will be created automatically |
| store_server | Select the scheduling policy when the storage server uploads | 0 | 0: polling mode 1: Sort by IP address and select the first server (the one with the smallest IP address) 2: Sort by priority. The upload priority is set by the storage server |
| store_path | Select which directory in the storage server to upload the scheduling policy | 0 | 0: in rotation mode, multiple directories store files in turn 2: Select the directory with the largest remaining space to store files |
| download_server | Which storage server is selected as the scheduling policy of the download server | 0 | 0: in polling mode, you can download any storage server of the current file 1: Use whichever storage server is the source |
5.2 StorageServer storage server configuration
- Enter the configuration directory
[root@localhost ~]# cd /etc/fdfs
- Copy a storage.conf as the StorageServer configuration file and the original storage.conf.sample as a backup.
[root@localhost fdfs]# cp storage.conf.sample storage.conf
- Enter storage.conf for configuration.
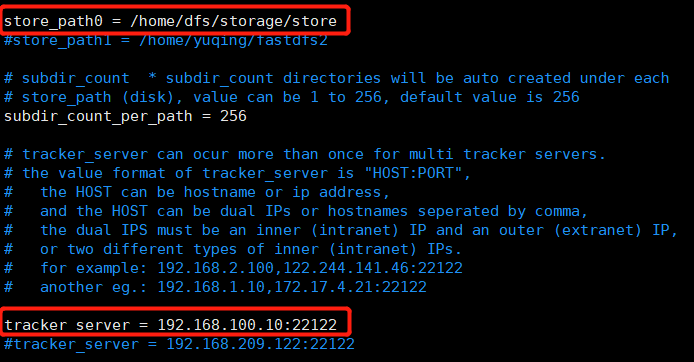
[root@localhost fdfs]# vim storage.conf
base_path = /home/dfs/storage
store_path0 = /home/dfs/storage/store
tracker_server = 192.168.X.X:22122 #IP and port of your TrackerServer service
http.server_port = 8080

5.2.1 description of common storage configuration parameters
| Parameter name | explain | Default value | remarks |
|---|---|---|---|
| group_name | Group (volume) name | group1 | |
| port | StorageServer service port number | 23000 | |
| base_path | Storage server data and log location | /home/yuqing/fastdfs | The root directory must exist and subdirectories will be created automatically |
| store_path0 | The directory location where the uploaded files are actually stored | /home/yuqing/fastdfs | |
| tracker_server | TrackerServer IP address and port of tracking server | 192.168.209.121:22122 192.168.209.122:22122 | TrackerServer can be configured with multiple trackerservers in a cluster or one TrackerServer in a single machine |
| http.server_port | http access file port | 8888 | Modify it according to the situation and keep it consistent with nginx |
5.3 fastdfs nginx module configuration
- Enter the src directory of fastdfs nginx module
[root@localhost src]# cd /usr/local/src/fastdfs/fastdfs-nginx-module-1.22/src
- Copy mod_fastdfs.conf file to / etc/fdfs directory
[root@localhost src]# cp mod_fastdfs.conf /etc/fdfs
- Enter the / etc/fdfs directory
[root@localhost src]# cd /etc/fdfs
- Modify mod_fastdfs.conf configuration
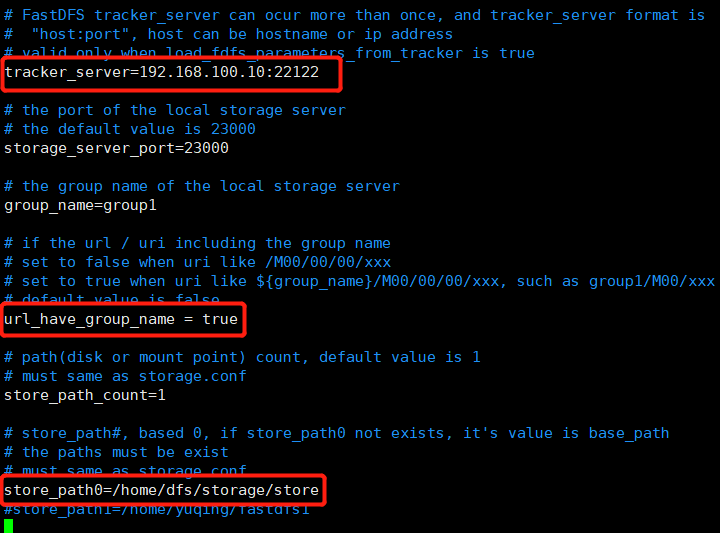
[root@localhost fdfs]# vim mod_fastdfs.conf
tracker_server=192.168.100.10:22122	#IP and port number of TrackerServer server
url_have_group_name = true	#Does the url contain the group name
store_path0=/home/dfs/storage/store	#File resource storage location
Save and exit.
5.3.1 description of common configuration parameters of fastdfs nginx module
| Parameter name | explain |
|---|---|
| tracker_server | IP and port number of TrackerServer server |
| storage_server_port | The port number of the StorageServer server |
| group_name | Group name |
| url_have_group_name | Does the url contain the group name |
| store_path0 | File resource storage location |
5.4 nginx configuration
- Configure nginx.config
[root@localhost ~]# vi /usr/local/nginx/conf/nginx.conf
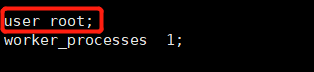
# Change user nobody to user root
user root;
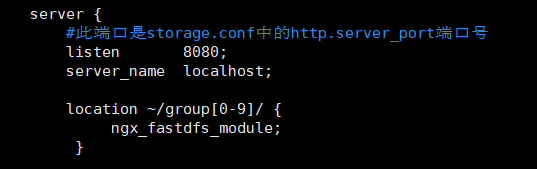
server {
#This port is http.server in storage.conf_ Port port number
listen 8080;
server_name localhost;
location ~/group[0-9]/ {
ngx_fastdfs_module;
}
}
- Copy http.conf and mime.types from fastdfs to / etc/fdfs/
[root@localhost ~]# cp /usr/local/src/fastdfs/fastdfs-6.06/conf/http.conf /etc/fdfs/
[root@localhost conf]# cp /usr/local/src/fastdfs/fastdfs-6.06/conf/mime.types /etc/fdfs/
- After modification, restart trackersriver, StorageServer and nginx
[root@localhost ~]# /etc/init.d/fdfs_trackerd restart
[root@localhost ~]# /etc/init.d/fdfs_storaged restart
[root@localhost ~]# /usr/local/nginx/sbin/nginx -s reload
Enter / usr/local/nginx/sbin directory and restart nginx
[root@localhost ~]# cd /usr/local/nginx/sbin
[root@localhost sbin]# ./nginx
6. fastDFS command
The service script is located in the * * / etc/init.d * * directory and enters the init.d directory
[root@localhost ~]# cd /etc/init.d
6.1 Tracker command
6.1.1 Tracker service startup
[root@localhost ~]# /etc/init.d/fdfs_trackerd start

6.1.2 viewing Tracker status
/Under / etc/init.d directory
[root@localhost init.d]# ./fdfs_trackerd status

6.1.3 viewing service progress
[root@localhost init.d]# ps -ef|grep fdfs

6.1.4 Tracker service stop
[root@localhost ~]# /etc/init.d/fdfs_trackerd stop

6.1.5 Tracker service restart
[root@localhost ~]# /etc/init.d/fdfs_trackerd restart

6.1.6 automatic startup of tracker
- Enter the / etc/rc.d/rc.local file.
[root@localhost init.d]# vim /etc/rc.d/rc.local
- Add the specified startup file location.
/etc/init.d/fdfs_trackerd start

6.2 Storage commands
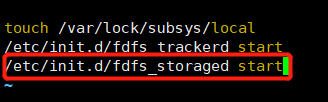
6.2.1 Storage service startup
[root@localhost ~]# /etc/init.d/fdfs_storaged start

6.2.2 viewing Storage status
/Under / etc/init.d directory
[root@localhost init.d]# ./fdfs_storaged status

6.2.3 viewing service progress
[root@localhost init.d]# ps -ef|grep fdfs

6.2.4 Storage service stop
[root@localhost ~]# /etc/init.d/fdfs_storaged stop

6.2.5 Storage service restart
[root@localhost ~]# /etc/init.d/fdfs_storaged restart

6.2.6 Storage startup
It is not recommended to set the Storage startup self startup. Since the Storage service is started, the Tracker service must be started first, otherwise an error will be reported. Generally, it can be started manually. If you can ensure the long-term operation of the Tracker service, you can also set the Storage self startup.
- Enter the / etc/rc.d/rc.local file.
[root@localhost init.d]# vim /etc/rc.d/rc.local
- Add the specified startup file location.
/etc/init.d/fdfs_storaged start
7. File upload
7.1 file upload process
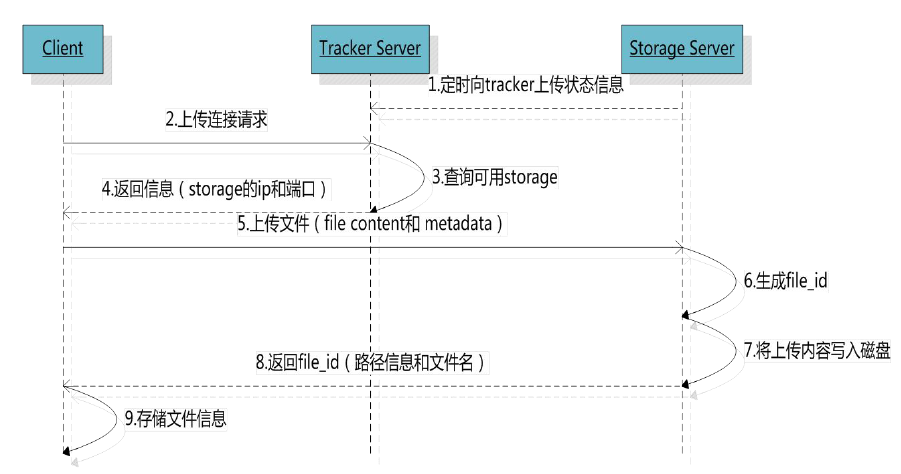
- The StorageServer storage server regularly sends its current status information to the TrackerServer tracking server.
- The client sends an upload file request to the TrackerServer.
- TrackerServer will schedule an optimal storage node according to the configured scheduling policy according to the current status of each storage server.
- TrackerServer returns the IP and port number of the selected optimal storage node to the client.
- The client calls fastDFS API to upload files to the corresponding storage node.
- StorageServer generates a unique file name for the file.
- StorageServer writes files to disk.
- Return the full path of the file (group name + virtual disk path + file name) to the client.
- The client stores the file path, such as in the database.
7.2 file upload via Java API
Use the java API provided by the fastdfs author.
7.2.1 pom introduces fastdfs client dependency
        <dependency>
            <groupId>net.oschina.zcx7878</groupId>
            <artifactId>fastdfs-client-java</artifactId>
            <version>1.27.0.0</version>
        </dependency>
7.2.2 creating fdfs_client.conf configuration file
Create files in the resource folder and configure fastdfs connection parameters
#connection timed out
connect_timeout=60
#Network Timeout
network_timeout=60
#Coding format
charset=UTF-8
#tracker port number
http.tracker_http_port=8080
#tracker server IP + port number
tracker_server=192.168.100.10:22122
7.2.3 package file information class
package com.fastdfs.fastdfspro.entity;

import lombok.AllArgsConstructor;
import lombok.Data;
import lombok.NoArgsConstructor;
import lombok.experimental.Accessors;

/**
 * Encapsulation class of file information
 */
@Data
@NoArgsConstructor
@AllArgsConstructor
@Accessors(chain = true)
public class FastdfsFile {
    //File name
    private String name;
    //Contents of the document
    private byte[] content;
    //File extension
    private String ext;
    //Summary of documents
    private String md5;
    //Document author
    private String author;

    public FastdfsFile(String name, byte[] content, String ext) {
        this.name = name;
        this.content = content;
        this.ext = ext;
    }
}
7.2.4 package file upload tools
package com.fastdfs.fastdfspro.utils;

import com.fastdfs.fastdfspro.entity.FastdfsFile;
import org.csource.common.NameValuePair;
import org.csource.fastdfs.ClientGlobal;
import org.csource.fastdfs.StorageClient;
import org.csource.fastdfs.TrackerClient;
import org.csource.fastdfs.TrackerServer;
import org.springframework.core.io.ClassPathResource;

/**
 * File upload tool class
 */
public class FastdfsUtil {

    //Information for initializing Tracker
    static{
        try {
            //Got fastdfs configuration file
            String filePath=new ClassPathResource("fdfs_client.conf").getPath();
            //Load the configuration information of the tracker
            ClientGlobal.init(filePath);
        } catch (Exception e) {
            e.printStackTrace();
        }
    }

    //Get TrackerServer object
    private static TrackerServer _getTrackerServer() throws Exception{
        return new TrackerClient().getConnection();
    }

    //Get StorageClient client
    private static StorageClient _getStorageClient() throws Exception{
        return new StorageClient(_getTrackerServer(),null);
    }

    /**
     * File upload
     * @param file Files to upload
     * @return Return the location where the file is saved (group name + virtual disk path + file name)
     */
    public static String[] upload(FastdfsFile file){
        //File information key value pair array
        NameValuePair[] meta_list=new NameValuePair[1];
        //Document author
        meta_list[0]=new NameValuePair(file.getAuthor());
        String[] uploadResults=null;
        try {
            StorageClient storageClient = _getStorageClient();
            //The three parameters are file content byte [], file extension and file information list
            uploadResults = storageClient.upload_file(file.getContent(),file.getExt(),meta_list);
        } catch (Exception e) {
            e.printStackTrace();
        }
        return uploadResults;
    }
}
7.2.5 file upload client call
package com.fastdfs.fastdfspro.controller;

import com.fastdfs.fastdfspro.entity.FastdfsFile;
import com.fastdfs.fastdfspro.utils.FastdfsUtil;
import org.springframework.util.StringUtils;
import org.springframework.web.bind.annotation.PostMapping;
import org.springframework.web.bind.annotation.RequestParam;
import org.springframework.web.bind.annotation.RestController;
import org.springframework.web.multipart.MultipartFile;

@RestController
public class FastdfsController {

    //File upload
    @PostMapping("/upload")
    public String upload(@RequestParam(value = "file") MultipartFile file) throws  Exception{
        FastdfsFile fastDFSFile=new FastdfsFile(
                file.getOriginalFilename(),
                file.getBytes(),
                StringUtils.getFilenameExtension(file.getOriginalFilename()));
        String[] upload = FastdfsUtil.upload(fastDFSFile);
        String url="http://192.168.100.10:8080/"+upload[0]+"/"+upload[1];
        return url;
    }
}
7.2.6 testing
Note: the virtual machine must turn off the firewall and cannot be used without it.
[root@localhost ~]# systemctl stop firewalld.service
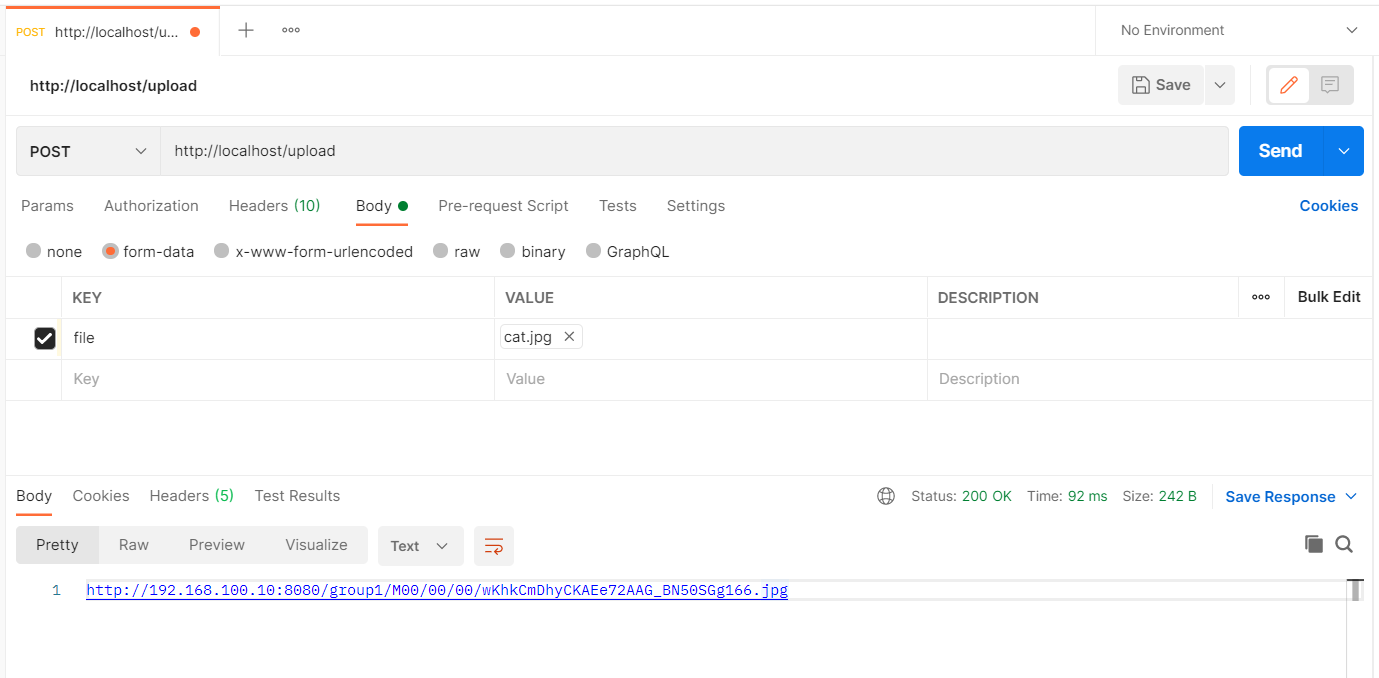
Enter the file storage path in the virtual machine to view. The upload is successful. The file with suffix - m is a backup file automatically generated.

Enter the url in the browser to access.