We receive all kinds of push messages every day, and the original Flutter push is mainly interactive with the original; Aurora is launched at this stage. Flutter JPush Although not as powerful as the original, but the daily needs can be met, small dishes try to integrate the Flutter version of JPush;
preparation in advance
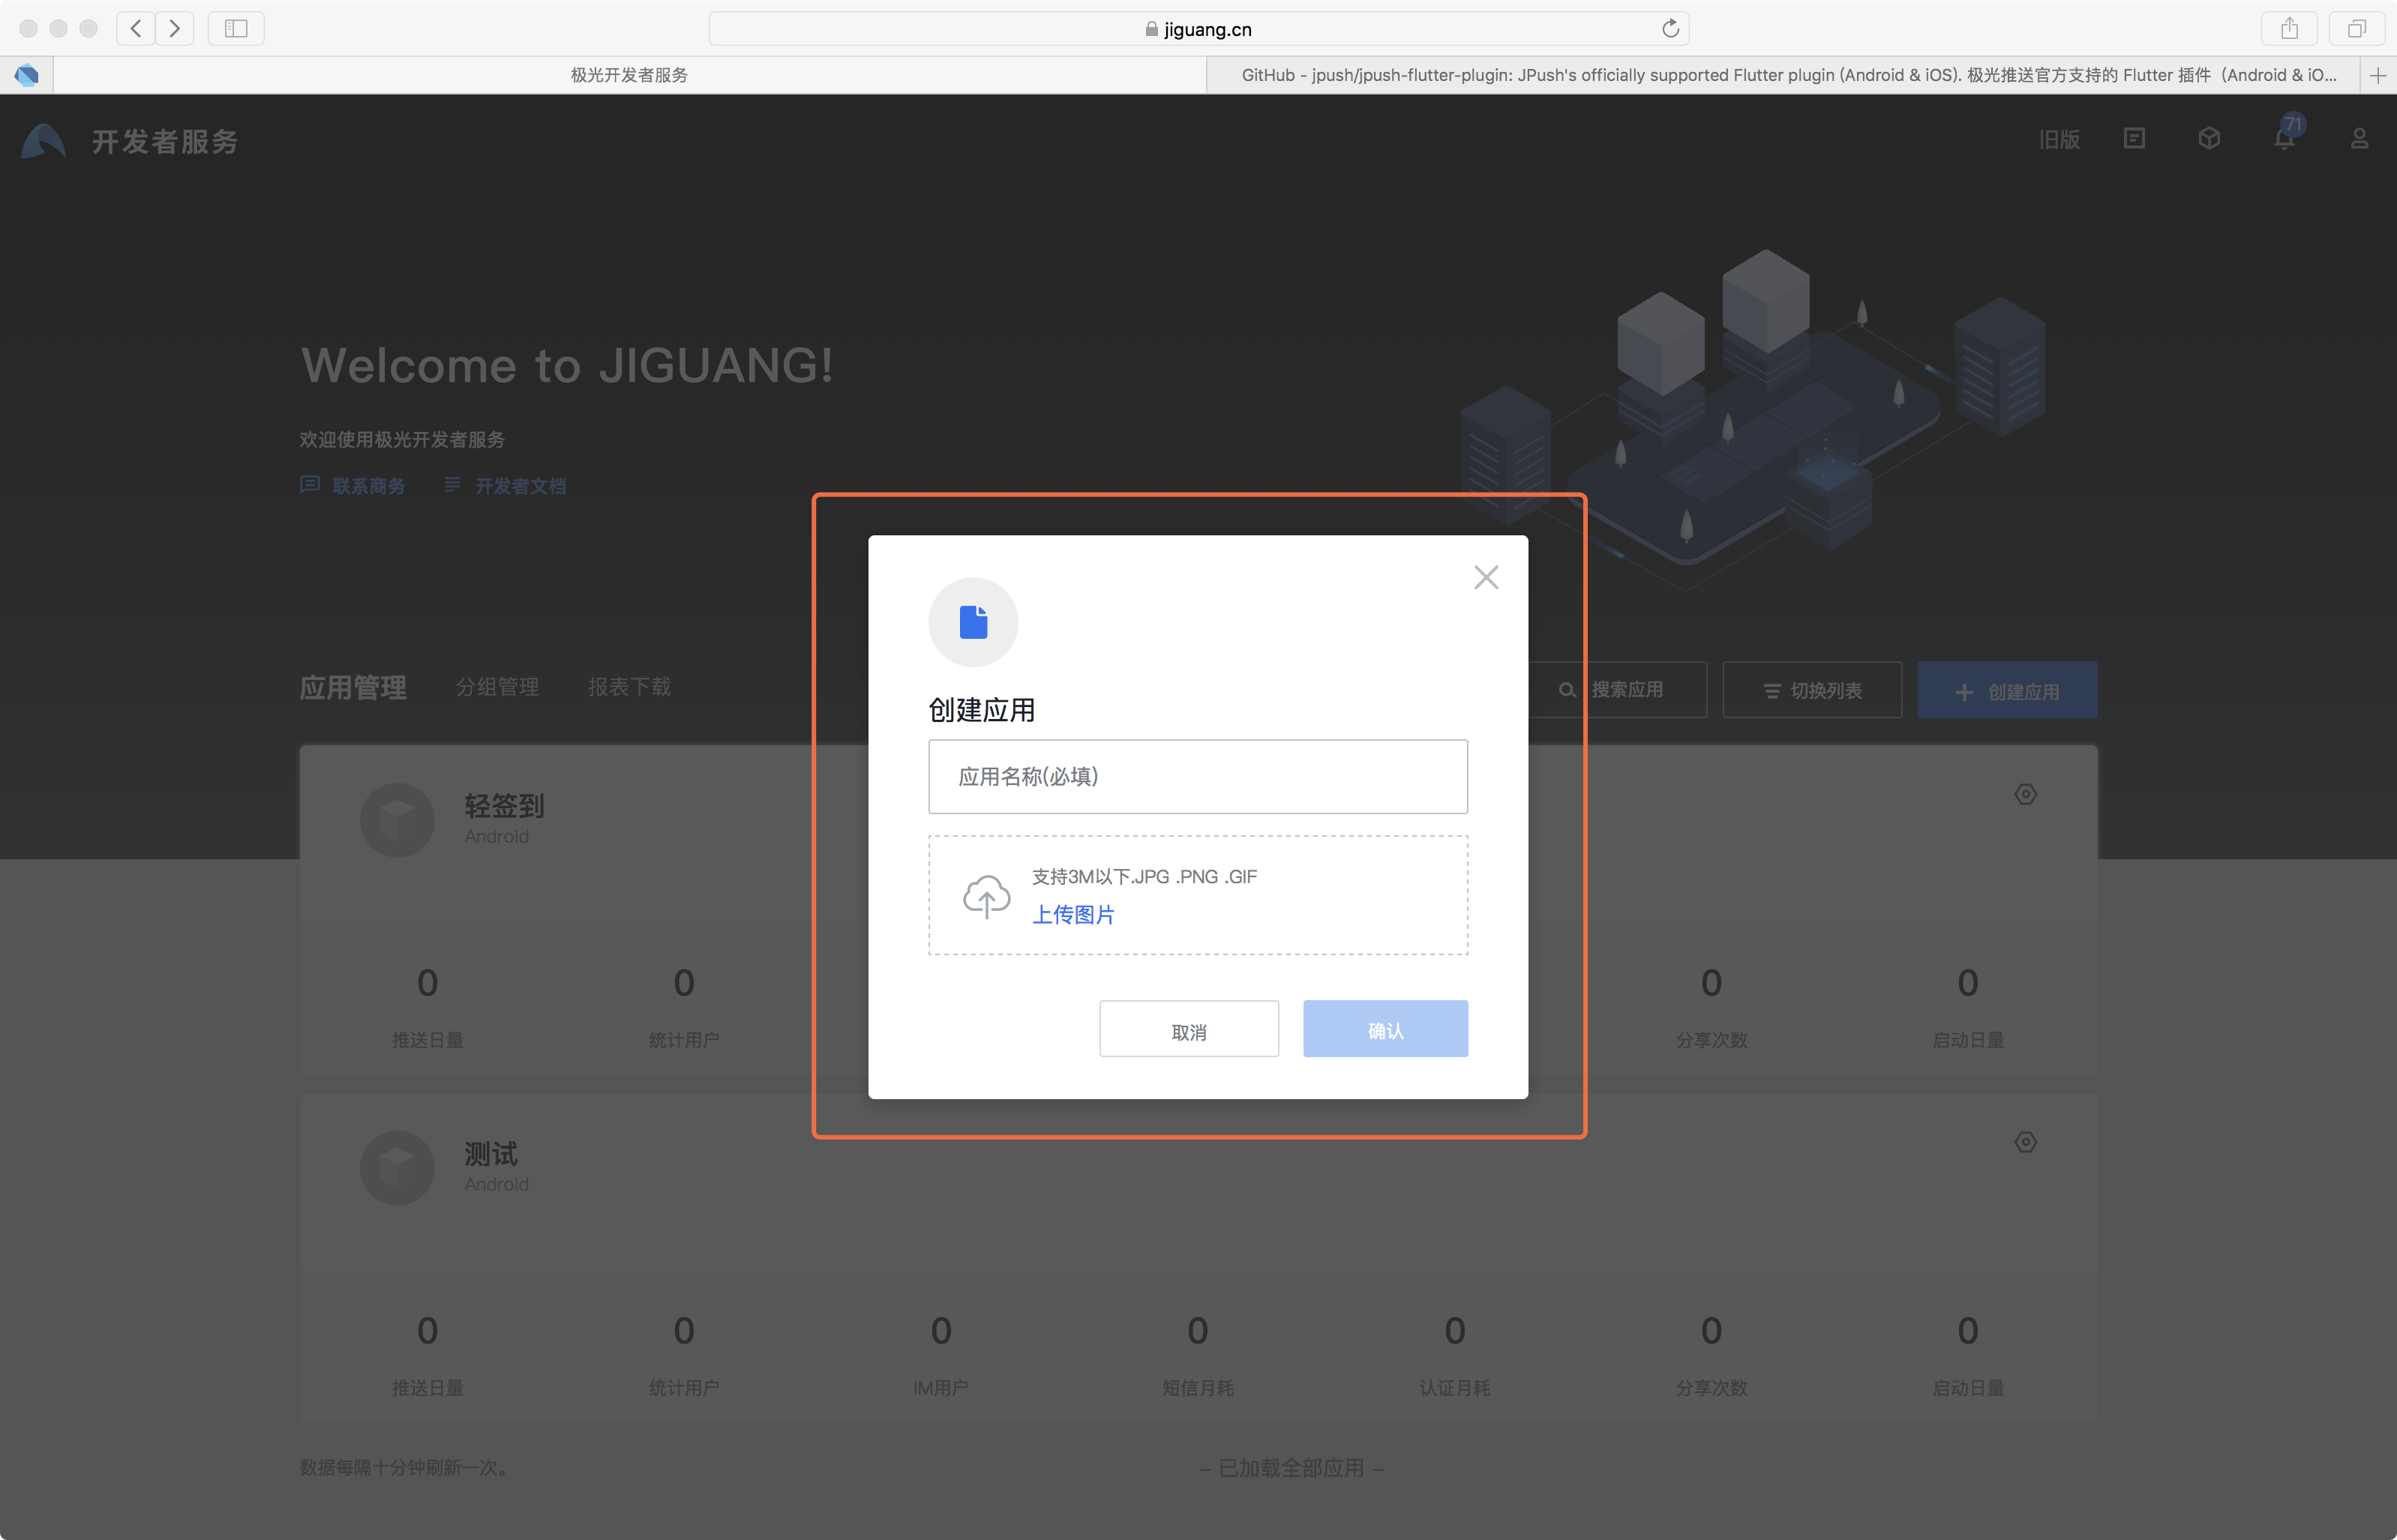
- stay Aurora Register the account in the background and create the application.
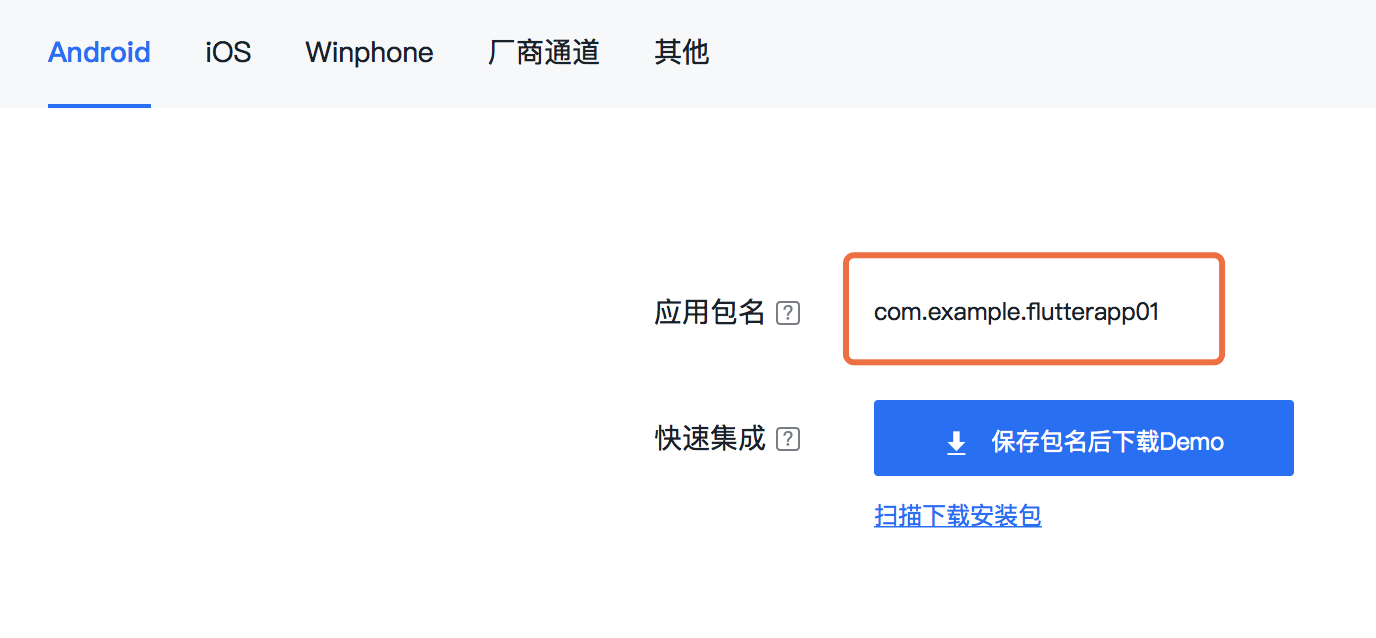
- Set the basic information of Android/iOS in Push Settings. Take Android as an example, pay attention to the application package named Application ID.
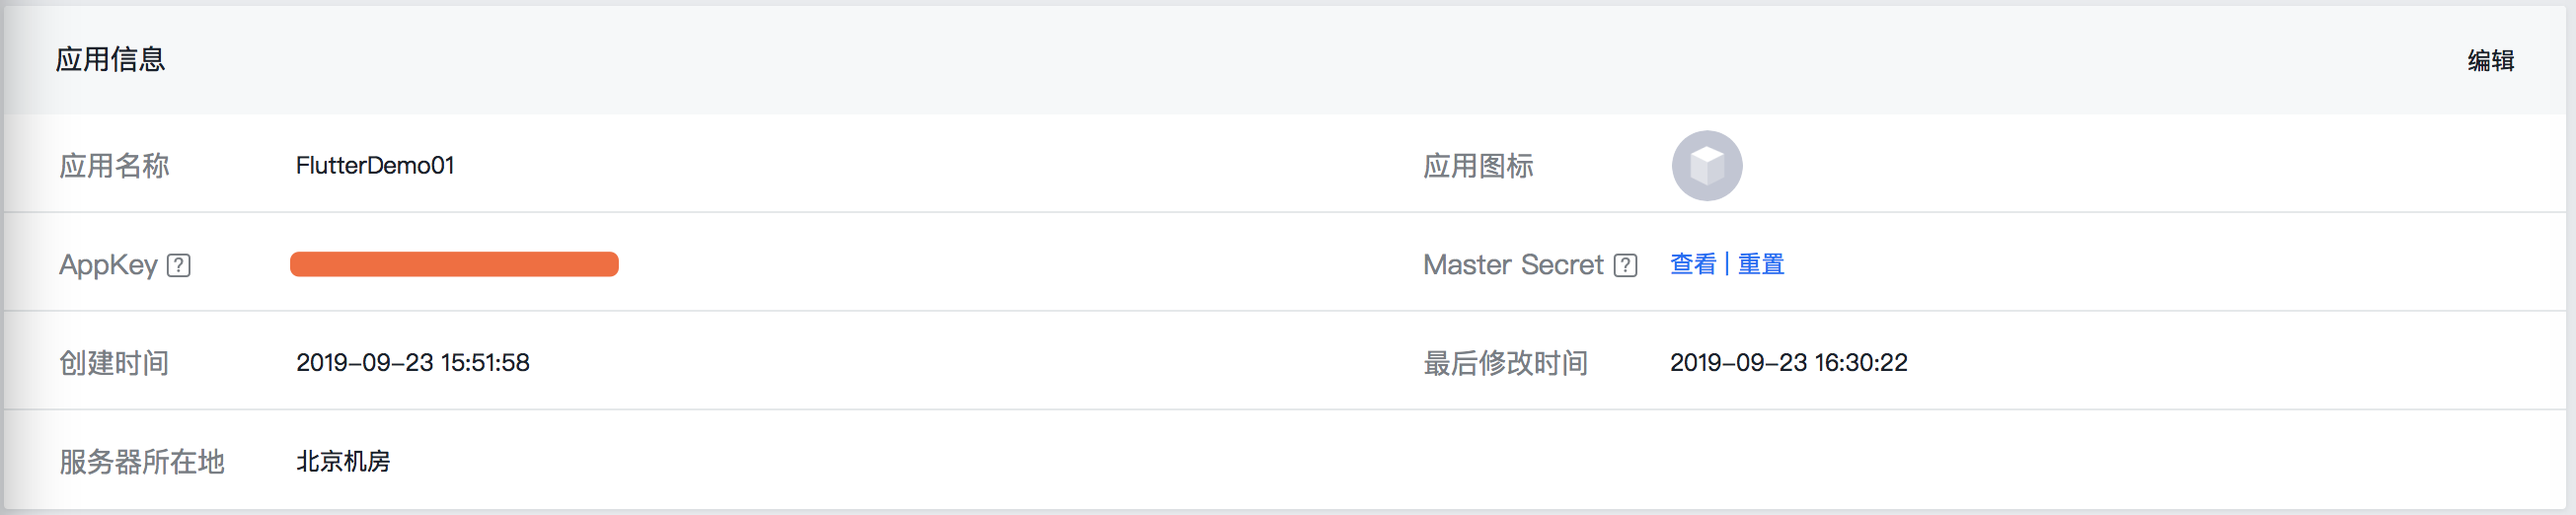
- Obtain key parameters such as AppKey in Application Information.
Mid-term integration
Android configuration
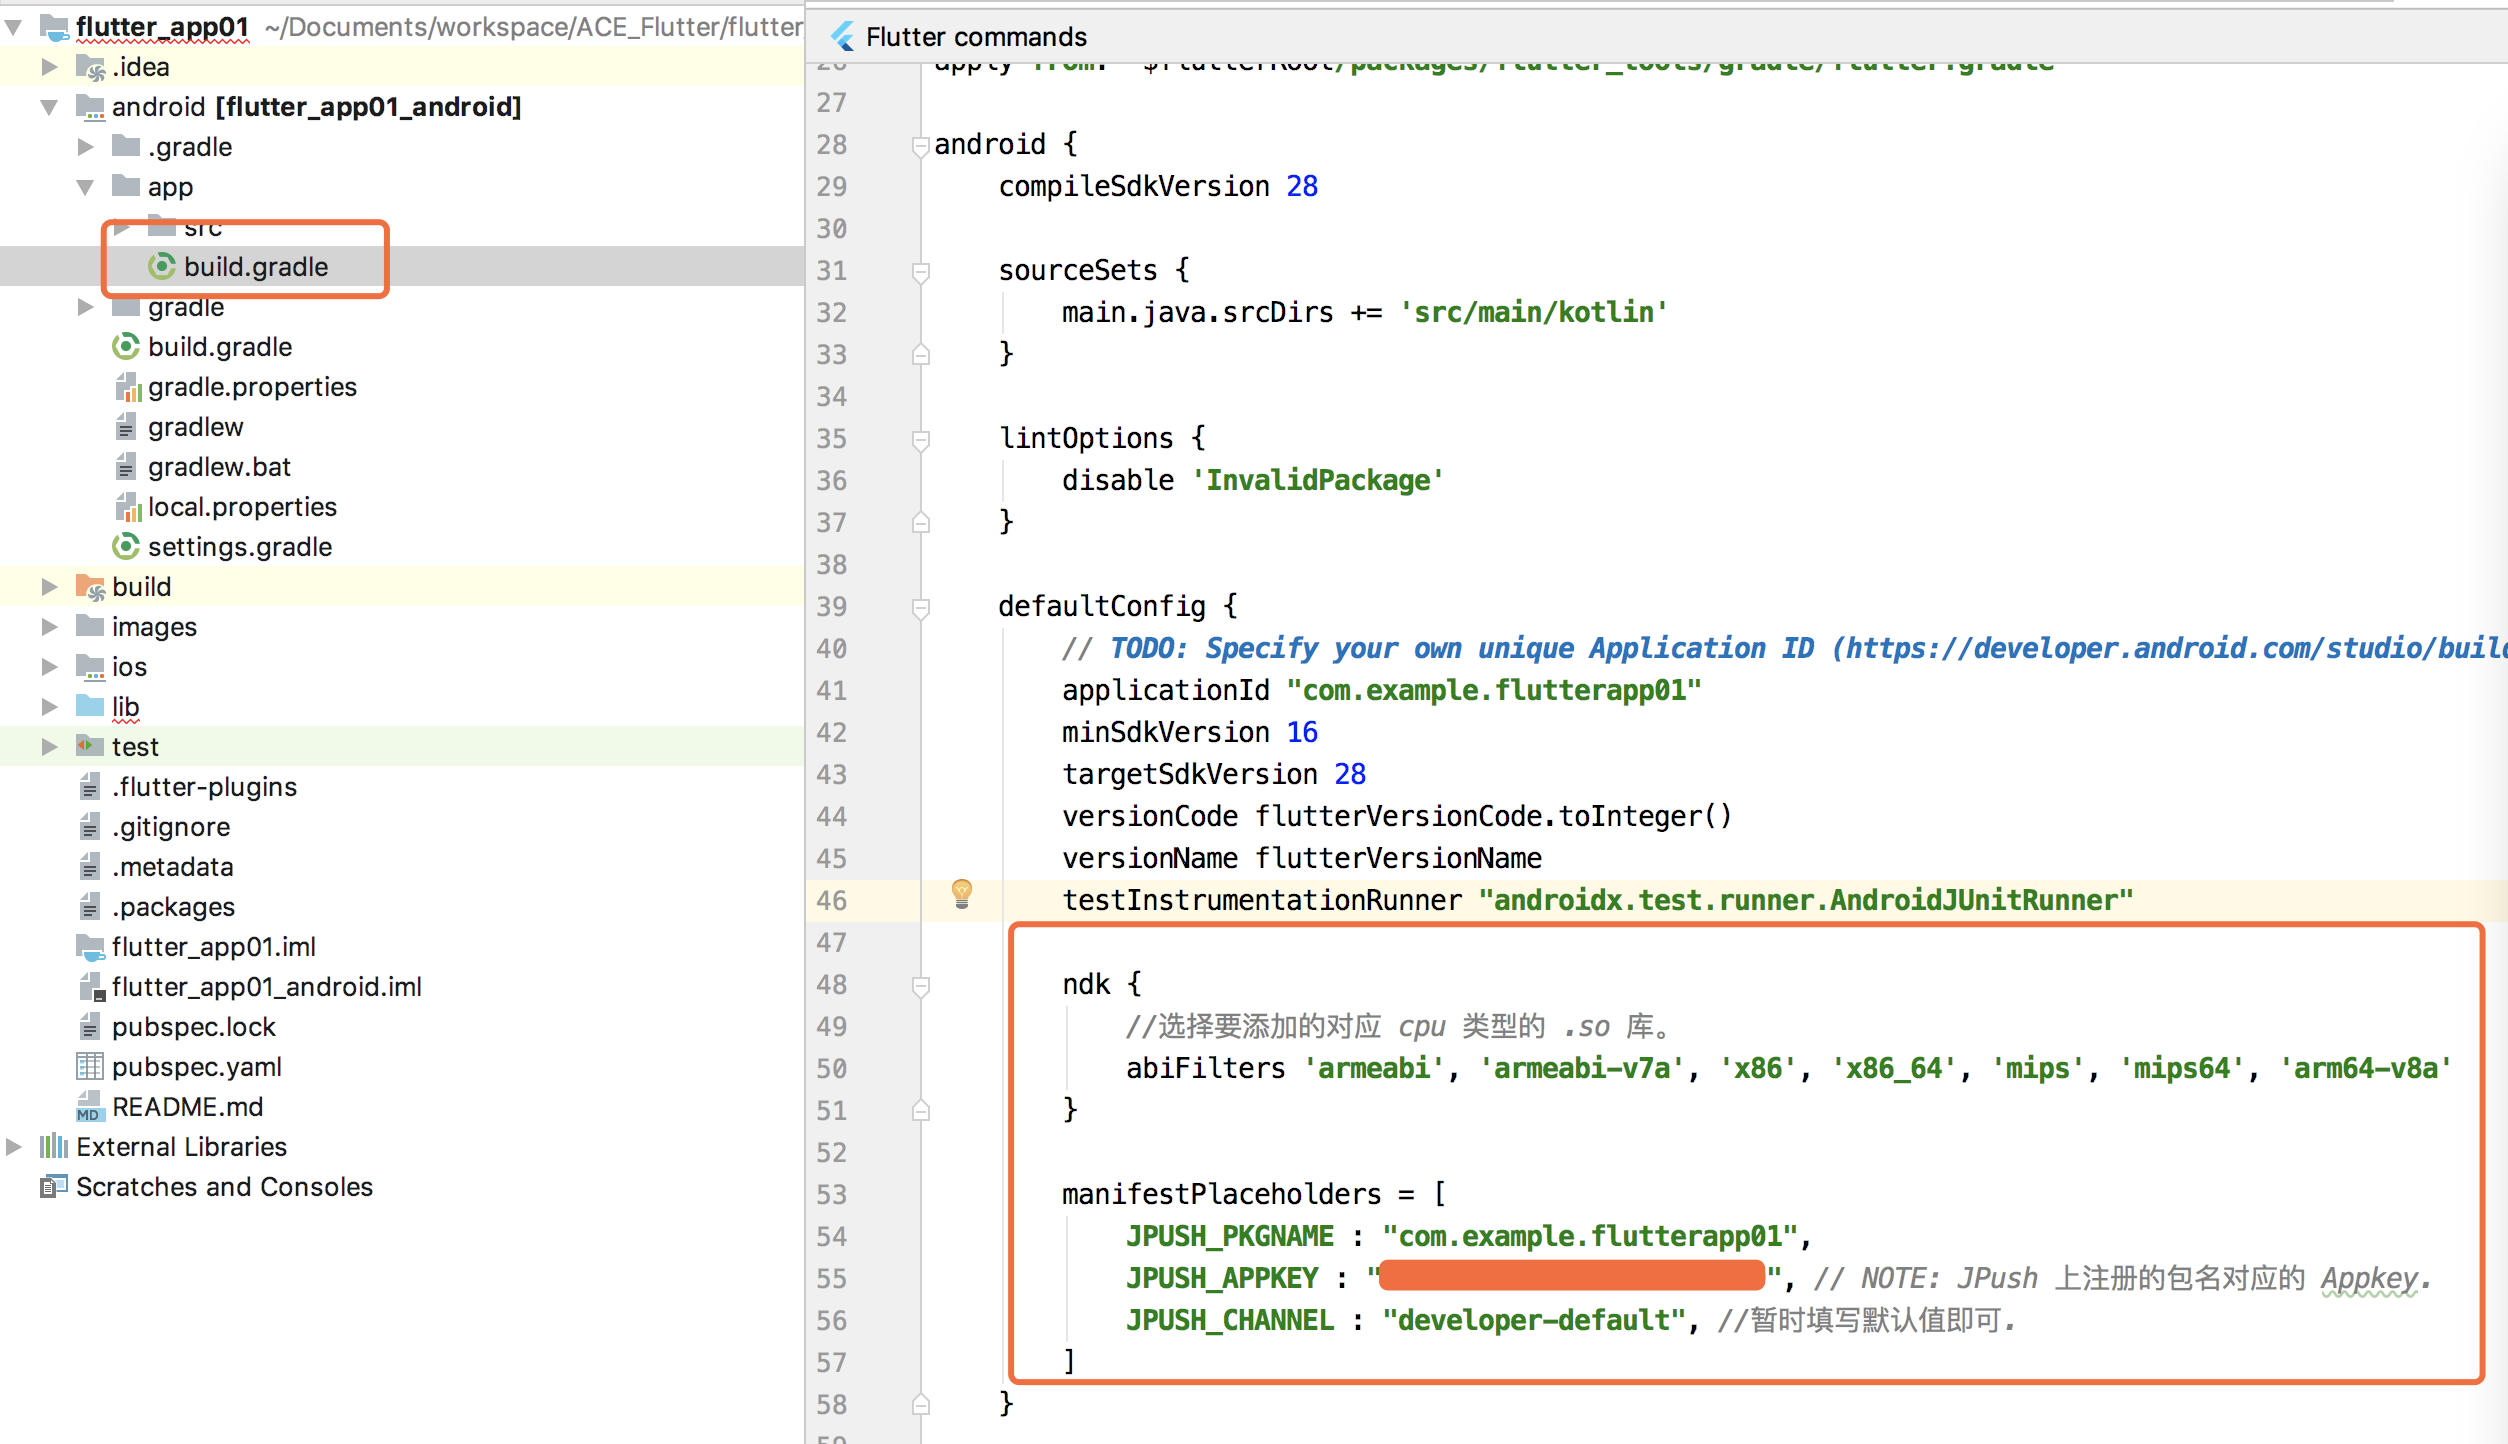
As with native access to JPush, configuration information needs to be added to Android Gradle.
defaultConfig {
    applicationId "com.example.flutterapp01"
    minSdkVersion 16
    targetSdkVersion 28
    versionCode flutterVersionCode.toInteger()
    versionName flutterVersionName
    testInstrumentationRunner "androidx.test.runner.AndroidJUnitRunner"

    ndk {
        //Select the. so library that corresponds to the type of cpu you want to add.
        abiFilters 'armeabi', 'armeabi-v7a', 'x86', 'x86_64', 'mips', 'mips64', 'arm64-v8a'
    }

    manifestPlaceholders = [
        JPUSH_PKGNAME : "com.example.flutterapp01",
        JPUSH_APPKEY : "AppKey", // NOTE: Appkey for the package name registered on JPush.
        JPUSH_CHANNEL : "developer-default", //Fill in the default value temporarily.
    ]
}
Flutter configuration
Add jpush_flutter: 0.1.0 and synchronize in engineering pubspec.yaml according to the usual plug-in access method.
dependencies:
  jpush_flutter: 0.1.0
API call
JPush's use is very simple, it's comprehensive in Demo, and the side dish only tries common methods.
1. initialization
In native development, almost all kinds of three-party plug-ins must be initialized in Application, and Flutter also needs to call JPush.setup to initialize. Channel can be customized, the dish does not get accurate information from the source code, personal understanding is similar to the high version of Android Channel channel;
After successful initialization, message push can be obtained, but it can not be processed for the time being.
final JPush _jPush = JPush();

@override
void initState() {
  super.initState();
  initPlatformState();
}

Future<void> initPlatformState() async {
  _jPush.setup(
    appKey: "Background acquisition AppKey",
    channel: "flutter_channel",
    production: false,
    debug: true,
  );
  if (!mounted) return;
}
2. RegistrationID
Each user has a Registration ID as the unique identifier for receiving messages, which facilitates push testing of single or multiple devices.
_jPush.getRegistrationID().then((rid) {
  setState(() {
    _result = "JPush RegistrationID Unique identification:\n $rid";
    _registID = rid;
  });
});
3. Local Notification
JPush provides a local push method, which can flexibly call to get local push messages; note that the id is int type, and the settings can not be too long;
// Source code analysis
const LocalNotification ({
    @required this.id,          // Notification id, which can be used to cancel notifications
    @required this.title,       // Notification heading
    @required this.content,     // Notification content
    @required this.fireTime,    // Notification trigger time (milliseconds)
    this.buildId,               // Notification Style: 1 is the base style, 2 is the custom style (you need to call'setStyleCustom'to set the custom style first)
    this.extra,                 // Additional information
    this.badge = 0,             // iOS: Application of Angle Scaling after Local Push Trigger
    this.soundName,             // iOS: Audio files specified for push
    this.subtitle               // iOS: Subtitle
}):

onTap: () {
  var fireDate = DateTime.fromMillisecondsSinceEpoch(DateTime.now().millisecondsSinceEpoch + 3000);
  var localNotification = LocalNotification(
      id: 000001,
      title: 'Local Push Local title',
      buildId: 1,
      content: 'Local Push Local content',
      fireTime: fireDate,
      extra: {"extra_key": "extra_value"});
  _jPush.sendLocalNotification(localNotification).then((res) {
    setState(() {
      _result = res;
    });
  });
}
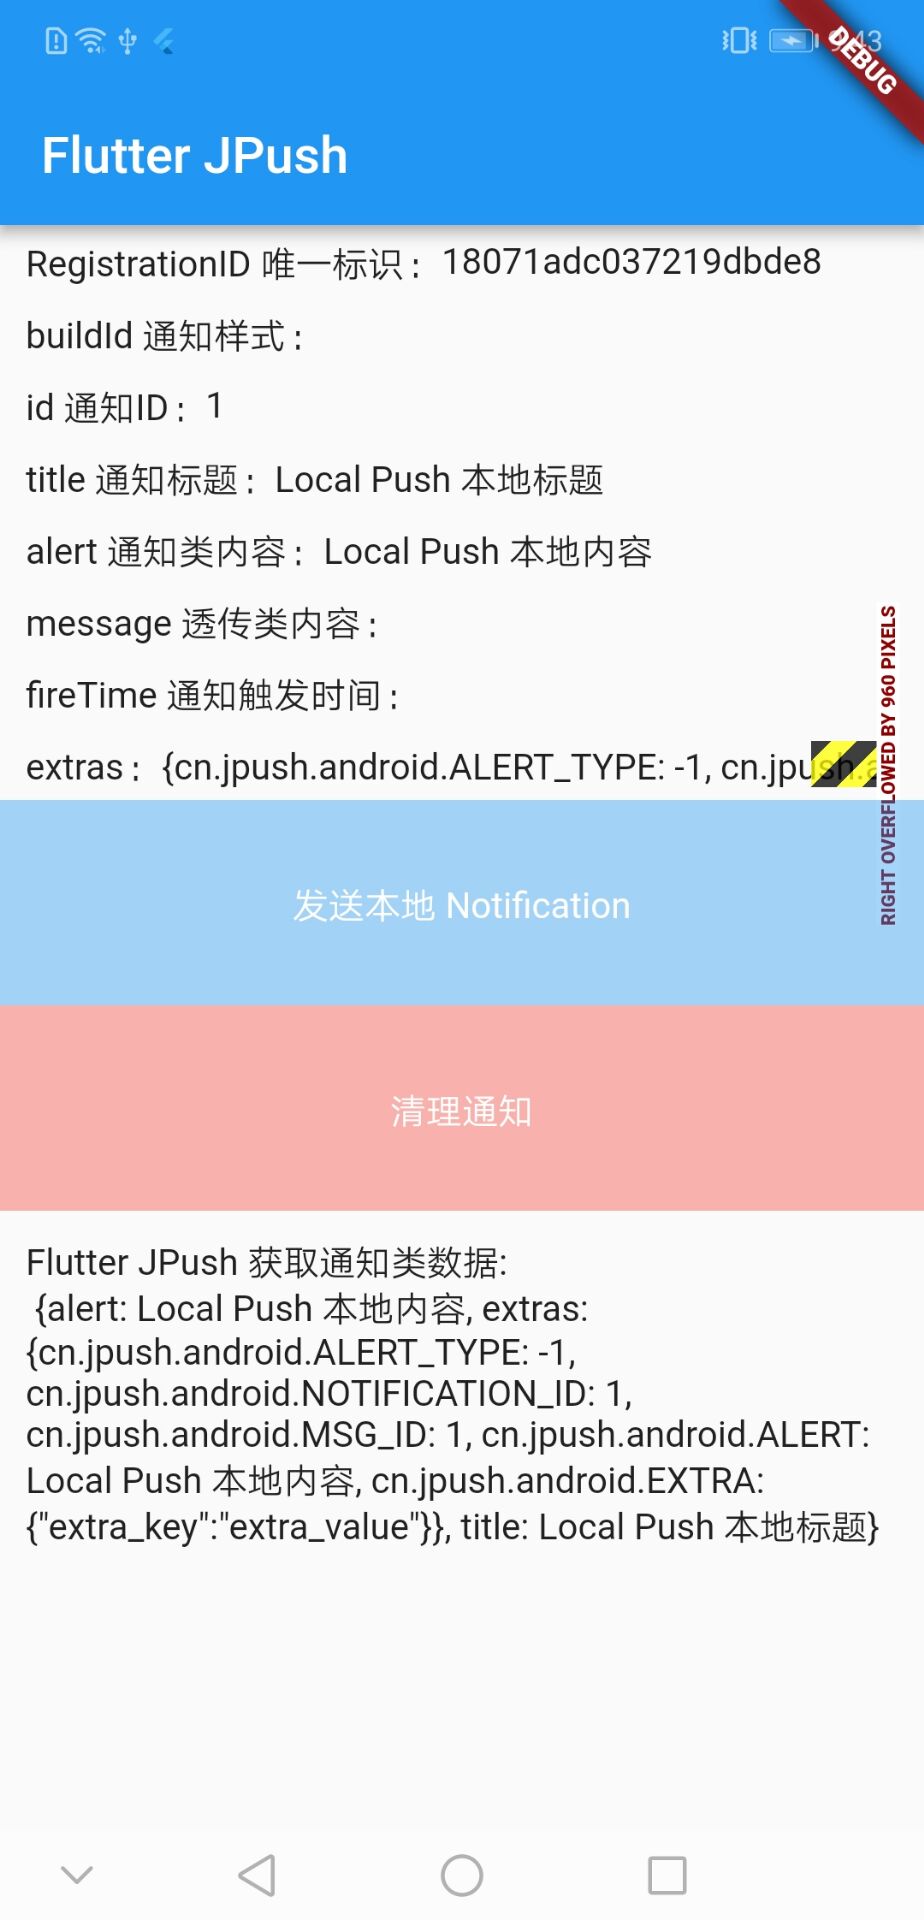
4. Notification message
When integrating native push into notification message and through message (custom message), the two kinds of push are slightly different; notification message can configure message title, message content and other information through Aurora background, and App directly calls the push channel to display in the notification bar after receiving it;
try {
  _jPush.addEventHandler(
    onReceiveNotification: (Map<String, dynamic> message) async {
      // Obtain notification data
      print('Flutter JPush Get notification class data:\n $message');
      setState(() {
        _result = 'Flutter JPush Get notification class data:\n $message';
        _message = message;
      });
    }
  );
} on PlatformException {
  platformVersion = 'Failed to get platform version.';
}
5. Pass-through news
Transmitted messages are sent through Aurora backstage configuration, mainly configuring notification content; App receives no direct call to push channel, after obtaining content, we can use it flexibly according to content, whether to display push messages or other operations; and the parameters of notification messages are different from those of transmissive messages.
try {
  _jPush.addEventHandler(
    onReceiveMessage: (Map<String, dynamic> message) async {
      // Obtaining Pass-through Data
      print('Flutter JPush Getting Pass-through Class Data:\n $message');
      setState(() {
        _result = 'Flutter JPush Getting Pass-through Class Data:\n $message';
        _message = message;
      });
    }
  );
} on PlatformException {
  platformVersion = 'Failed to get platform version.';
}
6. Push Click Monitor
After getting the push, it is doomed to have a click operation. JPush also provides monitoring methods, including notification type messages and local push messages.
try {
  _jPush.addEventHandler(
    onOpenNotification: (Map<String, dynamic> message) async {
      // Click Notification Information
      print('Flutter JPush Click on the notification message:\n $message');
      setState(() {
        _result = 'Flutter JPush Click on the notification message:\n $message';
        _message = message;
      });
    }
  );
} on PlatformException {
  platformVersion = 'Failed to get platform version.';
}
7. Empty the Notice Bar
If the user does not click on the push notification, the native Android can clear the notification through Notification Manager. cancel (), and Flutter also provides the method of emptying the notification bar; however, the small dish test can only empty the notification push message, and the local notification message can not be emptied.
Future clearAllNotifications() async {
  await _channel.invokeMethod('clearAllNotifications');
}

_jPush.clearAllNotifications();
Post test
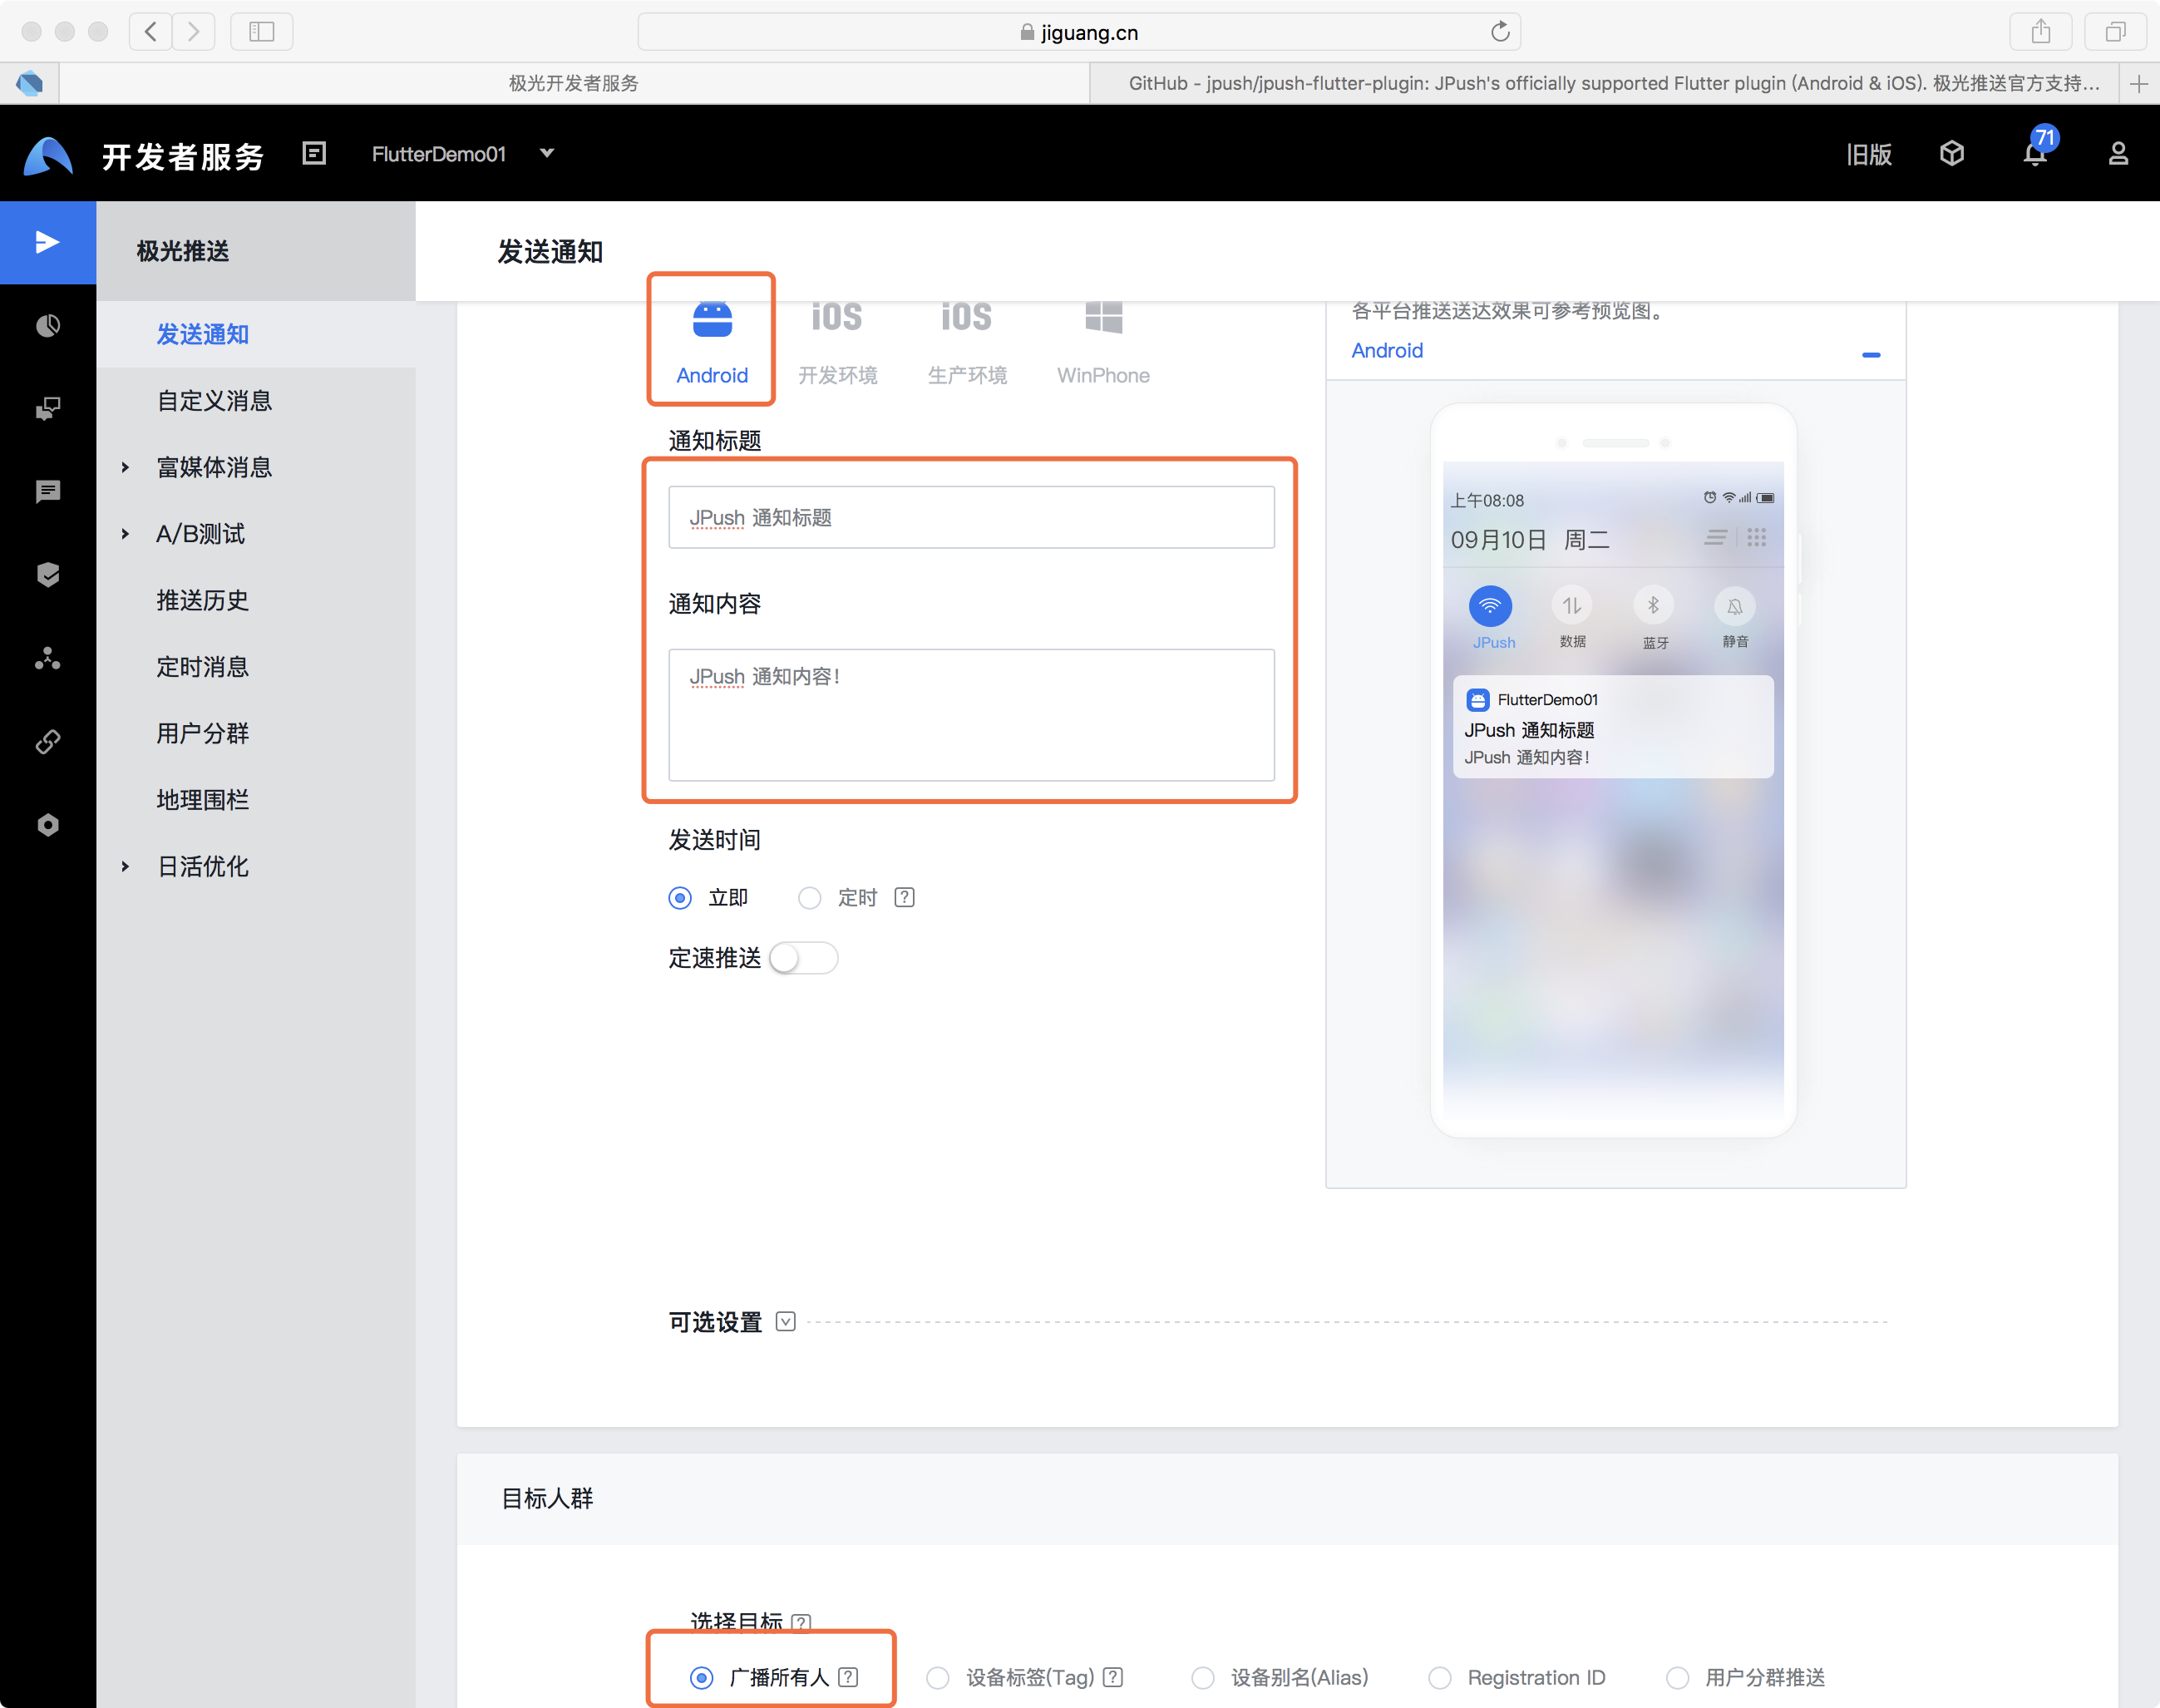
1. Notification message
- Edit the basic information of target platform, notification title, notification content, sending time and target selection according to the requirement in Aurora background.
-
App receives messages and displays push messages with the following parameters:
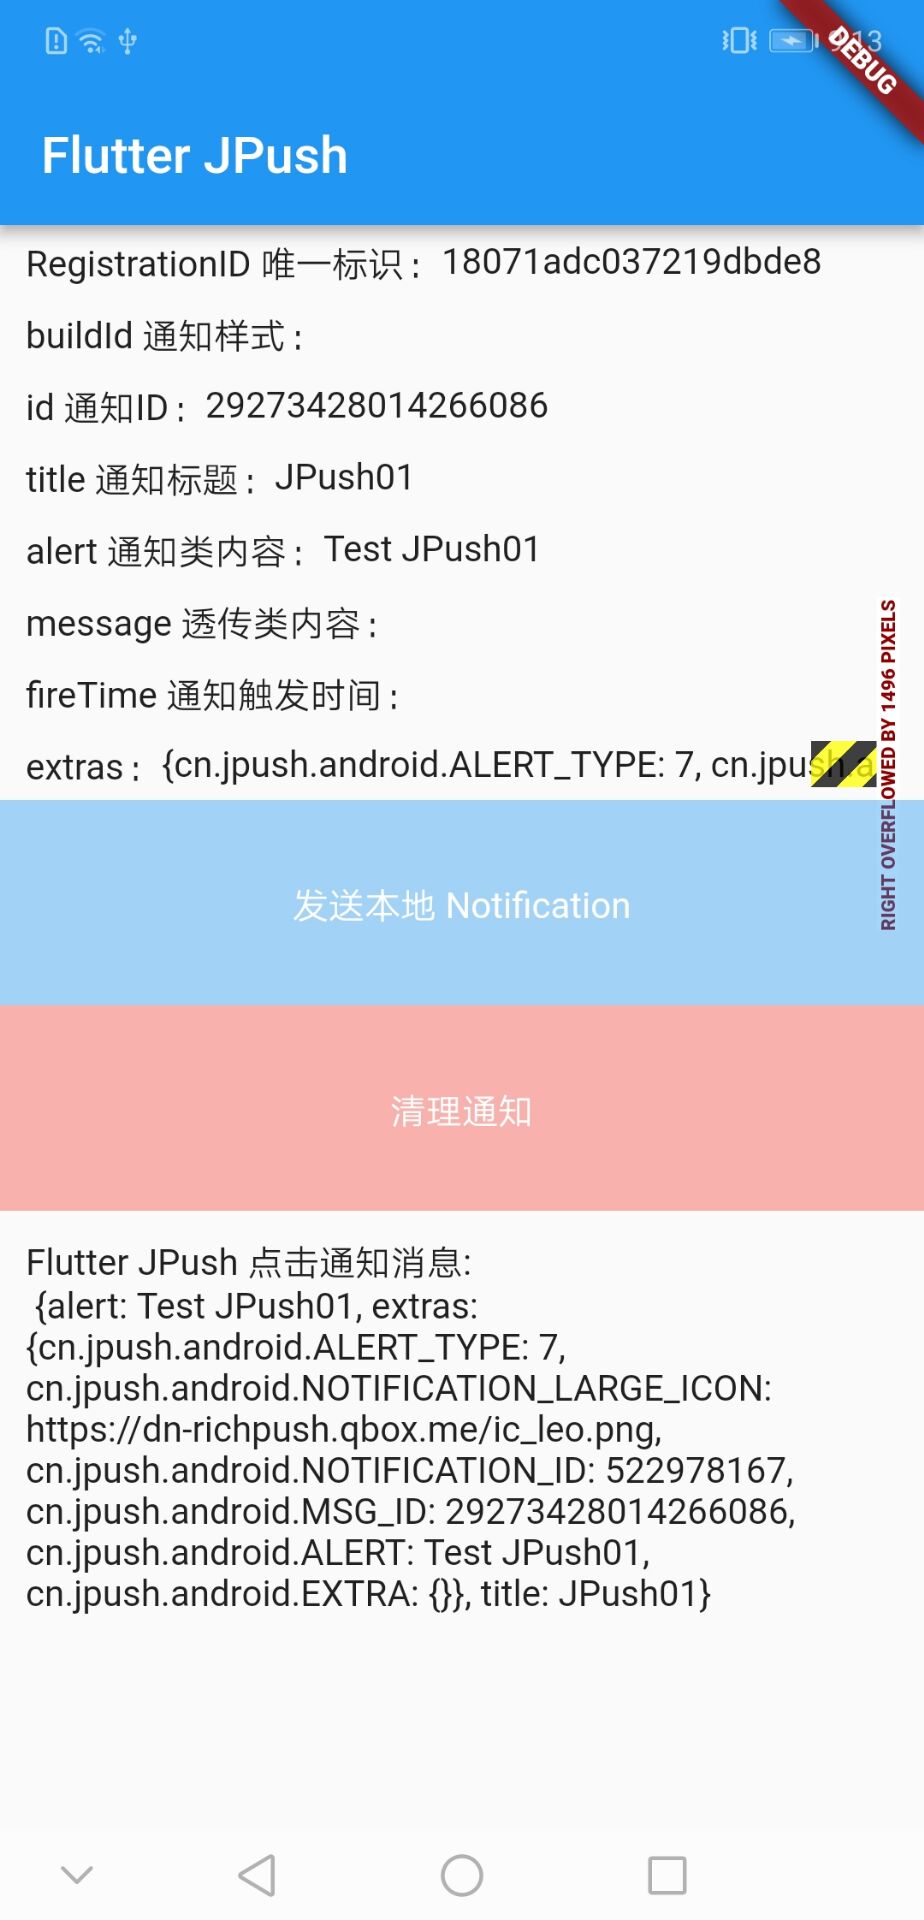
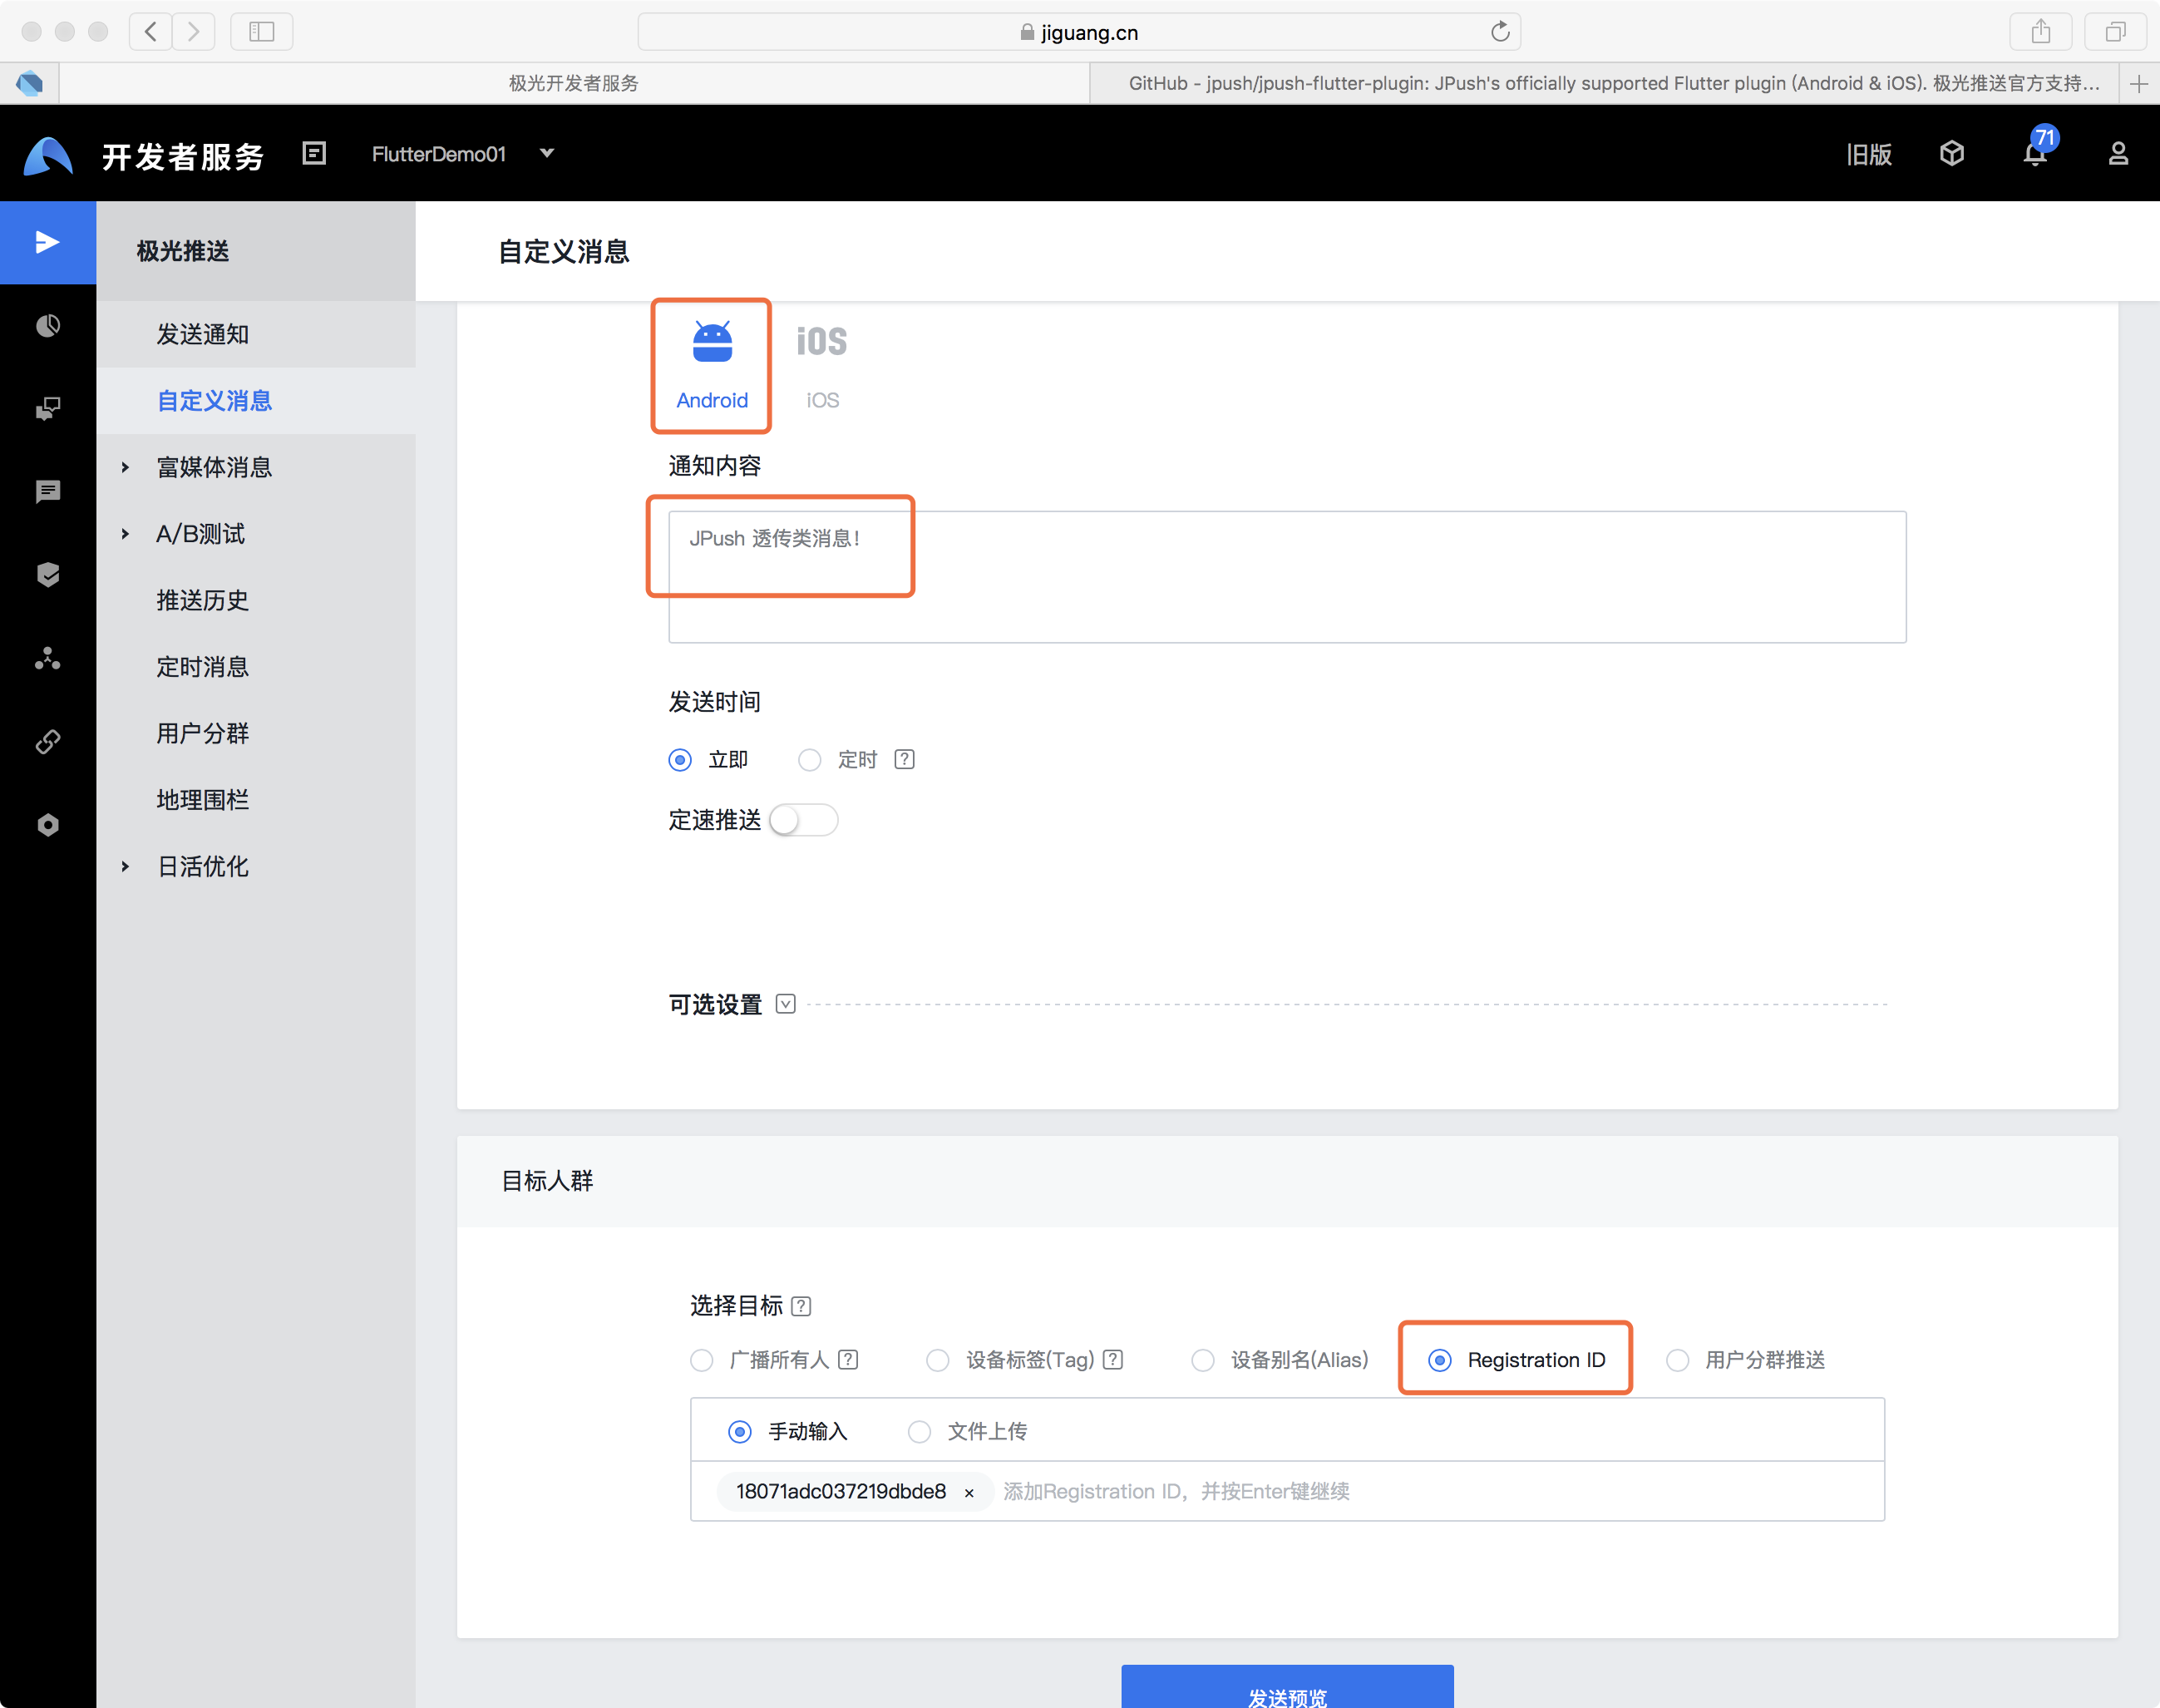
2. Pass-through message
- In Aurora Background [Custom Message], basic information such as target platform, notification content, sending time and target selection is edited as required, and Registration ID is the only identification obtained during testing.
- App receives messages without displaying push messages and calls local notifications if necessary; the parameters are as follows:
onOpenNotification: (Map<String, dynamic> message) async {
  setState(() {
    _result = 'Flutter JPush Click on the notification message:\n $message';
    _message = message;
    Map<String, dynamic> message2 = convert.jsonDecode(_message['extras']['cn.jpush.android.EXTRA']);
    if (message2['type'] == "1") {
      Toast.show('Custom notification message!', context, duration: Toast.LENGTH_SHORT, gravity: Toast.BOTTOM);
    }
  });
}

onReceiveMessage: (Map<String, dynamic> message) async {
  setState(() {
    _result = 'Flutter JPush Getting Pass-through Class Data:\n $message';
    _message = message;
    Map<String, dynamic> message2 = convert.jsonDecode(_message['message']);
    var fireDate = DateTime.fromMillisecondsSinceEpoch(DateTime.now().millisecondsSinceEpoch + 2000);
    var localNotification = LocalNotification(
        id: message2['id'],
        title: message2['title'],
        buildId: 1,
        content: message2['context'],
        fireTime: fireDate,
        extra: {"type": message2['type']});
    _jPush.sendLocalNotification(localNotification).then((res) {
      setState(() { _result = res; });
    });
  });
}

The difference between Flutter's Aurora Push and Android's original version is that most of the configurations have moved to the Aurora Background, including icon, page processing, notification level, etc. The dish only tries to push and process basic messages, but there are still many details to be carefully studied. If you have problems, please give more guidance!
Source: Ace Junior Monk