If you need to reproduce, please indicate the source: Flutter Learning Notes (29) -- How Flutter Communicates with native
Foreword: When we develop Flutter project, we will inevitably encounter the need to call native api or other situations. At this time, we need to deal with the communication problem between Flutter and native. There are three common communication modes between Flutter and native.
1. Method Channel: The Flutter side sends notifications to the native side, usually used to call a method of native.
2. Event Channel: Used for data stream communication, it has the function of monitoring, such as pushing directly to the Flutter terminal after the change of power.
3. Basic Message Channel: Data used to pass strings or semi-structured objects.
Next, take a look at the use of each mode of communication!
-
MethodChannel
First, let's talk about the logic idea as a whole, so that we can understand more easily. If we want to realize the communication between Flutter and native, we first need to establish a communication channel and match it through a channel identifier. After matching, the Flutter side initiates a request through invokeMethod invocation method, and the Native side matches the key of the request through onMethodCall. Processing the logic in the corresponding case!!! Overall, I feel a little EventBus, like an event bus...
Step 1: Implement Plugin-native end of communication plug-in
Because a project may require a lot of communication between Flutter and native, I encapsulate the test plug-in into a class and register with onCreate in MainActivity.
package com.example.flutter_demo;

import android.content.Context;

import io.flutter.plugin.common.MethodCall;
import io.flutter.plugin.common.MethodChannel;
import io.flutter.plugin.common.PluginRegistry;

public class TestPlugin implements MethodChannel.MethodCallHandler {
    public static String CHANNELNAME = "channel_name";//The unique identification of each communication channel is unique in the whole project!!!
    private static MethodChannel methodChannel;
    private Context context;

    public TestPlugin(Context context) {
        this.context = context;
    }

    public static void registerWith(PluginRegistry.Registrar registrar){
        methodChannel = new MethodChannel(registrar.messenger(),CHANNELNAME);
        TestPlugin instance = new TestPlugin(registrar.activity());
        methodChannel.setMethodCallHandler(instance);
    }

    @Override
    public void onMethodCall(MethodCall methodCall, MethodChannel.Result result) {
        if (methodCall.method.equals("method_key")){
            result.success("what is up man???");
        }
    }
}
Note: CHANNELNAME - > As mentioned above, because there will be a lot of communication in the project, so the Channel we defined must be the only one!!!!
TestPlugin implements MethodChannel.MethodCallHandler and defines an exposed registration method registerWith, because we need to register in MainActivity to initialize the MethodChannel in the registerWith method.
Next, let's look at the onMethodCall method, which is called when Flutter initiates a request. There are two parameters in the method, a methodCall and a result. Let's talk about these two parameters separately:
methodCall: Information about the current request, such as the key that matches the request
Result: There are three methods for returning data to Flutter: result.success (successful call), result.erro (failed call), result.notImplemented (method not implemented call)
Step 2: Register the Plugin-native end of the communication plug-in
package com.example.flutter_demo;

import android.os.Bundle;
import io.flutter.app.FlutterActivity;
import io.flutter.plugins.GeneratedPluginRegistrant;

public class MainActivity extends FlutterActivity {
  @Override
  protected void onCreate(Bundle savedInstanceState) {
    super.onCreate(savedInstanceState);
    GeneratedPluginRegistrant.registerWith(this);
    TestPlugin.registerWith(this.registrarFor(TestPlugin.CHANNELNAME));
  }
}
Registering this piece, I feel, serves as a bridge between the plug-in and the CHANNEL defined in Flutter.
Step 3: Initiate a communication request within Flutter - the flutter side
import 'package:flutter/material.dart';
import 'package:flutter/services.dart';

void main() => runApp(MyApp());

class MyApp extends StatefulWidget{
  @override
  State<StatefulWidget> createState() {
    // TODO: implement createState
    return new MyAppState();
  }

}

class MyAppState extends State<MyApp> {
  var _textContent = 'welcome to flutter word';

  Future<Null> _changeTextContent() async{
    //channel_name The unique identification of each communication channel is unique in the whole project!!!
    const platfom = const MethodChannel('channel_name');
    try {
      //method_key Is plug-in TestPlugin in onMethodCall Callback matching key
      String resultValue = await platfom.invokeMethod('method_key');
      setState(() {
        _textContent = resultValue;
      });
    }on PlatformException catch (e){
      print(e.toString());
    }
  }

  @override
  Widget build(BuildContext context) {
    // TODO: implement build
    return new MaterialApp(
      theme: new ThemeData(
        primaryColor: Colors.white,
      ),
      debugShowCheckedModeBanner: false,
      title: 'demo',
      home: new Scaffold(
        appBar: new AppBar(
          title: new Text('Demo'),
          leading: Icon(Icons.menu,size: 30,),
          actions: <Widget>[
            Icon(Icons.search,size: 30,)
          ],
        ),
        body: new Center(
          child: new Text(_textContent),
        ),
        floatingActionButton: new FloatingActionButton(onPressed: _changeTextContent,child: new Icon(Icons.adjust),),
      ),
    );
  }
}
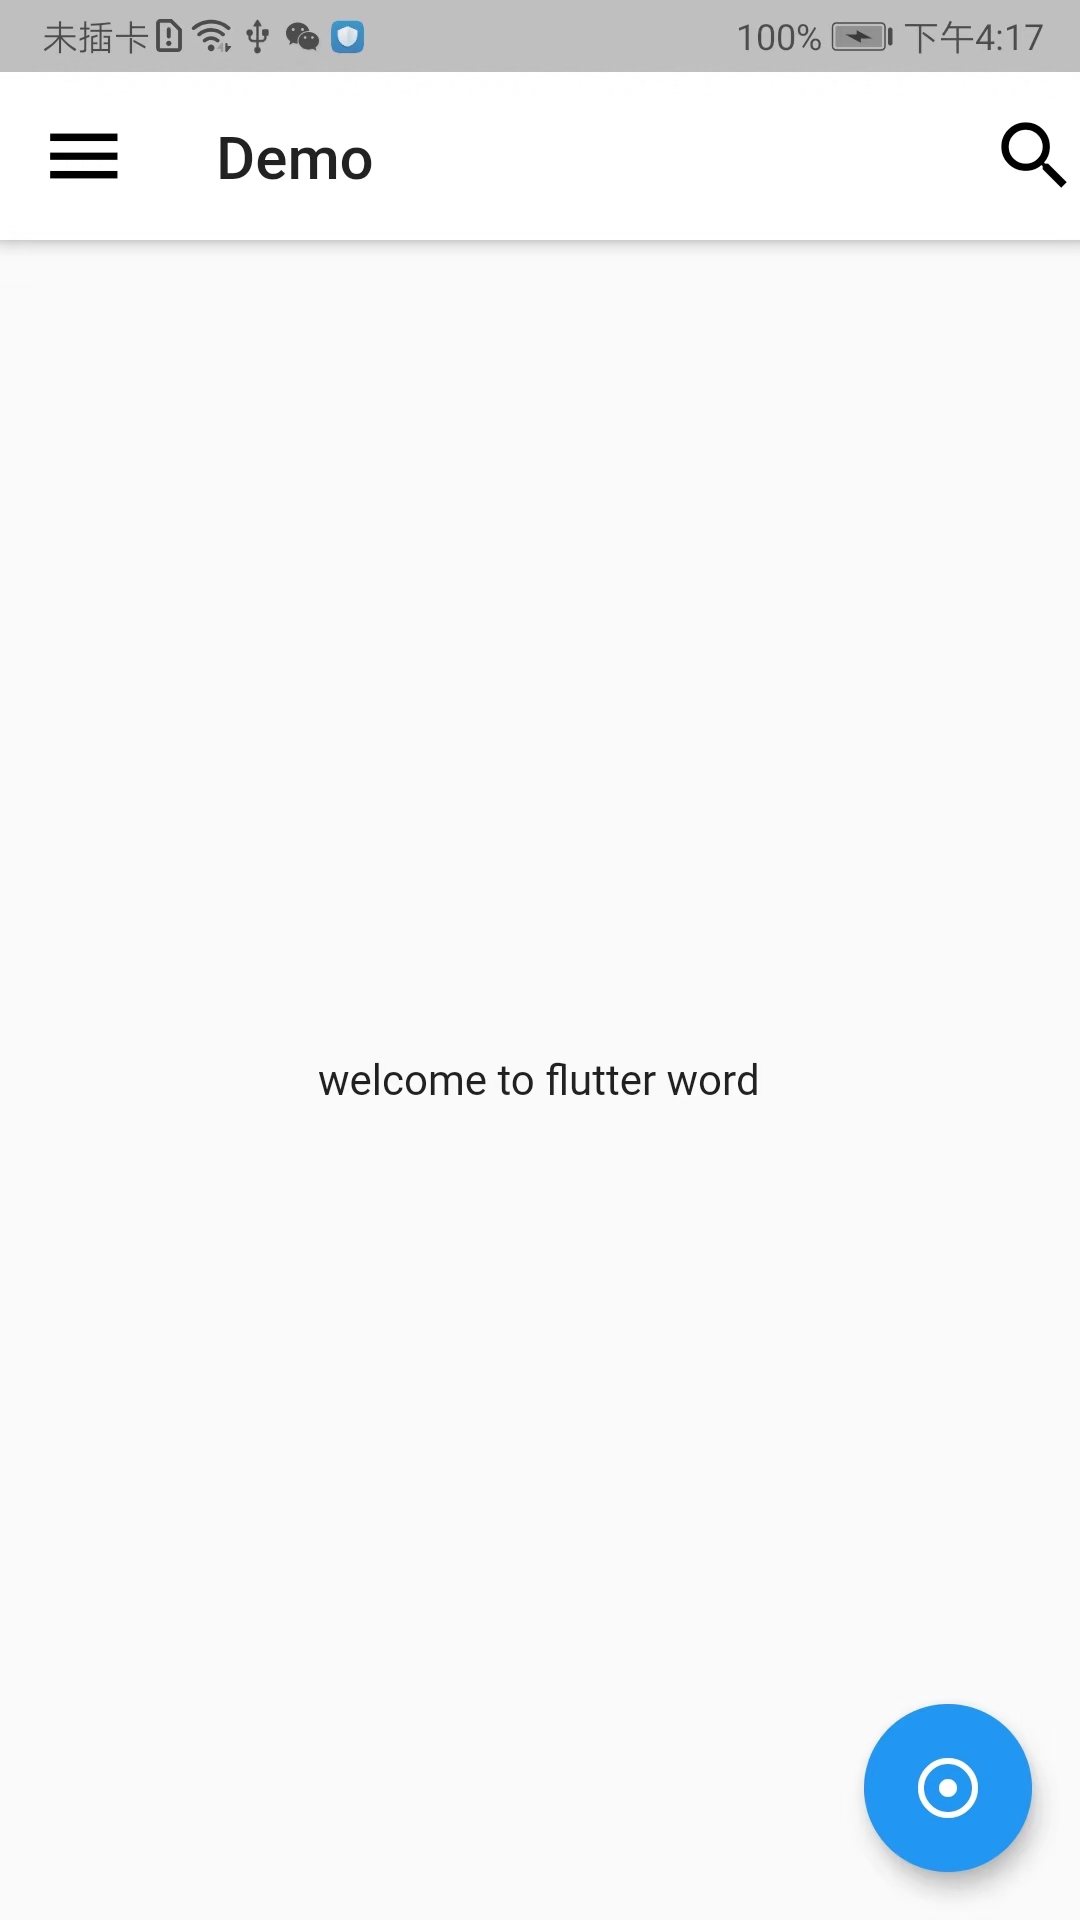
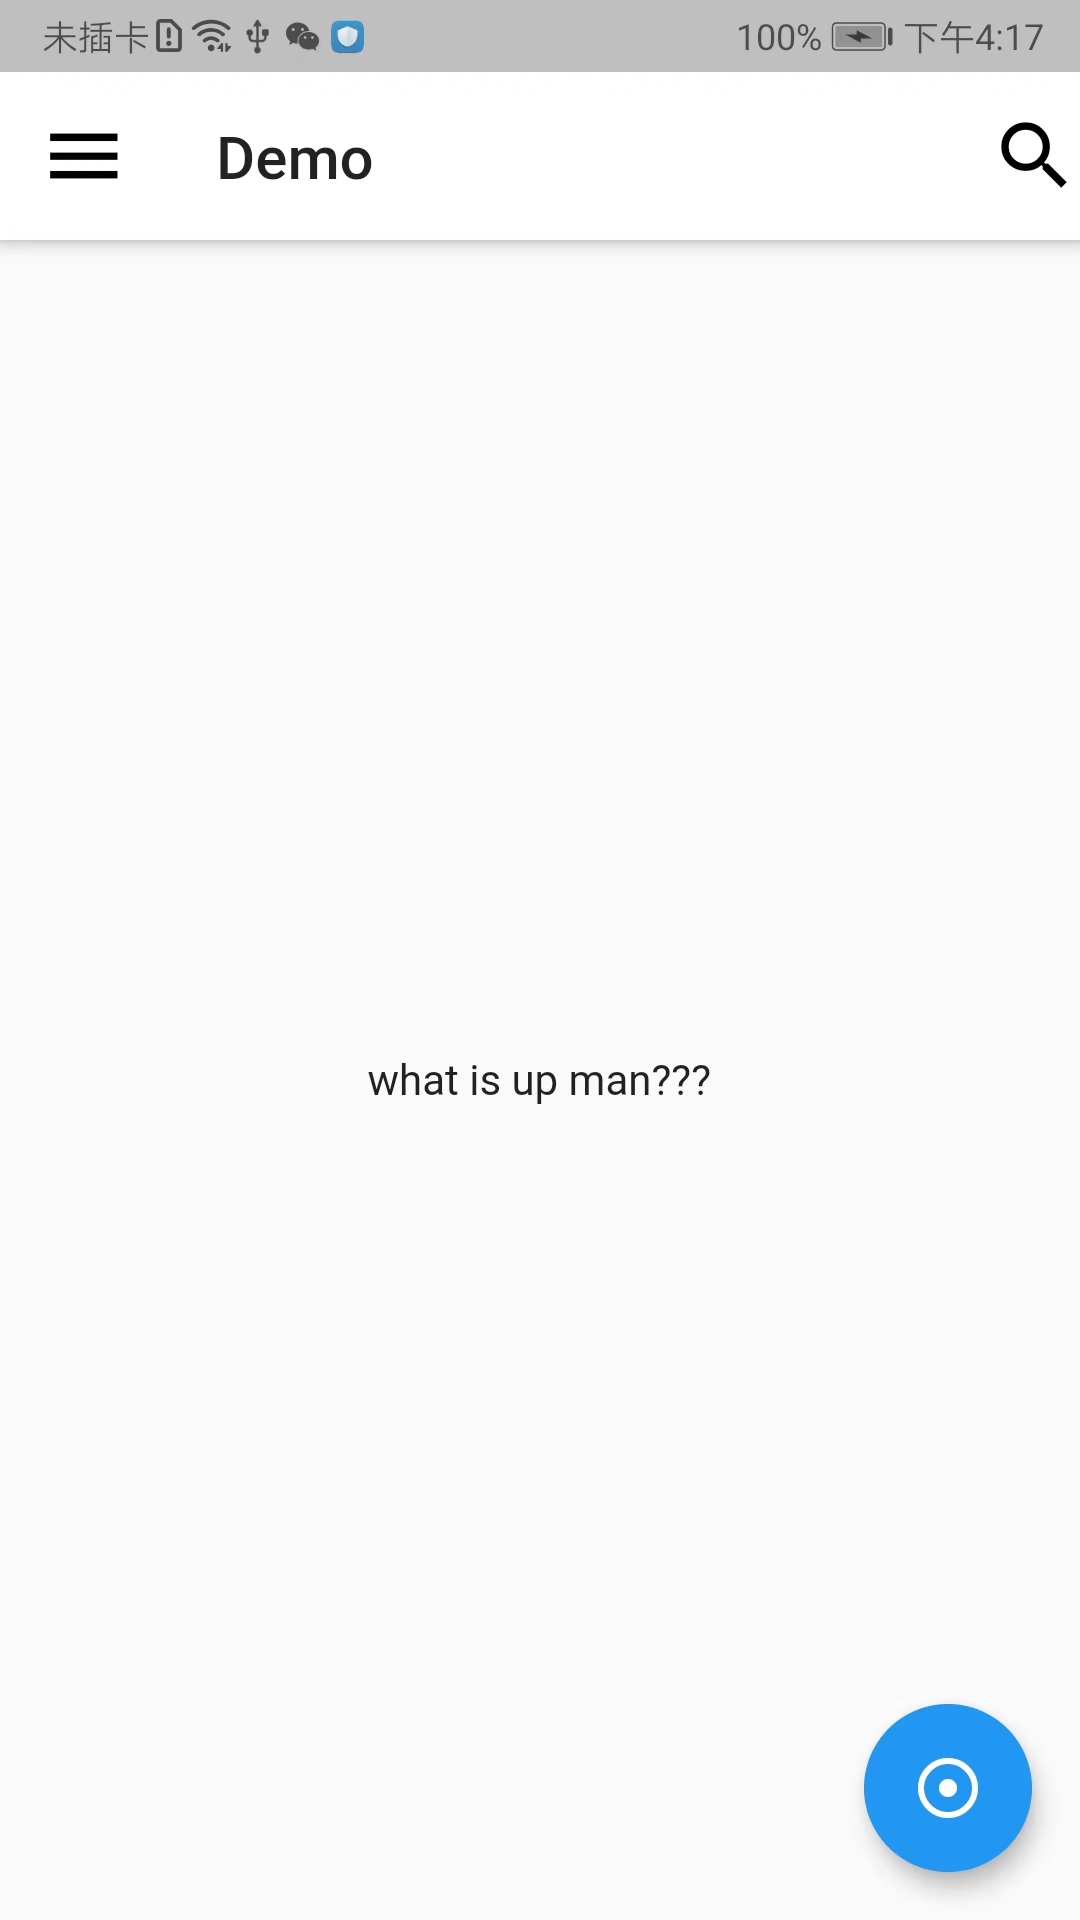
The function here is to have a text in the middle of the page. By clicking a button, a communication request is initiated, and the text is successfully modified after receiving the data returned by native.
Let's look at the final effect:


MethodChannel communication is bidirectional, that is to say, Flutter can initiate communication to native, native can also initiate communication to Flutter, essentially invoke it, in principle, the same meaning, the specific code is not written here, you can Baidu yourself if you need it!
-
EventChannel
The use of Event Channel is also illustrated by demo, which officially acquires battery power. The battery status of mobile phones is constantly changing. We need to tell Flutter about this change in battery status by Native through Event Channel in time. This is not the case with the previously mentioned MethodChannel approach, which means that Flutter needs to call getBatteryLevel continuously in a polling manner to get the current power, which is obviously incorrect. In the Event Channel way, the current battery status is "pushed" to Flutter.
Step 1: Register Event Channel in MainActivity and provide a way to get electricity - the native side
public class EventChannelPlugin implements EventChannel.StreamHandler {

    private Handler handler;
    private static final String CHANNEL = "com.example.flutter_battery/stream";
    private int count = 0;

    public static void registerWith(PluginRegistry.Registrar registrar) {
        // Newly build EventChannel, CHANNEL The role of constants MethodChannel Same
        final EventChannel channel = new EventChannel(registrar.messenger(), CHANNEL);
        // Processor Setting Stream(StreamHandler)
        channel.setStreamHandler(new EventChannelPlugin());
    }

    @Override
    public void onListen(Object o, EventChannel.EventSink eventSink) {
        // Numbers every second+1
        handler = new Handler(message -> {
            // Then send the number to Flutter
            eventSink.success(++count);
            handler.sendEmptyMessageDelayed(0, 1000);
            return false;
        });
        handler.sendEmptyMessage(0);

    }

    @Override
    public void onCancel(Object o) {
        handler.removeMessages(0);
        handler = null;
        count = 0;
    }
}
onCancel stands for no longer receiving from the other side. Here we should do something clean up. OnListen means that the channel has been built and Native can send data. Notice the EventSink parameter in onListen, and all subsequent Native data is sent through EventSink.
Step 2: Like Method Channel, initiate a communication request
class _MyHomePageState extends State<MyHomePage> {
  // Establish EventChannel
  static const stream = const EventChannel('com.example.flutter_battery/stream');

  int _count = 0;

  StreamSubscription _timerSubscription;

  void _startTimer() {
    if (_timerSubscription == null)
       // Monitor EventChannel flow, Will trigger Native onListen Callback
      _timerSubscription = stream.receiveBroadcastStream().listen(_updateTimer);
  }

  void _stopTimer() {
    _timerSubscription?.cancel();
    _timerSubscription = null;
    setState(() => _count = 0);
  }

  void _updateTimer(dynamic count) {
    print("--------$count");
    setState(() => _count = count);
  }

  @override
  void dispose() {
    super.dispose();
    _timerSubscription?.cancel();
    _timerSubscription = null;
  }

  @override
  Widget build(BuildContext context) {
    return Scaffold(
      appBar: AppBar(
        title: Text(widget.title),
      ),
      body: Container(
        margin: EdgeInsets.only(left: 10, top: 10),
        child: Center(
          child: Column(
            children: [
              Row(
                children: <Widget>[
                  RaisedButton(
                    child: Text('Start EventChannel',
                        style: TextStyle(fontSize: 12)),
                    onPressed: _startTimer,
                  ),
                  Padding(
                      padding: EdgeInsets.only(left: 10),
                      child: RaisedButton(
                        child: Text('Cancel EventChannel',
                            style: TextStyle(fontSize: 12)),
                        onPressed: _stopTimer,
                      )),
                  Padding(
                    padding: EdgeInsets.only(left: 10),
                    child: Text("$_count"),
                  )
                ],
              )
            ],
          ),
        ),
      ),
    );
  }
}
Overall: Flutter monitors the data sent by native through stream.receiveBroadcastStream().listen, and native returns the data to Flutter through eventSink.success(++count) continuously, thus achieving the desired effect of real-time monitoring!
-
BasicMessageChannel
In fact, he is a simple version of Method Channel, which can also be said to be based on Basic Message Channel. BasicMessage Channel only communicates. A more popular understanding is that notifications are sent at both ends, but there is no need for method matching.
Step 1: initialization and registration - native
@Override
protected void onCreate(Bundle savedInstanceState) {
    super.onCreate(savedInstanceState);

    // Eliminate other code...

    messageChannel = new BasicMessageChannel<>(flutterView, CHANNEL, StringCodec.INSTANCE);
    messageChannel.
        setMessageHandler(new MessageHandler<String>() {
            @Override
            public void onMessage(String s, Reply<String> reply) {
                // Receive Flutter news, To update Native
                onFlutterIncrement();
                reply.reply(EMPTY_MESSAGE);
            }
        });

    FloatingActionButton fab = findViewById(R.id.button);
    fab.setOnClickListener(new View.OnClickListener() {
        @Override
        public void onClick(View v) {
            // notice Flutter To update
            sendAndroidIncrement();
        }
    });
}

private void sendAndroidIncrement() {
    messageChannel.send(PING);
}

private void onFlutterIncrement() {
    counter++;
    TextView textView = findViewById(R.id.button_tap);
    String value = "Flutter button tapped " + counter + (counter == 1 ? " time" : " times");
    textView.setText(value);
}
Step 2: Flutter initiates communication-flutter
class _MyHomePageState extends State<MyHomePage> {
  static const String _channel = 'increment';
  static const String _pong = 'pong';
  static const String _emptyMessage = '';
  static const BasicMessageChannel<String> platform =
      BasicMessageChannel<String>(_channel, StringCodec());

  int _counter = 0;

  @override
  void initState() {
    super.initState();
    // Setting up Message Processor
    platform.setMessageHandler(_handlePlatformIncrement);
  }

  // If received Native Messages are numbers+1
  Future<String> _handlePlatformIncrement(String message) async {
    setState(() {
      _counter++;
    });
    // Send an empty message
    return _emptyMessage;
  }

  // click Flutter Medium FAB Send a message to Native
  void _sendFlutterIncrement() {
    platform.send(_pong);
  }

  @override
  Widget build(BuildContext context) {
    return Scaffold(
      appBar: AppBar(
        title: Text('BasicMessageChannel'),
      ),
      body: Container(
          child: Column(
        crossAxisAlignment: CrossAxisAlignment.start,
        children: <Widget>[
          Expanded(
            child: Center(
              child: Text(
                  'Platform button tapped $_counter time${_counter == 1 ? '' : 's'}.',
                  style: const TextStyle(fontSize: 17.0)),
            ),
          ),
          Container(
            padding: const EdgeInsets.only(bottom: 15.0, left: 5.0),
            child: Row(
              children: <Widget>[
                Image.asset('assets/flutter-mark-square-64.png', scale: 1.5),
                const Text('Flutter', style: TextStyle(fontSize: 30.0)),
              ],
            ),
          ),
        ],
      )),
      floatingActionButton: FloatingActionButton(
        onPressed: _sendFlutterIncrement,
        child: const Icon(Icons.add),
      ),
    );
  }
}