Four components - Content Provider Details
@author worry-free teenager
@createTime 2021/08/15
1. Introduction to Content Providers
Content Provider is mainly used to share data between different applications. It provides a complete mechanism to allow one program to access data in another program while also ensuring the security of the data being accessed. Currently, using content providers is the standard way for Android to share data across programs.
Unlike the two global read-write modes of operation in file storage and Shared Preferences storage, content providers can choose which part of the data to share, that is, control permissions to ensure that private data in our applications is not at risk of leaking.
Before introducing content providers, you need to know about Android runtime permissions, because content providers use runtime permissions for a while, and of course, more than content providers do. When we do development work, we often deal with permissions.
2. Runtime permissions
The Android privilege mechanism is not new. It has existed since the first version of the system. But in fact, before Android's privilege mechanism to protect user security and privacy channels have a limited role, especially some common software that everyone can not do without, is very easy to "big shopper". To do this, the Adnroid development team added runtime privileges to the Android 6.0 system inrush, which better protects users'security and privacy.
2.1 Detailed Android privilege mechanism
Previous broadcast mechanisms (Roadcast) had permissions to apply for the network state of the system to ensure that broadcasts that listened to network changes would need to be AndroidManifest. Add the following declaration to the XML
<manifest xmlns:android="http://schemas.android.com/apk/res/android"  package="com.example.broadcasttest">
    ...
	<uses-permission android:name="android.permission.ACCESS_NETWORK_STATE" />
    ...
</manifest>
Since accessing the network state of the system involves security risks for user devices, it must be in AndroidManifest.xml adds a permission declaration, otherwise the program will crash without permission.
Privileges are divided into two main categories: ordinary and dangerous privileges, and the privileges previously applied for the network state of the system in the broadcasting mechanism (Roadcast) are ordinary privileges, which are worth the privileges that do not directly threaten the security and privacy of users. For applications for these privileges, the system will automatically authorize us. There is no need for the user to do this manually. Hazardous permissions are those that may touch user privacy or affect device security, such as obtaining device contact information, locating the device's geographic location, etc. For this part of the permission request, the user must click on the authorization manually, otherwise the program will not be able to use the appropriate functions.
Specifically all permissions can see official documents https://developer.android.google.cn/reference/android/Manifest.permission
2.2 Application for permission when the program is running
Start with a new Runtime PermissonTest project and learn how to use runtime permissions. Use CALL_primarily PHONE is a privilege that requires adding a button to the page, then listening, clicking on the button to call 10010, as well as Android Manifest. XML adds a permission declaration with the following code:
activity_main.xml
<LinearLayout xmlns:android="http://schemas.android.com/apk/res/android"
    xmlns:app="http://schemas.android.com/apk/res-auto"
    xmlns:tools="http://schemas.android.com/tools"
    android:layout_width="match_parent"
    android:layout_height="match_parent"
    tools:context=".MainActivity">

    <Button
        android:id="@+id/make_call"
        android:layout_width="match_parent"
        android:layout_height="wrap_content"
        android:text="Make Call">
    </Button>

</LinearLayout>
AndroidManifest.xml
<?xml version="1.0" encoding="utf-8"?>
<manifest xmlns:android="http://schemas.android.com/apk/res/android"
    package="com.example.runtimepermissontest">

    <permission android:name="android.permission.CALL_PHONE" />

    <application
        android:allowBackup="true"
        android:icon="@mipmap/ic_launcher"
        android:label="@string/app_name"
        android:roundIcon="@mipmap/ic_launcher_round"
        android:supportsRtl="true"
        android:theme="@style/Theme.Androidtest">
        <activity
            android:name=".MainActivity"
            android:exported="true">
            <intent-filter>
                <action android:name="android.intent.action.MAIN" />

                <category android:name="android.intent.category.LAUNCHER" />
            </intent-filter>
        </activity>
    </application>

</manifest>
MainActivity.java
public class MainActivity extends AppCompatActivity {

    @Override
    protected void onCreate(Bundle savedInstanceState) {
        super.onCreate(savedInstanceState);
        setContentView(R.layout.activity_main);
        Button button = findViewById(R.id.make_call);
        button.setOnClickListener(view -> {
            Intent intent = new Intent(Intent.ACTION_CALL);
            intent.setData(Uri.parse("tel:10010"));
            startActivity(intent);
        });
    }
}
The code still looks simple. Run it for a try, click on the button, and find that it has no effect and the program flashes back. Take a look at the console log as follows:
E/AndroidRuntime: FATAL EXCEPTION: main
    Process: com.example.runtimepermissontest, PID: 1983
    java.lang.SecurityException: Permission Denial: starting Intent { act=android.intent.action.CALL dat=tel:xxxxx cmp=com.android.server.telecom/.components.UserCallActivity } from ProcessRecord{f209fb5 1983:com.example.runtimepermissontest/u0a404} (pid=1983, uid=10404) requires android.permission.CALL_PHONE
Prompt us to "Permission Denial" and we can see that this is due to the prohibition of permissions, because systems with 6.0 and above must handle runtime permissions when using dangerous permissions. Next, you'll modify MainActivity.java code, as shown below
public class MainActivity extends AppCompatActivity {

    @Override
    protected void onCreate(Bundle savedInstanceState) {
        super.onCreate(savedInstanceState);
        setContentView(R.layout.activity_main);
        Button button = findViewById(R.id.make_call);
        button.setOnClickListener(view -> {
            // Determine if you currently have permission to make phone calls and do not have permission to apply for permission
            if (ContextCompat.checkSelfPermission(MainActivity.this, android.Manifest.permission.CALL_PHONE) != PackageManager.PERMISSION_GRANTED) {
                ActivityCompat.requestPermissions(MainActivity.this, new String[]{android.Manifest.permission.CALL_PHONE}, 1);
            } else {
                call();
            }
        });
    }

    /**
     * Call
     */
    private void call() {
        Intent intent = new Intent(Intent.ACTION_CALL);
        intent.setData(Uri.parse("tel:10010"));
        startActivity(intent);
    }

    @Override
    public void onRequestPermissionsResult(int requestCode, @NonNull String[] permissions, @NonNull int[] grantResults) {
        super.onRequestPermissionsResult(requestCode, permissions, grantResults);
        switch (requestCode) {
            case 1:
                // As a result, call if you grant permission
                if (grantResults.length > 0 && grantResults[0] == PackageManager.PERMISSION_GRANTED) {
                    call();
                    // Pop up a prompt box to give permission
                } else {
                    Toast.makeText(this, "you denied the permission", Toast.LENGTH_SHORT).show();
                }
                break;
            default:
        }
    }
}
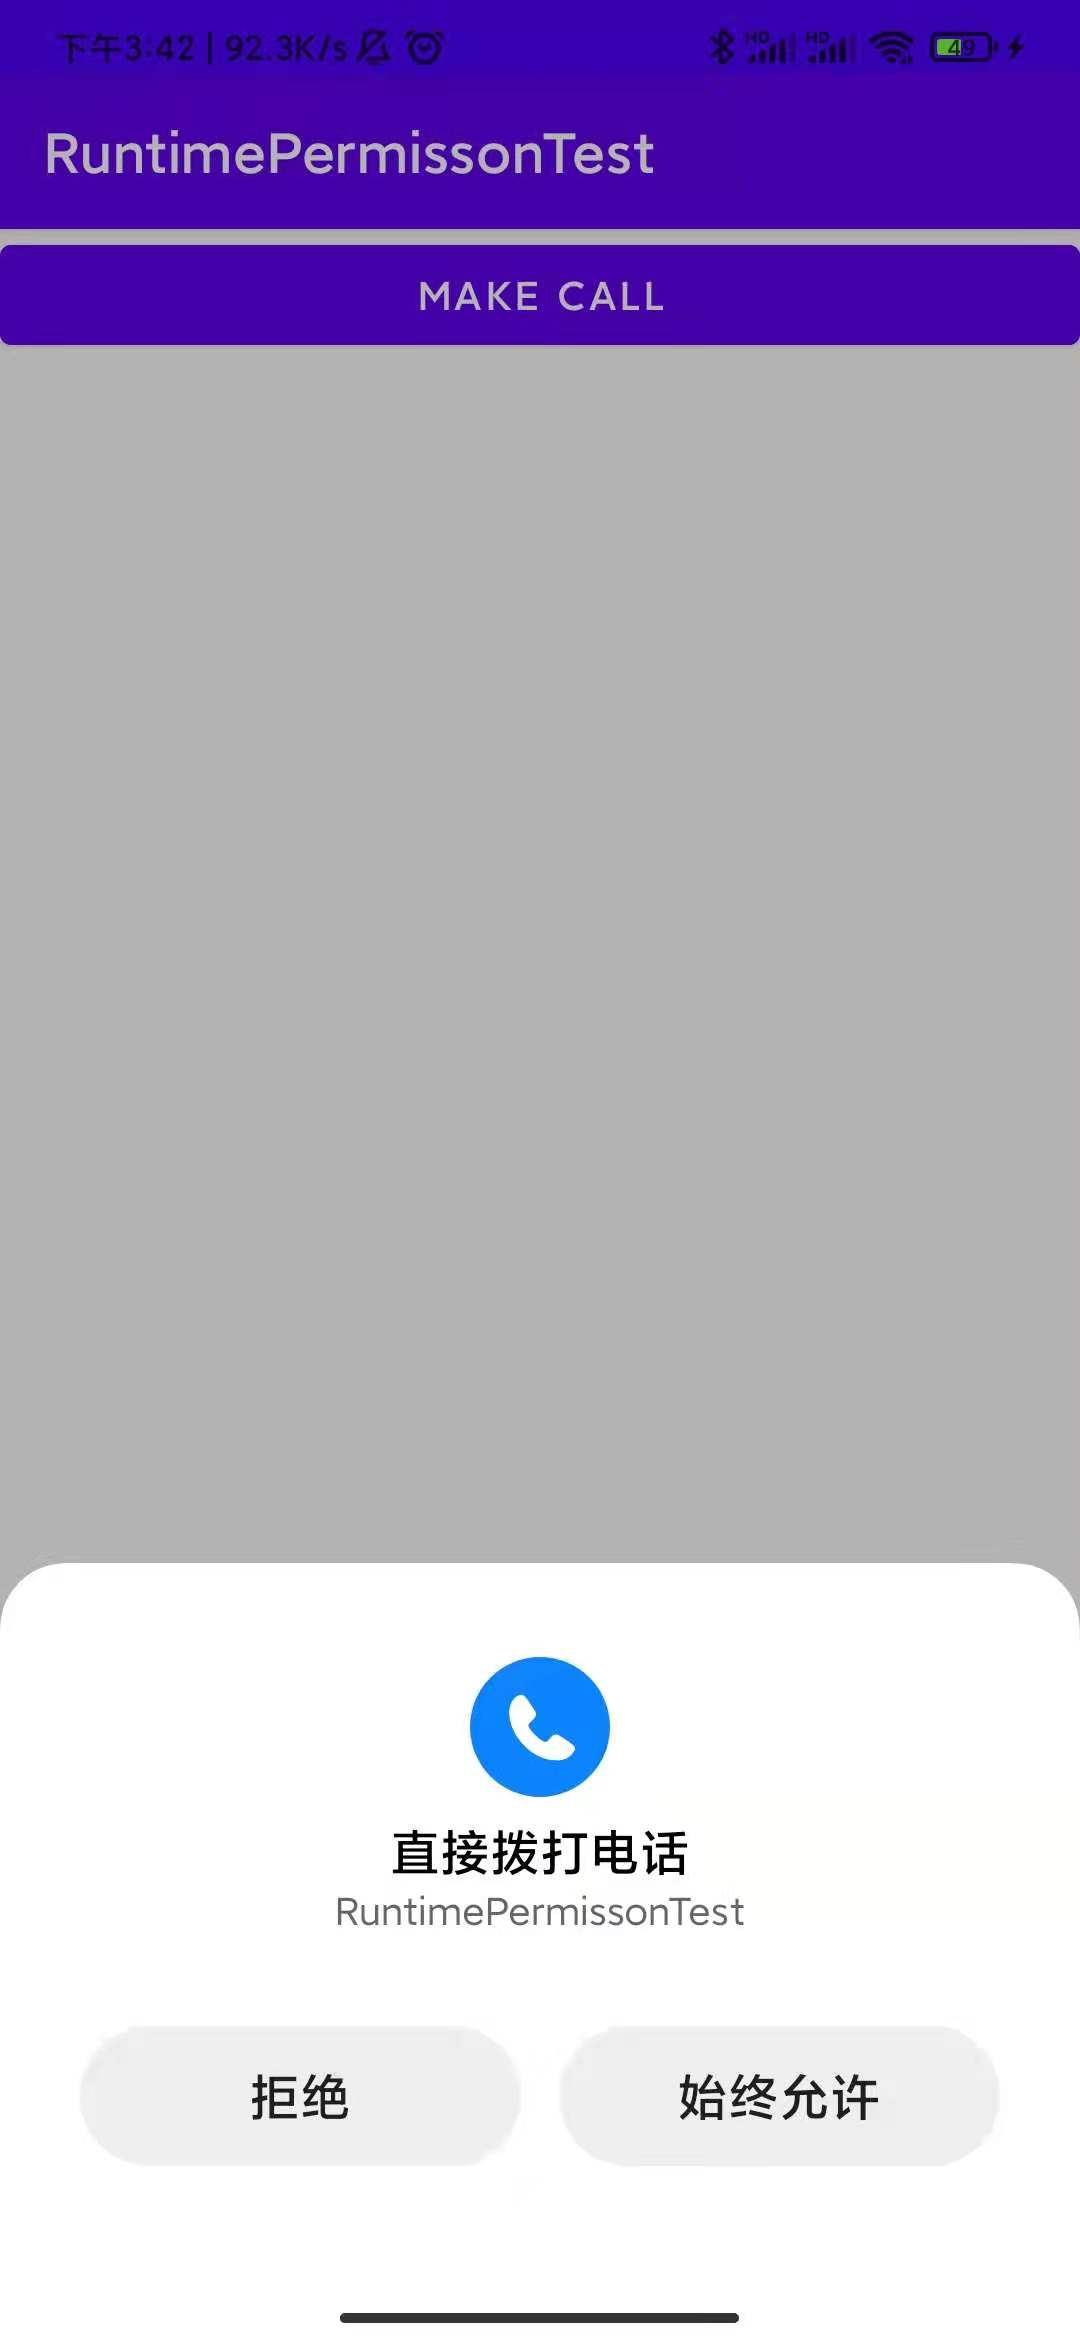
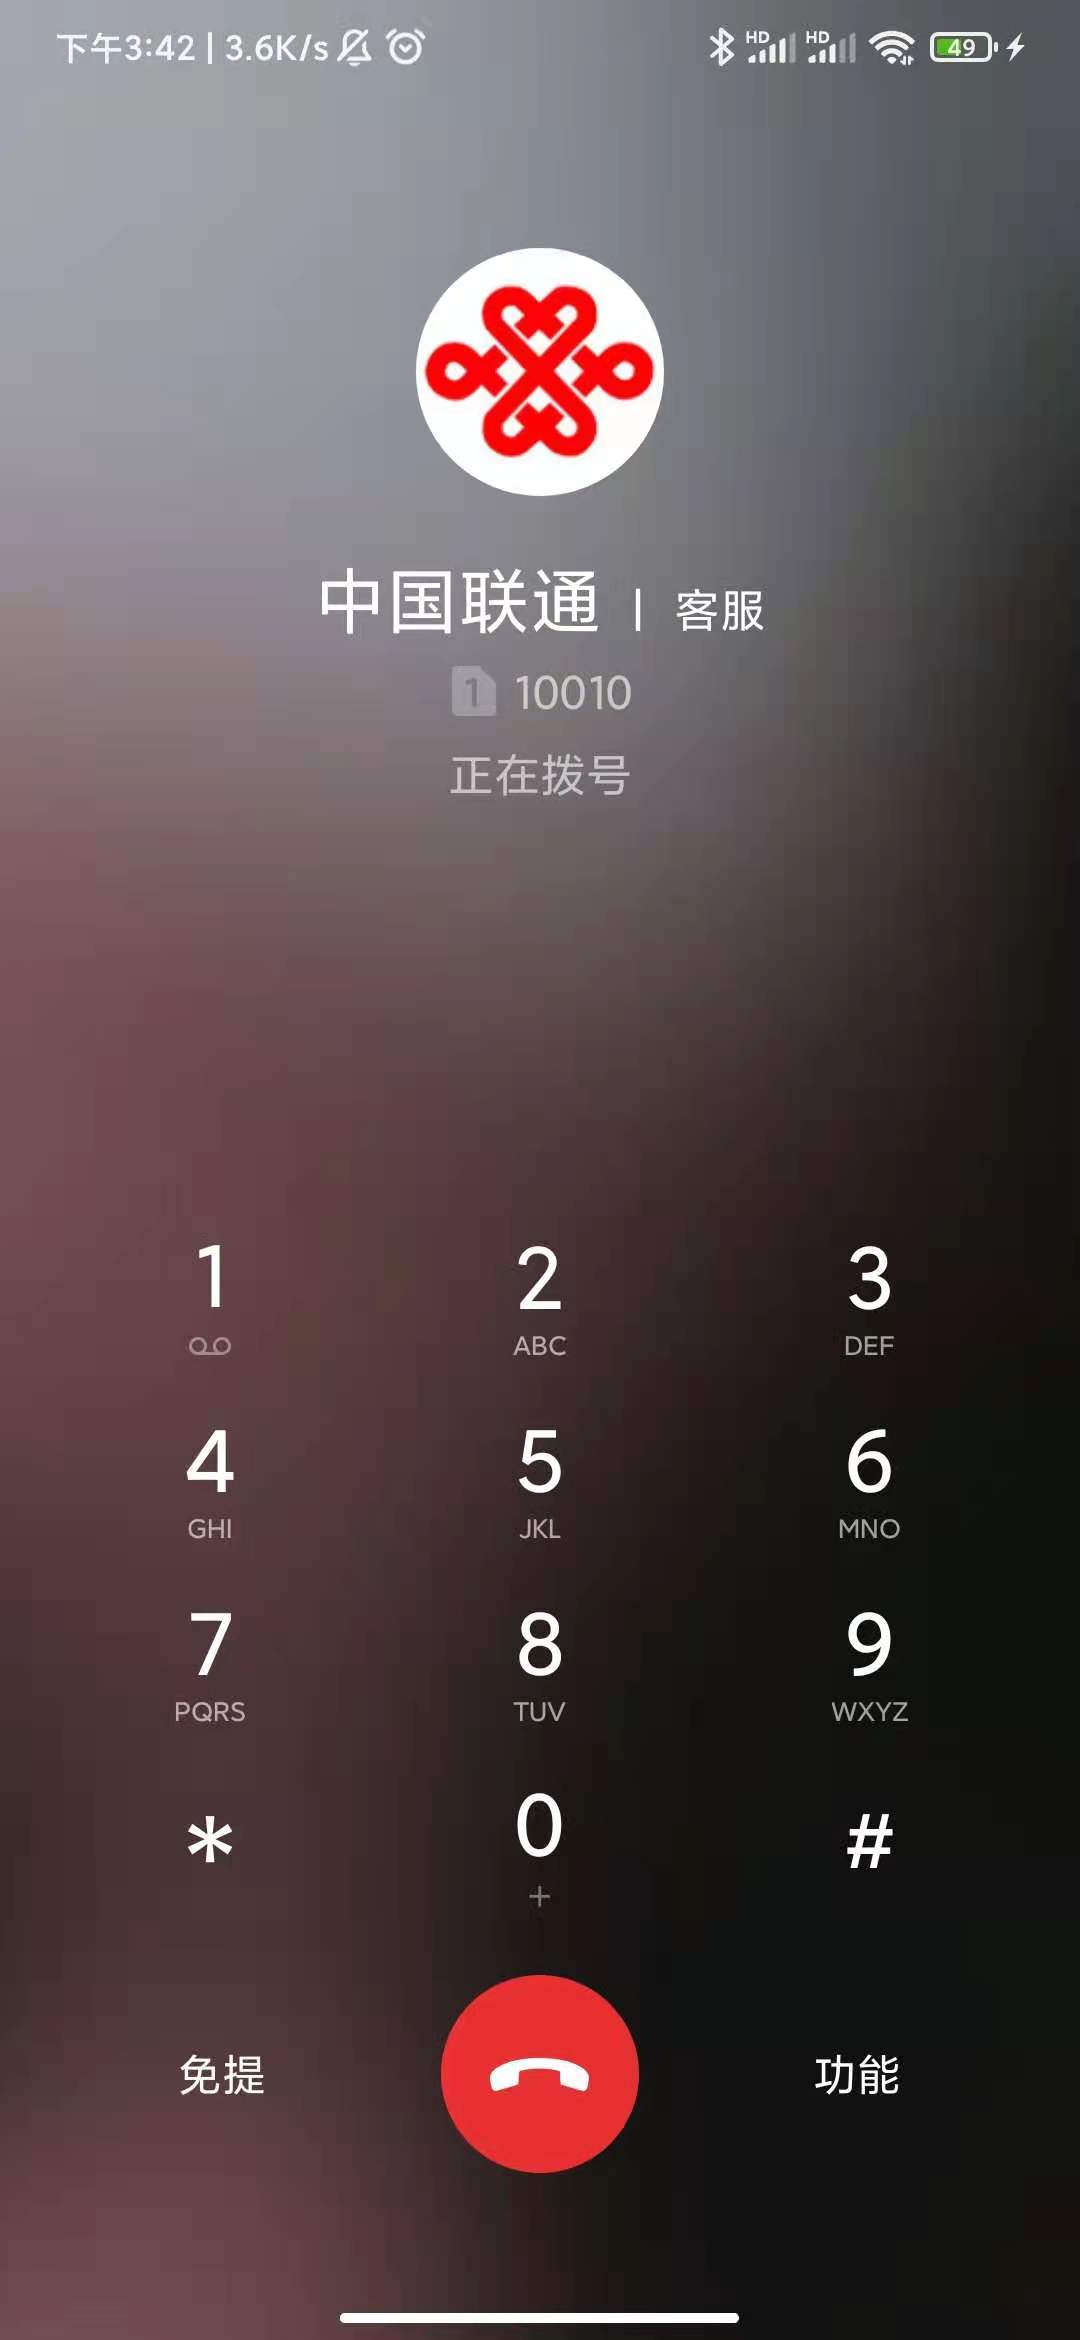
The code above overrides the entire process of runtime privileges. Let's parse it in detail below. The core of runtime privileges is that the user authorizes us to perform some dangerous operations while the program is running. It is impossible for the program to perform these dangerous operations without authorization. So the first step is to decide if we currently have permission to perform the operation by calling ContextCompat. CheSelfPermission () to determine if it has the appropriate permissions, and if it does not, invoke ActivityCompat.requestPermissions() alerts the user to authorize, and then calls back onRequestPermissionsResult() to inform us of the results of the user's authorization. We can judge the results of the authorization of the current user and whether to make a phone call or to pop up a prompt box. Run the screenshot as follows:


3. Access data from other programs
There are two general uses of content providers, one is to use an existing content provider to read and manipulate data in the corresponding program, the other is to create your own content provider to provide external access to data in our program.
Basic usage of 3.1 ContentResolver
For each application, if you want to access content to provide the data it shares, you must use the ContentResolver class, which you can gain strength from the getContentResolver() method in the Context. ContentResolver provides a series of scenarios for CRUD operations on data.
Unlike SQLiteDatabase, additions and deletions in ContentResolver do not receive a table name parameter, which is replaced by a Uri parameter, which is called a content URI. The content URI establishes a unique identifier for the content provider. It consists of two main components: authority and path. Authority is used to distinguish between different applications. Generally, to avoid conflicts, it is named by the package name. For example, the registration for a program is com. Example. App, then the corresponding authority of the program can be com. Example. App. Provider. Paths are used to distinguish between different tables in the same application and are often added to the back of authority. For example, if a program has two tables, table1 and table2, the path can be named / table1 and / table2, respectively. Then, by combining authority and path, the content UIRI becomes com. Example. App. Provider/table1, com. Example. App. Provider/table2. These URI headers are added to represent URIs that can be identified as content in the following format content://com.example.app.provider/table1 , content://com.example.app.provider/table2
Use Uri after getting the content URI string. The parse() method converts the string into a URI object, which can then be used to query the data with the following code
Cursor cursor = getContentResolver().query(uri, projection, selection, selectionArgs, sortOrder);
The parameters of the parameter and the query() method in SQLiteDatabase are much the same, but overall it is simpler, since sql is simpler.
Returned an instance of cursor, which can be traversed to retrieve the query values, adding and modifying is not an example, the similarities and differences are not very different from the use of SQLiteDatabase.
3.2 Read System Contacts
Create a new ContactsTest project and also apply for read access to the address book, coded as follows:
MainActivity.java
public class MainActivity extends AppCompatActivity {

    ArrayAdapter<String> adapter;
    List<String> contactsList = new ArrayList<>();

    @Override
    protected void onCreate(Bundle savedInstanceState) {
        super.onCreate(savedInstanceState);
        setContentView(R.layout.activity_main);
        ListView contactsView = findViewById(R.id.contacts_view);
        adapter = new ArrayAdapter<>(this, android.R.layout.simple_list_item_1, contactsList);
        contactsView.setAdapter(adapter);
        // Determine whether you currently have permission
        if (ContextCompat.checkSelfPermission(MainActivity.this, android.Manifest.permission.READ_CONTACTS) != PackageManager.PERMISSION_GRANTED) {
            ActivityCompat.requestPermissions(MainActivity.this, new String[]{android.Manifest.permission.READ_CONTACTS}, 1);
        } else {
            readContacts();
        }
    }

    /**
     * Read Address Book Data
     */
    private void readContacts() {
        Cursor cursor = null;
        try {
            cursor = getContentResolver().query(ContactsContract.CommonDataKinds.Phone.CONTENT_URI, null, null, null, null);
            if (cursor != null) {
                while (cursor.moveToNext()) {
                    String displayName = cursor.getString(cursor.getColumnIndex(ContactsContract.CommonDataKinds.Phone.DISPLAY_NAME));
                    String number = cursor.getString(cursor.getColumnIndex(ContactsContract.CommonDataKinds.Phone.NUMBER));
                    contactsList.add(displayName + "\n" + number);
                }
            }
        } catch (Exception e) {
            e.printStackTrace();
        } finally {
            if (cursor != null) {
                cursor.close();
            }
        }
    }

    @Override
    public void onRequestPermissionsResult(int requestCode, @NonNull String[] permissions, @NonNull int[] grantResults) {
        super.onRequestPermissionsResult(requestCode, permissions, grantResults);
        switch (requestCode) {
            case 1:
                // The result is that if permission is granted, the contact list is read
                if (grantResults.length > 0 && grantResults[0] == PackageManager.PERMISSION_GRANTED) {
                    readContacts();
                    // Pop up a prompt box to give permission
                } else {
                    Toast.makeText(this, "you denied the permission", Toast.LENGTH_SHORT).show();
                }
                break;
            default:
        }
    }
}
activity_main.xml
<LinearLayout xmlns:android="http://schemas.android.com/apk/res/android"
    xmlns:app="http://schemas.android.com/apk/res-auto"
    xmlns:tools="http://schemas.android.com/tools"
    android:layout_width="match_parent"
    android:layout_height="match_parent"
    tools:context=".MainActivity">

<ListView
    android:id="@+id/contacts_view"
    android:layout_width="match_parent"
    android:layout_height="wrap_content"/>

</LinearLayout>
AndroidManifest.xml
<manifest xmlns:android="http://schemas.android.com/apk/res/android"
    package="com.example.contactstest">

    <uses-permission android:name="android.permission.READ_CONTACTS" />

    <application
        android:allowBackup="true"
        android:icon="@mipmap/ic_launcher"
        android:label="@string/app_name"
        android:roundIcon="@mipmap/ic_launcher_round"
        android:supportsRtl="true"
        android:theme="@style/Theme.Androidtest">
        <activity
            android:name=".MainActivity"
            android:exported="true">
            <intent-filter>
                <action android:name="android.intent.action.MAIN" />
                <category android:name="android.intent.category.LAUNCHER" />
            </intent-filter>
        </activity>
    </application>

</manifest>
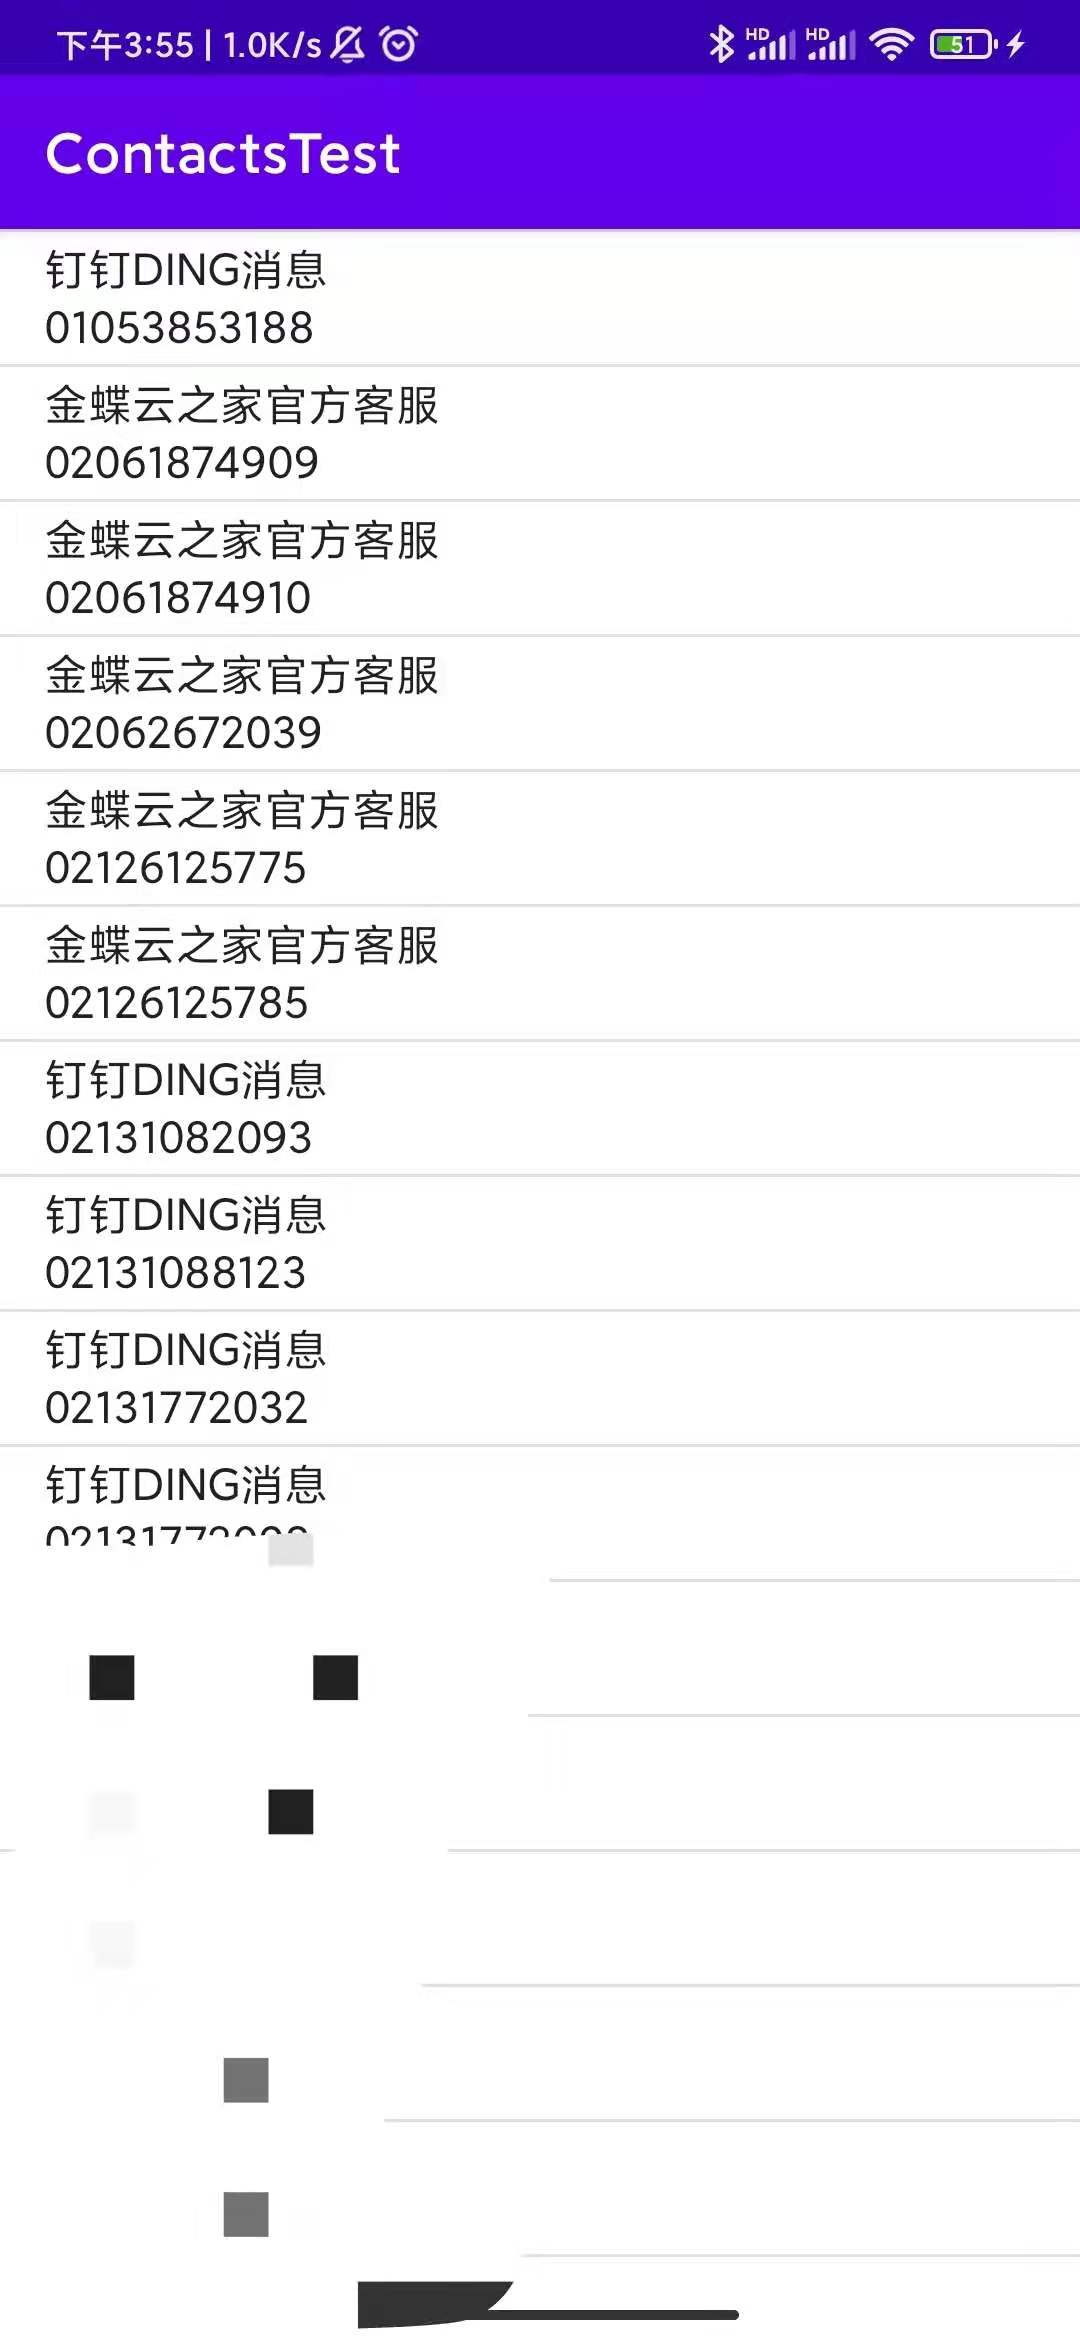
The topic code is simple, and the previous example call is just a little more data initialization. Run the screenshot below


4. Create your own content provider
### 4.1 Create Content Provider Steps
Create a familiar routine, click com. Example. The broadcasttest right-click New->new->Other->Content Provider and then the class MyContentProvider, a default content provider, is created, although the current content provider also needs to be in AndroidManifest.xml is registered, but this step ide has already been completed for us to see the code
MyContentProvider.java
public class MyContentProvider extends ContentProvider {
    String TAG="MyContentProvider";
    public MyContentProvider() {

    }
    @Override
    public int delete(Uri uri, String selection, String[] selectionArgs) {
        Log.d(TAG,"insert delete");
        return 0;
    }

    @Override
    public String getType(Uri uri) {
        Log.d(TAG,"insert getType");
        return null;
    }

    @Override
    public Uri insert(Uri uri, ContentValues values) {
        Log.d(TAG,"insert insert");
        return null;
    }

    @Override
    public boolean onCreate() {
        Log.d(TAG,"insert onCreate");
        return true;
    }

    @Override
    public Cursor query(Uri uri, String[] projection, String selection,
                        String[] selectionArgs, String sortOrder) {
        Log.d(TAG,"insert query");
        return null;
    }

    @Override
    public int update(Uri uri, ContentValues values, String selection,
                      String[] selectionArgs) {
        Log.d(TAG,"insert update");
        return 0;
    }
}
AndroidManifest.xml
<manifest xmlns:android="http://schemas.android.com/apk/res/android"
    package="com.example.contenttest">

    <application
        android:allowBackup="true"
        android:icon="@mipmap/ic_launcher"
        android:label="@string/app_name"
        android:roundIcon="@mipmap/ic_launcher_round"
        android:supportsRtl="true"
        android:theme="@style/Theme.Androidtest">
        <provider
            android:name=".MyContentProvider"
            android:authorities="com.example.contactstest"
            android:enabled="true"
            android:exported="true"></provider>

        <activity
            android:name=".MainActivity"
            android:exported="true">
            <intent-filter>
                <action android:name="android.intent.action.MAIN" />

                <category android:name="android.intent.category.LAUNCHER" />
            </intent-filter>
        </activity>
    </application>

</manifest>
Summary of the six methods rewritten above, most of which are already familiar, so let's briefly introduce them
-
onCreate(): Called when the content provider is initialized. This is where data creation and upgrade are typically done. Returning true indicates that the content provider was initialized successfully, and returning false indicates that it failed.
-
query(): Query data from the content provider. The uri parameter is used to determine which table to query, the projection parameter to determine which columns to query, the selections and selectionArgs parameters to constrain which rows to query, the sortOrder parameter to sort the results, and the results of the query are stored and returned in the Cursor object.
-
insert(): Add a piece of data to the content provider. The uri parameter is used to determine the table to be added, and the data to be added is stored in the values parameter. When the addition is complete, a URL representing the new record is returned.
-
update(): Update data already in the content provider. The uri parameter is used to determine which table's data is updated, the new data is stored in the values parameter, the selections and selectionArgs parameters are used to constrain which rows are updated, and the number of rows affected is returned as a return value.
-
delete(): Delete data from the content provider. The uri parameter is used to determine which table data is deleted, the selections and selectionArgs parameters are used to constrain which rows are deleted, and the deleted rows are returned as return values.
-
getType(): Returns the corresponding MIME type based on the content URI passed in.
As you can see, almost every method carries the URI parameter, which is passed in when the ContentResolver's add-delete check method is formally called. Now you need to parse the incoming Uri parameter to analyze the tables and data that the calling method expects to access.
Specific code sample reference https://www.cnblogs.com/jiqing9006/p/7704125.html