 <dependency>
   <groupId>org.springframework.boot</groupId>
   <artifactId>spring-boot-starter-jdbc</artifactId>
 </dependency>
 <dependency>
   <groupId>org.mybatis</groupId>
   <artifactId>mybatis</artifactId>
 </dependency>
 <dependency>
   <groupId>org.mybatis</groupId>
   <artifactId>mybatis-spring</artifactId>
 </dependency>
b. bean configuration
The following steps 3 and 4 are related to the configuration of Mybatis. The first step is to introduce resource allocation. The second step is to configure the data source
<?xml version="1.0" encoding="UTF-8"?>
<beans xmlns="http://www.springframework.org/schema/beans"
 xmlns:xsi="http://www.w3.org/2001/XMLSchema-instance" xmlns:context="http://www.springframework.org/schema/context"
 xsi:schemaLocation="http://www.springframework.org/schema/beans
 http://www.springframework.org/schema/beans/spring-beans.xsd
 http://www.springframework.org/schema/context
 http://www.springframework.org/schema/context/spring-context.xsd">
 <!-- Configuration integration mybatis process -->
 <!-- 1.Configure database related parameters properties Properties of: ${url} -->
 <context:property-placeholder location="classpath:jdbc.properties" />

 <!-- 2.Database connection pool -->
 <bean id="dataSource" class="com.mchange.v2.c3p0.ComboPooledDataSource">
  <!-- Configure connection pool properties -->
  <property name="driverClass" value="${jdbc.driver}" />
  <property name="jdbcUrl" value="${jdbc.url}" />
  <property name="user" value="${jdbc.username}" />
  <property name="password" value="${jdbc.password}" />

  <!-- c3p0 Private properties of connection pool -->
  <property name="maxPoolSize" value="30" />
  <property name="minPoolSize" value="10" />
  <!-- Not automatically after closing the connection commit -->
  <property name="autoCommitOnClose" value="false" />
  <!-- Get connection timeout -->
  <property name="checkoutTimeout" value="10000" />
  <!-- Number of retries when getting connection failed -->
  <property name="acquireRetryAttempts" value="2" />
 </bean>

 <!-- 3.to configure SqlSessionFactory object -->
 <bean id="sqlSessionFactory" class="org.mybatis.spring.SqlSessionFactoryBean">
  <!-- Inject database connection pool -->
  <property name="dataSource" ref="dataSource" />
  <!-- to configure MyBaties Global profile:mybatis-config.xml -->
  <property name="configLocation" value="classpath:mybatis-config.xml" />
  <!-- scanning entity package Use alias -->
  <property name="typeAliasesPackage" value="com.soecode.lyf.entity" />
  <!-- scanning sql configuration file:mapper Needed xml file -->
  <property name="mapperLocations" value="classpath:mapper/*.xml" />
 </bean>

 <!-- 4.Configure scan Dao Interface package, dynamic implementation Dao Interface, injection into spring In container -->
 <bean class="org.mybatis.spring.mapper.MapperScannerConfigurer">
  <!-- injection sqlSessionFactory -->
  <property name="sqlSessionFactoryBeanName" value="sqlSessionFactory" />
  <!-- Give the information that needs to be scanned Dao Interface package -->
  <property name="basePackage" value="com.soecode.lyf.dao" />
 </bean>
</beans>
1.2. 3 Summary
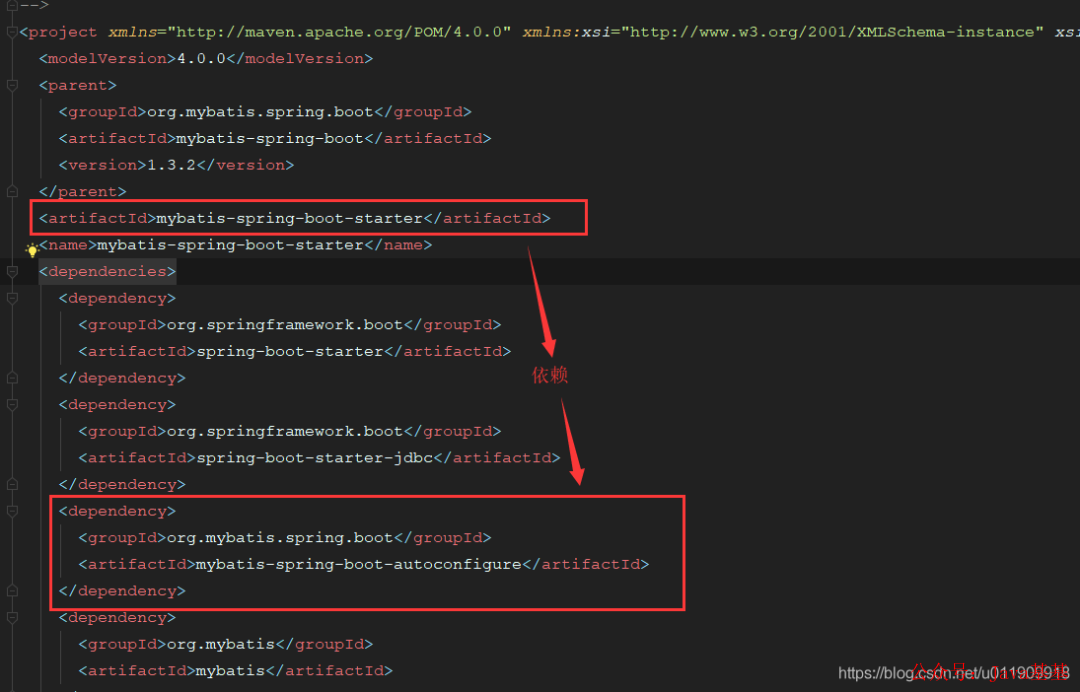
a. Starter helps us encapsulate all the necessary dependencies to avoid some Jar package conflicts or missing packages caused by our own addition;
b. Starter helps us automatically inject the required Bean instances into the Spring container, which does not need to be configured manually (it can be said that starter did this, but it is not. There is a hole buried here, and the following answer is given);
So: the content of starter package is pom file, which is a dependency transfer package.
Recommend your own actual Spring Cloud project:
https://github.com/YunaiV/onemall
2, Spring Boot Autoconfigure
2.1 introduction to autoconfigure
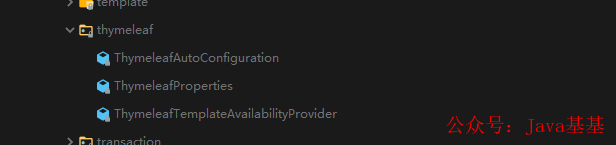
Autoconfigure is not perceived in our development because it exists in our starter. Therefore, each of our starters depends on autoconfigure:
picture
Of course, we can also put the contents of autoconfig directly in the starter package.
a. spring-boot-autoconfigure:
Note: there is a point here, that is, most of the configurations provided on the official website are in the spring boot auto configure package, and no new package is created separately.
b,mybatis-spring-boot-autoconfigure
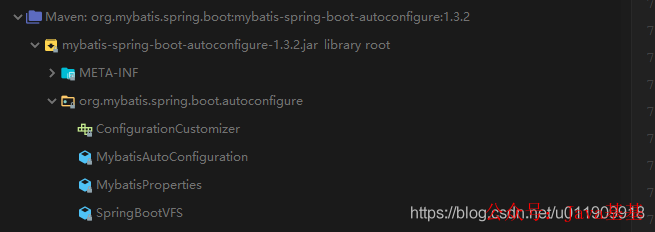
picture
2.2 summary
The autoconfigure content is the actual code implementation package that configures the Bean instance to the Spring container, and then provides it to the starter dependency. So 1.2 The configuration of Bean instances into the Spring container mentioned in item b of 3 is actually done by autoconfigure. Because starter depends on it, it can also be said that starter did it.
Therefore: autoconfigure is the code implementation of the ability embodied by starter
3, Spring Boot CLI
Spring Boot CLI is a client tool that uses Spring Boot from the command line; The main functions are as follows:
-
Run groovy script = > official website 2.1
-
Package groovy files to jar = > official website 2.3
-
Initialize Spring Boot project = > official website 2.4
-
other
Previous official website document first:
https://docs.spring.io/spring-boot/docs/current/reference/html/spring-boot-cli.html
Because we use less of this, we won't repeat it. Personally, I think the function is to execute groovy scripts directly from the command line.
4, Spring Boot Actuator
Actor is a monitoring plug-in of Spring Boot. It provides many interfaces to obtain various running status indicators of the current project.
Official website documents:
https://docs.spring.io/spring-boot/docs/2.4.0/reference/html/production-ready-features.html#production-ready
Explanation of terms:
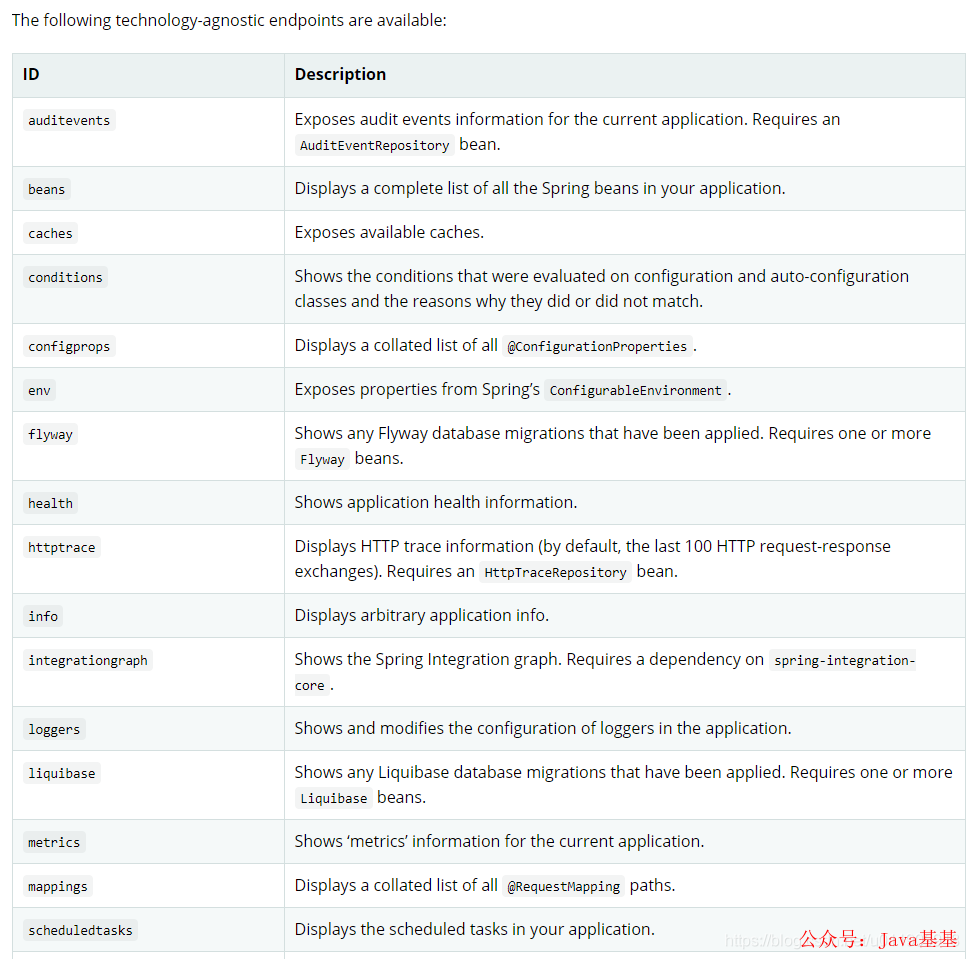
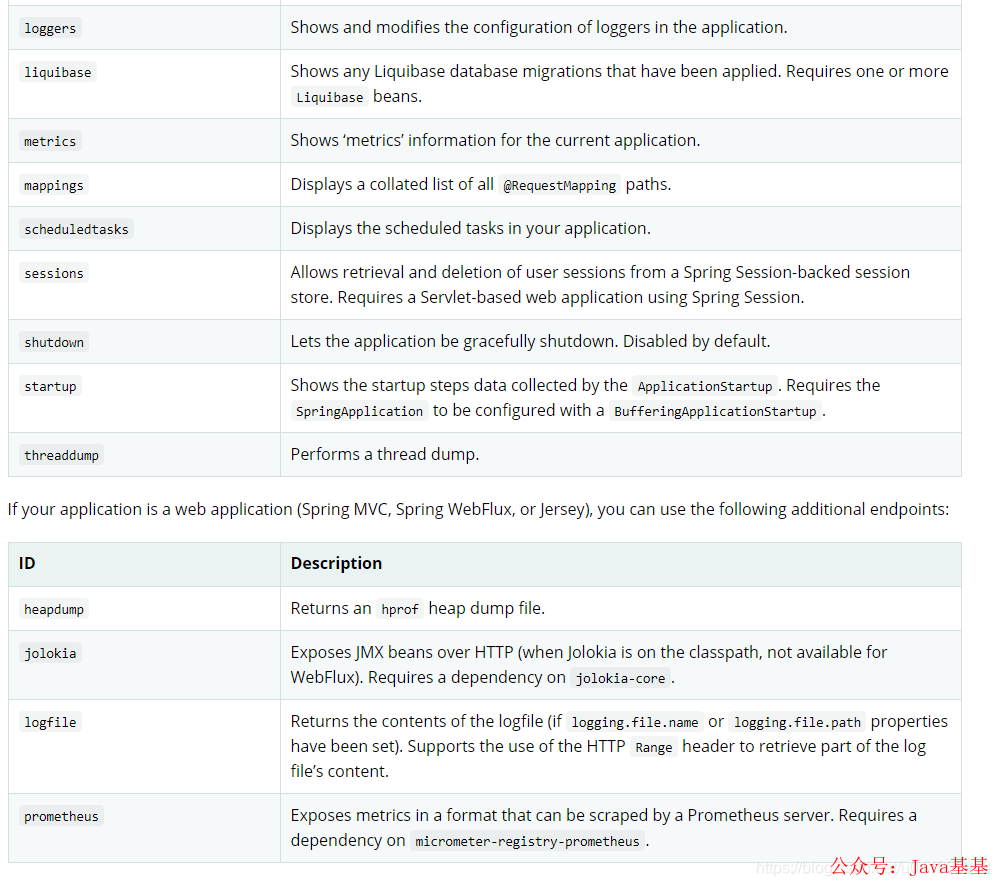
Endpoints: endpoint to be monitored. Refer to Section 2 of the official website for official website documents
Available endpoints:
picture
picture
Below is the endpoint of the web project.
The method of use is as follows:
4.1 adding dependencies
<dependency>
    <groupId>org.springframework.boot</groupId>
    <artifactId>spring-boot-starter-actuator</artifactId>
</dependency>
4.2 configure the endpoint to be monitored
management:
  endpoint:
    health: #Turn on health monitoring endpoint
      enabled: true
    beans: #Enable Bean instance monitoring endpoint
      enabled: true
4.3 start service and verify
4.3. 1 startup results

picture
4.3. 2 view each monitoring information
Browser access (view monitoring information address): http://localhost:9500/actuator
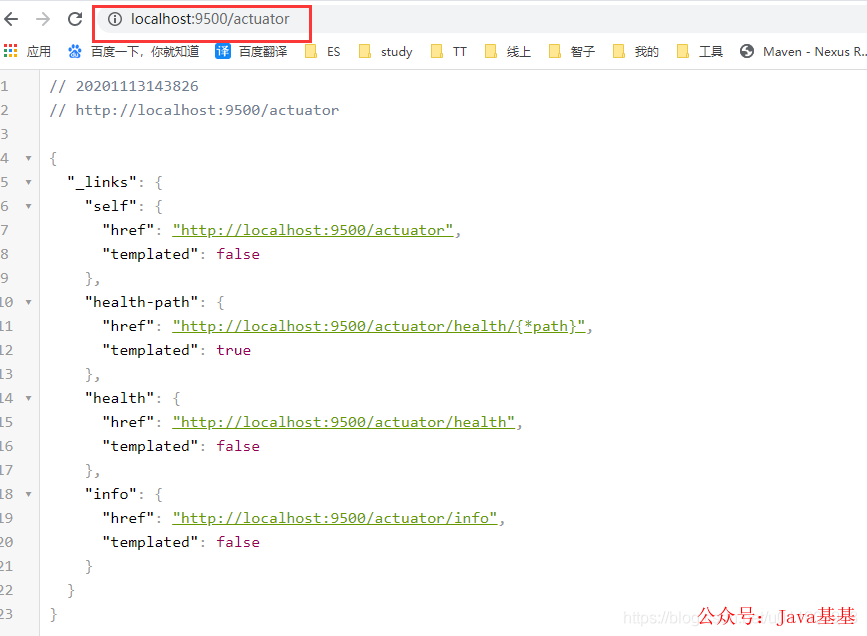
picture
View service health status:
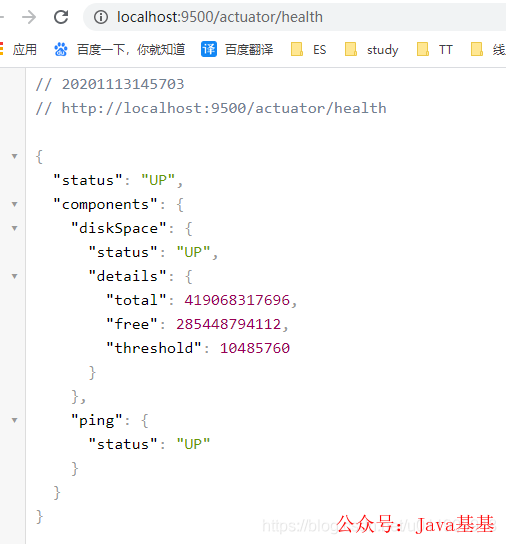
picture
Check the official documents or comments of other API s and study them together. Shamelessly, I haven't used this much. However, after introducing starter and autoconfigure in the next chapter, we can study the source code of the actor....
summary
This chapter mainly introduces the functions of the four components of Spring Boot, mainly starter and autoconfigure. In addition, CLI and actuator are not used much, so they are not introduced in detail.