Modular development
-
There is an environment compatibility problem with ESModules
-
Too many module files and frequent network requests
-
All front-end resources need to be modular
Requirements, compile all ES6 codes into ES5 or better compatible codes, package the converted codes into a file, and support different types of resource modules; The first two requirements can use the building system glup and so on, but the last requirement requires us to learn a new modular packaging tool;
Webpack4
yarn add webpack webpack-cli --dev
webpack supports 0 configuration packaging. By default, Src / index js ->dist/main. js
yarn webpack
Because the module needs to be packaged, processing import and export does not automatically deal with other problems. Therefore, in most cases, we need to customize the configuration and create a new webpack. Com in the current directory config. JS file;
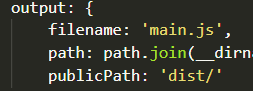
Entry: entry file;
output: export file to receive an object;
- filename is the export file name;
- Path is the export file directory. The path attribute must be an absolute path. You can use the path module in node;
Mode: working mode, none, development, production. The default is production mode;
- none mode only performs normal packaging;
- The development mode will pay attention to the packaging time, etc;
- production mode will be more optimized;
module.exports = {
    entry: './src/main.js',
    output: {
        filename: 'bundle.js',
        path: path.join(__dirname, 'output')
    }
}
Resource module loading
By default, webpack only packages js files. For different types of resource files, you need to use the corresponding Loader;
Loader is the core feature of webpack. Any type of resources can be loaded with the help of different loaders;
- yarn add css-loader style-loader --dev
The entry file is main css
const path = require('path')

module.exports = {
    entry: './src/main.css',
    output: {
        filename: 'main.js',
        path: path.join(__dirname, 'dist')
    },
    mode: 'none',
    module: {
        rules: [
            {
                test: /.css$/,
                use: [
                    'style-loader',
                    'css-loader'
                ]
            }
        ]
    }
}
The recommended approach is that the entry file is still a js file, and the css file is imported through import;
**Webpack suggests that we introduce any files needed by the current code in the process of writing the code** This is the place where webpack thought is worth learning deeply;
File resource loader
The file resource loader needs to be used for the packaging of files such as pictures and fonts
According to the idea of webpack, we use import to load images where they need to be introduced;
yarn add file-loader --dev
- Webpack 4 will default that all packaging results are placed under the root directory of the website. The configuration file needs to tell webpack the packaging location and configure it in the publicPath of output; (this problem is not encountered in webpack5, and will be automatically)
Configured publicPath in dist / directory
URL loader
Data URLs: URLs can directly represent the file content without sending http requests;
- data:text/html;charset=UTF-8,
html content
- The image or font file can represent the file content through Base64 encoding, data:image/png;base64,iasfasfaskfl…asfasf
yarn add url-loader --dev
At this time, there is no png file generated by file loader in dist directory, and the pictures are represented in base64 format in the packaged js file;
Suggestion: use Data URLs for small files to reduce the number of requests, and extract and store large files separately to improve the loading speed;
const path = require('path')

module.exports = {
    entry: './src/main.js',
    output: {
        filename: 'main.js',
        path: path.join(__dirname, 'dist'),
        // publicPath: '/dist/'
    },
    mode: 'none',
    module: {
        rules: [
            {
                test: /.css$/,
                use: [
                    'style-loader',
                    'css-loader'
                ]
            },
            {
                test: /.png$/,
                use: {
                    loader: 'url-loader',
                    options: {
                        limit: 10 * 1024 // 10kb
                    }
                }
            }
        ]
    }
}
When the image exceeds 10kb, it will be processed in the form of file loader, and the image less than 10kb will be converted into Data URLs embedded in the code;
**Note: * * file loader must be downloaded before using URL loader in this way;
Common loader classification
CSS loader, file loader, eslint loader;
Babel-loader
yarn add babel-loader @babel/core @babel/preset-env --dev
{
    test: /.js$/,
        use: {
            loader: 'babel-loader',
                options: {
                    presets: ['@babel/preset-env']
                }
        }
}
How resources are loaded
- Follow the import declaration of the ES Modules standard
- The require function following the CommonJS standard
- define function and require function following AMD standard
- The @ import directive and url function in the style code
- By default, only the src attribute of the picture tag in the html code is supported. You need to manually configure the herf attribute of the a tag in the attrs attribute
yarn add html-loader --dev
{
    test: /.html$/,
        use: {
            loader: 'html-loader',
                options: {
                    attrs: ['img:src', 'a:href']
                }
        }
},
The core working principle of webpack
Webpack will find one of the files as the entry according to the configuration, follow the code of the entry file, analyze and infer the resource modules that the file depends on according to import or require statements, respectively analyze the corresponding dependencies of each resource module, and finally form the dependency tree of the whole project. Webpack recurs this dependency tree to find the resource files that each node depends on, Find the loader corresponding to the resource file according to the rules attribute in the configuration file, and finally put the loaded results into the specified export file, so as to package the whole project; If there is no loader, then webpack can only be a tool for packaging and merging js code;
webpack develops a Loader
The working process of loader is similar to that of a stream. We can try to develop a loader that parses md documents manually
- The loader receives the contents of the loaded file resources and outputs the results loaded here. If it is the last loader, it must be an executable js code. At this time, there are two solutions: either return an executable js code or select an appropriate loader and then process the returned results;
Example: when loader returns executable js code

Packaged bundle This executable js code will appear in js

So you need to return an executable js code
// markdown-loader.js
const marked = require('marked')

module.exports = source => {
  // return 'hello'
  // return 'console.log("hello ~")'
  const html = marked(source)
  // return html
  // return `module.exports = ${JSON.stringify(html)}`
  // return `export default ${JSON.stringify(html)}`

  // Return the html string to the next loader for processing
  return html
}


// webpack.config
const path = require('path')

module.exports = {
  mode: 'none',
  entry: './src/main.js',
  output: {
    filename: 'bundle.js',
    path: path.join(__dirname, 'dist'),
    publicPath: 'dist/'
  },
  module: {
    rules: [
      {
        test: /.md$/,
        use: [
          'html-loader',
          './markdown-loader'
        ]
      }
    ]
  }
}
Plug in mechanism of webpack
Plugin is used to solve other automation tasks, such as clearing dist directory, copying static resource files, compressing output code, etc;
webpack common plug-ins
Most plug-ins export a class and put an instance object in the plugins attribute;
Clear plug-in: yarn add clean wbpack plugin -- dev
const { CleanWebpackPlugin } = require('clean-webpack-plugin')

module.exports = {
    plugins: [
    	new CleanWebpackPlugin()
  	]
}
**Auto generate HTML plug-in: * * yarn add HTML webpack plugin -- dev
-
Previously, we used hard coding to create our own html file, and then introduced the bundle packaged under dist js file, there are many problems. For example, the directory of js file needs to be modified manually;
-
After using the plug-in, an html file will also be exported, and it is a dynamically imported js file;
-
Originally, we set publicPath in the output property to tell webpack our packaged public directory. Now the html file is automatically generated, so there is no need to configure the publicPath property;
-
For simple html files, we can specify parameters through configuration options. For complex html files, we can specify template. The template html file supports lodash template engine syntax through htmlwebpackplugin Options to get configuration options
<!DOCTYPE html> <html lang="en"> <head> <meta charset="UTF-8"> <meta name="viewport" content="width=device-width, initial-scale=1.0"> <meta http-equiv="X-UA-Compatible" content="ie=edge"> <title>Webpack</title> </head> <body> <div class="container"> <h1><%= htmlWebpackPlugin.options.title %></h1> </div> </body> </html> -
Using multiple instance objects can be used to export multiple html files;
const HtmlWebpackPlugin = require('html-webpack-plugin')

module.exports = {
  mode: 'none',
  entry: './src/main.js',
  output: {
    filename: 'bundle.js',
    path: path.join(__dirname, 'dist'),
    publicPath: 'dist/'
  },
  plugins: [
    // Used to generate index html
    new HtmlWebpackPlugin({
      title: 'Webpack Plugin Sample',
      meta: {
        viewport: 'width=device-width'
      },
      template: './src/index.html'
    }),
    // Used to generate about html
    new HtmlWebpackPlugin({
      filename: 'about.html' // Specifies the generated html file name
    })
  ]
}
**copy-webpack-plugin: **yarn add copy-webpack-plugin
We usually don't use this file in the development phase
Copy the static resource file and put it into the directory name of the static resource https://cloud.tencent.com/developer/section/1477556
Pass in an array to specify the static resource file directory
const CopyWebpackPlugin = require('copy-webpack-plugin')

plugins: [
    new CopyWebpackPlugin([
        // 'public/**'
        'public'
    ])
]
webpack develops a Plugin
Plugin is implemented through the hook mechanism. webpack requires that the plug-in must be a function or an object containing the apply method;
Now let's develop one to clear the bundle JS;
- apply receives the compiler parameter, which contains all the configuration information
- https://webpack.docschina.org/api/compiler-hooks/#emit
class MyPlugin {
  apply (compiler) {
    console.log('MyPlugin start-up')

    compiler.hooks.emit.tap('MyPlugin', compilation => {
      // Compilation = > can be understood as the context of this packaging
      for (const name in compilation.assets) {
        // console.log(name)
        // console.log(compilation.assets[name].source())
        if (name.endsWith('.js')) {
          const contents = compilation.assets[name].source()
          const withoutComments = contents.replace(/\/\*\*+\*\//g, '')
          compilation.assets[name] = {
            source: () => withoutComments,
            size: () => withoutComments.length
          }
        }
      }
    })
  }
}
webpack development experience issues
We developed the above by writing source code = "webpack packaging =" running application = "refreshing browser"
- Our project should be accessed in the form of http
- Auto compile + auto refresh
Automatic compilation: we can use the watch working mode to monitor the changes of files and recompile them;
- yarn webpack --watch
watch mode will automatically compile the code, and then we need to refresh the browser manually to see the latest results
**Automatic refresh: * * BrowserSync plug-in can help us realize the function of automatic refresh;
- browser-sync dist --files "**/*"
webpack is automatically compiled into our dist directory, intercepted by Browser Sync, and then refreshed automatically
**But** In this way, the operation is troublesome and the disk needs to be read repeatedly. It is inefficient. It would be perfect if there were better tools to replace it!
Webpack Dev Server
yarn add webpack-dev-server --dev
yarn webpack-dev-server
- webpack.config.js specifies a devServer attribute for dev server and passes in the object;
- contentBase additionally specifies the directory for finding resources for the devServer server. Because we usually do not use copy webpack plugin to copy static resources in the development stage, we configure the contentBase attribute to specify the directory of static resources;
- In the actual development, if the project is launched into the production environment, we can actually access the api, but using the local server to access it locally will cause cross domain problems; The premise of using CORS is that APT must support CORS, but if it is deployed in the same source, it is not necessary to support CORS, so the proxy service needs to be configured in the front-end development server;
devServer: {
    contentBase: './public',
    proxy: {
        '/api': {
            // http://localhost:8080/api/users -> https://api.github.com/api/users
            target: 'https://api.github.com',
            // http://localhost:8080/api/users -> https://api.github.com/users
            pathRewrite: {
                '^/api': ''
            },
            // localhost:8080 cannot be used as the host name for requesting GitHub
            changeOrigin: true
        }
    }
},
Source Map
Mapping the relationship between converted code and source code
Use the comment / / # sourcemappingurl = bundle at the end of the source file js. Map to introduce source Map
webpack now supports 12 source Map modes, which are only recommended here;
Development environment: heap module Eval source map
- The number of lines of code shall not exceed 80 characters
- The difference after Loader conversion is large
- It doesn't matter if the first packaging is slow, but rewriting packaging is relatively fast
Production mode: none or nosources source map
- The Source Map exposes the source code
webpack HMR experience
We have configured automatic refresh, but each automatic refresh will lose the status and experience unfriendly;
Problem core: page state loss caused by automatic refresh;
Enable HMR: it can be configured through the yarn webpack dev server -- hot or in the configuration file
const webpack = require('webpack')

module.exports = {
  mode: 'development',
  entry: './src/main.js',
  output: {
    filename: 'js/bundle.js'
  },
  devtool: 'source-map',
  devServer: {
    hot: true,
  },
  plugins: [
    new webpack.HotModuleReplacementPlugin()
  ]
}
Q1: when we modify the css file, we can hot update it directly, but when we modify the js file, it will refresh automatically?
- Because CSS loader automatically handles the hot update, but the js module has no rules, so it can't handle it;
Q2: if the framework is used in the project, js can still be hot replaced?
- Because we use the framework, each file under the framework is regular, and the HMR scheme is integrated within the project created through the scaffold;
Note: the HMR in webapck is not out of the box, and the module hot replacement logic needs to be handled manually;
HMR API
-
module.hot provides a hot update api using module hot. Accept to register for hot updates
-
When using module hot. Accept to register the hot update of the module. If the module changes, it will not trigger automatic refresh
-
It can also be configured through the hotOnly attribute in the configuration file. No matter whether the module is configured with hot update or not, the browser will not be refreshed, so you can see the error message
// webpack.congfig.js devServer: { // hot: true, hotOnly: true }, -
If the API provided by HMR is used but the HMR option is not enabled, an error will be reported, so an if (module.hot) is added to determine whether it exists
-
In order to realize hot update, we have written a lot of business irrelevant code in the business code, but in the production environment, we have removed the HMR plug-in. false will not affect the state of the production environment;
import createEditor from './editor'
import background from './better.png'
import './global.css'

const editor = createEditor()
document.body.appendChild(editor)

const img = new Image()
img.src = background
document.body.appendChild(img)

// ================================================================
// HMR manual processing module hot update
// Don't worry about the redundancy of these codes in the production environment, because after packaging through webpack,
// All the code will be removed, which is only used in the development phase
if (module.hot) {
  let hotEditor = editor
  module.hot.accept('./editor.js', () => {
    // When editor JS update to automatically execute this function
    // Temporary record editor content
    const value = hotEditor.innerHTML
    // Remove pre update elements
    document.body.removeChild(hotEditor)
    // Create a new editor
    // At this point, createEditor is the updated function
    hotEditor = createEditor()
    // Restore editor content
    hotEditor.innerHTML = value
    // Append to page
    document.body.appendChild(hotEditor)
  })

  module.hot.accept('./better.png', () => {
    // When better Execute after PNG update
    // Overriding the setting src triggers the picture element to reload, thereby locally updating the picture
    img.src = background
  })

  // The style loader automatically processes the updated styles internally, so there is no need to manually process the style module
}
webpack production environment optimization
There are great differences between production environment and development environment. Development environment pays attention to development efficiency, while production environment pays attention to operation efficiency;
Webpack 4 provides the mode mode mode, which provides us with many default configurations in the production environment;
To use configurations in different environments, there are the following methods
-
The configuration file exports different configurations according to different environments;
In the function exported from the configuration file, two parameters will be passed in, among which env is the environment variable, and different configurations can be made for different environments according to Env;
const webpack = require('webpack') const { CleanWebpackPlugin } = require('clean-webpack-plugin') const HtmlWebpackPlugin = require('html-webpack-plugin') const CopyWebpackPlugin = require('copy-webpack-plugin') module.exports = (env, argv) => { const config = { ....// Configuration in development environment } if (env === 'production') { config.mode = 'production' config.devtool = false config.plugins = [ ...config.plugins, new CleanWebpackPlugin(), new CopyWebpackPlugin(['public']) ] } return config } -
One environment corresponds to one configuration file. Usually, three files are configured: public configuration, development environment configuration and production environment configuration;
For the merging of configuration files, we usually use the webpack merge plug-in;
const webpack = require('webpack')
const merge = require('webpack-merge')
const common = require('./webpack.common')

module.exports = merge(common, {
  mode: 'development',
  devtool: 'cheap-eval-module-source-map',
  devServer: {
    hot: true,
    contentBase: 'public'
  },
  plugins: [
    new webpack.HotModuleReplacementPlugin()
  ]
})
DefinePlugin
Inject global members into code. In production mode, process is enabled and injected by default env. NODE_ ENV
- DefinePlugin requires that the value we define is a code fragment (similar to the value returned in Loader)
const webpack = require('webpack')

module.exports = {
  mode: 'none',
  entry: './src/main.js',
  output: {
    filename: 'bundle.js'
  },
  plugins: [
    new webpack.DefinePlugin({
      // Value requires a snippet of code
      API_BASE_URL: JSON.stringify('https://api.example.com')
      // API_BASE_URL: " 'https://api.example.com' "
    })
  ]
}
Tree-shaking
Three methods are exported in a file, only one method is introduced in b file, and the other two methods are unreferenced code;
Tree shaking is to remove unreferenced code. Tree shaking is not a value of a configuration option, but the effect of a combination of functions, which will be automatically turned on in production mode;
The optimization attribute is provided in webpack configuration to centrally configure the optimization function of webpack;
- usedExports is similar to marking dead leaves, and minimize is responsible for shaking them off
- webpack packs a module into a function. concatenateModules is used to merge and output all modules into one function as much as possible, which not only improves the operation efficiency, but also reduces the size of the code. It is called scope hosting
module.exports = {
  mode: 'none',
  entry: './src/index.js',
  output: {
    filename: 'bundle.js'
  },
  optimization: {
    // The module exports only the used members
    usedExports: true,
    // Merge each module into a function as much as possible
    concatenateModules: true,
    // Compressed output results
    minimize: true
  }
}
**Note: * * the premise of tree shaking is that the ES Module mode is modular. The @ Babel / preset env we use will convert the ES Module into Common JS mode, which will lead to tree shaking failure;
You can modify the conversion mode of babel in the configuration
module: {
    rules: [
        {
            test: /\.js$/,
            use: {
                loader: 'babel-loader',
                options: {
                    presets: [
                        // If the ESM has been converted when Babel loads the module, it will cause the Tree Shaking to fail
                        // ['@babel/preset-env', { modules: 'commonjs' }]
                        // ['@babel/preset-env', { modules: false }]
                        // You can also use the default configuration, which is auto, so that the Babel loader will automatically close the ESM conversion
                        ['@babel/preset-env', { modules: 'auto' }]
                    ]
                }
            }
        }
    ]
},
sideEffects
Side effects: when the module executes, it does things other than exporting Members (for example, adding a new method on the prototype object of Number), which is generally used to mark whether there are side effects in the npm package;
Turn on sideEffects in the optimization attribute, and then webpack will check the package to which the current code belongs JSON has a sideEffects flag to determine whether the module has side effects. If the module has no side effects, webpack will not package it;
- css modules in the code are side effects
webpack.config.js
module.exports = {
  mode: 'none',
  entry: './src/index.js',
  output: {
    filename: 'bundle.js'
  },
  module: {
    rules: [
      {
        test: /\.css$/,
        use: [
          'style-loader',
          'css-loader'
        ]
      }
    ]
  },
  optimization: {
    sideEffects: true,
    // The module exports only the used members
    // usedExports: true,
    // Merge each module into a function as much as possible
    // concatenateModules: true,
    // Compressed output results
    // minimize: true,
  }
}
package.json
{
  "name": "31-side-effects",
  "version": "0.1.0",
  "main": "index.js",
  "author": "zce <w@zce.me> (https://zce.me)",
  "license": "MIT",
  "scripts": {
    "build": "webpack"
  },
  "devDependencies": {
    "css-loader": "^3.2.0",
    "style-loader": "^1.0.0",
    "webpack": "^4.41.2",
    "webpack-cli": "^3.3.9"
  },
  // Mark that there are no side effects in this project
  // "sideEffects": false
  "sideEffects": [
  	"*.css",
  	"./src/extend.js"
  ]
}
Code segmentation
All the code of the project will be packaged together. When the project becomes larger and larger, it will lead to bundle JS is very large, but not every module is necessary at startup; It is more reasonable to separate our packaged results into multiple bundles according to certain rules JS, load on demand according to the operation needs defined by us;
http1. Defects in version 1
- Co domain parallel request limit
- Each request has a certain delay
- The requested Header wastes bandwidth traffic
To meet the above requirements, webpack supports Code Splitting, which can be implemented in the following two ways:
- Multi entry packaging
- Dynamic import
Multi entry packaging
It is generally applicable to multi page applications. One page corresponds to one entry, and the public part is extracted separately;
- entry is configured as an object
- Different entry files are represented by [name] in output
- The HTML webpack plugin will import all packaged js by default, so configure different chunks attributes to specify the imported js file
- The public part extracts the splitChunks attribute in the configuration optimization attribute, and specifies chunks as all;
const { CleanWebpackPlugin } = require('clean-webpack-plugin')
const HtmlWebpackPlugin = require('html-webpack-plugin')

module.exports = {
  mode: 'none',
  entry: {
    index: './src/index.js',
    album: './src/album.js'
  },
  output: {
    filename: '[name].bundle.js'
  },
  optimization: {
    splitChunks: {
      // Automatically extract all common modules to a separate bundle
      chunks: 'all'
    }
  },
  module: {
    rules: [
      {
        test: /\.css$/,
        use: [
          'style-loader',
          'css-loader'
        ]
      }
    ]
  },
  plugins: [
    new CleanWebpackPlugin(),
    new HtmlWebpackPlugin({
      title: 'Multi Entry',
      template: './src/index.html',
      filename: 'index.html',
      chunks: ['index']
    }),
    new HtmlWebpackPlugin({
      title: 'Multi Entry',
      template: './src/album.html',
      filename: 'album.html',
      chunks: ['album']
    })
  ]
}
Dynamic import
When a module needs to be used, load the module
Dynamically imported modules will be automatically subcontracted and imported ('. / posts/posts')
Magic notes
The packaged file names of dynamically imported modules are serial numbers. If you want to name the packaged files, you can use magic comments;
The same webpackchunkname will be packaged together;
if (hash === '#posts') {
    import(/* webpackChunkName: 'components' */'./posts/posts').then(({ default: posts }) => {
      mainElement.appendChild(posts())
    })
  } else if (hash === '#album') {
    import(/* webpackChunkName: 'components' */'./album/album').then(({ default: album }) => {
      mainElement.appendChild(album())
    })
  }
MiniCssExtractPlugin
Extract the CSS file into a separate file. It is recommended to consider using the plug-in when the CSS file is greater than 150kb, otherwise one more request for CSS will be made;
- After using the plug-in, you do not need to use style loader to inject css in the css loader configuration, but use minicssextractplugin Loader (injected through link)
const MiniCssExtractPlugin = require('mini-css-extract-plugin')


...
module: {
    rules: [
        {
            test: /\.css$/,
            use: [
                // 'style loader ', / / inject styles through style tags
                MiniCssExtractPlugin.loader,
                'css-loader'
            ]
        }
    ]
},
optimize-css-assets-webpack-plugin
webpack only compresses js files by default, and the subcontracted css is not compressed. At this time, we need to use plug-ins
...
const OptimizeCssAssetsWebpackPlugin = require('optimize-css-assets-webpack-plugin')

module.exports = {
  ...,
  plugins: [
    ...,
    new OptimizeCssAssetsWebpackPlugin()
  ]
}
- In addition to being configured in the plugins attribute, the optimizecssasassetswebpackplugin can also be configured in the minimizer attribute of the optimization attribute. webpack recommends that we prevent this operation of compressing code in the minimizer. The compression instruction will be executed only when the minimizer is enabled (such as production mode);
- When we manually configure the minizer attribute, webpack will think that we want to customize the compressor plug-in, so the js file will not be compressed at this time (production mode); This requires us to manually configure the compression plug-in TerserWebpackPlugin of js
const { CleanWebpackPlugin } = require('clean-webpack-plugin')
const HtmlWebpackPlugin = require('html-webpack-plugin')
const MiniCssExtractPlugin = require('mini-css-extract-plugin')
const OptimizeCssAssetsWebpackPlugin = require('optimize-css-assets-webpack-plugin')
const TerserWebpackPlugin = require('terser-webpack-plugin')

module.exports = {
  mode: 'none',
  entry: {
    main: './src/index.js'
  },
  output: {
    filename: '[name].bundle.js'
  },
  devtool: 'cheap-eval-source-map',
  module: {
    rules: [
      {
        test: /\.css$/,
        use: [
          // 'style loader ', / / inject styles through style tags
          MiniCssExtractPlugin.loader,
          'css-loader'
        ]
      }
    ]
  },
  optimization: {
    minimizer: [
      new OptimizeCssAssetsWebpackPlugin(),
      new TerserWebpackPlugin()
    ]
  },
  plugins: [
    new CleanWebpackPlugin(),
    new MiniCssExtractPlugin(),
    new HtmlWebpackPlugin({
      template: 'src/index.html',
      title: 'xp item'
    }),
    new OptimizeCssAssetsWebpackPlugin()
  ]
}
Output file name Hash
In the cache strategy, if we set the cache time too short, the effect may not be obvious. Once the time is set too long, there is no way to update the application to the back end in time after redeployment. Therefore, in the production mode, the file name uses Hash. When the resource file changes, the file name will also change, For the back end, it is a new request, so we can set the cache policy for a long time without worrying about the untimely update;
All paths such as filename in the configuration support hash mode
hash has the following three modes:
-
filename: '[name]-[hash].bundle.css';
Hash mode. When any place in the project changes, the hash of all files will change
-
filename: '[name]-[chunkhash].bundle.css';
The chunk hash mode is a chunk level hash. The hash value of the chunk of one channel in the project is the same (multiple chunks will be formed when dynamic import is used in the project). When changing, it will only affect the hash value of the current channel
-
filename: '[name]-[contenthash].bundle.css';
Content hash mode, file level hash, different files have different hash values;
-
The default hash length is 20. You can specify the length manually. Personally, it's about 8 bits
filename: '[name]-[contenthash:8].bundle.css'
const { CleanWebpackPlugin } = require('clean-webpack-plugin')
const HtmlWebpackPlugin = require('html-webpack-plugin')
const MiniCssExtractPlugin = require('mini-css-extract-plugin')
const OptimizeCssAssetsWebpackPlugin = require('optimize-css-assets-webpack-plugin')
const TerserWebpackPlugin = require('terser-webpack-plugin')

module.exports = {
  mode: 'none',
  entry: {
    main: './src/index.js'
  },
  output: {
    filename: '[name]-[contenthash:8].bundle.js'
  },
  optimization: {
    minimizer: [
      new TerserWebpackPlugin(),
      new OptimizeCssAssetsWebpackPlugin()
    ]
  },
  module: {
    rules: [
      {
        test: /\.css$/,
        use: [
          // 'style loader ', / / inject styles through style tags
          MiniCssExtractPlugin.loader,
          'css-loader'
        ]
      }
    ]
  },
  plugins: [
    new CleanWebpackPlugin(),
    new HtmlWebpackPlugin({
      title: 'Dynamic import',
      template: './src/index.html',
      filename: 'index.html'
    }),
    new MiniCssExtractPlugin({
      filename: '[name]-[contenthash:8].bundle.css'
    })
  ]
}