Today, the front-end girls let me optimize the project, think nothing of it, early in the morning to the company, the boss has arrived, I listened to Tingfeng Tse's song "Live via", happy to live really good, do not think, after the National Day mood is really good, rest, I quickly scrapped, hit the code, do not hit the code out of the waves is not good for money, we still do not bubble, good money to invest and manage. Money bar, picking up girls is too expensive, one day can spend you a month's meal money ah, heartache ah.
A qq message was thrown over. I have seen webpack before. I have only seen a little bit, but I have not practiced it. After a while, I have thrown a message and a link. They are all in English. Wow, I don't know my English is very good. Haha, but foreign articles are really awesome.
4 Ways To Boost Your Vue.js App With Webpackvuejsdevelopers.com
I calm down and think about it carefully. We have to work purposefully. First of all, we need to know where we need to optimize and which places affect the effect of the first screen loading.
So I wondered if there were any plug-ins that could directly generate a report optimization report, and there were
webpack-bundle-analyzer
This analysis plug-in
Recent basic uses are as follows:
install
# NPM npm install --save-dev webpack-bundle-analyzer
# Yarn
yarn add -D webpack-bundle-analyzer
Basic usage method
const BundleAnalyzerPlugin =  require('webpack-bundle-analyzer').BundleAnalyzerPlugin;
module.exports =  {
 plugins:  [
    new  BundleAnalyzerPlugin()
  ]
}
To configure:

Use

Description of parameters:
{
   analyzerMode: One of: server, static, disabled,
   analyzerHost    {String}    Default: 127.0.0.1. Host that will be used in server mode to start HTTP server.
   analyzerPort    {Number} or auto    Default: 8888. Port that will be used in server mode to start HTTP server.
   openAnalyzer    {Boolean}    Default: true. Automatically open report in default browser.
   generateStatsFile    {Boolean}    Default: false. If true, webpack stats JSON file will be generated in bundle output directory
   statsFilename    {String}    Default: stats.json. Name of webpack stats JSON file that will be generated if generateStatsFile is true. It can be either an absolute path or a path relative to a bundle output directory (which is output.path in webpack config).
   statsOptions    null or {Object}    Default: null. Options for stats.toJson() method. For example you can exclude sources of your modules from stats file with source: false option. See more options here.
}
The principle is as follows:
Read the stats.json file in the output folder (usually dist) and visualize the file as a plug-in. It is convenient to compare the size of each bundle file intuitively to achieve the purpose of optimizing performance.
Two Construction Models
1 Auto-Open Browser after Construction: Default Port 8888
new BundleAnalyzerPlugin({ analyzerMode: 'server', generateStatsFile: true, statsOptions: { source: false } })
2 Use package.json file to configure startup command
new BundleAnalyzerPlugin({
    analyzerMode: 'disabled',
    generateStatsFile: true,
    statsOptions: { source: false }
})
Add in the scripts field of package.json
"bundle-report": "webpack-bundle-analyzer --port 8123 dist/stats.json"
(3) Type commands on the command line
npm run bundle-report
Browser opens Analysis page automatically: localhost:8123

What aspects can we start with to optimize? Let's leave our own projects behind and talk about how we optimize projects in general.
1 The first must be to compress js files and css files
This webpack vue-cli3 has been automatically done for us, so we don't have to worry about it.
2 Remove mapSource files
Map file is a js file compressed, file variable name replacement corresponding, variable location and other original information data files. Personal understanding is: the record of js compression process, such as browser support, can restore the file to the uncompressed file through map file.

3 Picture Compression
npm install image-webpack-loader --save-dev
Usage:
 // Compressed pictures
  chainWebpack: config => {
    config.module
        .rule('images')
        .use('image-webpack-loader')
        .loader('image-webpack-loader')
        .options({
          bypassOnDebug: true
        })
        .end()
  },
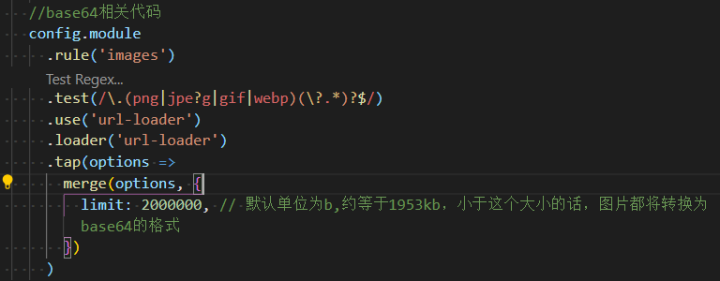
This code does two things: compression and Base64 conversion.
You can find that there are fewer pictures under dist/img because no more than 4096 bytes will be converted to Base64 encoding, and those referenced by require will also be converted to and base64, and those beyond this limit will be packaged in the img folder.
We use the following:

4. Common Code Extraction
configureWebpack: () => ({
    optimization: {
      splitChunks: {
        cacheGroups: {
          vendor:{
            chunks:"all",
                test: /node_modules/,
                name:"vendor",
                minChunks: 1,
                maxInitialRequests: 5,
                minSize: 0,
                priority:100,
          },
          common: {
            chunks:"all",
            test:/[\\/]src[\\/]js[\\/]/,
            name: "common",
            minChunks: 2,
            maxInitialRequests: 5,
            minSize: 0,
            priority:60
          },
          styles: {
            name: 'styles',
            test: /\.(sa|sc|c)ss$/,
            chunks: 'all',
            enforce: true,
          },
          runtimeChunk: {
            name: 'manifest'
          }
        }
      }
    }
  }),
But in fact, vue-cli3 has already done code extraction, maybe not what we need, we can make the above code changes.
5.GZip
asset size limit: The following asset(s) exceed the recommended size limit (244 KiB). This can impact web performance.
This means that these files are larger than 244kb and can be compressed once using Gzip
npm i -D compression-webpack-plugin
plugins:[
      new CompressionWebpackPlugin({
        filename: '[path].gz[query]',
        algorithm: 'gzip',
        test: /\.js$|\.html$|\.json$|\.css/,
        threshold: 0, // Only resources larger than this value are processed
        minRatio:0.8, // Only resources with compression rates less than this value will be processed
        deleteOriginalAssets: true // delete original file
      })
    ],
But in fact, we don't need to compress at the code level. In fact, we can start gzip compression on the server when we deploy the project.
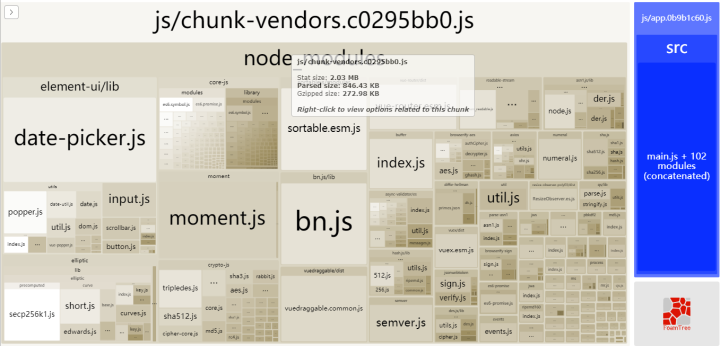
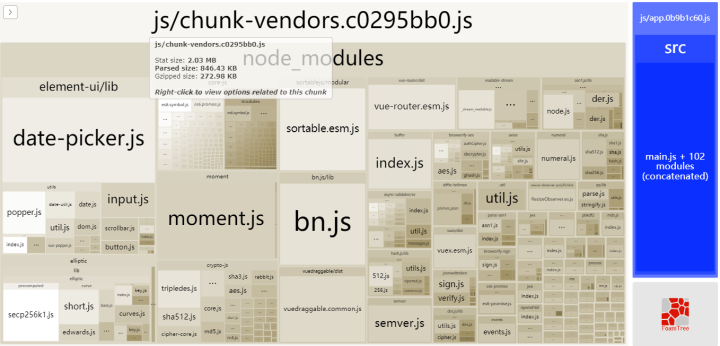
At present, the most important part of our project is element-ui plus echarts plus moment.js.
These three areas are the most important areas to be optimized. We know from the analysis of the structure diagram that moment.js occupies a large volume, mainly because of his i18n file occupied. So when we pack, we don't need to pack i18n files, just JS files. We do some processing in vue.config.js.

As for element-ui, we can use on-demand loading. The current project is the component needed to introduce element-ui directly into main.js, but there is a disadvantage that when the first screen is loaded, we will load everything once, and our project encapsulates element-ui components twice, which will lead to this.
element-ui dependency files have been introduced twice, so all we need to do is migrate the components introduced in main.js to the files under each component component.

As for echarts, they are also huge, which can take up more than 3M of bandwidth. So this is a big problem, but also do not introduce in main.js, do not do global introduction, in their respective use of the current project pages to introduce, so as to load on demand, will not take up too much time on the first screen.
The final optimization is

