Hello, fellow students! When Xiaobian was learning the front end, he accidentally heard the concept of pseudo class. It doesn't matter. What matters is that I forgot how to use pseudo class and pseudo element. After reviewing it again, I want to share this part of the content:
Pseudo class
Both pseudo classes and pseudo elements belong to css rendering.
Mouse over
The function of mouse over pseudo class is to set the style when the mouse hovers over the element. That is, when the mouse moves to the label with pseudo class, the rendering style in the pseudo class will be displayed. After the mouse is removed, it will return to its original appearance.
<style type="text/css">
	div{/*div The original style of the label */
		width: 50px;
		height: 50px;
		background-color: red;
	}
	div:hover{/* The style when the mouse moves over the div tag */
		background-color: blue;
	}
</style>
<div></div>
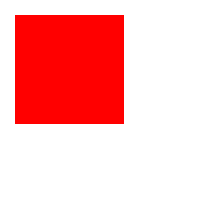
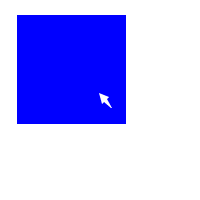
As above: we display a red square with a length and width of 50 pixels on the web page. When we move the mouse to the square, the color of the square will become the blue style in the pseudo class.
matching
There are still a lot of pseudo classes that can play a matching role. I'll explain two kinds here:
First child pseudo class
: the first child pseudo class matches the first child element of all elements. If it matches, the matching element style will be modified:
<style type="text/css">
div:first-child{
color: red;
}
</style>
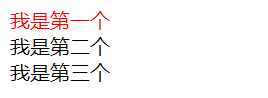
<div>I was the first</div>
<div>I'm the second</div>
<div>I'm the third</div>
Here we can see that the pseudo class specifies to match the < div > < / div > tag, so the text color in the < div > < / div > tag of the first child element of the < body > < / body > element is red, as shown in the following figure:
Example:
<!doctype html>
<html lang="en">
<head>
<meta charset="UTF-8">
<title>Document</title>
<style type="text/css">
p:first-child{
color: red;
}
</style>
</head>
<body>
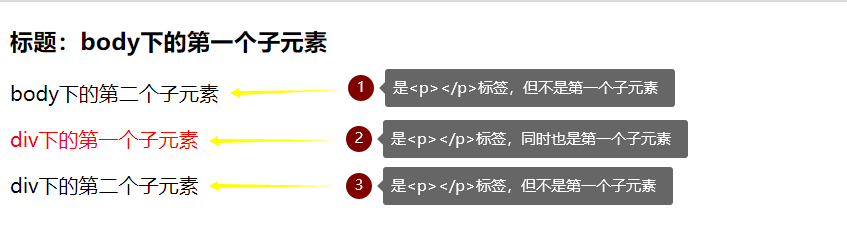
<h3>title: body First child element under</h3>
<p>body The second child element under</p>
<div>
<p>div First child element under</p>
<p>div The second child element under</p>
</div>
</body>
</html>
Cough, don't rush to view the web page effect. Let's analyze it first: the < p > < / P > tag under the < body > < / body > tag is not the first child element, so the pseudo class will not be activated; The < p > < / P > tag under the < div > < / div > tag is the first child element, so as the first child element under < div > < / div >, it is also the < p > < / P > tag of the specified element, so the pseudo class is activated. Next is the web page display effect:
Generally speaking, there are two activation conditions for the: first child pseudo class: the object is the specified element; Object is the first child element of the parent.
focus pseudo class
Focus pseudo class: select the input field to get focus and set its style. Mainly used on < input type = "text" / > labels:
<style type="text/css">
	input:focus{
		background-color: yellow;
	}
</style>
<input type="text">
Display effect on Web page:
Access link
The above hover pseudo class can be used in multiple tags, but several are only useful for link < a > < / a > tags and not for other tags.
When no pseudo classes are added:
<a href="#"> I am a link</a>
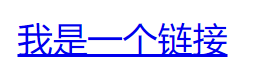
These three are the link color styles before, during and after clicking. These are the default values of < a > < / a > tags. We can modify them through pseudo classes:
link pseudo class
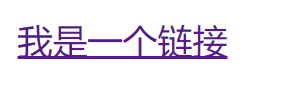
To modify the style before link access, you can modify the < a > < / a > tag directly or use the a:link {} pseudo class:
<style type="text/css">
	a:link{
		color: gray;
	}
</style>

<a href="#"> I am a link</a>
Before clicking the link again, the font color of the link has changed:

Note: if the color of the link does not change after clicking, it may be because the link belongs to the visited link. You need to change the link to display the style of the unreached link. You can modify the link in < a href = "#" > < / a >, for example, add several # signs.
active pseudo class and visited pseudo class
It is not much different from the previous pre access style. You only need to master the use of two pseudo classes:
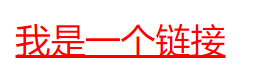
/* Selected link, link when accessing */
a:active {
  color: green;
}
/* Visited links */
a:visited {
  color: black;
}
For the selected link, it will be displayed after clicking the link:

For the visited link, it will be displayed after clicking the link:

Pseudo element
The CSS pseudo element is used to style the specified part of the element. It can style the initial letter and first line of an element, or insert content before or after the content of an element.
The use of pseudo elements is different from that of pseudo classes. For example, the use of pseudo classes is: a:hover {}, which is connected by one ":", but pseudo elements are generally connected by two ":": span::before {}.
before pseudo element and after pseudo element
These two pseudo elements are used to insert content before and after an element. Among the two pseudo elements, there is a very important attribute: content:;, The content in this attribute is the content inserted by the pseudo element, which can be text, pictures, etc.
Insert text like:
span::before{
	contend: "hello!";
}
Text "hello!" It will be inserted into the front part of the < span > < / span > tag, or the picture will be inserted, which requires url() to locate the position of the picture.
span::before{
	contend: url("photo/smile.gif");
}
As for the:: after {} pseudo element, it is used in the same way as the:: before {} pseudo element. Here is a small example:
<style type="text/css">
	span{/* Sets the background color of the body */
		background-color: yellow;
	}
	span:before{/* Sets the font color for the front section */
		content: "I'm the first part";
		color: red;
	}
	span::after{/* Set the background color of the back part */
		content: "I'm the latter part";
		background-color: red;
	}
</style>
<span>~~~!I am the main part!~~~</span>
The web page is shown as follows:

Only one < span > < / span > tag can do what three tags can do.
First line pseudo element and first letter pseudo element
For:: first line {} pseudo elements, they act on text and can only be applied to block level elements. Their main function is to change the style of the first line of text:
<style type="text/css">
	div::first-line{
		font-size: 20px;
		background-color: yellow;
	}
</style>
<!-- The following is a little content copied on the Internet. Don't introduce it -->
<div>Let's copy an article: according to the information from China Manned Space Engineering Office, at 14:57 Beijing time on July 4, 2021, after about 7 hours of extravehicular activities, the Shenzhou 12 astronaut crew worked closely and successfully completed all the established tasks during the extravehicular activities. Astronauts Liu Boming and Tang Hongbo returned to the Tianhe core module safely, It marks the complete success of the first spaceflight of Chinese astronauts in the space station stage. This is another space extravehicular activity implemented by Chinese astronauts after the Shenzhou VII manned mission in 2008, and it is also the first space extravehicular activity of Chinese astronauts at the space station stage.</div>
According to the above code, the style of the first line in a paragraph will be changed. The effect diagram is as follows:
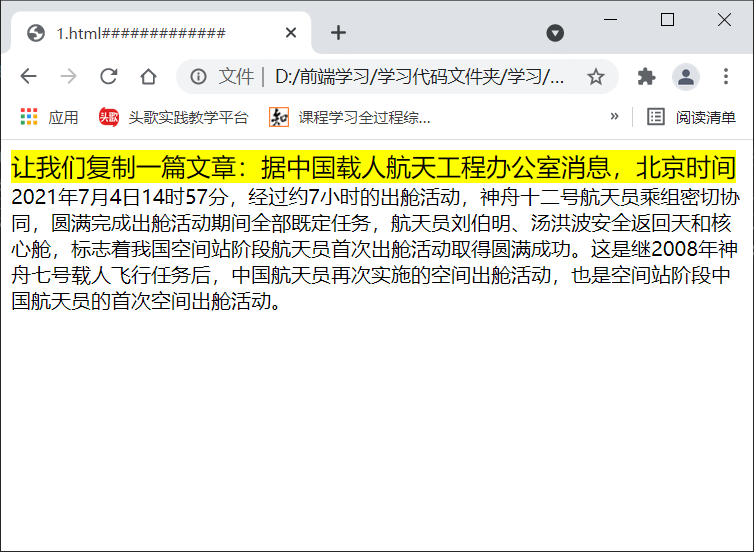
:: the first line {} pseudo element will only modify the style of the first line of content. If you reduce or enlarge the web page, it will only affect the first line of the web page.
For the:: first letter {} pseudo element, the use method is similar to the:: first line {} pseudo element, which can only act on block level elements. The:: first letter {} pseudo element is used to change the first letter or text of the text:
<style type="text/css">
	div::first-letter{
		font-size: 25px;
		color: red;
	}
</style>
<div>Hello Web</div>
<div>Hello, front end</div>
Web page display effect:

selection pseudo element
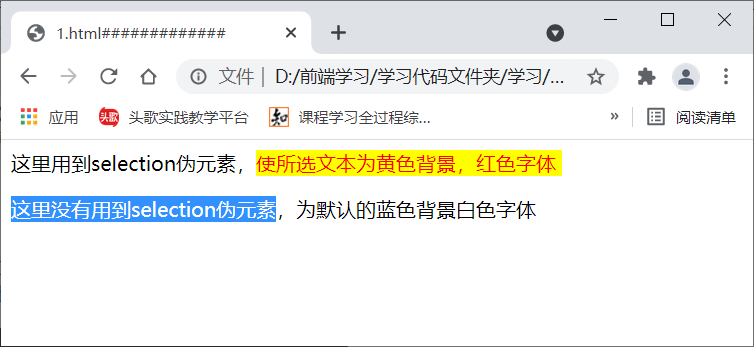
Just look at the name. Choose!:: The selection {} pseudo element can modify the style of the part selected by the user, which may be difficult to understand. Let's directly give an example:
<style type="text/css">
p.have::selection{
background-color: yellow;
color: red;
}
</style>
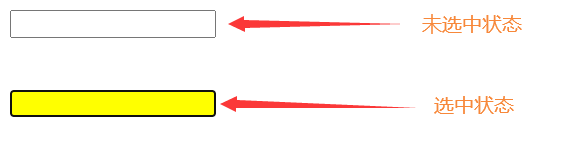
<p class="have">Used here selection Pseudo element, so that the selected text has a yellow background and a red font</p>
<p>Not used here selection Pseudo element, which is the default white font with a blue background</p>
The text style with the selection pseudo element is no different from the original text, but after we select the text, the difference is shown in the following figure:
The above is all the content shared this time. Thank you for watching!
If you don't feel satisfied with this article, you can go to the w3school website to learn:
w3school learning website: css3 pseudo class, click to enter