8, Vue routing
Understanding: a route is a set of key - value s. Multiple routes need to be managed by a router.
Front end Routing: key is the path and value is the component.
8.1 relevant understanding
- vue-router
vue is a plug-in library specially used to implement SPA applications.
- SPA application
- single page web application (SPA).
- The whole application has only one complete page.
- Clicking the navigation link in the page will not refresh the page, but only make a partial update of the page.
- The data needs to be obtained through ajax requests.
- What is routing
- A route is a set of mapping relationships (key - value)
- key is the path, and value may be function or component
- Back end routing
- Understanding: value is a function used to process requests submitted by clients.
- Working process: when the server receives a request, it finds a matching function according to the request path to process the request and return the response data.
- Front end routing
- Understanding: value is a component used to display page content.
- Working process: when the path of the browser changes, the corresponding component will be displayed.
8.2 basic routing
- Installing Vue router
PS D:\workspace\vscode\vue_test> npm i vue-router

+ vue-router@3.5.3
added 1 package from 1 contributor in 6.881s

PS D:\workspace\vscode\vue_test>
- Create Vue router
// router/index.js

// This file is dedicated to creating routers for the entire application
import VueRouter from "vue-router"

import About from '../pages/About'
import Home from '../pages/Home'

// Create a router
export default new VueRouter({
    routes: [
        {
            path: '/about',
            component: About
        },
        {
            path: '/home',
            component: Home
        }
    ]
})
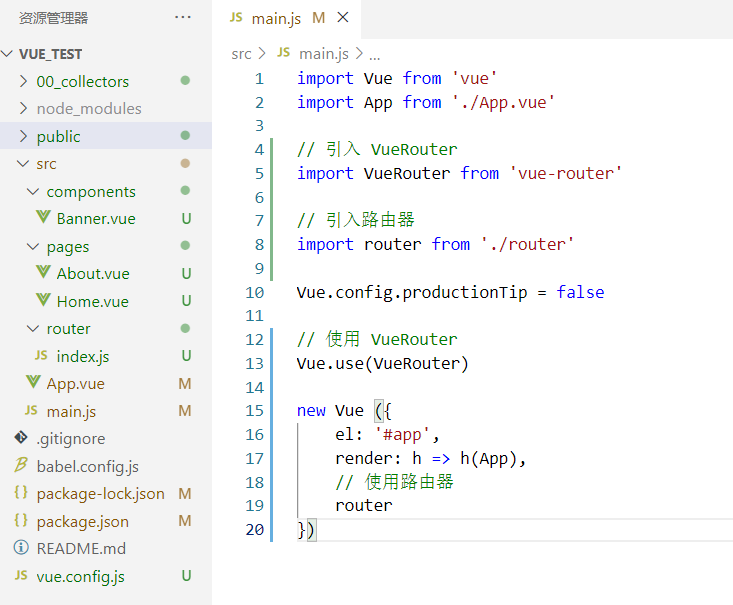
- Introducing Vue router
// main.js

import Vue from 'vue'
import App from './App.vue'

// Introducing VueRouter
import VueRouter from 'vue-router'

// Introduction router
import router from './router'

Vue.config.productionTip = false

// Using vueroter
Vue.use(VueRouter)

new Vue ({
    el: '#app',
    render: h => h(App),
    // Use router
    router
})
- Use router
<template>
    <div class="col-xs-offset-2 col-xs-8">
        <div class="page-header"><h2>Vue Router Demo</h2></div>
    </div>
</template>

<script>
    export default {
        name: 'Banner'
    }
</script>
<template>
    <h2>I am About Content of</h2>
</template>

<script>
    export default {
        name: 'About'
    }
</script>
<template>
    <h2>I am Home Content of</h2>
</template>

<script>
    export default {
        name: 'Home'
    }
</script>
<template>
	<div>
		<div class="row">
			<Banner/>
		</div>
		<div class="row">
			<div class="col-xs-2 col-xs-offset-2">
				<div class="list-group">
					<!-- original html We use a Tab to realize page Jump -->
					<!-- <a class="list-group-item active" href="./about.html">About</a>
					<a class="list-group-item" href="./home.html">Home</a> -->

					<!-- 1. Vue With the help of router-link Label to switch routes -->
					<router-link class="list-group-item" active-class="active" to="/about">About</router-link>
					<router-link class="list-group-item" active-class="active" to="/home">Home</router-link>
				</div>
			</div>
			<div class="col-xs-6">
				<div class="panel">
				<div class="panel-body">
					<!-- 2. Specifies the render location of the component -->
					<router-view></router-view>
				</div>
				</div>
			</div>
		</div>
	</div>
</template>

<script>
	import Banner from './components/Banner.vue'
	export default {
		name:'App',
		components: {Banner}
	}
</script>
- Several points for attention
- Routing components are usually stored in the pages folder, and general components are usually stored in the components folder.
- By switching, "hidden" routing components are destroyed by default and can be mounted when necessary.
- Each component has its own $route attribute, which stores its own routing information.
- There is only one router in the whole application, which can be obtained through the $router attribute of the component.
8.3 nested (multi-level) routing
- Modify routing rules
import VueRouter from "vue-router"

import About from '../pages/About'
import Home from '../pages/Home'
import News from '../pages/News'
import Message from '../pages/Message'

export default new VueRouter({
    routes: [
        {
            path: '/about',
            component: About
        },
        {
            path: '/home',
            component: Home,
            // Configure sub routes without '/'
            children:[
                {
                    path: 'news',
                    component: News
                },
                {
                    path: 'message',
                    component: Message
                }
            ]
        }
    ]
})
- Use nested routing
<template>
    <ul>
        <li>news001</li>
        <li>news002</li>
        <li>news003</li>
    </ul>
</template>

<script>
    export default {
        name: 'News'
    }
</script>

<style>

</style>
<template>
<div>
<ul>
<li>
<a href="/message1">message001</a>
</li>
<li>
<a href="/message2">message002</a>
</li>
<li>
<a href="/message/3">message003</a>
</li>
</ul>
</div>
</template>
<script>
export default {
name: 'Message'
}
</script>
<style>
</style>
<template>
    <div>
        <h2>Home Component content</h2>
        <div>
            <ul class="nav nav-tabs">
                <li>
                    <!-- To bring a parent route -->
                    <router-link class="list-group-item" active-class="active" to="/home/news">News</router-link>
                </li>
                <li>
                    <router-link class="list-group-item" active-class="active" to="/home/message">Message</router-link>
                </li>
            </ul>
            <router-view></router-view>
        </div>
    </div>
</template>

<script>
    export default {
        name: 'Home'
    }
</script>
8.4 routing parameters
8.4.1 query parameters
- Transfer parameters
<!-- Jump and carry query Parameters, to String writing -->
<router-link :to="/home/message/detail?id=666&title=Hello">Jump</router-link>

<!-- Jump and carry query Parameters, to Object writing of -->
<router-link
	:to="{
		path:'/home/message/detail',
		query:{
		   id:666,
            title:'Hello'
		}
	}"
>Jump</router-link>
- Receiving parameters:
$route.query.id
$route.query.title
8.4.2 route naming
Function: it can simplify the jump of routing.
- Name the route:
{
   path:'/demo',
   component:Demo,
   children:[
      {
         path:'test',
         component:Test,
         children:[
            {
               name:'hello' //Name the route
               path:'welcome',
               component:Hello,
            }
         ]
      }
   ]
}
- Simplified jump:
<!--Before simplification, you need to write a complete path -->
<router-link to="/demo/test/welcome">Jump</router-link>

<!--After simplification, jump directly through the name -->
<router-link :to="{name:'hello'}">Jump</router-link>

<!--Simplified writing fit transfer parameters -->
<router-link
	:to="{
		name:'hello',
		query:{
		   id:666,
            title:'Hello'
		}
	}"
>Jump</router-link>
8.4.3 params parameters
- Configure the route and declare to receive params parameters
{
	path:'/home',
	component:Home,
	children:[
		{
			path:'news',
			component:News
		},
		{
			component:Message,
			children:[
				{
					name:'xiangqing',
					path:'detail/:id/:title', //Receive params parameters using placeholder declarations
					component:Detail
				}
			]
		}
	]
}
- Transfer parameters
<!-- Jump and carry params Parameters, to String writing -->
<router-link :to="/home/message/detail/666/Hello">Jump</router-link>

<!-- Jump and carry params Parameters, to Object writing of -->
<router-link
	:to="{
		name:'xiangqing',
		params:{
		   id:666,
            title:'Hello'
		}
	}"
>Jump</router-link>
Special note: when the route carries params parameters, if the object writing method of to is used, the path configuration item cannot be used, but the name configuration must be used!
- Receiving parameters:
$route.params.id
$route.params.title
8.4.4 props configuration
Function: make it easier for routing components to receive parameters
- to configure
{
	name:'xiangqing',
	path:'detail/:id',
	component:Detail,

	//The first way to write it: props value is an object, and all key value combinations in the object will eventually be passed to the Detail component through props
	// props:{a:900}

	//The second way to write it: if the props value is Boolean and the Boolean value is true, all the 'params' parameters received by the route will be passed to the Detail component through props
	// props:true

	//The third way to write: props value is a function. Each set of key values in the object returned by this function will be passed to the Detail component through props (query parameter can be passed here)
	props(route){
		return {
			id:route.query.id,
			title:route.query.title
		}
	}
}
- use
<template>
   <ul>
      <li>Message number:{{id}}</li>
      <li>Message Title:{{title}}</li>
   </ul>
</template>

<script>
   export default {
      name:'Detail',
      props:['id','title']
   }
</script>
8.5 programming route navigation
- replace attribute of < router link >
- Function: control the mode of operating browser history during route jump
- There are two ways to write browser history: push and replace. Push is to add history and replace is to replace the current record. The default value for route jump is push
- How to start the replace mode: < router link replace... > News < / router link >
- Programmed route navigation
-
Function: route jump is realized without the help of < router link >, making route jump more flexible
-
Specific code:
//Two API s of $router
this.$router.push({
	name:'xiangqing',
	params:{
		id:xxx,
		title:xxx
	}
})

this.$router.replace({
	name:'xiangqing',
	params:{
		id:xxx,
		title:xxx
	}
})

this.$router.forward() //forward
this.$router.back() //back off
this.$router.go() //You can move forward or backward
8.6 cache routing component
-
Function: keep the routing components not displayed mounted and not destroyed.
-
Specific code:
<!-- Display area to be cached keep-alive Packages are available if only one component needs to be cached 'include' Indicate (component name) -->
<keep-alive include="News">
<!-- <keep-alive :include="['News', 'Message']">  -->
    <router-view></router-view>
</keep-alive>
8.7 two new life cycle hooks
Function: the two hooks unique to the routing component are used to capture the activation status of the routing component.
- Triggered when the activated routing component is activated.
- Triggered when the deactivated routing component is deactivated.
8.8 route guard
Function: to control the routing permission
- Global guard
//Global front guard: executed during initialization and before each route switching
router.beforeEach((to,from,next)=>{
	console.log('beforeEach',to,from)
	if(to.meta.isAuth){ //Judge whether the current route needs permission control
		if(localStorage.getItem('school') === 'atguigu'){ //Specific rules for permission control
			next() //Release
		}else{
			alert('No permission to view')
			// next({name:'guanyu'})
		}
	}else{
		next() //Release
	}
})

//Global post guard: executed during initialization and after each route switch
router.afterEach((to,from)=>{
	console.log('afterEach',to,from)
	if(to.meta.title){
		document.title = to.meta.title //Modify the title of the page
	}else{
		document.title = 'vue_test'
	}
})
- Exclusive guard
beforeEnter(to,from,next){
	console.log('beforeEnter',to,from)
	if(to.meta.isAuth){ //Judge whether the current route needs permission control
		if(localStorage.getItem('school') === 'atguigu'){
			next()
		}else{
			alert('No permission to view')
			// next({name:'guanyu'})
		}
	}else{
		next()
	}
}
- Guard in assembly
//Entry guard: called when entering the component through routing rules
beforeRouteEnter (to, from, next) {
},
//Leave guard: it is called when leaving the component through routing rules
beforeRouteLeave (to, from, next) {
}
8.9 two working modes of router
- What is a hash value for a url? --# And what follows is the hash value.
- The hash value will not be included in the HTTP request, that is, the hash value will not be brought to the server.
- hash mode:
3.1 the address always carries a # number, which is not beautiful.
3.2 if the address is shared through a third-party mobile app in the future, if the app verification is strict, the address will be marked as illegal.
3.3 good compatibility. - history mode:
4.1 the address is clean and beautiful.
4.2 compatibility is slightly worse than hash mode.
4.3 when the application is deployed online, it needs the support of back-end personnel to solve the problem of refreshing the page server 404.