Fusion Series of Unmanned Sensors (11) - Camera Internal Reference Calibration
Summary of this chapter: This chapter explains the causes of camera distortion, calibration principle, and how to calibrate camera internal parameters through opencv.
I. Causes of Camera Distortion
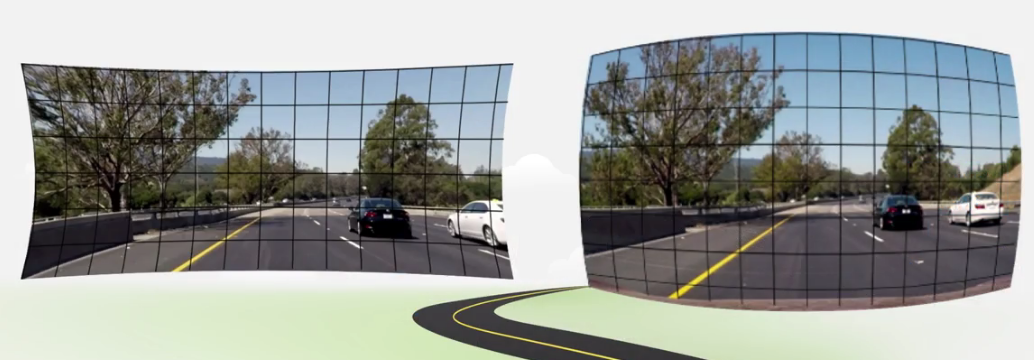
There are two main distortion of the camera, radial distortion and tangential distortion.
Radial distortion:
The left image below is a pinhole camera model. If projected according to this ideal model, there would be no radial distortion. But in fact, the camera uses lens instead of pinhole to increase lighting and improve projection quality. At the edge of the lens, the light will bend abnormally more or less, which leads to the distortion of the edge of the photograph.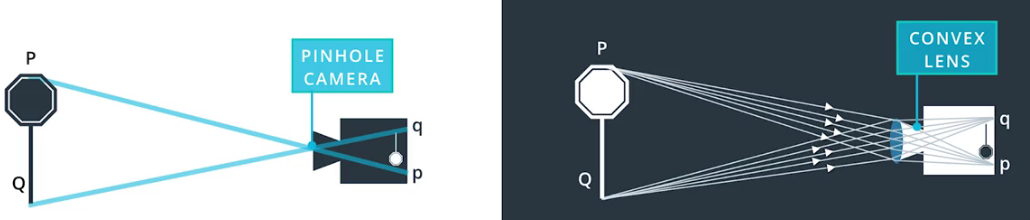
 Tangential distortion:
Because of the non-parallelism between the lens and the imaging plane, the tilt phenomenon of the imaging will cause the imaging object to look closer or farther than the actual object.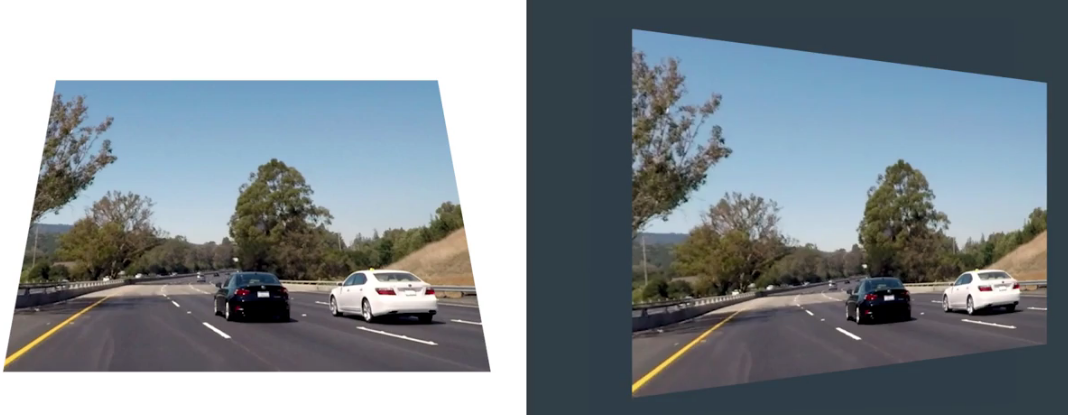
2. The Principle of Calculating Distortion Coefficient
The radial distortion coefficients are k1, k2, k3, and the tangential distortion coefficients are P1 and p2, which can be obtained by the following two equations: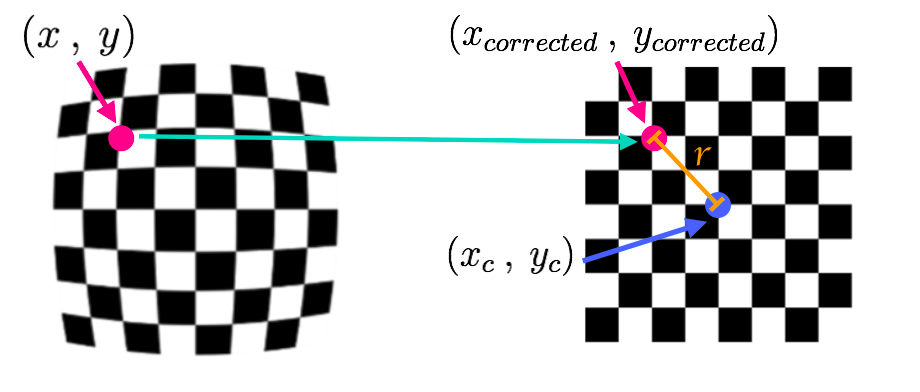 Radial distortion equation:
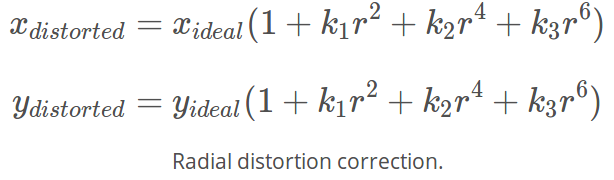
Tangential distortion equation: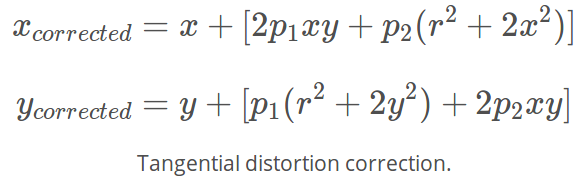
III. Camera Internal Reference Calibration
According to the above distortion wash calculation principle, how to use opencv to calibrate camera internal parameters is described below.
- Using cv2. find Chessboard Corners (), the corners on the distorted chessboard are found. Often a series of chessboard pictures from different angles and directions will be included.
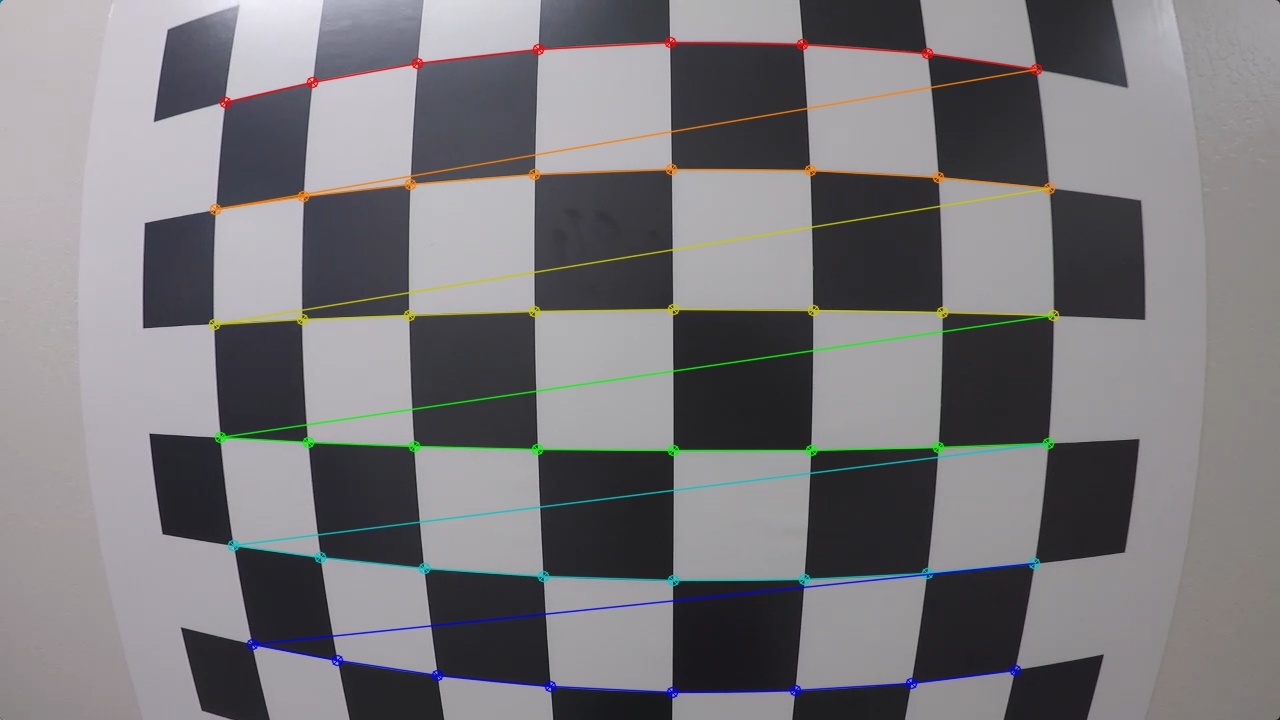
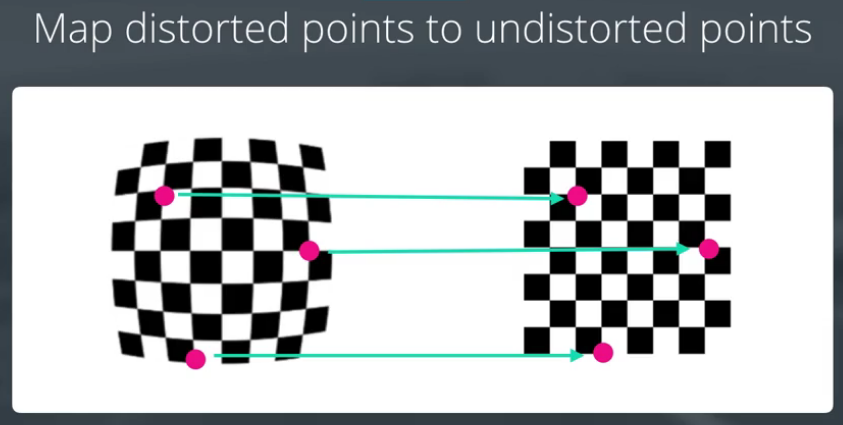
- Correspond distorted chessboard corners to non-distorted chessboard corners.
- The distortion coefficient is calculated by cv2.calibrateCamera().
- cv2.undistort() is used to remove the distortion of the image.
IV. Demonstration of Examples
import numpy as np
import cv2
import glob
import matplotlib.pyplot as plt
import matplotlib.image as mpimg
import pickle

# prepare object points, like (0,0,0), (1,0,0), (2,0,0) ....,(6,5,0)
#Non-distorted chessboard corners
objp = np.zeros((6*9,3), np.float32)
objp[:,:2] = np.mgrid[0:9, 0:6].T.reshape(-1,2)

# Arrays to store object points and image points from all the images.
objpoints = [] # 3d points in real world space
imgpoints = [] # 2d points in image plane.

# Make a list of calibration images
#Import a set of checkerboard photos from different angles and distances
images = glob.glob('camera_cal/*.jpg')

# Step through the list and search for chessboard corners
#Find the corner, and then put in objpoints, imgpoints
for idx, fname in enumerate(images):
    img = cv2.imread(fname)
    gray = cv2.cvtColor(img, cv2.COLOR_BGR2GRAY)

    # Find the chessboard corners
    ret, corners = cv2.findChessboardCorners(gray, (9,6), None)

    # If found, add object points, image points
    if ret == True:
        objpoints.append(objp)
        imgpoints.append(corners)

# Test undistortion on an image
img = cv2.imread('camera_cal/calibration1.jpg')
img_size = (img.shape[1], img.shape[0])

# Do camera calibration given object points and image points
# Calculating Distortion Coefficient
# mtx:3-to 2-dimensional image plane projection matrix, dist: distortion wash matrix [k1, k2, p1, p2, k3].
ret, mtx, dist, rvecs, tvecs = cv2.calibrateCamera(objpoints, imgpoints, img_size,None,None)

# De-distortion the picture
dst = cv2.undistort(img, mtx, dist, None, mtx)
cv2.imwrite('output_images/calibration1_undist.jpg',dst)

# Save the camera calibration result for later use (we won't worry about rvecs / tvecs)
dist_pickle = {}
dist_pickle["mtx"] = mtx
dist_pickle["dist"] = dist
pickle.dump( dist_pickle, open( "camera_cal/dist_pickle.p", "wb" ) )
#dst = cv2.cvtColor(dst, cv2.COLOR_BGR2RGB)
# Visualize undistortion
f, (ax1, ax2) = plt.subplots(1, 2, figsize=(20,10))
ax1.imshow(img)
ax1.set_title('Original Image', fontsize=30)
ax2.imshow(dst)
ax2.set_title('Undistorted Image', fontsize=30)

Code resources
For the above code resources, see github: Advanced-Lane-Finding The first half.