These three special data types are not a new type; The bottom layer is one of the five types; For example: Zset, String
1. Geospatial geographic location
geo: geographical location[ ˈ spe ɪʃ l] spatial
Positioning of friends, people nearby, taxi distance calculation?
Redis's Geo is in redis3 Version 2 is launched! This function can calculate the information of geographical location, the distance between the two places and the radius
A few miles away!
You can query some test data: http://www.jsons.cn/lngcodeinfo/0706D99C19A781A3/
Official documents: Redis command center GEO
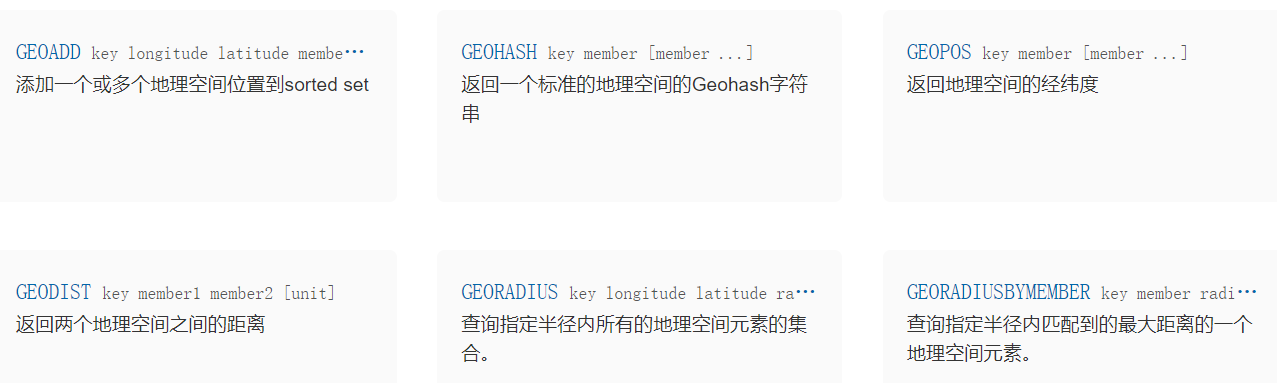
1) Add geographic location
- geoadd key [NX|XX] [CH] longitude latitude member [longitude latitude member ...] Add the longitude and latitude of one or more locations; Longitude before latitude
Rules:
- The effective longitude is from - 180 degrees to 180 degrees
- The effective latitude ranges from -85.05112878 degrees to 85.05112878 degrees
When the coordinate position exceeds the above specified range, the command will return an error.
The two levels cannot be added directly. Generally, the city data will be downloaded and imported directly through the java program at one time!
# Add Beijing latitude and longitude
127.0.0.1:6379> geoadd china:city 116.405285 39.904989 beijing
(integer) 1

# View key
127.0.0.1:6379> keys *
1) "china:city"

# key type: zset
127.0.0.1:6379> type china:city
zset

# Add Shanghai, Guangzhou and Chongqing
127.0.0.1:6379> geoadd china:city 121.47264 31.231706 shanghai 113.28063 23.125178 guangzhou 106.504962 29.533155 chongqing
(integer) 3

# Query all
127.0.0.1:6379> zrange china:city 0 -1
1) "chongqing"
2) "guangzhou"
3) "shanghai"
4) "beijing"
2) Get latitude and longitude
- geopos key member [member ...] Gets the latitude and longitude of one or more locations
127.0.0.1:6379> geopos china:city chongqing guangzhou
1) 1) "106.50495976209640503"
   2) "29.53315530684997015"
2) 1) "113.28062742948532104"
   2) "23.12517743834835215"
3) Get the distance between two places
- geodist key member1 member2 [m|km|ft|mi] get the distance between two location members
Company:
- m is in meters (default)
- km is expressed in kilometers
- mi is in miles
- ft is in feet
# Distance between Beijing and Shanghai
127.0.0.1:6379> geodist china:city beijing shanghai km
"1067.5978"
# The distance between Guangzhou and Chongqing
127.0.0.1:6379> geodist china:city guangzhou chongqing
"981476.5000"
4) Find other elements within a specific coordinate range
- Geodius key longitude latitude radius m|km|ft|mi [withcool] [withdist] [withhash] [count count] obtain other positions in the range with a specific position as the center and radius as the radius
- longitude latitude center coordinates
- radius m|km|ft|mi radius and unit; There is a space in the middle
- withcoord returns the longitude and latitude of the location element together
- The distance between withlist and the center is also returned
- The withhash location is returned together with the hash value
- count returns the number of elements
People near me? (get the address and location of all nearby people!) Query by radius!
Get the specified number of people, 200
All data should be entered: china:city, which will make the result more requested!
# Find out other cities within a radius of 500km from the location (100,30)
127.0.0.1:6379> georadius china:city 100 30 500 km
(empty array)

# Find out other cities with a radius of 1000km from the location (100,30), including longitude and latitude, distance and hash value
127.0.0.1:6379> georadius china:city 100 30 1000 km withcoord withdist withhash
1) 1) "chongqing"
   2) "630.1140"
   3) (integer) 4026042117887371
   4) 1) "106.50495976209640503"
      2) "29.53315530684997015"
5) Find other elements within a specific member scope
- Georadiusbymember key member radius m|km|ft|mi [withcool] [withdist] [withhash] [count count] find out the members away from the member and other members within the radius
127.0.0.1:6379> georadiusbymember china:city beijing 100 km
1) "beijing"
127.0.0.1:6379> georadiusbymember china:city beijing 1000 km
1) "beijing"
127.0.0.1:6379> georadiusbymember china:city beijing 2000 km
1) "chongqing"
2) "guangzhou"
3) "shanghai"
4) "beijing"

127.0.0.1:6379> georadiusbymember china:city beijing 2000 km withcoord withdist withhash
1) 1) "chongqing"
   2) "1464.2210"
   3) (integer) 4026042117887371
   4) 1) "106.50495976209640503"
      2) "29.53315530684997015"
2) 1) "guangzhou"
   2) "1889.3707"
   3) (integer) 4046533764066475
   4) 1) "113.28062742948532104"
      2) "23.12517743834835215"
3) 1) "shanghai"
   2) "1067.5978"
   3) (integer) 4054803464817062
   4) 1) "121.47264093160629272"
      2) "31.23170490709807012"
4) 1) "beijing"
   2) "0.0000"
   3) (integer) 4069885370671010
   4) 1) "116.40528291463851929"
      2) "39.9049884229125027"
6) Returns the hash string of the location
- geohash key member [member ...] Returns a hash string (11 characters) of one or more location elements
# Convert the two-dimensional latitude and longitude into one-dimensional string. The closer the two strings are, the closer the distance is!
127.0.0.1:6379> geohash china:city beijing chongqing
1) "wx4g0b7xrt0"
2) "wm78p86e170"
7) Underlying principle
The underlying implementation principle of geo is actually Zset! You can use the Zset command to operate geo!
127.0.0.1:6379> keys *
1) "china:city"
# key type zset
127.0.0.1:6379> type china:city
zset

# View all
127.0.0.1:6379> zrange china:city 0 -1
1) "chongqing"
2) "guangzhou"
3) "shanghai"
4) "beijing"

# delete
127.0.0.1:6379> zrem china:city chongqing
(integer) 1
127.0.0.1:6379> zrange china:city 0 -1
1) "guangzhou"
2) "shanghai"
3) "beijing"
2,Hyperloglog
1) Introduction
Approaching the source code: the magical hyperlog - Zhihu (zhihu.com)
2) Application scenario
- Count the number of registered IP S
- Count the number of IP accesses per day
- Count the number of real-time UV s on the page
- Count the number of online users
- Count the number of different entries searched by users every day
Page views (a person visits a website many times, but still counts as a person!)
In the traditional way, set saves the user's id, and then you can count the number of elements in set as the standard judgment! If you save a large number of user IDs in this way, it will be more troublesome! Our purpose is to count, not save the user id;
Hyperlog is very suitable;
Hyperlog has a 0.81% error rate! Statistical UV tasks, negligible!
If fault tolerance is allowed, Hyperloglog must be used!
If fault tolerance is not allowed, use set or your own data type!
3) Add pfadd
- pfadd key element [element ...] Add one or more elements to the key
# Add v1, v2, v3 to mykey1
127.0.0.1:6379> pfadd mykey1 v1 v2 v3
(integer) 1

# key: mykey1
127.0.0.1:6379> keys *
1) "mykey1"

# key type string
127.0.0.1:6379> type mykey1
string

# Number of elements (error in case of large amount of data)
127.0.0.1:6379> pfcount mykey1
(integer) 3

# The value of the string (the specific element in mykey1 cannot be viewed)
127.0.0.1:6379> getrange mykey1 0 -1
"HYLL\x01\x00\x00\x00\x03\x00\x00\x00\x00\x00\x00\x00G\x1f\x80o4\x88@P\x8cIV"
4) Quantity pfcount
- pfcount key [key ...] Gets the total number of non repeating elements in one or more keys
# Add v10 v11 v12 to mykey2
127.0.0.1:6379> pfadd mykey2 v10 v11 v12
(integer) 1

# Number of elements in mykey1
127.0.0.1:6379> pfcount mykey1
(integer) 3 # v1 v2 v3
# Then add v11 to mykey1
127.0.0.1:6379> pfadd mykey1 v11
(integer) 1
# Number of elements in mykey1
127.0.0.1:6379> pfcount mykey1
(integer) 4 # v1 v2 v3 v11

# Total number of elements in mykey1 and mykey2 (non repeating elements)
127.0.0.1:6379> pfcount mykey1 mykey2
(integer) 6
5) Merge pfmerge
- pfmerge destkey sourcekey [sourcekey ...] Merge one or more sourcekeys into a target destkey
127.0.0.1:6379> keys *
1) "mykey2"
2) "mykey1"

# Merge mykey1 and mykey2 into mykey3
127.0.0.1:6379> pfmerge mykey3 mykey1 mykey2
OK

127.0.0.1:6379> keys *
1) "mykey3"
2) "mykey2"
3) "mykey1"

# The number of non repeating elements in mykey3; The effect is equivalent to pfcount mykey1 mykey2
127.0.0.1:6379> pfcount mykey3
(integer) 6
3,Bitmap
Original link: Usage of bit Redis in the scene
1) Concept
The original meaning of BitMap is to use a bit to map the state of an element. Since a bit can only represent 0 and 1 states, BitMap can map limited states, but the advantage of using bits is that it can save a lot of memory space.
The offset of each bit in the Bitmap array can only be called one bit in the unit of 0 and 1.

It should be noted that BitMap is not a new data type in Redis, and its bottom layer is Redis's String type.
2) Related commands
(1) Set value setbit
# Set value, where value can only be 0 and 1
setbit key offset value
(2) Get value getbit
# Get value
getbit key offset
(3) Get bitcount of 1
# Gets the number of values with 1 in the specified range
# start and end are in bytes
bitcount key start end
(4) bitop operation between bitmaps
# Operation between bitmaps
# operations displacement operator, enumeration value
  AND And operation &
  OR Or operation |
  XOR XOR ^
  NOT Reverse ~
# The result of result calculation will be stored in this key
# key1... keyn there can be multiple keys involved in the operation. The space is divided, and the not operation can only have one key
# When BITOP processes strings of different lengths, the missing part of the shorter string is treated as 0. The return value is the length of the string saved to destkey (in byte s), which is equal to the length of the longest string in the input key.
bitop [operations] [result] [key1] [keyn...]
(5) Location of the first occurrence of bitpos value
# Returns the position where the specified value(0/1) appears for the first time in the specified key
bitpos [key] [value]
3) Occupied space
Before we know how much space BitMap occupies, let's reiterate that Redis actually only supports five data types. There is no BitMap type. The bottom layer of BitMap is based on Redis's string type.
Let's see the space occupied by BitMap through the following command:
# First, set the position where the offset is 0 to 1; Where csx:key:1 represents a key
127.0.0.1:6379> setbit csx:key:1 0 1
(integer) 0
# Through the STRLEN command, we can see that the length of the string is 1
127.0.0.1:6379> STRLEN csx:key:1
(integer) 1
# Set the position where the offset is 1 to 1
127.0.0.1:6379> setbit csx:key:1 1 1
(integer) 0
# At this time, the length of the string is still 1, because a string has 8 bits, so there is no need to open up new memory space
127.0.0.1:6379> STRLEN csx:key:1
(integer) 1
# Set the position with an offset of 8 to 1
127.0.0.1:6379> setbit csx:key:1 8 1
(integer) 0
# At this time, the length of the string is programmed 2. Because there are no 9 bits in one byte, it is necessary to open up another byte space
127.0.0.1:6379> STRLEN csx:key:1
(integer) 2
Through the above experiment, we can see that the space occupied by BitMap is the space occupied by the underlying string. Suppose the maximum value of BitMap offset is OFFSET_MAX, then the space occupied by the bottom layer is:
(OFFSET_MAX/8)+1 = Occupied bytes
Because string memory can only be allocated in bytes, the unit above is bytes.
However, it should be noted that the maximum length of the string in Redis is 512M, so the offset value of BitMap also has an upper limit, and its maximum value is:
8 * 1024 * 1024 * 512 = 2^32
Since a separator is stored at the end of the string in C language, the upper limit of offset value of BitMap is:
(8 * 1024 * 1024 * 512) -1 = 2^32 - 1
4) Usage scenario
1. User sign in
Many websites provide check-in function and need to show the check-in situation of the last month. This situation can be realized by BitMap.
According to the date offset = (today is the day of the year)% (days of this year), key = year: user id.
If you need to store the user's detailed check-in information, you can consider using a one-step thread to complete it.
2. Statistics of active users (user login)
Use the date as the key, and then the user id is offset. If the current day is active, it is set to 1. The standard of how to be active can be specified by ourselves.
If 20201009 active users are: [1, 0, 1, 1, 0]
20201010 active users: [1, 1, 0, 1, 0]
Count the total number of active users for two consecutive days:
# Merge two-day key s
bitop and dest1 20201009 20201010
# The offset with the value of 1 in dest1 is the ID of the active user for two consecutive days
bitcount dest1
Statistics of active users from 20201009 to 20201010:
# Or operation (Union)
bitop or dest2 20201009 20201010
3. Check whether the user is online
If you need to provide an interface to query whether the current user is online, you can also consider using BitMap. That is, it saves space and has high efficiency. Only one key is needed, and then the user id is offset. If it is online, it is set to 1, and if it is not online, it is set to 0.
4. Realize bloom filter