note: this spring cloud introduction demo is to make an order module micro service.
1. Order micro service
the business logic of this introductory demo is to call the order micro service, that is, when the user places an order, we need to call the order micro service to place an order, and we can also view our order.
Therefore, the order micro service provides two interfaces, one is to create the order interface, and the other is to view the order interface get.
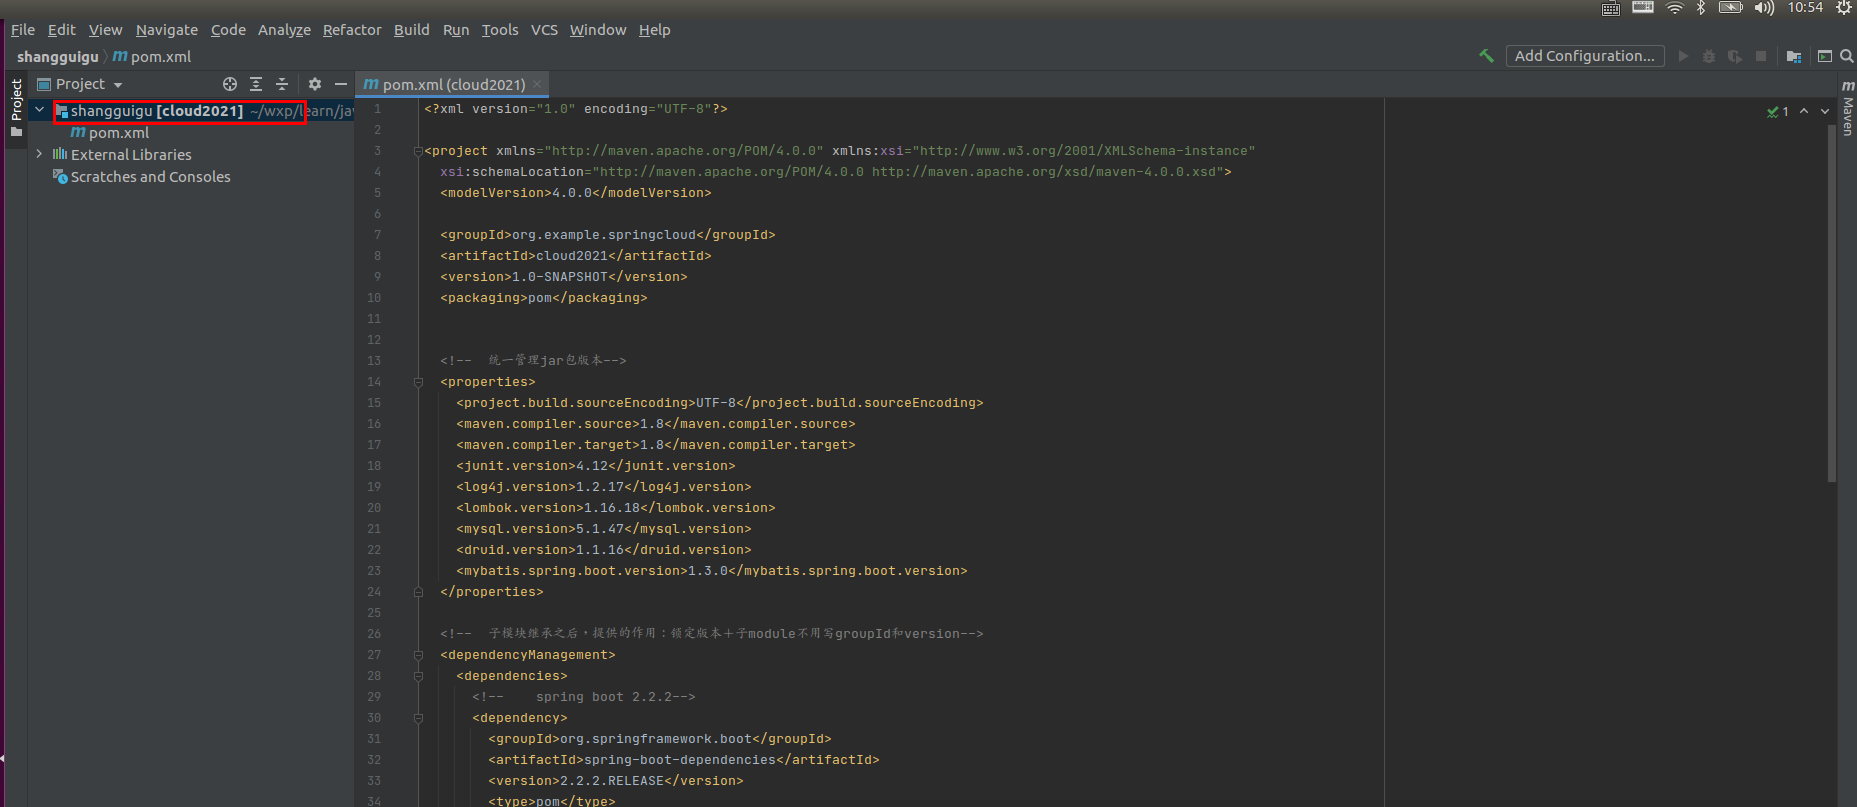
2. Construction of public works
why not start creating the order module directly at the beginning? Why don't you start creating entity classes, controller s and service s? What do public works do?
The reason is that when creating the order module, we will create an entity class Payment of the order. Similarly, in the consumption order module, we have to create the order entity class Payment. The actual business in the future must be much more complex than this demo. It is impossible to save an entity class in each module. What if there are inconsistencies between the two sides?
Therefore, the first step is to build a public project and publish it for use by other services. Similarly, some common tool classes can be put into this project in the future.
2.1 create module
Then build a new module based on the previous blog post.
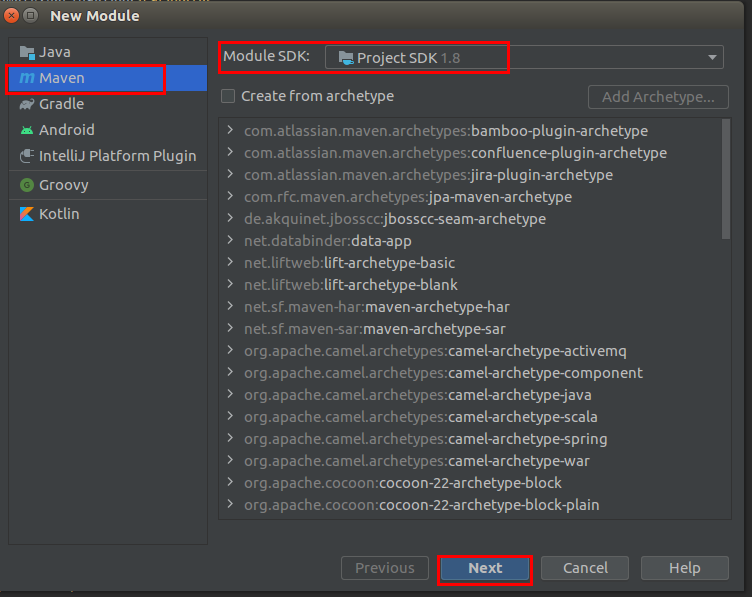
Right click the general engineering cloud 2021 - > New - > module to get the following figure
Select Maven, jdk select 1.8, and click Next
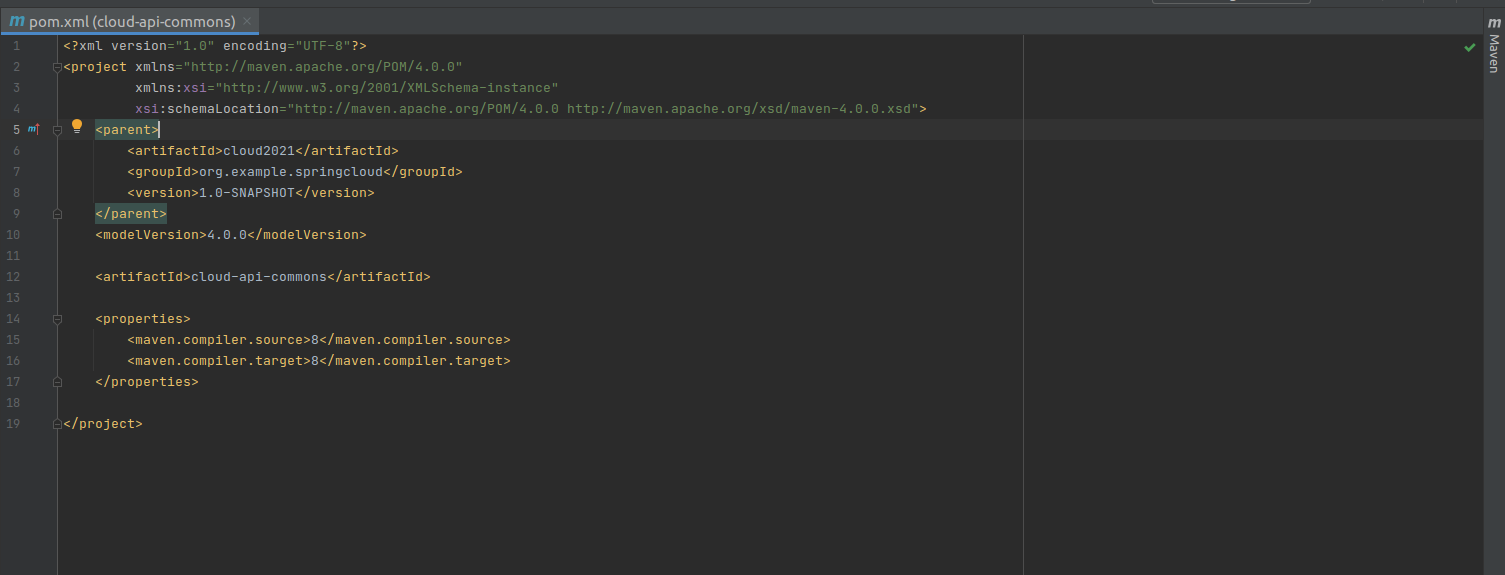
Fill in the project name: cloud API Commons
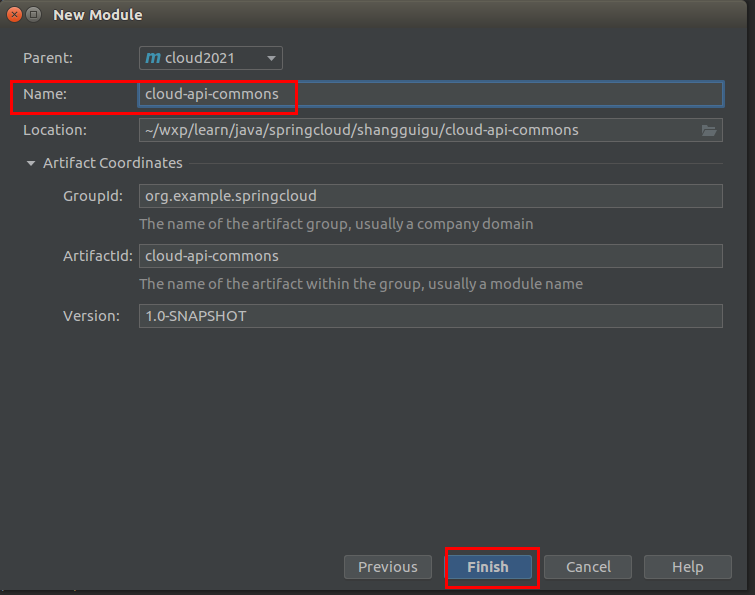
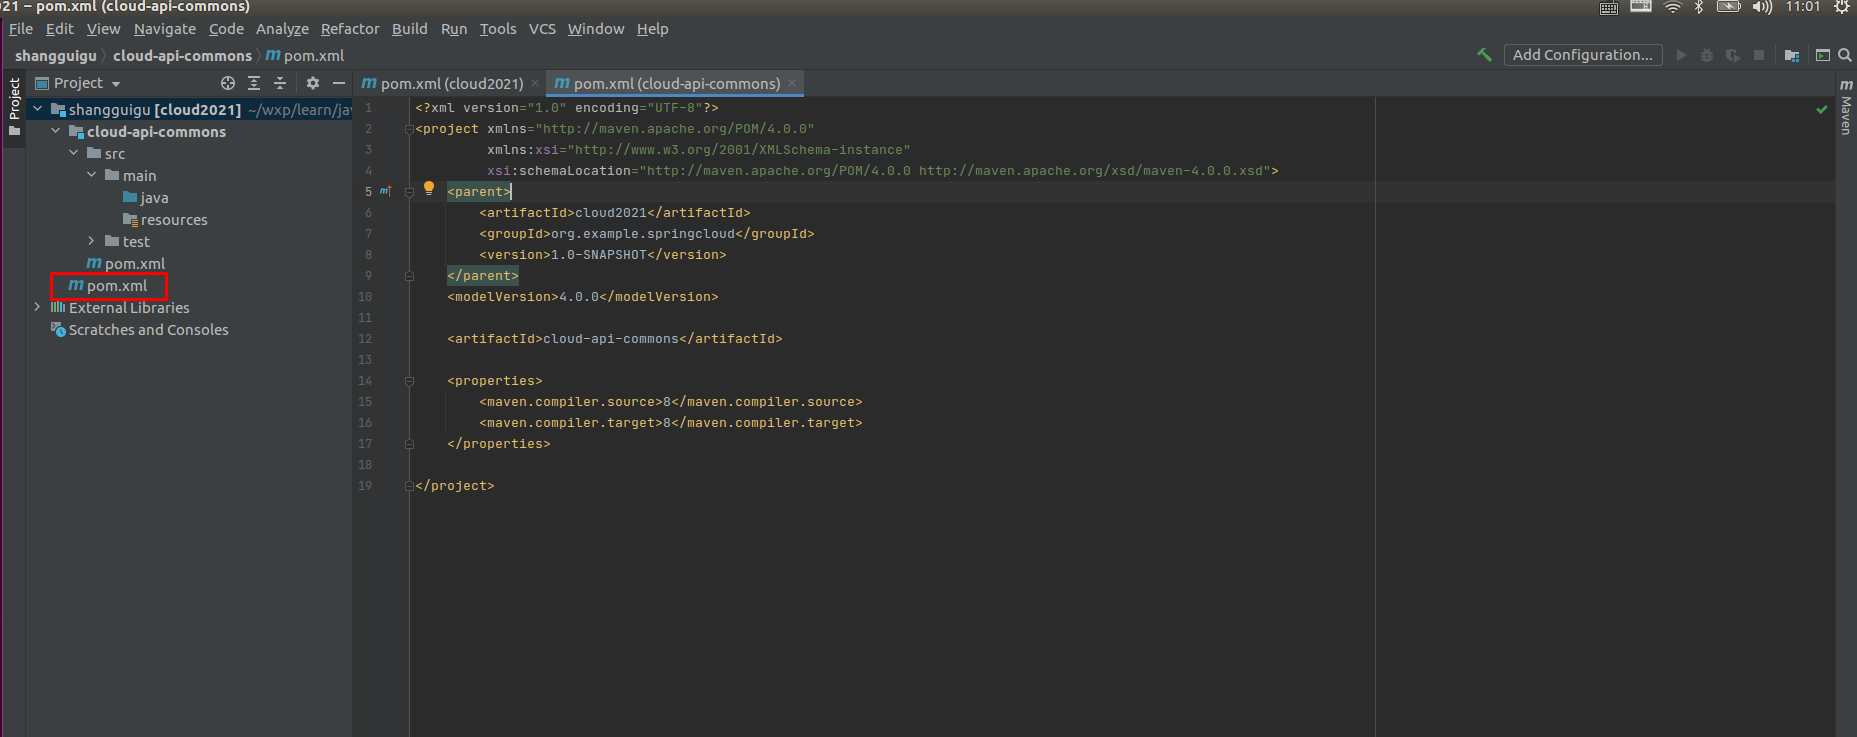
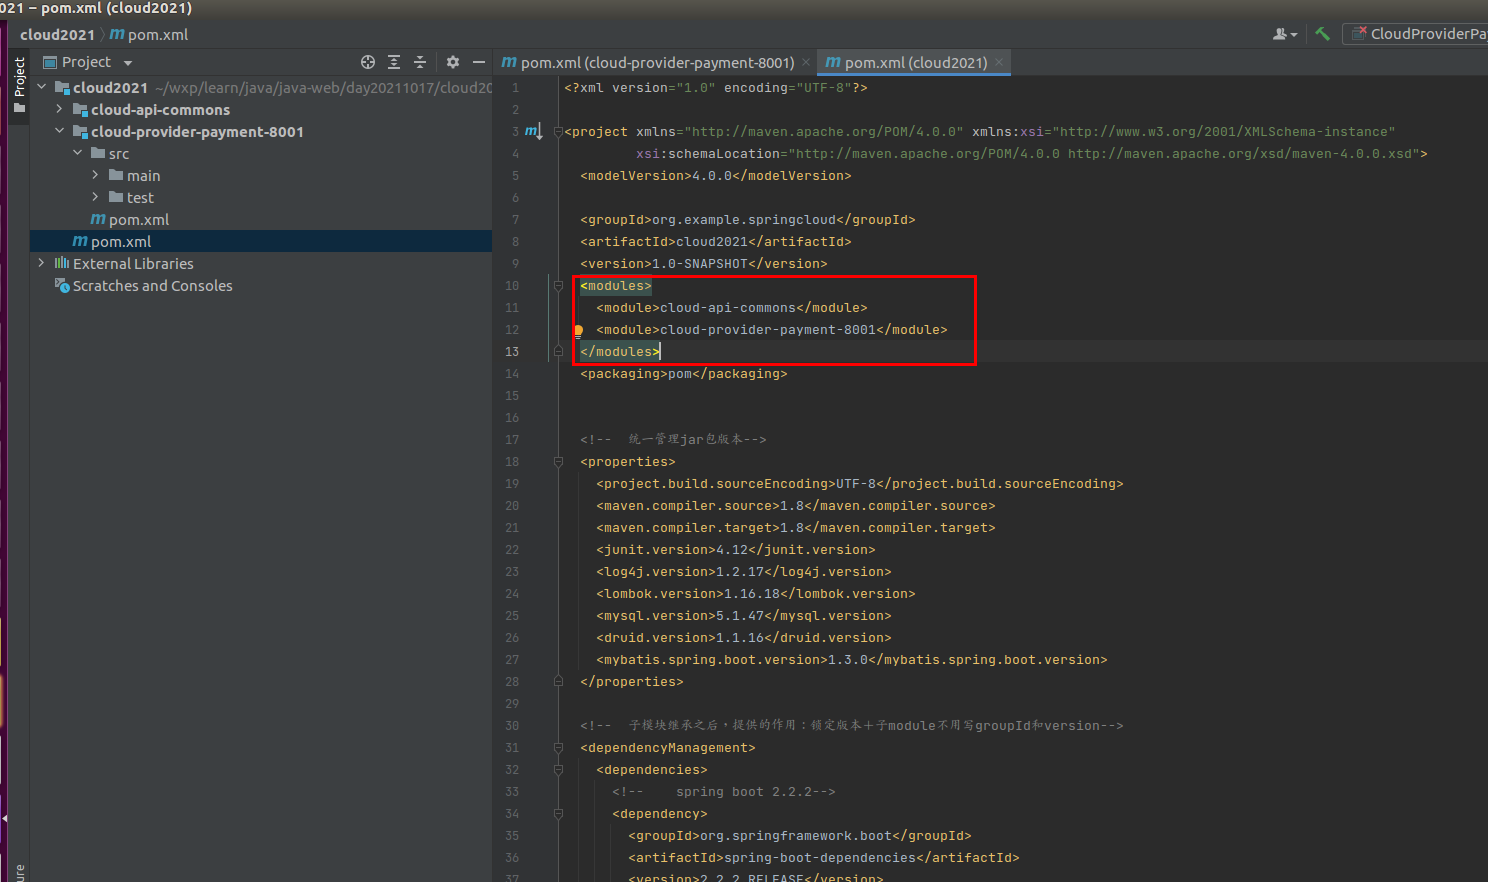
Click Finish to get the parent project cloud 2021 and the new module, as shown in the following figure. Note that the pom file in the red box is the pom file of the parent project cloud 2021. There will be more and more modules in the future, which can not be confused.
2.2 change pom
The following figure shows the newly created pom file in 2.1
Add dependencies as follows:
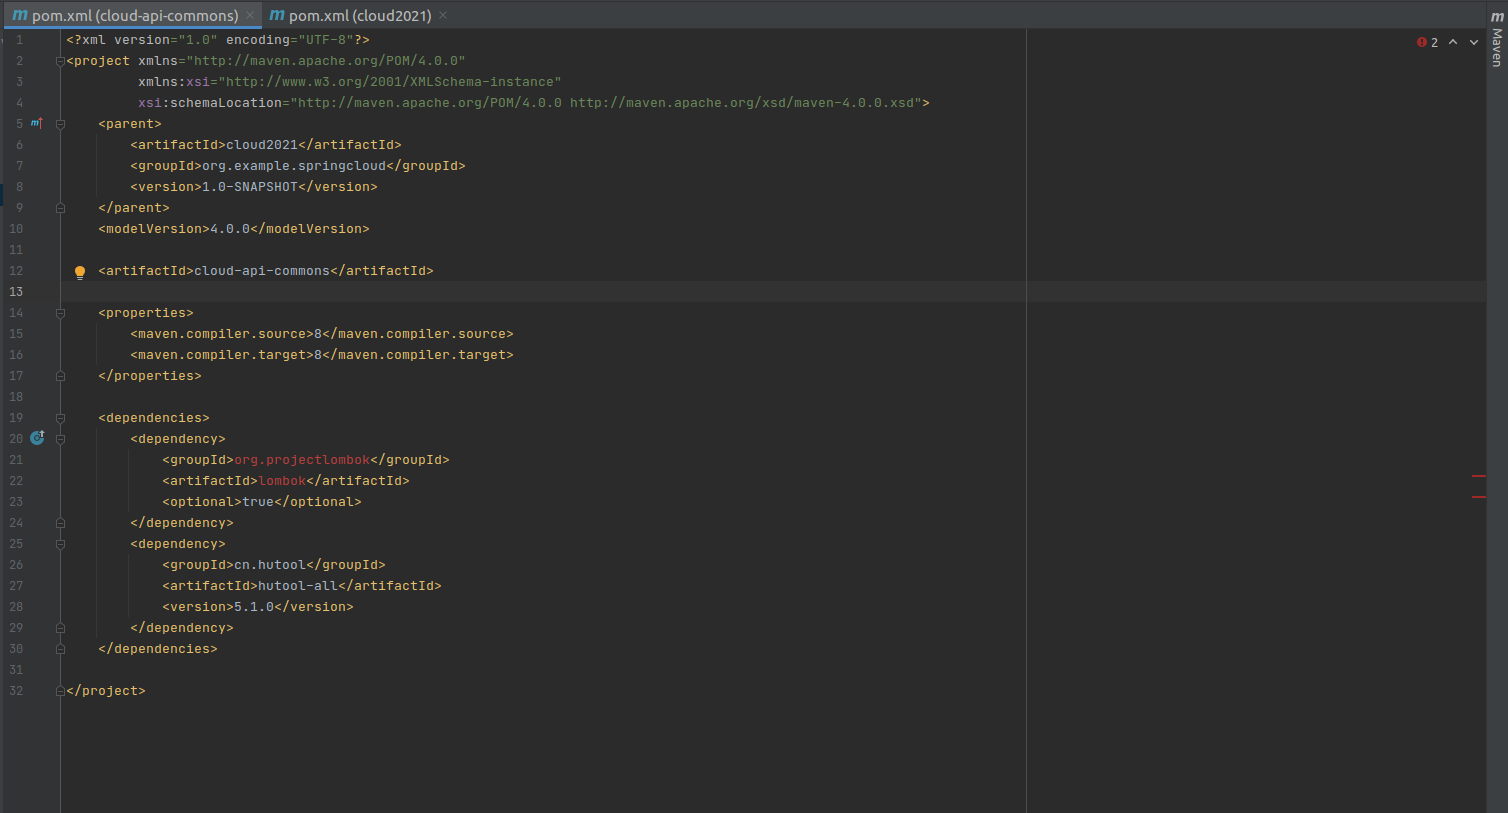
Note: if you are importing and using lombok in IDEA for the first time, you need to install lombok plug-in first. The operation is as follows:
Click file - > Settings - > plugins, enter lombok in the networking status, find and install it.
After installation, right-click on the pom file - > Maven - > reload project.
We didn't fill in the version number version here. According to the introduction of the previous blog post, version 1.16.18 in the parent project cloud 2021 will be used here. As shown below
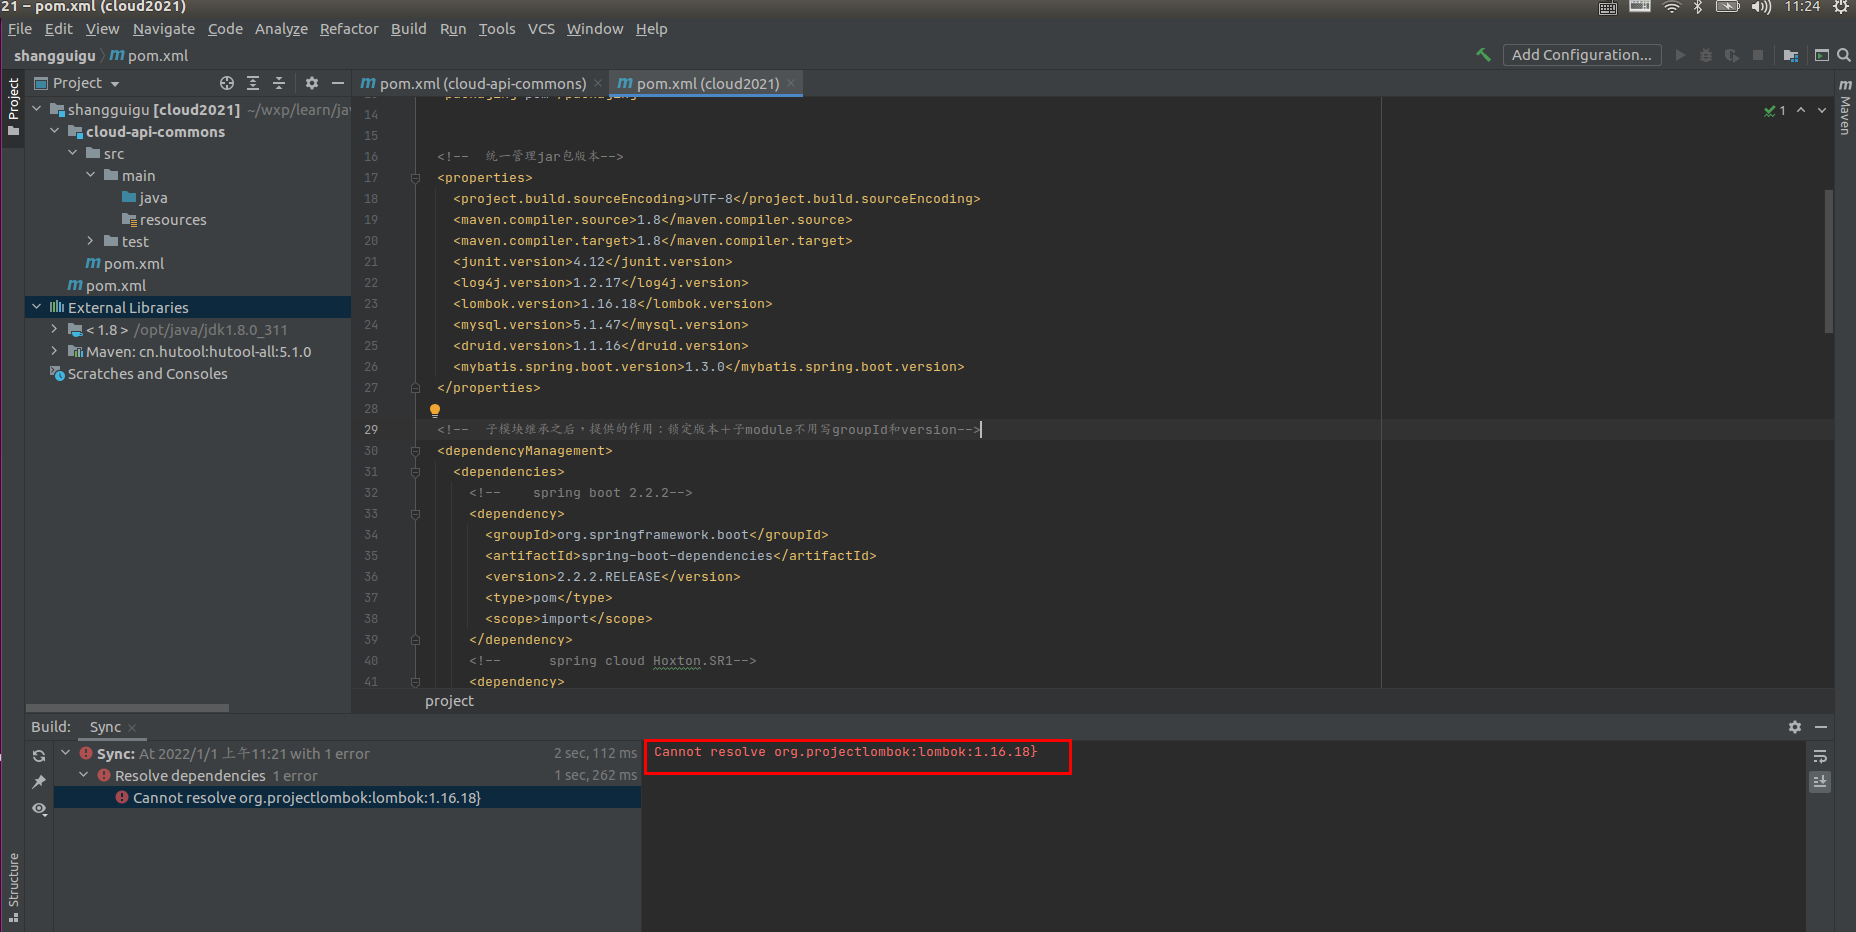
Since maven display cannot be parsed and version 1.16.18 cannot be parsed, I went back to the parent project to modify the lombok version and try to change it to 1.14.0.
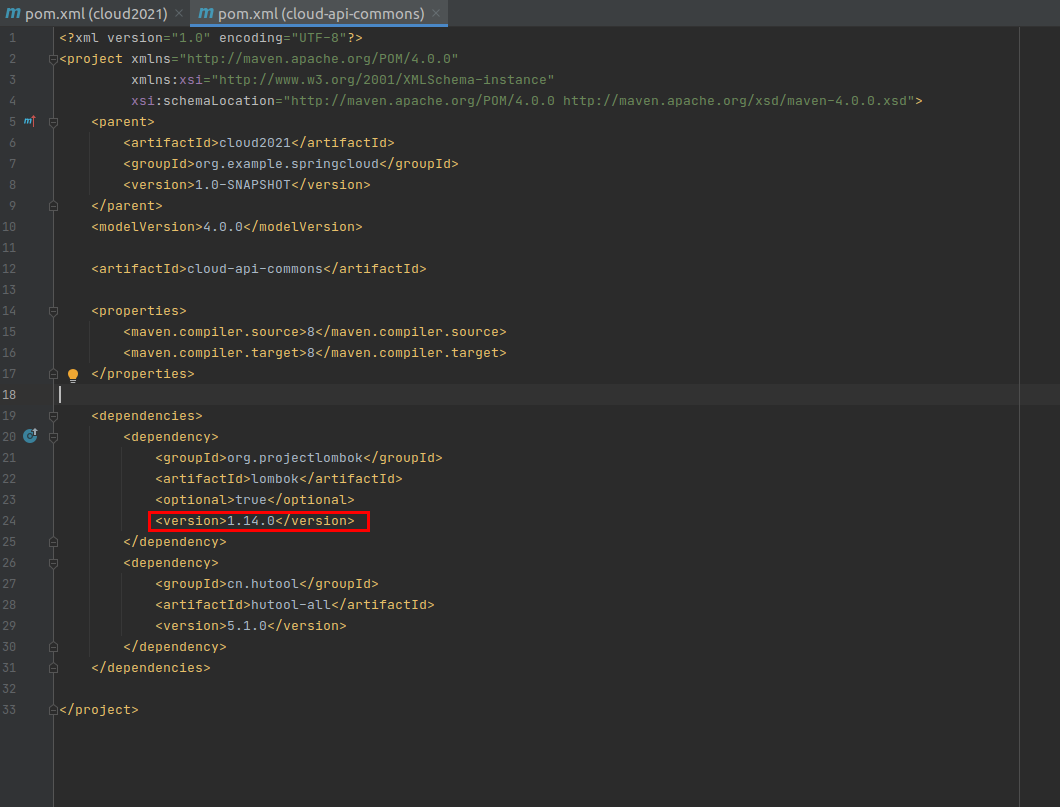
As shown in the figure below, when the cloud api commons module is compiled again, no lombok error message is displayed.
2.3 building common modules
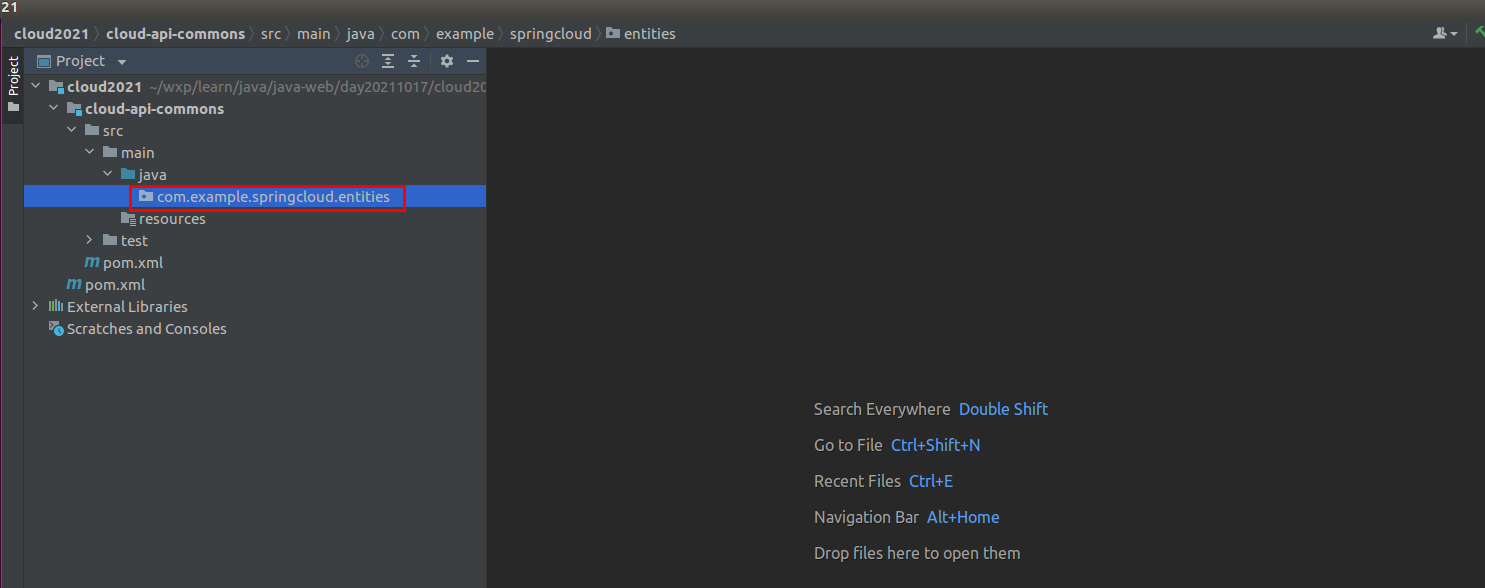
At present, the public module of this demo is mainly entity classes: including order classes and public return classes. Therefore, it is necessary to create a new package com.com in cloud api commons example. springcloud. entities
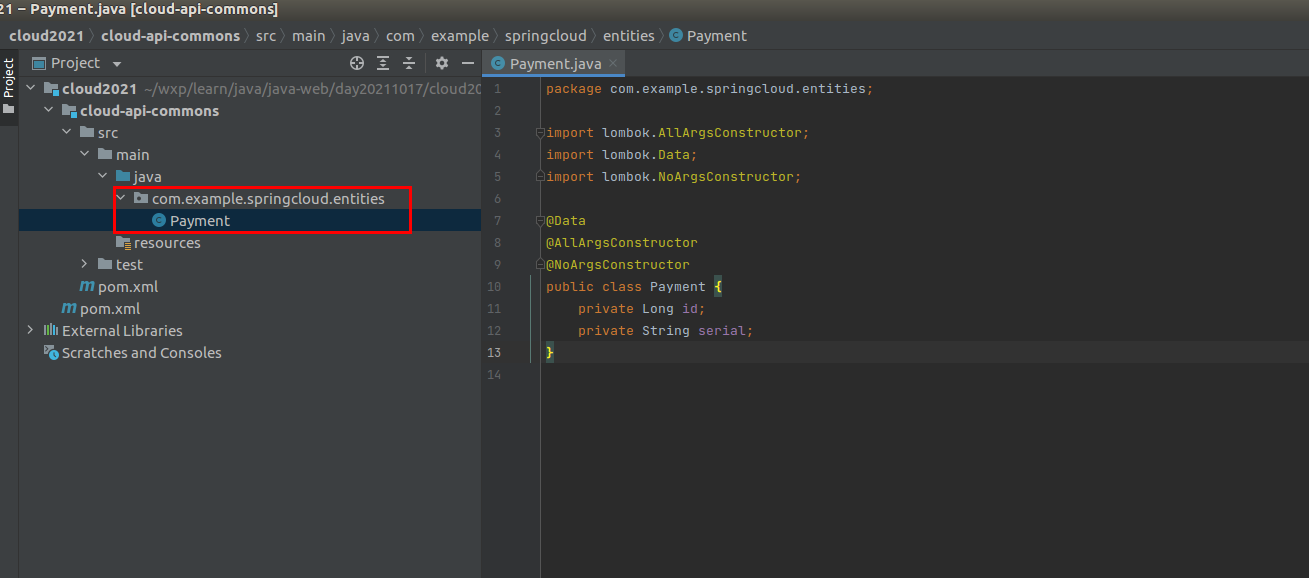
Create a new order class in the entity: Payment
There are only two fields in the order class: id and order number serial
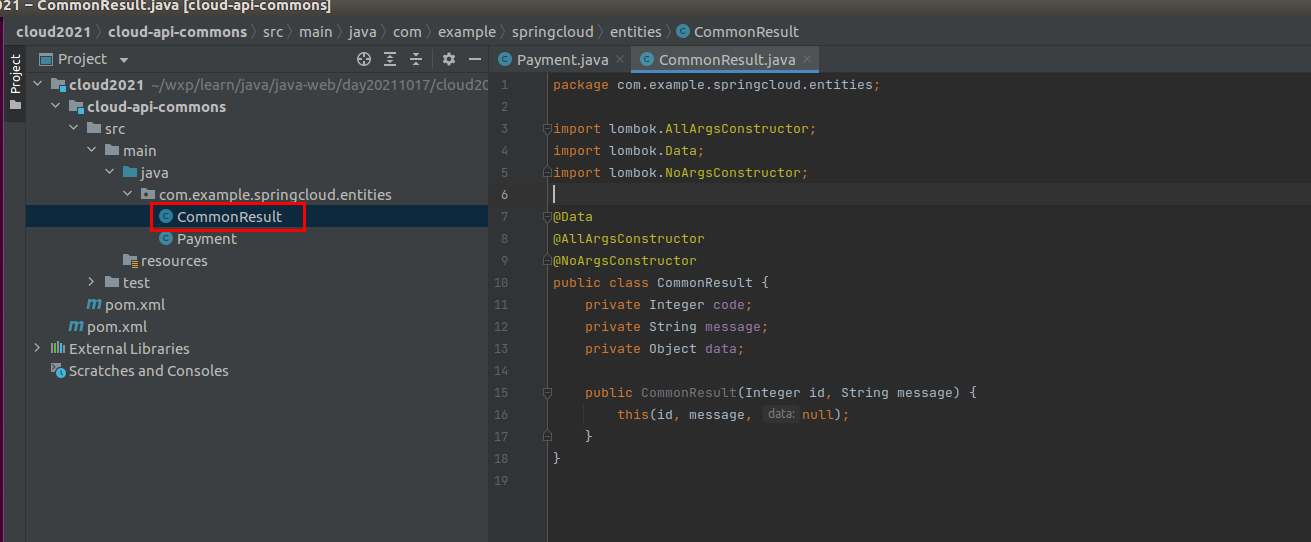
Create a new public return class in the entity: CommonResult
2.4 packaging and publishing Maven to public library
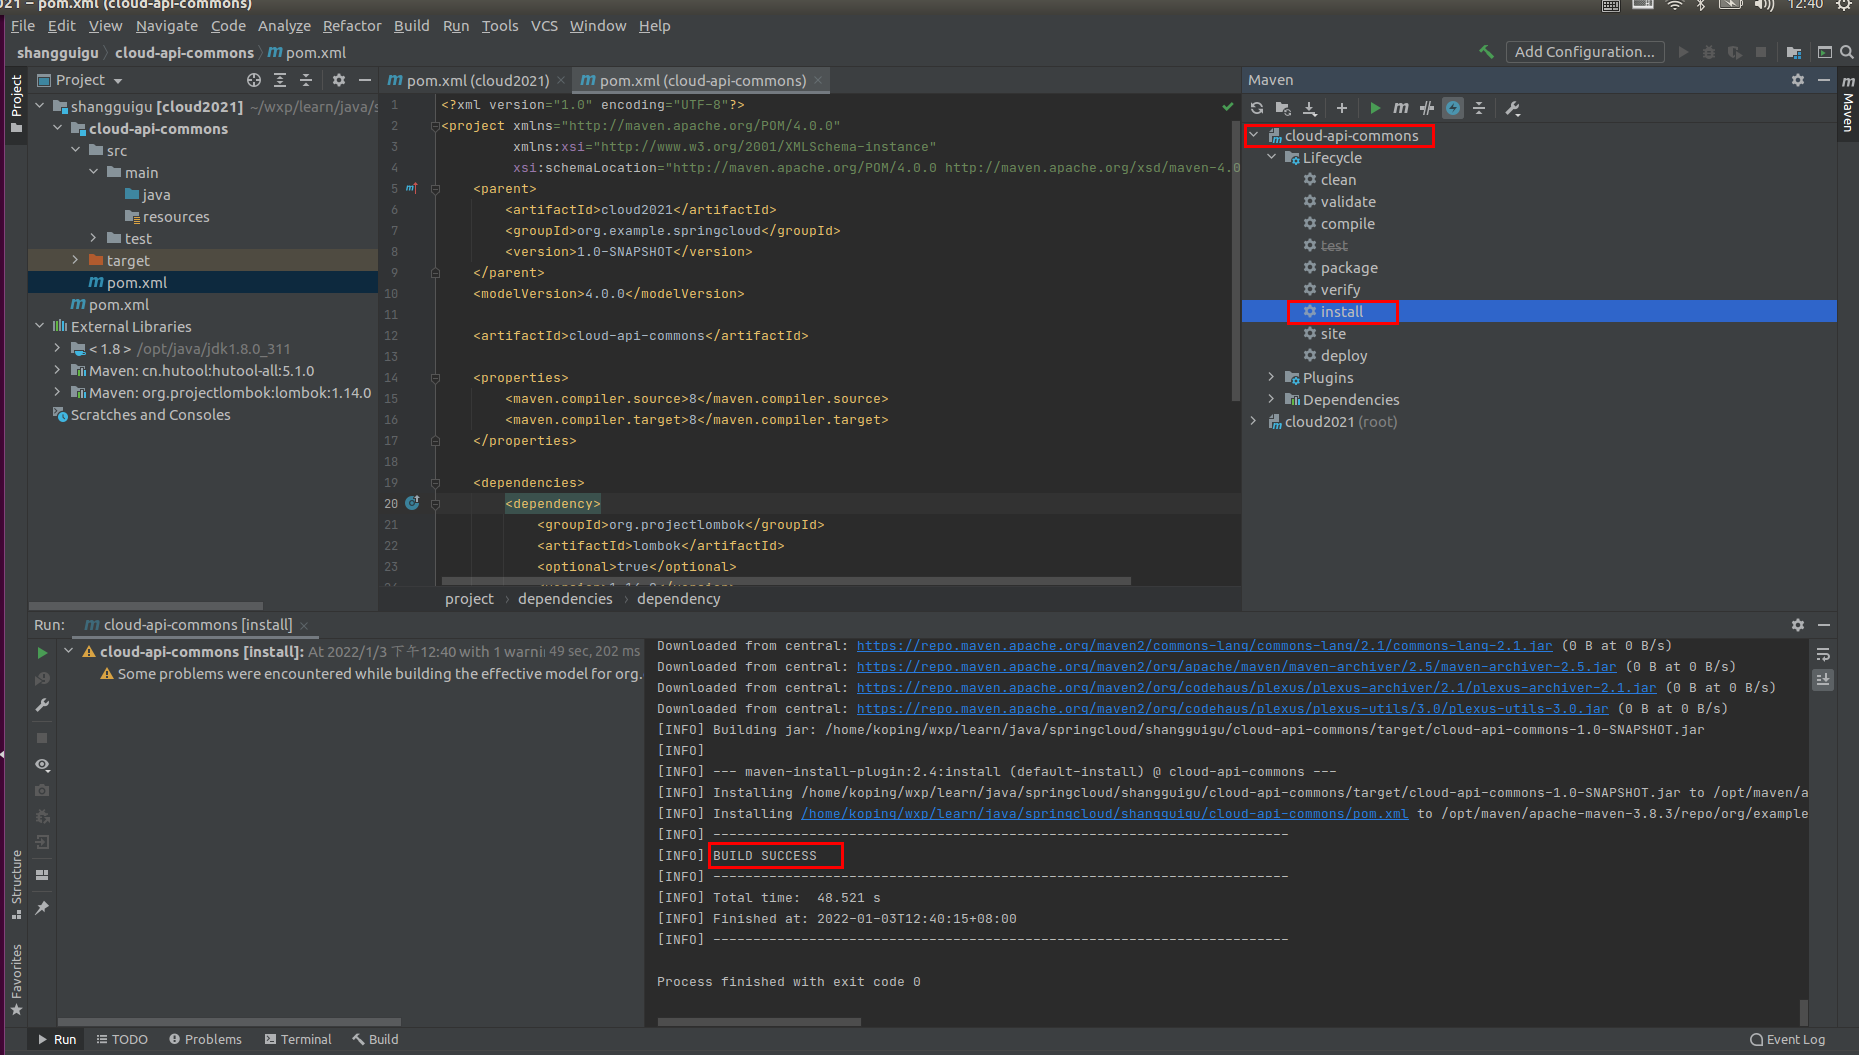
Next, you need to use maven packaging to publish to the public library for other modules to call the public part.
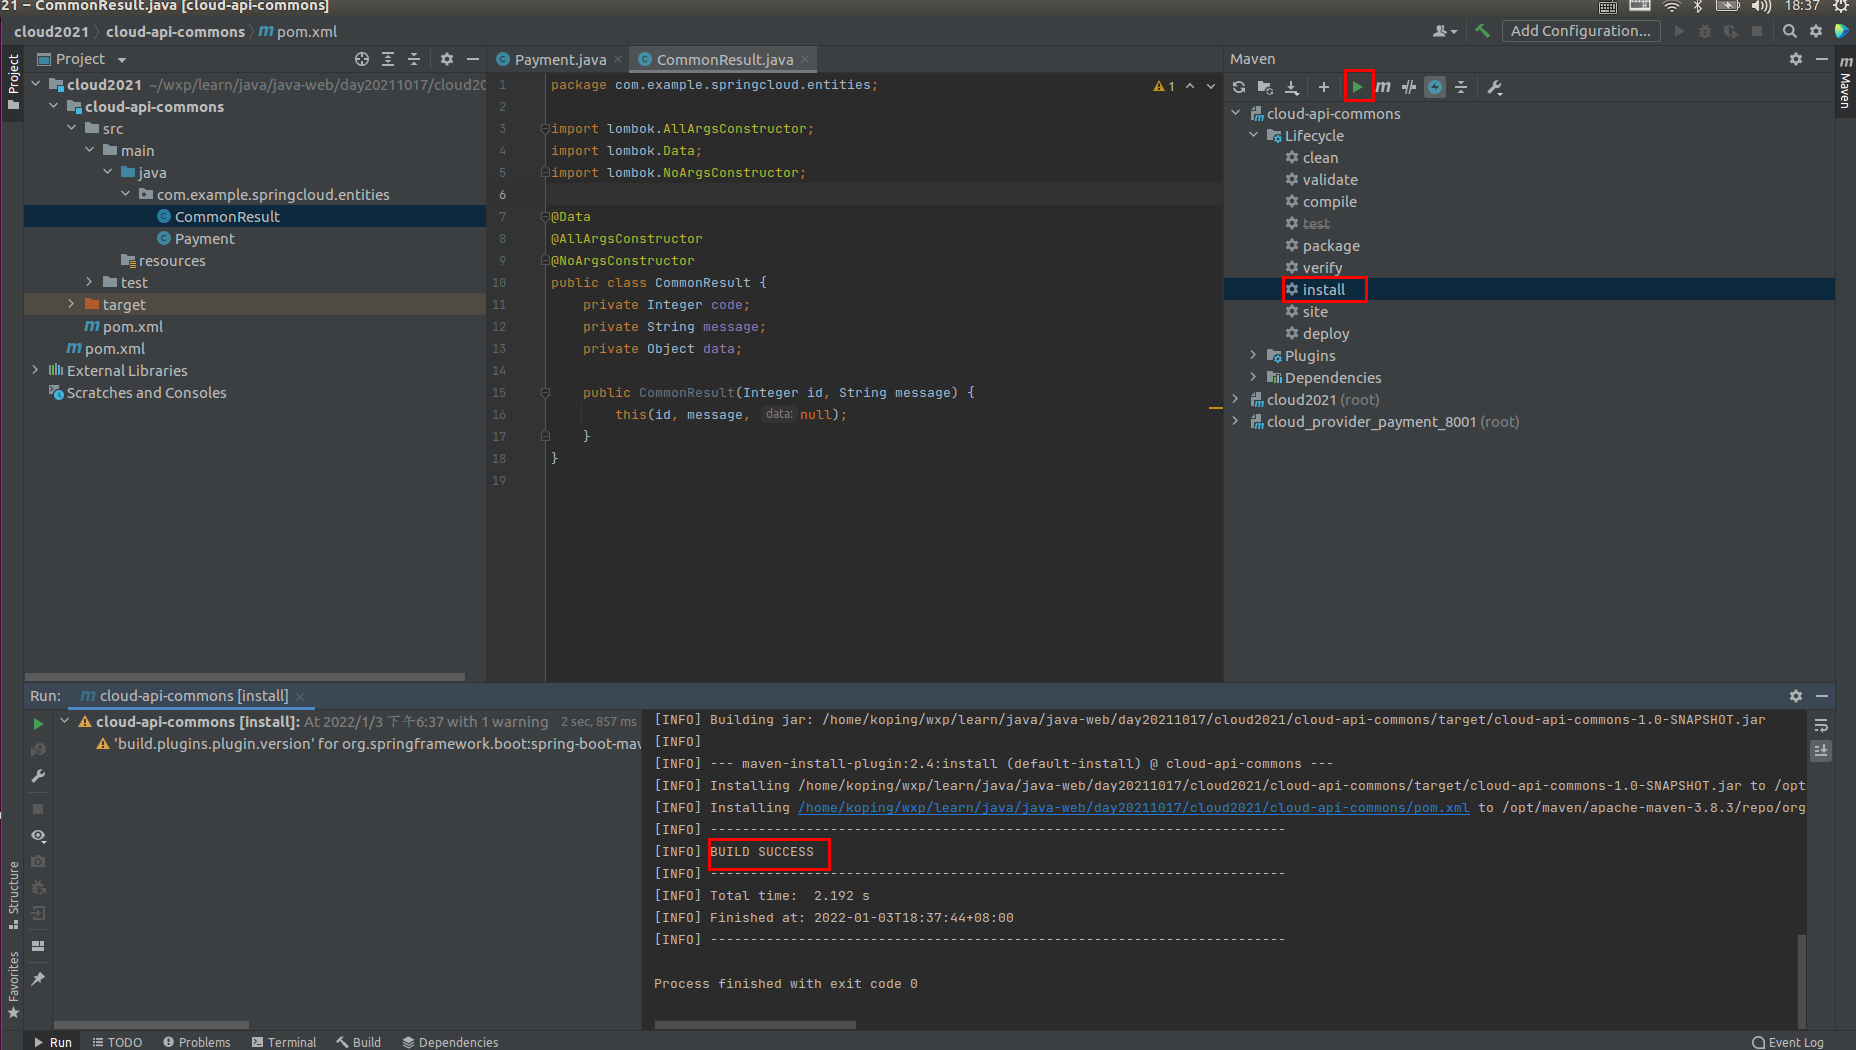
maven clean first
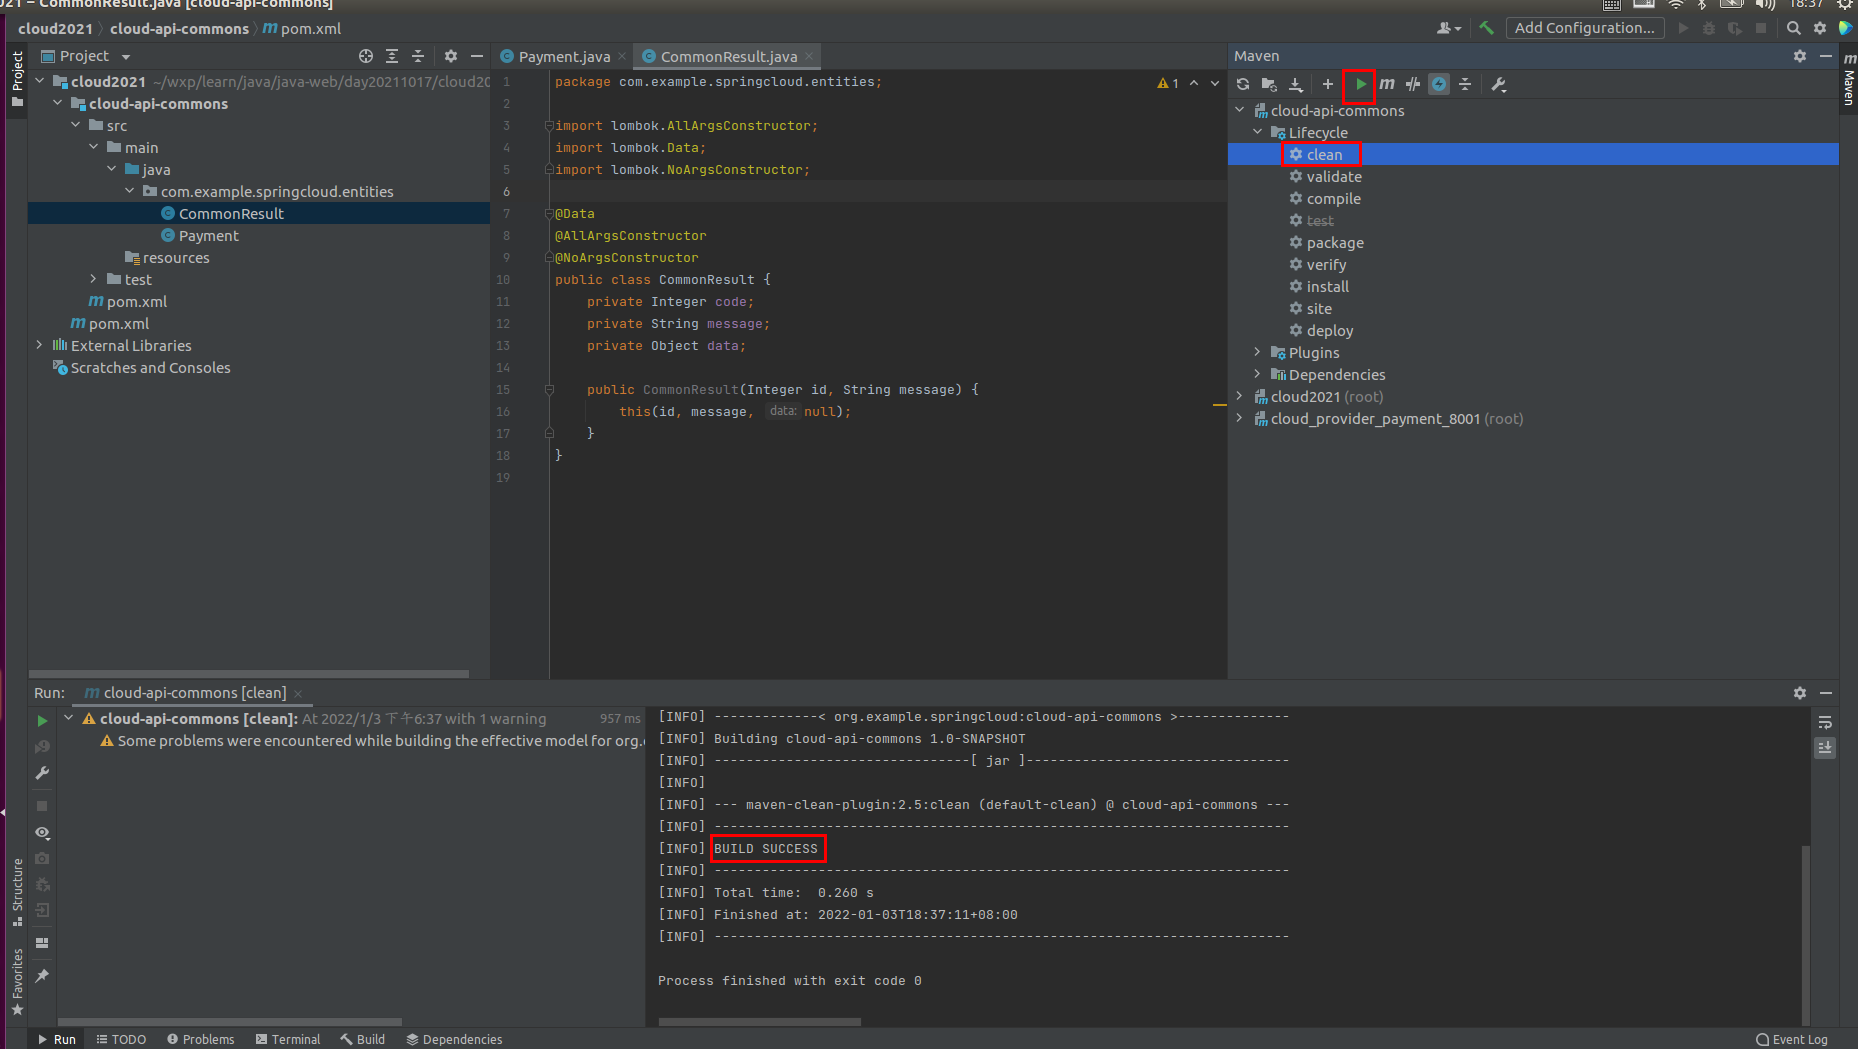
Then mvn install and publish to the local library
3. Build order module
next, build the order module. As described in the previous blog post, the order service only provides two interfaces, namely, the create order interface and the view order interface.
Secondly, there are only two public entity classes, which have been created and published to the local library in cloud API commons in Section 2. We only need to introduce them.
3.1 create module
First, build a module providing services: cloud-provider-payment-8001
The port number of the module is 8001
Right click the parent project cloud2021 - > New - > module to get the following figure
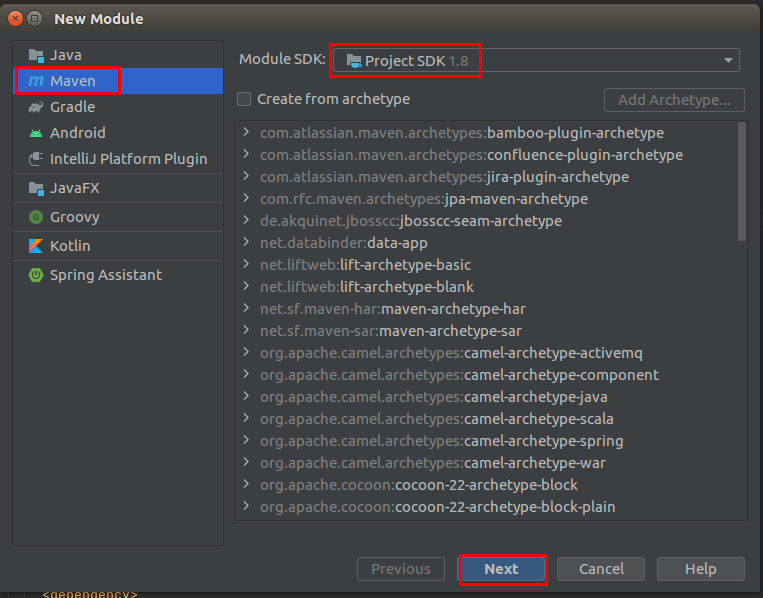
Select Maven, jdk select 1.8, and click Next to get the following figure.
You can see that the parent project is cloud2021. Enter the sub module name: cloud-provider-payment-8001.

Click Finish to get the newly built sub module:
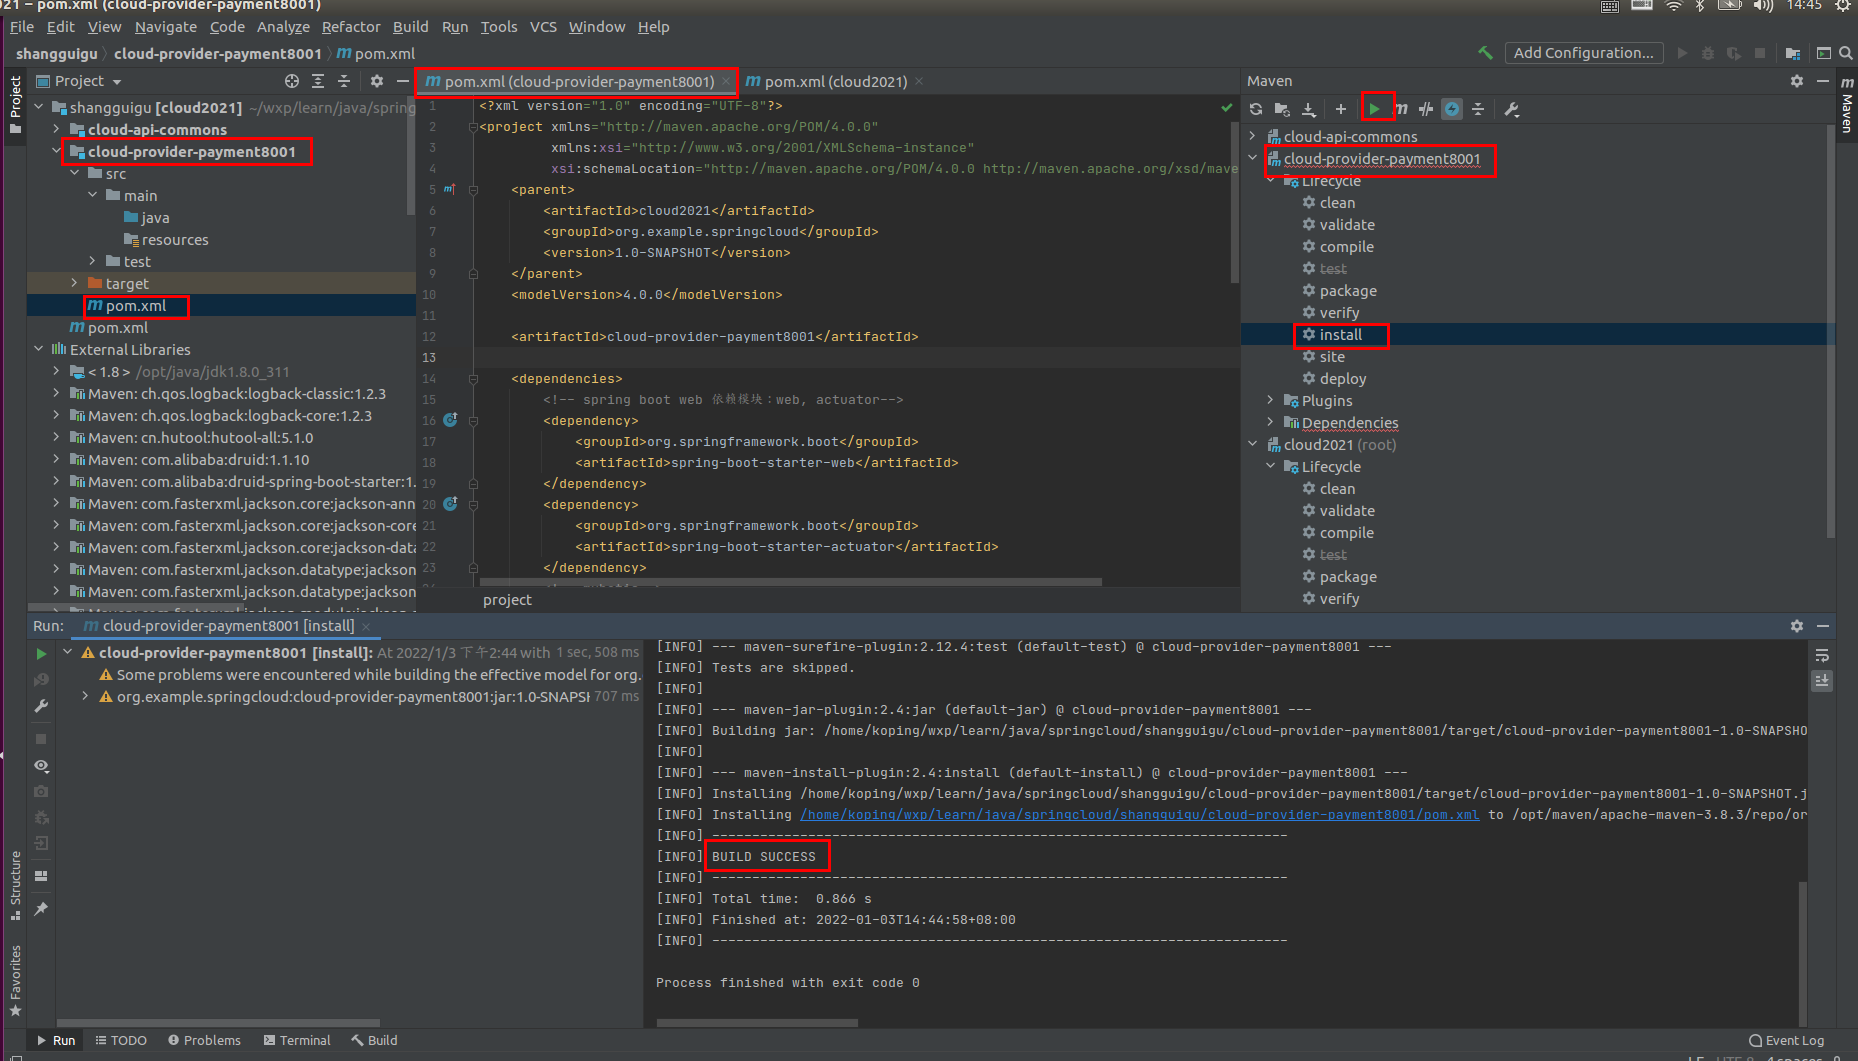
At this time, we can first look at the pom file of the parent project cloud2021, as shown in the figure below. We can see that there are now two sub projects under the parent project, that is, the two sub projects we just created:
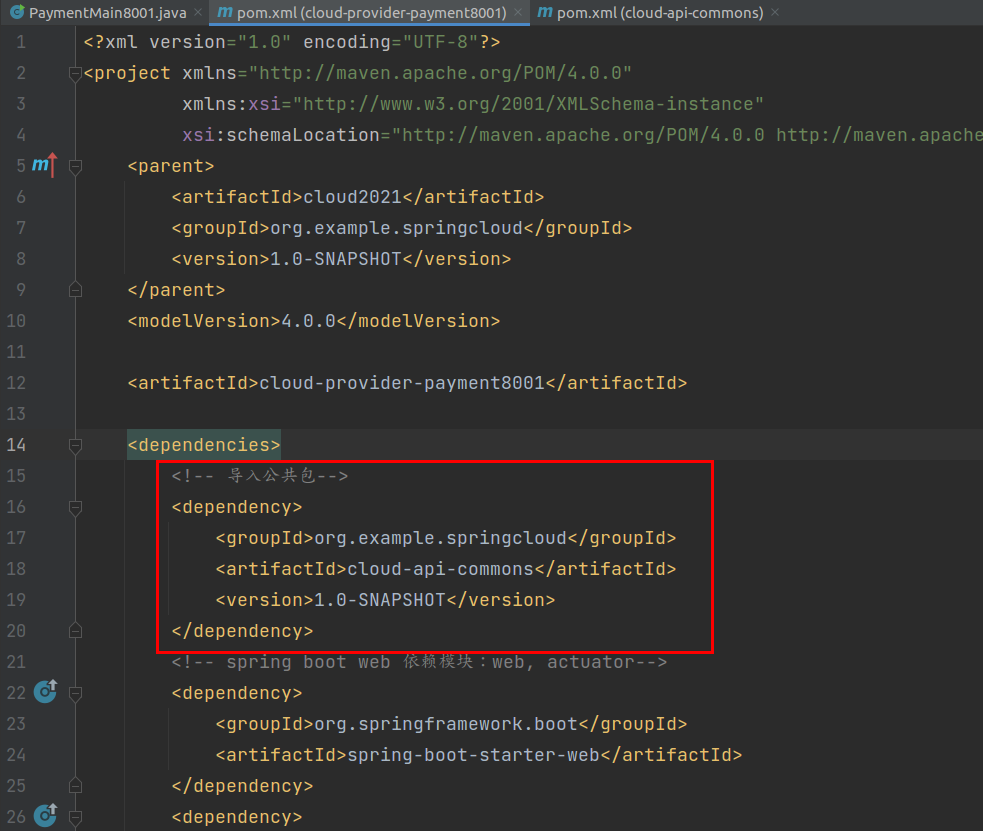
3.2 change pom
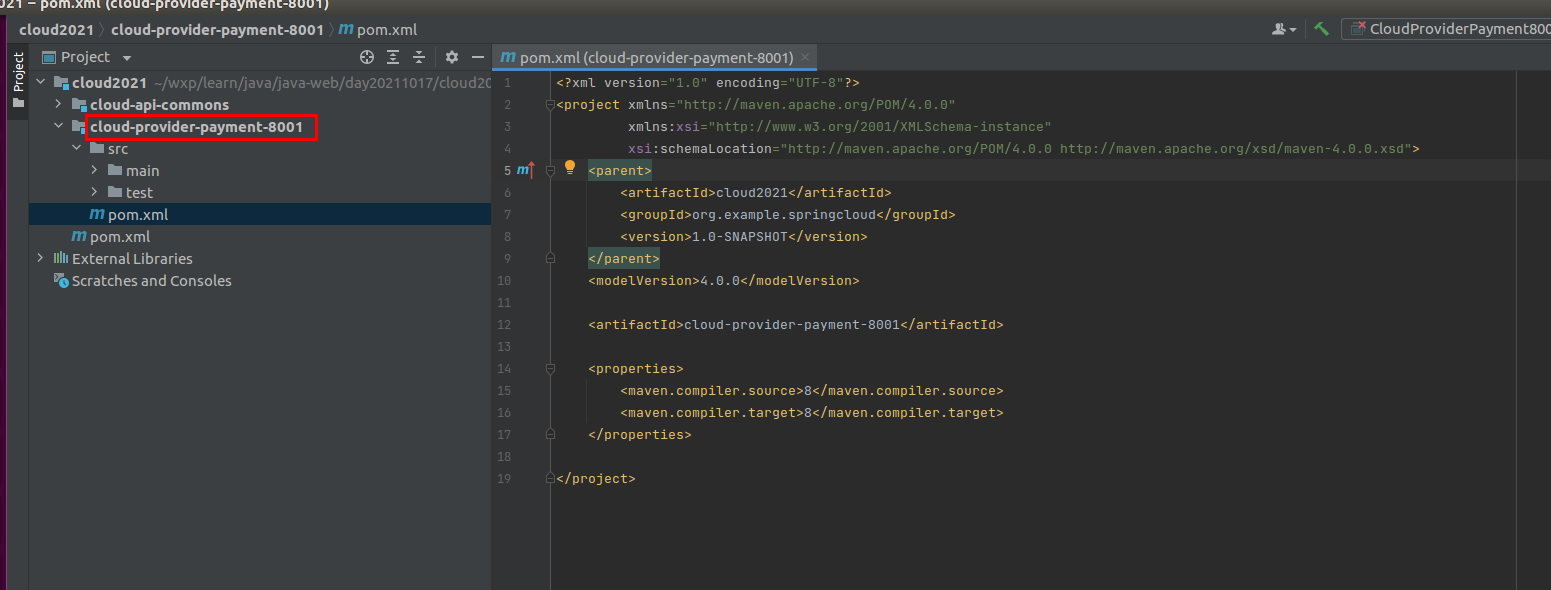
The second step is to modify the pom file of the payment module. The modified pom file is as follows,
<?xml version="1.0" encoding="UTF-8"?>
<project xmlns="http://maven.apache.org/POM/4.0.0"
         xmlns:xsi="http://www.w3.org/2001/XMLSchema-instance"
         xsi:schemaLocation="http://maven.apache.org/POM/4.0.0 http://maven.apache.org/xsd/maven-4.0.0.xsd">
    <parent>
        <artifactId>cloud2021</artifactId>
        <groupId>org.example.springcloud</groupId>
        <version>1.0-SNAPSHOT</version>
    </parent>
    <modelVersion>4.0.0</modelVersion>

    <artifactId>cloud-provider-payment8001</artifactId>

    <dependencies>
        <!-- Import public package-->
        <dependency>
            <groupId>org.example.springcloud</groupId>
            <artifactId>cloud-api-commons</artifactId>
            <version>1.0-SNAPSHOT</version>
        </dependency>
        <!-- spring boot web Dependent modules: web, actuator-->
        <dependency>
            <groupId>org.springframework.boot</groupId>
            <artifactId>spring-boot-starter-web</artifactId>
        </dependency>
        <dependency>
            <groupId>org.springframework.boot</groupId>
            <artifactId>spring-boot-starter-actuator</artifactId>
        </dependency>
        <dependency>
            <groupId>org.springframework.boot</groupId>
            <artifactId>spring-boot-configuration-processor</artifactId>
            <optional>true</optional>
        </dependency>
        <!-- mybatis-->
        <dependency>
            <groupId>org.mybatis.spring.boot</groupId>
            <artifactId>mybatis-spring-boot-starter</artifactId>
        </dependency>
        <dependency>
            <groupId>com.alibaba</groupId>
            <artifactId>druid-spring-boot-starter</artifactId>
            <version>1.1.10</version>
        </dependency>
        <dependency>
            <groupId>com.alibaba</groupId>
            <artifactId>druid</artifactId>
            <version>1.1.10</version>
        </dependency>
        <dependency>
            <groupId>mysql</groupId>
            <artifactId>mysql-connector-java</artifactId>
            <version>5.1.47</version>
        </dependency>
        <dependency>
            <groupId>org.springframework.boot</groupId>
            <artifactId>spring-boot-starter-jdbc</artifactId>
        </dependency>
        <dependency>
            <groupId>org.projectlombok</groupId>
            <artifactId>lombok</artifactId>
            <optional>true</optional>
            <version>1.14.0</version>
        </dependency>
        <dependency>
            <groupId>org.springframework.boot</groupId>
            <artifactId>spring-boot-starter-test</artifactId>
            <scope>test</scope>
        </dependency>
    </dependencies>

</project>
The screenshot of successful mvn compilation is as follows:
3.3 write yml/properties
Right click the resources folder of cloud-provider-payment-8001 - > New - > file to create a new application properties:
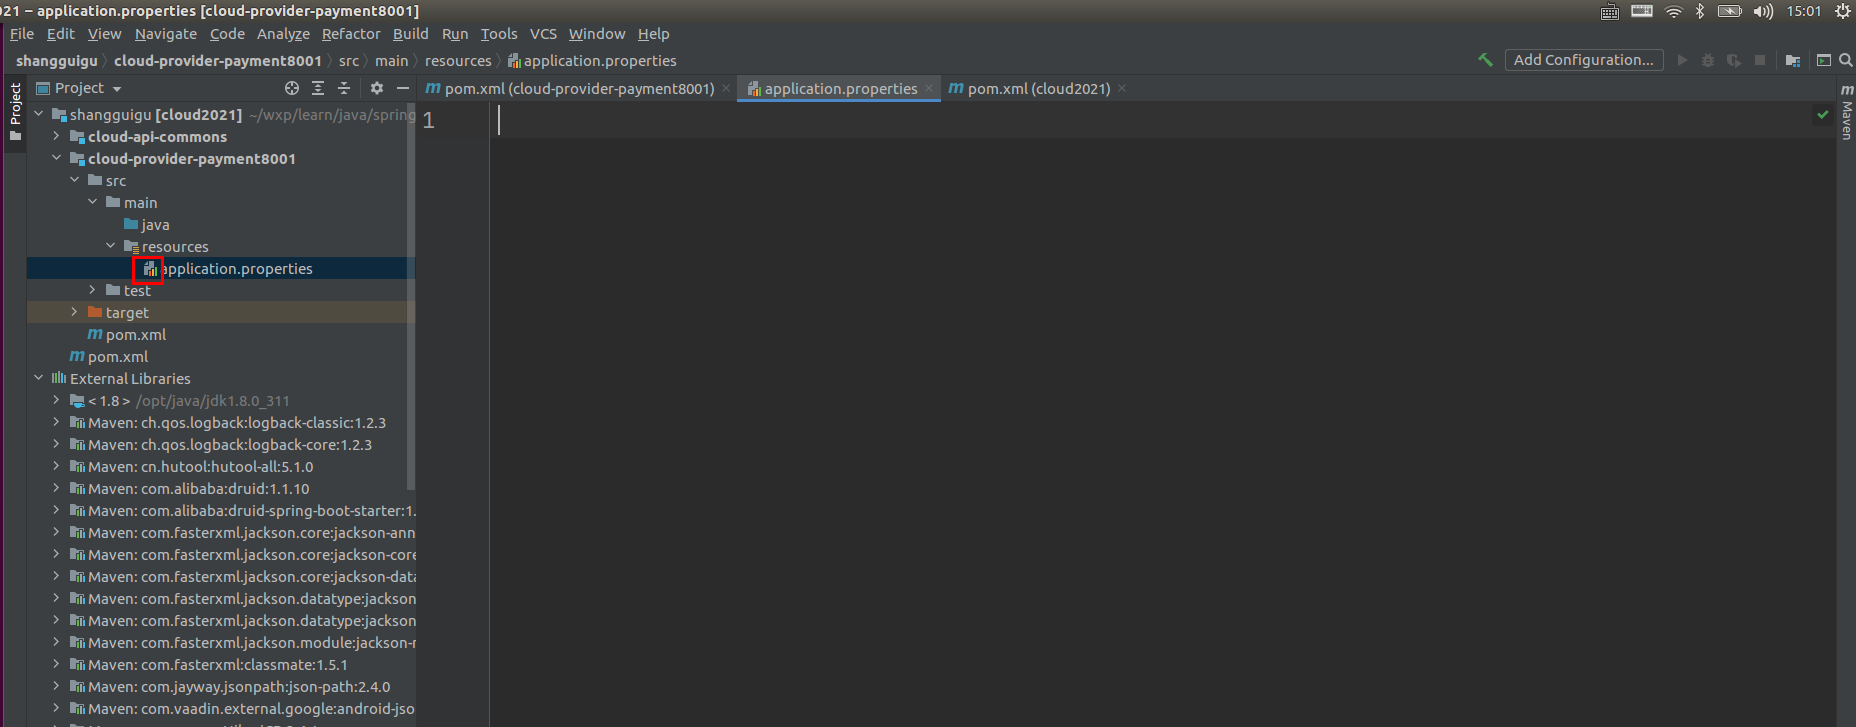
application.properties are as follows:
server.port=8001

spring.application.name=cloud-payment-service
spring.datasource.type=com.alibaba.druid.pool.DruidDataSource
spring.datasource.driver-class-name=org.gjt.mm.mysql.Driver
spring.datasource.url=jdbc:mysql://localhost:3306/springcloud?useUnicode=true&characterEncoding=utf-8&useSSL=false
spring.datasource.username=root
spring.datasource.password=123

mybatis.mapperLocations=classpath:mapper/*.xml
mybatis.type-aliases-package=com.example.springcloud.entities
3.4 main startup
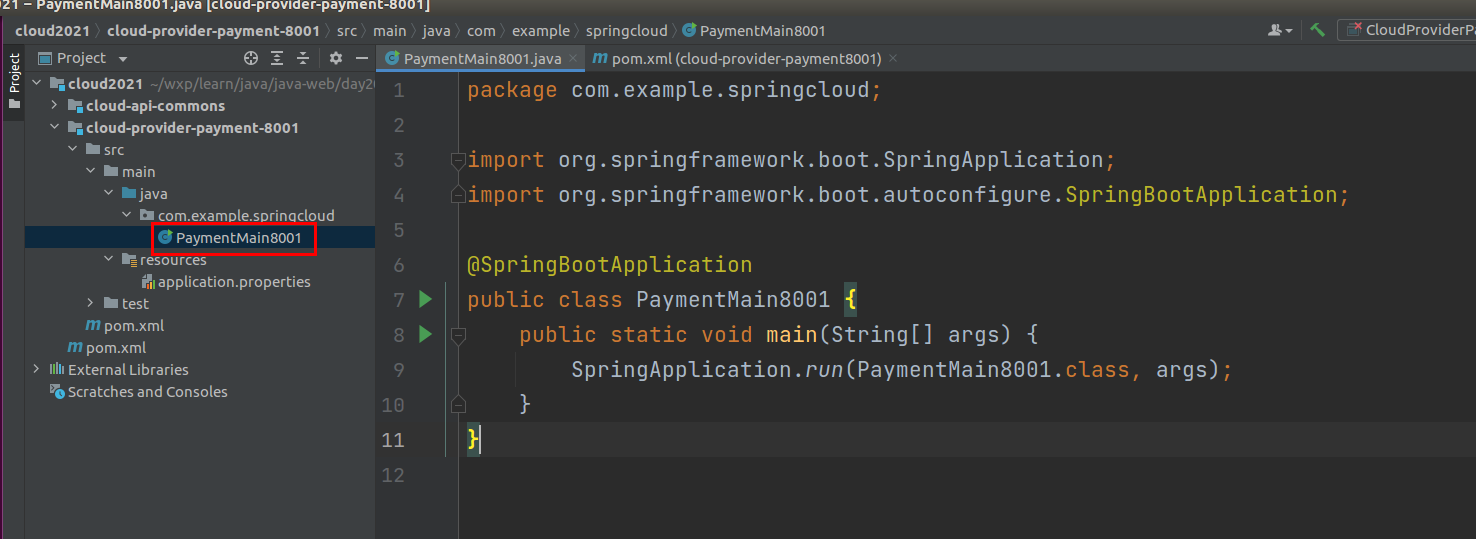
Right click java to create a new PaymentMain8001 main startup class
3.5 business
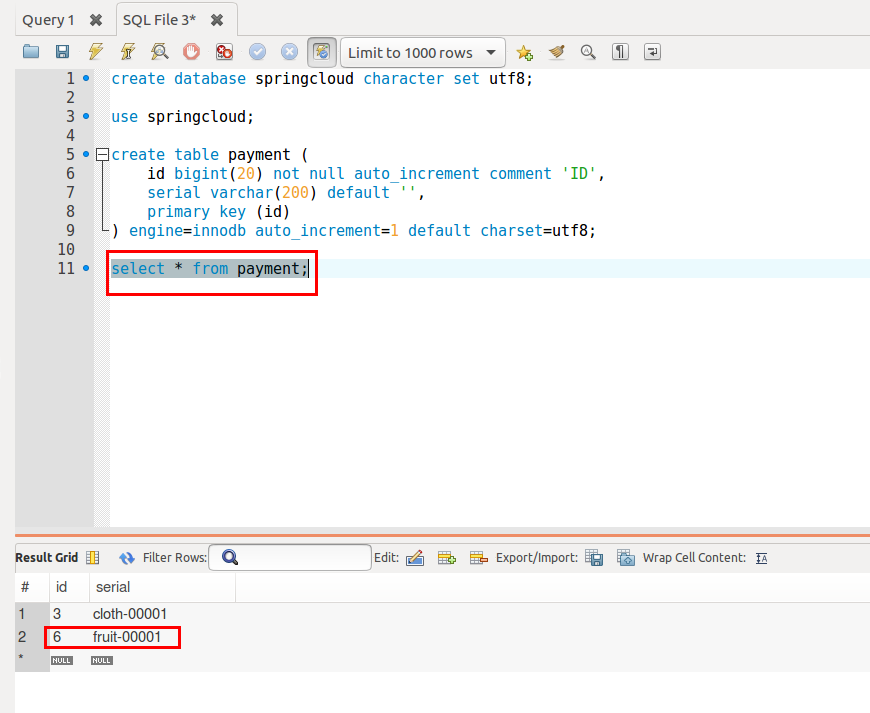
3.5.1 creating database tables
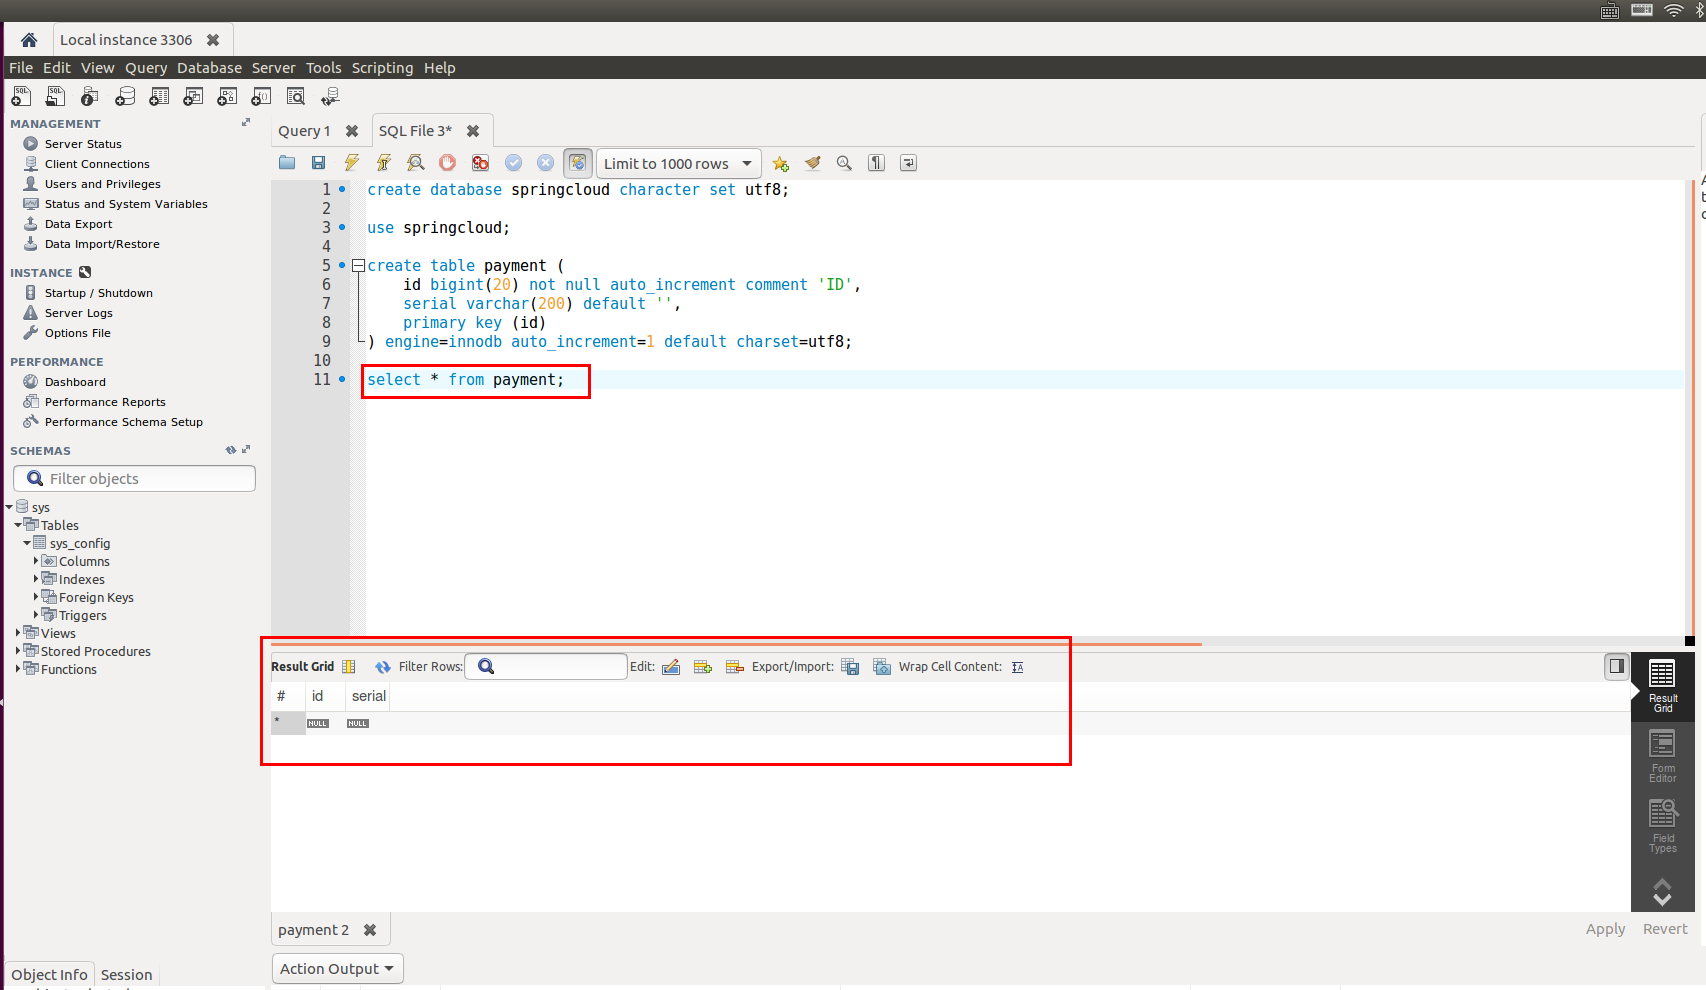
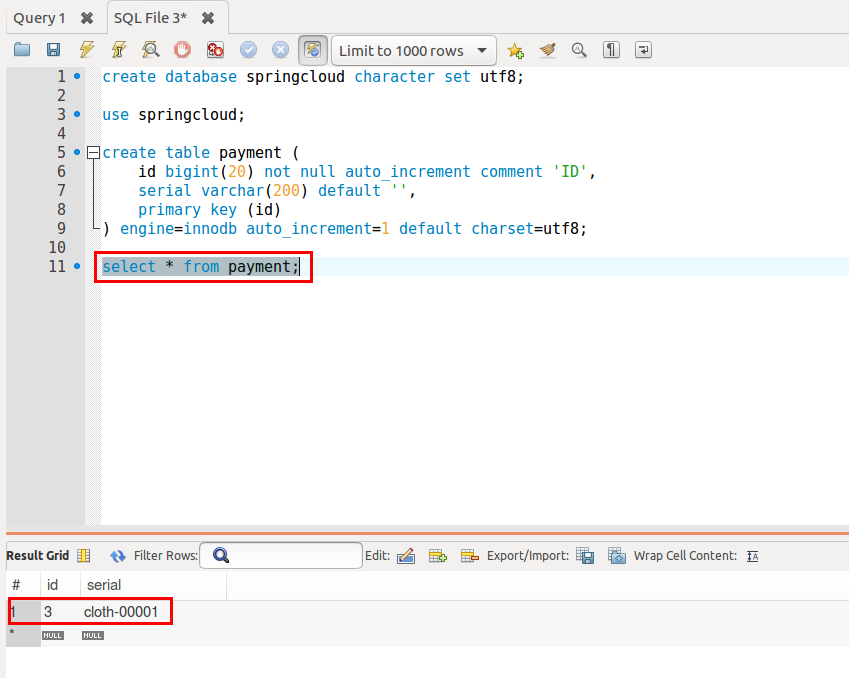
Create a new database springcloud in the mysql database, and then create an order table payment. Now the data in the order table is empty:
create database springcloud character set utf8;

use springcloud;

create table payment (
	id bigint(20) not null auto_increment comment 'ID',
    serial varchar(200) default '',
    primary key (id)
) engine=innodb auto_increment=1 default charset=utf8;

select * from payment;
3.5.2 creating entities
Since we have already built it in public works, there is no need to build a new one here. However, our pom file needs to import the local project just released.
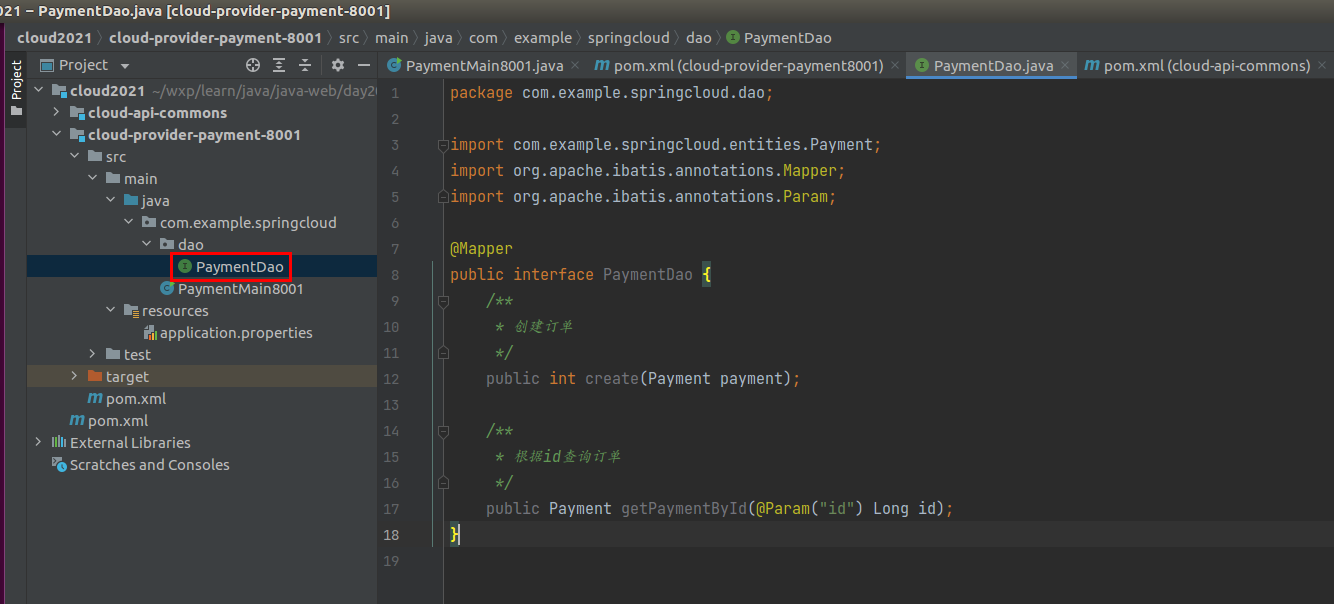
3.5.3 building dao
Create a new PaymentDtao, and provide two methods: create an order and view an order
3.5.4 building mapper
Under the resources/mapper folder, create a new paymentmapper XML file, as follows:
<?xml version="1.0" encoding="UTF-8" ?>
<!DOCTYPE mapper
        PUBLIC "-//mybatis.org//DTD Mapper 3.0//EN"  "http://mybatis.org/dtd/mybatis-3-mapper.dtd">
<mapper namespace="com.example.springcloud.dao.PaymentDao">
    <!-- Create order-->
    <insert id="create" parameterType="com.example.springcloud.entities.Payment" useGeneratedKeys="true" keyProperty="id">
        insert into payment(serial) values(#{serial});
    </insert>

    <resultMap id="BaseResultMap" type="com.example.springcloud.entities.Payment">
        <id column="id" property="id" jdbcType="BIGINT"/>
        <id column="serial" property="serial" jdbcType="VARCHAR"/>
    </resultMap>

    <!-- according to id Query order-->
    <select id="getPaymentById" parameterType="Long" resultMap="BaseResultMap">
        select * from payment where id=#{id};
    </select>
</mapper>

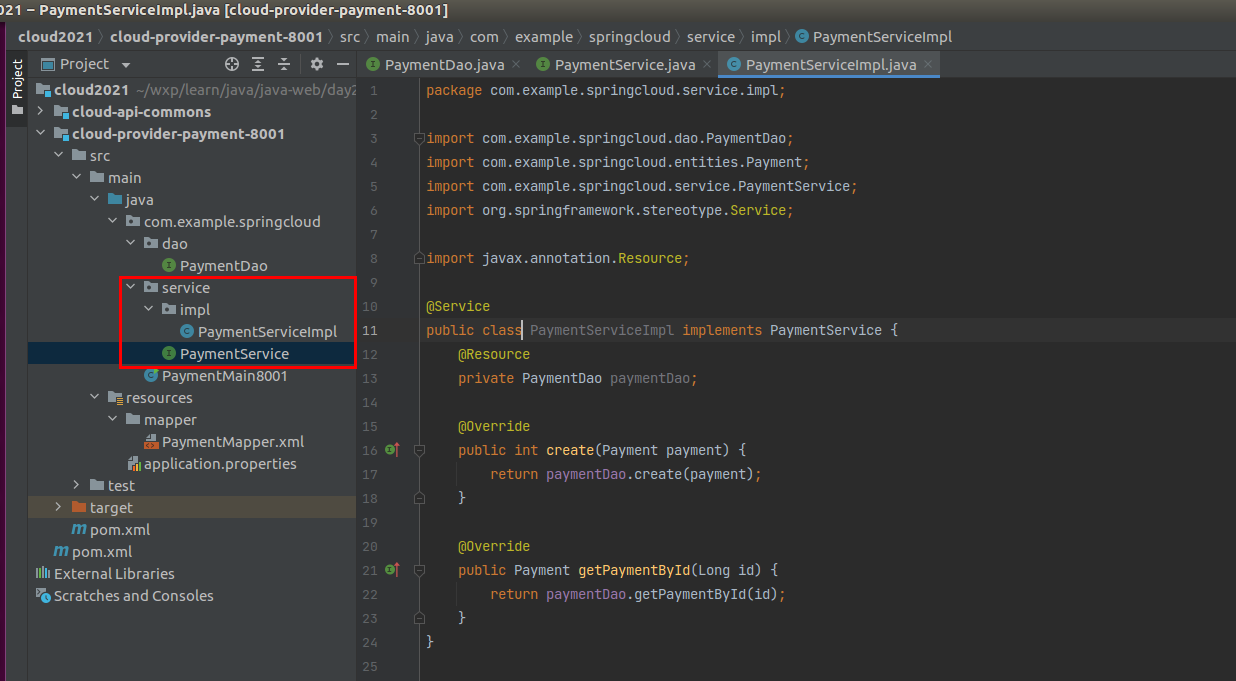
3.5.5 building a service
Order service interface PaymentService, code as follows:
package com.example.springcloud.service;

import com.example.springcloud.entities.Payment;
import org.apache.ibatis.annotations.Param;

public interface PaymentService {
    /**
     * Create order
     */
    public int create(Payment payment);

    /**
     * Query order by id
     */
    public Payment getPaymentById(@Param("id") Long id);
}
The order service interface implements the class PaymentServiceImpl, and the code is as follows:
package com.example.springcloud.service.impl;

import com.example.springcloud.dao.PaymentDao;
import com.example.springcloud.entities.Payment;
import com.example.springcloud.service.PaymentService;
import org.springframework.stereotype.Service;

import javax.annotation.Resource;

@Service
public class PaymentServiceImpl implements PaymentService {
    @Resource
    private PaymentDao paymentDao;

    @Override
    public int create(Payment payment) {
        return paymentDao.create(payment);
    }

    @Override
    public Payment getPaymentById(Long id) {
        return paymentDao.getPaymentById(id);
    }
}
3.5.6 building controller
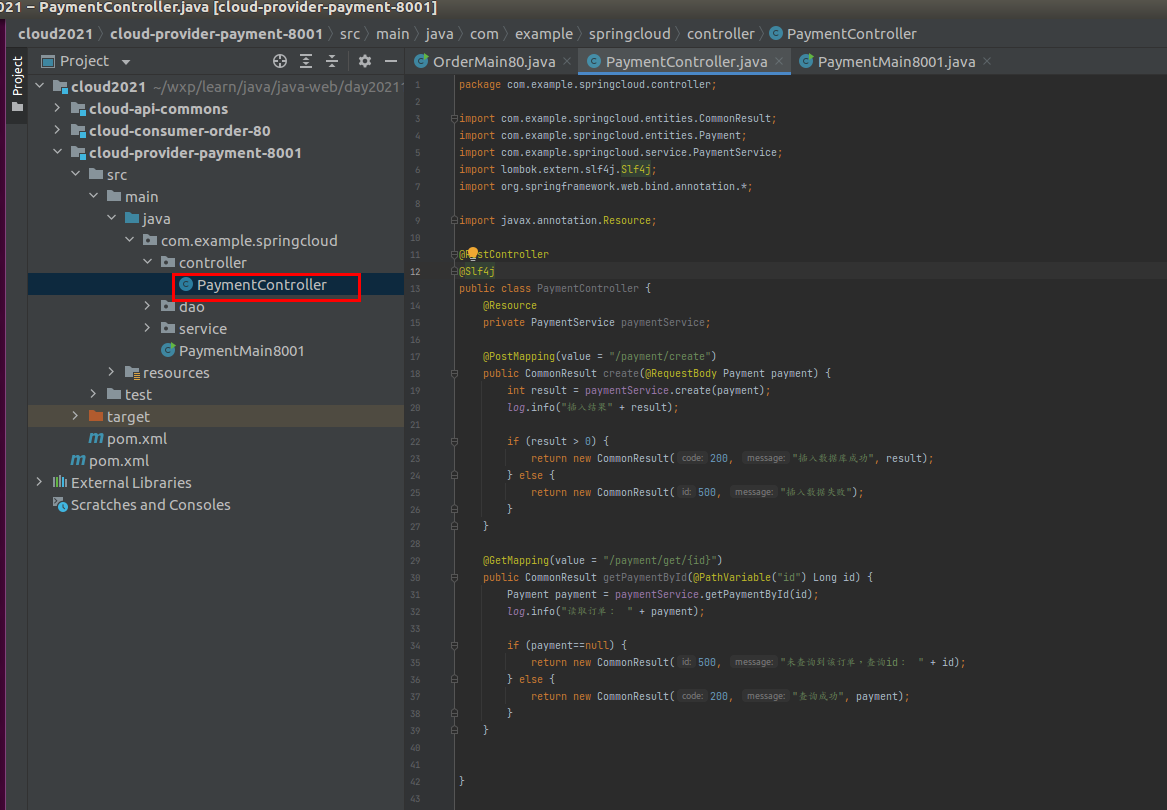
Build the order controller: PaymentController. The code is as follows:
package com.example.springcloud.controller;

import com.example.springcloud.entities.CommonResult;
import com.example.springcloud.entities.Payment;
import com.example.springcloud.service.PaymentService;
import lombok.extern.slf4j.Slf4j;
import org.springframework.web.bind.annotation.*;

import javax.annotation.Resource;

@RestController
@Slf4j
public class PaymentController {
    @Resource
    private PaymentService paymentService;

    @PostMapping(value = "/payment/create")
    public CommonResult create(@RequestBody Payment payment) {
        int result = paymentService.create(payment);
        log.info("Insert results" + result);

        if (result > 0) {
            return new CommonResult(200, "Insert database succeeded", result);
        } else {
            return new CommonResult(500, "Failed to insert data");
        }
    }

    @GetMapping(value = "/payment/get/{id}")
    public CommonResult getPaymentById(@PathVariable("id") Long id) {
        Payment payment = paymentService.getPaymentById(id);
        log.info("Read order: " + payment);

        if (payment==null) {
            return new CommonResult(500, "The order is not found, please query id:  " + id);
        } else {
            return new CommonResult(200, "query was successful", payment);
        }
    }
}
3.6 testing
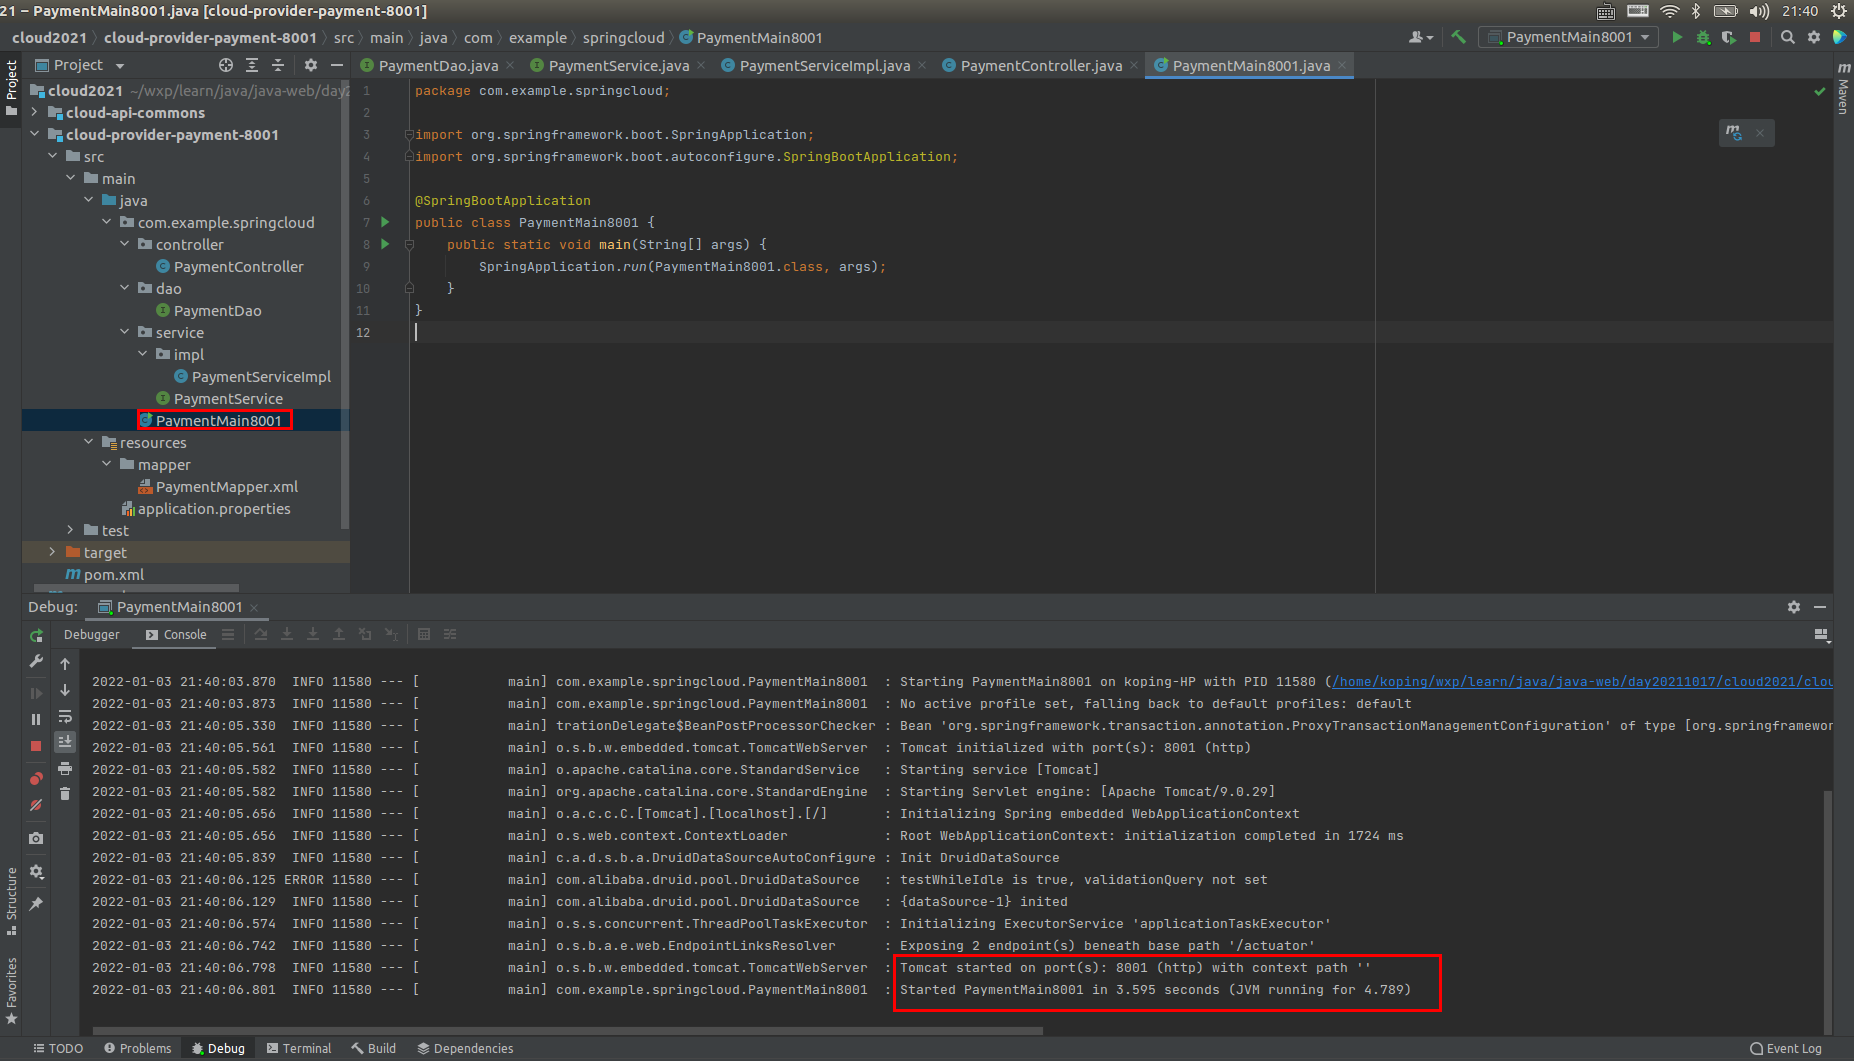
3.6.1 start service
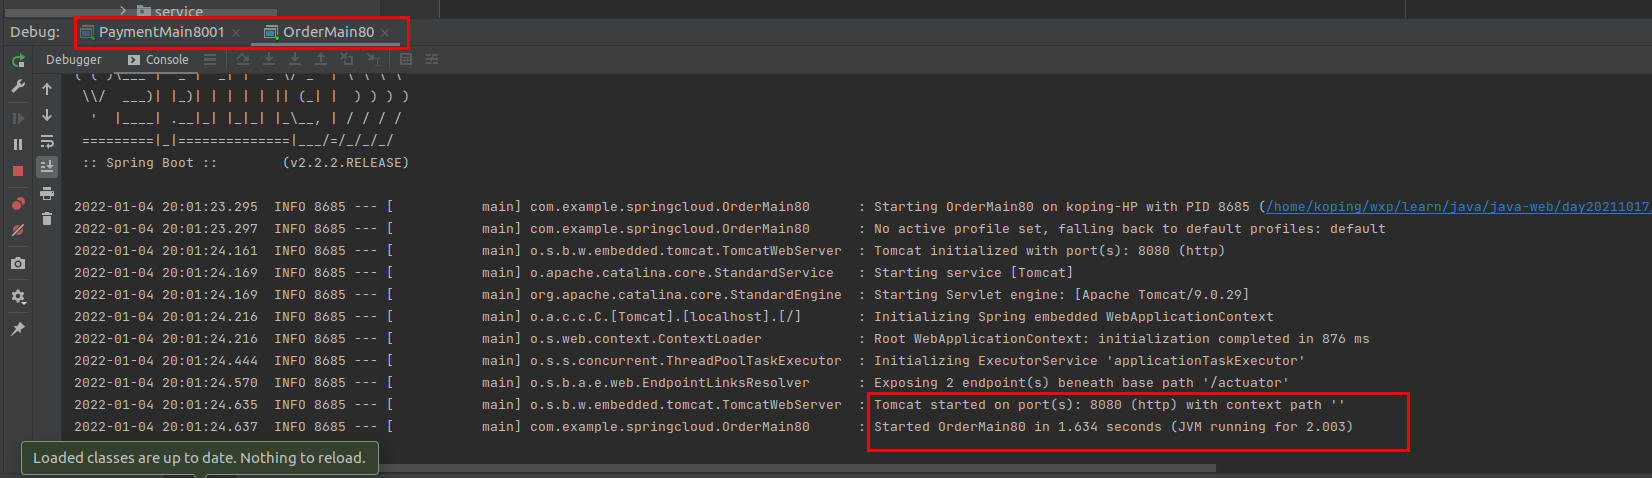
Main startup class of startup module: PaymentMain8001. As shown in the figure below, you can see that the order service of port 8001 has been started.
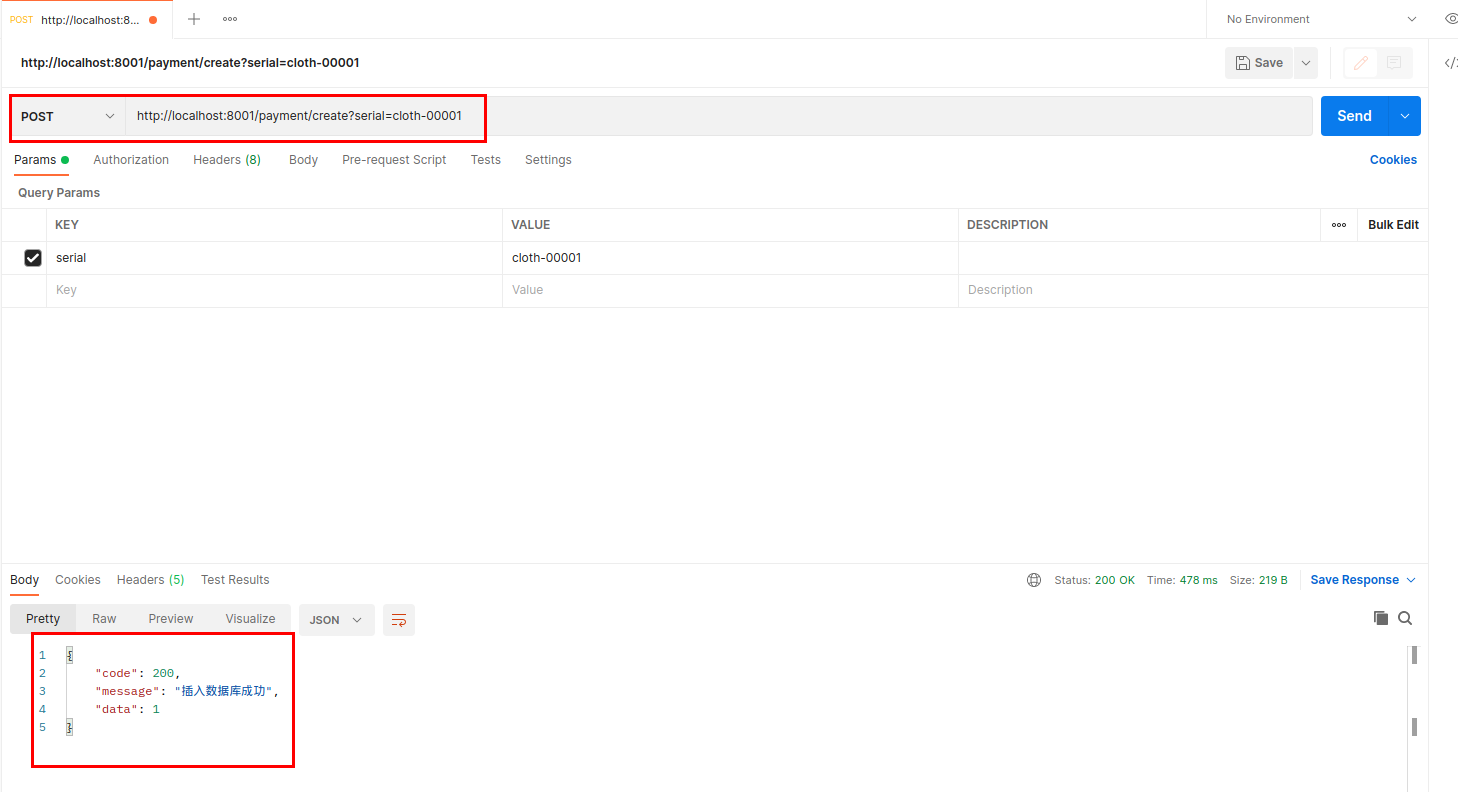
3.6.3 test create order
The order creation class is the post method. Use postman to send an order creation request. The order number is cloth-00001
As shown in the figure above, postman shows that the database was inserted successfully.
As shown in the following figure, the order number inserted by the service just called can be seen in mysql:
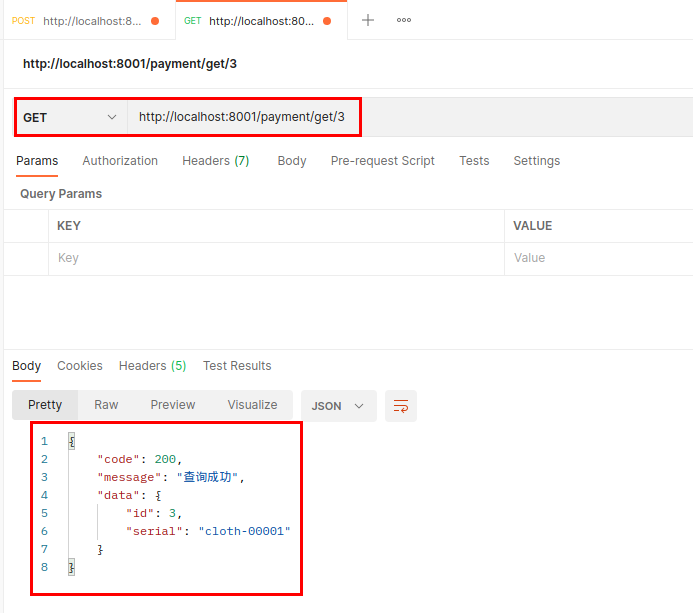
3.6.4 test acquisition order
By querying the database, we can see that the id is 3, and we can test the interface to obtain the order:
At this point, the order micro service has been built and tested.
4. Build consumption order module
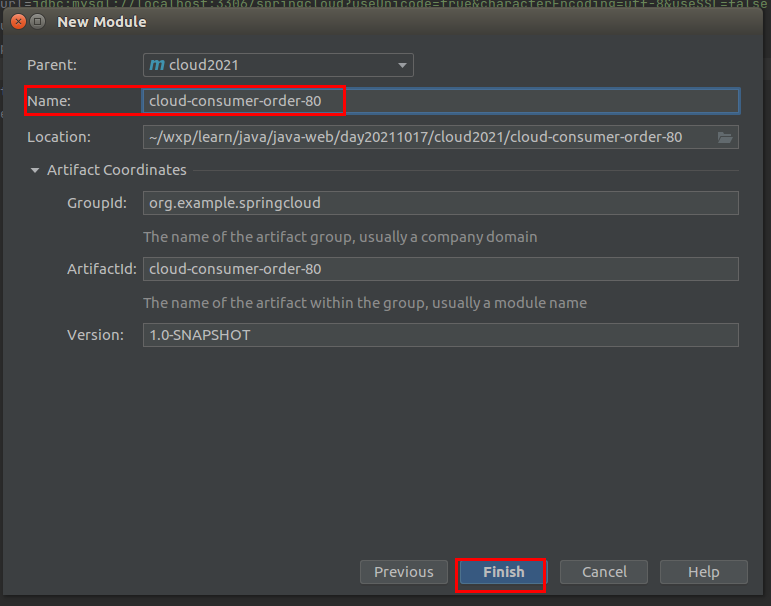
4.1 create module
Build the consumption order module: cloud-consumer-order-80. Since the use of ports below 1024 requires root permission, in order to avoid error reporting, we set the port number of the consumption order module as 8080
Right click cloud2021 - > New - > module, select Maven, and jdk select 1.8

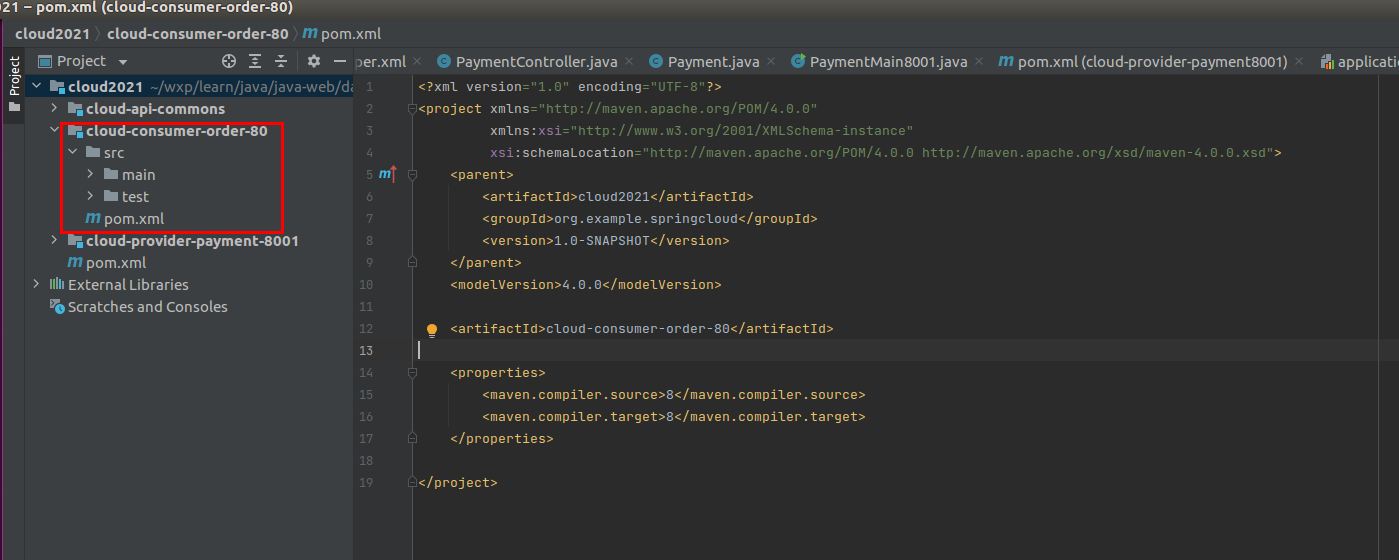
At this point, you can see that there are already three sub modules under the parent project:
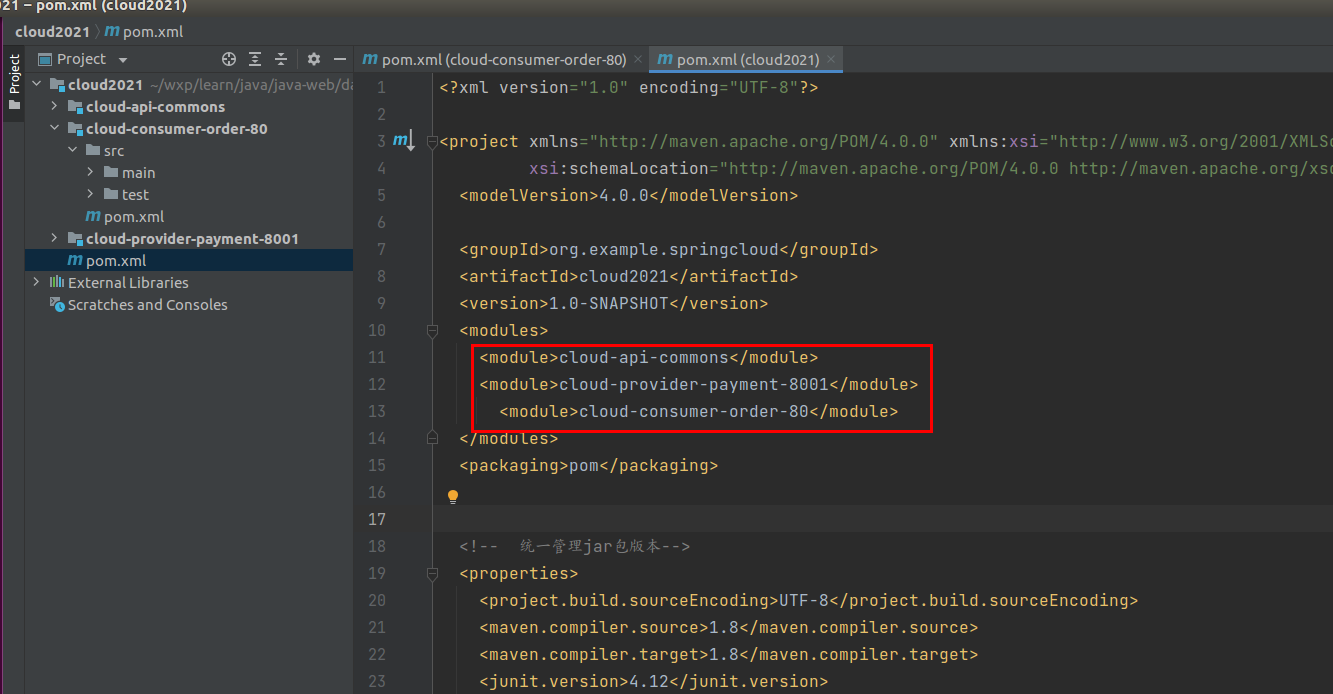
4.2 change pom
The pom file of the consumption order module can now directly copy the components used in the pom file in the order service. The contents of the pom file are as follows:
<?xml version="1.0" encoding="UTF-8"?>
<project xmlns="http://maven.apache.org/POM/4.0.0"
         xmlns:xsi="http://www.w3.org/2001/XMLSchema-instance"
         xsi:schemaLocation="http://maven.apache.org/POM/4.0.0 http://maven.apache.org/xsd/maven-4.0.0.xsd">
    <parent>
        <artifactId>cloud2021</artifactId>
        <groupId>org.example.springcloud</groupId>
        <version>1.0-SNAPSHOT</version>
    </parent>
    <modelVersion>4.0.0</modelVersion>

    <artifactId>cloud-consumer-order-80</artifactId>

    <properties>
        <maven.compiler.source>8</maven.compiler.source>
        <maven.compiler.target>8</maven.compiler.target>
    </properties>

    <dependencies>
        <!-- Import public package-->
        <dependency>
            <groupId>org.example.springcloud</groupId>
            <artifactId>cloud-api-commons</artifactId>
            <version>1.0-SNAPSHOT</version>
        </dependency>
        <!-- spring boot web Dependent modules: web, actuator-->
        <dependency>
            <groupId>org.springframework.boot</groupId>
            <artifactId>spring-boot-starter-web</artifactId>
        </dependency>
        <dependency>
            <groupId>org.springframework.boot</groupId>
            <artifactId>spring-boot-starter-actuator</artifactId>
        </dependency>
        <dependency>
            <groupId>org.springframework.boot</groupId>
            <artifactId>spring-boot-configuration-processor</artifactId>
            <optional>true</optional>
        </dependency>

        <dependency>
            <groupId>org.projectlombok</groupId>
            <artifactId>lombok</artifactId>
            <optional>true</optional>
            <version>1.14.0</version>
        </dependency>
        <dependency>
            <groupId>org.springframework.boot</groupId>
            <artifactId>spring-boot-starter-test</artifactId>
            <scope>test</scope>
        </dependency>
    </dependencies>
</project>
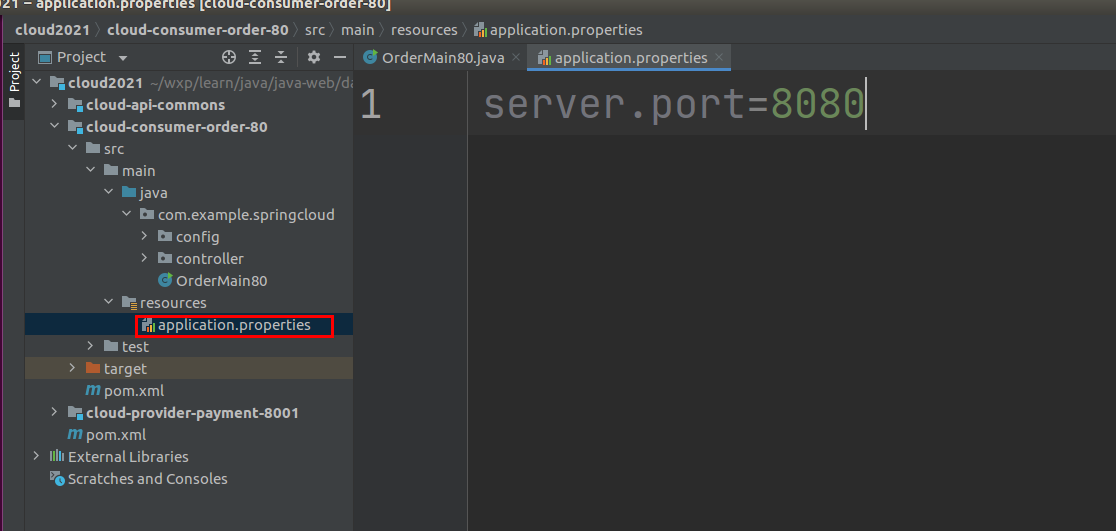
4.3 write yml/properties
The application of the service Properties only need to fill in the port number of the service: 8080
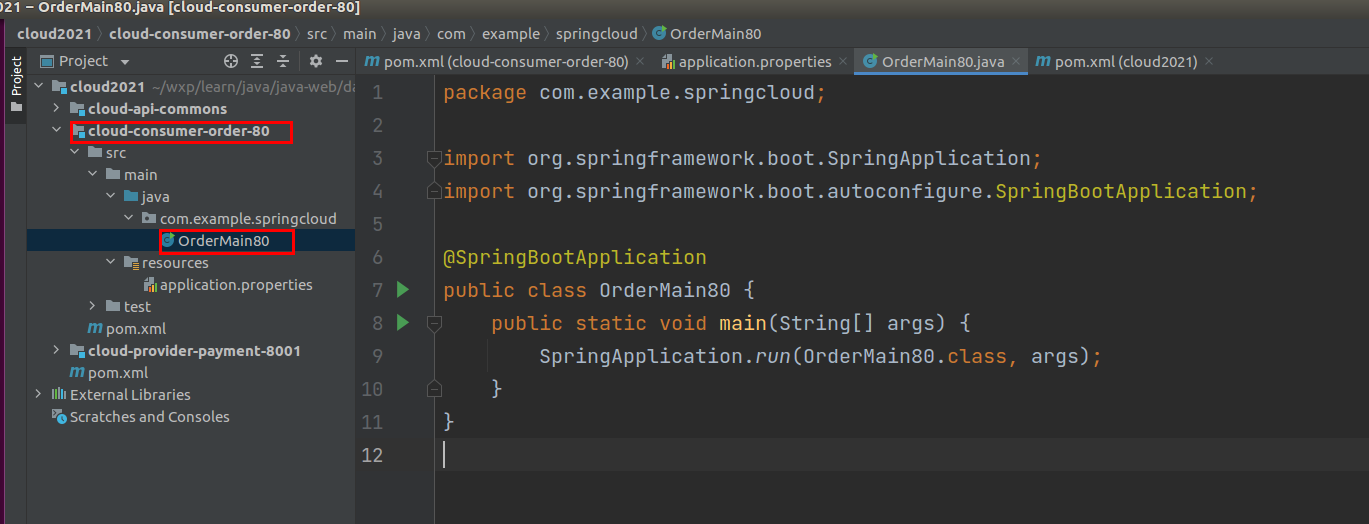
4.4 main startup
4.5 business
Because our demo business logic is relatively simple, Service, Mapper and Mysql are no longer required in the business class of the consumption order module. Therefore, these modules are not imported in the pom file just now.
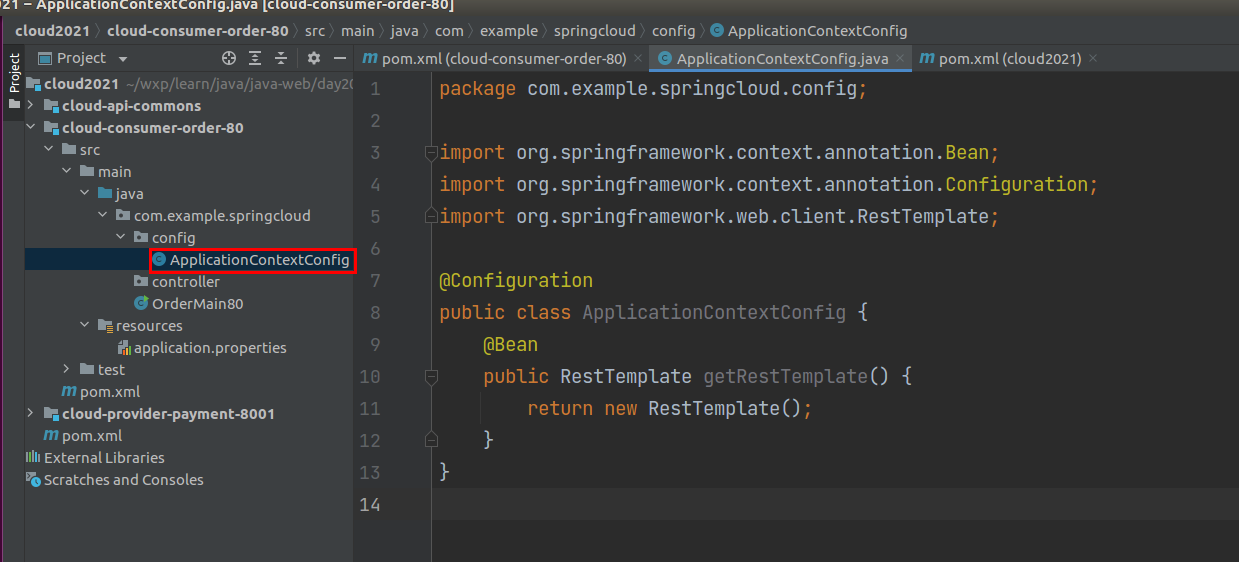
4.5.1 get RestTemplate
Now, when our consumption order module wants to call the interface of the order service, because the two modules may be deployed on different servers, we need to build a method to remotely call the Http service. At this time, RestTemplate can be used.
RestTemplate provides a variety of convenient methods to access remote http services. It is a simple and convenient restful service template class. It is the client template tool set provided by Spring to access Rest services.
Usage: generally, only 3 parameters are used:
url: rest request address
requestMap: request parameters
responseBean.class: the object type to which the http response is converted
To get the RestTemplate, you can build the config class
4.5.2 building controller class
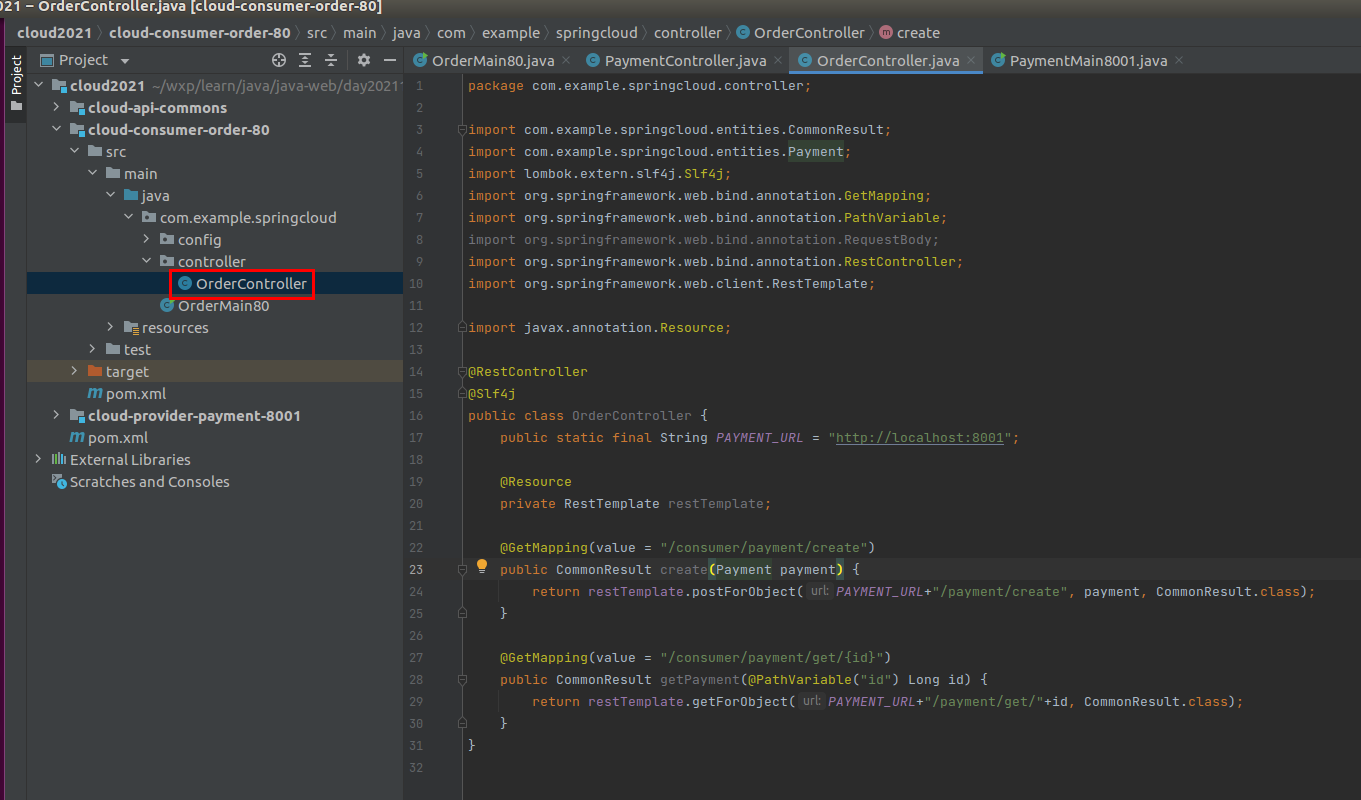
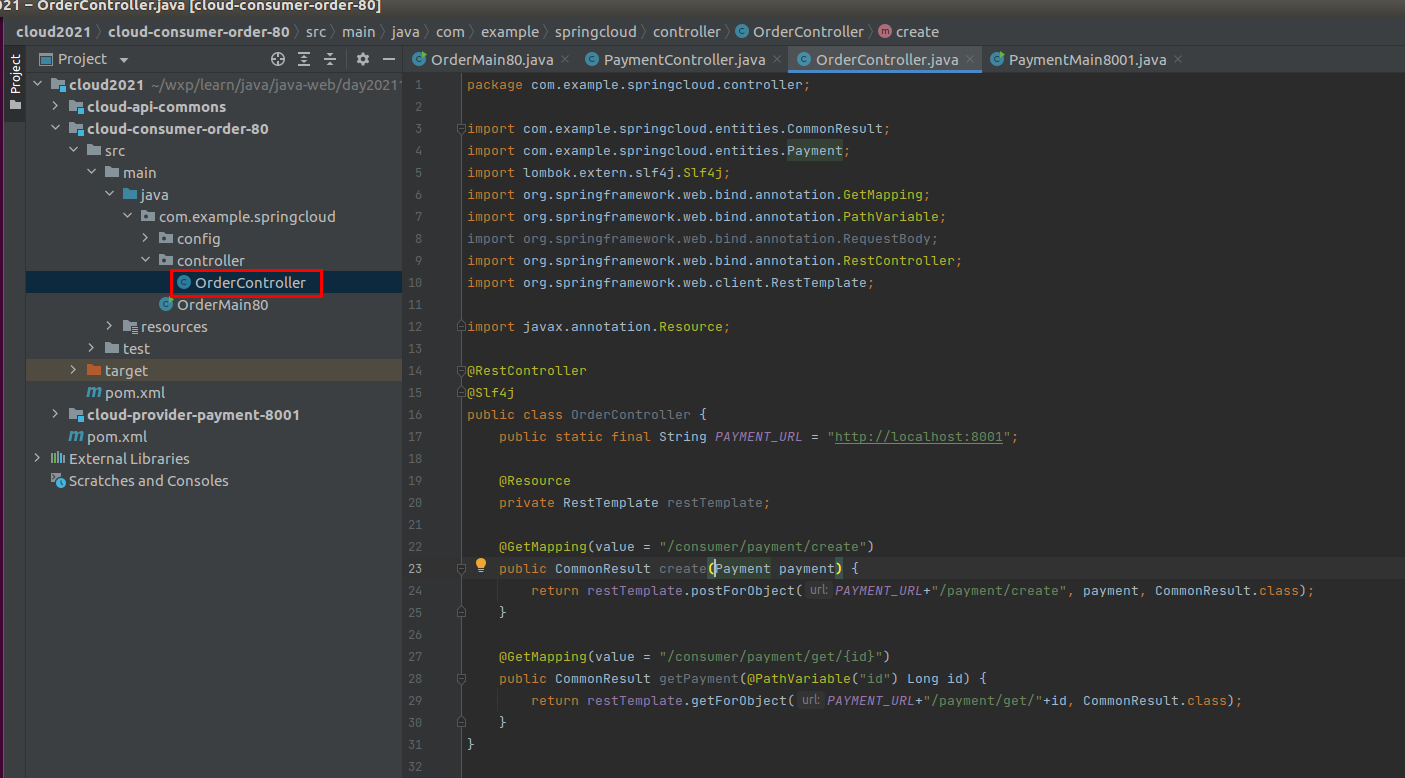
The code of OrderController class is as follows:
package com.example.springcloud.controller;

import com.example.springcloud.entities.CommonResult;
import com.example.springcloud.entities.Payment;
import lombok.extern.slf4j.Slf4j;
import org.springframework.web.bind.annotation.GetMapping;
import org.springframework.web.bind.annotation.PathVariable;
import org.springframework.web.bind.annotation.RestController;
import org.springframework.web.client.RestTemplate;

import javax.annotation.Resource;

@RestController
@Slf4j
public class OrderController {
    public static final String PAYMENT_URL = "http://localhost:8001";

    @Resource
    private RestTemplate restTemplate;

    @GetMapping(value = "/consumer/payment/create")
    public CommonResult create(Payment payment) {
        return restTemplate.postForObject(PAYMENT_URL+"/payment/create", payment, CommonResult.class);
    }

    @GetMapping(value = "/consumer/payment/get/{id}")
    public CommonResult getPayment(@PathVariable("id") Long id) {
        return restTemplate.getForObject(PAYMENT_URL+"/payment/get/"+id, CommonResult.class);
    }
}
4.6 testing the consumer order module
Start order service: cloud-provider-payment-8001
And consumer order service class: cloud-consumer-order-80
4.6.1 test acquisition order interface
In the order interface module, an order has been created: {id=4, serial=cloth00001}, so let's test the order acquisition interface first.
As can be seen from the figure below, we have successfully obtained the content of order No. 3 by calling the consumption order service on port 8080.

4.6.1 test order creation interface
A fruit related order is created this time: fruit-00001
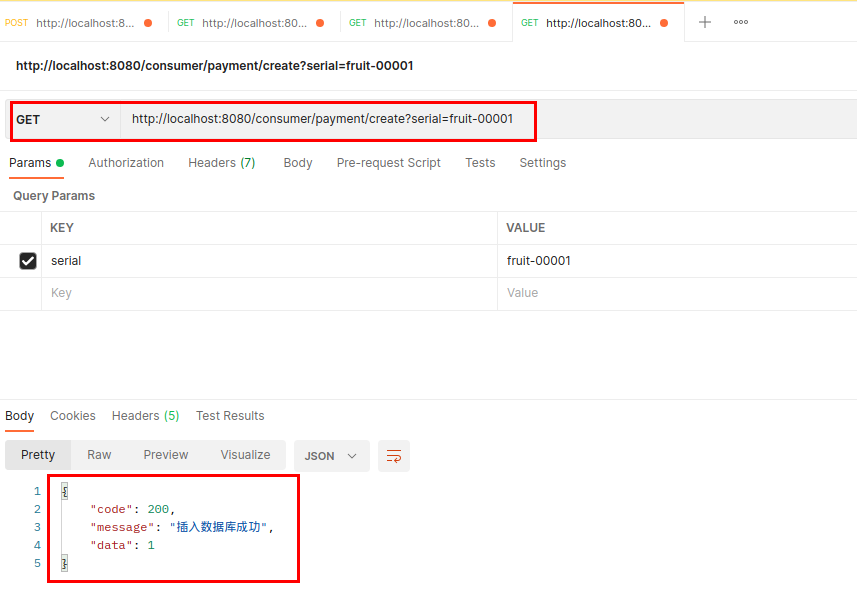
As can be seen from Figure 2 above, we also successfully created the interface through port 8080.
Here, we have completed the introduction demo of spring cloud, that is, simulate the remote call of the order service on another server through port 8080, so as to complete the creation and viewing of orders.