1. What is CSS?
Cascading StyleSheet, representing standard language
Including font, color, margin, height, width, background picture, web page positioning, web page floating
The < style > tag can write css code. Syntax:
selector{
	Statement 1;
	Statement 2;
	Statement 3;
}
<!DOCTYPE html>
<html lang="en">
<head>
    <meta charset="UTF-8">
    <title>Title</title>

<!--standard,<style>Can write css code,No statement,End with a semicolon
 grammar:
    selector{
	Statement 1;
	Statement 2;
	Statement 3;
}
-->
<style>
    h1{
        color: red;
    }

</style>

</head>
<body>

<h1>I'm the title</h1>

</body>
</html>
This method is recommended
Advantages of css:
- Content and performance classification
- The structure of web pages is unified and can be reused
- The style is very rich
- It is recommended to use css files that are independent of html
- Conducive to SEO, easy to be included by search engines
1.1 CSS import method
Inline style
<h1 style="color: red">I'm the title</h1>
Internal style
<style>
    h1{
        color: green;
}</style>
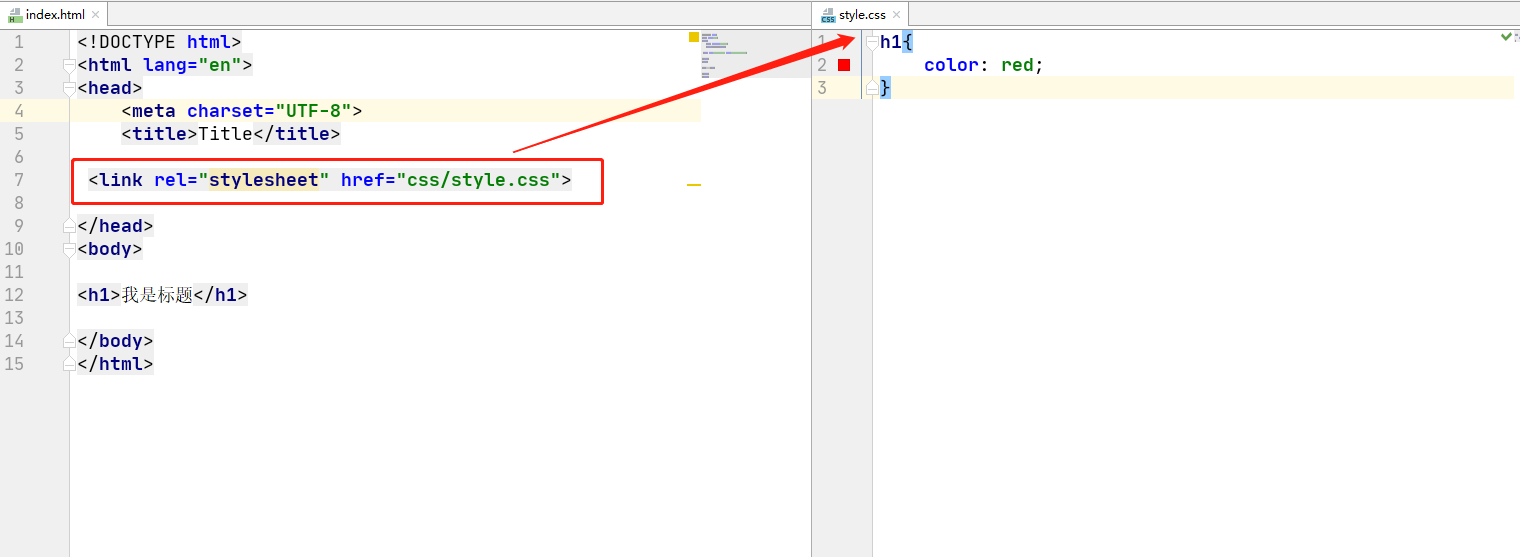
External style
In separate css Style written in file
h1{
	color: blue;
}
stay html Import from file
<link rel="style" href="css/style.css">
Priority, according to the principle of proximity: in line style > internal style > external style
Expansion: two ways of writing external style
-
Linked
Belong to html<!--External style--> <link rel="style" href="css/style.css">
-
Import type
@import is CSS2 1 unique<!--Import type--> <style> @import "css/style.css"; </style>
2. Selector
Function: select an element or a type of element on the page
2.1 basic selector
1. Label selector: select a type of label
 <style>
     /*The tag selector will select all the elements of this tag on the page*/
     h1{
         color: #187780;
     }
     p{
         font-size: 80px;
     }
</style>
2. Class selector class: select all tags with the same class attribute, across tags Class name {}
<style>
    /*Format of class selector: Name of class {}
    Benefits: multiple tags can be classified. They are the same class and can be reused
    */
    .zm{
        color: orange;
    }
    .zs{
        color: pink;
    }
</style>

<body>
    <h1 class="zm">111</h1>
    <h1 class="zs">222</h1>
</body>
3.id selector: globally unique #id name {}
 <style>
     /*id selector
     #id Name {}
     */
     #zm{
         color: deeppink;
     }
     .style1{
         color: #187780;
     }
     h1{
         color: orange;
     }
</style>
<body>
    <h1 id="az">111</h1>
    <h1 class="style1">222</h1>
    <h1 class="style1">333</h1>
    <h1>444</h1>
    <h1>555</h1>
</body>
Priority: id selector > class selector > label selector
2.2 level selector
1. Descendant selector: after an element
/*Descendant Selectors */
body p {
    background: red;
}
2. Sub selector: limit the rendering of the lower generation, and the inner level does not render
/*Child selectors */
body>p{
    background: green;
}
3. Downward selector: it does not render itself, but only renders one downward adjacent of the same type. If the next is a different type, it will not render
/*Adjacent selector: only one, adjacent (down)*/
.style1 + p{
    backgroud: yellow;
}
4. General selector: it does not render itself. It renders all downward adjacent of the same type. If the next one is a different type, it will continue to render
/*universal selector */
.zm ~ p{
   background: #187780;
}
2.3 structure pseudo class selector
/*ul First element of*/
ul li:first-child{
    background: #187780;
}
/*ul Last element of*/
ul li:last-child{
    background: orange;
}
/*Check p1: navigate to the parent element and select the current first element
 Select the parent element of the current p element, select the first parent element, and it will take effect only if it is the current element. If the first is other elements, it will be blocked and cannot be realized
 Sequence based division
*/
p:nth-child(1){
    background: deeppink;
}
/*Select the first p element under the parent element, which is not affected by other labels
 Type based division
*/
p:nth-of-type(1){
    background: pink;
}
2.4 attribute selector
Combined application of id and class
/*Attribute name = attribute value (regular)
= Absolutely equal to
*= Include this element
^= Start with this
$= End with this
*/
/*Select the element where the id attribute exists*/
a[id]{
    background:red;
}
/*Select the element with id first*/
a[id=first]{
    background:green;
}
/*Select the element whose class contains links*/
a[class*="links"]{
    background:yellow;
}
/*Check the elements in the href that begin with http*/
a[href^=http]{
    background:blue;
}
/*Check the elements in the href that end with jpg*/
a[href$=jpg]{
    background:pink;
}
3. Beautify web page elements
3.1 why beautify the page
1. Effective delivery of page information
2. Beautify the web page, which is beautiful and easy to attract users
3. Highlight the theme of the page
4. Improve user experience
Span label: use span to cover the key words
<!DOCTYPE html>
<html lang="en">
<head>
    <meta charset="UTF-8">
    <title>Title</title>
    <style>
        #test{
            font-size: 50px;
        }
    </style>
</head>
<body>
Learning together<span id="test">front end css</span>
</body>
</html>
3.2 font style
 <!--
    font-family:typeface
    font-size:font size
    font-weight:Font thickness
    color:Font color
    -->
<style>
body{
    font-family: Regular script;
    color: #187780;
}
h1{
    font-size: 50px;
}
.p1{
    font-weight: bold;
}
</style>
Text style 3
1. color rgb rgba
2. Text alignment: Center
3. Indent text indent in the first line: 2em
4. Line height single line text is centered up and down: line height = height
5. Text decoration
6. Horizontal alignment of text and picture vertical align: middle
<!DOCTYPE html>
<html lang="en">
<head>
    <meta charset="UTF-8">
    <title>Title</title>
    <!--colour
    RGB 0~F
    RGBA  transparency A:0~1

    text-align:Typesetting
    text-indent: 2em Indent the first line of the paragraph by 2 characters
    height:Row height
    line-height:Height of block
    When row height and block height are consistent,You can center it up and down
    -->
    <style>
        h1{
            color: rgba(33,222,111,0.6);
            text-align: center;
        }
        .p1{
            text-indent: 2em;
        }
        .p2{
            background: #187780;
            height: 20px;
            line-height: 20px;
        }
        /*Upper scribe*/
        .l1{
            text-decoration: overline;
        }
        /*strikethrough */
        .l2{
            text-decoration: line-through;
        }
        /*Underline*/
        .l3{
            text-decoration: underline;
        }
        /*Underline hyperlinks*/
        a{
            text-decoration: none;
        }
        /*Text picture horizontal alignment*/
        img,span{
            vertical-align: middle;
        }
    </style>

</head>
<body>
<p class="l1">111</p>
<p class="l2">222</p>
<p class="l3">333</p>

<a href="">123</a>

<h1>Cascading style sheets(Full English Name: Cascading Style Sheets)</h1>
<p class="p1">
    It's a way to show HTML(An application of standard universal markup language) or XML(A subset of the standard universal markup language) and other file style computer languages.
</p>

<p class="p2">
    CSS It can not only modify the web page statically, but also format the elements of the web page dynamically with various scripting languages.
</p>

<p>
    <img src="1.png">
    <span>123456789</span>
</p>
</body>
</html>
3.4 shadows
/*text-shadow:  Shadow color, horizontal offset, vertical offset, shadow radius*/
#price{
    text-shadow: mediumvioletred 5px 0px 5px;
}
3.5 hyperlink pseudo class
Generally, only a: hover is used
/*Unreached links*/
a:link{
    color: black;
}
/*Visited links*/
a:visited{
    color: aqua;
}
/*Mouse over link (important)*/
a:hover{
    color: #187780;
}
/*Click not releasing*/
a:active{
    color: deeppink;
}
3.6 list
ul li{
    height: 30px;
    list-style: none;
    text-indent: 1em;
}

a{
    text-decoration: none;
    font-size: 14px;
    color: dimgray;
}
a:hover{
    color: hotpink;
    text-decoration: underline;
}
3.7 background
background color
Background picture
<style>
div{
    width: 1000px;
    height: 700px;
    border: 1px solid red;
    background-image: url("../4.Hyperlink pseudo class/image/a.jpeg");
    /* The default is tile all repeat*/
}
.div1{
    background-repeat: repeat-x;
}
.div2{
    background-repeat: repeat-y;
}
.div3{
    background-repeat: no-repeat;
}
</style>
3.8 gradient
background: linear-gradient(19deg,#21D4FD 0%,#B721FF 100%);
4. Box model
4.1 what is a box model
- Margin: outer margin
- padding: inner margin
- border: border
4.2 frame
border: weight style color
- Thickness of border
- The style of the border
- border color
<style>
        #box{
            width: 300px;
            border: 1px solid blue;
        }
        h2{
            font-size: 20px;
            background-color: #ffdefc;
            line-height: 30px;
            color: mediumvioletred;
        }
        form{
            background: #bbe7ff;
        }
        div:nth-of-type(1)>input{
            border: 3px solid black;
        }
        div:nth-of-type(2)>input{
            border: 3px dashed pink;
        }
    </style>
4.3 outer margin
Margin left / right / top / bottom – > refers to four sides, which can be set separately or simultaneously as follows
margin:0 0 0 0/*Represents up, right, down and left respectively; Clockwise from top*/
/*Example 1: Centering*/
margin:0 auto /*auto Left and right automatic*/
/*Example 2:*/
margin:4px/*It means 4px for top, right, bottom and left*/
/*Example 3*/
margin:10px 20px 30px/*Indicates 10px for the top, 20px for the left and right, and 30px for the bottom*/
Calculation method of box:
margin+border+padding + content size
The body always has a default outer margin margin margin:0
Common operations: initialization
margin:0;
padding:0;
text-decoration:none;
4.4 rounded border
Border radius has four parameters (clockwise), starting from the top left
Circle: fillet = radius
/*fillet*/
<style>
    div{
        width: 100px;
        height: 100px;
        border: 10px solid pink;
        border-radius: 50px ;
    }
</style>
4.5 box shadow
<style>
    div{
        width: 100px;
        height: 100px;
        border: 10px solid pink;
        box-shadow:10px 10px 100px greenyellow;
    }
</style>
5. Floating
5.1 standard document flow
6. Exclusive list: HV ~ 1
In line element: not exclusive to one line span, a, img, strong
Note: inline elements can be included in block level elements, and vice versa.
5.2. display (important)
-
Block: block element
-
Inline: inline element
-
Inline block: line block element
This is also a way to arrange elements in a row, but we use float in many cases
- none: disappear
<!--
block Block element
inline Inline element
inline-block Row block element
-->
<style>
    div{
        width: 100px;
        height: 100px;
        border: 1px solid deepskyblue;
        display: inline-block;
    }
    span{
        width: 100px;
        height: 100px;
        border: 1px solid deepskyblue;
        display: inline-block;
    }
</style>
5.3float
Floating is an attribute that allows an element to have the characteristics of a block level element, but can be displayed in a row, whether the element is a block level element or an inline element
float: set element as floating element
Left: arranged from left to right
Right: arrange from right to left
none: No floating
.layer01{
    display:inline-block;
    float:right;
}
.layer02{
    display:inline-block;
    float:left;
}
5.4 overflow and parent frame collapse
clear:
Right: floating elements are not allowed on the right
Left: floating elements are not allowed on the left
Both: floating elements are not allowed on both sides
none: No floating limit
Solution to collapse:
Scheme 1: increase the height of parent elements;
#father{
    border:1px #000 solid;
    height:800px;
}
Scheme 2: add an empty div tag and clear the float
<div class = "clear"></div>
<style>
	.clear{
		clear:both;
		margin:0;
		padding:0;
	}
</style>
Scheme 3: add an overflow: hidden in the parent element
overflow:hidden/*hide*/
overflow: scoll/*roll*/
Scheme 4: add a pseudo class to the parent class: after
#father:after{
	content:'';
	display:block;
	clear:both;
}
Summary:
- Add empty div to floating element
Simple, try to avoid empty div in the code - Sets the height of the parent element
Simply, if the element does not have a fixed height, it will exceed - overflow
Simple, some drop-down scenarios should be avoided - Add a pseudo class to the parent class: after (recommended)
The writing method is slightly complex, but there are no side effects. It is recommended
5.5 comparison
-
display
The direction cannot be controlled
-
float
Floating will break away from the standard document flow, so the problem of parent border collapse should be solved
6 positioning
6.1 relative positioning
Relative positioning: position: relative;
If the specified offset is made relative to the original position, it will still be in the standard document stream, and the original position will be retained
top:-20px;
left:20px;
bottom:-10px;
right:20px;
6.2 absolute positioning
Absolute positioning: position: absolute;
Positioning: positioning based on xxx, up, down, left and right~
1. Relative to browser positioning without parent element positioning
2. Assuming that the parent element has positioning, we usually offset it from the parent element
3. Move within parent elements
Summary: the specified offset is made relative to the position of a parent or browser. If it is absolutely positioned, it will be separated from the ordinary document stream, and the original position will not be retained
<!DOCTYPE html>
<html lang="en">
<head>
    <meta charset="UTF-8">
    <title>Title</title>
    <style>
        div{
            margin: 10px;
            padding: 5px;
            font-size: 12px;
            line-height: 25px;
        }
        #father{
            border: 1px solid #666;
            padding: 0;
            position: relative;
        }
        #first{
            background-color: #a13d30;
            border: 1px dashed #b27530;

        }
        #second{
            background-color: green;
            border: 1px dashed #0ece4f;
            position: absolute;
            right:30px;
            top:30px
        }
        #third{
            background-color: red;
            border: 1px dashed #ff1b87;
        }
    </style>
</head>
<body>
<div id = "father">
    <div id="first">First box</div>
    <div id="second">Second box</div>
    <div id="third">Third box</div>
</div>
</body>
</html>
6.3 fixed positioning
Fixed position: fixed
Break away from normal document flow
<!DOCTYPE html>
<html lang="en">
<head>
    <meta charset="UTF-8">
    <title>Title</title>
    <style>
        body{
            height: 1000px;
        }
        /*Absolute positioning: there is no relative parent element, so it is relative to the browser*/
        div:nth-of-type(1){
            width: 100px;
            height: 100px;
            background: red;
            position: absolute;
            right: 0;
            bottom: 0;
        }
        /*Fixed positioning: fixed*/
        div:nth-of-type(2){
            width: 50px;
            height: 50px;
            background: yellow;
            position: fixed;
            right: 0;
            bottom: 0;
        }
    </style>
</head>
<body>
<div>div1</div>
<div>div2</div>
</body>
</html>
6.4z-index
z-index, which sets the level of the element and the value without unit
The default is 0, and the maximum is infinite ~ 999
By default, in the html structure, the lower the order, the higher the level of elements
The higher the setting value of the hierarchy attribute, the higher the hierarchy
<!DOCTYPE html>
<html lang="en">
<head>
    <meta charset="UTF-8">
    <title>Title</title>
    <link rel="stylesheet" href="css/stlye.css">
</head>
<body>
<div id="content">
    <ul>
        <li><img src="./image/a.jpeg" alt=""></li>
        <li class="tipText">java book</li>
        <li class="tipBG"></li>
        <li>time:2020-02-02</li>
    </ul>
</div>
</body>
</html>
#content{
    width: 300px;
    padding: 0px;
    margin: 0px;
    overflow: hidden;
    font-size: 12px;
    line-height: 25px;
    border: 1px #000 solid;
}
ul,li{
    padding: 0px;
    margin: 0px;
    list-style: none;
}
/*Relative positioning of parent elements*/
#content ul{
    position: relative;
}
.tipText,.tipBG{
    position: absolute;
    width: 300px;
    height: 20px;
    top: 296px;
}
.tipText{
    color: deeppink;
    /*Level setting*/
    /*z-index: 999;*/
}
.tipBG{
    background: #bbe7f0;
    /*Background transparency can also be used to achieve some requirements*/
    opacity: 0.5;
}