Nginx services
Nginx is a high-performance, lightweight Web service software, which has the advantages of high stability, low system resource consumption and high processing capacity for HTTP concurrent connections (a single physical server can support 30000 ~ 50000 concurrent requests)
Advantages of Nginx over Apache:
Lightweight, also a Web service, occupies less memory and resources than Apache
High concurrency, Nginx handles requests asynchronously and non blocking, while Apache is blocking. Under high concurrency, Nginx can maintain low resources, low consumption and high performance;
Highly modular design
Writing modules is relatively simple; The community is active and various high-performance modules are produced rapidly.
Advantages of Apache over Nginx:
Rewrite is more powerful than Nginx's rewrite; There are so many modules that you can find everything you think of; There are few bugs, and there are relatively many bugs in Nginx; Superstable
Existence is the reason. Generally speaking, web services that need performance use nginx. If you don't need performance but stability, use Apache. Nginx is weak in processing dynamic requests. Generally, Apache is required to do dynamic requests. Nginx is only suitable for processing static web pages or reverse proxies.
Compiling and installing Nginx services
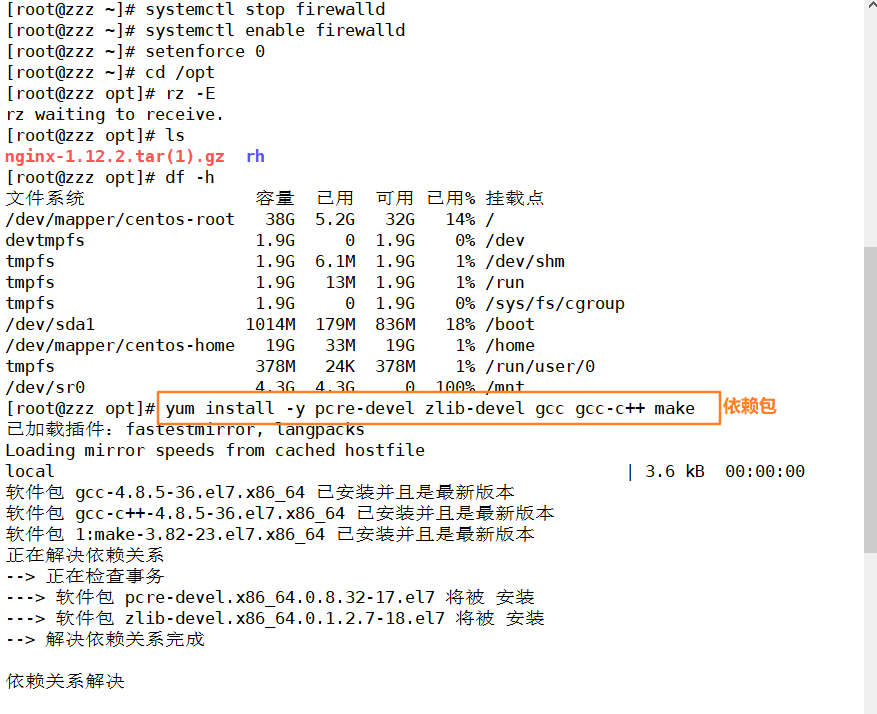
1. Close the firewall, transfer the Nginx software package to the / opt directory, and install the dependent package
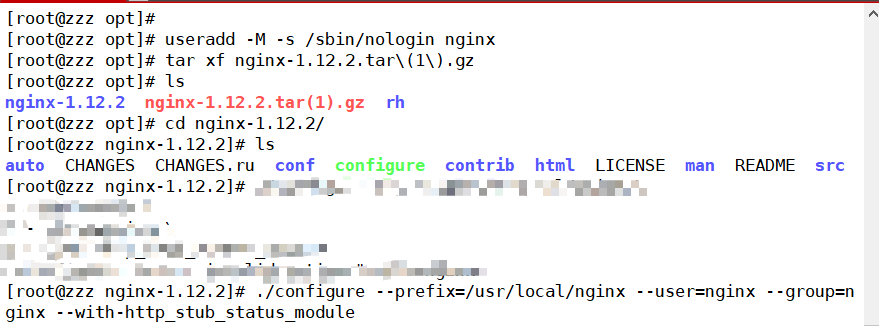
2. Compile and install
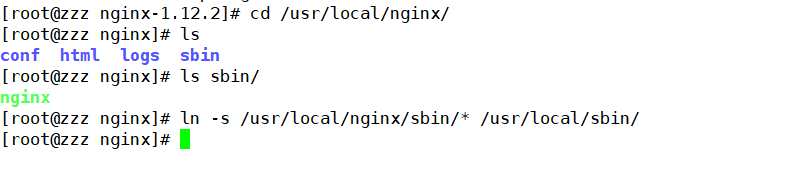
make && make install
3. Add Nginx to the / usr/local/sbin directory
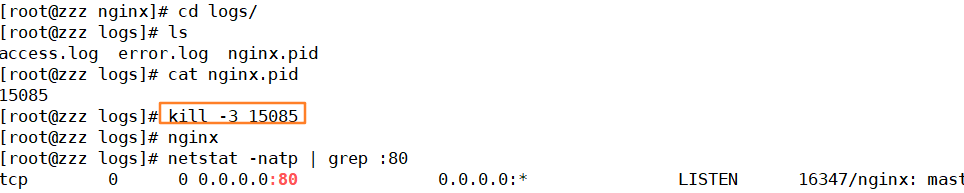
4. Start service

Check, start, restart, stop, nginx service
nginx -t ##start-up
nginx    ##stop it

cat /usr/local/nginx/logs/nginx.pid   ##Check the PID number of nginx

kill -3 <PID number>

kill -s OUIT <PID number>

killall -3 nginx

killall -s QUIT nginx

#heavy load
kill -s HUP <PID number>

#Log separator, reopen log file
kill -USR1 <PID number>

#Smooth upgrade
kill -USR2 <PID number>

#View version number
nginx -v
Manage nginx services
[root@zzz opt]# cd nginx-1.12.2/
[root@zzz nginx-1.12.2]# cd objs/
[root@zzz objs]# cd /etc/init.d/
[root@zzz init.d]# vim nginx
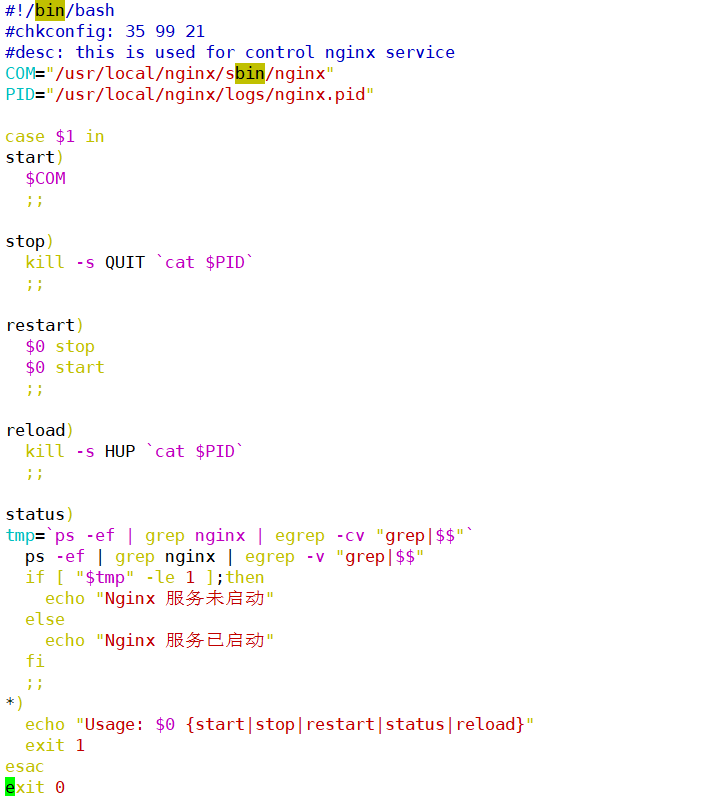
#!/bin/bash
#chkconfig: 35 99 21
#desc: this is used for control nginx service
COM="/usr/local/nginx/sbin/nginx"
PID="/usr/local/nginx/logs/nginx.pid"

case $1 in
start)
  $COM
  ;;

stop)
  kill -s QUIT `cat $PID`
  ;;

restart)
  $0 stop
  $0 start
  ;;

reload)
  kill -s HUP `cat $PID`
  ;;

status)
tmp=`ps -ef | grep nginx | egrep -cv "grep|$$"`
  ps -ef | grep nginx | egrep -v "grep|$$"
  if [ "$tmp" -le 1 ];then
    echo "Nginx Service not started"
  else
    echo "Nginx Service started"
  fi
  ;;
*)
  echo "Usage: $0 {start|stop|restart|status|reload}"
  exit 1
esac
exit 0
Give permission to join the system service
[root@zzz init.d]# chmod +x nginx
[root@zzz init.d]# chkconfig --add nginx
[root@zzz init.d]# service nginx status

The second method is to add the system file
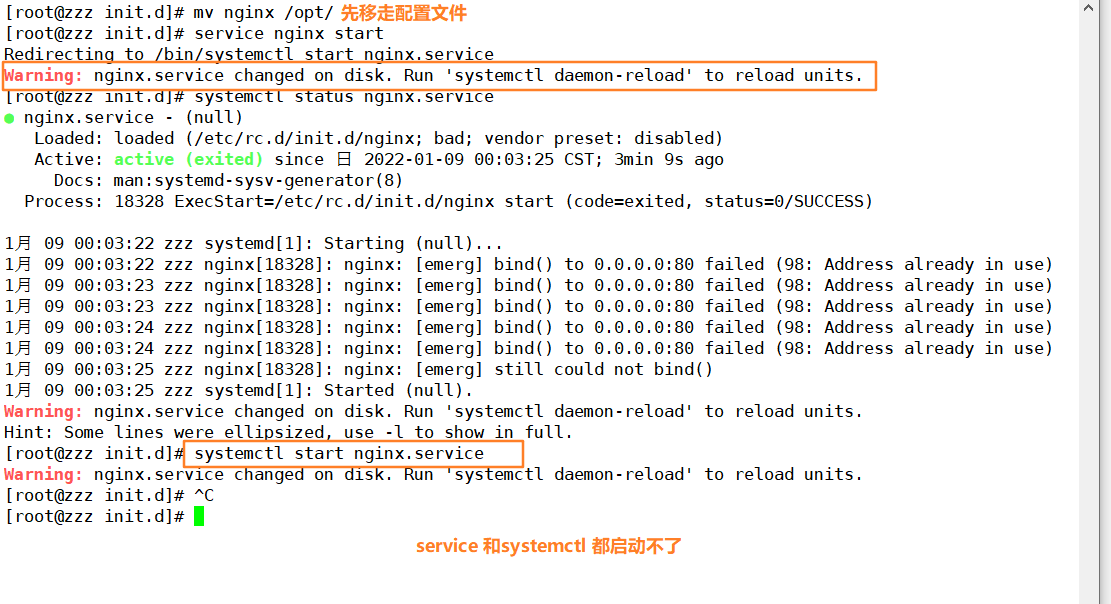

[Unit]		Description of the service
Description=nginx  Describe service
After=network.target  Dependency: the white defined service is started after the dependent service is started

[Service] Setting of service operation parameters

Type=forking  Is the form of background operation. This startup type should be specified at the same time PIDFile=,so that				systemd Can track the main process of the service.


PIDFile=/usr/local/nginx/logs/nginx.pid

ExecStart=/usr/local/nginx/sbin/nginx  Specific run commands for the service

ExecReload=/bin/kil1 -s HUP $MAINPID  Restart command
ExecStop=/bin/kill -s QUIT $MAINPID  Stop command
PrivateTmp=true   Independent temporary space allocated by the service
[Install]
WantedBy=multi-user.target  The related settings of service installation can be set to multi-user
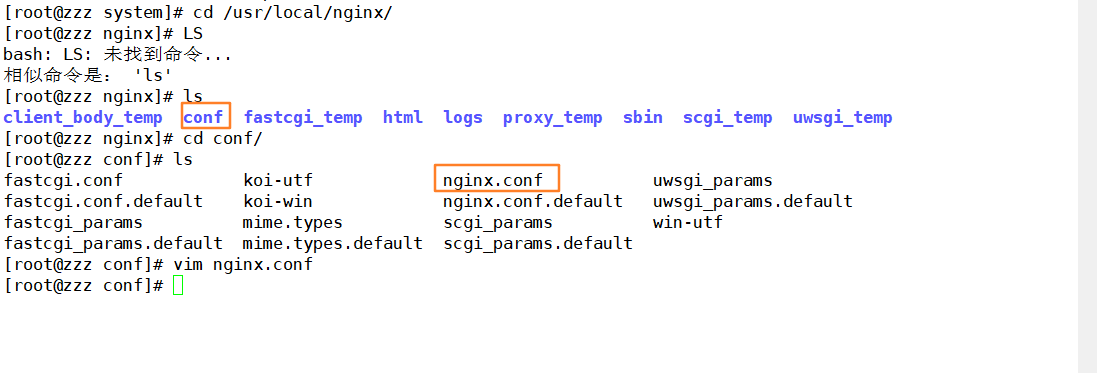
Understanding Nginx profiles
Location of the Nginx configuration file
View valid rows
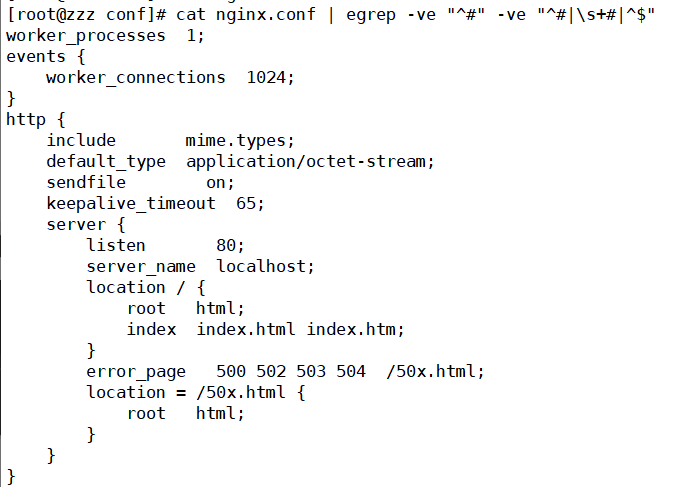
1. Global block: configure instructions that affect nginx global. Generally, there are user groups running nginx server, pid storage path of nginx process, log storage path, introduction of configuration file, number of worker process es allowed to be generated, etc.
2. events block: the configuration affects the nginx server or the network connection with the user. There is the maximum number of connections per process, which event driven model is selected to process connection requests, whether multiple network connections are allowed to be accepted at the same time, and opening multiple network connection serialization.
3. http block: it can nest multiple server s, configure most functions such as proxy, level storage, log definition and the configuration of third-party modules. Such as file import, MIME type definition, log customization, whether to use sendfile to transfer files, connection timeout, number of single connection requests, etc.
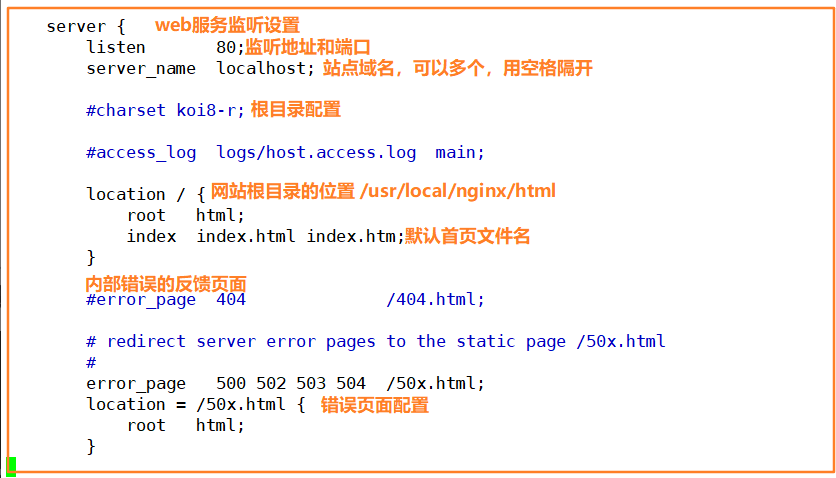
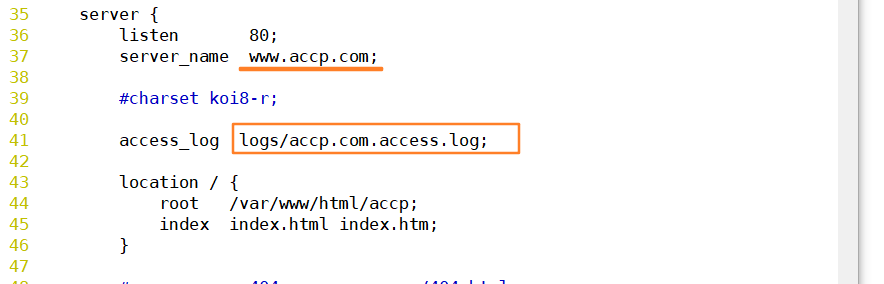
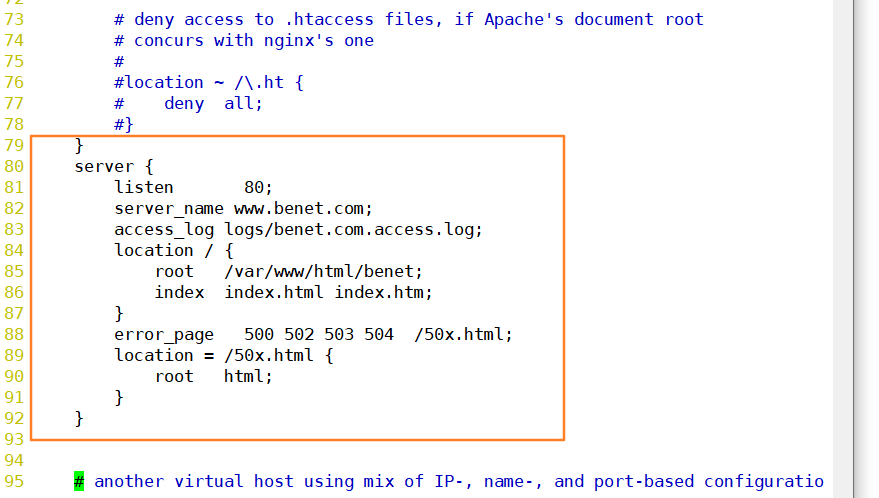
4. server block: configure the relevant parameters of the virtual host. There can be multiple servers in one http.
5. location block: configure the routing of requests and the processing of various pages.
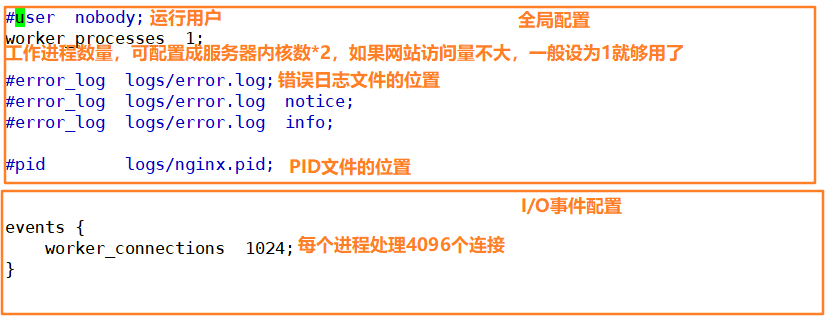
To increase the number of connections per process, you also need to execute the command "ulimit -n 65535" to temporarily modify the maximum number of files that can be opened simultaneously by each local process. Set based on cpu performance
On the Linux platform, when processing highly concurrent TCP connections, the maximum number of concurrent connections is limited by the system to the number of files that can be opened by a single user process at the same time (this is because the system creates a socket handle for each TCP connection, and each socket handle is also a file handle).
You can use the ulimit -a command to view the limit on the number of files that the system allows the current user process to open.
epoll is a poll improved by the Linux kernel to handle a large number of handles. It is an enhanced version of the multiplexed IO interface select/poll under Linux. It can significantly reduce the system CPU utilization when the program is only active in a large number of concurrent connections.
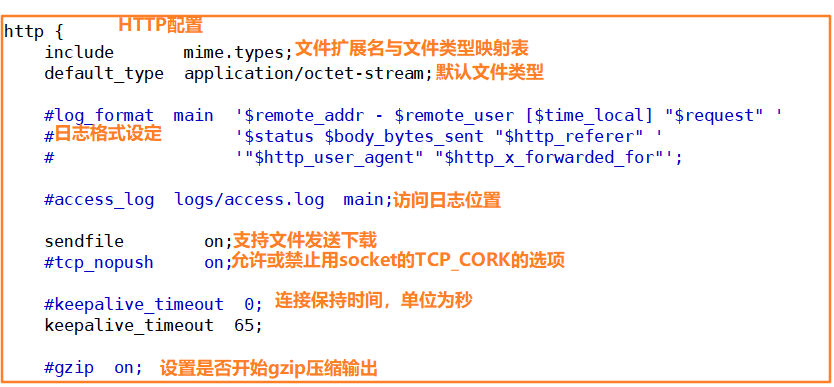
Log format setting:
$ remote_addr and $http_ x _ forwarded_for is used to record the ip address of the client;
$remote_user: used to record the client user name;
$time_local: used to record access time and time zone;
$request: url and http protocol used to record the request
$status: used to record request status; Success is 200
$body bytes_ Send: record the size of the main content of the file sent to the client;
$http_referer: used to record which page link to access from;
$http user agent: record the relevant information of the client browser;
Usually, the web server is placed behind the reverse proxy, so you can't get the customer's IP address through $remote_ The IP address obtained by add is the IP address of the reverse proxy server. The reverse proxy server can add x to the http header information of the forwarding request_ The forwarded for information is used to record the IP address of the original client and the server address requested by the original client.
location common configuration instructions, root, alias, proxy_pass
Root (root path configuration): root /var/ www / html
Request www kgc. com/test/1. HTML, the file / var / www / HTML / test / 1 will be returned html
Alias (alias configuration): alias /var/ www / html
Request www kgc. com/test/1. HTML, the file / var / www / HTML / 1 is returned html
proxy_pass (reverse proxy configuration)
Access status statistics configuration

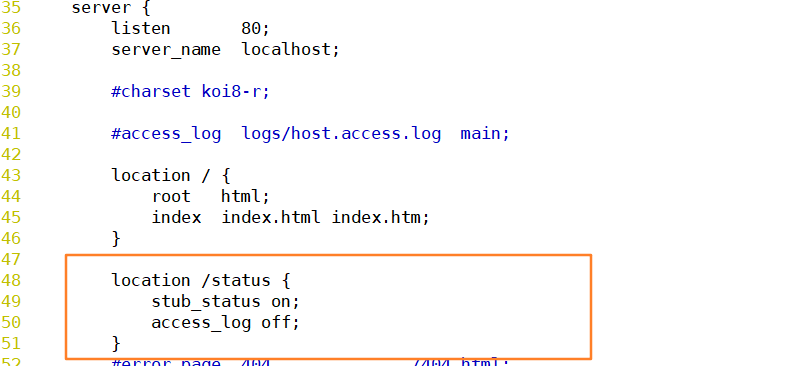
After restarting the service. We'll verify the browser again
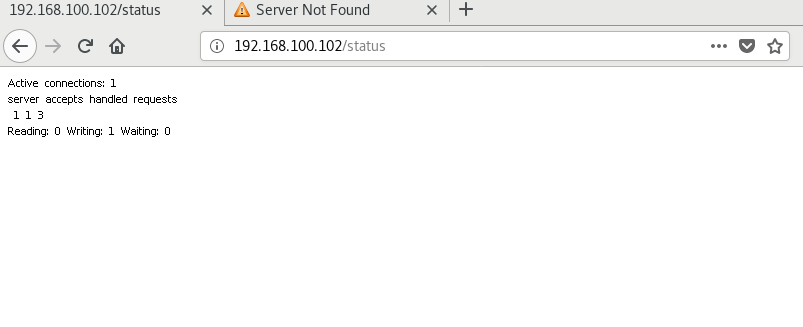
Meaning of field representation
Active connections :Indicates the current number of active connections:
server accepts handled requests :Represents the processed connection information. The three numbers represent the number of processed connections and the number of successful connections in turn TCP Number of handshakes, number of requests processed.

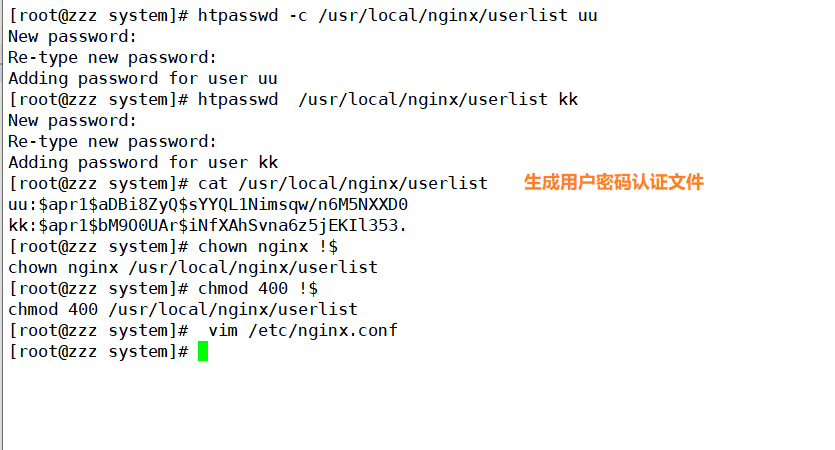
Authorization based access control
1. Generate user password authentication file
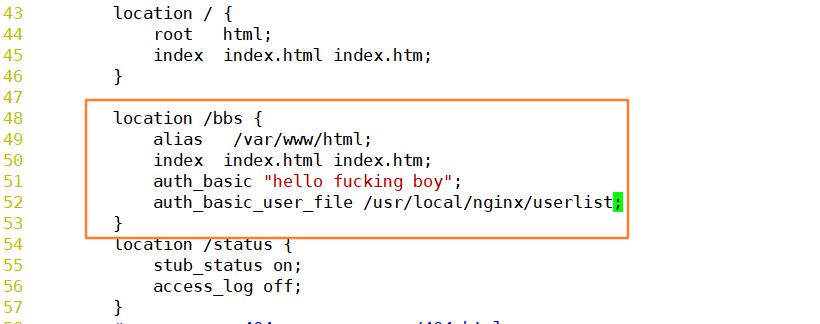
2. Modify the directory corresponding to the main configuration file and add authentication configuration items
3. Restart the service

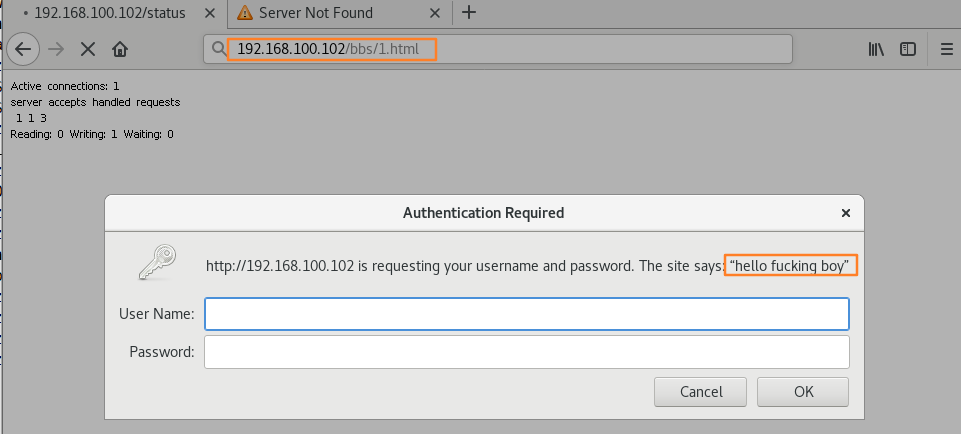
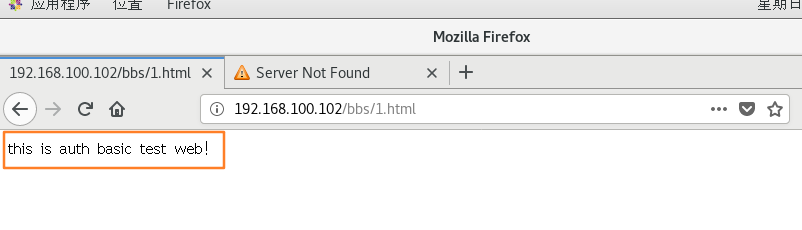
4. Open web page verification
Client based access control
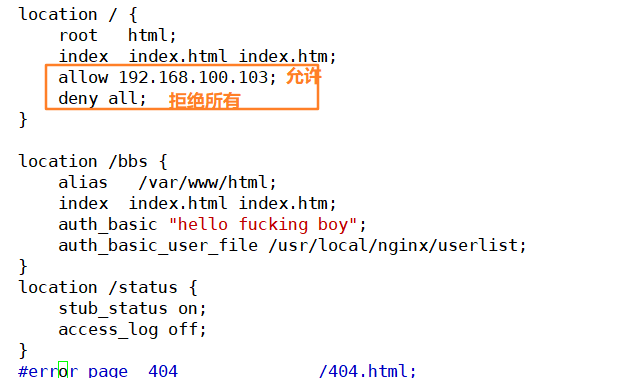
The access control rules are as follows:
deny IP/IP segment: deny client access to an IP or IP segment.
allow IP/IP segment: allows client access to an IP or IP segment.
The rule is executed from top to bottom. If it matches, it will stop and no longer match from bottom to top.
Example: only 103 hosts are allowed to access, and all others are rejected
1. Modify the configuration file
[root@zzz system]# vim /etc/nginx.conf
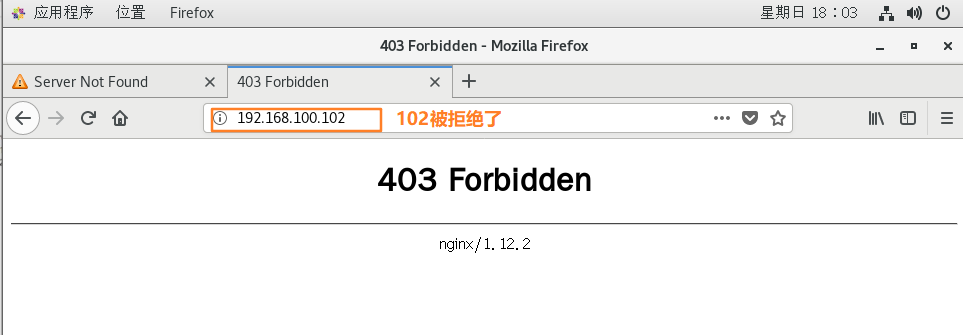
2. Open browser verification
Switch to the host of 102 to access (nginx service is on the machine of 102). Once this configuration is set, the local machine will not have access rights
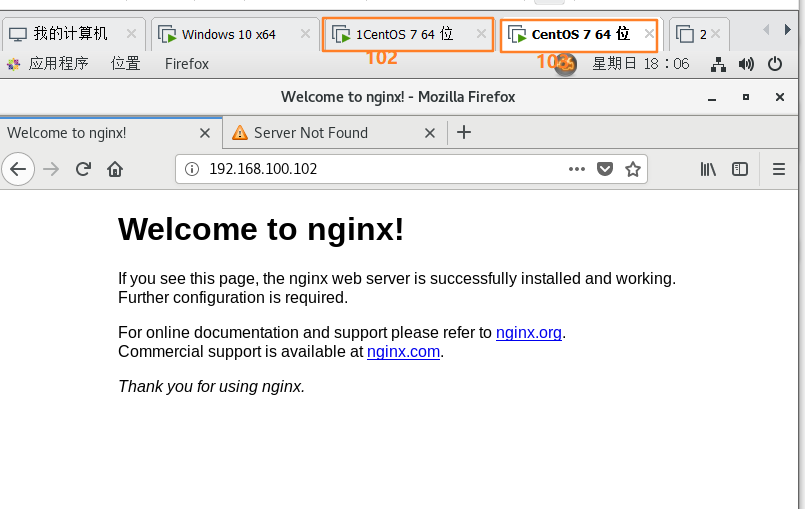
Switch to the 103 machine for access
Domain name based Nginx virtual host
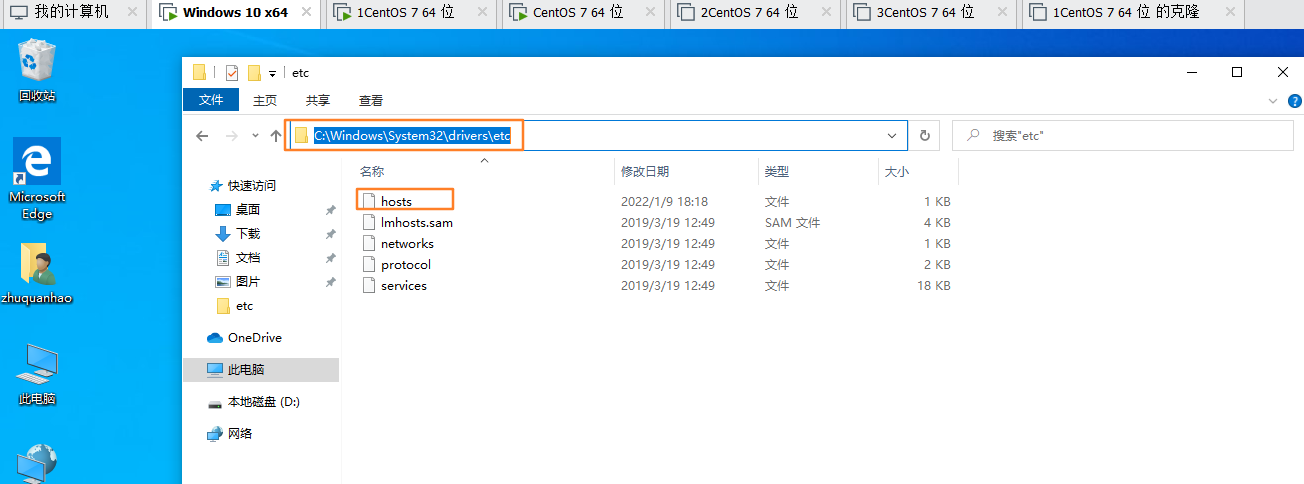
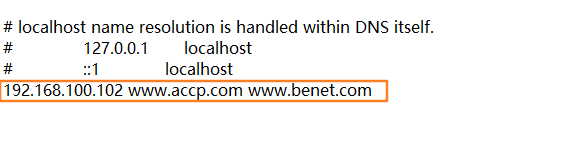
Set on client
Switch to server
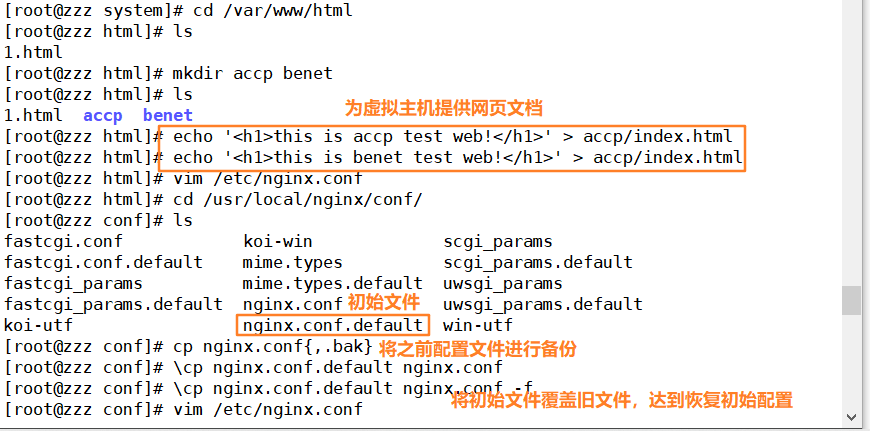
Edit profile
vim /etc/nginx.conf
Restart service
[root@zzz conf]# systemctl restart nginx.service
Open web page verification