Git&GitHub&Gitee&GitLab
Chapter 1 Common Git Commands
| Command Name | Effect |
|---|---|
| Git config--global user. Name User Name | Set User Signature |
| Git config--global user. Email mailbox | Set User Signature |
| git init | Initialize Local Library |
| git status | View local library status |
| git add file name | Add to Staging Area |
| Git commit-m "log information" file name | Submit to Local Library |
| git reflog | View History |
| Git reset--hard version number | Version Shuttle |
1.1 Setting up user signatures
- Basic Grammar
Git config--global user. Name User Name
Git config--global user. Email mailbox
- Case Practice
Global Signature Settings:
1@LAPTOP-5MDL9EQ1 MINGW64 ~/Desktop
$ git config --global user.name lavine
1@LAPTOP-5MDL9EQ1 MINGW64 ~/Desktop
$ git config --global user.email xxxx@xx.com
Explain:
The purpose of a signature is to distinguish the identity of different operators. The user's signature information is visible during each version submission to confirm who made this submission. The following user signatures must be set for the first Git installation or code cannot be submitted.
Note: Setting up user signatures here has nothing to do with future account logins to GitHub (or other code hosting centers).
1.2 Initialize Local Library
- Basic Grammar
git init
- Case Practice
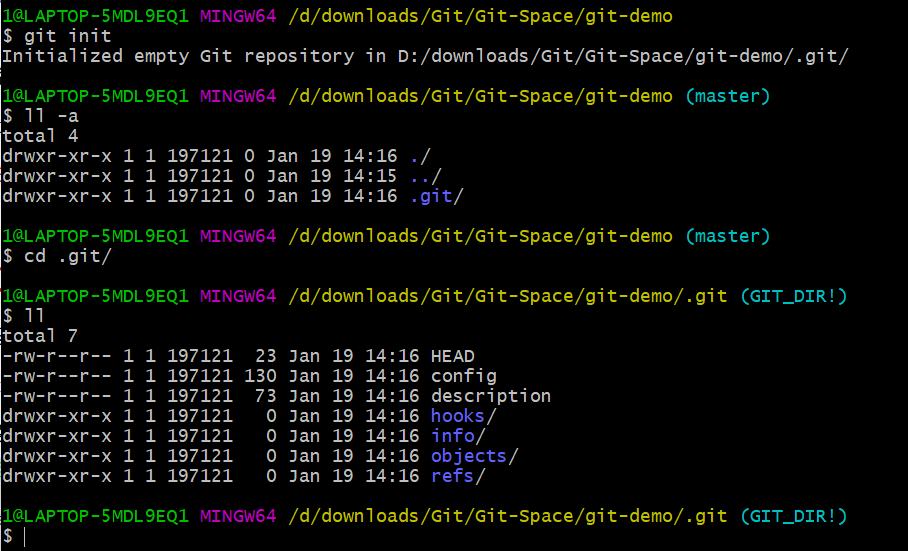
1@LAPTOP-5MDL9EQ1 MINGW64 /d/downloads/Git/Git-Space/git-demo
$ git init
Initialized empty Git repository in D:/downloads/Git/Git-Space/git-demo/.git/
1@LAPTOP-5MDL9EQ1 MINGW64 /d/downloads/Git/Git-Space/git-demo (master)
$ ll -a
1.3 View local library status
- Basic Grammar
git status
1.3.1 First view (workspace has no files)
1@LAPTOP-5MDL9EQ1 MINGW64 /d/downloads/Git/Git-Space/git-demo (master)
$ git status

1.3.2 New Files (hello.txt)
1@LAPTOP-5MDL9EQ1 MINGW64 /d/downloads/Git/Git-Space/git-demo (master)
$ vim hello.txt
hello Git
hello Git
hello Git
hello Git
hello Git
hello Git
hello Git
hello Git
hello Git
hello Git
hello Git
hello Git
hello Git
hello Git
hello Git
hello Git
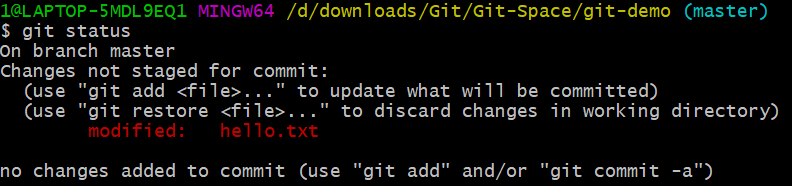
1.3.3 View again (Untracked files detected)
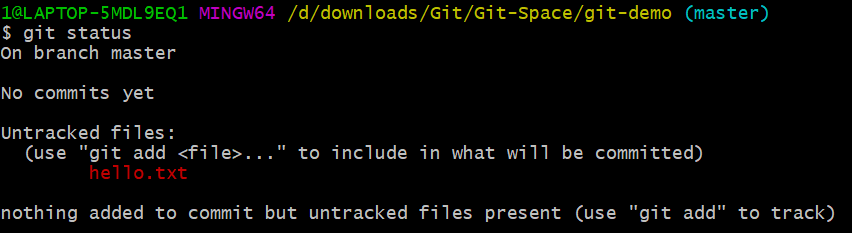
1@LAPTOP-5MDL9EQ1 MINGW64 /d/downloads/Git/Git-Space/git-demo (master)
$ git status
1.4 Add Staging Area
1.4.1 Add workspace files to staging area
- Basic Grammar
git add file name
- Case Practice
1@LAPTOP-5MDL9EQ1 MINGW64 /d/downloads/Git/Git-Space/git-demo (master)
$ git add hello.txt
warning: LF will be replaced by CRLF in hello.txt.
The file will have its original line endings in your working directory
1.4.2 View status (new files detected in staging area)
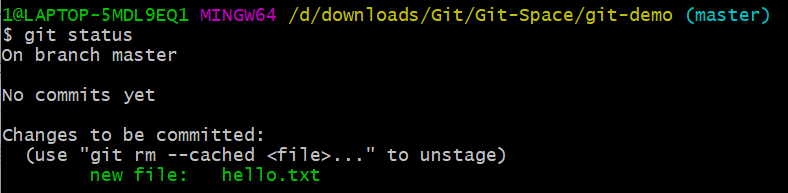
1@LAPTOP-5MDL9EQ1 MINGW64 /d/downloads/Git/Git-Space/git-demo (master)
$ git status
You can use git rm --cached hello.txt deleted from staging area
1@LAPTOP-5MDL9EQ1 MINGW64 /d/downloads/Git/Git-Space/git-demo (master)
$ git rm --cached hello.txt
rm 'hello.txt'
Review the status again and find:
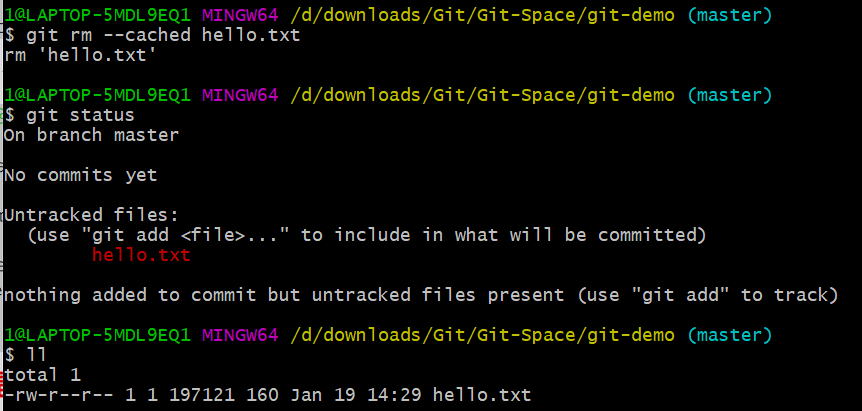
This indicates that there is no hello in the staging area. Txt, the staging area has detected untracked files, and the workspace still has hello.txt.
1.5 Submit to Local Library
1.5.1 Submit files from staging area to local library
- Basic Grammar
Git commit-m "log information" file name
- Case Practice
1@LAPTOP-5MDL9EQ1 MINGW64 /d/downloads/Git/Git-Space/git-demo (master)
$ git commit -m "first commit" hello.txt
warning: LF will be replaced by CRLF in hello.txt.
The file will have its original line endings in your working directory
[master (root-commit) 5178955] first commit
 1 file changed, 16 insertions(+)
 create mode 100644 hello.txt
5178955 is the version number submitted to the local library.
1.5.2 View status (no files to submit)
1@LAPTOP-5MDL9EQ1 MINGW64 /d/downloads/Git/Git-Space/git-demo (master)
$ git status
On branch master
nothing to commit, working tree clean
You can view history using git reflog
1@LAPTOP-5MDL9EQ1 MINGW64 /d/downloads/Git/Git-Space/git-demo (master)
$ git reflog

You can also view specific history using git log s
1@LAPTOP-5MDL9EQ1 MINGW64 /d/downloads/Git/Git-Space/git-demo (master)
$ git log

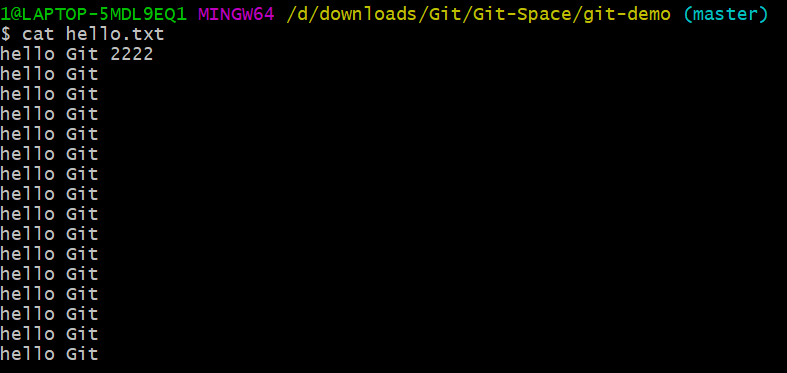
1.6 Modify file (hello.txt)
1@LAPTOP-5MDL9EQ1 MINGW64 /d/downloads/Git/Git-Space/git-demo (master)
$ vim hello.txt
hello Git 2222
hello Git
hello Git
hello Git
hello Git
hello Git
hello Git
hello Git
hello Git
hello Git
hello Git
hello Git
hello Git
hello Git
hello Git
hello Git
1.6.1 View status (file modification detected in workspace)
1@LAPTOP-5MDL9EQ1 MINGW64 /d/downloads/Git/Git-Space/git-demo (master)
$ git status
1.6.2 Add the modified file to the staging area again
1@LAPTOP-5MDL9EQ1 MINGW64 /d/downloads/Git/Git-Space/git-demo (master)
$ git add hello.txt

1.6.3 View Status (workspace modifications added to staging area)
1@LAPTOP-5MDL9EQ1 MINGW64 /d/downloads/Git/Git-Space/git-demo (master)
$ git status

1.6.4 Submit to Local Library
1@LAPTOP-5MDL9EQ1 MINGW64 /d/downloads/Git/Git-Space/git-demo (master)
$ git commit -m "second commit" hello.txt

1.6.5 View status (no files to submit)

View historical versions:
1@LAPTOP-5MDL9EQ1 MINGW64 /d/downloads/Git/Git-Space/git-demo (master)
$ git reflog

1.7 Historical Version
1.7.1 View historical versions
- Basic Grammar
git reflog view historical version
git log view version details
- Case Practice
1@LAPTOP-5MDL9EQ1 MINGW64 /d/downloads/Git/Git-Space/git-demo (master)
$ git reflog

Looking at the current history, we found that the head er points to the second edition with the version number 57c276b and that the version number of the first edition is 5178955.
Switch to the first version using the command git reset --hard version number:
1@LAPTOP-5MDL9EQ1 MINGW64 /d/downloads/Git/Git-Space/git-demo (master)
$ git reset --hard 5178955

View the current historical version:

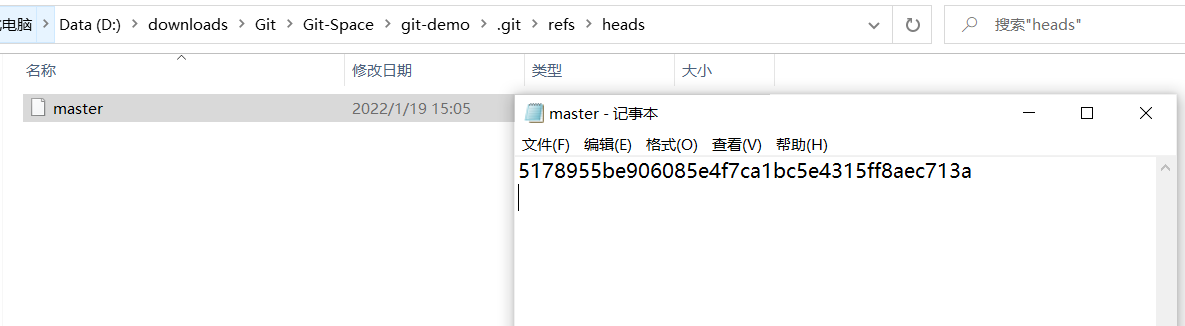
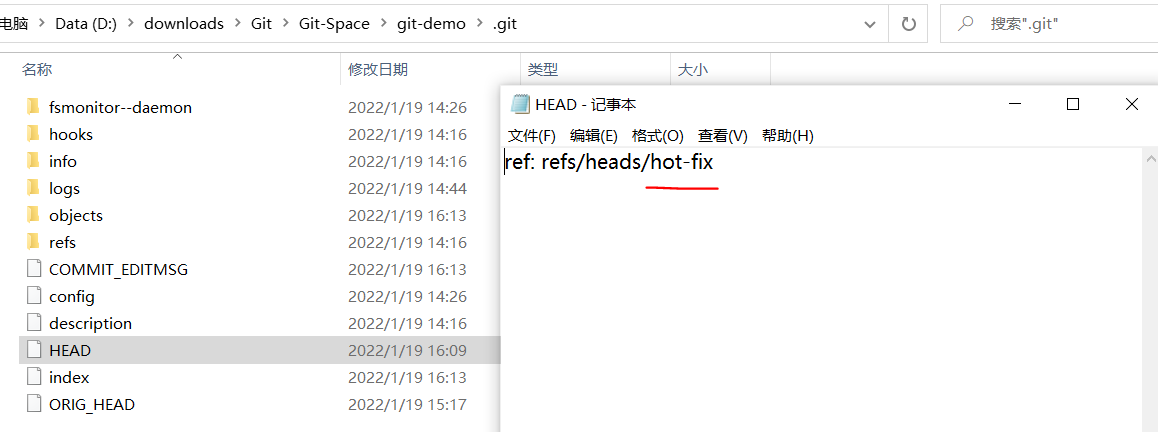
head points to the first version.
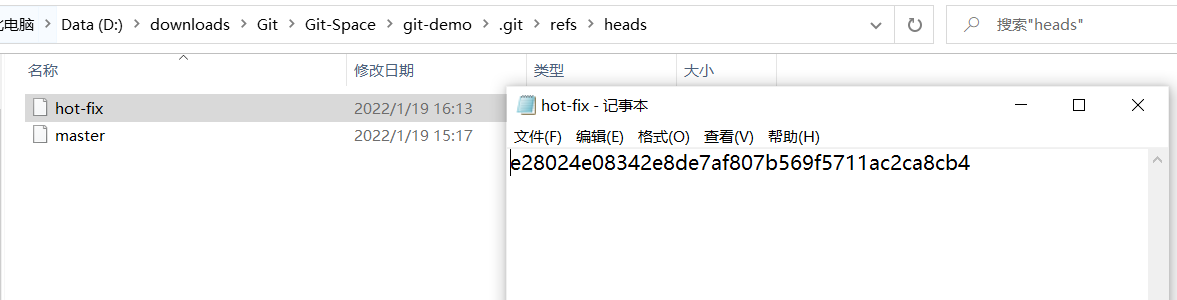
Also, in the ref/head directory of the directory, you can see that the master file records the version number of the first version.
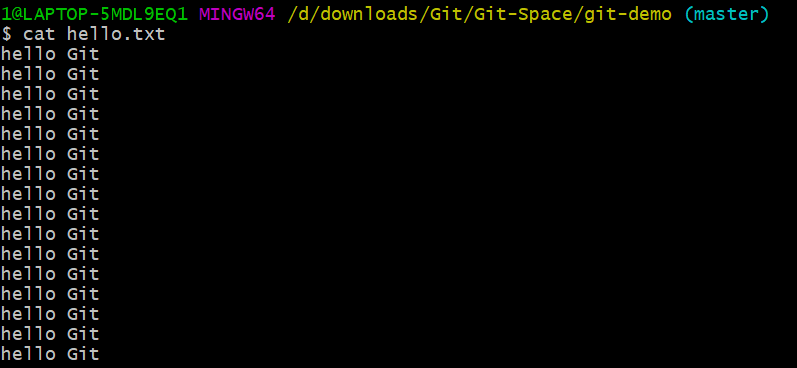
Current hello.txt became the first version of content
You can still shuttle to the second edition:
1@LAPTOP-5MDL9EQ1 MINGW64 /d/downloads/Git/Git-Space/git-demo (master)
$ git reflog

1@LAPTOP-5MDL9EQ1 MINGW64 /d/downloads/Git/Git-Space/git-demo (master)
$ git reset --hard 57c276b


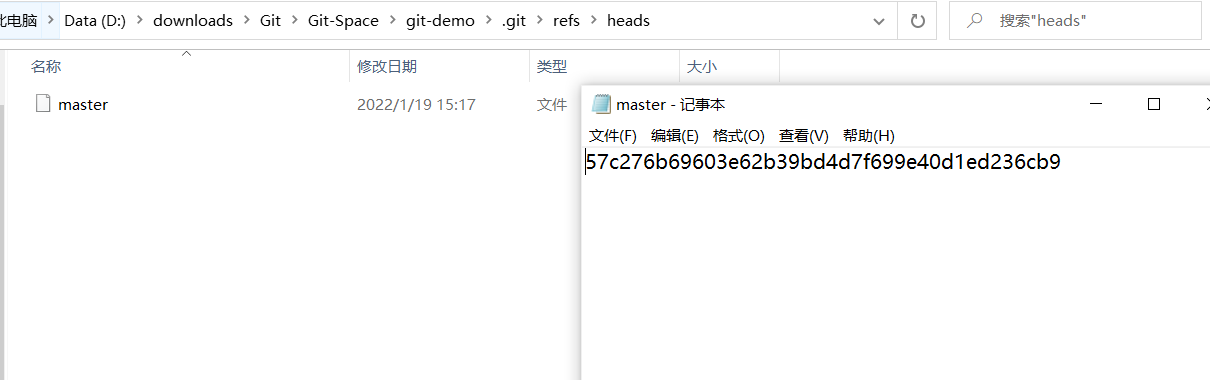
Looking at the current history, we found that the head pointed back to the second edition.
At the same time, the master file record found in the ref/head directory of the directory will be the version number of the second version.
Current hello. The TXT has also been shuttled to the second version of the content:
Git switches versions, and at the bottom is a moving HEAD pointer.
Chapter 2 Git Branch Operations
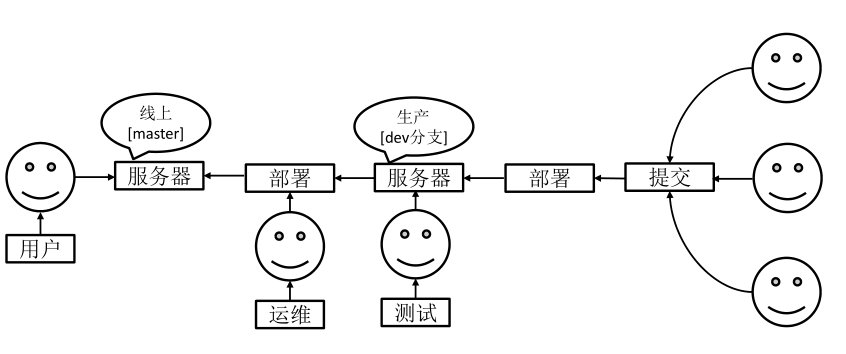
2.1 What is a branch
In the version control process, multiple tasks are pushed forward simultaneously, and for each task, we can create separate branches of each task. Using branches means that programmers can separate their work from the main line of development, when they develop their own branches
Wait, it will not affect the operation of the main line branch. For beginners, a branch can be simply understood as a copy, and one branch is
A separate copy. (The bottom of the branch is actually a reference to the pointer)
Benefits of Branch 2.2
Promote the development of multiple functions concurrently to improve development efficiency.
During the development of each branch, if one branch fails to develop, there will be no impact on the other branches. Failed branch deletion can be restarted.
2.3 Branch Operation
| Command Name | Effect |
|---|---|
| git branch branch name | Create Branch |
| git branch -v | View Branches |
| git checkout branch name | Switch Branch |
| git merger branch name | Merge the specified branch onto the current branch |
2.3.1 View Branches
- Basic Grammar
git branch -v
- Case Practice
1@LAPTOP-5MDL9EQ1 MINGW64 /d/downloads/Git/Git-Space/git-demo (master)
$ git branch -v

2.3.2 Branch creation
- Basic Grammar
git branch branch name
- Case Practice
1@LAPTOP-5MDL9EQ1 MINGW64 /d/downloads/Git/Git-Space/git-demo (master)
$ git branch hot-fix
1@LAPTOP-5MDL9EQ1 MINGW64 /d/downloads/Git/Git-Space/git-demo (master)
$ git branch -v

2.3.3 Switching Branches
- Basic Grammar
git checkout branch name
- Case Practice
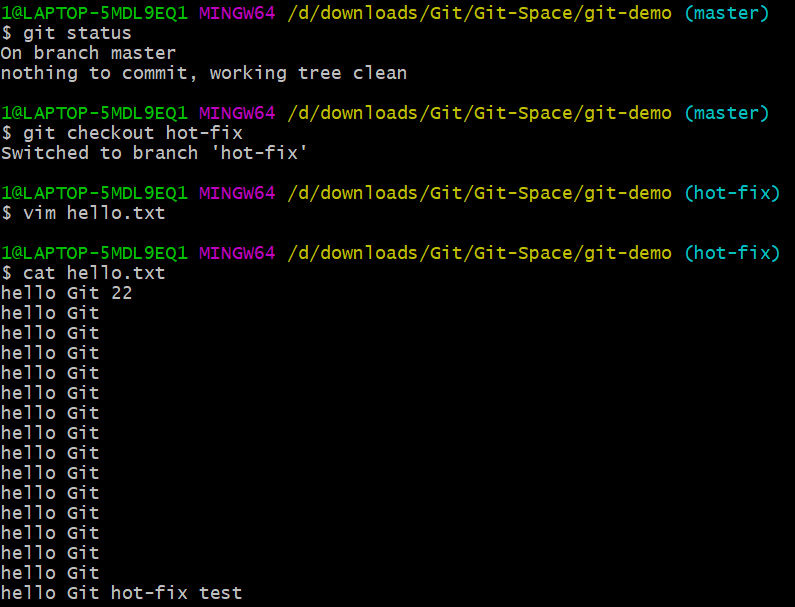
1@LAPTOP-5MDL9EQ1 MINGW64 /d/downloads/Git/Git-Space/git-demo (master)
$ git checkout hot-fix
Switched to branch 'hot-fix'
1@LAPTOP-5MDL9EQ1 MINGW64 /d/downloads/Git/Git-Space/git-demo (hot-fix)
$ git branch -v

2.3.4 Modify Branch
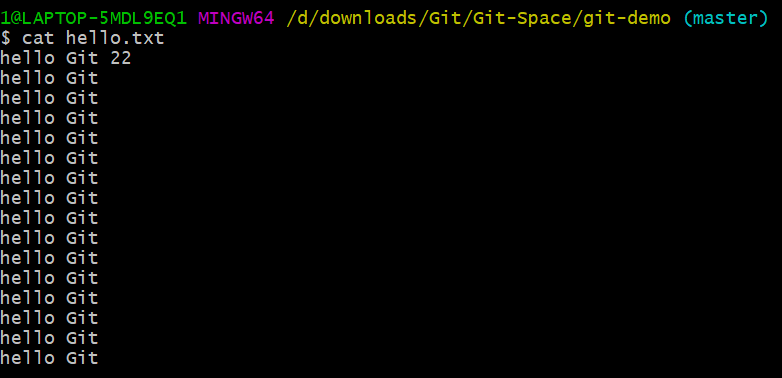
1@LAPTOP-5MDL9EQ1 MINGW64 /d/downloads/Git/Git-Space/git-demo (hot-fix)
$ vim hello.txt
hello Git 22
hello Git
hello Git
hello Git
hello Git
hello Git
hello Git
hello Git
hello Git
hello Git
hello Git
hello Git
hello Git
hello Git
hello Git
hello Git
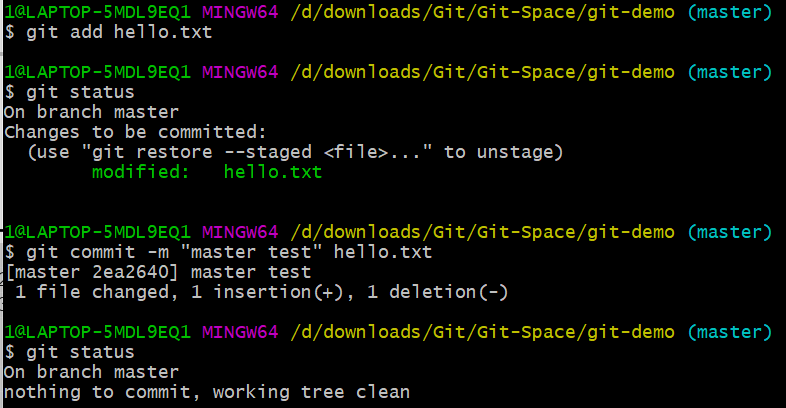
View the current status:

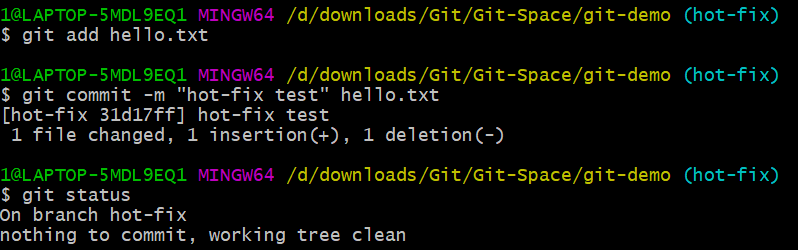
Add to staging area:
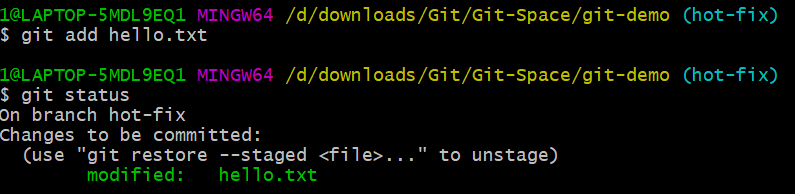
Submit to local library:
1@LAPTOP-5MDL9EQ1 MINGW64 /d/downloads/Git/Git-Space/git-demo (hot-fix)
$ git commit -m "hot-fix first commit" hello.txt
[hot-fix e28024e] hot-fix first commit
 1 file changed, 1 insertion(+), 1 deletion(-)
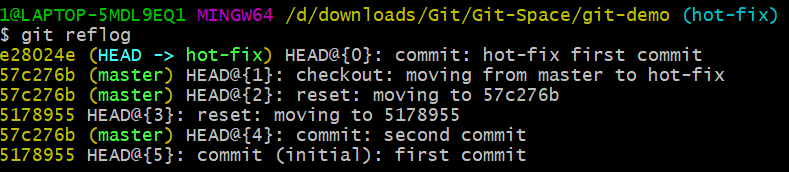
The head pointer points to hot-fix. The version number is as follows:
2.3.5 Merge Branches
- Basic Grammar
git merge branch name
- Case Practice
Go back to the master branch first:
1@LAPTOP-5MDL9EQ1 MINGW64 /d/downloads/Git/Git-Space/git-demo (hot-fix)
$ git checkout master
Switched to branch 'master'
Merge hot-fix branches on the master branch:
1@LAPTOP-5MDL9EQ1 MINGW64 /d/downloads/Git/Git-Space/git-demo (master)
$ git merge hot-fix
Updating 57c276b..e28024e
Fast-forward
 hello.txt | 2 +-
 1 file changed, 1 insertion(+), 1 deletion(-)
View hello.txt file:
2.3.6 Conflicts
Behavior of conflict: MERGING later
Case study: modifying hello in master branch. The TXT file is:

And add to staging area and local library:
Switch to the hot-fix branch and modify hello.txt file:
Add to staging area and local library:
Switch back to the master branch and merge the hot-fix branch:
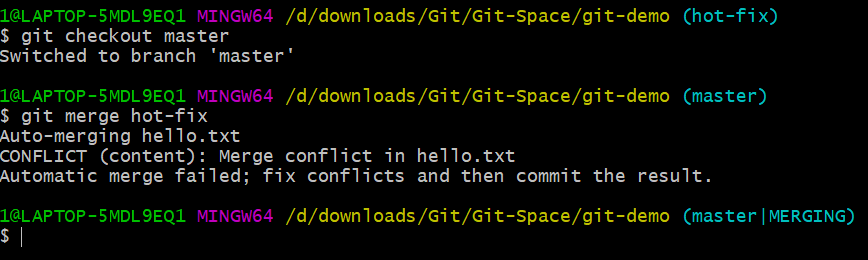
The later state is MERGING.
Cause of conflict: When merging branches, two branches have two completely different sets of modifications in the same file location. Git can't decide which to use. New code content must be artificially determined.
View status (two modifications to the file were detected):
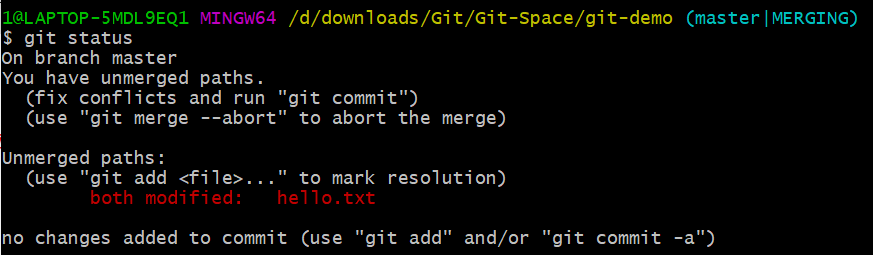
2.3.7 Conflict Resolution
Special Symbols: <<<<<< HEAD Current Branch Code=======Merged Code >>> hot-fix
View hello in its current state. Txt file:
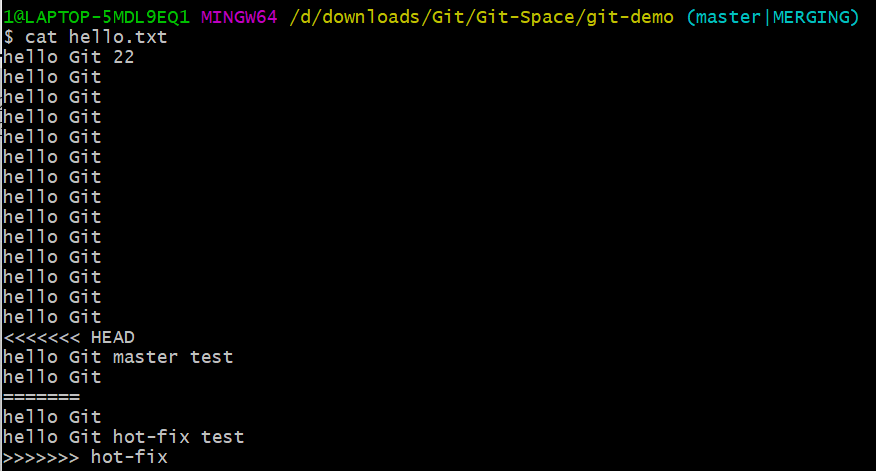
- Edit conflicting files, delete special symbols, and decide what to use
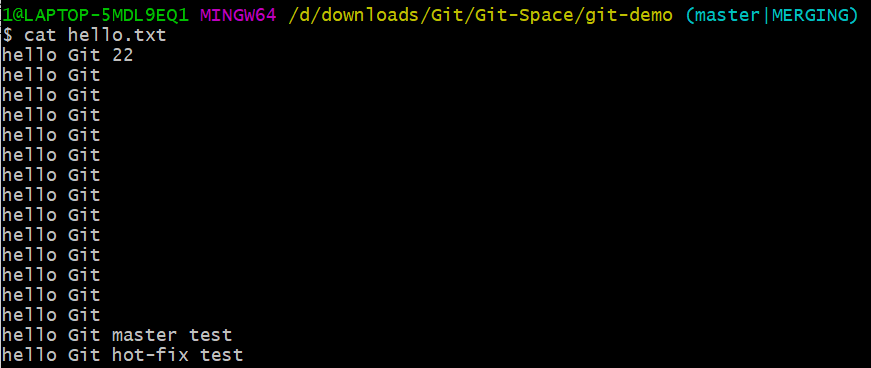
- Add to Staging Area

- Perform the commit (note: you cannot use the git commit command with a file name at this time)
1@LAPTOP-5MDL9EQ1 MINGW64 /d/downloads/Git/Git-Space/git-demo (master|MERGING)
$ git commit -m "merge hot-fix"
[master 521838a] merge hot-fix

2.4 Creating and Switching Branches
master, hot-fix are actually pointers to specific version records. The current branch is actually owned by HEAD
Decided. So the essence of branching is to create one more pointer.
If HEAD points to master, we are now in the master branch.
If HEAD executes hotfix, we are now on the hotfix branch.
Chapter 3 GitHub Operations
3.1 Create a remote warehouse
3.2 Remote Warehouse Operations
| Command Name | Effect |
|---|---|
| git remote -v | View all current remote address aliases |
| git remote add alias remote address | Alias |
| git push alias branch | Push content from local branch to remote warehouse |
| git clone remote address | Clone the contents of a remote repository locally |
| git pull remote library address alias remote branch name | Merge the remote warehouse directly with the current local branch after pulling down the latest content from the branch |
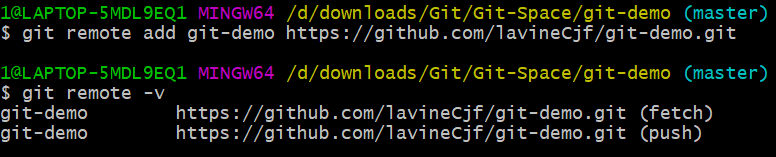
3.2.1 Create a remote warehouse alias
- Basic Grammar
git remote add alias remote address
- Case Practice
Remote address:
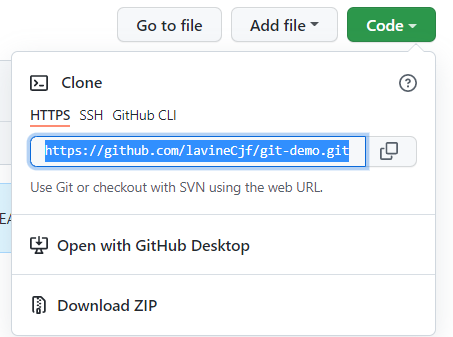
1@LAPTOP-5MDL9EQ1 MINGW64 /d/downloads/Git/Git-Space/git-demo (master)
$ git remote add git-demo https://github.com/lavineCjf/git-demo.git
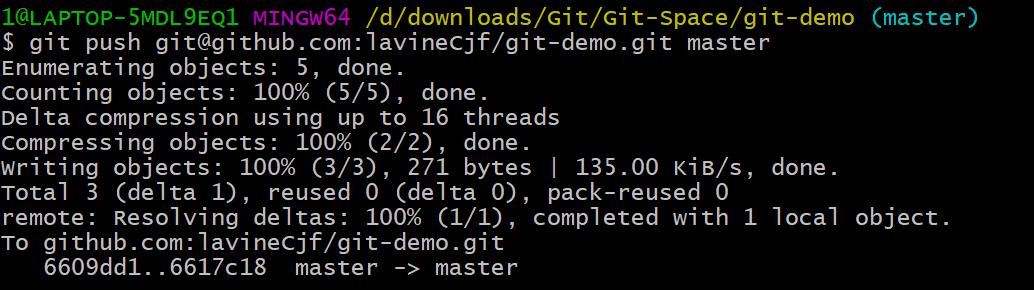
3.2.2 Push local branch to remote warehouse
- Basic Grammar
git push alias branch
- Case Practice
1@LAPTOP-5MDL9EQ1 MINGW64 /d/downloads/Git/Git-Space/git-demo (master)
$ git push git-demo master


Modifications can be made on remote servers
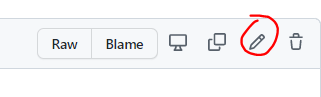
It is now modified as follows:
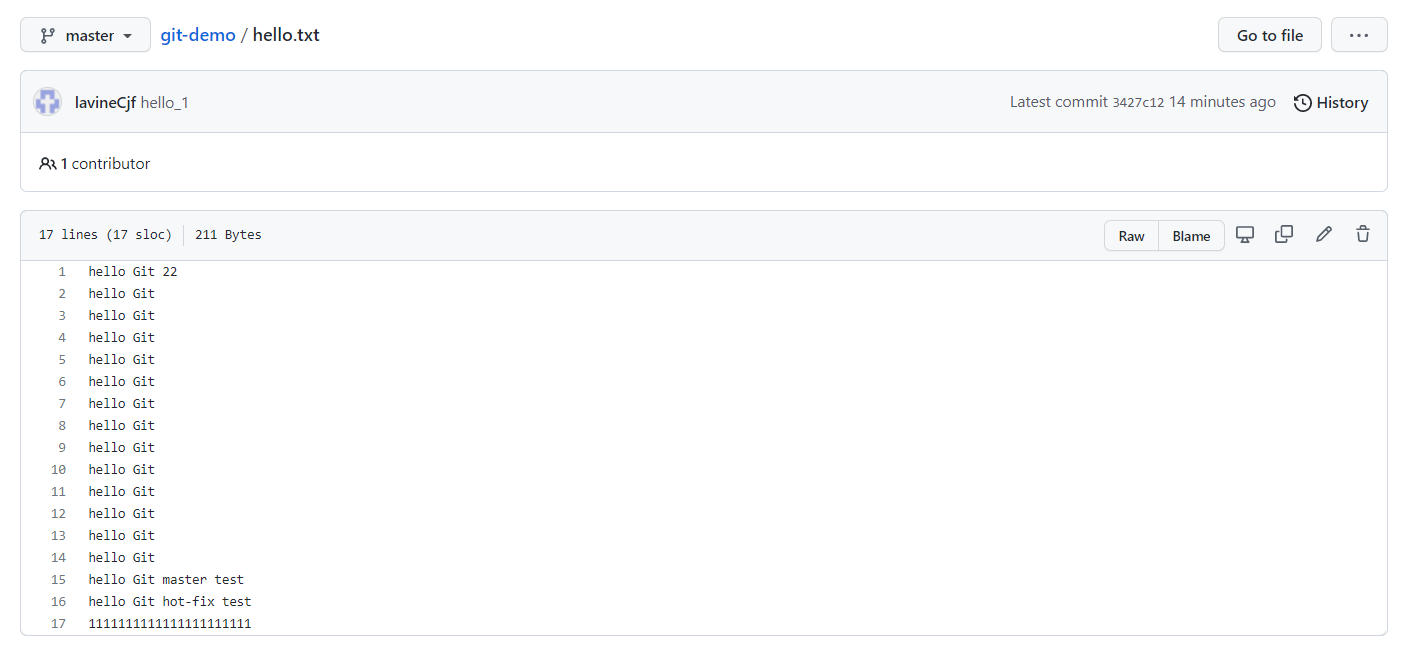
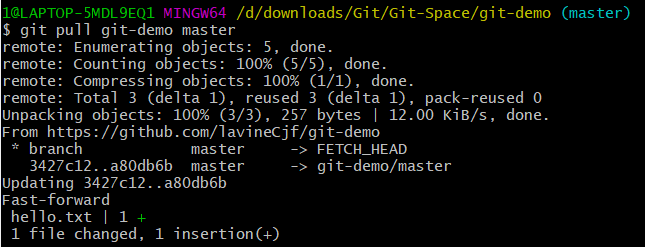
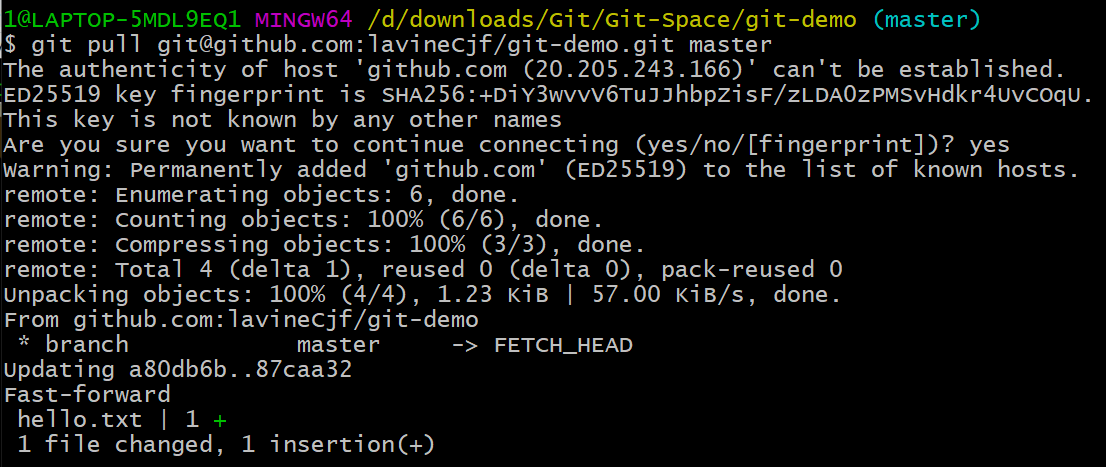
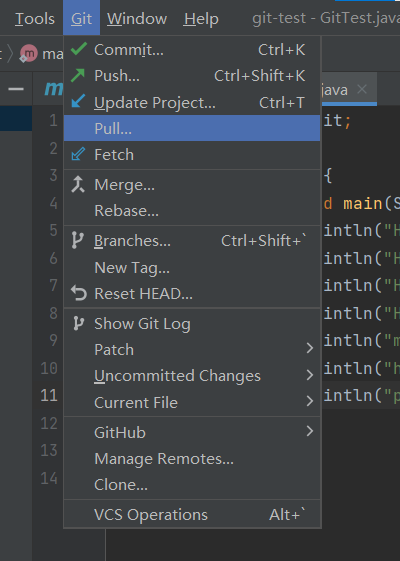
Pull Hello from a remote server. Txt to local
1@LAPTOP-5MDL9EQ1 MINGW64 /d/downloads/Git/Git-Space/git-demo (master)
$ git pull git-demo master
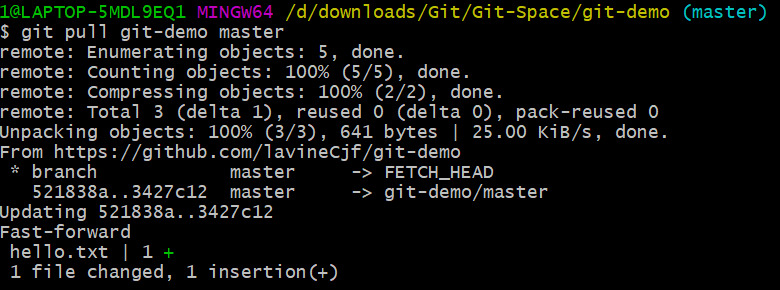
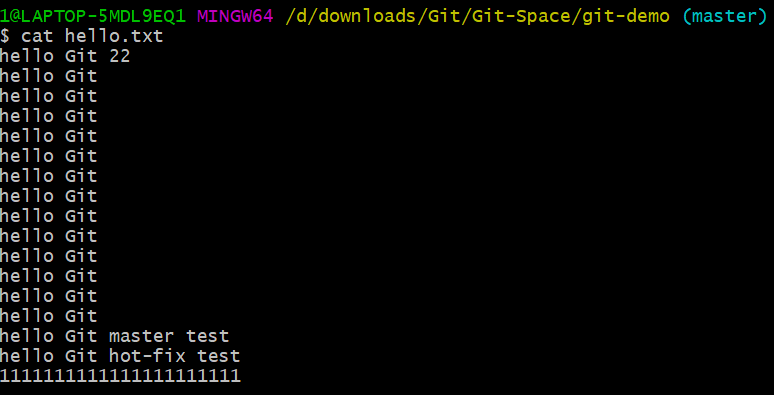
Success!
3.2.3 Clone remote warehouse to local
- Basic Grammar
git clone remote address
- Case Practice
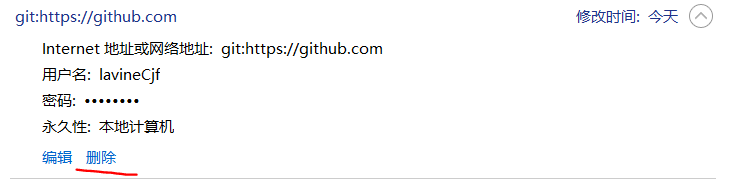
Note: For a computer, exit the github account in Credential Manager first
Then, create a new warehouse
1@LAPTOP-5MDL9EQ1 MINGW64 /d/downloads/Git/Git-aaa
$ git clone https://github.com/lavineCjf/git-demo.git
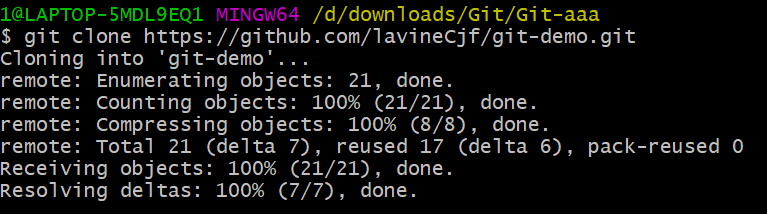

Cloning succeeded!
You can see the alias of the corresponding link.
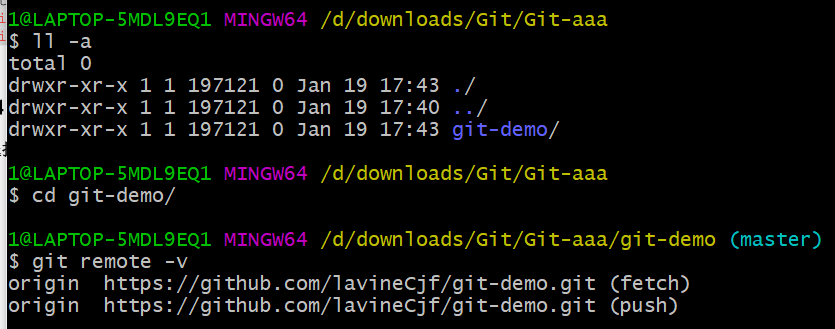
Cloning summary: 1. Pull substitution code; 2. Initialize the local warehouse; 3. Create an alias
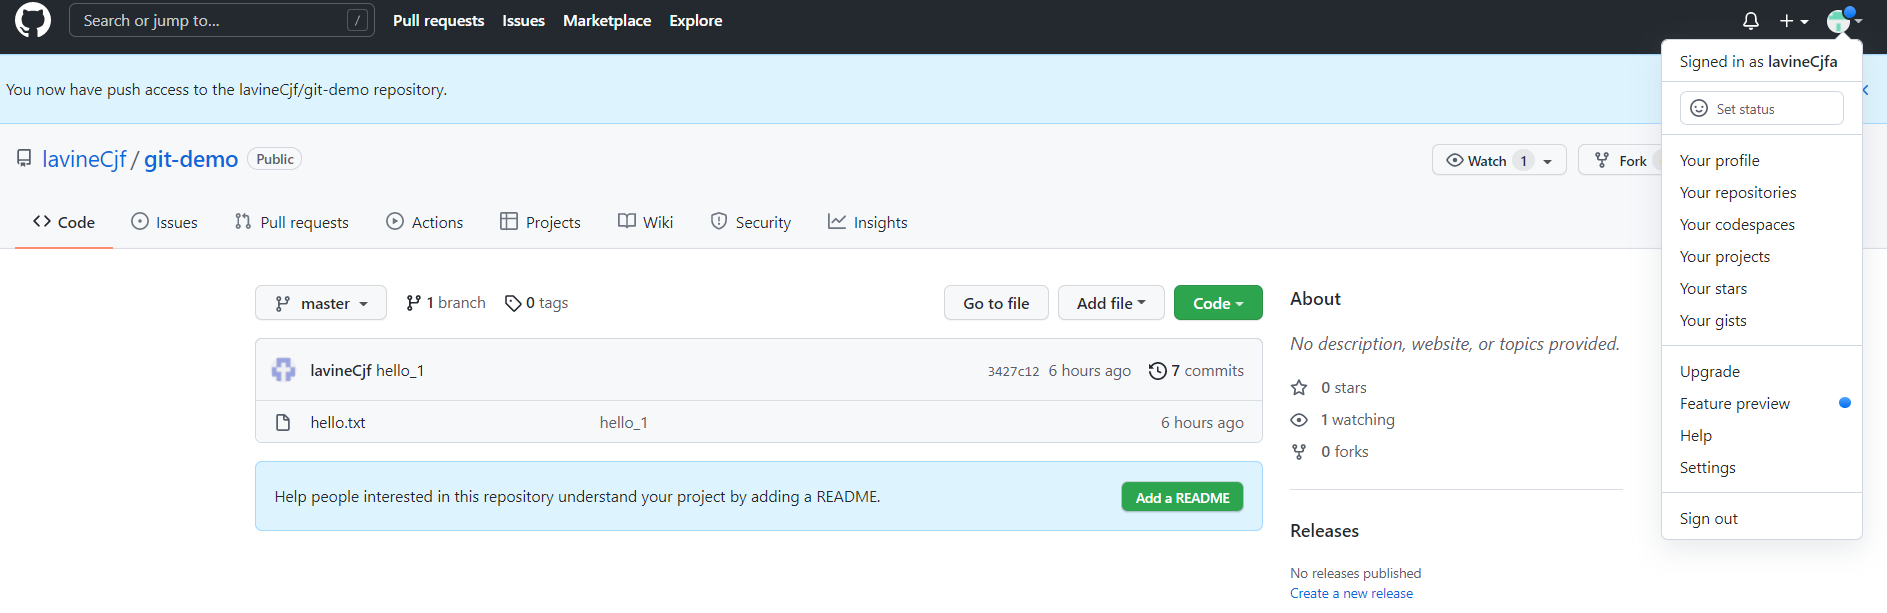
3.2.4 Invite to join the team
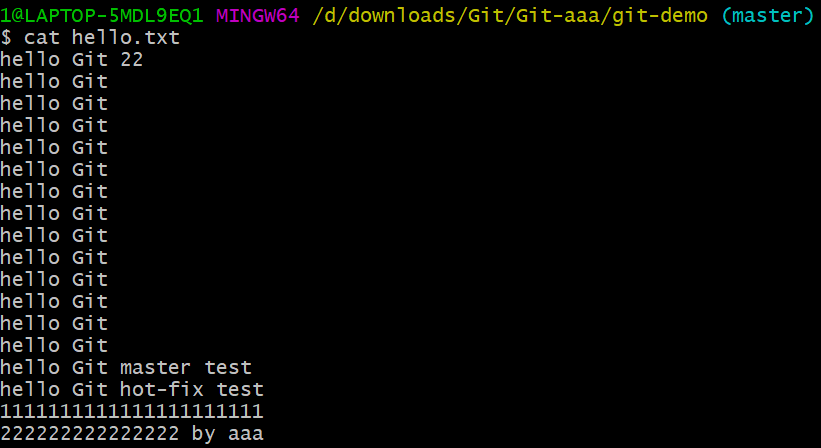
Modify hello in the Git-aaa workspace. Txt file and add to staging area and local library:
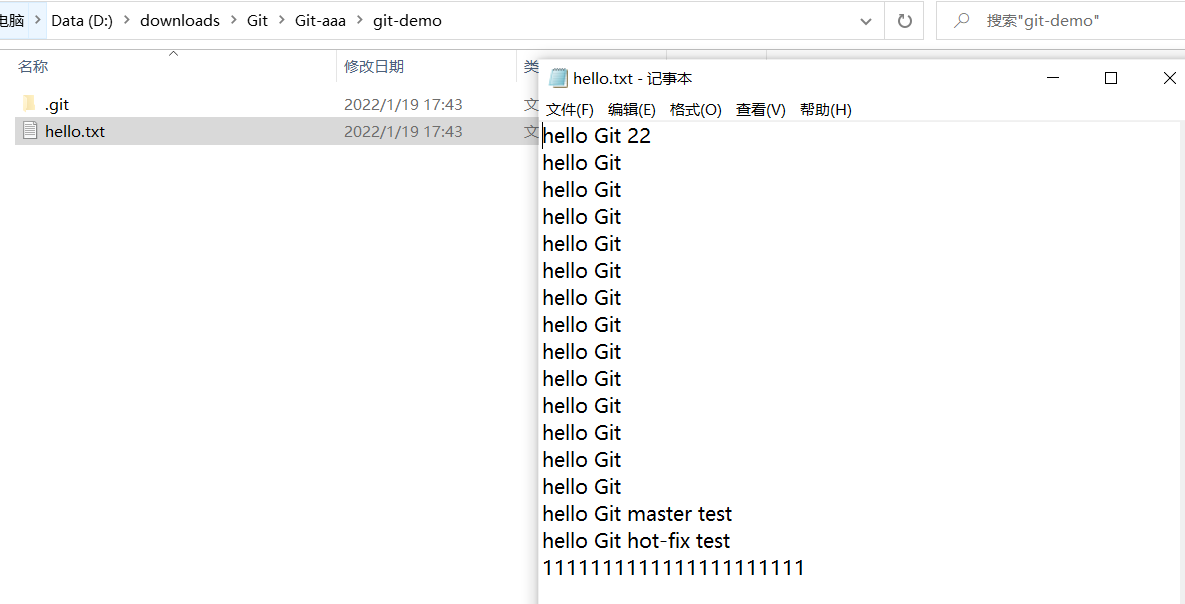
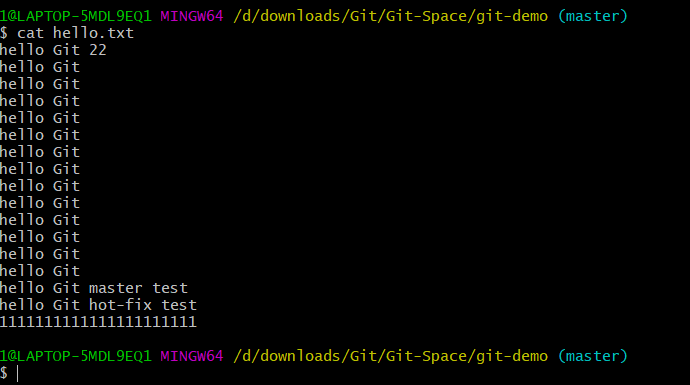
The original hello.txt:
Hello modified in Git-aaa workspace. Txt:
Add to staging area and local library:
1@LAPTOP-5MDL9EQ1 MINGW64 /d/downloads/Git/Git-aaa/git-demo (master)
$ git add hello.txt
1@LAPTOP-5MDL9EQ1 MINGW64 /d/downloads/Git/Git-aaa/git-demo (master)
$ git commit -m "aaa commit" hello.txt
Push local to lavineCjf.
1@LAPTOP-5MDL9EQ1 MINGW64 /d/downloads/Git/Git-aaa/git-demo (master)
$ git push https://github.com/lavineCjf/git-demo.git master

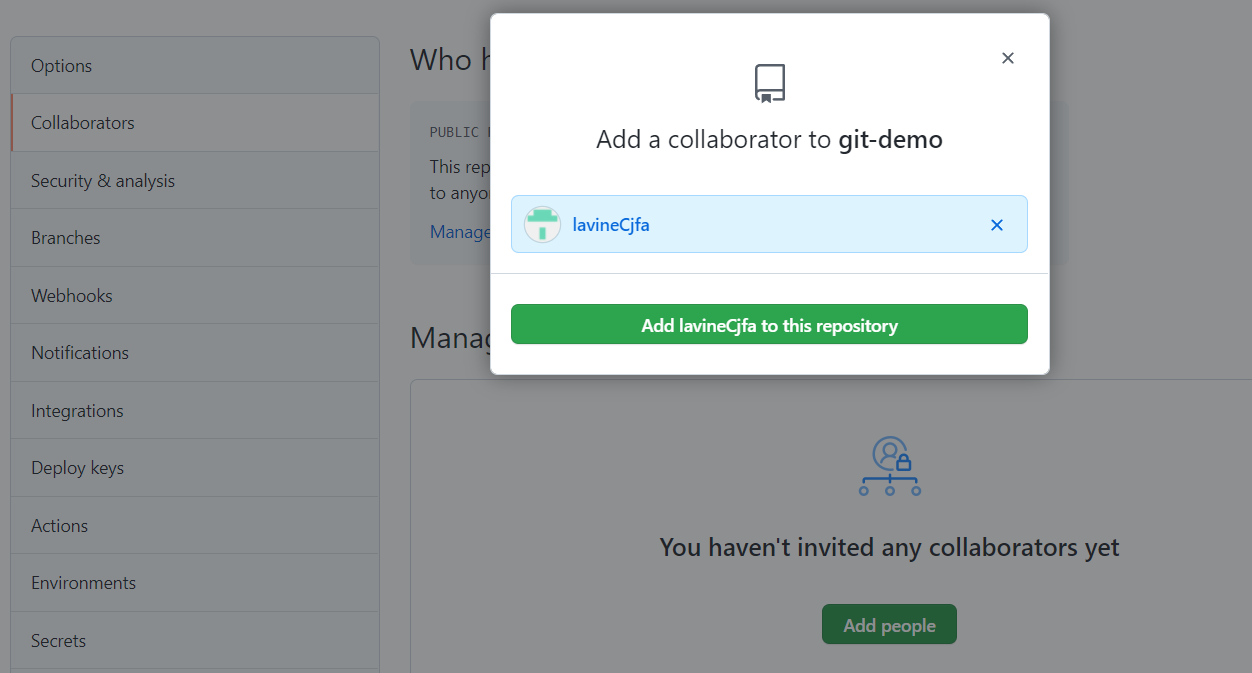
Sign in with another account, lavineCjfa. The following will occur:

This indicates that lavineCjf needs to invite lavineCjfa to join its team before it can add code to lavineCjfa.
So log in to the lavineCjf account and find Add people in settings:
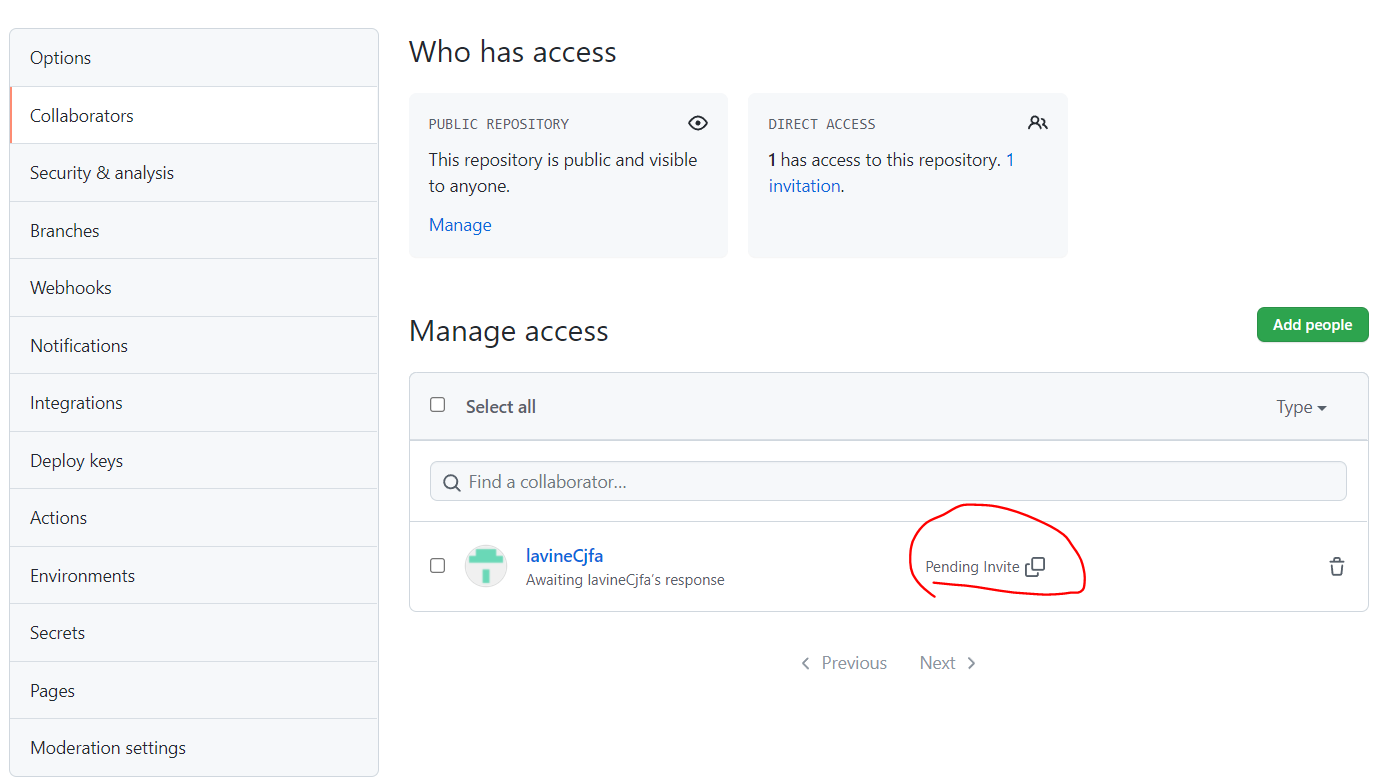
Click on the invitation link and agree to the invitation:

At this point lavineCjfa is already a team member of lavineCjf.
Push again to lavineCjf
1@LAPTOP-5MDL9EQ1 MINGW64 /d/downloads/Git/Git-aaa/git-demo (master)
$ git push https://github.com/lavineCjf/git-demo.git master
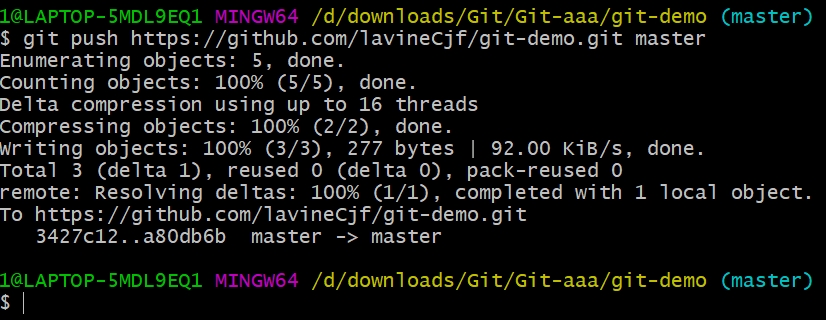
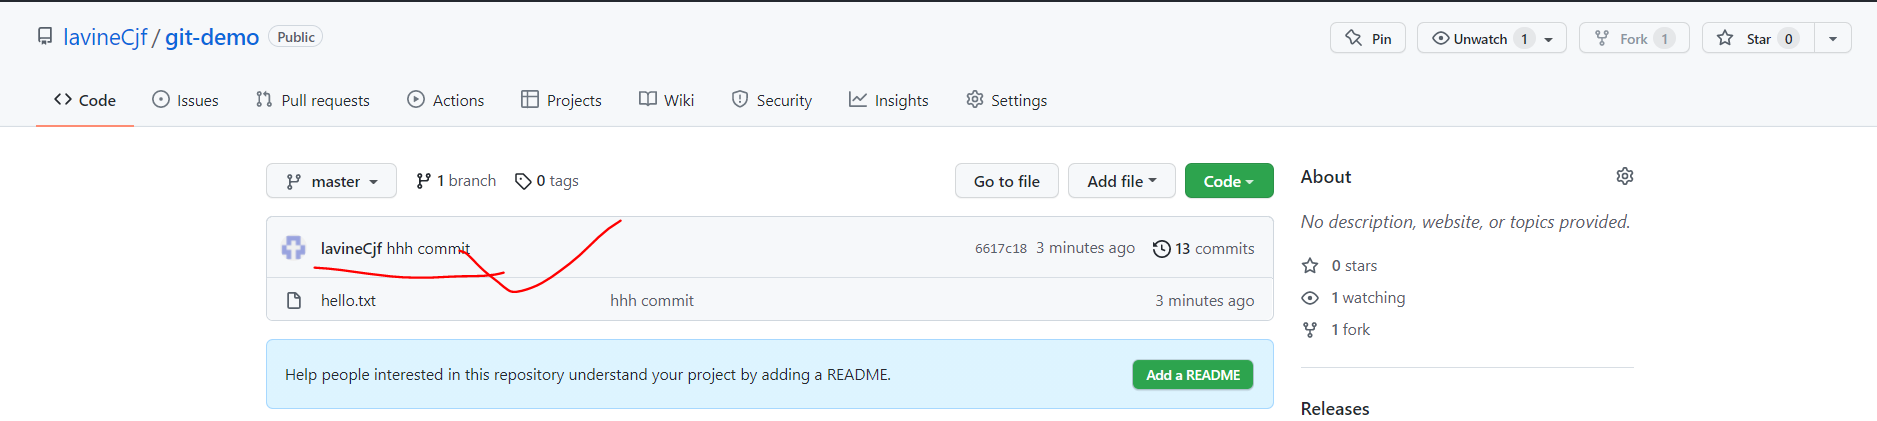
Push Success!
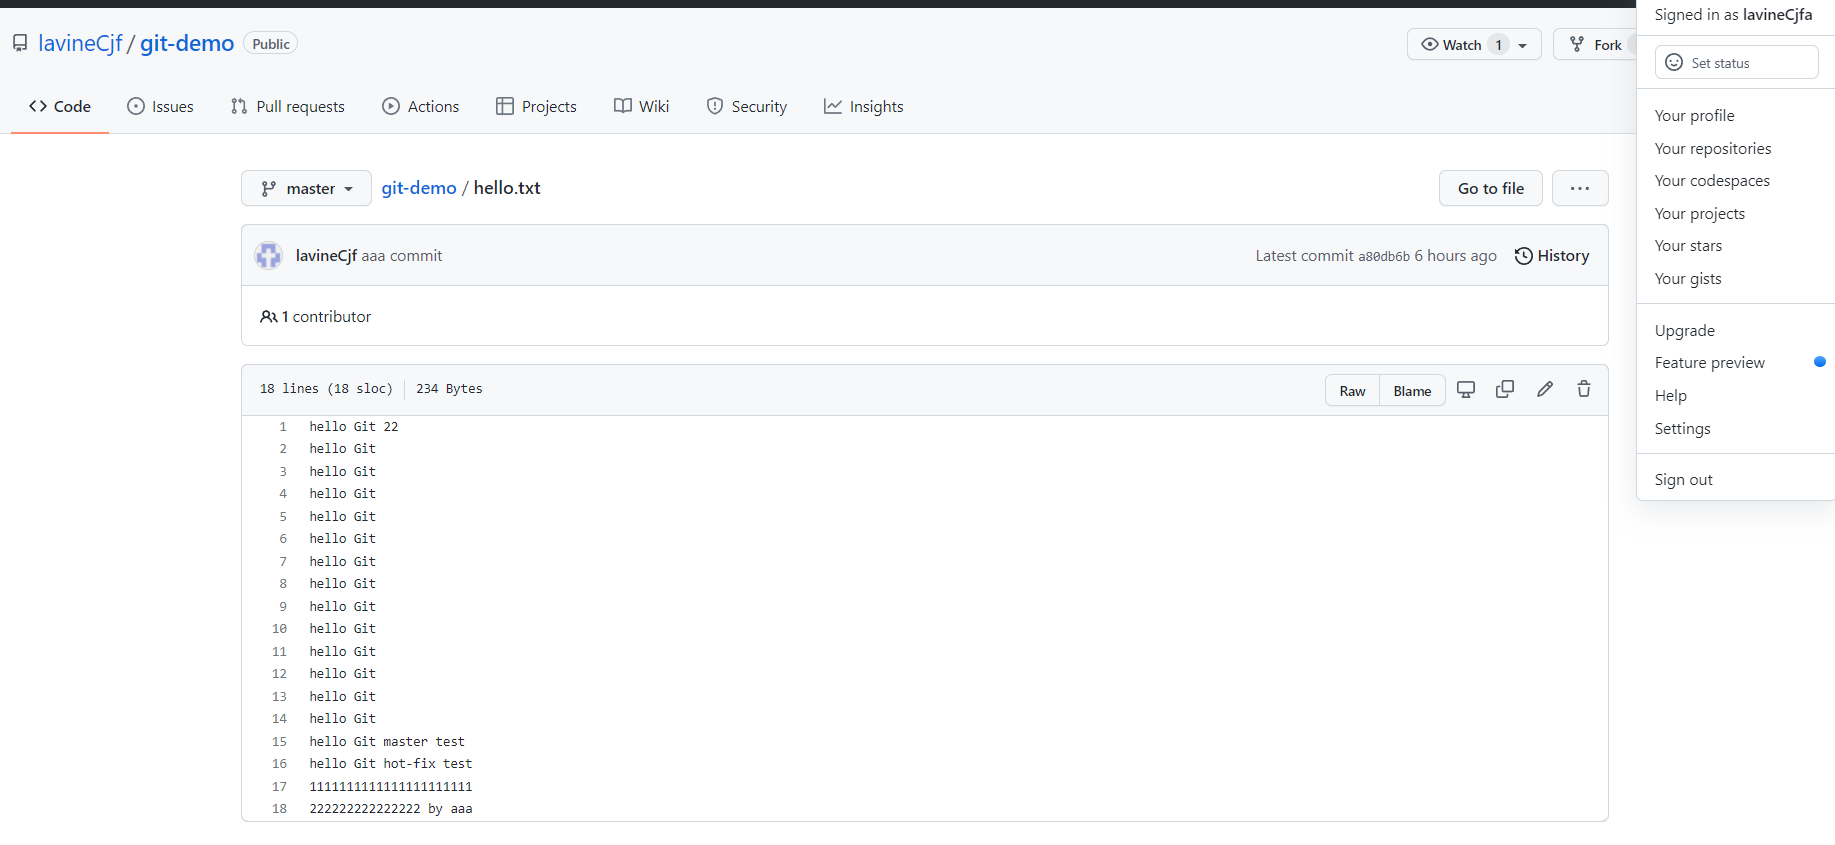
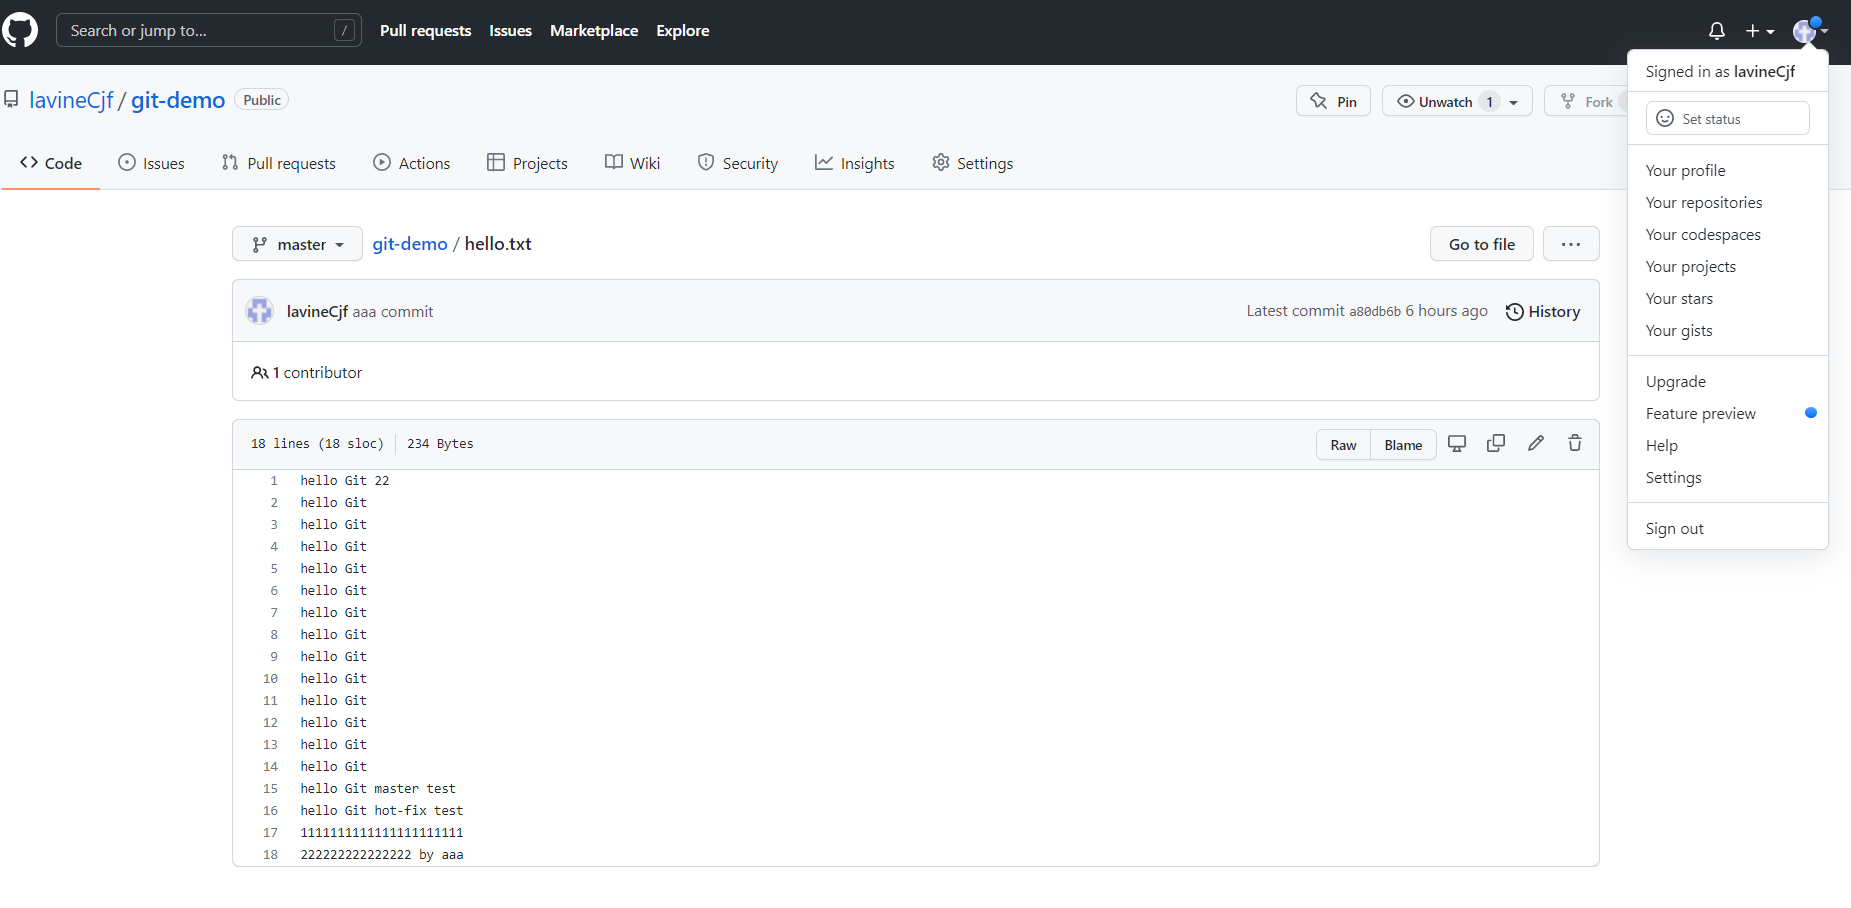
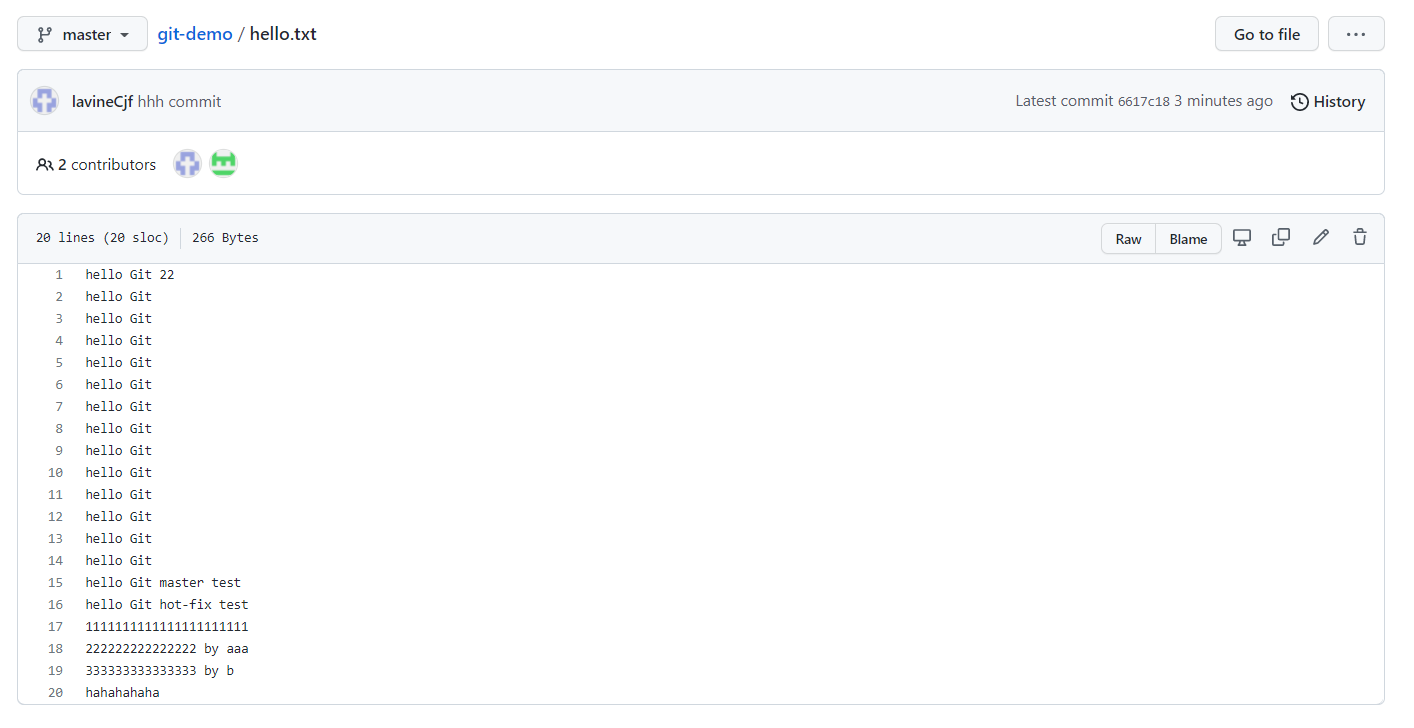
Both remote libraries can see the modified code:
Hello from the original local library. Txt file:
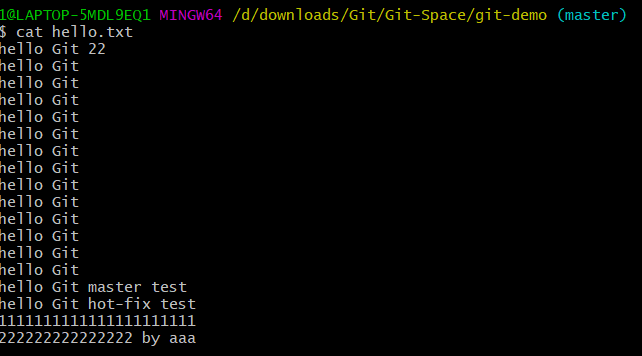
Pull out the modified file (note deleting lavineCjfa in Credential Manager first):
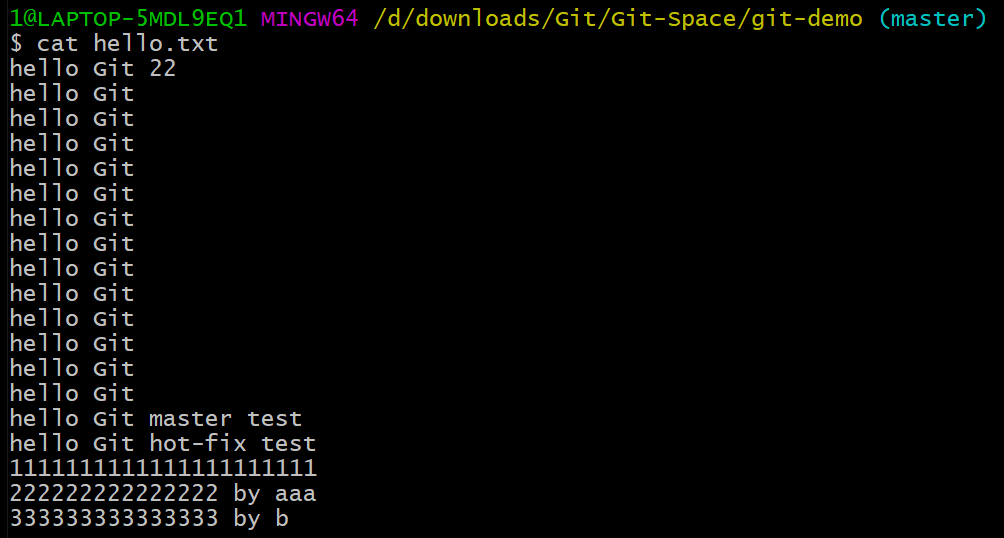
View hello.txt file:
3.2.5 Pull Remote Library Content
- Basic Grammar
git pull remote library remote branch name
1@LAPTOP-5MDL9EQ1 MINGW64 /d/downloads/Git/Git-Space/git-demo (master)
git pull https://github.com/lavineCjf/git-demo.git master
3.3 Cross-Team Collaboration
lavineCjfb fork s the git-demo project to the local warehouse through the address link of the remote warehouse provided by lavineCjf.

The lavineCjfb can modify the code locally, but the modified code can only be seen in the local repository after modification. To modify the code in the remote repository of lavineCjf, you need to pull the request backwards after modification of the code (hello-bbb).

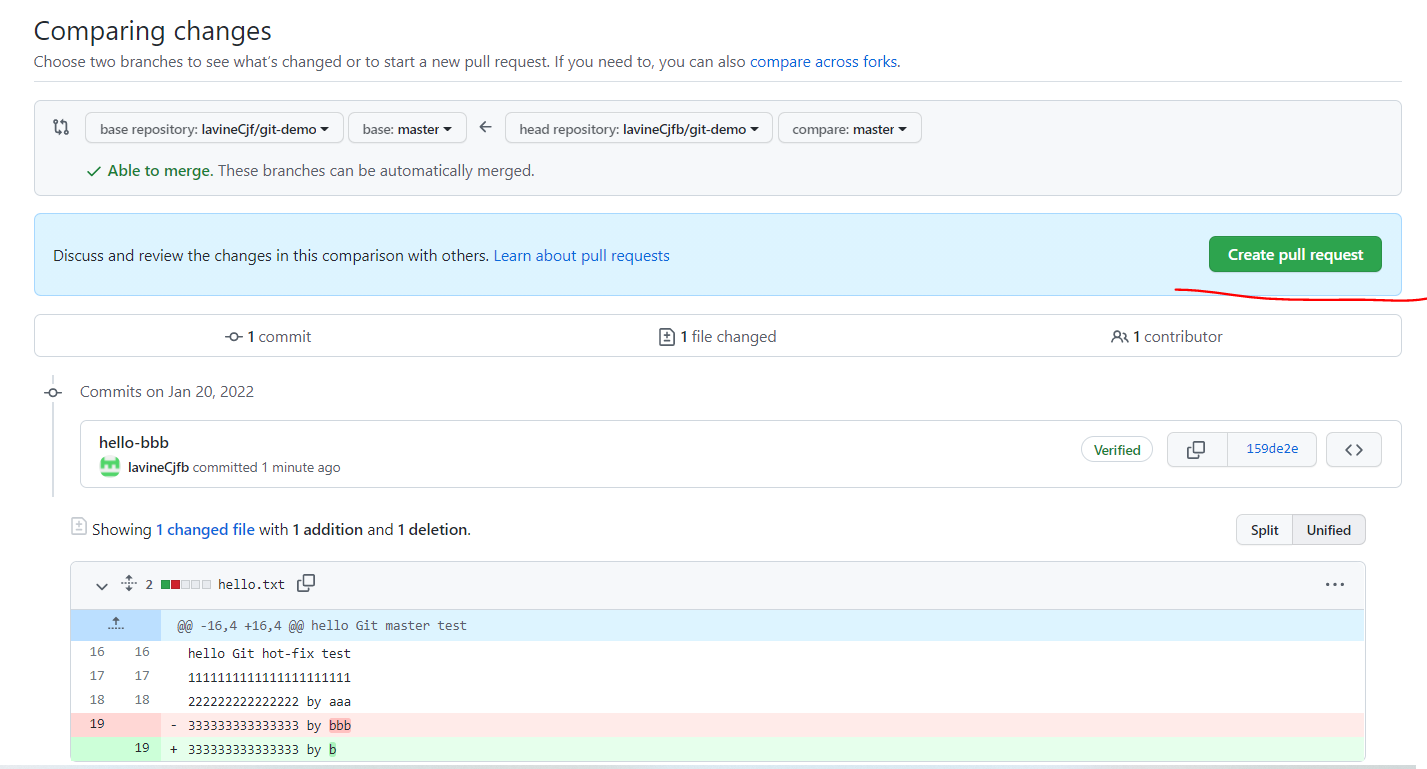
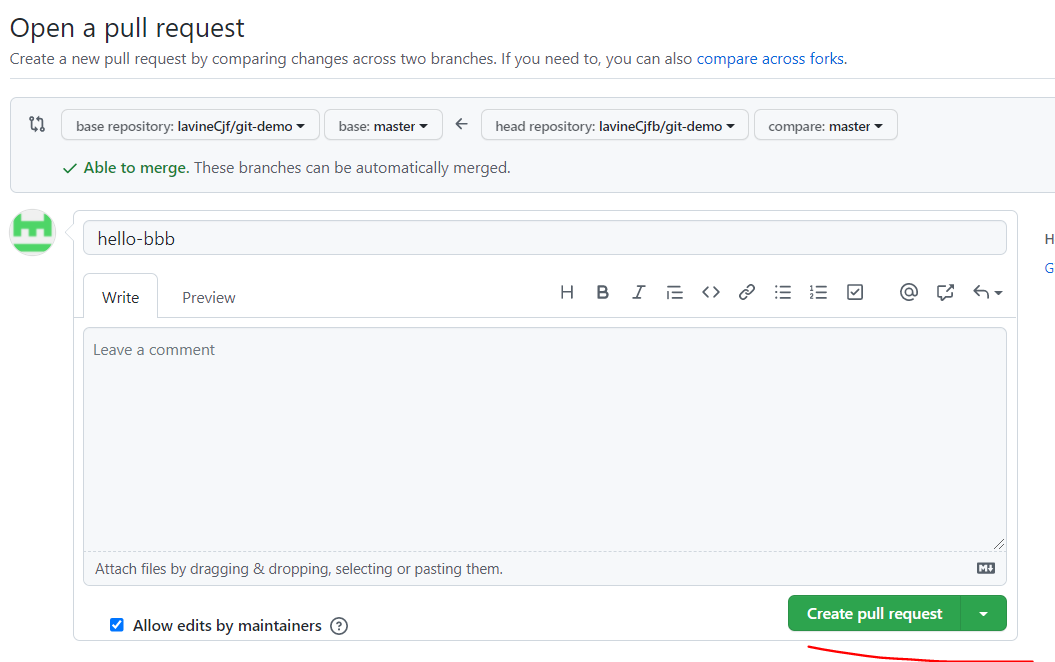
After the pull request completes, a request is made in the lavineCjf remote repository:

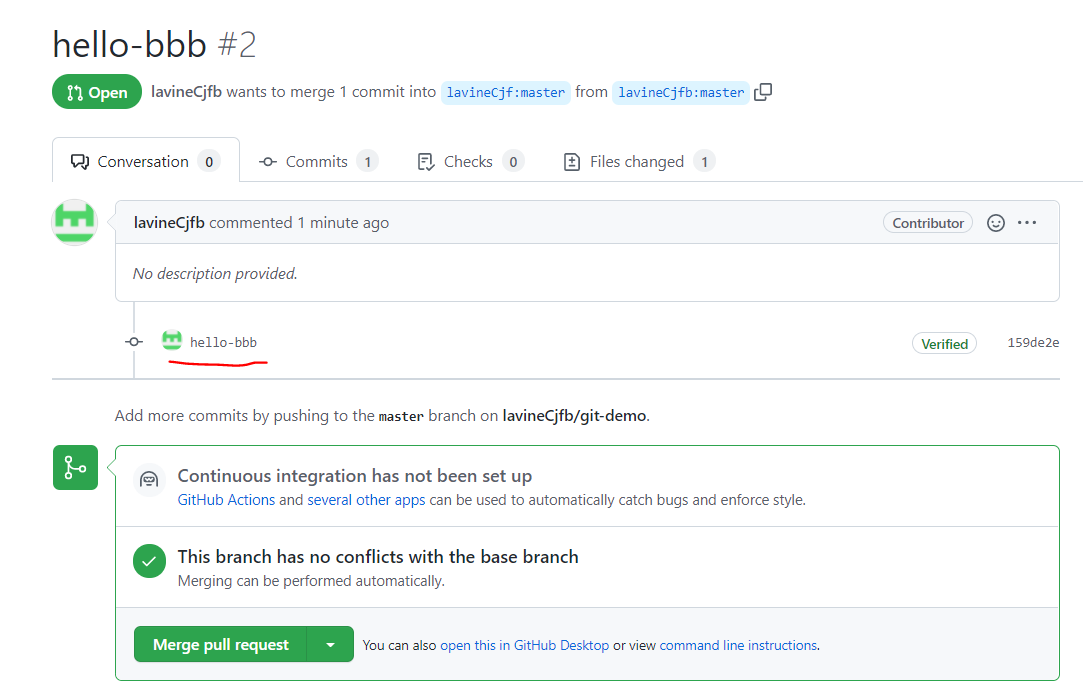
You can click hello-bbb to view the audit, and merge pull request can be selected after no error.
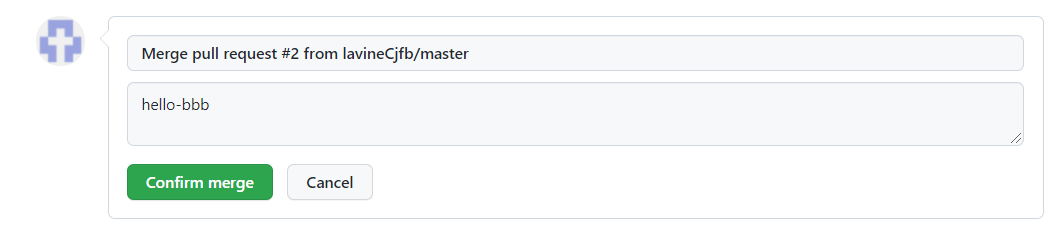
comfirm merge!
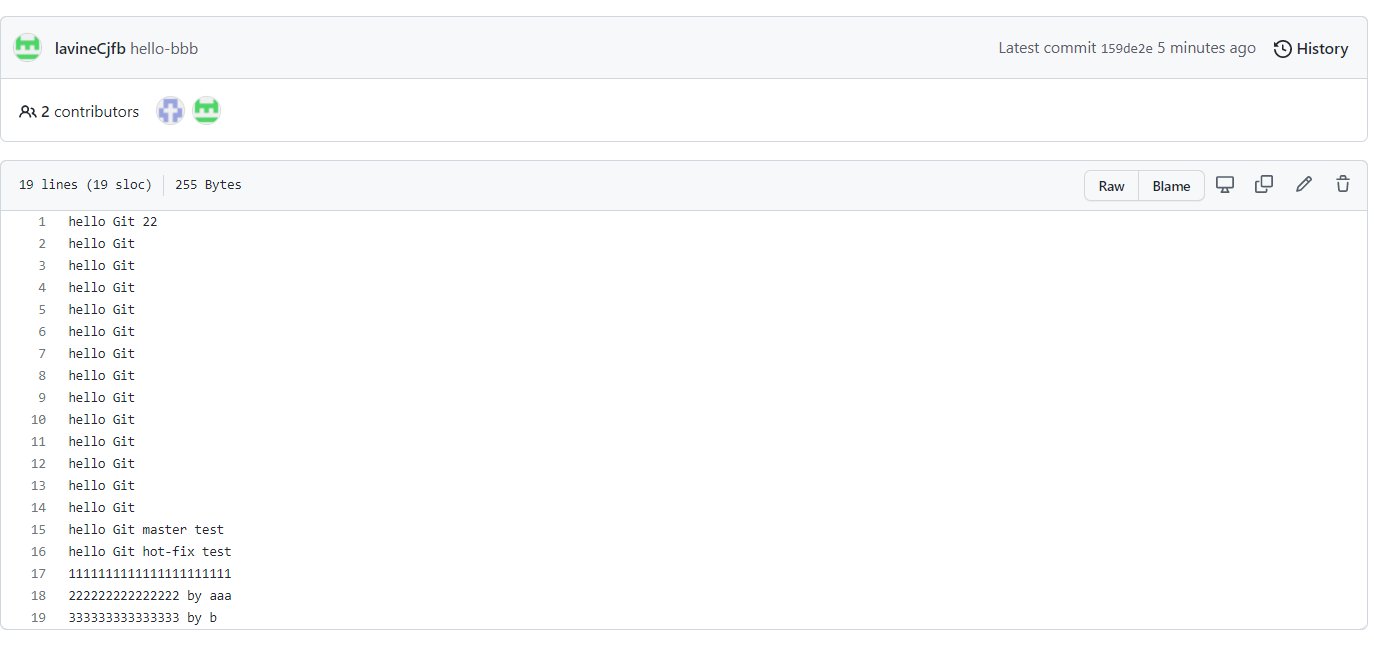
Team work done!
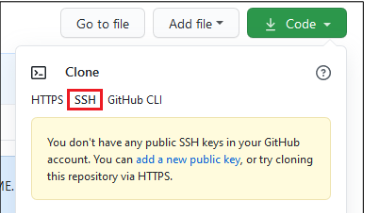
3.4 SSH Secret Login
There is also an SSH address in the remote warehouse that can be accessed using SSH.
Operation:
Run command generation in the windows home directory: C:\Users\1. ssh key directory
1@LAPTOP-5MDL9EQ1 MINGW64 ~
$ ssh-keygen -t rsa -C xxxxx@163.com
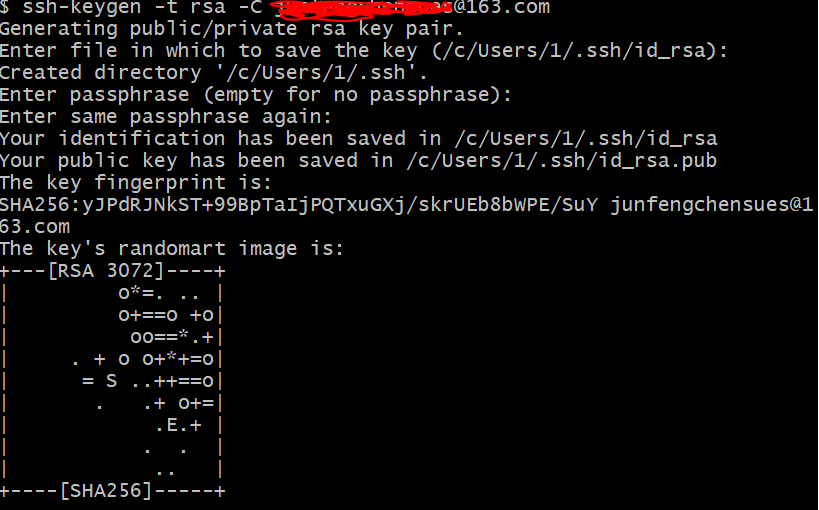
Click enter three times in a row. Get into. ssh/file, open id_rsa.pub.
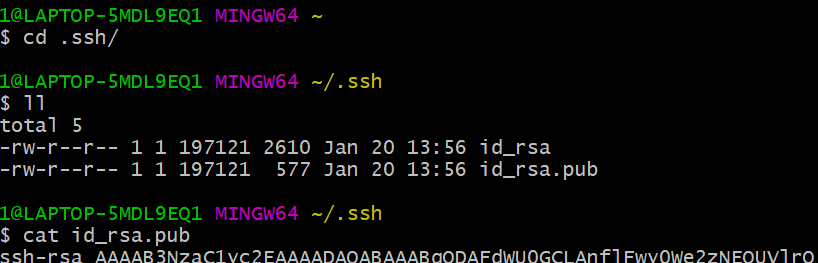
Copy the key to GitHub in the following location:

title itself, key is the secret key.
Success!
3.4.1 Test SSH Secret Login
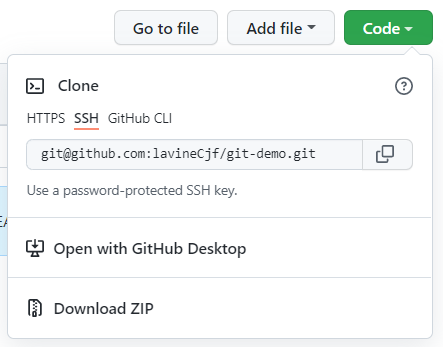
Copy the SSH link and pull the latest code from the lavineCjf remote warehouse to the local warehouse.
1@LAPTOP-5MDL9EQ1 MINGW64 /d/downloads/Git/Git-Space/git-demo (master)
$ git pull git@github.com:lavineCjf/git-demo.git master
The first ssh login asks if you want to continue linking, yes! Finish pulling and viewing:
Success!
Modify Hello again. Txt:
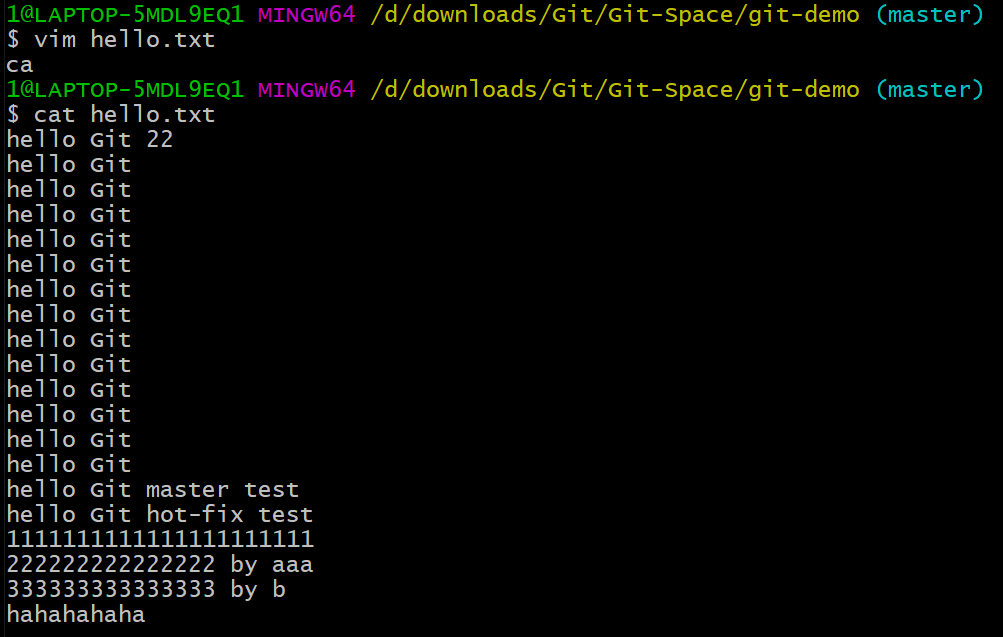
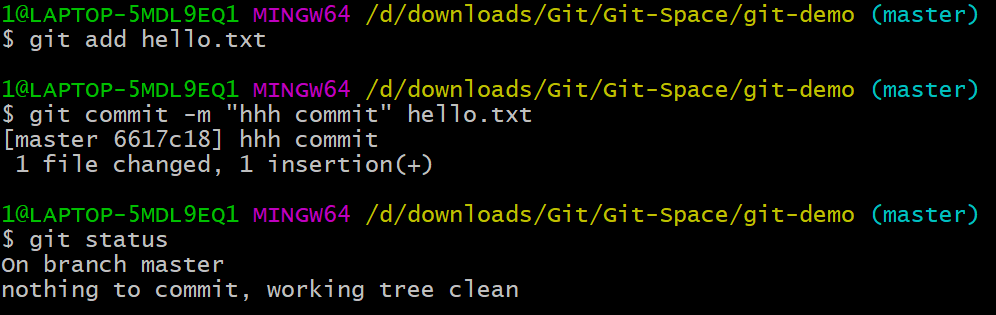
Add to the staging area, submit to the local library, and view the current status:
The following pull goes to the remote warehouse:
1@LAPTOP-5MDL9EQ1 MINGW64 /d/downloads/Git/Git-Space/git-demo (master)
$ git push git@github.com:lavineCjf/git-demo.git master
View the remote warehouse:
push success with SSH!
Chapter 4 IDEA Integration Git
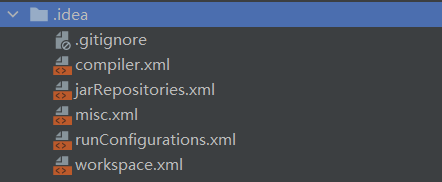
4.1 Configure Git to ignore files
(1) IDEA-specific files
(2) target directory for Maven project
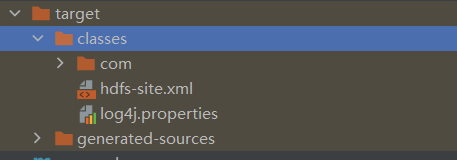
Question: Why ignore them?
Unrelated to the actual functionality of the project, does not participate in the deployment and operation on the server. Ignore them to block differences between IDEA tools.
Question: How to ignore?
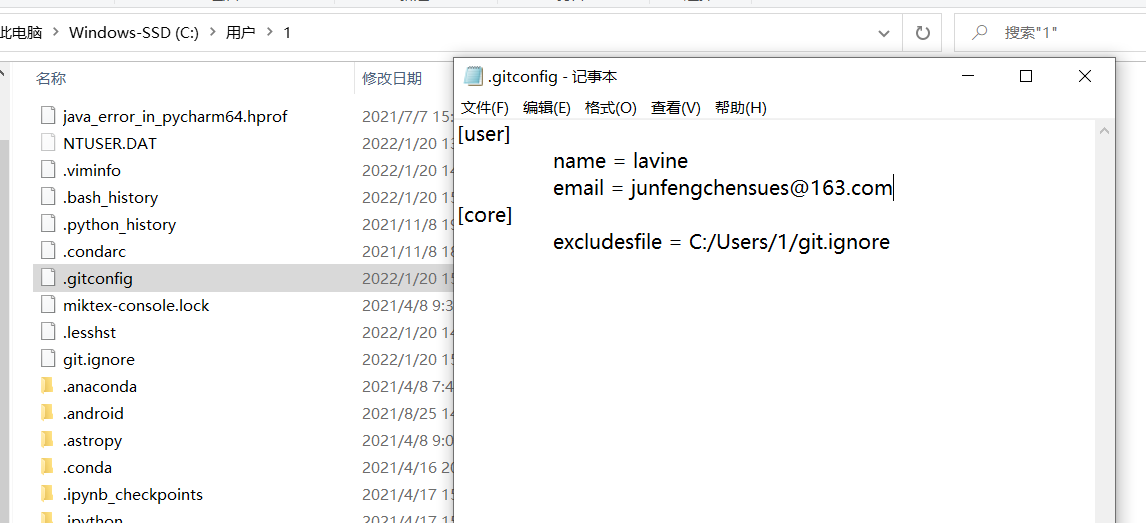
- Create Ignore Planning File xxx.ignore (git.ignore is recommended), this file can be stored anywhere in principle, so that ~/. gitconfig file reference, also recommended in home directory
Git. The ignore file template is as follows:
# Compiled class file
*.class

# Log file
*.log
# BlueJ files
*.ctxt
# Mobile Tools for Java (J2ME)
.mtj.tmp/
# Package Files #
*.jar
*.war
*.nar
*.ear
*.zip
*.tar.gz
*.rar
# virtual machine crash logs, see
http://www.java.com/en/download/help/error_hotspot.xml
hs_err_pid*
.classpath
.project
.settings
target
.idea
*.iml
- In. The gitconfig file references the Ignore Configuration File (which is in Windows'home directory), adding:
[core]
	excludesfile = C:/Users/1/git.ignore
4.2 Locate Git Program
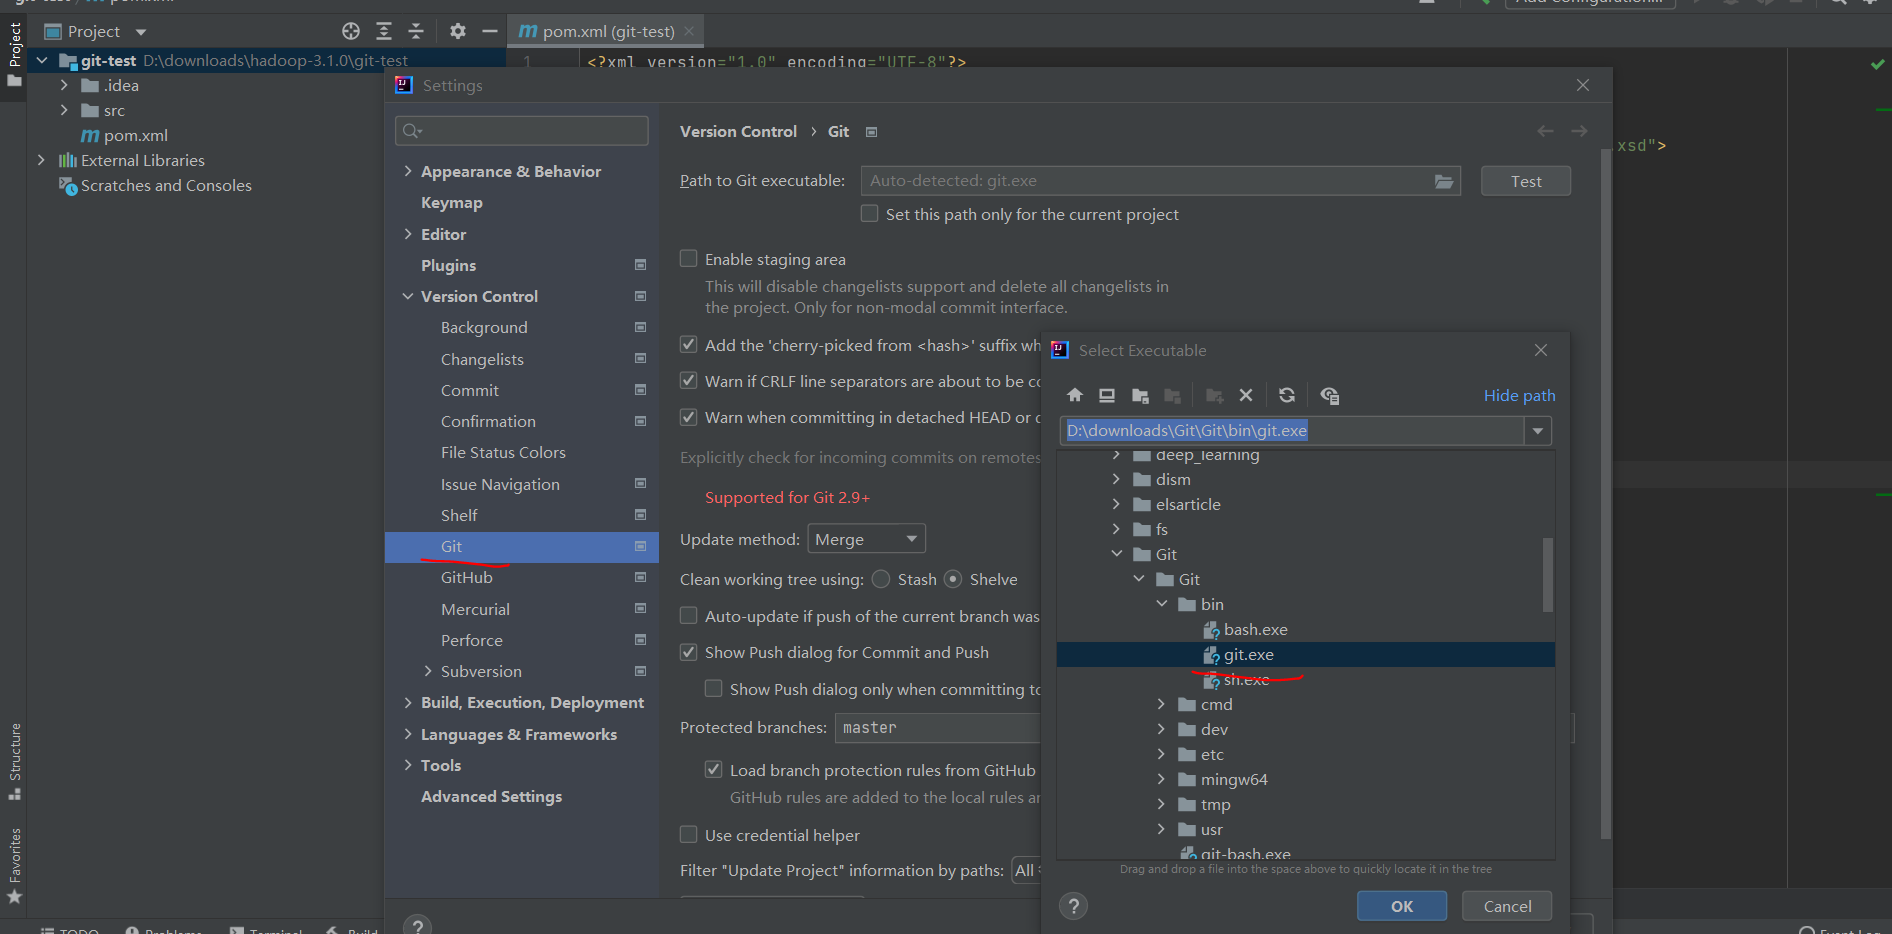
Click Test to see if it was successful:

Success!
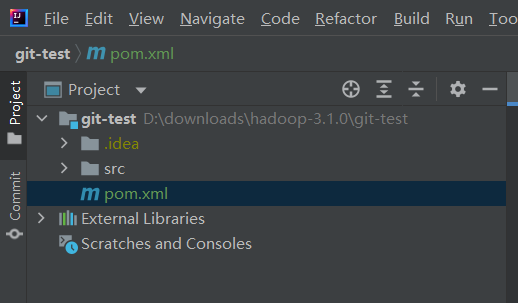
4.3 Initializing local libraries
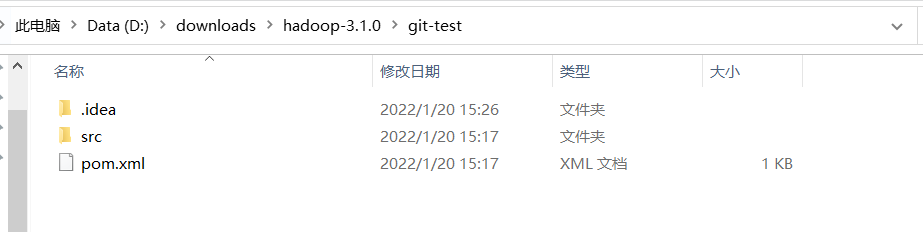
At this time the project has not been managed by Git:
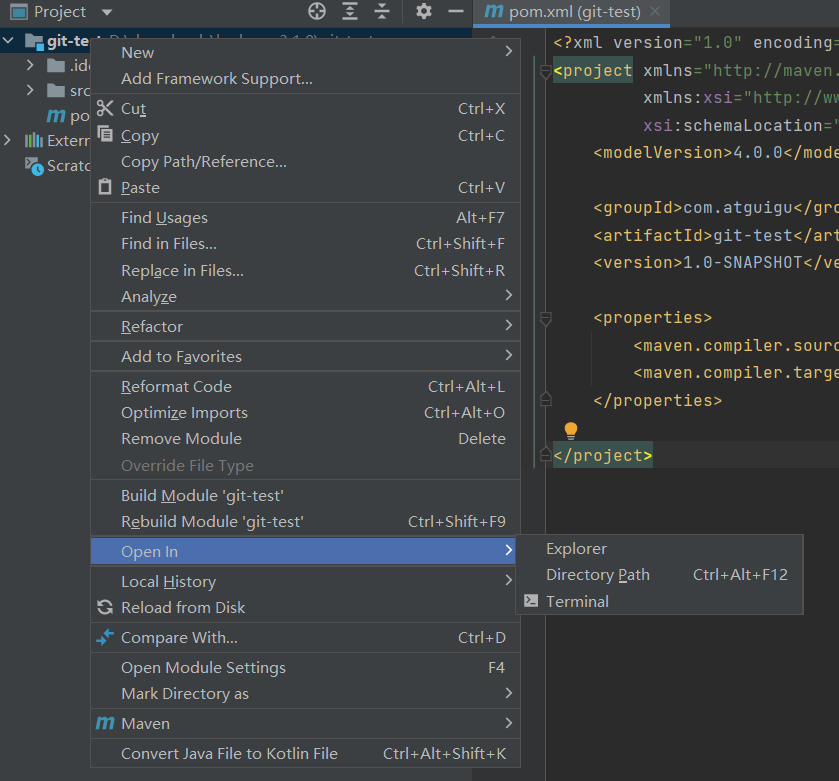
Not in git-test. Git configuration directory:
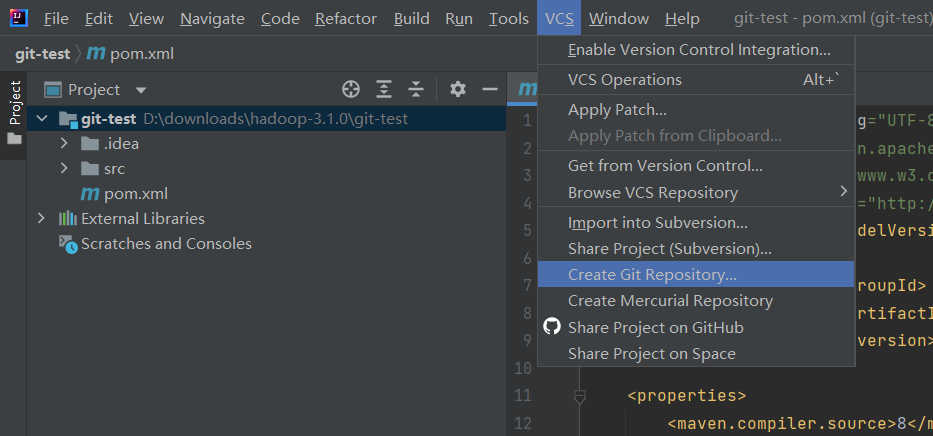
Click OK!

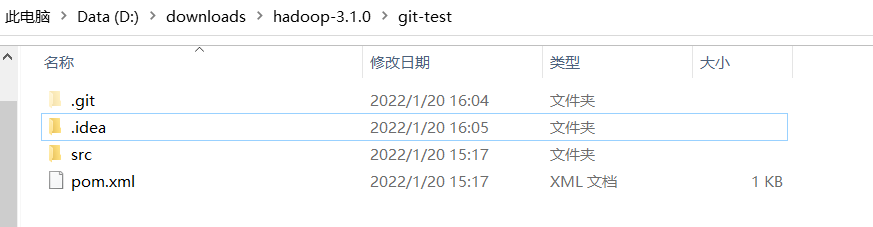
The.git configuration directory appears:
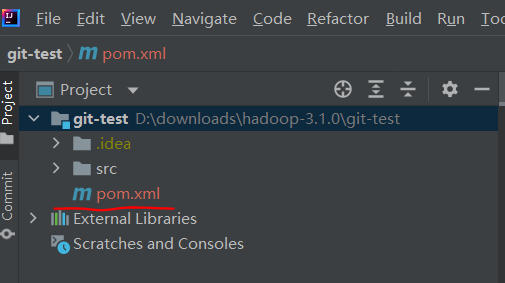
At this point, the pom file turns red, meaning it is not tracked and has not been added to the staging area.
4.4 Add to Staging Area
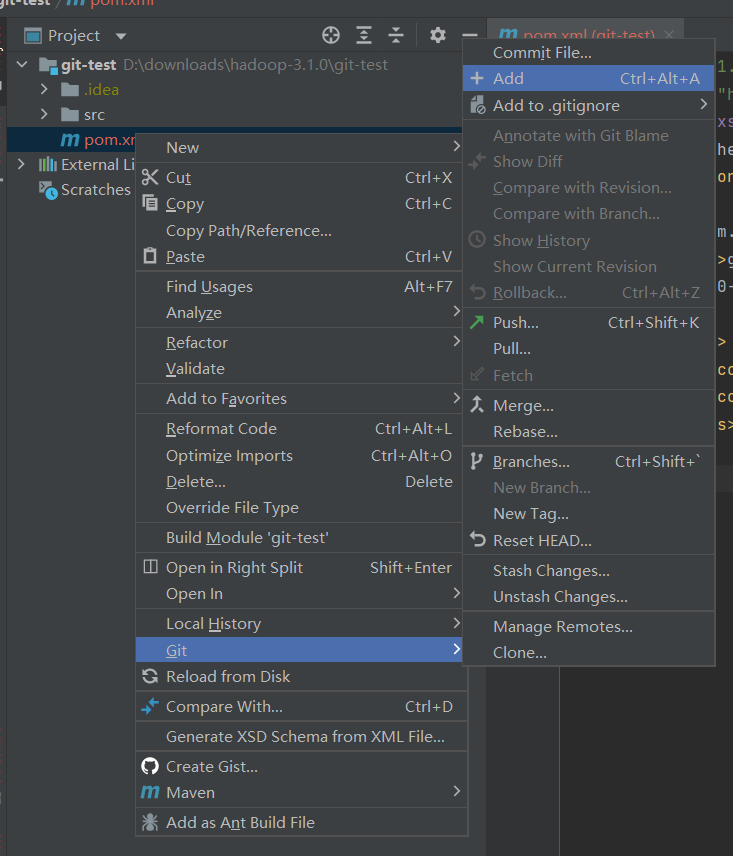
Add added to staging area:
The pom file turns green, meaning it has been added to the staging area and has not been submitted to the local library.
4.5 Submit to Local Library
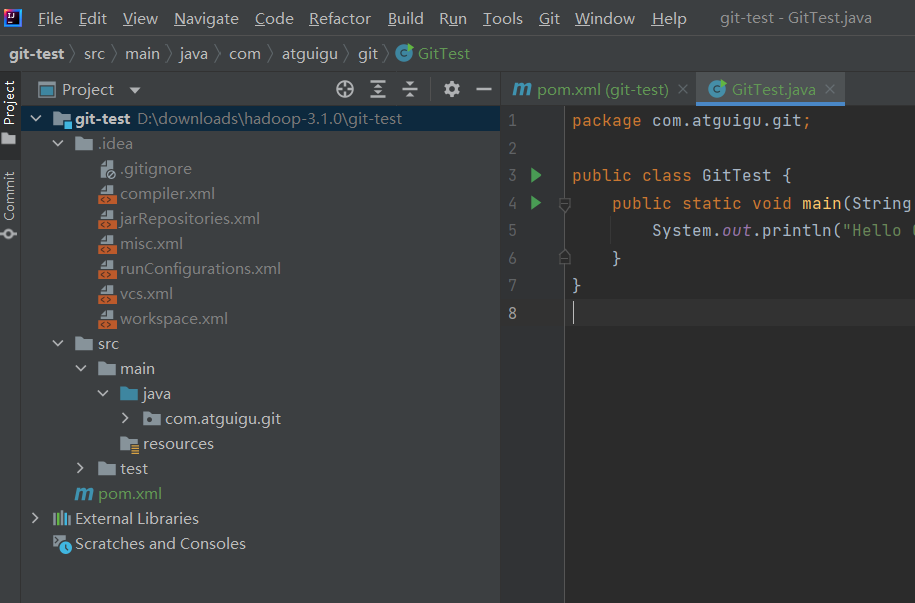
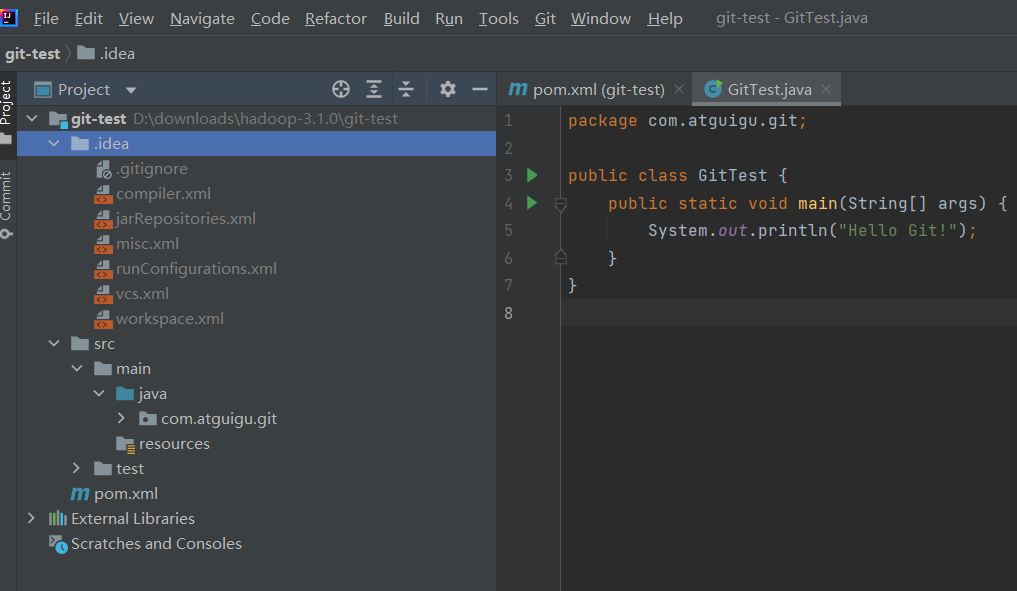
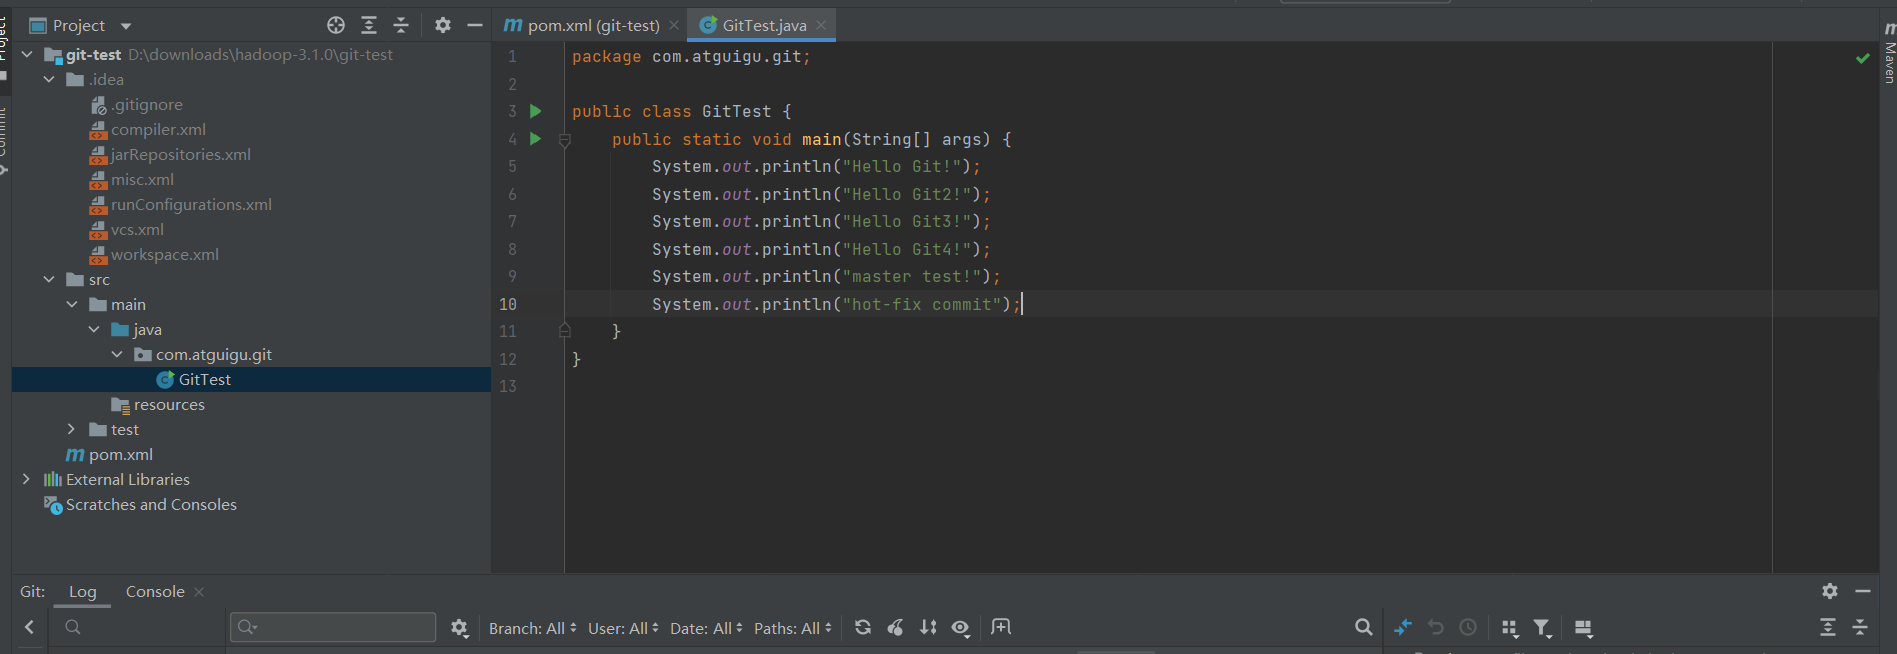
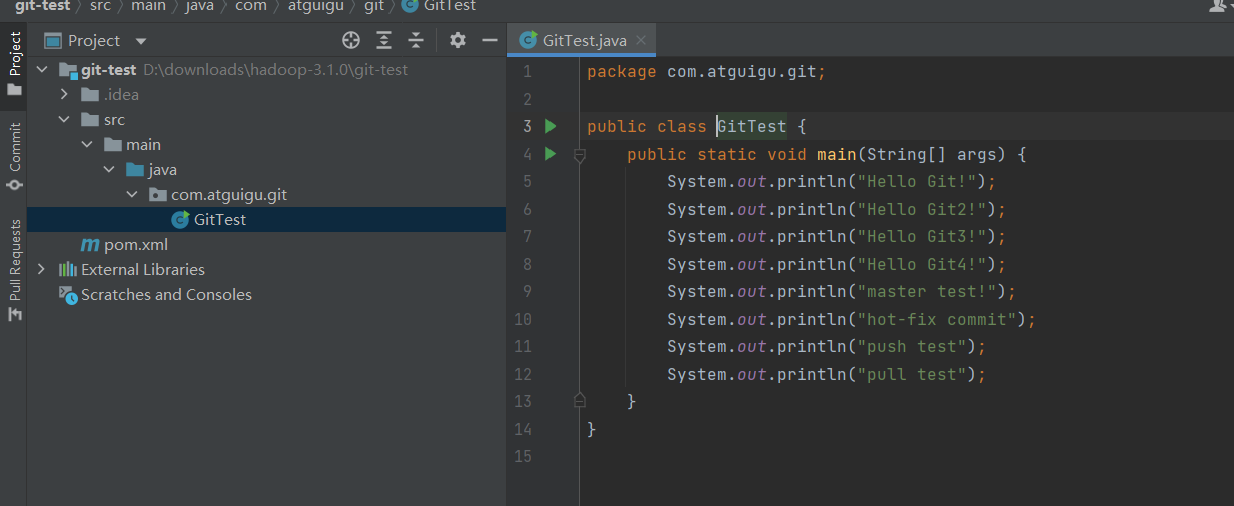
New GitTest class:
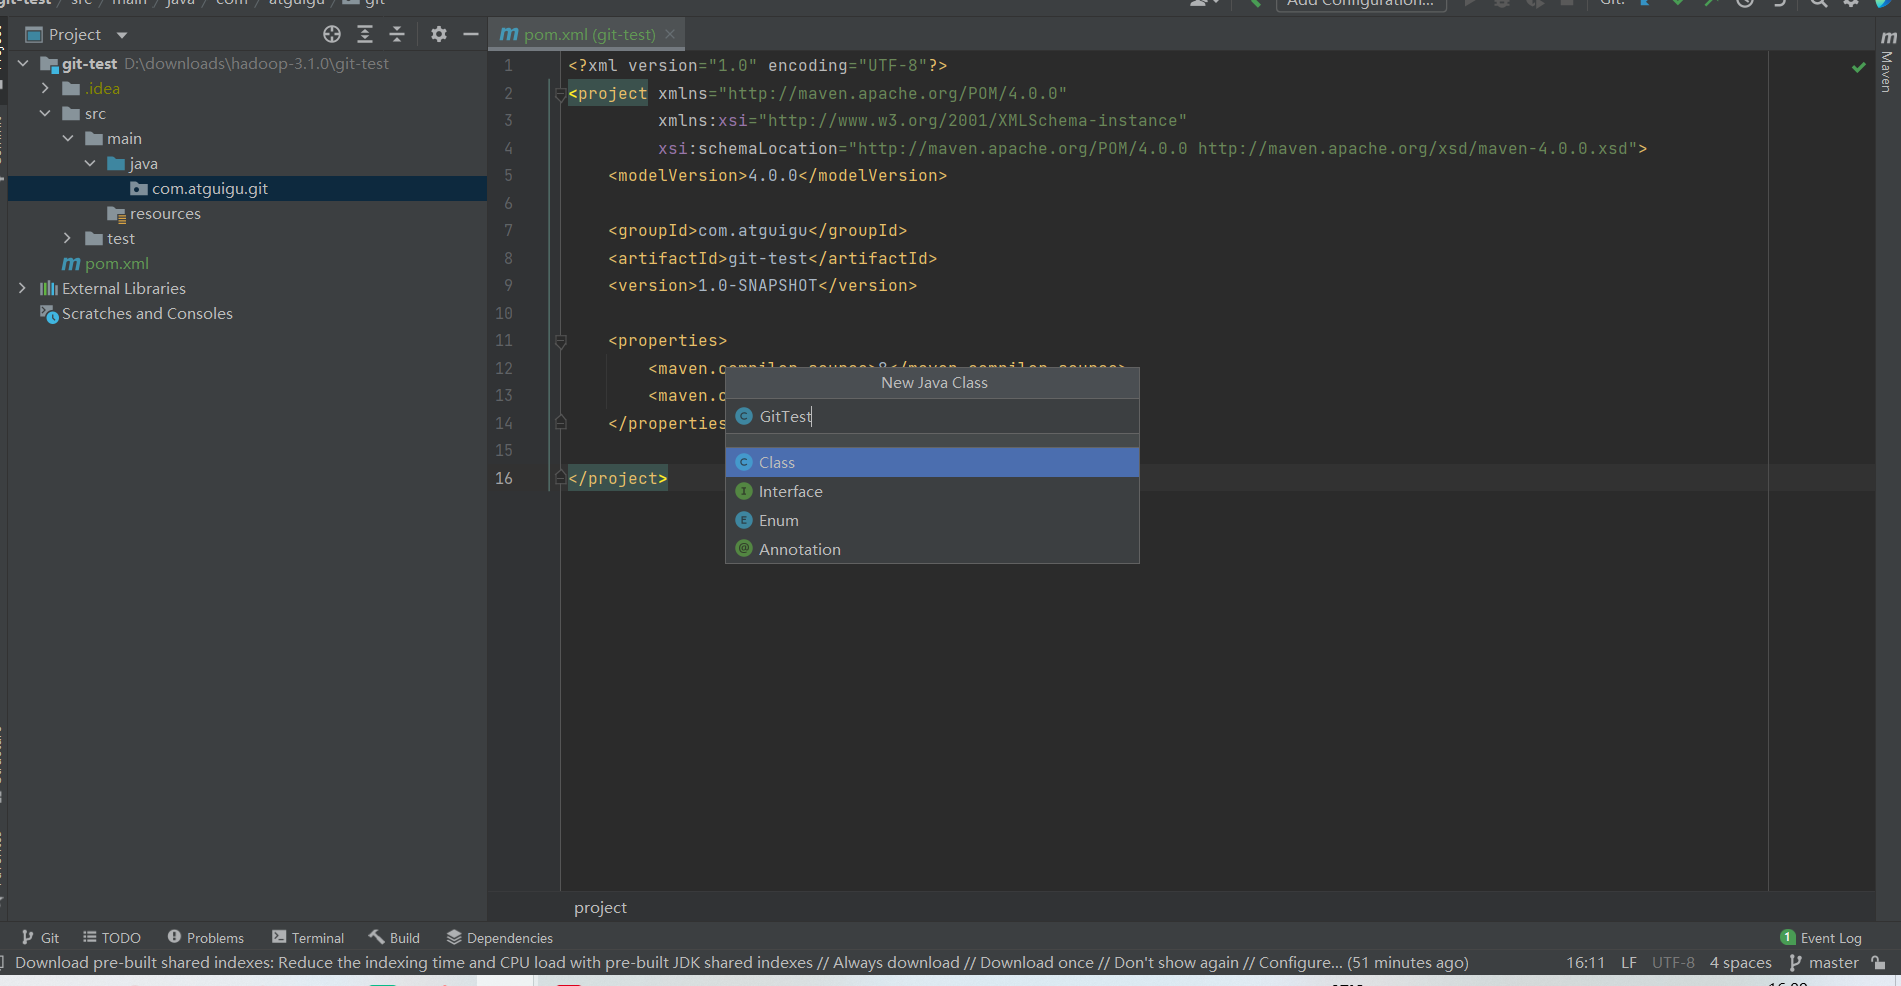
When the new class is created, IDEA asks if you want to add it to the staging area. Click Add to add and trace it automatically. If you don't want to click cancel, click Cancel here.

Write the appropriate code.
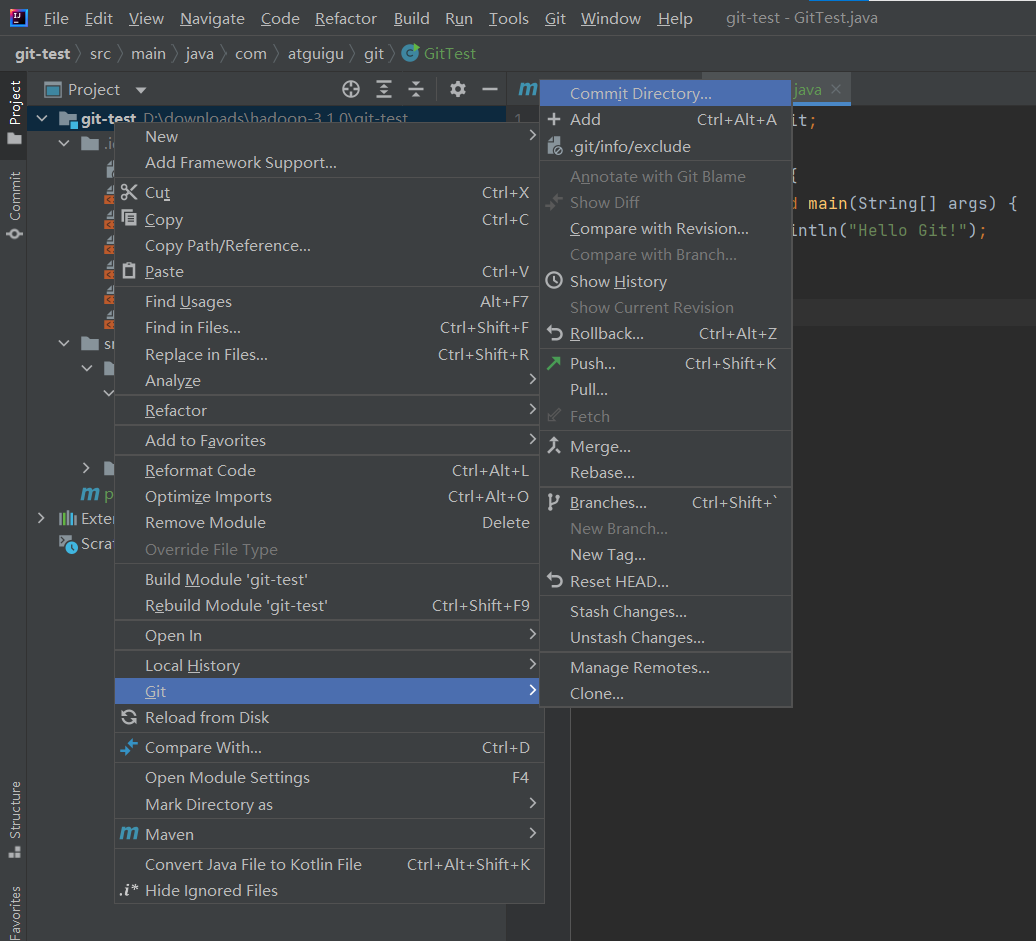
Submit the entire project to the staging area:
Note: Install first. ignore plug-in
install installation. ignore

Then submit the entire project to the staging area:
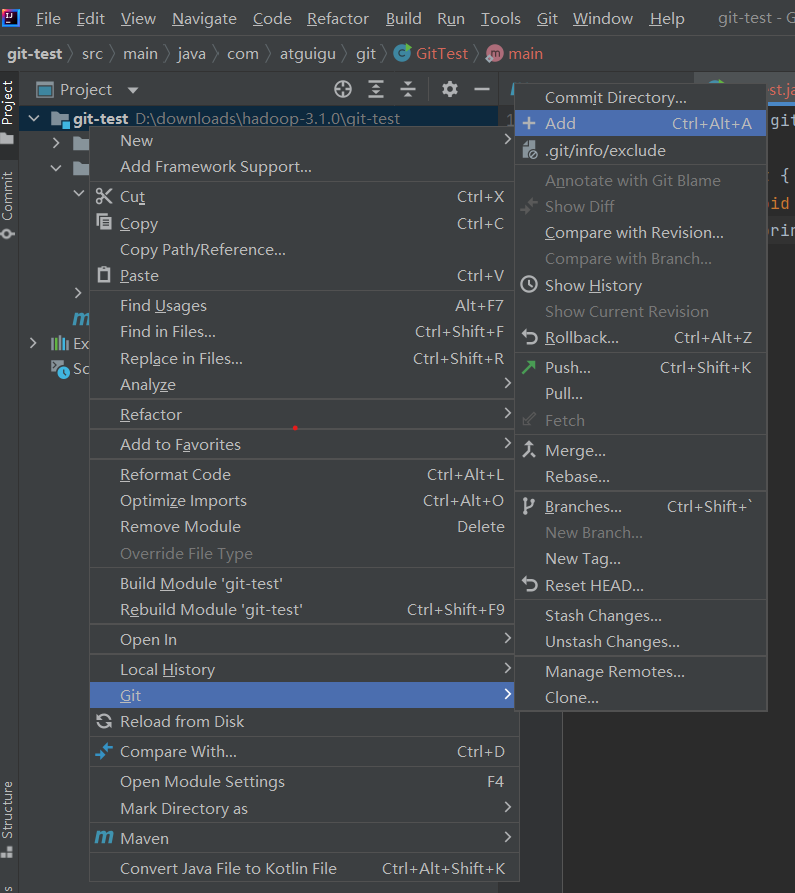
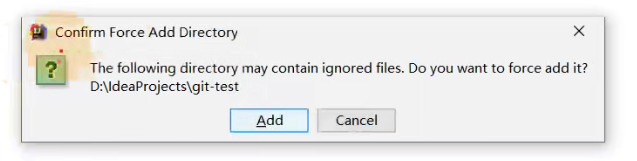
If confirm Force Add Directory appears, the previously configured ignore files are valid, click cancel here, that is, you do not need to add these ignore files.
As follows, the ignore file is gray, indicating it was not traced.
Submit the project to the local library:
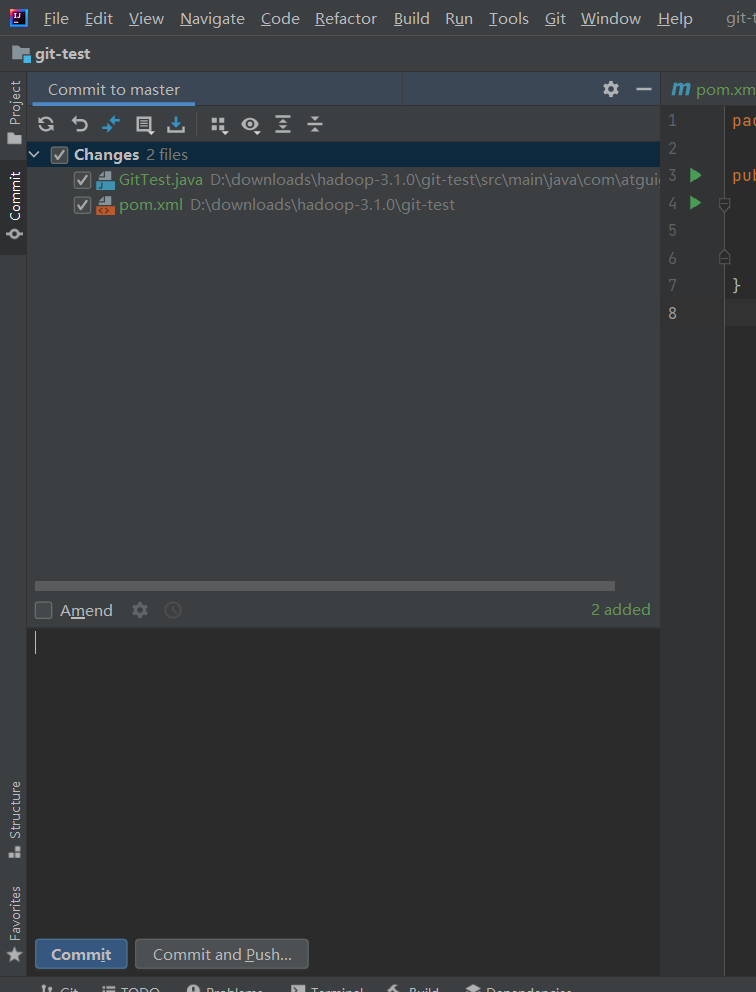
Submit: first commit
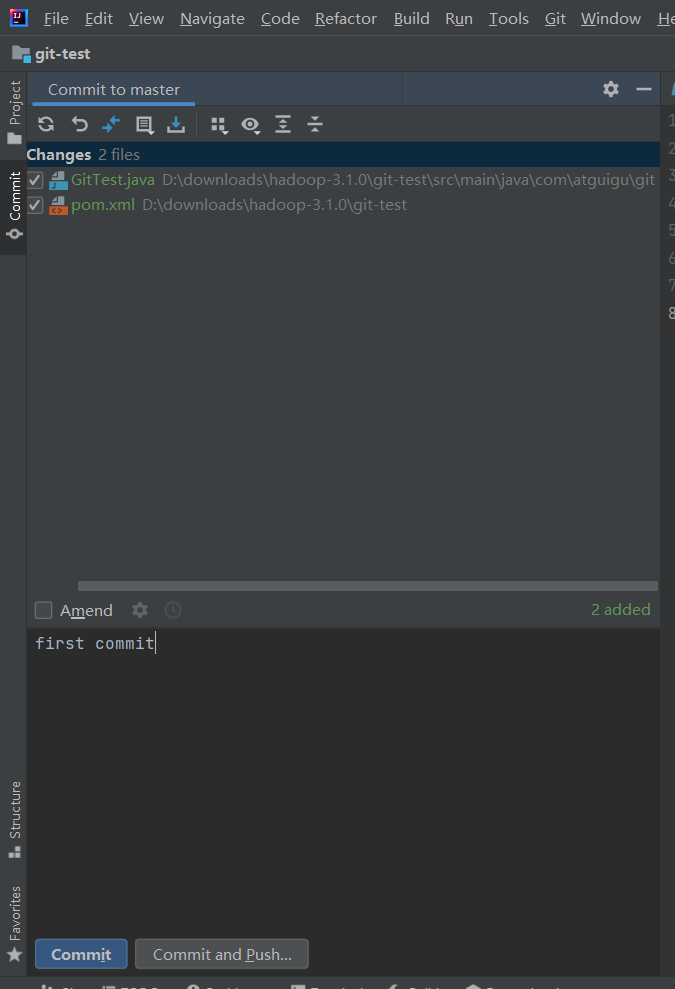
After submission
Corresponding green turns black, submit to local library successfully!
4.6 Change Version
Some of the code was modified as follows:
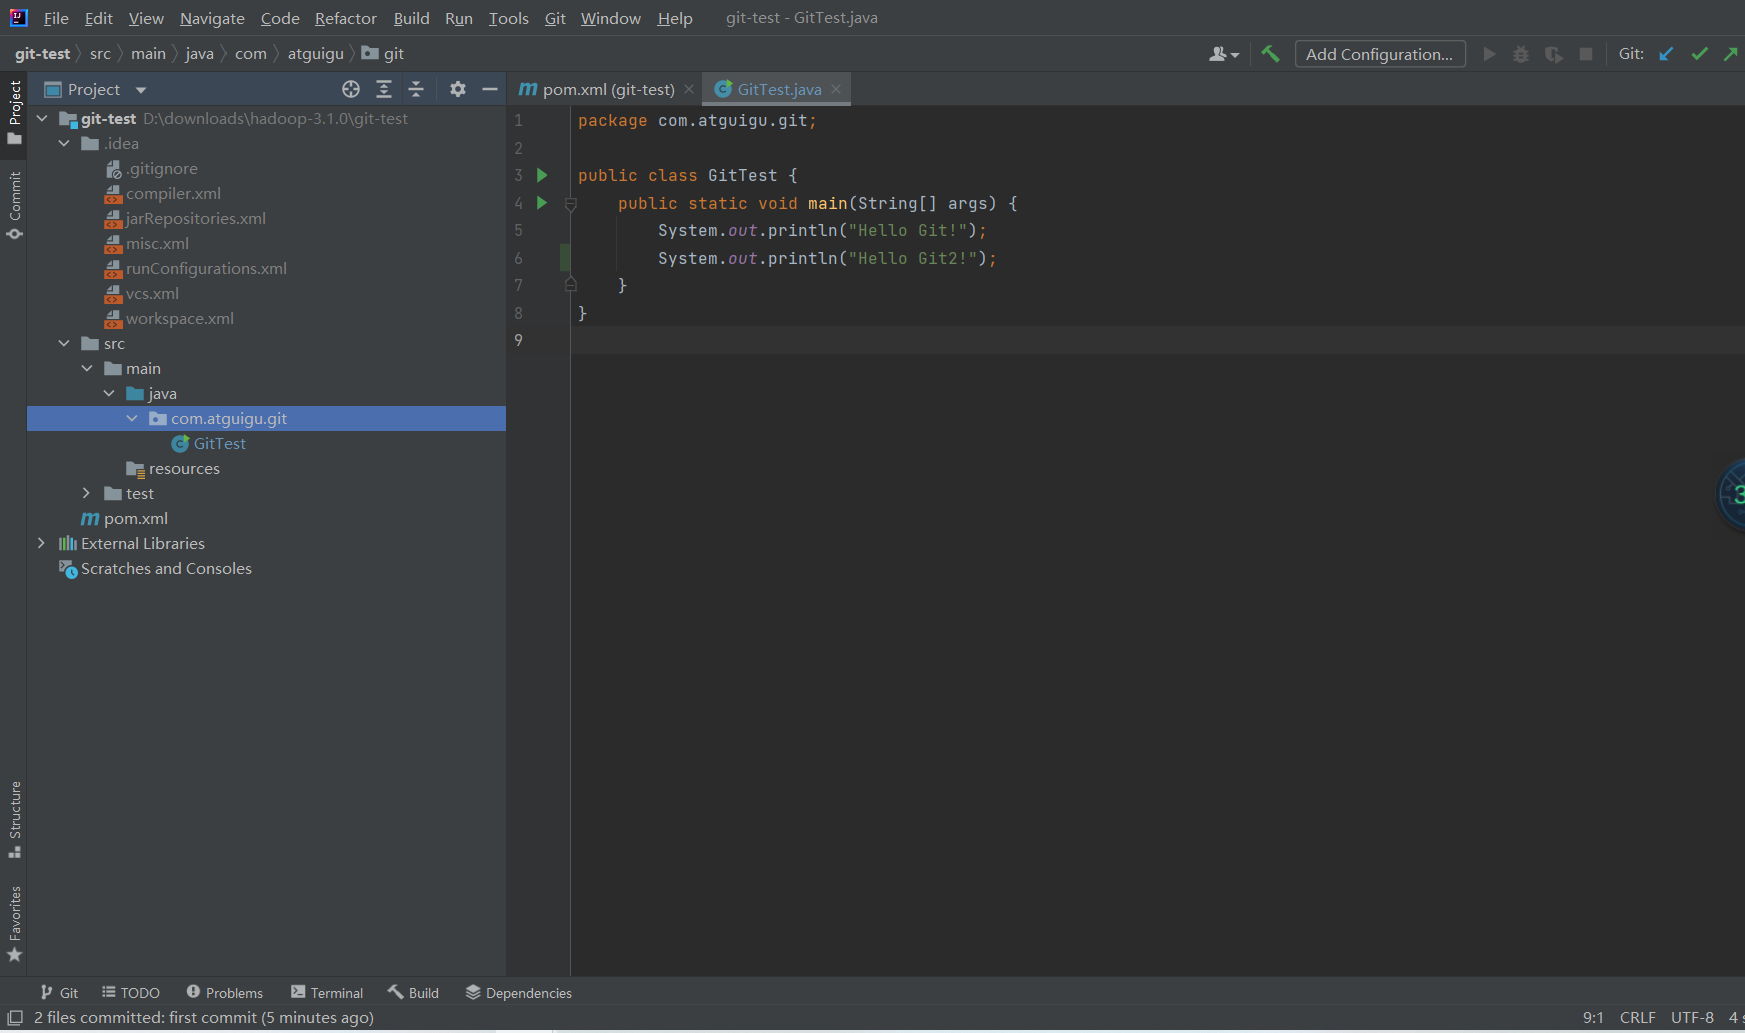
The GitTest class turns blue, indicating that it has been tracked but modified, and needs to be added to the staging area and committed to the local library (because it has been tracked and can be committed directly to the local library). Detailed steps are as above and modified to second commit:

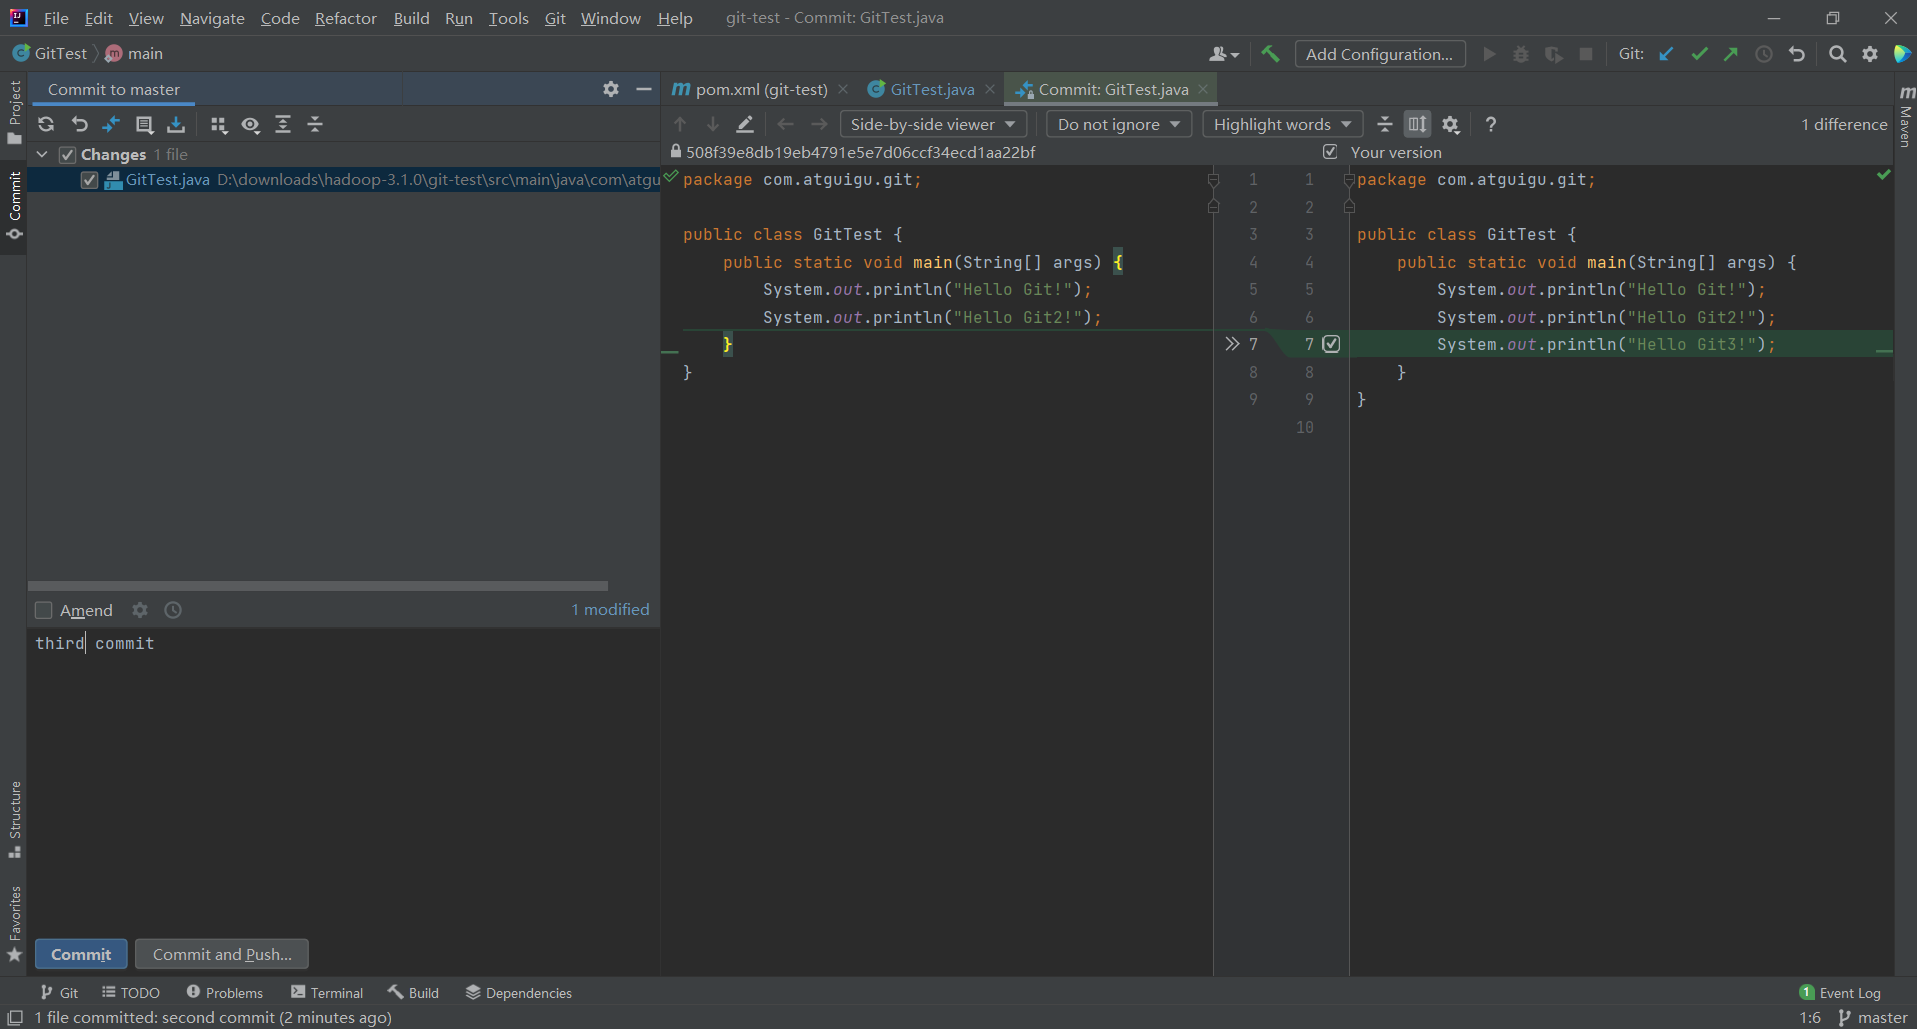
Modify the code again as follows:
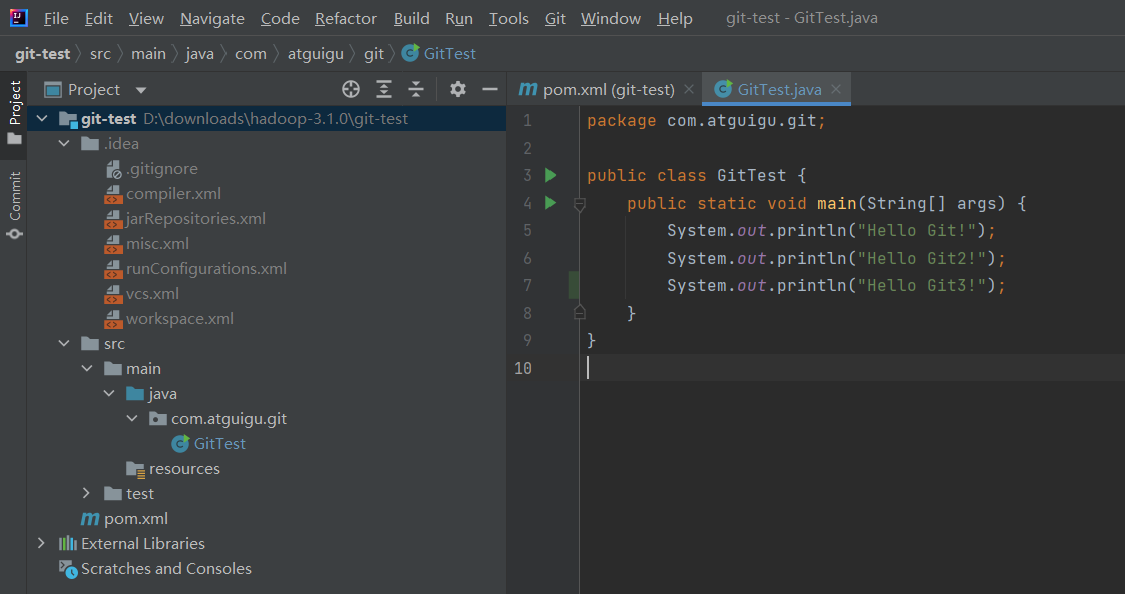
Submit third commit:
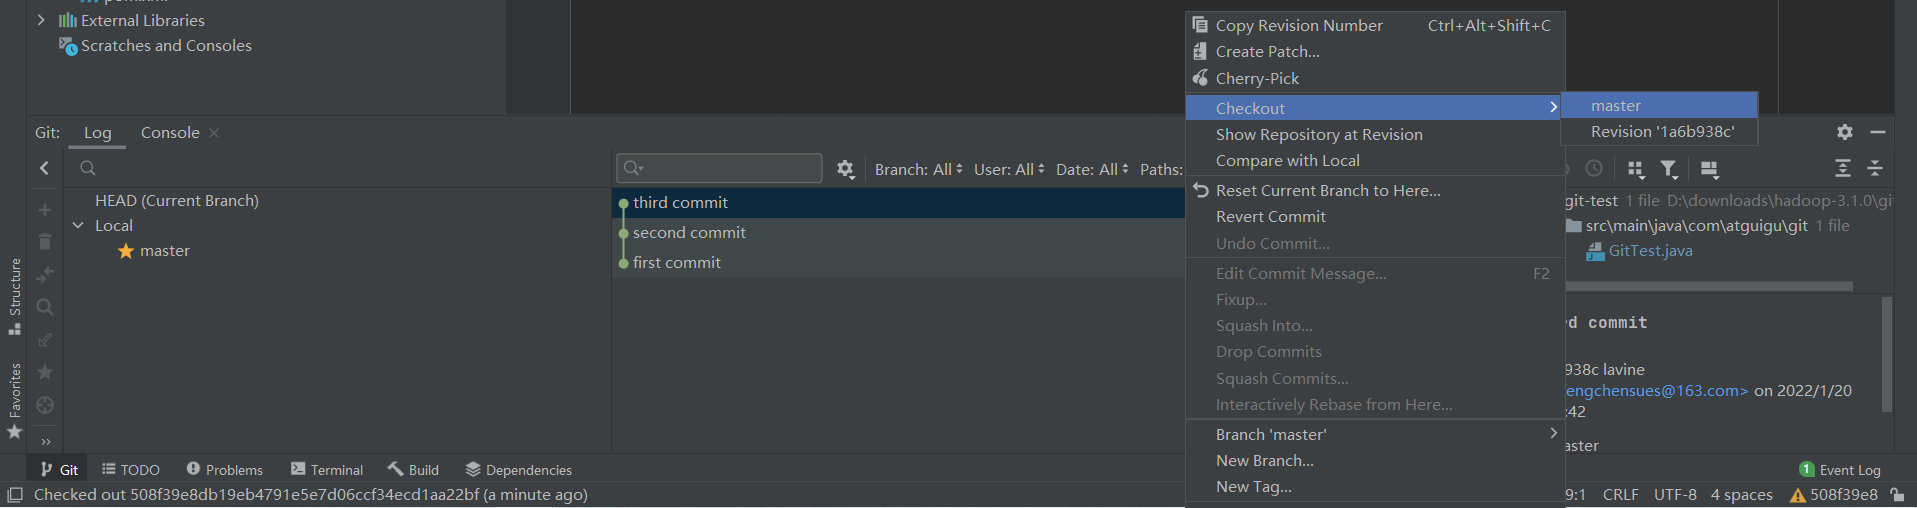
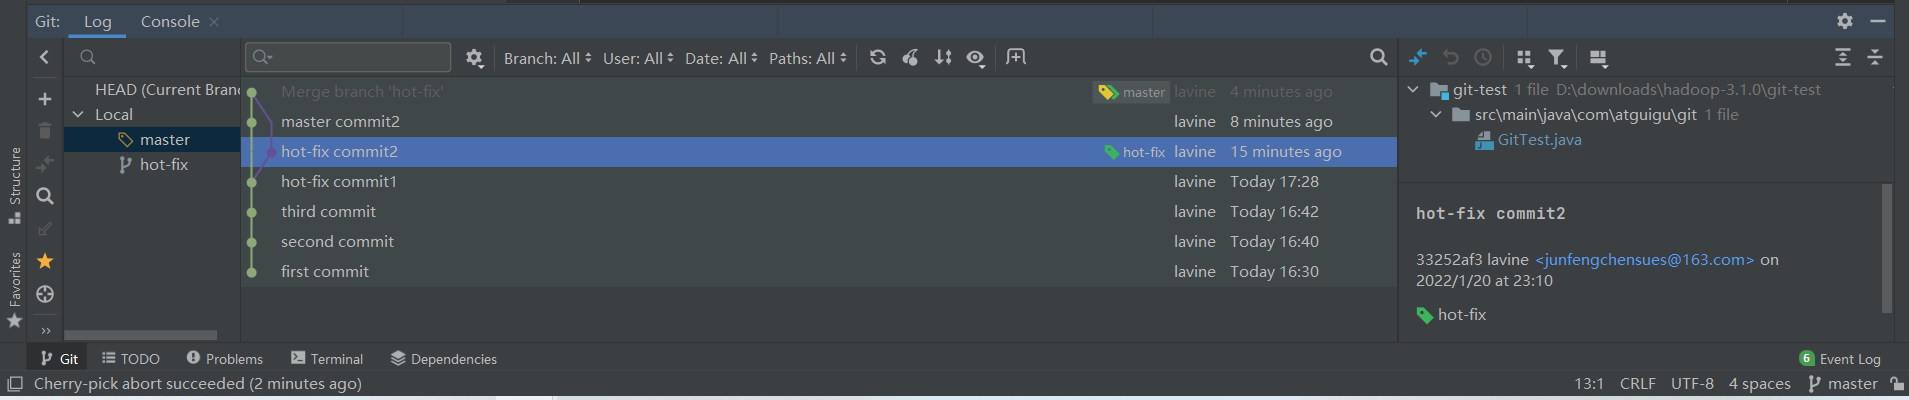
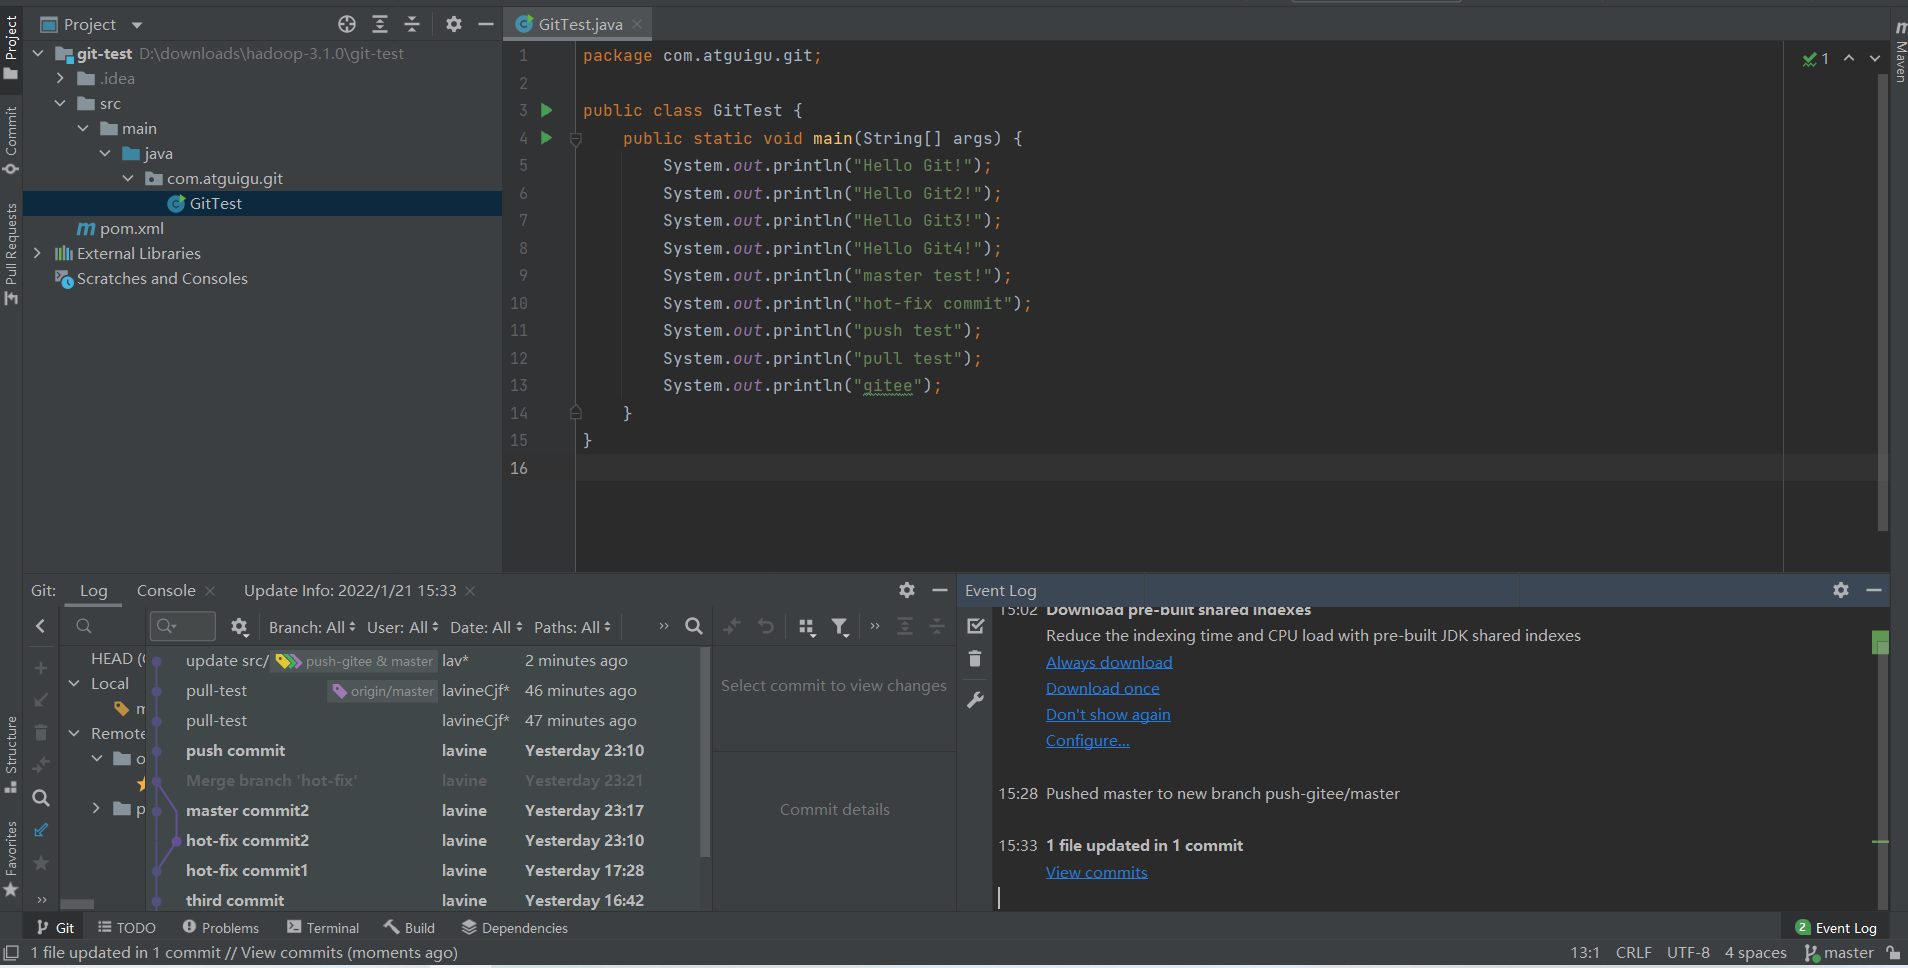
View the current version:
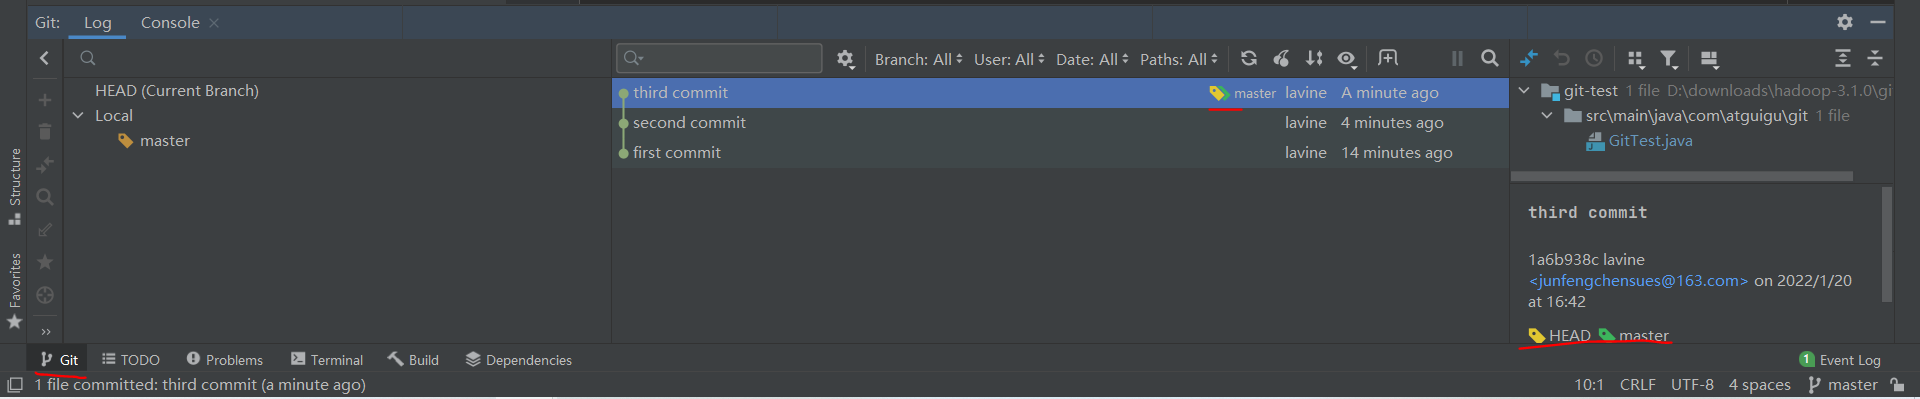
The green pointer represents the current master branch's pointer, and the Yellow pointer represents the current interface's header pointer.
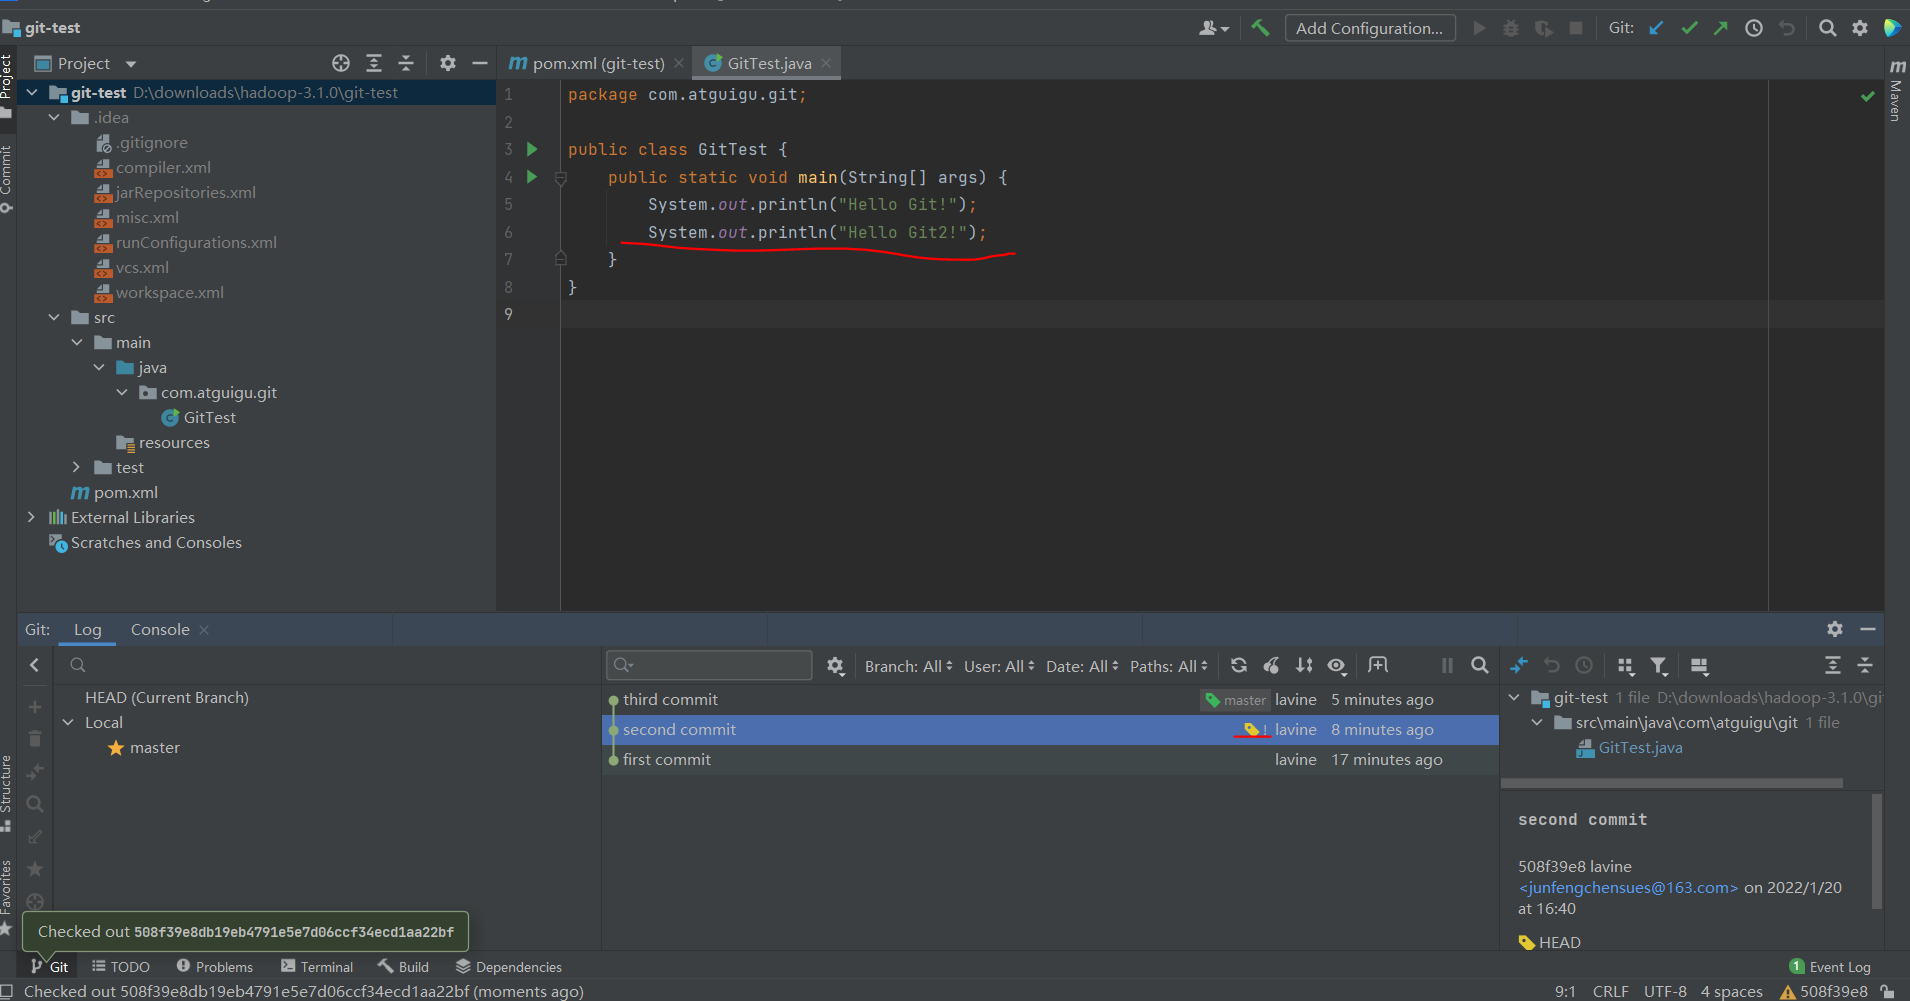
Switch to the second version:
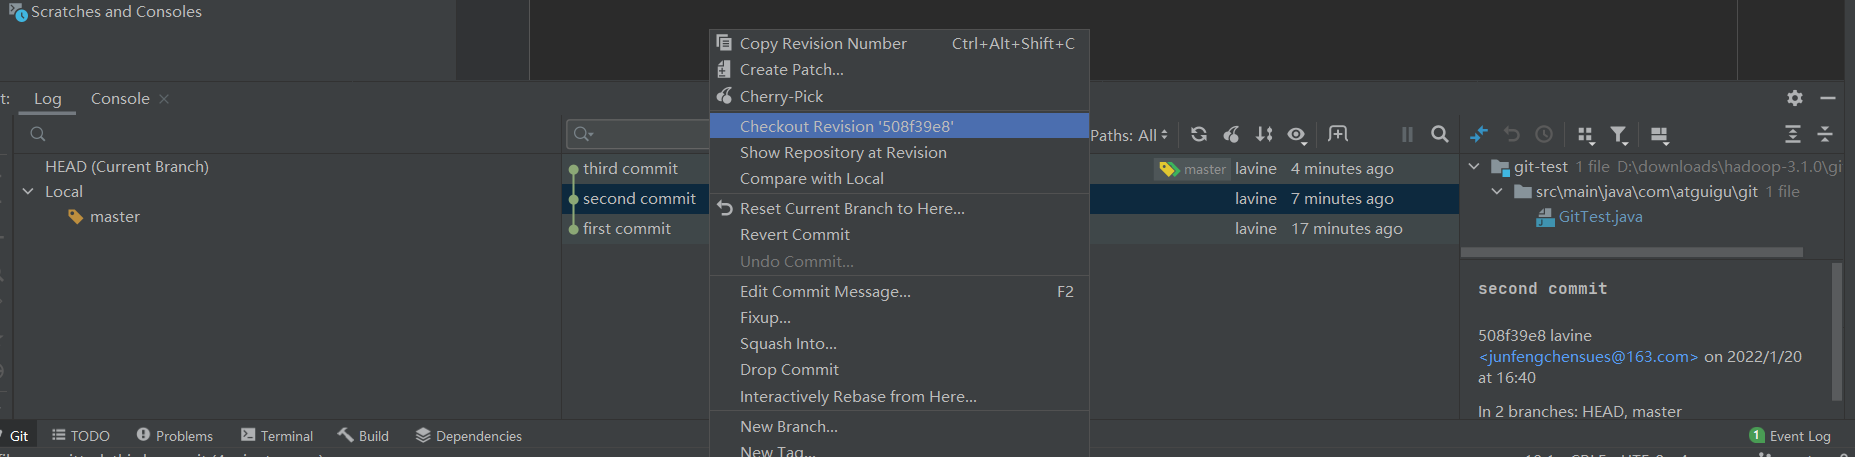
This brings you to the second version of the code:
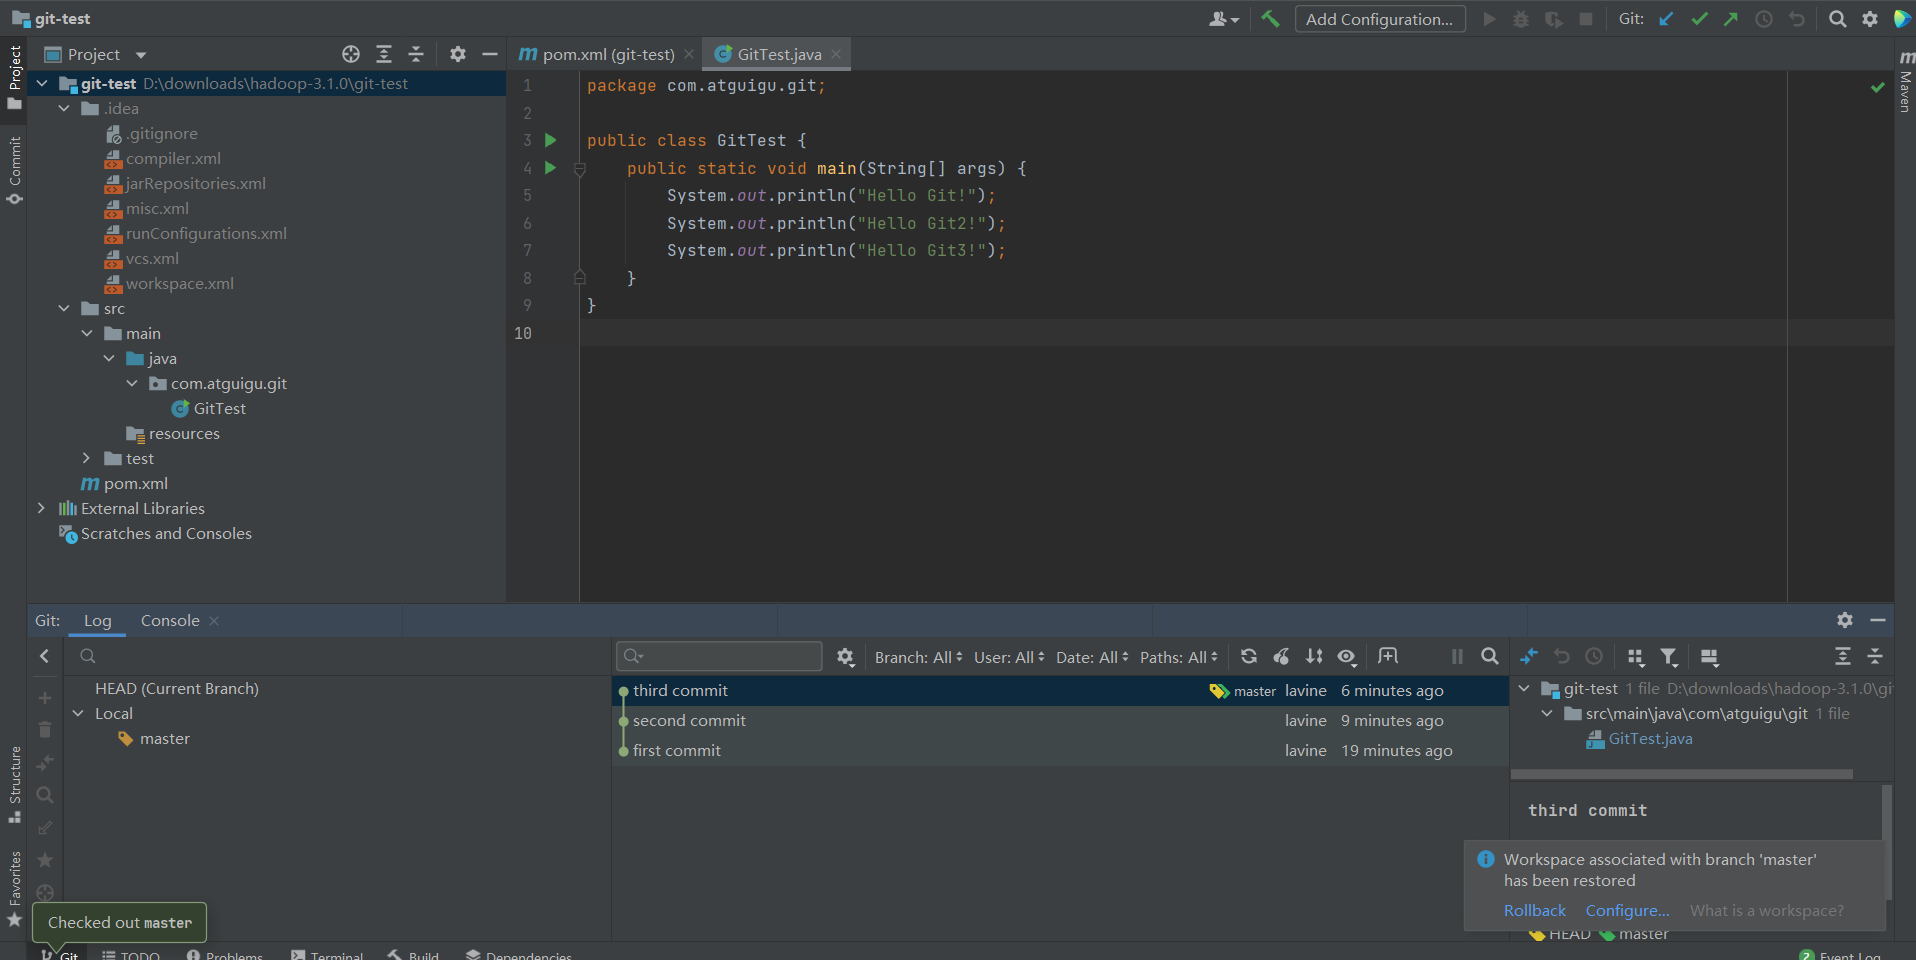
Cut back to the third version:
4.7 Branch creation
Method 1:
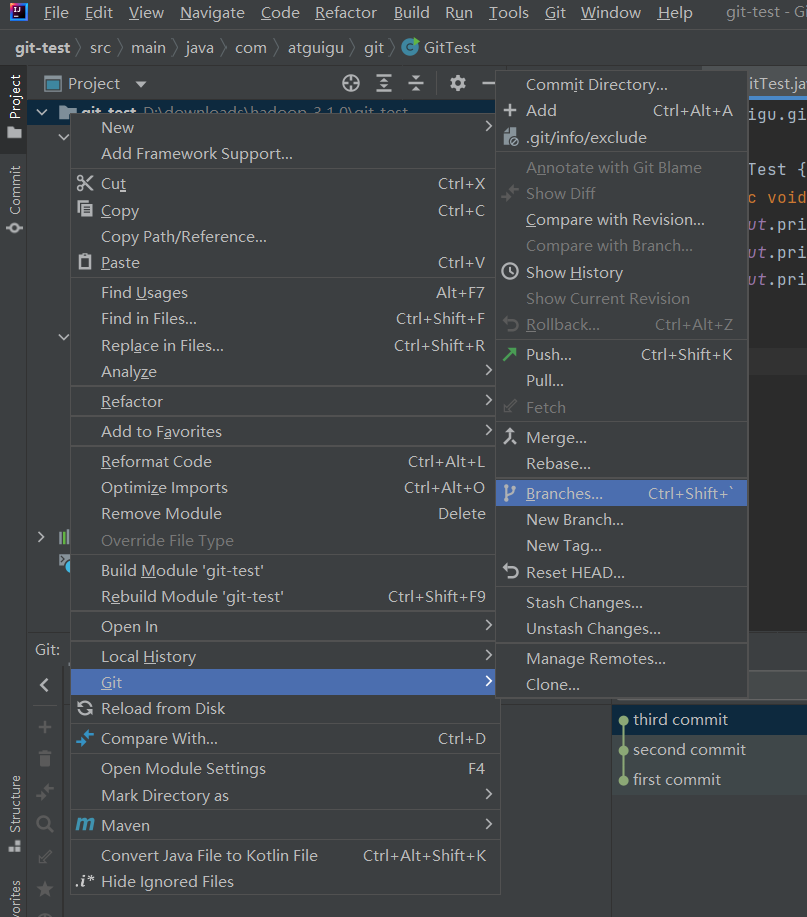
Method 2:
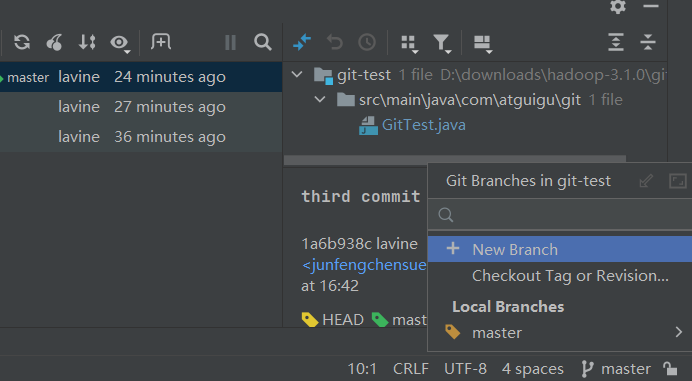
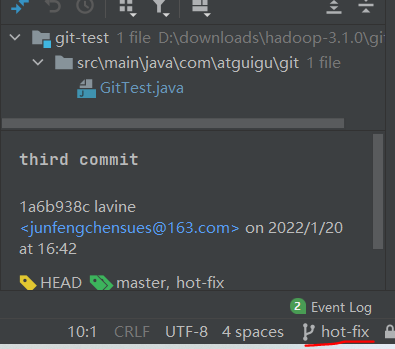
Create hot-fix branch:
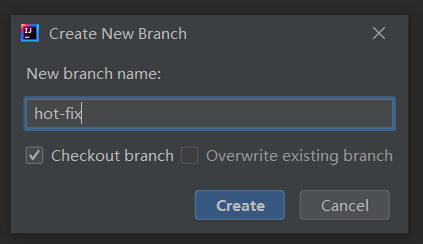
At this point in the hot-fix branch:
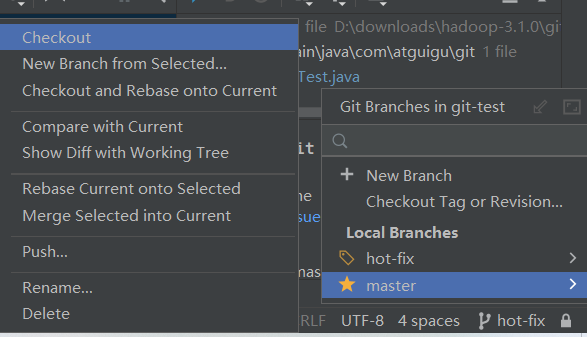
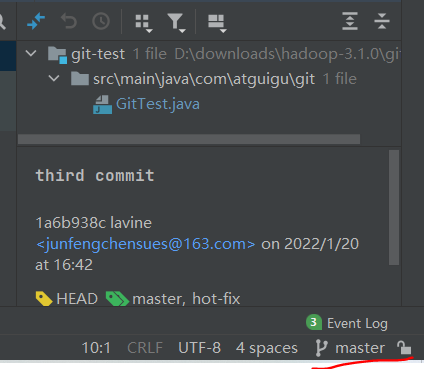
4.8 Switching Branches
Checkout!
4.9 Merge Branches
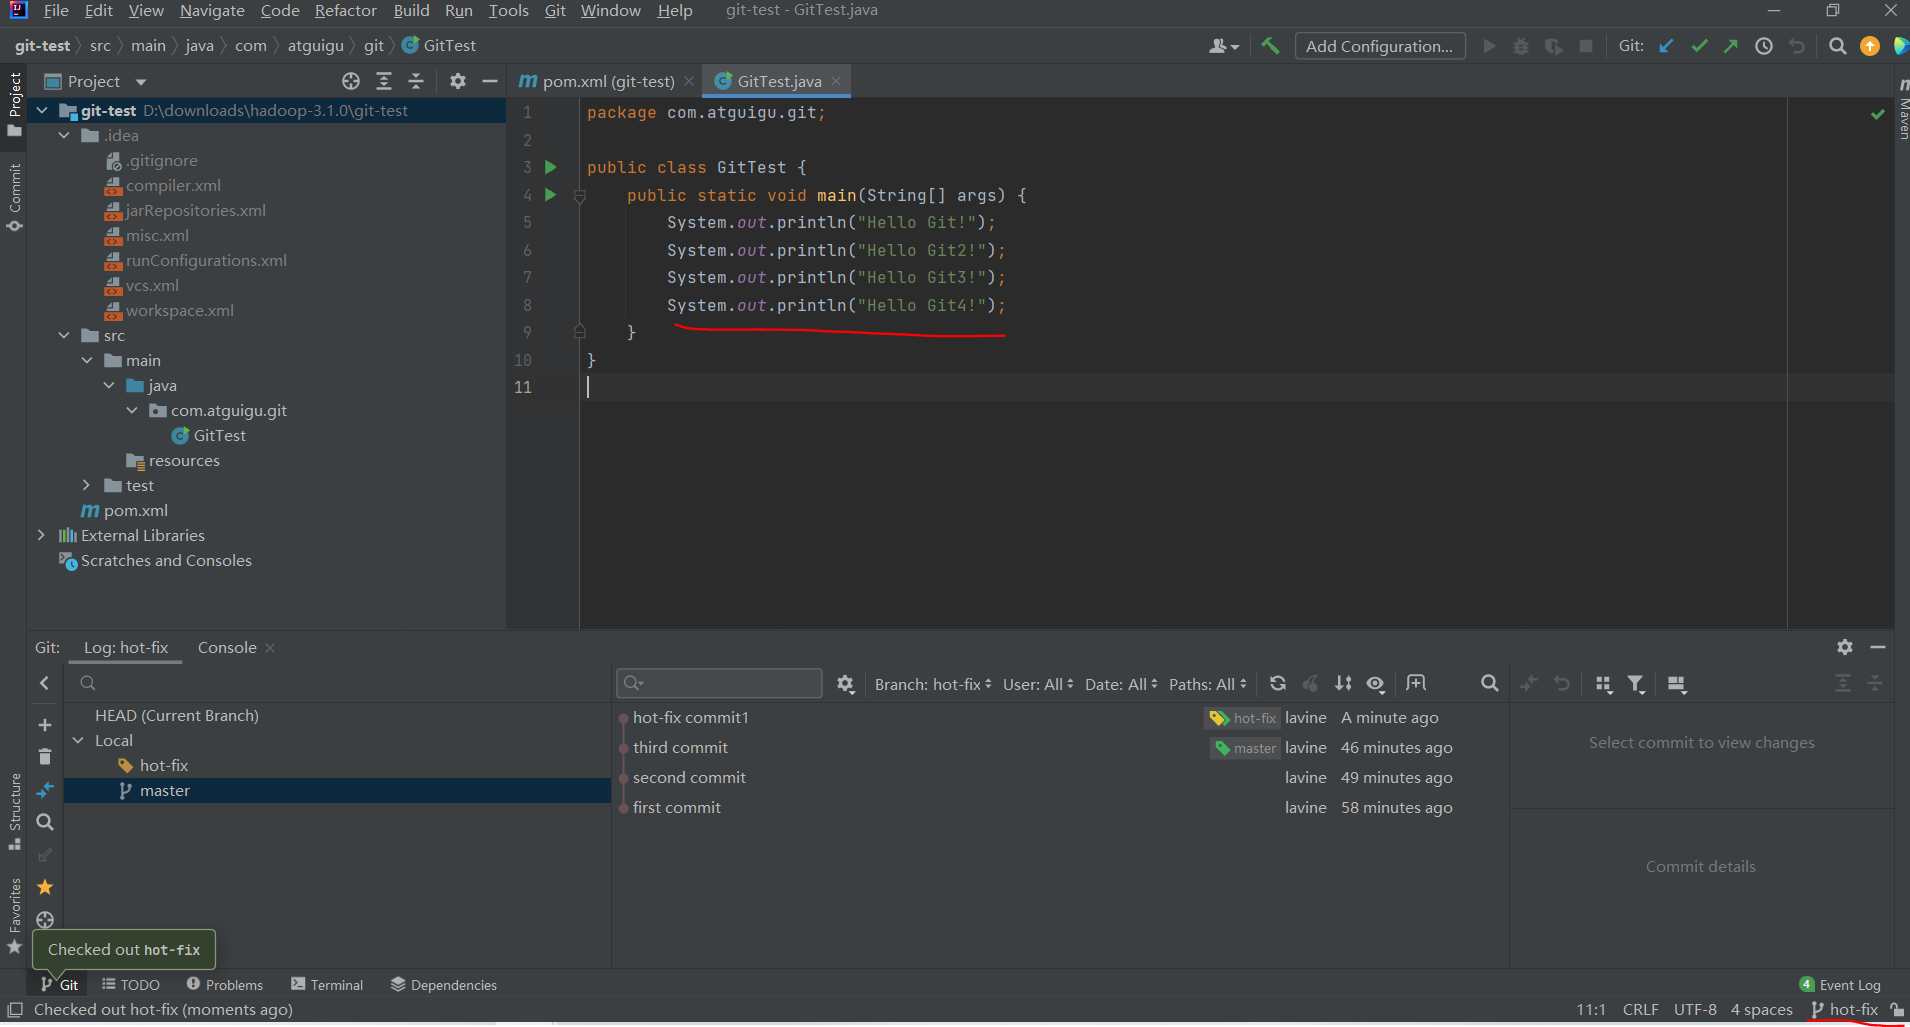
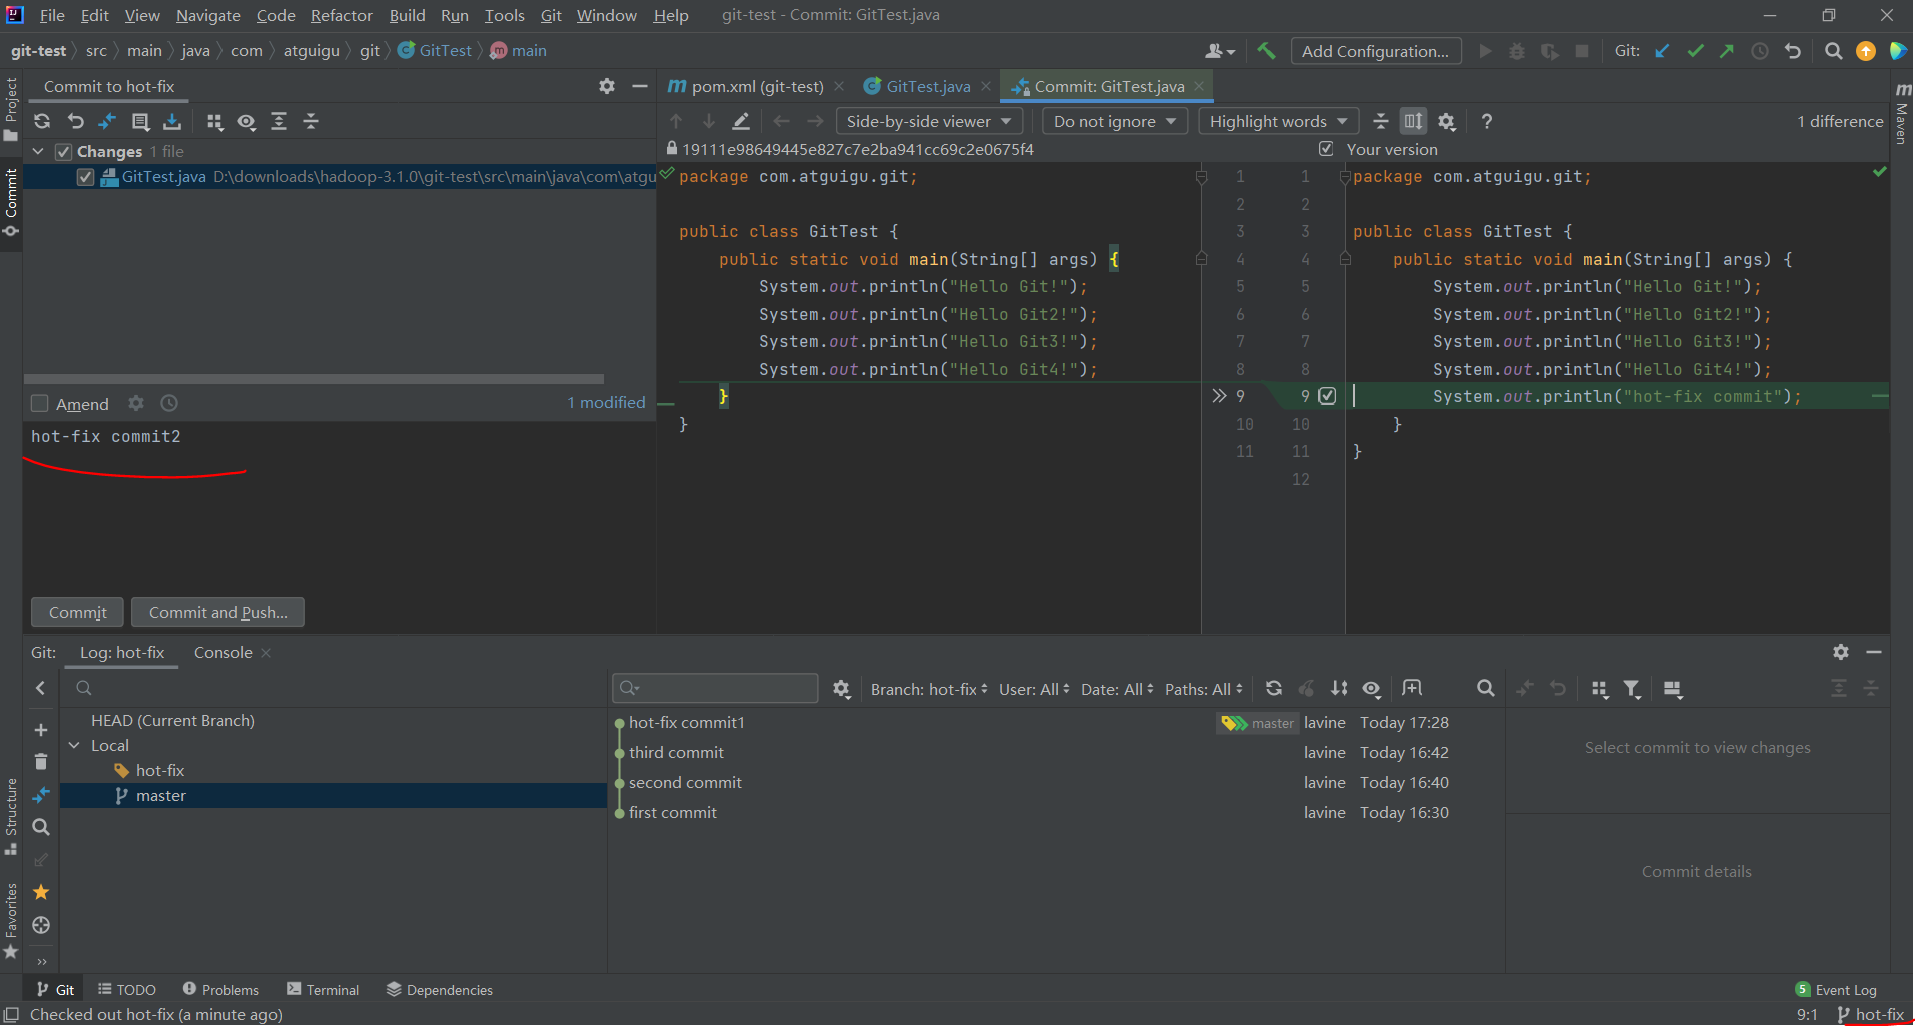
Switch to the hot-fix branch, modify the GitTest class as follows, change the code to blue, and submit it to the local library hot-fix commit1:
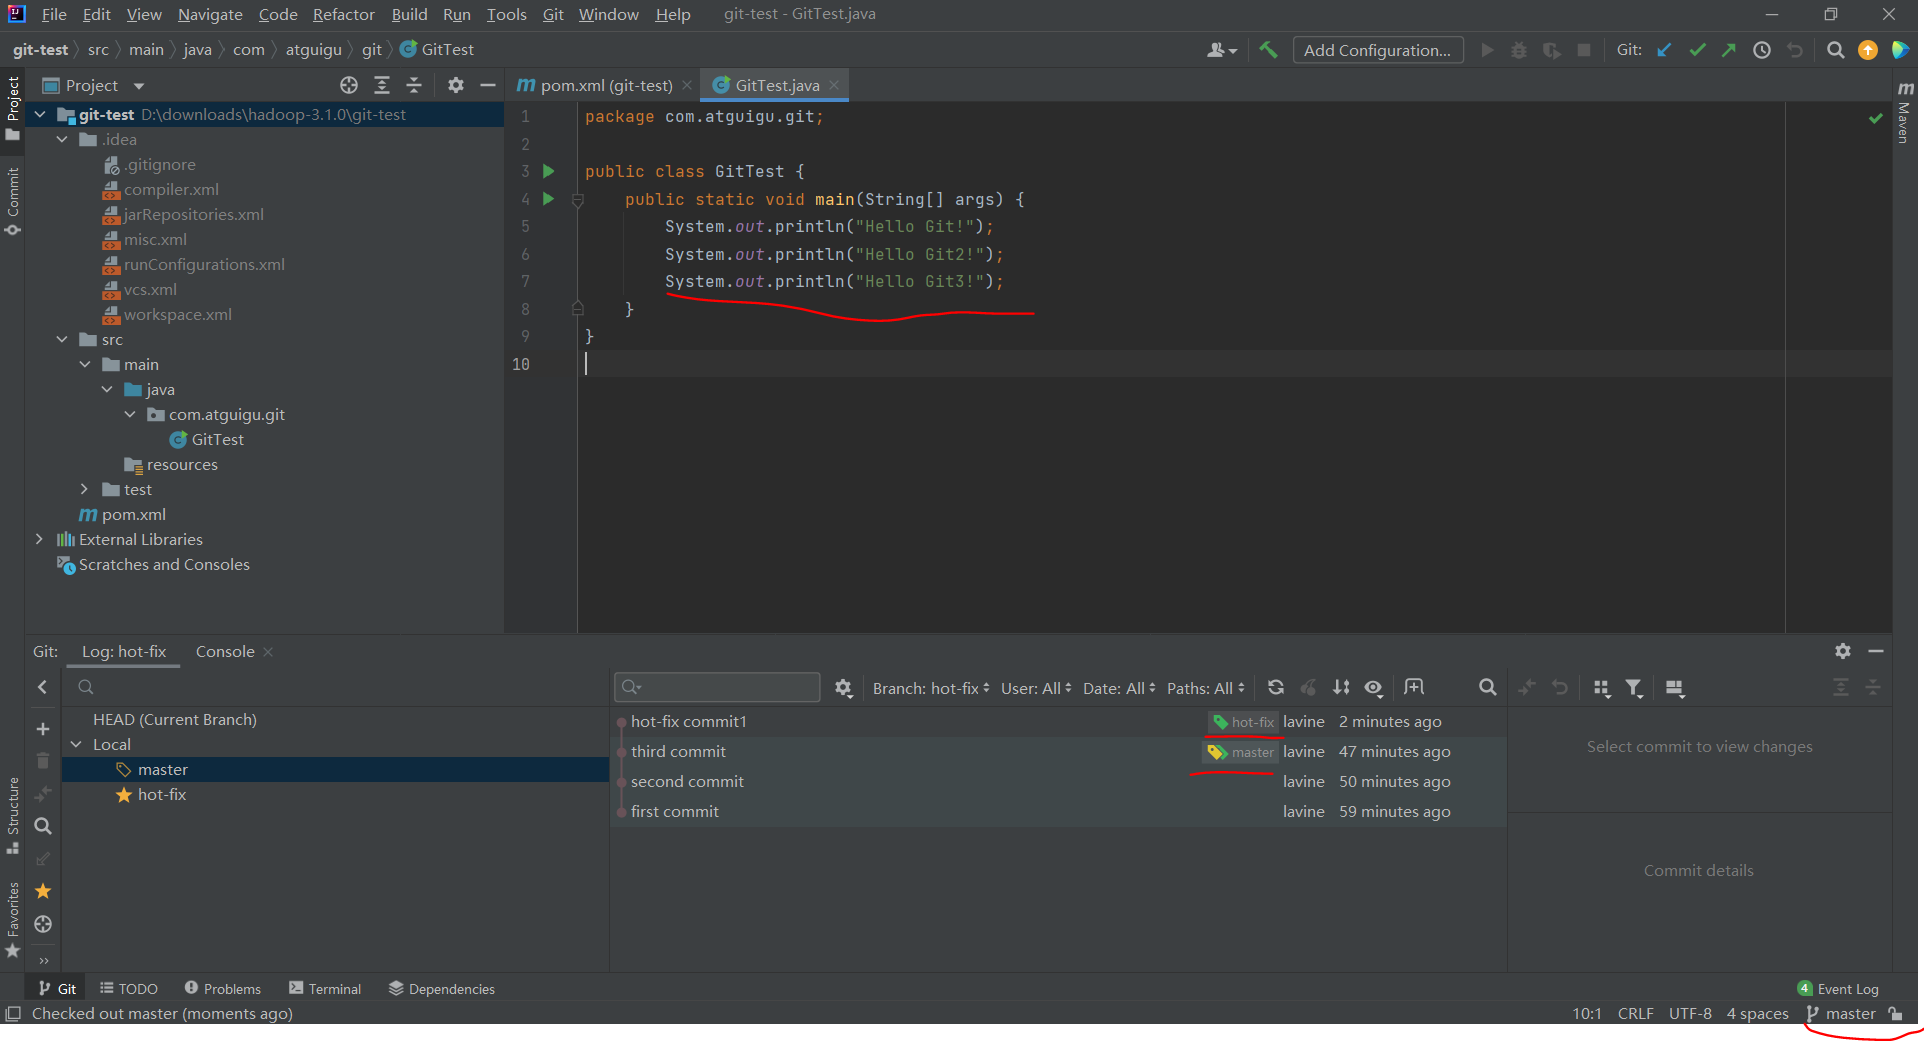
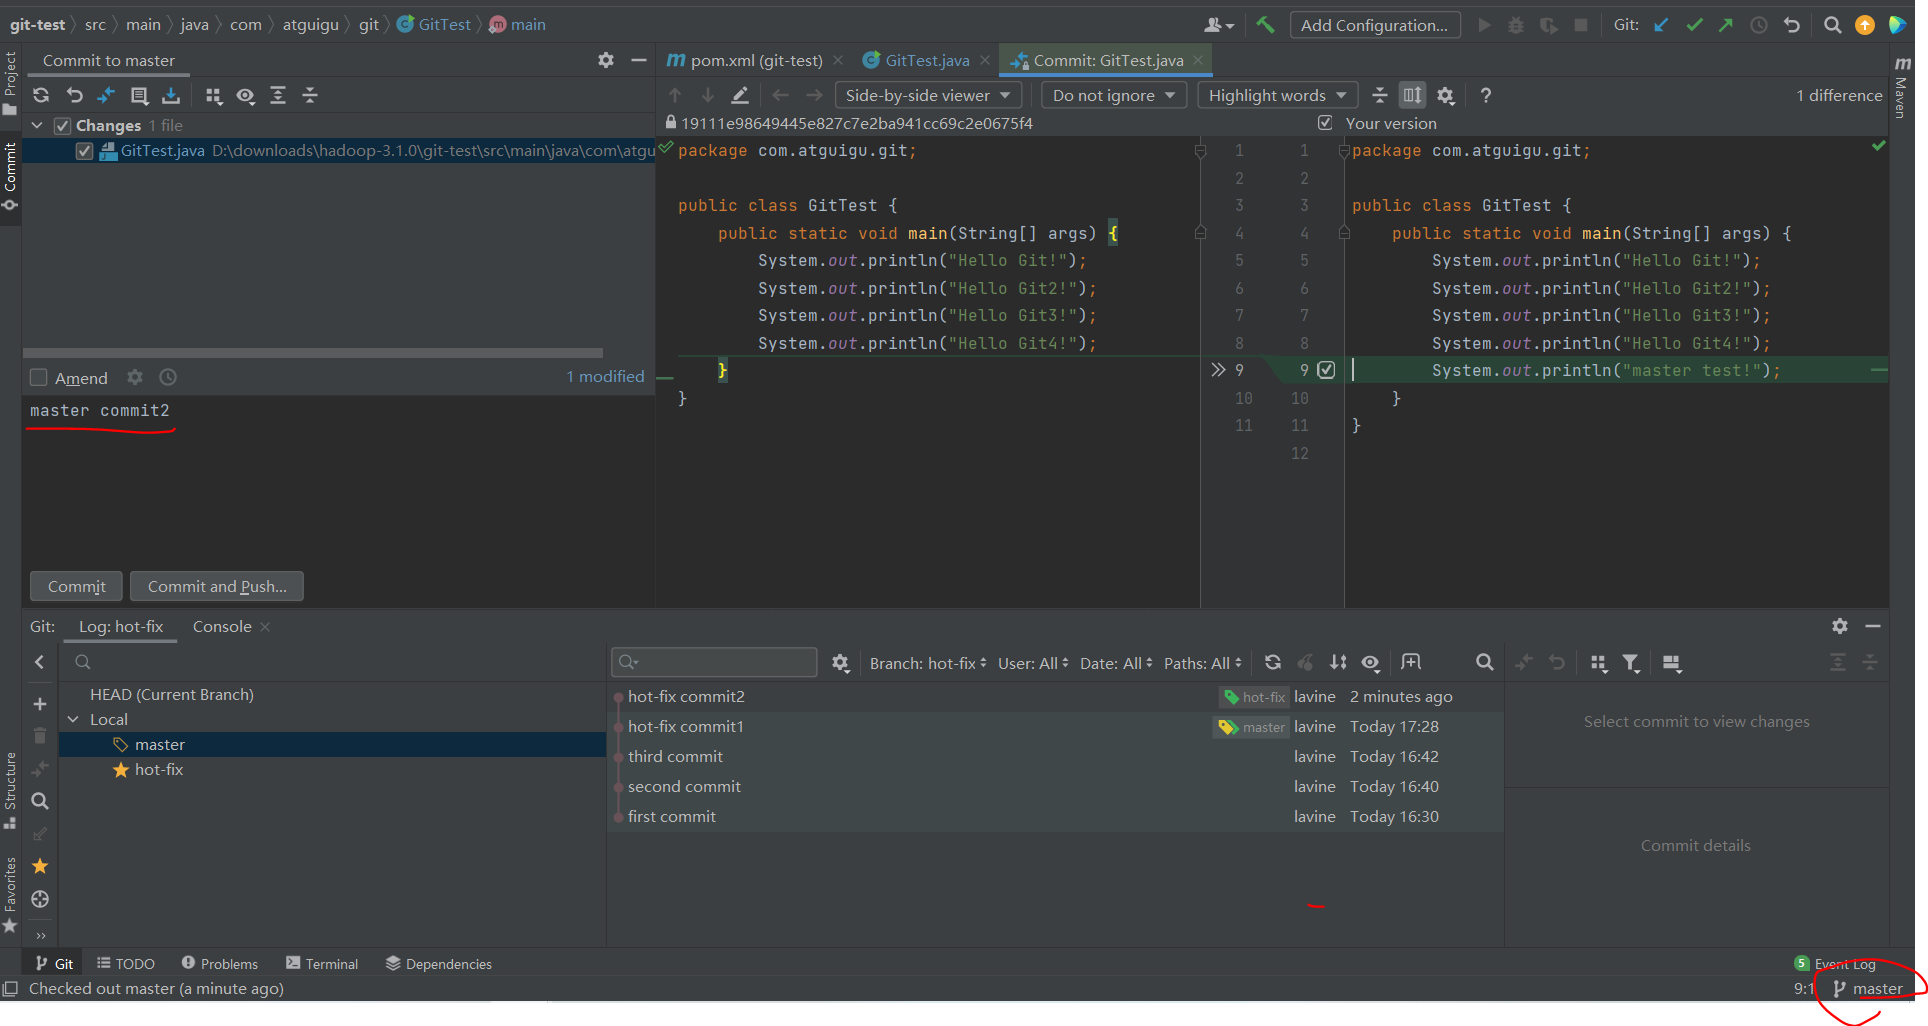
Switch back to master branch:
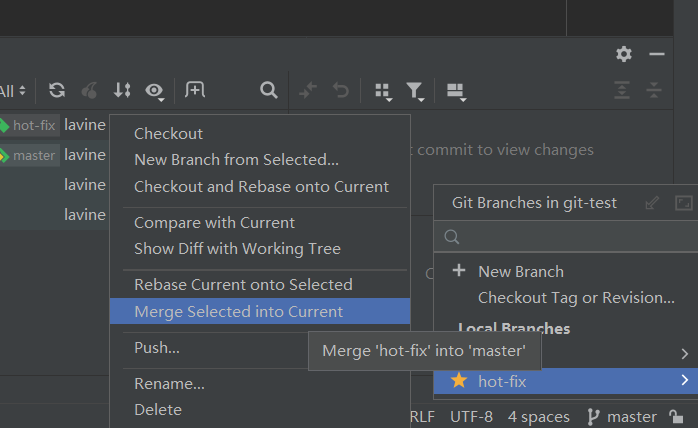
Merge hot-fix branches into master branches:
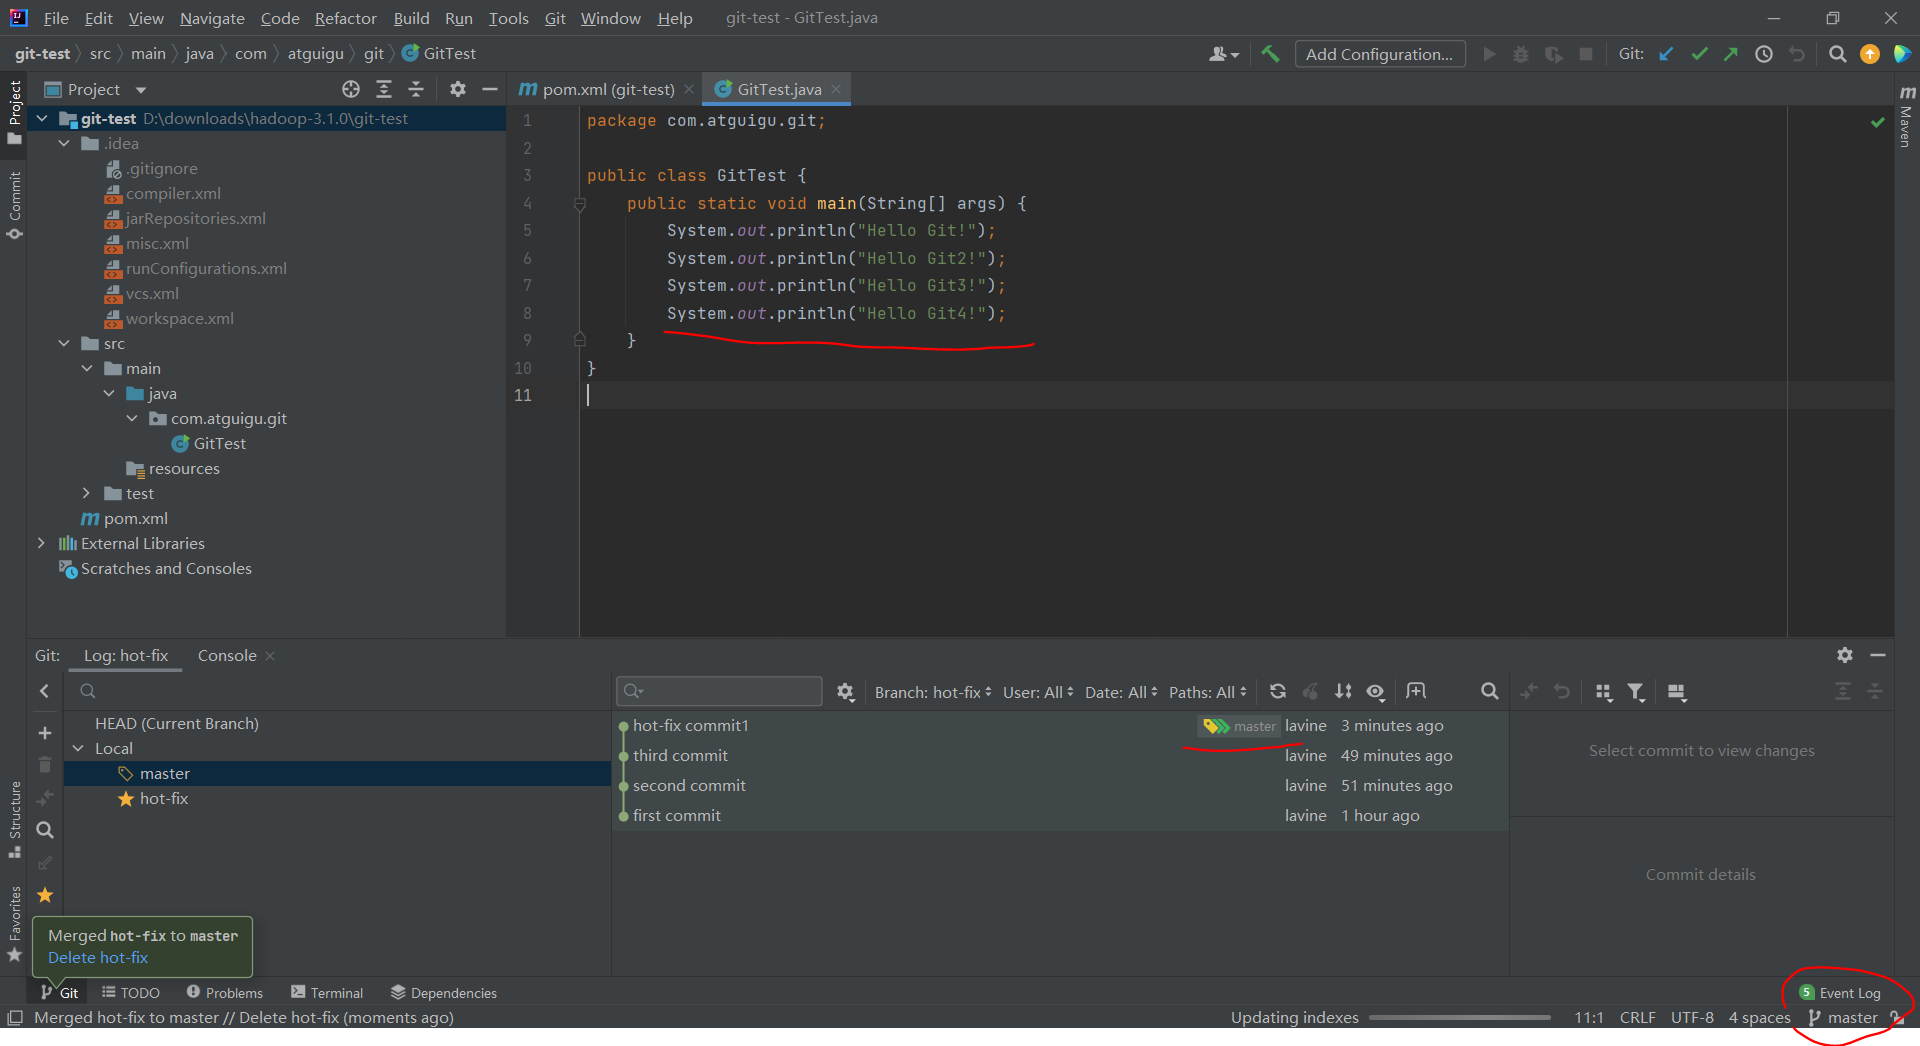
Merge branch successful!
4.10 Conflict Resolution
Modify the code on the hot-fix branch and submit it to the local library:
Switch back to the master branch, modify the code, and submit it to the local library:
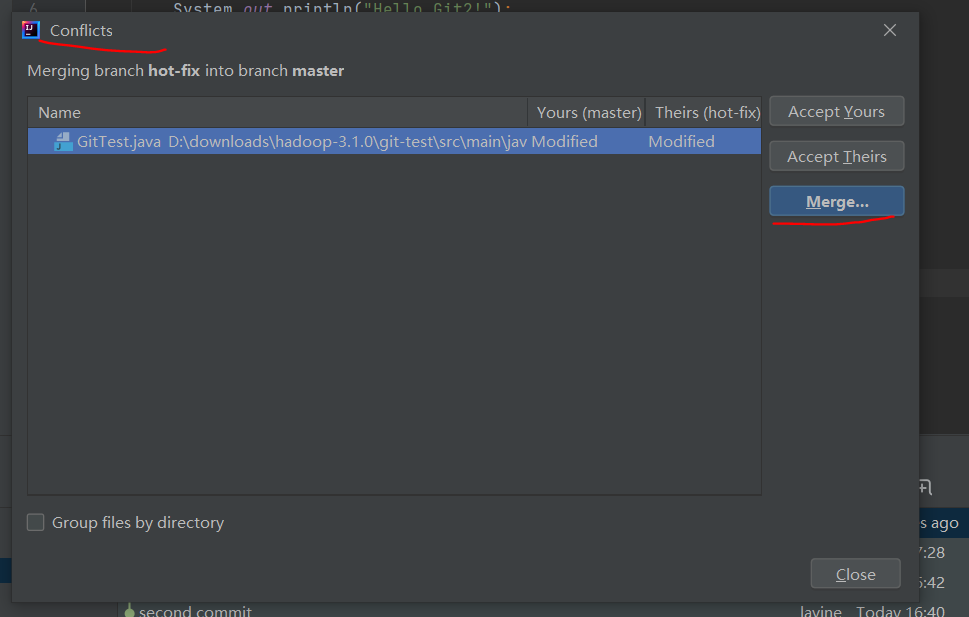
Conflicts occur when hot-fix branches are merged onto master branches:
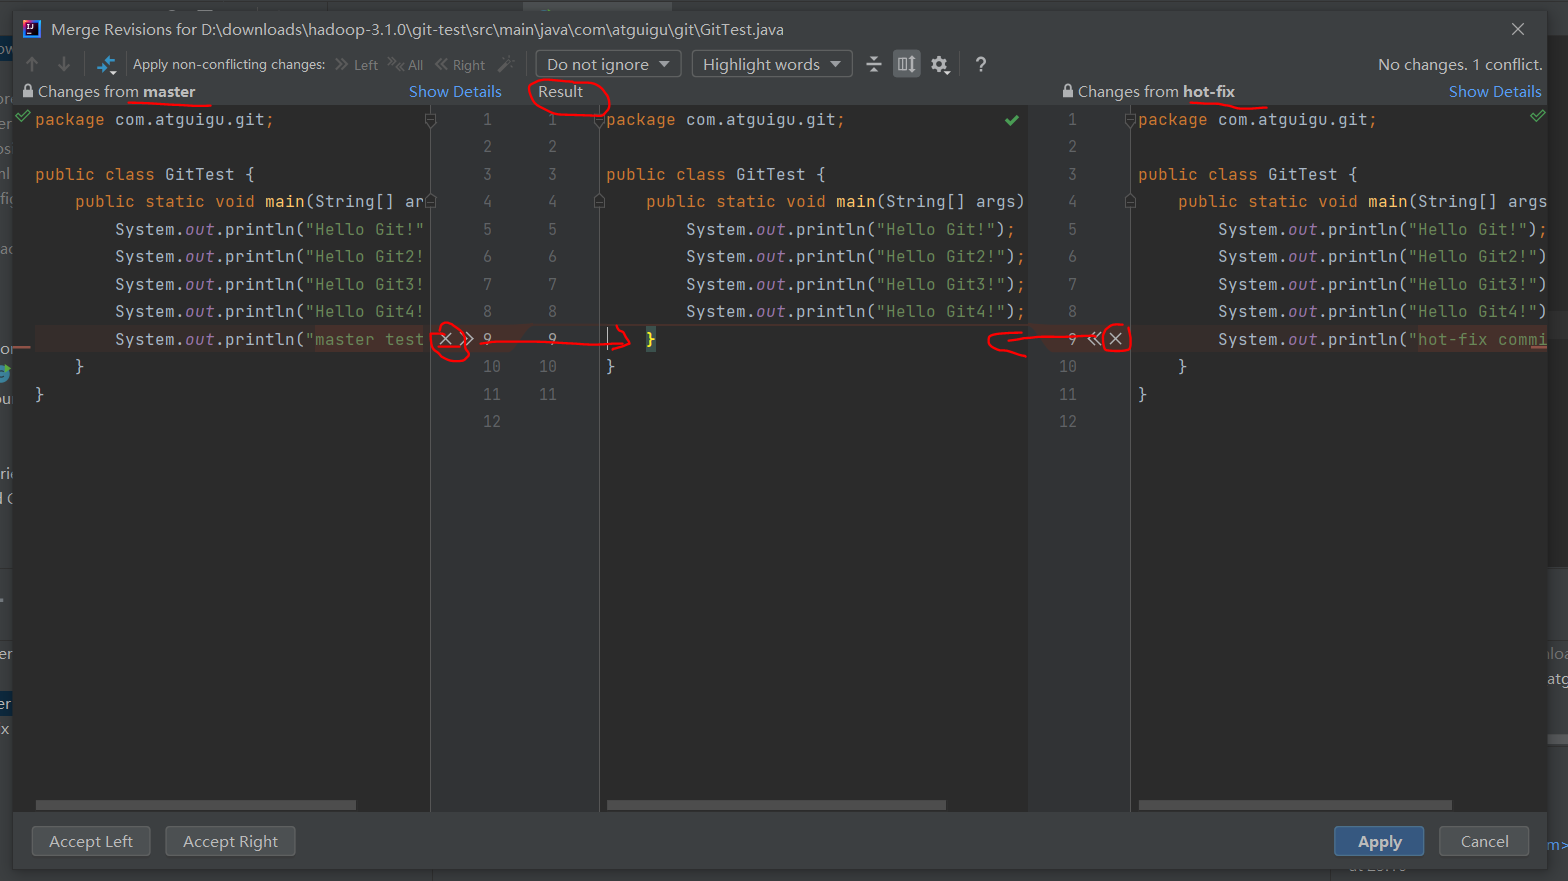
Modify as follows:
Conflict merge succeeded!
Chapter 5 IDEA Integration GitHub
5.1 Set up GitHub account
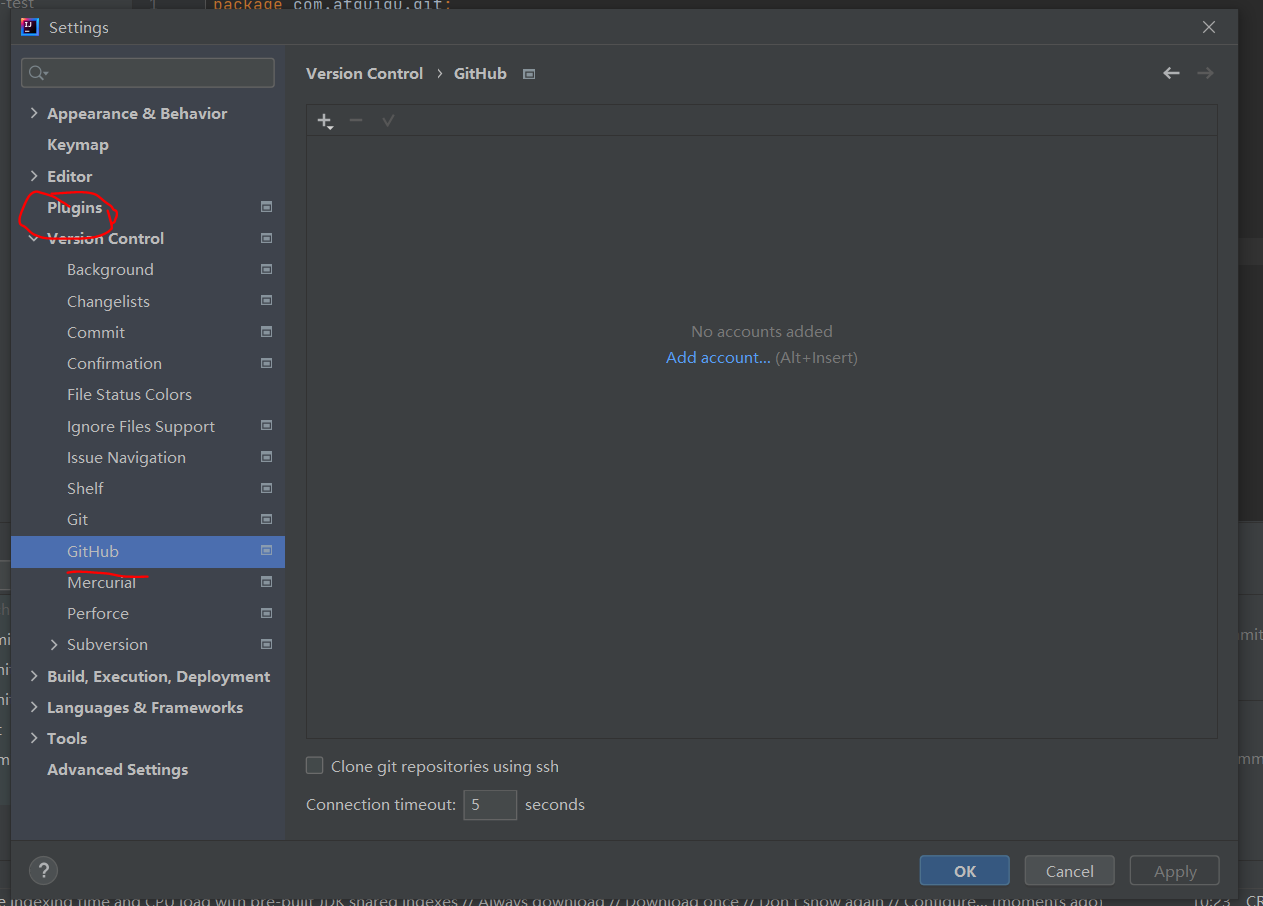
If there is no GitHub in the version control, you can download the GitHub plug-in from the plugins.
Click add account, log in via GitHub.
You can also connect by entering a token. Find the developer settings in your GitHub account:
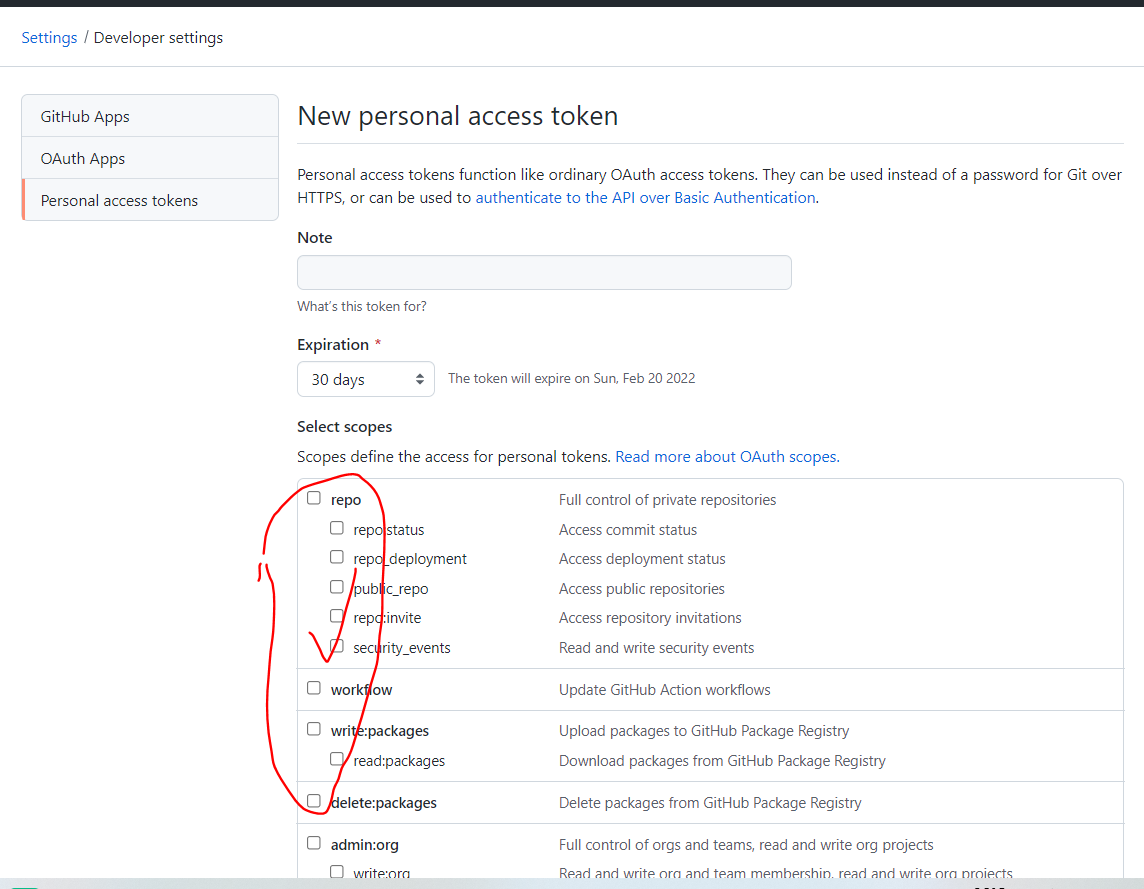
Check all under scopes and finally generate a token to copy the connection to IDEA.
5.2 Share Project to GitHub
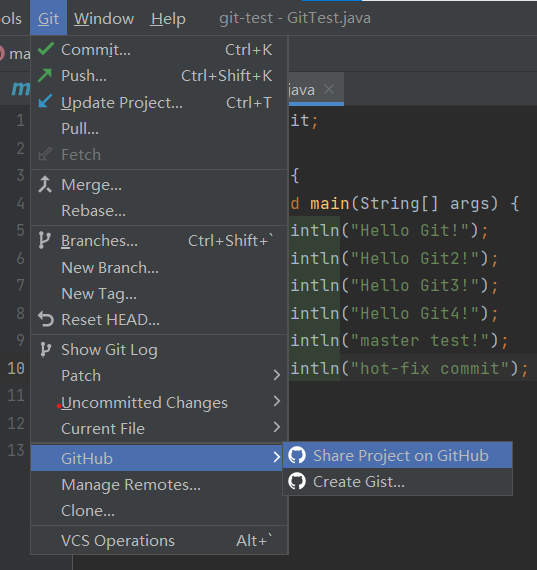
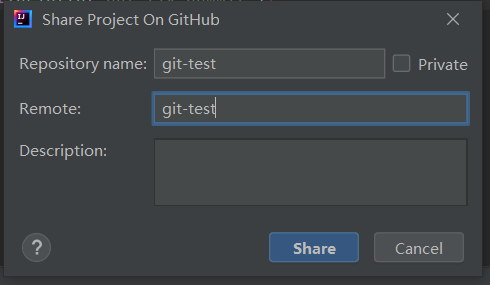
The Remote alias is set as close as possible to the project name, and Private indicates whether or not it is a private project.
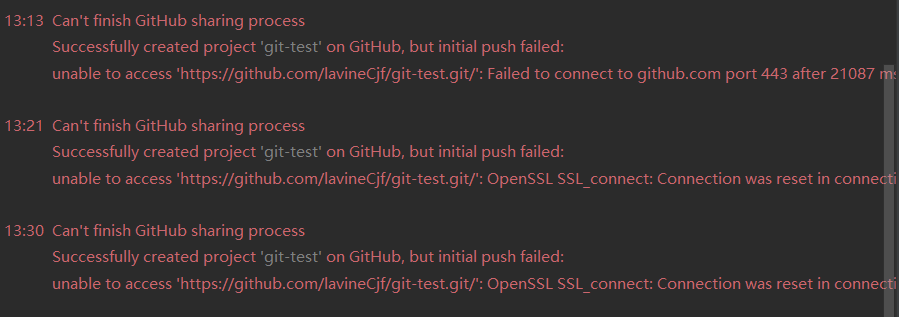
What happened!!!!!
Uploads are always unsuccessful.
Solution link: https://blog.csdn.net/weixin_44227519/article/details/118972380?spm=1001.2101.3001.6650.7&utm_medium=distribute.pc_relevant.none -task-blog-2%7Edefault%7EOPENSEARCH%7EHighlightScore-7. Queryctrv2&depth_ 1-utm_ Source=distribute. Pc_ Relevant. None-task-blog-2%7Edefault%7EOPENSEARCH%7EHighlightScore-7. Queryctrv2&utm_ Relevant_ Index=14
Delete items on GitHub that failed to upload successfully when re-uploading.
Note to execute the refresh command on the cmd command line:
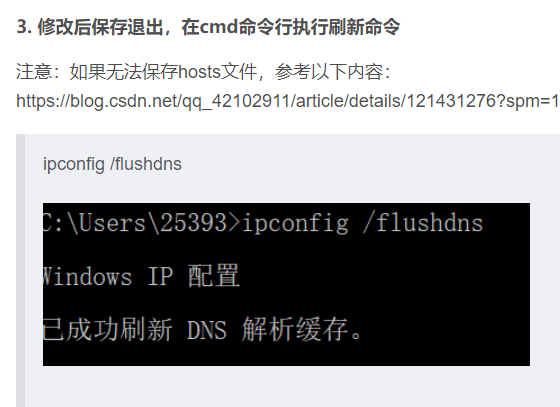
Upload successful!!

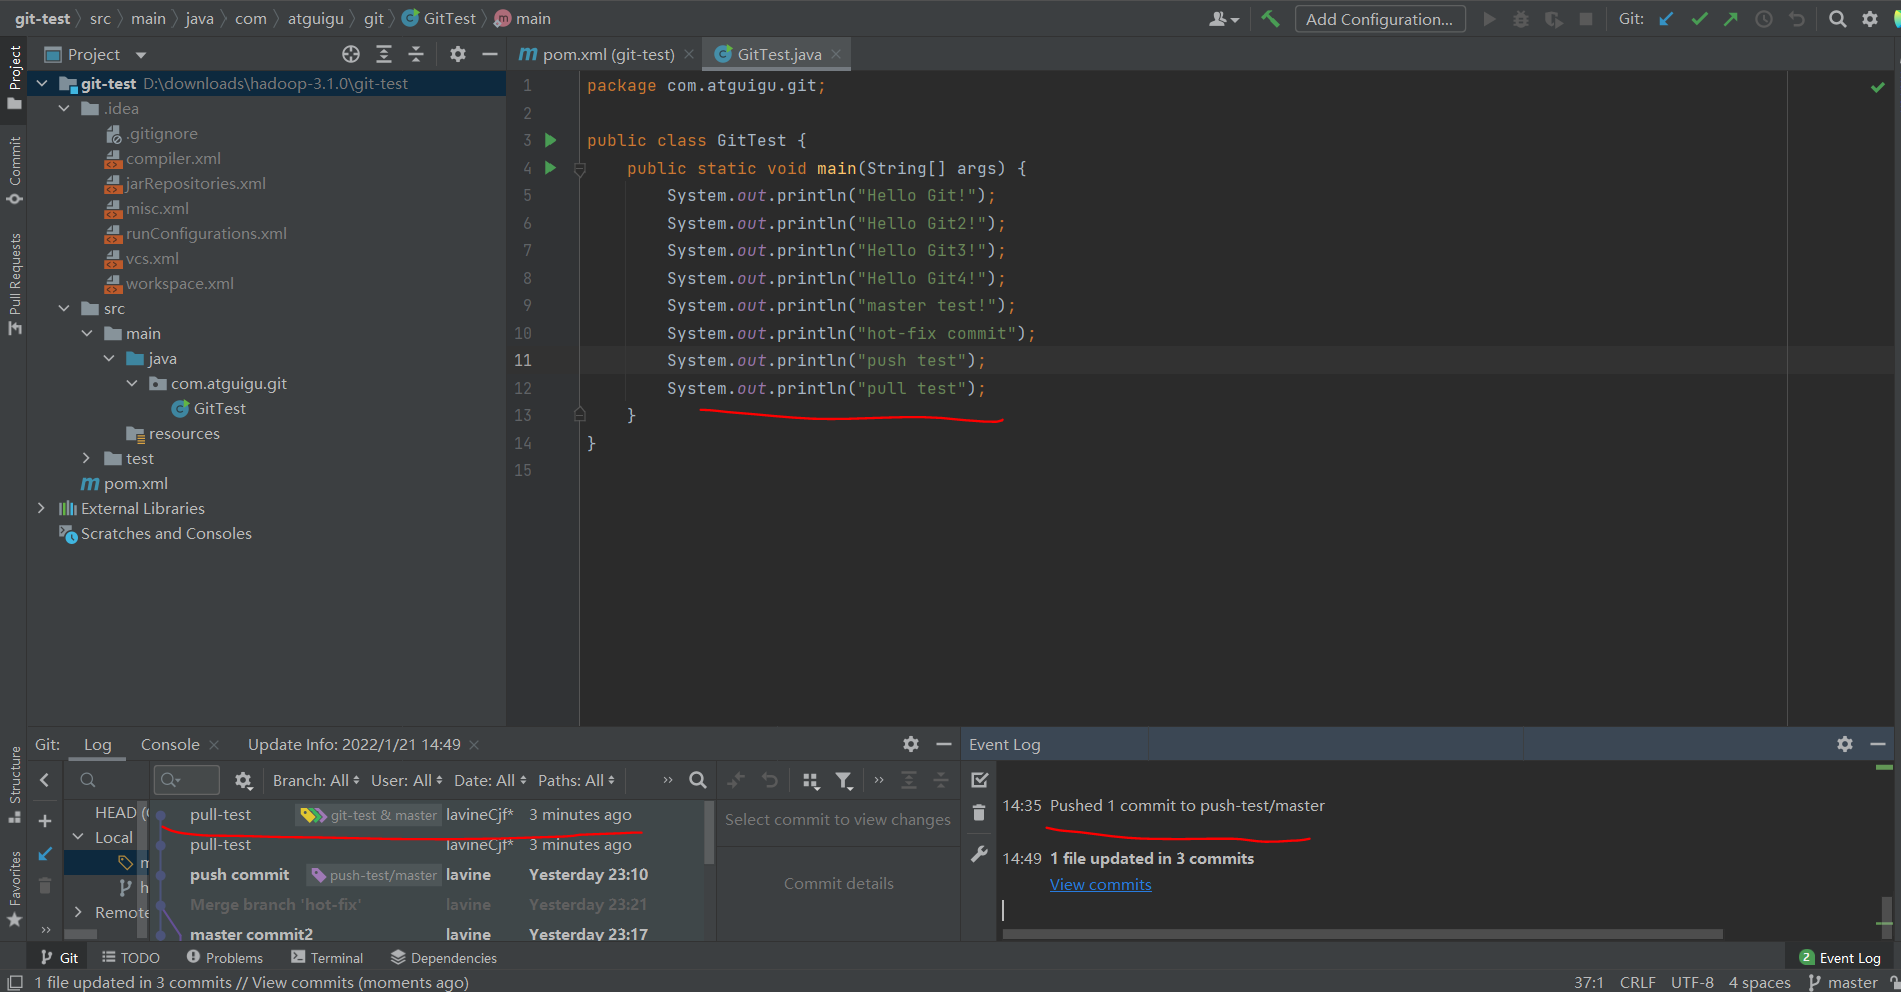
5.3 push pushes local libraries to remote Libraries
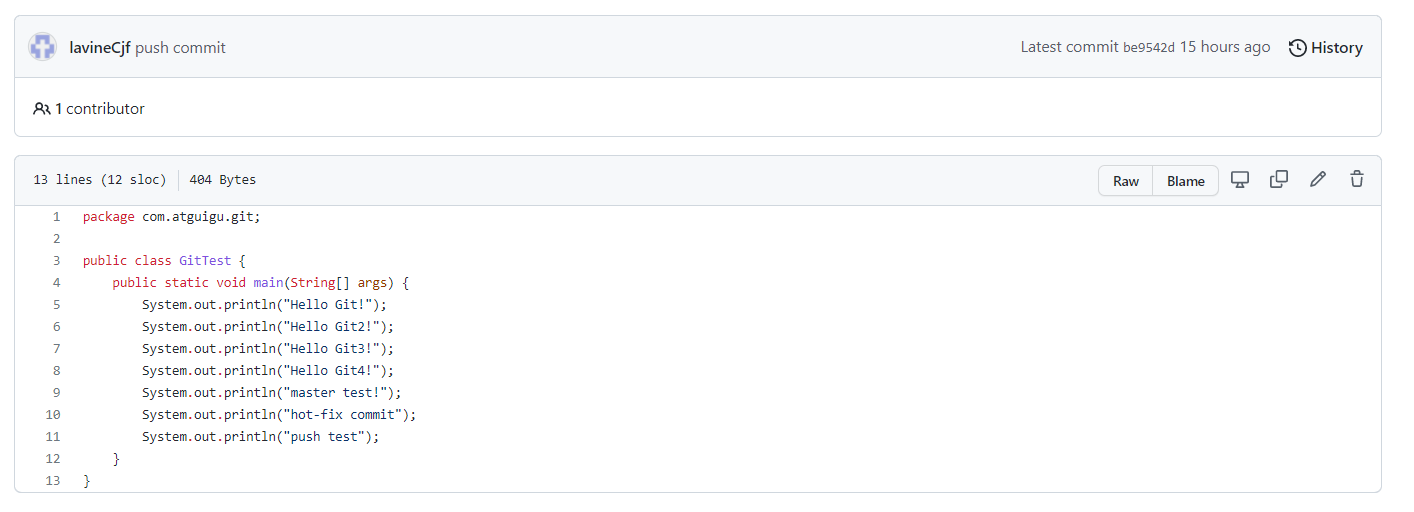
Modify the code and submit it to the local library push commit
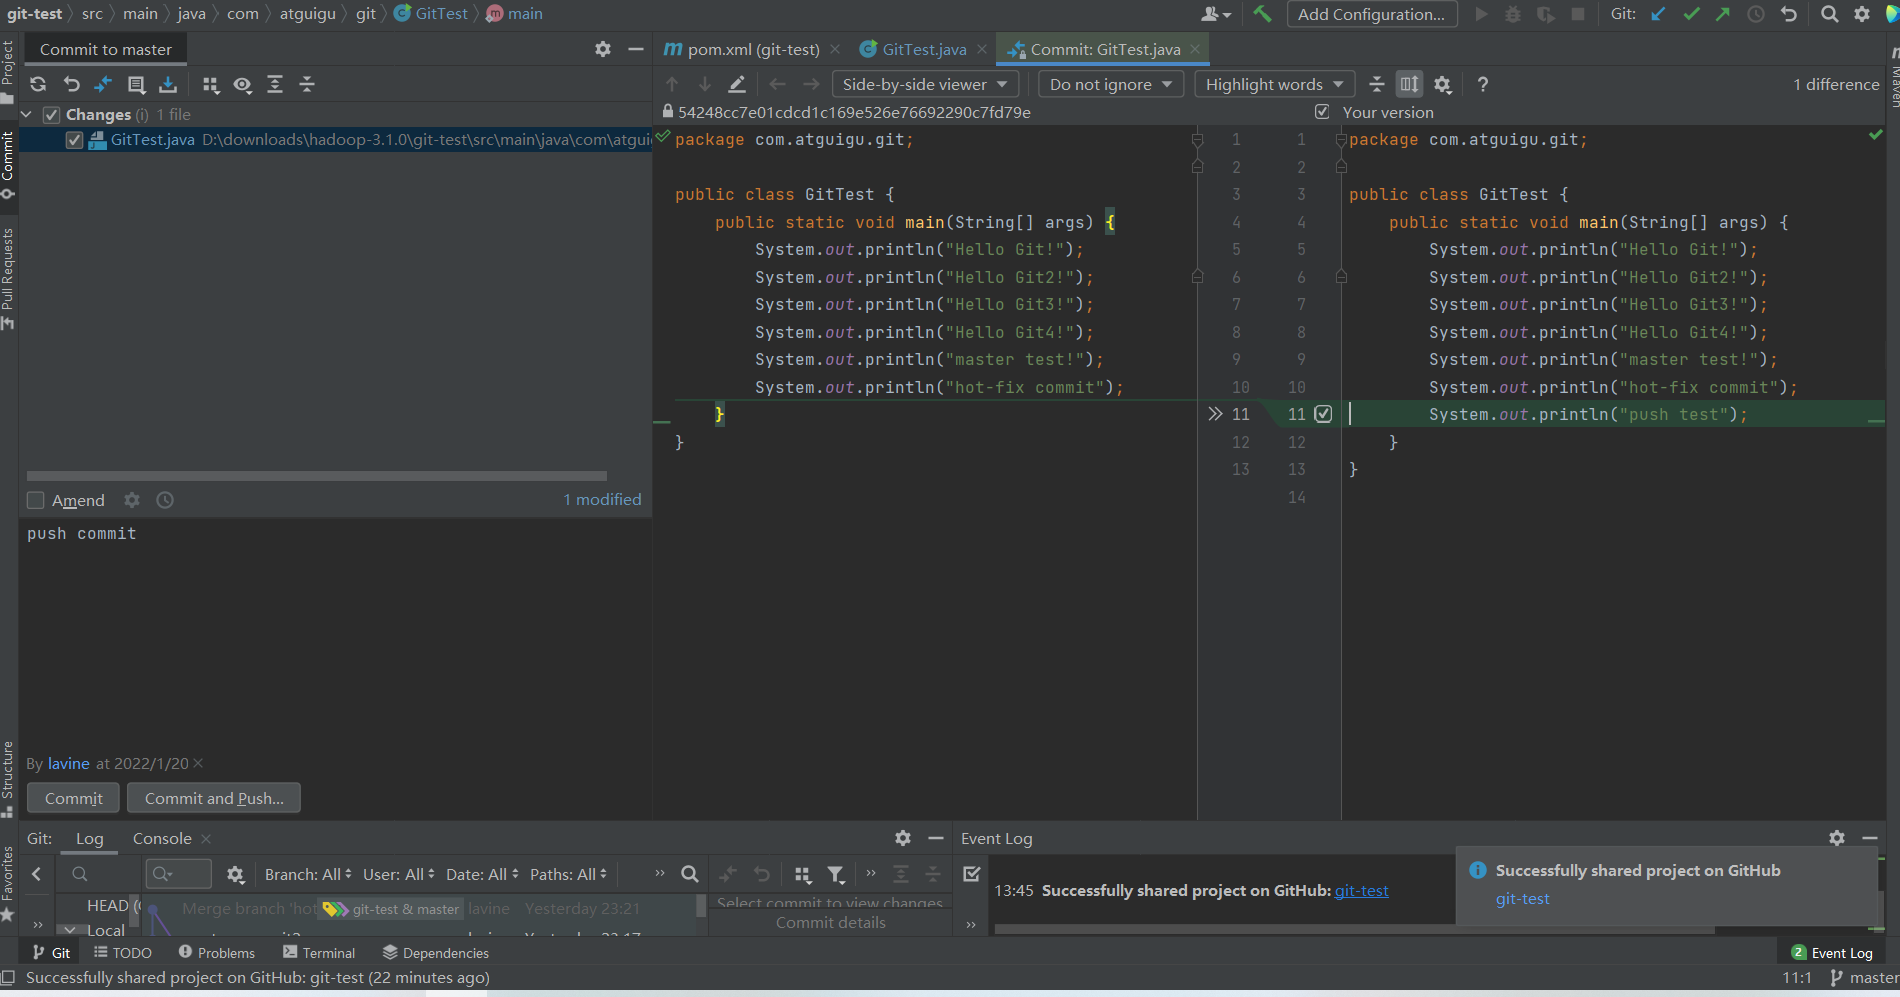
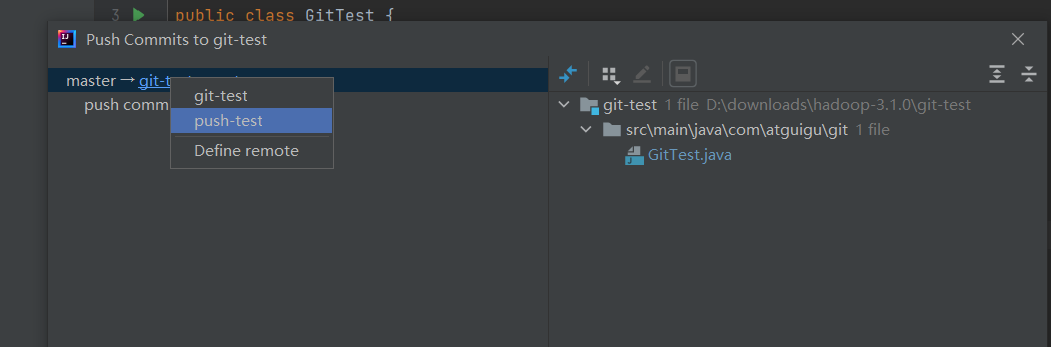
By default, http is used for push, but it has a lot to do with the network. ssh is recommended for push:
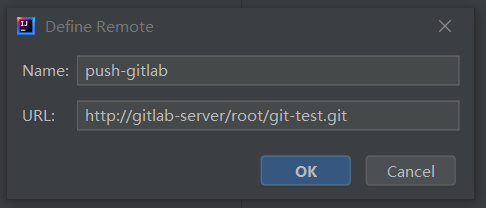
Left-click Define remote and paste the SSH link:
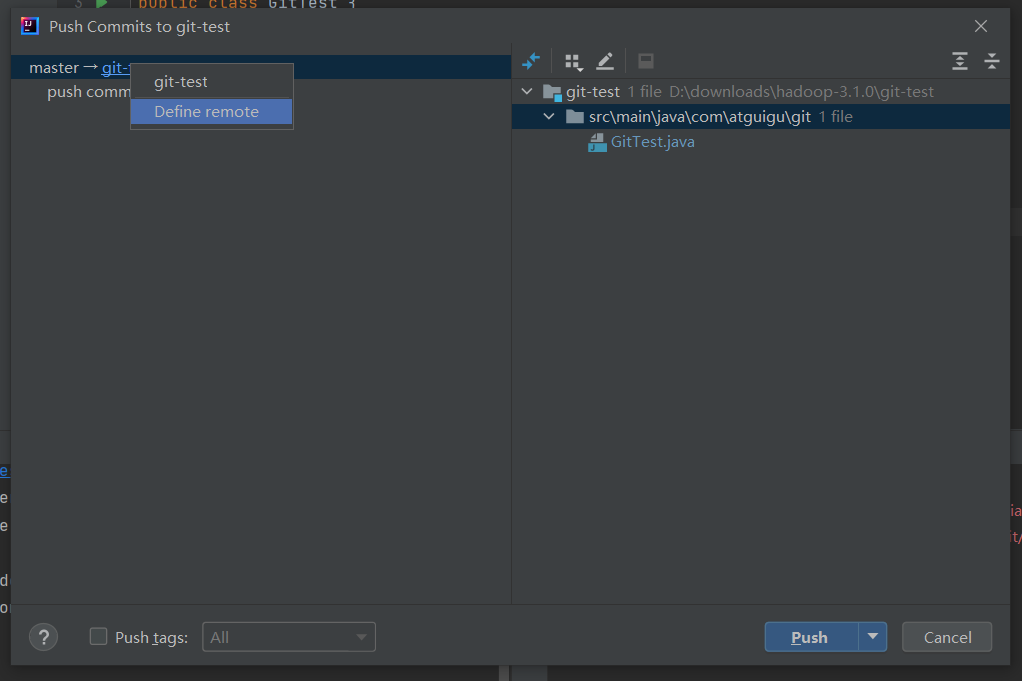
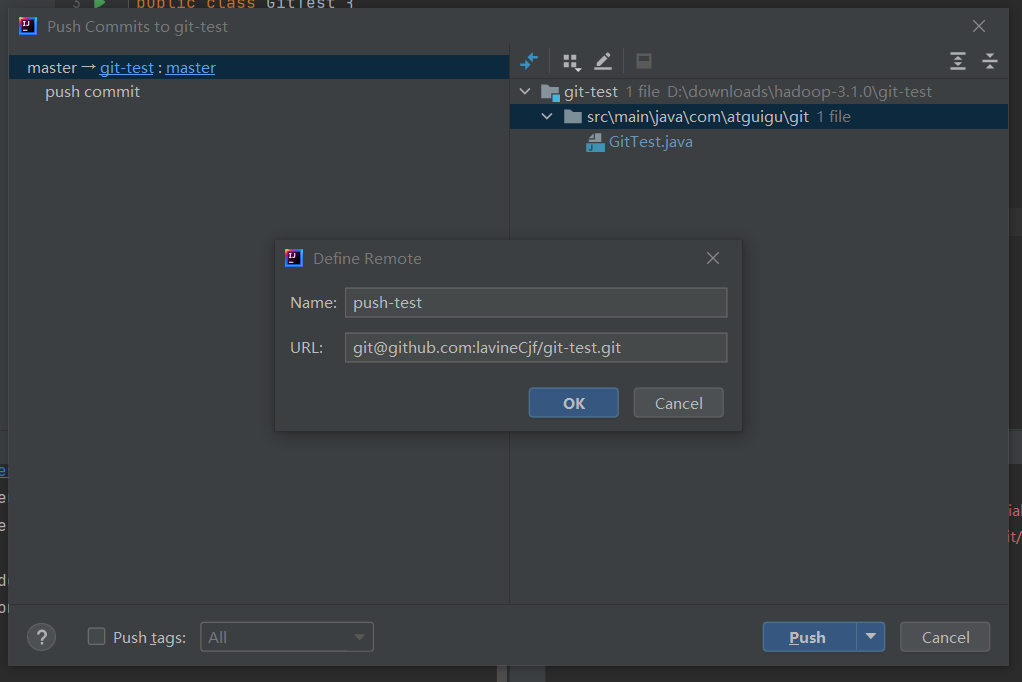
Then use push-test:
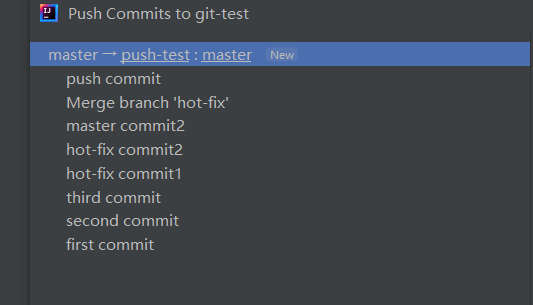
push succeeded!

Keep in mind that push ing with https is prone to the following errors:

Note: Push pushes local library code to a remote library. If the local library code root is inconsistent with the remote library code, the operation of push will be rejected. That is, to push successfully, make sure that the local library is a higher version than the remote library! So before you change the local code manually, be sure to check the differences between remote libraries and local code first! If the local code version is out of date, remember to pull and pull the code from the remote library, update the local code to the latest, then modify, submit, and push!
5.4 pull pulls remote libraries to local libraries
Modify the code on GitHub first
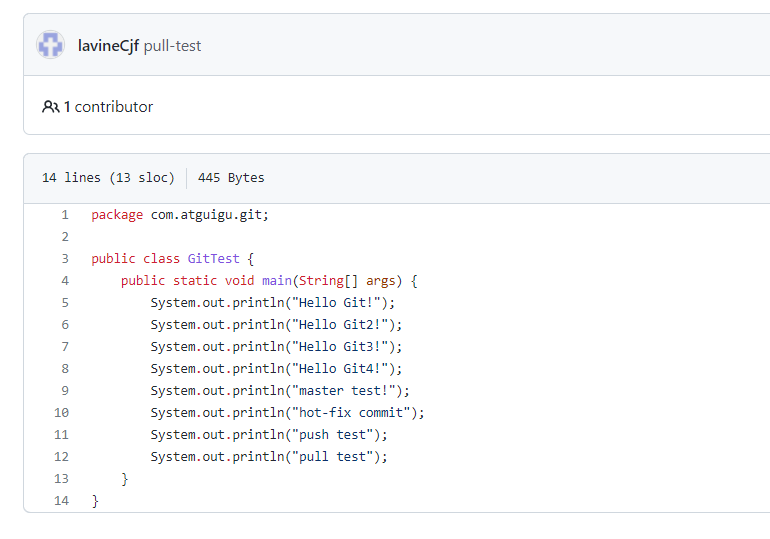
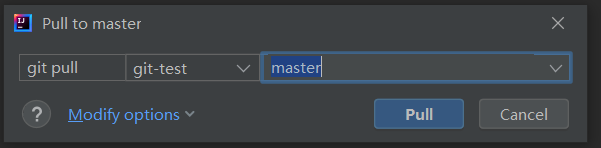
pull successful!
5.5 clone clone remote library to local
Delete the local item first.
Step 1:

Step 2: Paste the ssh link
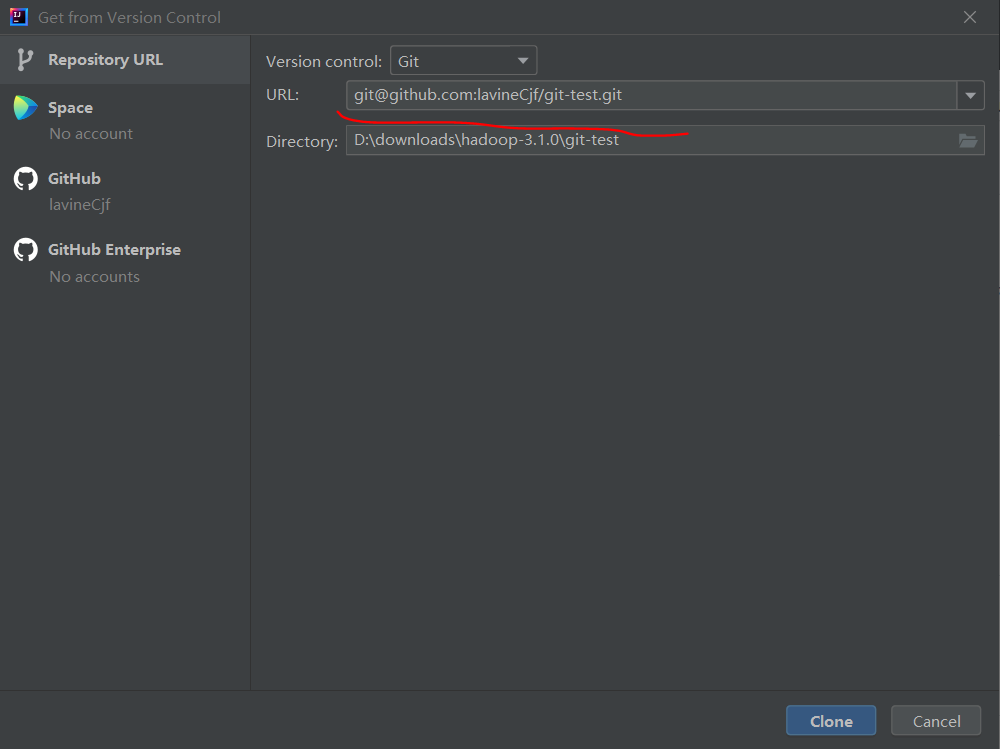
Cloning succeeded!
Chapter 6 Code Hosting Center-Code Cloud in China
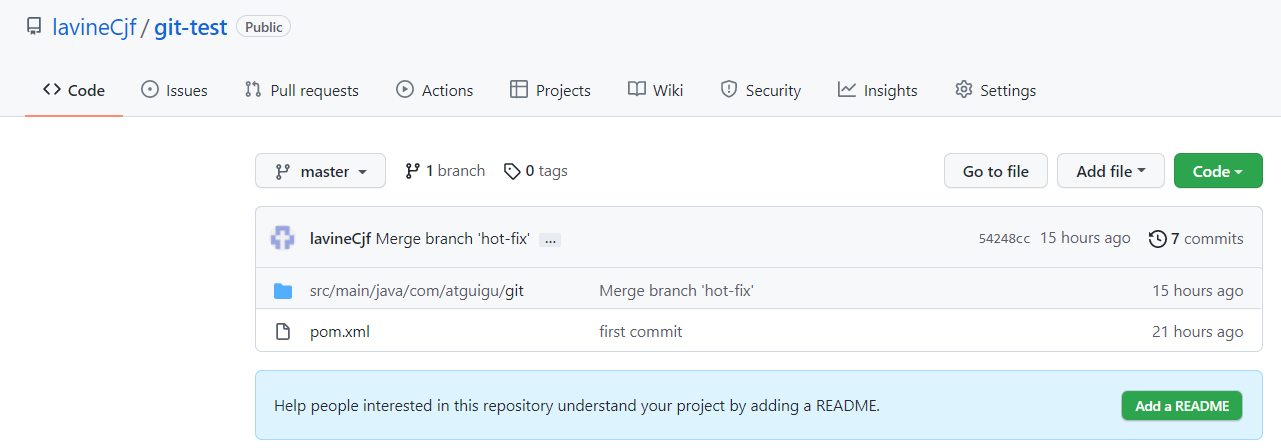
Register Number Cloud Account Create git-test Project

6.1 IDEA Integrated Code Cloud
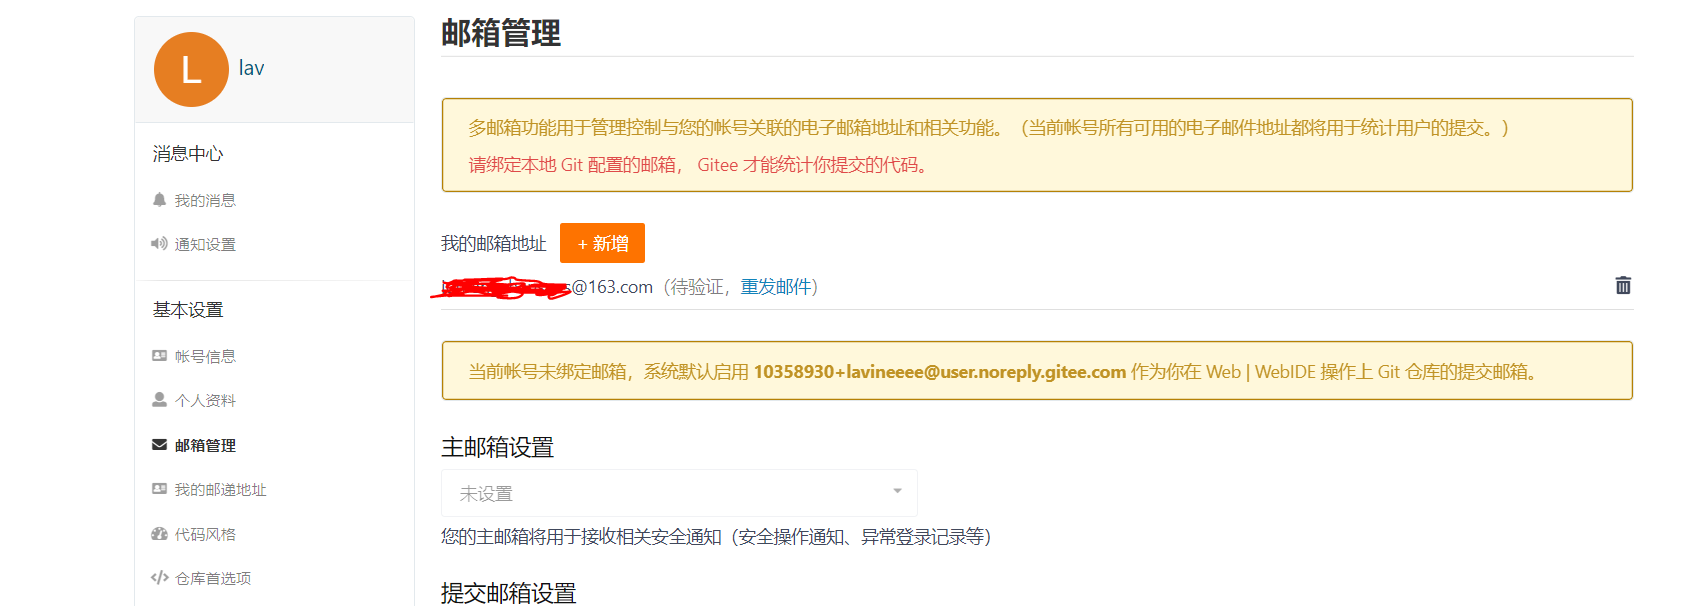
6.1.1 IDEA Installation Code Cloud Plugin
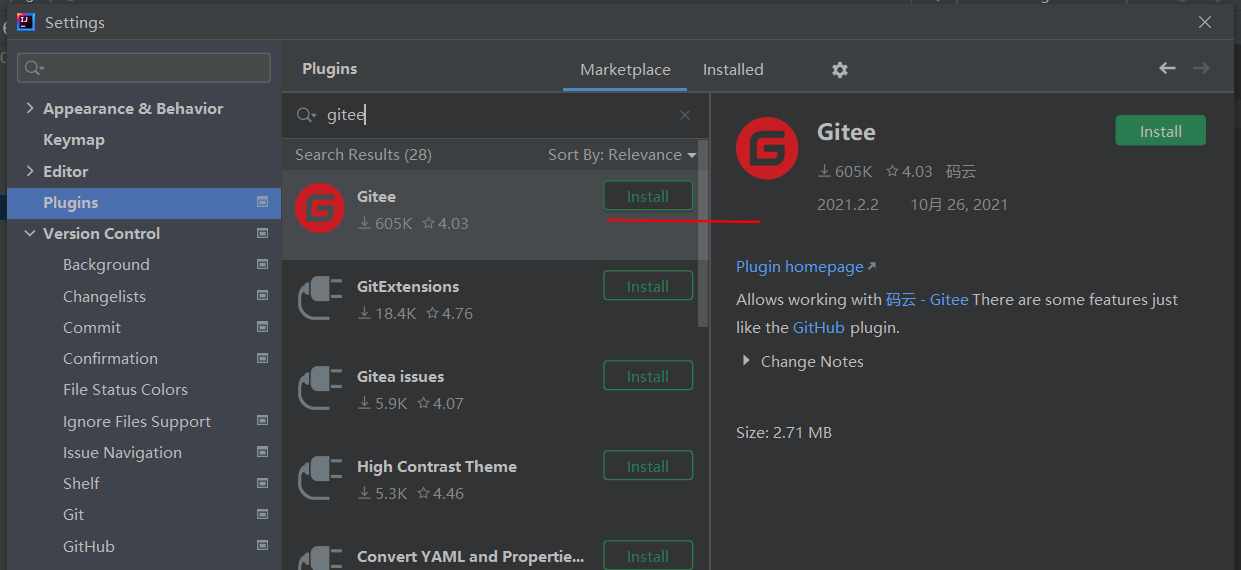
When binding a gitee account, be sure to add your own mailbox to the gitee account first, because the mailbox is used by default in IDEA to log in:

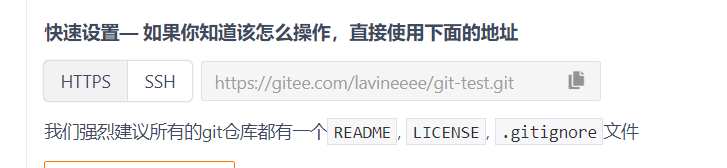
6.1.2 IDEA Connection Code Cloud
push to the code cloud, you can use the https protocol:
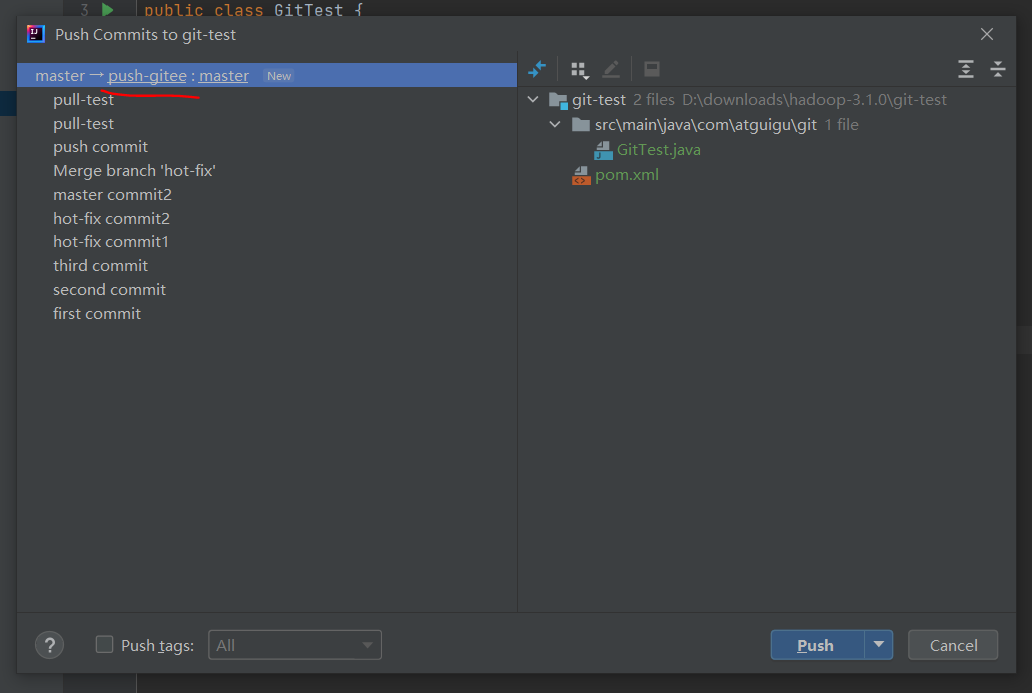
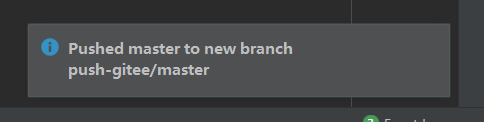
push succeeded!
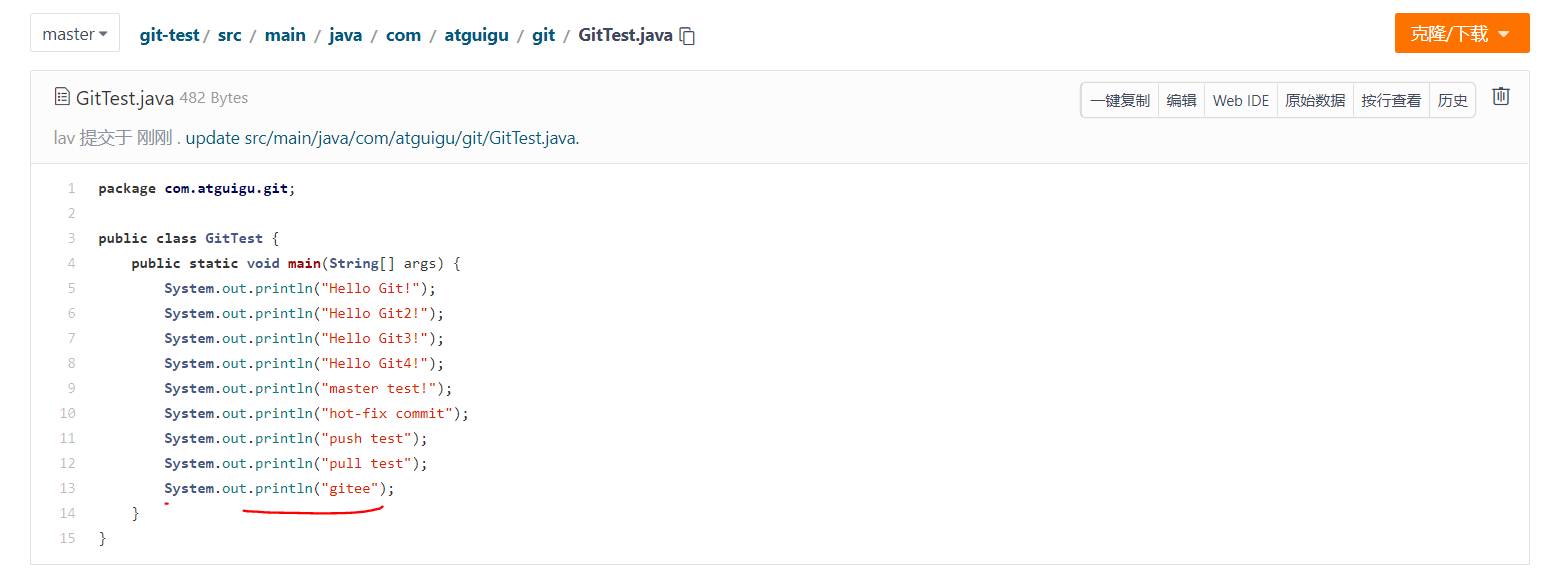
Modify Code:
pull, select push-gitee
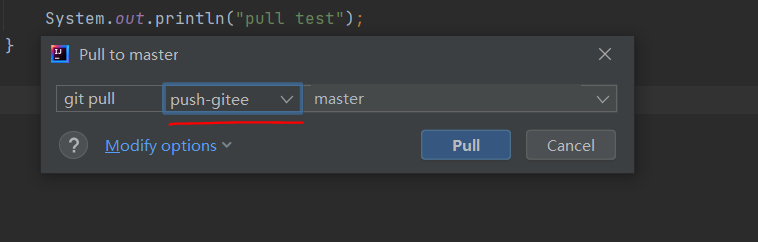
Success!
6.2 Code Cloud Copy GitHub Project

Then import from the GitHub link.
If the project code in GitHub is updated, click Refresh in the code cloud to synchronize the updates:

Chapter 7 Self-built Code Hosting Platform-GitLab
Introduction to 7.1 GitLab
GitLab is made by GitLab Inc. Develops a network-based Git warehouse management tool that uses MIT licenses with wiki and issue tracking capabilities. web services built on Git as a code management tool.
GitLab was developed by Ukrainian programmers Dmitriy Zaporozhets and ValerySizov and is written in Ruby. Later, some parts were rewritten in the Go language. As of May 2018, the company had about 290 team members and more than 2000 open source contributors. GitLab is used by IBM, Sony, J U Lich Research Center, NASA, Alibaba, Invincea, O'ReillyMedia, Leibniz-Rechenzentrum(LRZ), CERN, SpaceX, and others.
7.2 GitLab Official Address
Official address: https://about.gitlab.com/
Installation instructions: https://about.gitlab.com/installation/
7.3 GitLab Installation
7.3.1 Server Preparation
Prepare a server with a system of more than CentOS7, which requires 4G memory and 50G disk.
Close the firewall and configure the hostname and IP to ensure that the server can go online.
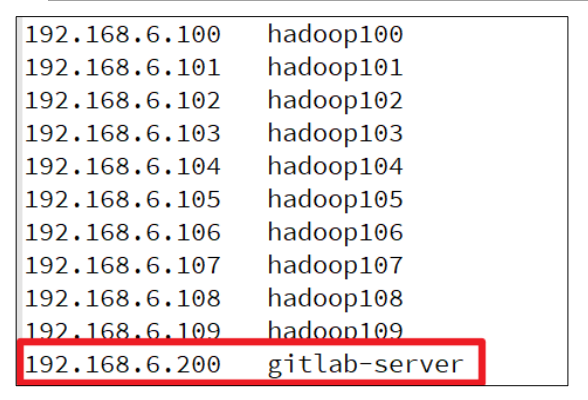
This tutorial uses a virtual machine: Host name: gitlab-server IP address: 192.168.6.200
Detailed reference: https://www.bilibili.com/video/BV1Qp4y1n7EN?p=1
7.3.2 Installation Package Preparation
When Yum installs gitlab-ce online, it takes a lot of time to download hundreds of Ms of installation files, so it's best to download all the RPM packages locally in advance and install them using offline rpm.
Download address: https://packages.gitlab.com/gitlab/gitlab-ce/packages/el/7/gitlab-ce-13.10.2-ce.0.el7.x86_64.rpm
7.3.3 Write installation scripts
The steps to install gitlab are cumbersome, so we can script the installation of gitlab using the official website.
[root@gitlab-server module]# vim gitlab-install.sh
sudo rpm -ivh /opt/module/gitlab-ce-13.10.2-ce.0.el7.x86_64.rpm
sudo yum install -y curl policycoreutils-python openssh-server cronie
sudo lokkit -s http -s ssh
sudo yum install -y postfix
sudo service postfix start
sudo chkconfig postfix on
curl https://packages.gitlab.com/install/repositories/gitlab/gitlab-ce/script.rpm.sh | sudo bash
sudo EXTERNAL_URL="http://gitlab.example.com" yum -y install gitlab-ce
Add Execution Rights to Scripts
[root@gitlab-server module]# chmod +x gitlab-install.sh
[root@gitlab-server module]# gitlab-install.sh
7.3.4 Initializing the GitLab service
Initialize the GitLab service by executing the following command
[root@gitlab-server module]# gitlab-ctl reconfigure
7.3.5 Initializing the GitLab service
To start the GitLab service, execute gitlab-ctl stop if necessary
[root@gitlab-server module]# gitlab-ctl start
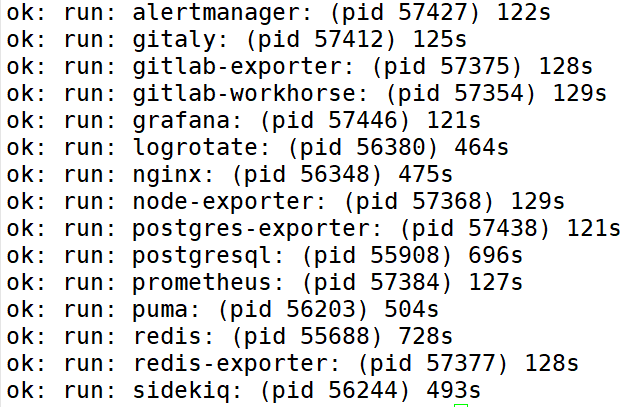
Be accomplished!
7.3.6 Use a browser to access GitLab
Access GitLab services using hostname or IP address. The hosts file for windows needs to be matched in advance.

Input 192.168.10.200 or gitlab-server/
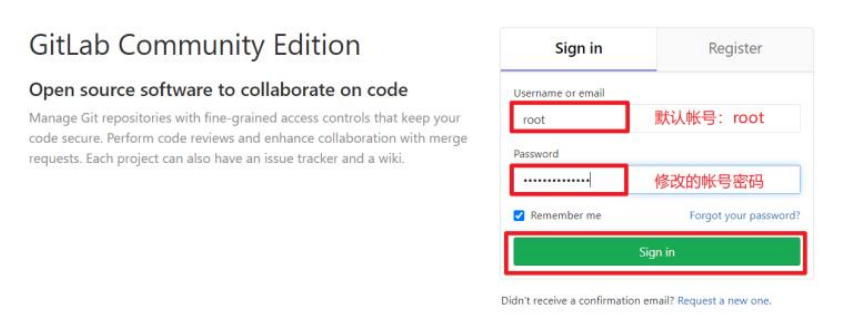
Before your first login, you need to change the password of the root account provided by GitLab, which requires more than 8 digits, including uppercase letters and special symbols.
Then log in to GitLab with the modified password.
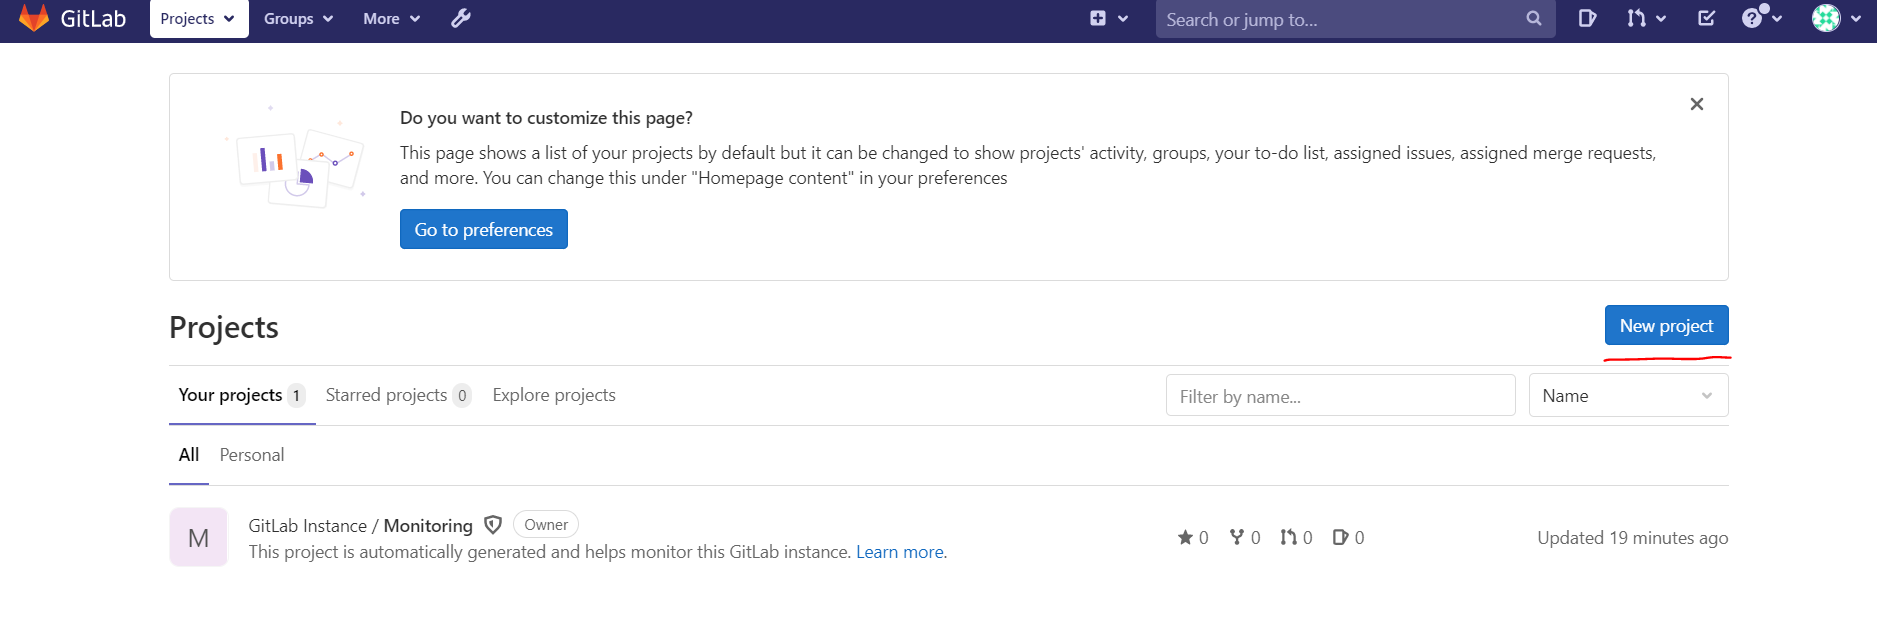
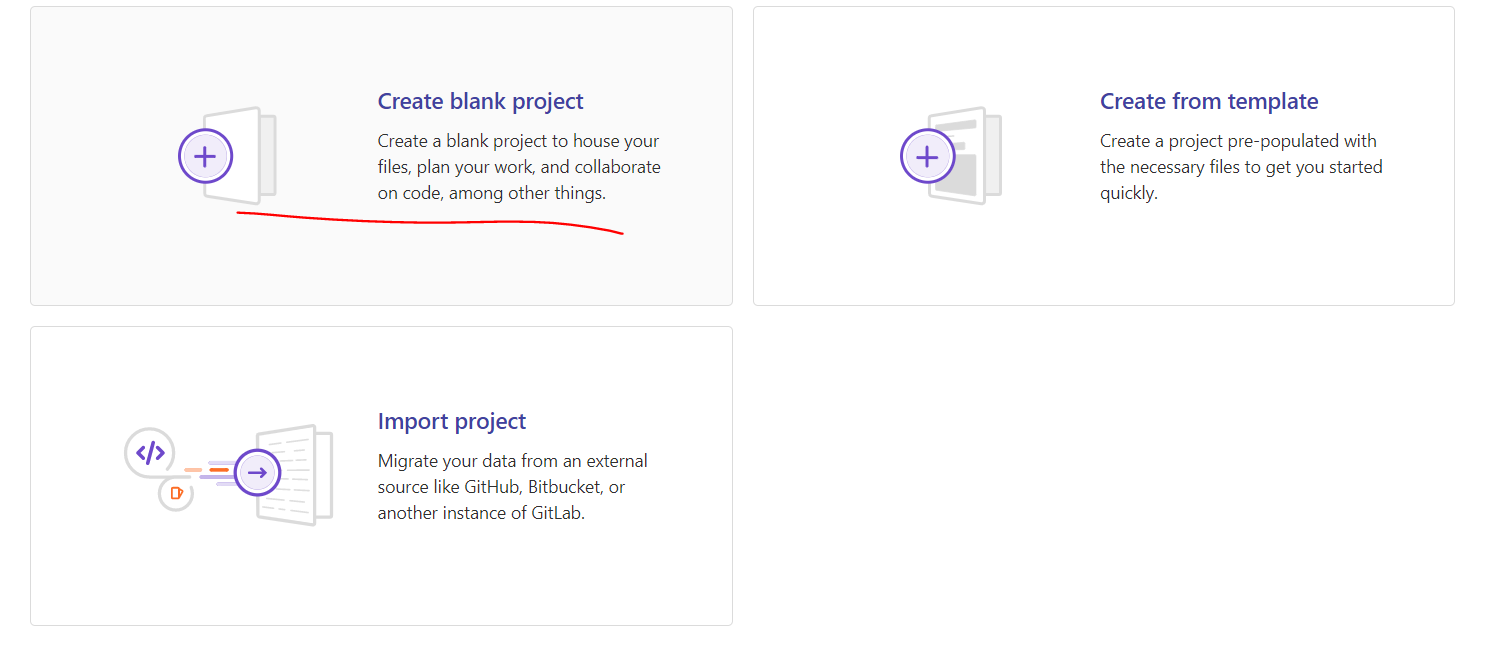
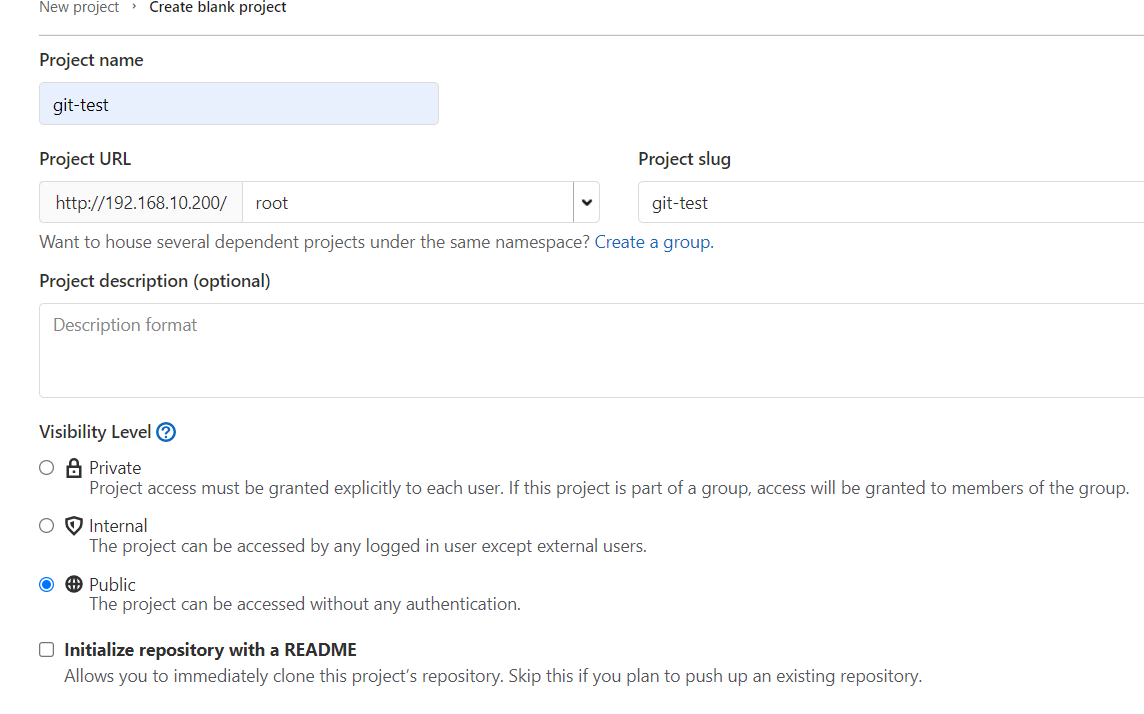
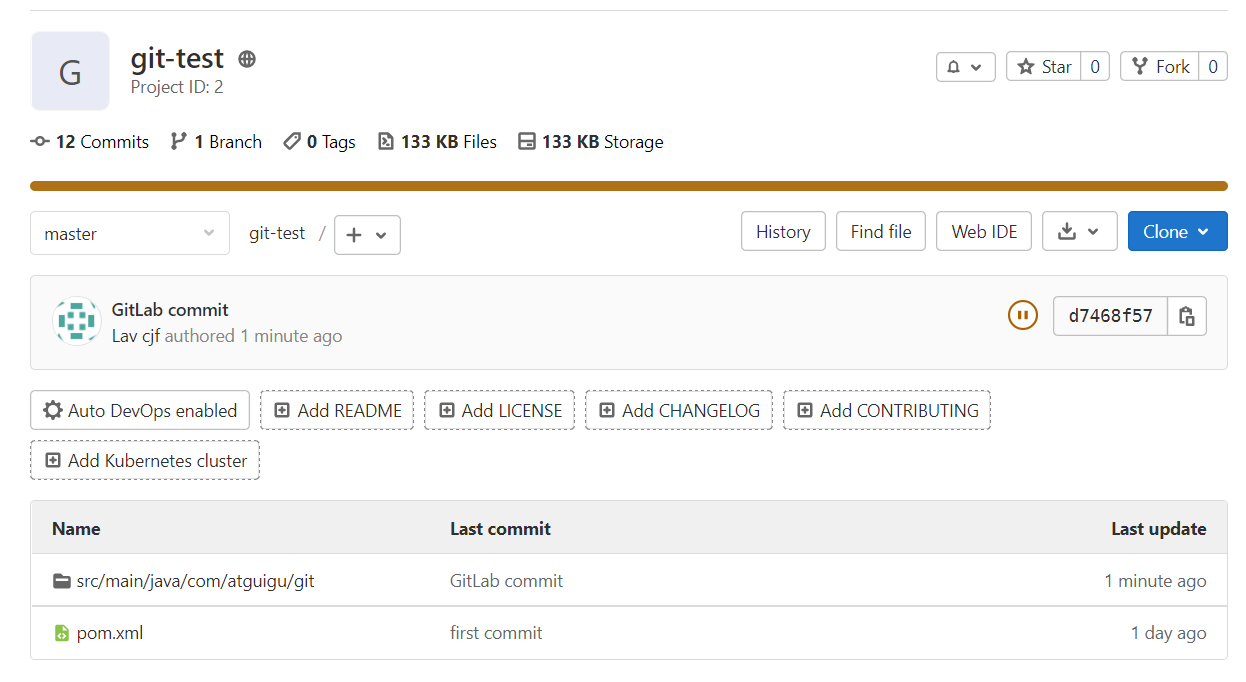
7.3.7 GitLab Create Remote Library
7.3.8 IDEA Integration GitLab
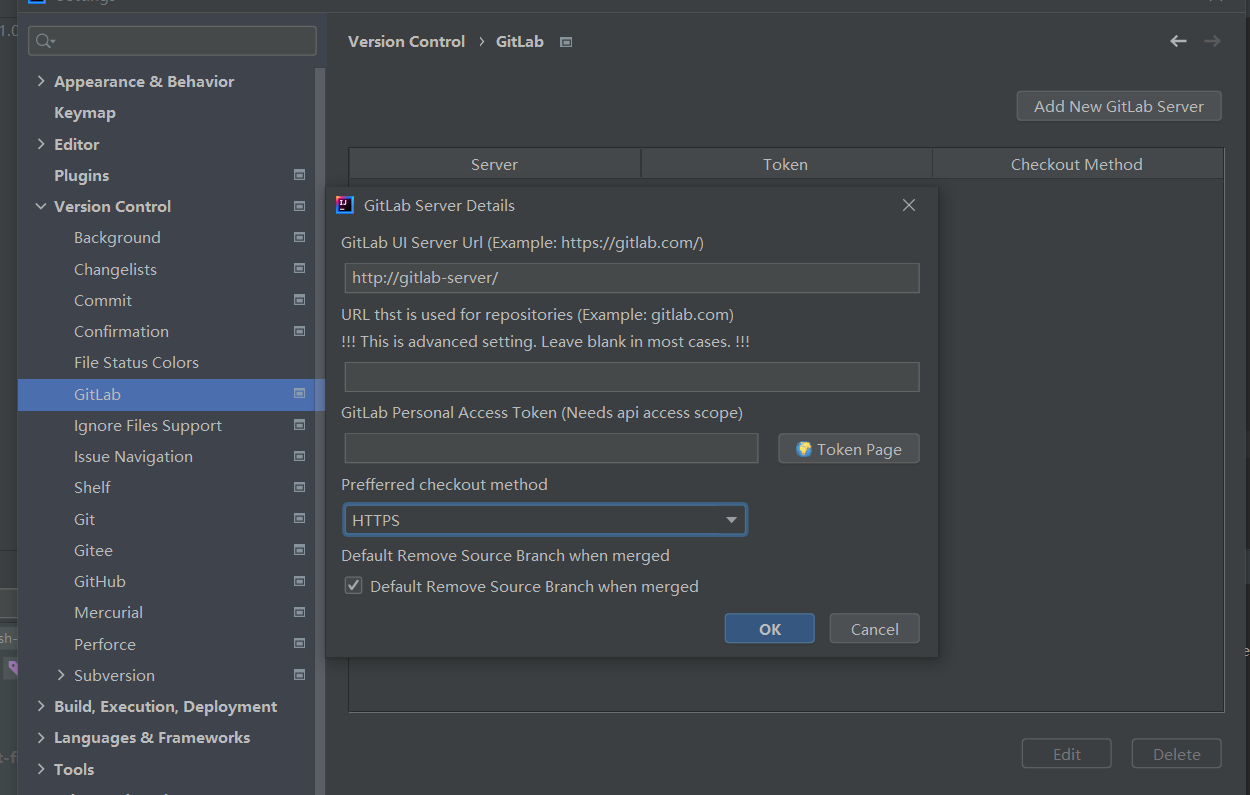
First install the GitLab plug-in, set up the GitLab plug-in, server host name, need to configure hosts file
And choose HTTPS
push Local Code to GitLab Remote Library
Copy the Https link on GitLab:
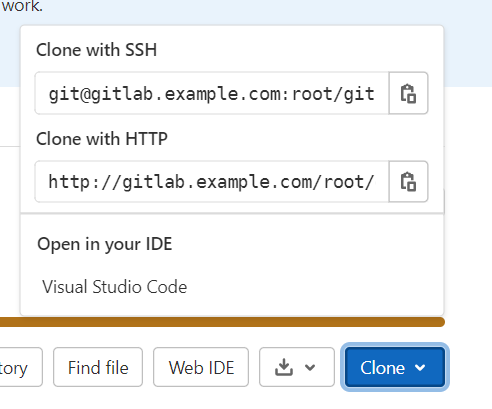
Note that the URL needs to be modified:
The URL copied is http://gitlab.example.com/root/git-test.git , modified to http://gitlab-server/root/git-test.git
Error found after push:
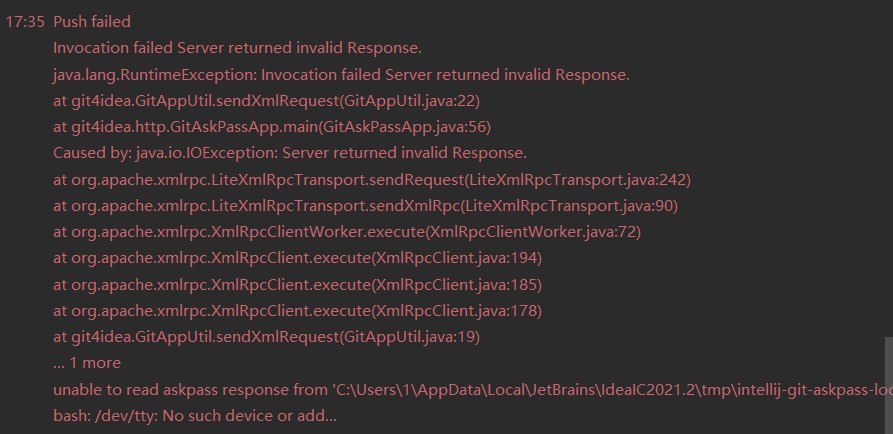
Reason: No user identity information in config file under git file
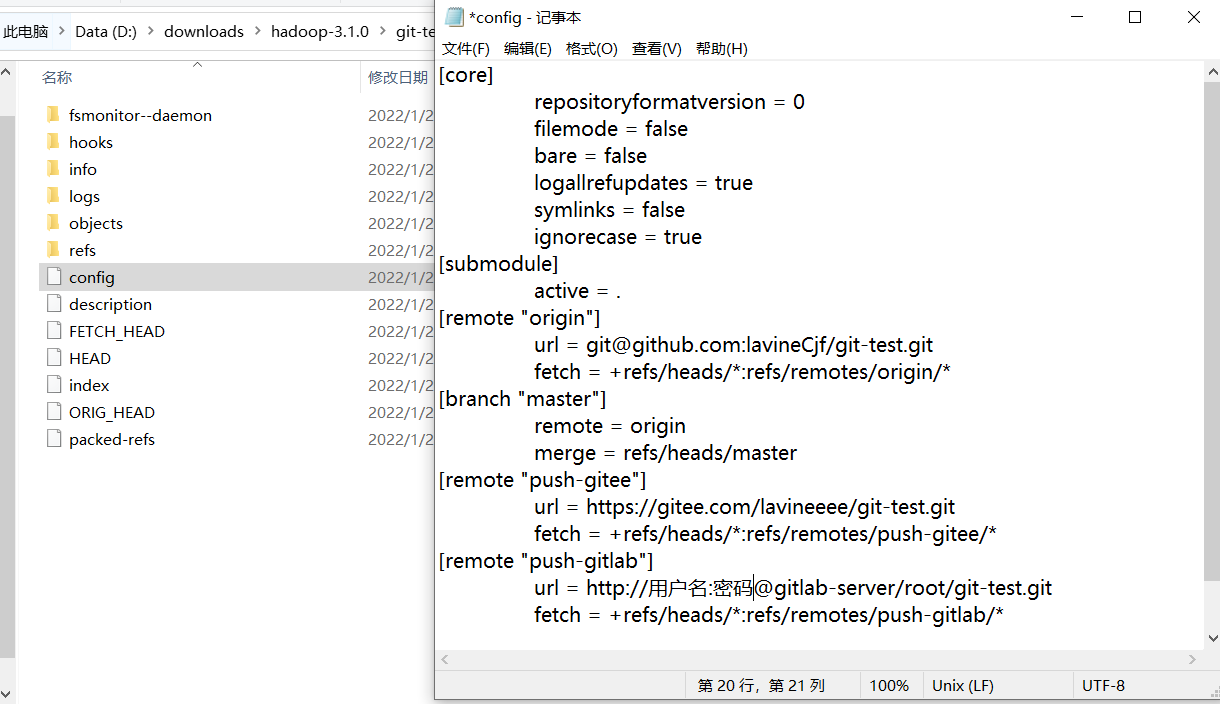
Add a user name (root) and password.
push again:

push succeeded!