This article mainly explains the "detailed process of Gitlab CI-CD automated deployment of SpringBoot project". Interested friends may wish to take a look. The method introduced in this paper is simple, fast and practical. Now let's take you to learn the "detailed process of Gitlab CI-CD automated deployment of SpringBoot project"!
catalogue
1, Overview
2, Preliminary preparation
3, Overall architecture diagram
4, Environment construction
1. Environmental preparation (optional)
2. Gitlab installation
3. Install Runner
4. Install application server environment
5, Create a SpringBoot project
1. Use Gitlab Spring template to quickly create a SpringBoot project;
2. Add environment variable (login application server password)
6, Summary
1, Overview
This article mainly records how to automatically deploy the spring boot project jar package through Gitlab CI/CD.
2, Preliminary preparation
Prepare three CentOS7 servers and deploy the following services:
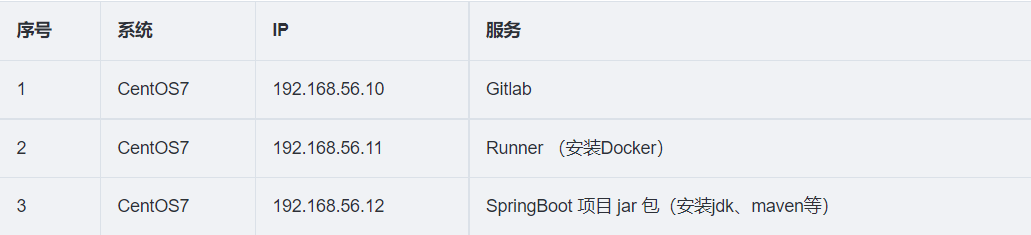
The above services can also use only one CentOS7 to deploy all programs on the same machine, but it is more recommended to deploy them separately;
3, Overall architecture diagram
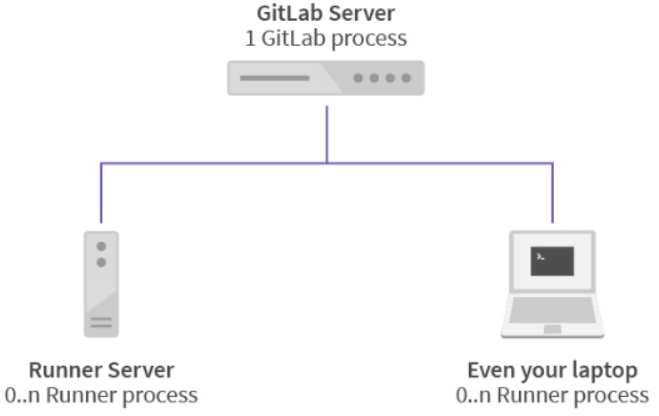
explain:
Gitlab Server is used to deploy gitlab remote warehouse. It has high requirements for CPU and memory. It is recommended to have 4-core CPU and more than 4GB memory;
The Runner Server is used for deployment execution Gitlab-ci. The stage (stage) defined in the YML file needs to have access to the Gitlab warehouse. You can download the code and implement it through Gitlab runner register;
Your Laptop Server users deploy your application. Here is the jar package of SpringBoot. You need to install JDK and Maven in advance and configure environment variables;
4, Environment construction
1. Environmental preparation (optional)
Three servers execute the following commands:
yum -y upgrade
yum -y install wget
yum -y install vim
2. Gitlab installation
(1) Install and configure the necessary dependencies
sudo yum install -y curl policycoreutils-python openssh-server
sudo systemctl enable sshd
sudo systemctl start sshd

sudo firewall-cmd --permanent --add-service=http
sudo firewall-cmd --permanent --add-service=https
sudo systemctl reload firewalld
(2) Install mail service
sudo yum install postfix
sudo systemctl enable postfix
sudo systemctl start postfix
(3) Add gitlab image
wget https://mirrors.tuna.tsinghua.edu.cn/gitlab-ce/yum/el7/gitlab-ce-13.4.0-ce.0.el7.x86_64.rpm
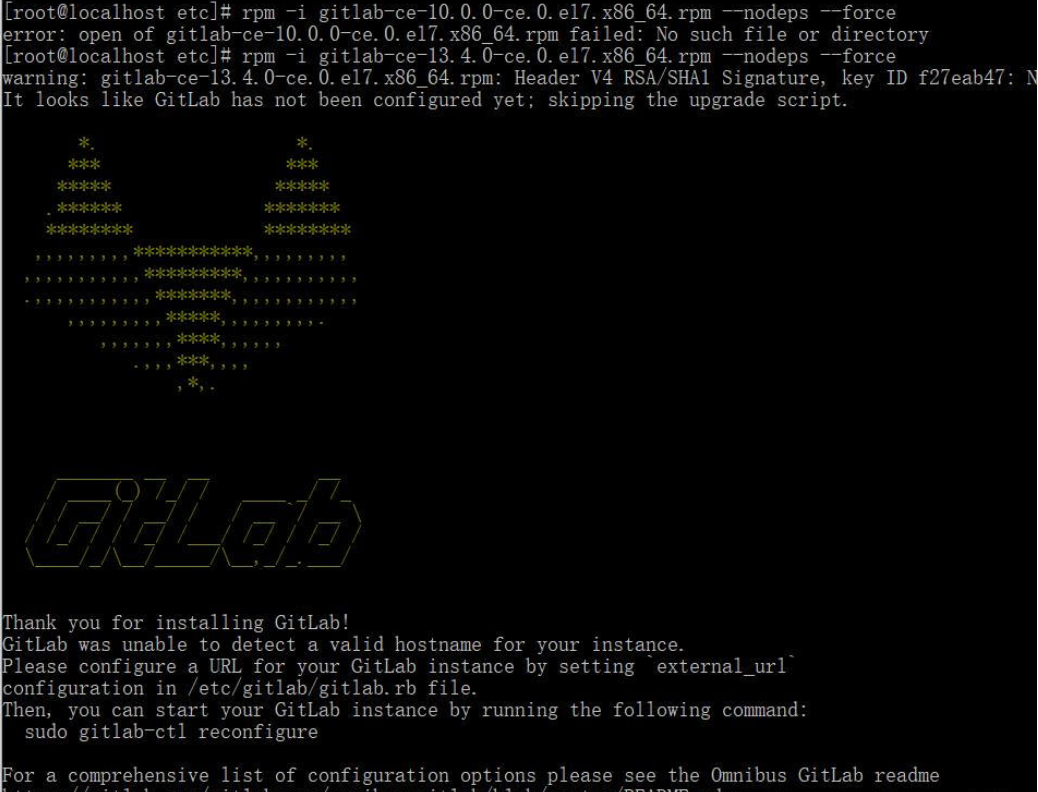
(4) Install gitlab installation command
rpm -i gitlab-ce-13.4.0-ce.0.el7.x86_64.rpm --nodeps --force
Picture after successful installation:
(5) Modify the gitlab configuration file to specify the server ip and custom port
vim /etc/gitlab/gitlab.rb
(6) Reset and start GitLab
gitlab-ctl reconfigure
gitlab-ctl restart
The prompt "ok: run:" indicates that the startup is successful
(7) Visit GitLab page
If you report 502, wait for a period of time before refreshing, usually about 1-2 minutes.
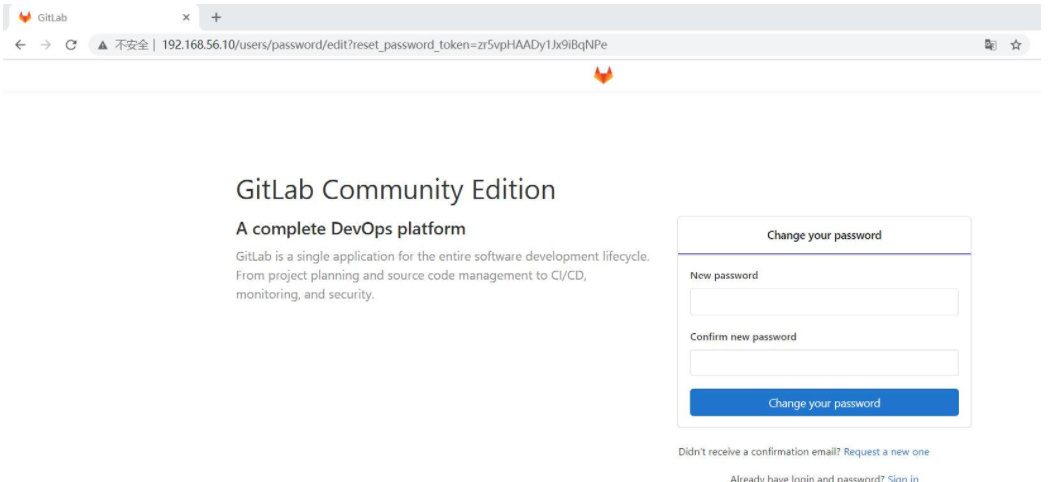
The account set in this article is root, and the new password is 11112222
3. Install Runner
Refer to official documents: https://docs.gitlab.com/runner/install/linux-manually.html#install -Using binary file Install in gitlab runner manually on gnulinux
(1) Download a binary file
sudo curl -L --output /usr/local/bin/gitlab-runner https://gitlab-runner-downloads.s3.amazonaws.com/latest/binaries/gitlab-runner-linux-amd64
(2) Modify execution permission
sudo chmod a+x /usr/local/bin/gitlab-runner
(3) Create GitLab CI user
sudo useradd --comment 'GitLab Runner' --create-home gitlab-runner --shell /bin/bash
(4) Install and run as a service
sudo gitlab-runner install --user=gitlab-runner --working-directory=/home/gitlab-runner
sudo gitlab-runner start
If you encounter the prompt sudo: gitlab runner: command not found, switch to the root user, remove sudo and execute the above command.
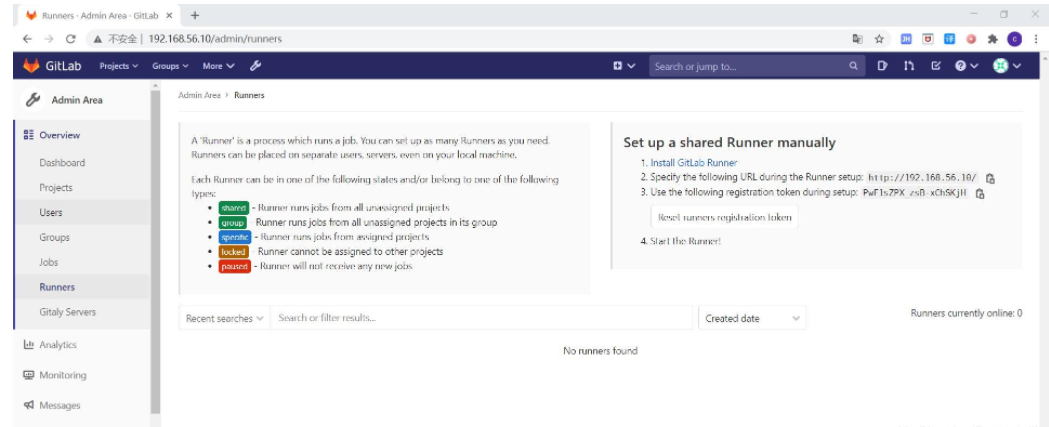
(5) Register Runner
Execute the gitlab runner register command:
[root@localhost bin]# gitlab-runner register
Runtime platform                                    arch=amd64 os=linux pid=21527 revision=4e1f20da version=13.4.0
Running in system-mode.

Please enter the gitlab-ci coordinator URL (e.g. https://gitlab.com/):
http://192.168.56.10/

Please enter the gitlab-ci token for this runner:
PwF1sZPX_zsB-xChSKjH

Please enter the gitlab-ci description for this runner:
[localhost.localdomain]: test ci cd desc

Please enter the gitlab-ci tags for this runner (comma separated):
my-tag,other-tag

Registering runner... succeeded                     runner=PwF1sZPX
Please enter the executor: ssh, virtualbox, parallels, shell, docker-ssh, docker+machine, docker-ssh+machine, kubernetes, custom, docker:
docker

Please enter the default Docker image (e.g. ruby:2.6):
maven:3.3.9-jdk-8
Runner registered successfully. Feel free to start it, but if it's running already the config should be automatically reloaded!
Note: the docker mode is selected here, so additional dockers need to be installed on the server
#!/bin/bash
# Remove the old version
sudo yum remove docker \
                  docker-client \
                  docker-client-latest \
                  docker-common \
                  docker-latest \
                  docker-latest-logrotate \
                  docker-logrotate \
                  docker-selinux \
                  docker-engine-selinux \
                  docker-engine

# Delete all old data
sudo rm -rf /var/lib/docker

#  Install dependent packages
sudo yum install -y yum-utils \
  device-mapper-persistent-data \
  lvm2

# Add source using alicloud image
sudo yum-config-manager \
    --add-repo \
    http://mirrors.aliyun.com/docker-ce/linux/centos/docker-ce.repo

# Configure cache
sudo yum makecache fast

# Install the latest stable version of docker
sudo yum install -y docker-ce

# Configure mirror accelerator
sudo mkdir -p /etc/docker
sudo tee /etc/docker/daemon.json <<-'EOF'
{
  "registry-mirrors": ["http://hub-mirror.c.163.com"]
}
EOF

# Start the docker engine and set startup
sudo systemctl start docker
sudo systemctl enable docker

# Configure the execution permission of the current user on docker
sudo groupadd docker
sudo gpasswd -a ${USER} docker
sudo systemctl restart docker
Here, register a globally shared Runner (administrator permission, copy server address and Token), which can be used by all projects, or register a separate Runner at the project level (enter the project Runner setting page, copy address and Token).
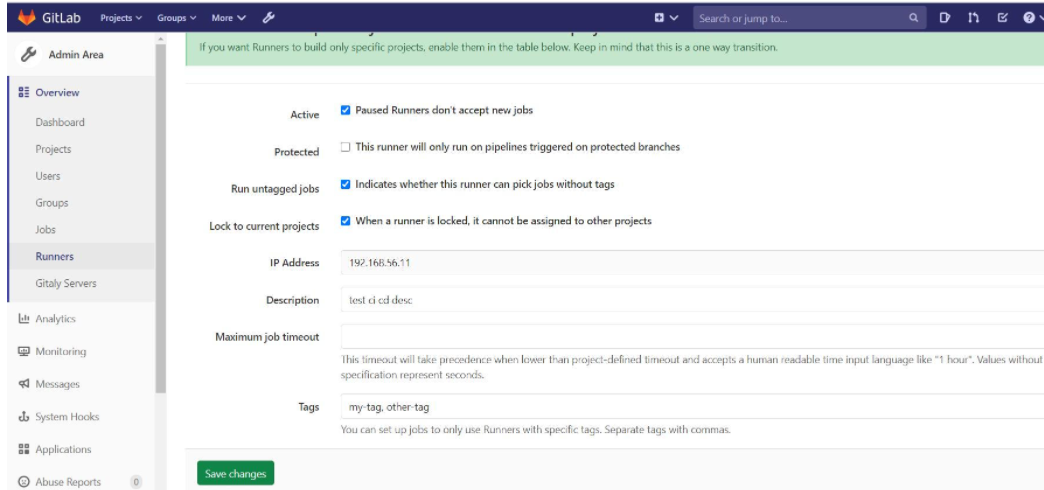
After successful registration, you can view the registered runners in the Runner list
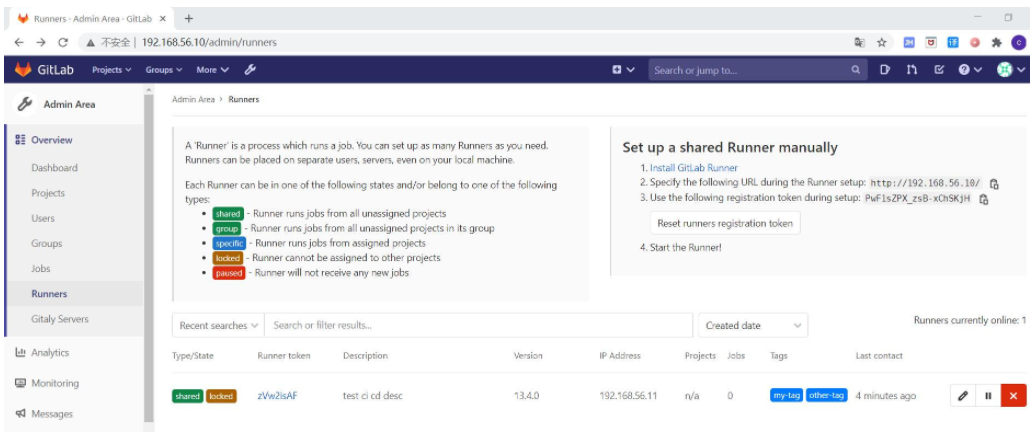
Check: run untagged jobs indicate why this runner can pick jobs without tags
4. Install application server environment
(1) Allow users to log on remotely (optional)
vi /etc/ssh/sshd_config
 Modification:
PasswordAuthentication yes
PermitRootLogin yes

Restart service:
service sshd restart
(2) Install JDK1.8
(1) Download address: http://www.oracle.com/technetwork/java/javase/downloads/jdk8-downloads-2133151.html
(2) Decompress
tar -zxvf jdk-8u161-linux-x64.tar.gz
 Rename:
mv jdk1.8.0_161 java1.8
(3) Configure environment variables
vi /etc/profile

Add the following:
export JAVA_HOME=/usr/local/java1.8
export PATH=$JAVA_HOME/bin:$PATH
export CLASSPATH=.:$JAVA_HOME/lib/dt.jar:$JAVA_HOME/lib/tools.jar
 Save exit

source /etc/profile
java -version
(3) Installation maven 3.3.9
(1) Download address: http://maven.apache.org/download.cgi
(2) Decompress
tar -zxvf apache-maven-3.3.9-bin.tar.gz

Rename:
mv apache-maven-3.3.9 maven-3.3.9
(3) Configure environment variables
vi /etc/profile

Add the following:
export MAVEN_HOME=/usr/local/maven-3.3.9
export PATH=$MAVEN_HOME/bin:$PATH
 Save exit

source /etc/profile
mvn -v
5, Create a SpringBoot project
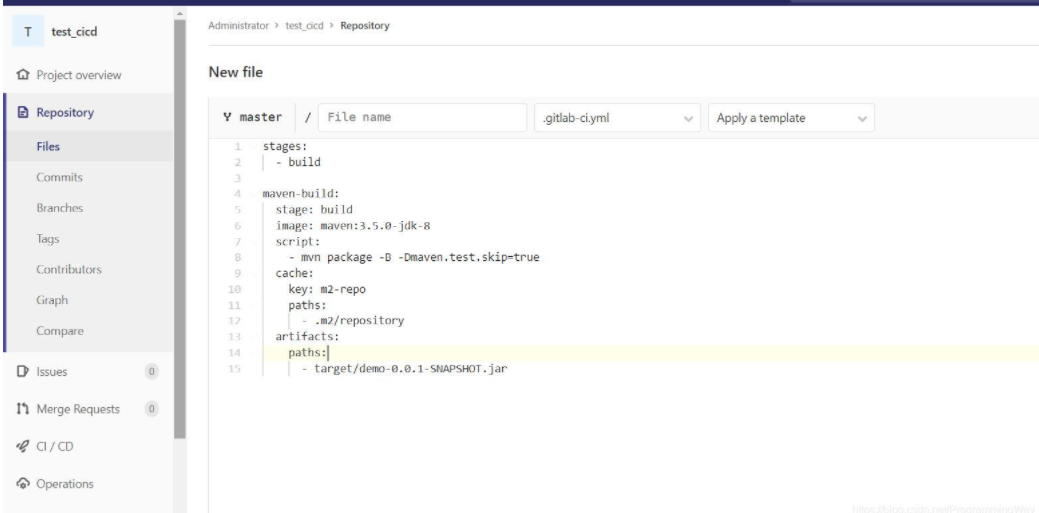
1. Use Gitlab Spring template to quickly create a SpringBoot project;
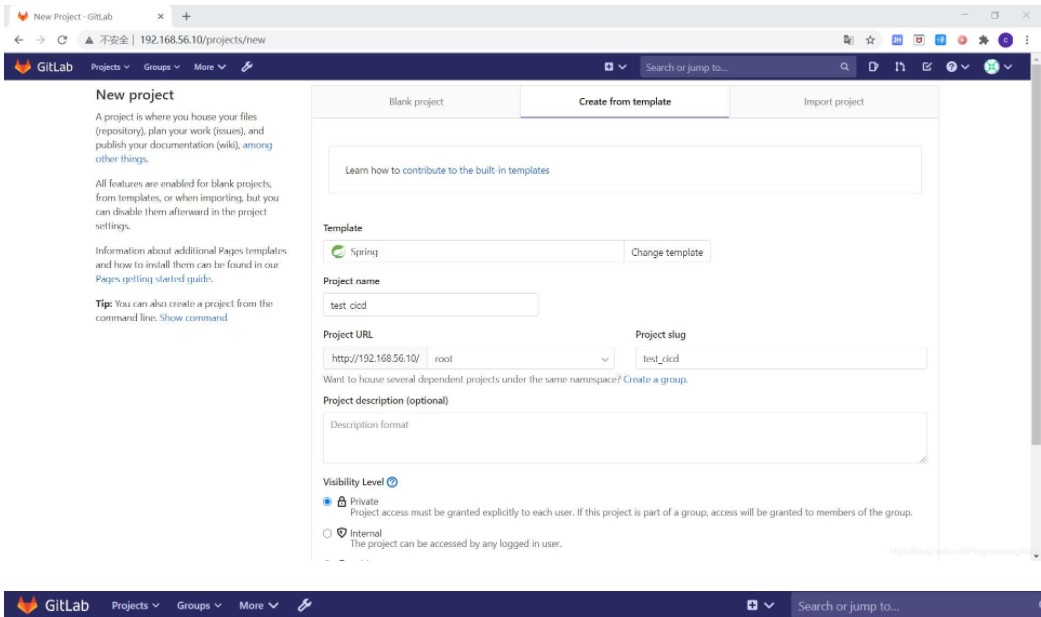
If an error is reported, delete POM This line in XML
If this error is reported:
[FATAL] Non-resolvable parent POM for com.example:demo:0.0.1-SNAPSHOT: Could not transfer artifact org.springframework.boot:spring-boot-starter-parent:pom:2.0.1.RELEASE from/to central (https://repo.maven.apache.org/maven2): Connect to repo.maven.apache.org:443 [repo.maven.apache.org/151.101.40.215] failed: Connection timed out (Connection timed out) and 'parent.relativePath' points at wrong local POM @ line 14, column 10
Modified version
1.5.9.RELEASE
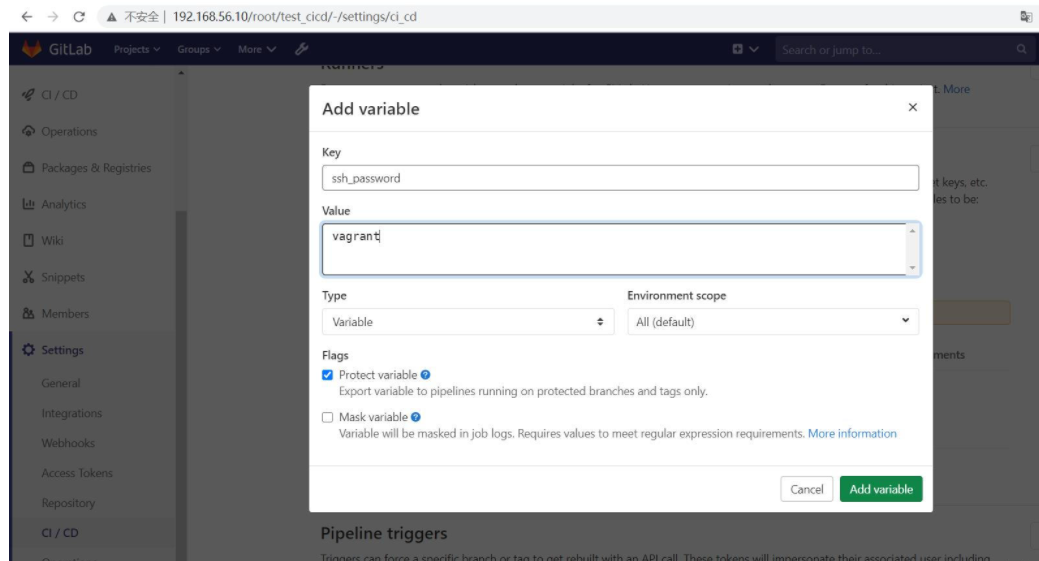
2. Add environment variable (login application server password)
Note: SSH_ Add password to the environment variable and uncheck Protect Branch (only Protect Branch); both modification and addition are checked by default and need to be cancelled. Otherwise, other branches cannot read the variable;
First, create a directory on the application server to upload and store the project jar package:
mkdir gitlab-project
add to. gitlab-ci. You can verify the YML file in CI Lint in CI/CD Pipeline gitlab-ci.yml file format
# Define some variables, which will be used in the following stages
variables:
server_ip: 192.168.56.12
jar_name: demo-0.0.1-SNAPSHOT.jar
java_path: /usr/local/java1.8/bin
upload_path: /usr/local/gitlab-project
# Define the stages and sequence of execution
stages:
- build
- upload
- deploy
# Packaging projects using maven images
maven-build:
stage: build
image: maven:3.5.0-jdk-8
script:
- mvn package -B -Dmaven.test.skip=true
cache:
key: m2-repo
paths:
- .m2/repository
artifacts:
paths:
- target/$jar_name
# Upload the generated jar package to your application server. The image ictu/sshpass is used here to use the sshpass command
upload-jar:
stage: upload
image: ictu/sshpass
script:
- ls -l target/
- sshpass -p $ssh_password scp -o UserKnownHostsFile=/dev/null -o StrictHostKeyChecking=no target/$jar_name root@$server_ip:$upload_path/$jar_name
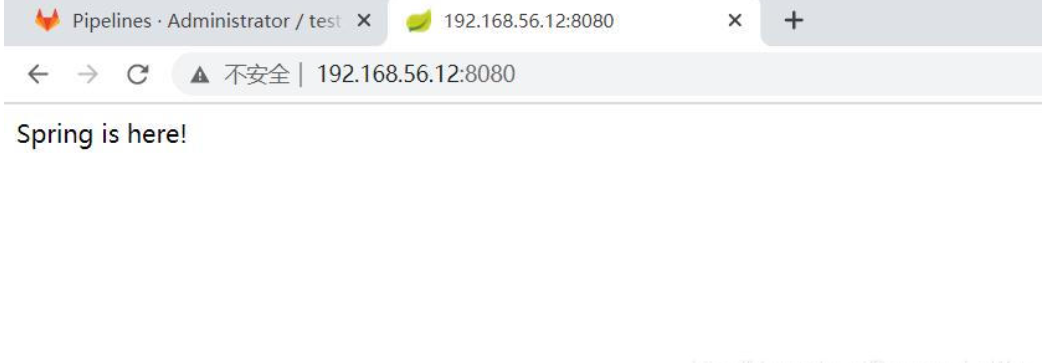
# Start the SpringBoot jar package
deploy-test:
stage: deploy
image: ictu/sshpass
script:
- sshpass -p $ssh_password ssh -o UserKnownHostsFile=/dev/null -o StrictHostKeyChecking=no root@$server_ip "nohup $java_path/java -jar $upload_path/$jar_name >/dev/null 2>&1 &"
Here, a public image (ictu/sshpass) on DockerHub is used, mainly to execute scp and ssh commands using the built-in sshpass command.
If everything goes well, CI/CD will be triggered automatically; If it fails, check the error information and execute the debugging command using the Debug mode.
[root@localhost gitlab-project]# jps
22119 Jps
22073 demo-0.0.1-SNAPSHOT.jar
[root@localhost gitlab-project]# curl localhost:8080
Spring is here!
Summary of possible problems:
Permission problem: you can first use the root user to see if the permission problem is caused. If so, increase the permission of the execution user; Concurrency problem: the number of concurrent tasks that can be performed at the same time can be modified instead of modifying the number of concurrent tasks of the Runner; Other problems: if the configured environment variables cannot be read, uncheck the option of protecting branches only;
Unexecuted job: the option "execute without configuring tags" is not checked;
6, Summary
It is very convenient to deploy the SpringBoot project using the CICD function of gitlab. It may take some time to learn to build the early environment, but the late deployment project can save a lot of human operation errors. For small teams, the CICD function of gitlab is simpler than Jenkins. The overall thought steps are as follows:
Set up GitLab service; Set up GitLab Runner service; Build application services; Write GitLab CI yml;
SpringBoot projects are generally divided into:
(1) maven packaging;
(2) Upload jar package;
(3) Start the jar package;
At this point, I believe you have a deeper understanding of the "detailed process of Gitlab CI-CD automated deployment of SpringBoot project". You might as well come to the actual operation!