Hello, I'm Zhang Jintao.
In the first two articles, I will give you This paper introduces the concept of GitOps , and Argo CD tool for implementing GitOps . In this article, we will introduce the practice of Argo CD with an example project.
Create cluster
We use the KIND (Kubernetes in Docker) tool to create a Kubernetes cluster for local testing. Use the following configuration file to create a cluster containing one control plane and three work.
kind: Cluster
apiVersion: kind.x-k8s.io/v1alpha4
nodes:
- role: control-plane
- role: worker
- role: worker
- role: worker
Use the following command to create a cluster:
➜ (MoeLove) kind create cluster --config=kind-config.yaml
Creating cluster "kind" ...
 ✓ Ensuring node image (kindest/node:v1.20.2) 🖼
 ✓ Preparing nodes 📦 📦 📦 📦
 ✓ Writing configuration 📜
 ✓ Starting control-plane 🕹️
 ✓ Installing CNI 🔌
 ✓ Installing StorageClass 💾
 ✓ Joining worker nodes 🚜
Set kubectl context to "kind-kind"
You can now use your cluster with:

kubectl cluster-info --context kind-kind

Have a nice day! 👋
Execute the following command and wait for the cluster to be fully Ready:
➜ (MoeLove) kubectl wait --for=condition=Ready nodes --all
Deploy Argo CD
After the cluster status is fully Ready, start the Argo CD deployment. We create a namespace called argocd.
deploy
Here, you can directly use the deployment file provided in the Argo CD project for installation. It should be noted that the configuration of RBA in this deployment file refers to the namespace argocd, so if you deploy it to other namespaces, you must modify it accordingly.
➜ (MoeLove) kubectl create ns argocd
namespace/argocd created
➜ (MoeLove) kubectl -n argocd apply -f https://raw.githubusercontent.com/argoproj/argo-cd/stable/manifests/install.yaml
customresourcedefinition.apiextensions.k8s.io/applications.argoproj.io created
customresourcedefinition.apiextensions.k8s.io/appprojects.argoproj.io created
serviceaccount/argocd-application-controller created
serviceaccount/argocd-dex-server created
serviceaccount/argocd-redis created
serviceaccount/argocd-server created
role.rbac.authorization.k8s.io/argocd-application-controller created
role.rbac.authorization.k8s.io/argocd-dex-server created
role.rbac.authorization.k8s.io/argocd-server created
clusterrole.rbac.authorization.k8s.io/argocd-application-controller created
clusterrole.rbac.authorization.k8s.io/argocd-server created
rolebinding.rbac.authorization.k8s.io/argocd-application-controller created
rolebinding.rbac.authorization.k8s.io/argocd-dex-server created
rolebinding.rbac.authorization.k8s.io/argocd-redis created
rolebinding.rbac.authorization.k8s.io/argocd-server created
clusterrolebinding.rbac.authorization.k8s.io/argocd-application-controller created
clusterrolebinding.rbac.authorization.k8s.io/argocd-server created
configmap/argocd-cm created
configmap/argocd-cmd-params-cm created
configmap/argocd-gpg-keys-cm created
configmap/argocd-rbac-cm created
configmap/argocd-ssh-known-hosts-cm created
configmap/argocd-tls-certs-cm created
secret/argocd-secret created
service/argocd-dex-server created
service/argocd-metrics created
service/argocd-redis created
service/argocd-repo-server created
service/argocd-server created
service/argocd-server-metrics created
deployment.apps/argocd-dex-server created
deployment.apps/argocd-redis created
deployment.apps/argocd-repo-server created
deployment.apps/argocd-server created
statefulset.apps/argocd-application-controller created
networkpolicy.networking.k8s.io/argocd-application-controller-network-policy created
networkpolicy.networking.k8s.io/argocd-dex-server-network-policy created
networkpolicy.networking.k8s.io/argocd-redis-network-policy created
networkpolicy.networking.k8s.io/argocd-repo-server-network-policy created
networkpolicy.networking.k8s.io/argocd-server-network-policy created
View status
➜ (MoeLove) kubectl -n argocd get deploy
NAME                 READY   UP-TO-DATE   AVAILABLE   AGE
argocd-dex-server    0/1     1            1           1m
argocd-redis         0/1     1            1           1m
argocd-repo-server   1/1     1            1           1m
argocd-server        0/1     1            1           1m
Get password:
By default, the installed Argo CD enables authentication based on Basic Auth. We can find the corresponding password in the Secret resource. However, it should be noted that the sercret resource with the name argocd initial admin Secret will not be written until the Pod is in the Running state.
# wait for Pod whole Ready
➜ (MoeLove) kubectl wait --for=condition=Ready pods --all -n argocd
pod/argocd-application-controller-0 condition met
pod/argocd-dex-server-5fc596bcdd-lnx65 condition met
pod/argocd-redis-5b6967fdfc-mfbrr condition met
pod/argocd-repo-server-98598b6c7-7pmgb condition met
pod/argocd-server-5b4b7b868b-bjmzz condition met

# Get password
➜ (MoeLove) kubectl  -n argocd get secret argocd-initial-admin-secret -o template="{{ .data.password | base64decode }}"
AFbmuBSmRo1F0Dow
Access it through the UI
We can map the 443 port of argocd server to the local 9080 port through kubectl port forward Port.
➜ (MoeLove) ➜ (MoeLove) kubectl port-forward --address 0.0.0.0 service/argocd-server -n argocd 9080:443
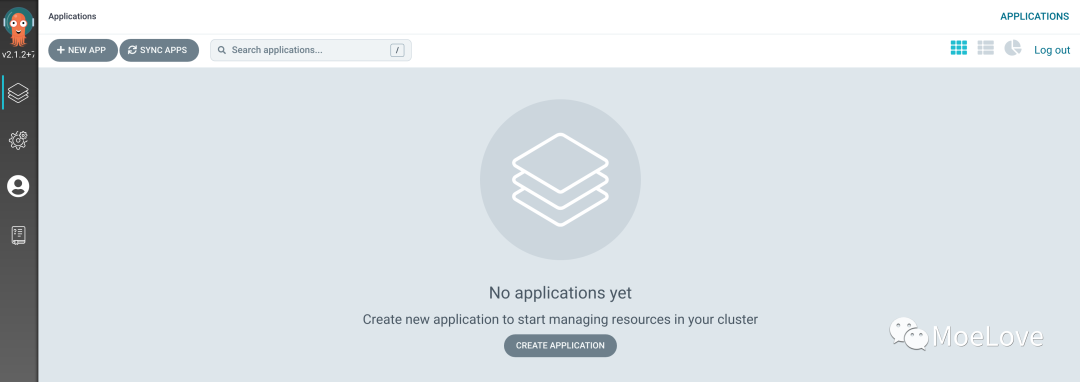
In this way, ArgoCD dashboard can be displayed in the browser, which is username and admin, And password can be used in the "get password" section mentioned earlier.
 img
img
Command line access:
If you don't like to operate through the browser, you can also use the CLI tools provided by Argo CD.
➜ (MoeLove) wget https://github.com/argoproj/argo-cd/releases/download/v2.1.2/argocd-linux-amd64 -O argocd
➜ (MoeLove) chmod +x argocd
➜ (MoeLove) mv argocd /bin/argocd

# Before we execute this order, we pass kubectl port-forward Port forwarding was performed
➜ (MoeLove) argocd login localhost:9080
WARNING: server certificate had error: x509: certificate signed by unknown authority. Proceed insecurely (y/n)? y
Username: admin
Password:
'admin:login' logged in successfully
Context 'localhost:9080' updated
Deploy application
Here I created a sample project. The complete content can be found in my GitHub https://github.com/tao12345666333/argo-cd-demo Get.
Create target namespace
➜ (MoeLove) kubectl  create ns kustomize
namespace/kustomize created
Create app
Here, you can choose to configure directly in the UI of Argo CD or use the CLI of Argo CD. Here I take cli configuration as an example
➜ (MoeLove) argocd app create argo-cd-demo --repo https://github.com/tao12345666333/argo-cd-demo.git --revision kustomize --path ./kustomization --dest-server https://kubernetes.default.svc --dest-namespace kustomize
application 'argo-cd-demo' created
Of which:
- --repo specifies the warehouse address used to deploy the application;
- --revision specifies the branch used to deploy the application. Here I use a branch named Branches of kustomize;
- --path is the location of the manifest used to deploy the application
- --Dest server address of the target Kubernetes cluster
- --dest-``namespace applies the target namespace to be deployed
View status
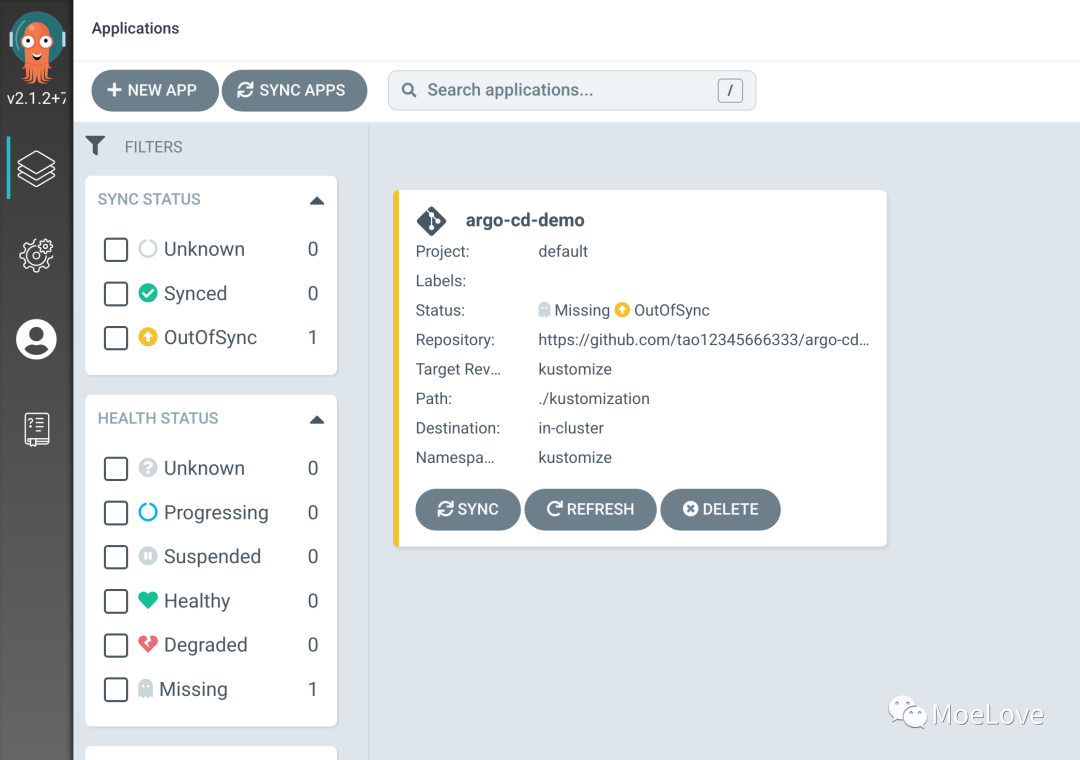
After the Application is created, you can also directly see the specific information on the UI:
 img
img
Or view it under the terminal through argocd:
➜ (MoeLove) argocd app get argo-cd-demo
Name:               argo-cd-demo
Project:            default
Server:             https://kubernetes.default.svc
Namespace:          kustomize
URL:                https://localhost:8080/applications/argo-cd-demo
Repo:               https://github.com/tao12345666333/argo-cd-demo.git
Target:             kustomize
Path:               ./kustomization
SyncWindow:         Sync Allowed
Sync Policy:        <none>
Sync Status:        OutOfSync from kustomize (e8a2d77)
Health Status:      Missing

GROUP  KIND        NAMESPACE  NAME          STATUS     HEALTH   HOOK  MESSAGE
       Service     kustomize  argo-cd-demo  OutOfSync  Missing
apps   Deployment  kustomize  argo-cd-demo  OutOfSync  Missing
You can see that the current Application state is OutOfSync, so we can trigger a sync operation for it for the first deployment.
sync
You can click the SYNC button on the UI or trigger the synchronization operation through the argocd CLI.
➜ (MoeLove) argocd app sync argo-cd-demo
TIMESTAMP                  GROUP        KIND   NAMESPACE                  NAME    STATUS    HEALTH        HOOK  MESSAGE
2021-10-30T10:35:33+00:00            Service   kustomize          argo-cd-demo  OutOfSync  Missing
2021-10-30T10:35:33+00:00   apps  Deployment   kustomize          argo-cd-demo  OutOfSync  Missing
2021-10-30T10:35:35+00:00            Service   kustomize          argo-cd-demo    Synced  Healthy
2021-10-30T10:35:35+00:00            Service   kustomize          argo-cd-demo    Synced   Healthy              service/argo-cd-demo created
2021-10-30T10:35:35+00:00   apps  Deployment   kustomize          argo-cd-demo  OutOfSync  Missing              deployment.apps/argo-cd-demo created
2021-10-30T10:35:35+00:00   apps  Deployment   kustomize          argo-cd-demo    Synced  Progressing              deployment.apps/argo-cd-demo created

Name:               argo-cd-demo
Project:            default
Server:             https://kubernetes.default.svc
Namespace:          kustomize
URL:                https://localhost:8080/applications/argo-cd-demo
Repo:               https://github.com/tao12345666333/argo-cd-demo.git
Target:             kustomize
Path:               ./kustomization
SyncWindow:         Sync Allowed
Sync Policy:        <none>
Sync Status:        Synced to kustomize (e8a2d77)
Health Status:      Progressing

Operation:          Sync
Sync Revision:      e8a2d77cf0e5405ba9e5dc70d3bf44da91b3ce00
Phase:              Succeeded
Start:              2021-10-30 10:35:33 +0000 UTC
Finished:           2021-10-30 10:35:35 +0000 UTC
Duration:           2s
Message:            successfully synced (all tasks run)

GROUP  KIND        NAMESPACE  NAME          STATUS  HEALTH       HOOK  MESSAGE
       Service     kustomize  argo-cd-demo  Synced  Healthy            service/argo-cd-demo created
apps   Deployment  kustomize  argo-cd-demo  Synced  Progressing        deployment.apps/argo-cd-demo created
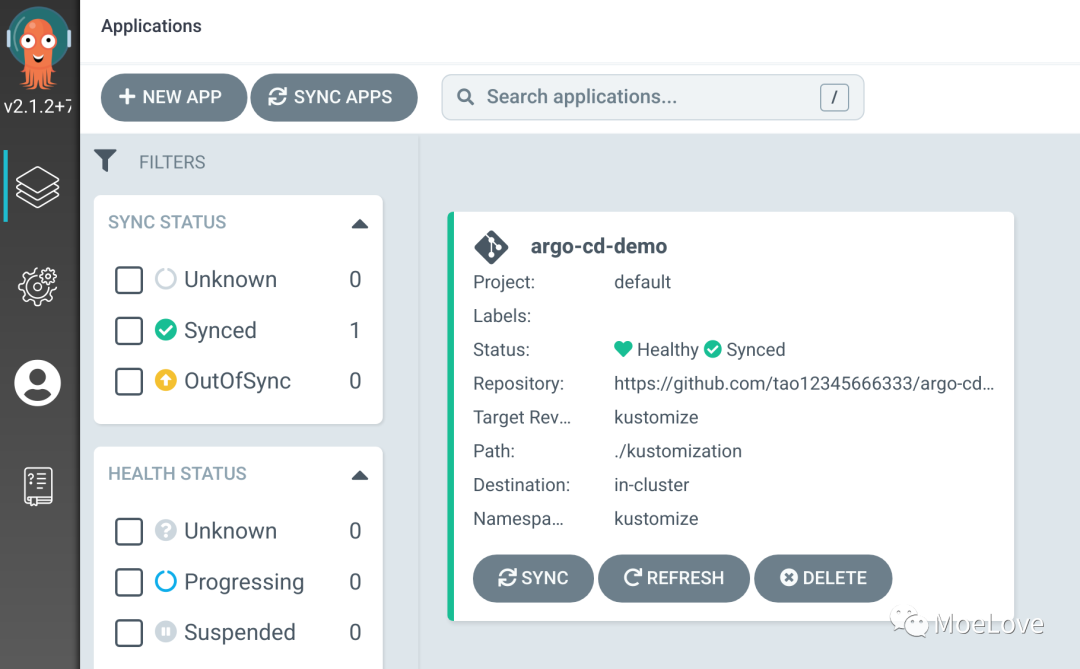
After successful synchronization, you can also see the current application and synchronization status on the UI.
 img
img
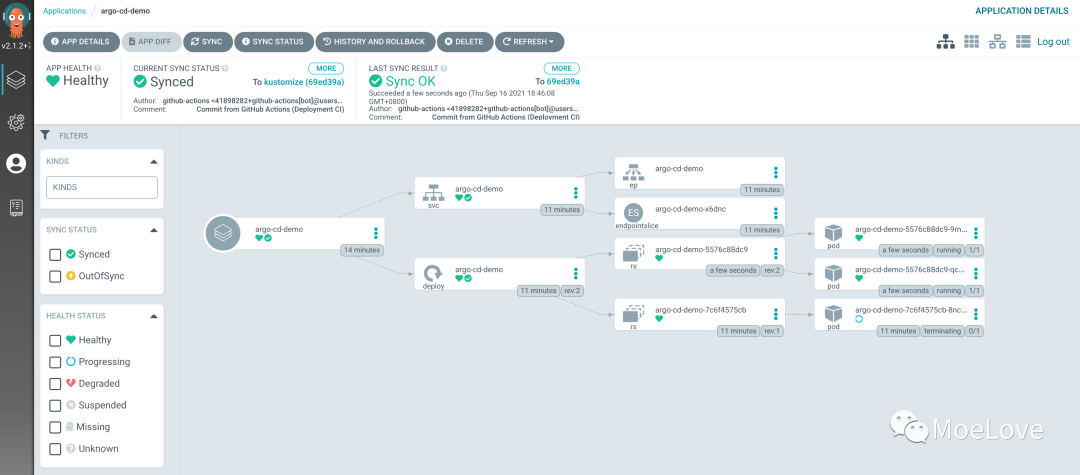
Click View Details to see the topology of application deployment:
 img
img
Verification effect
CI
Next, in the kustomize branch, make some code changes and submit them to GitHub. The CI based on GitHub Action in the project will be triggered. Let's take a look at its specific configuration:
  deploy:
    name: Deploy
    runs-on: ubuntu-latest
    continue-on-error: true
    needs: build

    steps:
      - name: Check out code
        uses: actions/checkout@v2

      - name: Setup Kustomize
        uses: imranismail/setup-kustomize@v1
        with:
          kustomize-version: "4.3.0"

      - name: Update Kubernetes resources
        env:
          DOCKER_USERNAME: ${{ secrets.DOCKER_USERNAME }}
        run: |-
          cd manifests
          kustomize edit set image ghcr.io/${{ github.repository }}/argo-cd-demo:${{ github.sha }}
          cat kustomization.yaml
          kustomize build ./ > ../kustomization/manifests.yaml
          cat ../kustomization/manifests.yaml

      - uses: EndBug/add-and-commit@v7
        with:
          default_author: github_actions
          branch: kustomize
You can see that the tool kustomize is actually used here to write the latest image to the manifest.yaml file used to deploy the application, and then use endbug / add and- commit@v7 This action submits the latest manifest. Yaml file back to GitHub.
View status
At this point, when Sync is triggered again, we can see the latest deployment topology.
 img
img
summary
The above is the practical content about using Argo CD to implement GitOps. Interested partners can find a complete example of this project directly on GitHub: https://github.com/tao12345666333/argo-cd-demo
Welcome to subscribe my official account number [MoeLove].

This article is shared with WeChat official account MoeLove (TheMoeLove).
In case of infringement, please contact support@oschina.cn Delete.
Article participation“ OSC source creation program ”, you who are reading are welcome to join us and share with us.