- Note: GoIndex is a Google platform deployed in Cloudflare Workers The Drive directory indexing program does not need to provide a server. It can directly list all the files on your Google online disk. At the same time, there is no need to speed up the download and access. Goindex can watch video files in some formats online. gdindex can be compatible with more videos and load subtitles. The actual experience of goindex is more comfortable. The header and tail notes and password files that oneindex can use can also be read
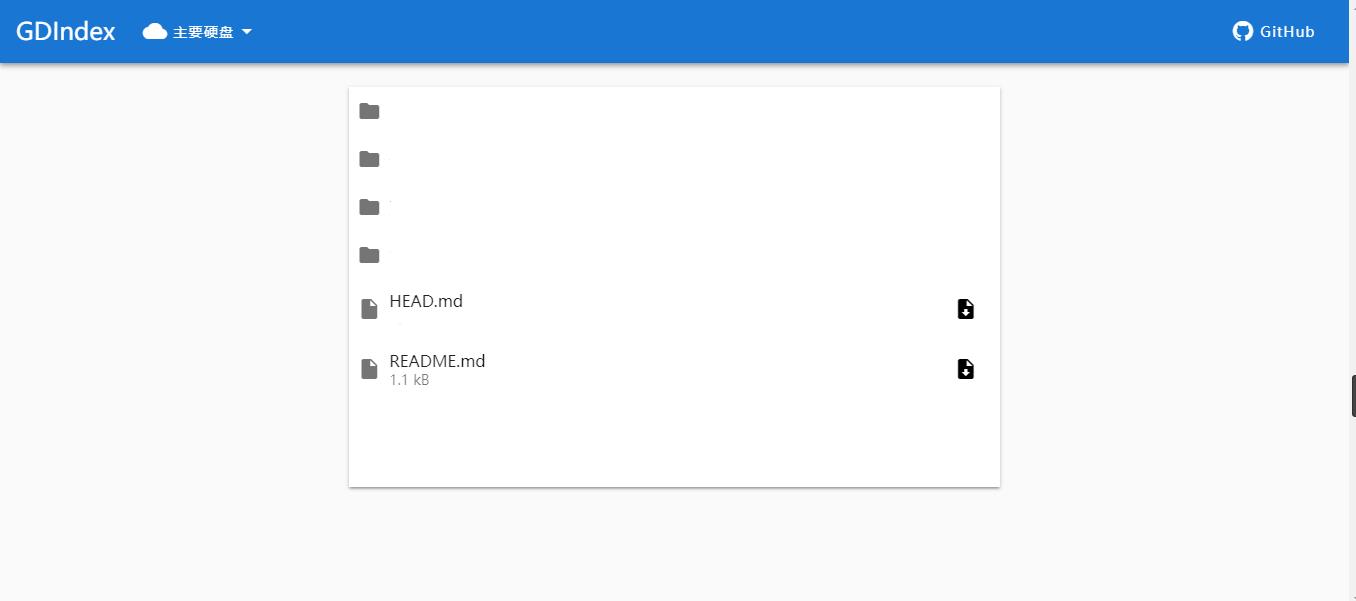
- Preview

install
Github: GOindex GDindex
First of all, we definitely need a Google disk. Here we directly use the rapid deployment method provided by goindex. Because we use rclone's google api, we will inevitably have some problems during the peak period. Later, we will also talk about using our own api deployment method.
1. Get Workers code
First visit: https://installen.gd.workers.dev/ , click GET AUTH CODE to verify your Google account and GET AUTH CODE.
Then start to enter your Auth code. Others can default first, and then click BUILD to get your code.
The relevant parameters at the beginning can be modified by yourself:
    #Site name
    "siteName": "GoIndex",
    #The root directory access password can be left blank if it is not set
    "root_pass": "moerats",
    #Root directory ID, the default is the entire network disk folder. If you only want to list a folder in the root directory, you can fill in the folder ID.
    "root": "root"
To obtain the folder ID, click a folder in the root directory, and the address bar is: https://drive.google.com/drive/folders/1C4Aro , then 1C4Aro is the folder ID.
2. Deploy to Workers
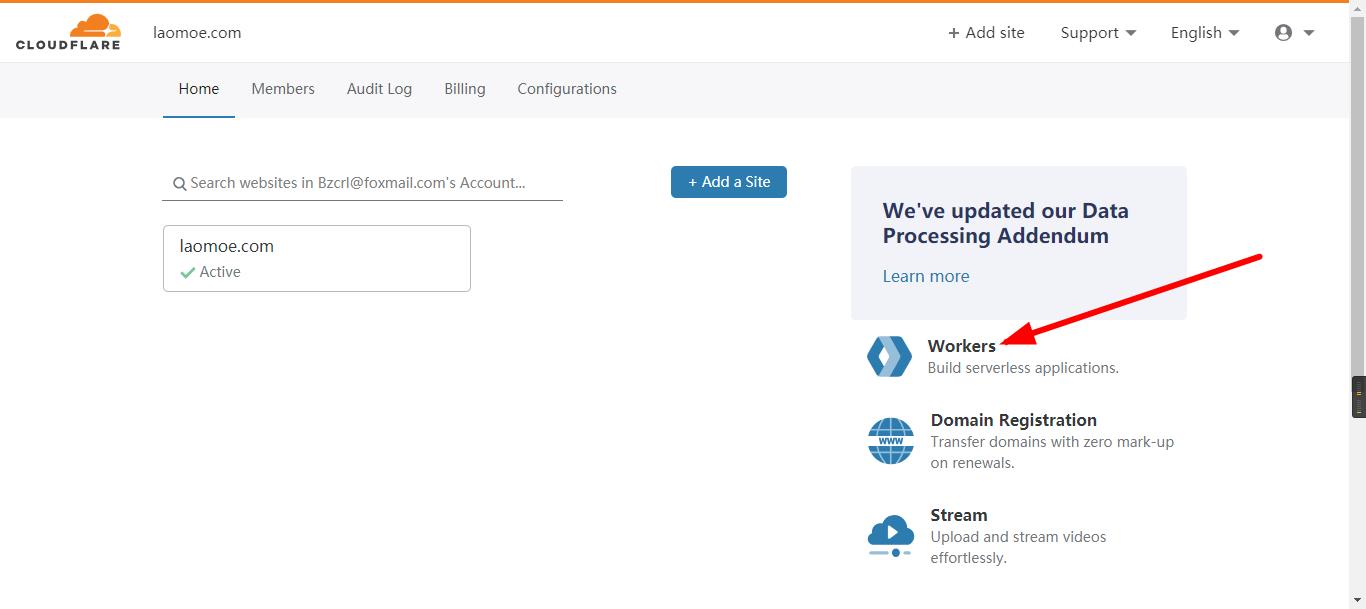
First log in to cloudflare, official website → portal, and then the Workers entrance can be seen on the right side of the home page.
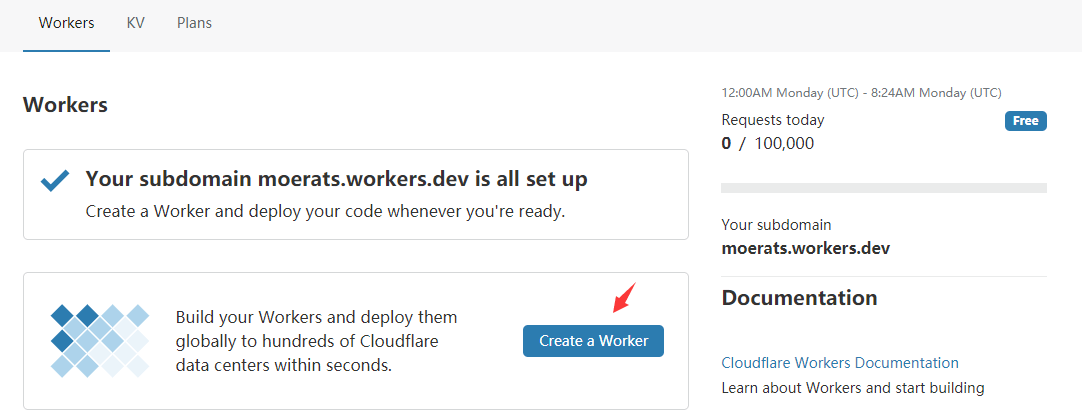
Click in and create a Workers sub domain name, that is, your exclusive domain name. After filling in and confirming, you can't change it, so don't fill in indiscriminately.
Next, click Create a Worker to Create a Worker.
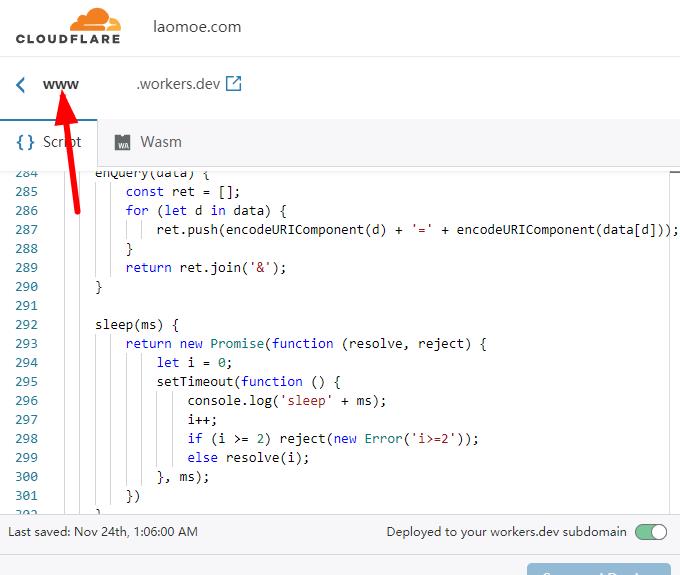
Paste the Workers code you obtained before, then double-click to modify the domain name in the upper left corner, and then click Save and Deploy.
Finally, open the assigned subdomain name, and then modify the configuration. You can modify the Workers code yourself.
3. Bind domain name
If you want to bind your own domain name, you need to first transfer your domain name to cloudflare (non ns transfer can also be used), and then click your own domain name to resolve an A record. The IP address is optional.

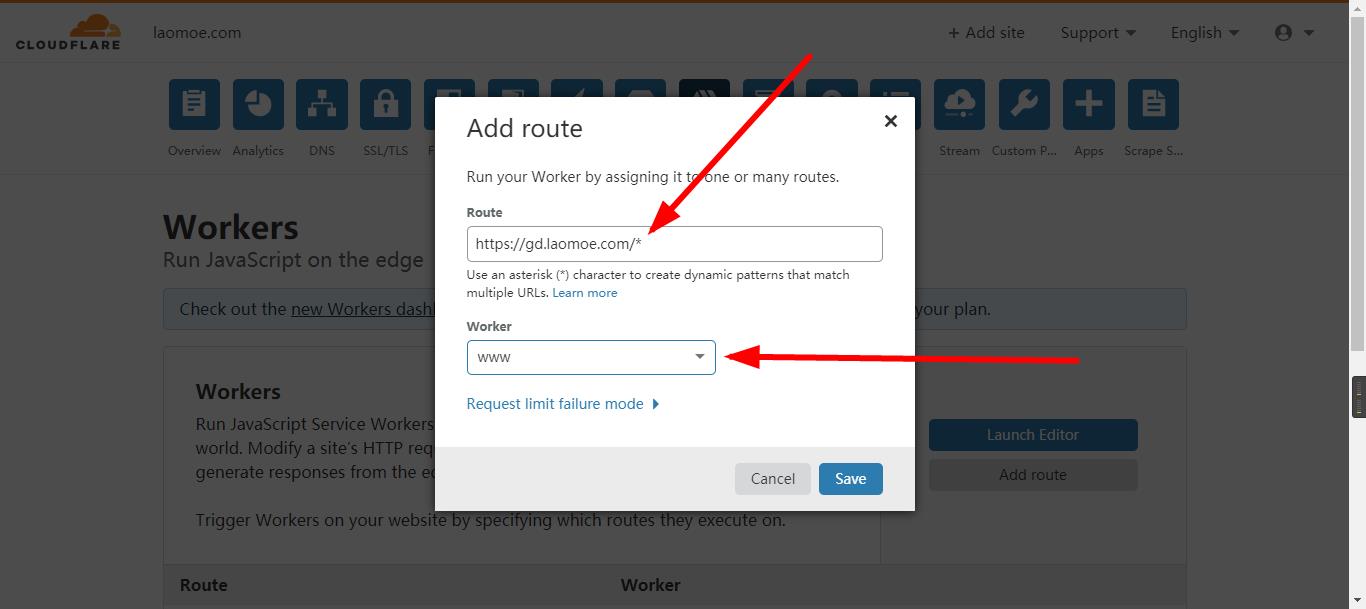
Then find the Workers at the top, select them, and click Add route under the page to make the following settings.

According to the format in the figure, fill in your own domain name and select the corresponding Workers program. Add / * after the domain name, e.g https://gd.laomoe.com/ *
Optional - API deployment
You can also use your own API deployment here. The advantage is that it is safe and it is not easy to explode in peak hours. Of course, the installation will be troublesome. If you don't use it often, it is recommended to use the above method for rapid deployment.
1. Get GDrive client
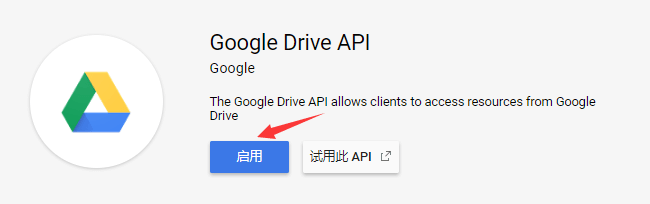
First enable the Google Drive API and enable the address: Click to enter. Note that personal account operation is used here.
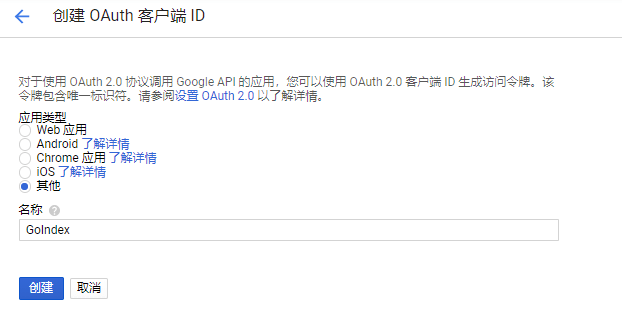
Create another OAuth client ID and address: Click to enter. Select other for the application type, and fill in the name yourself. Here, the blogger fills in GoIndex.
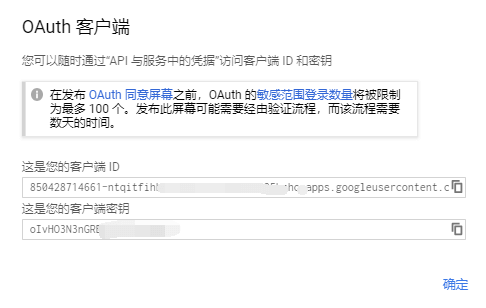
Then you will get your client ID and client key and copy it.
2. Get refresh_token Rclone is used here to get refresh_token, log in first and install the dependency first. Use the command:
CentOS system
yum install p7zip unzip -y
Debian/Ubuntu system
apt install -y p7zip-full
Then install Rclone and use the command:
curl https://rclone.org/install.sh | bash
To start configuration, use the command:
rclone config
The following message appears:
n) New remote
s) Set configuration password
q) Quit config
n/s/q> **n**
name> **Rats  #Configuration name, optional**
Type of storage to configure.
Enter a string value. Press Enter for the default ("").
Choose a number from below, or type in your own value
 1 / 1Fichier
   \ "fichier"
 2 / Alias for an existing remote
   \ "alias"
 3 / Amazon Drive
   \ "amazon cloud drive"
 4 / Amazon S3 Compliant Storage Provider (AWS, Alibaba, Ceph, Digital Ocean, Dreamhost, IBM COS, Minio, etc)
   \ "s3"
 5 / Backblaze B2
   \ "b2"
 6 / Box
   \ "box"
 7 / Cache a remote
   \ "cache"
 8 / Dropbox
   \ "dropbox"
 9 / Encrypt/Decrypt a remote
   \ "crypt"
10 / FTP Connection
   \ "ftp"
11 / Google Cloud Storage (this is not Google Drive)
   \ "google cloud storage"
12 / Google Drive
   \ "drive"
13 / Google Photos
   \ "google photos"
14 / Hubic
   \ "hubic"
15 / JottaCloud
   \ "jottacloud"
16 / Koofr
   \ "koofr"
17 / Local Disk
   \ "local"
18 / Mega
   \ "mega"
19 / Microsoft Azure Blob Storage
   \ "azureblob"
20 / Microsoft OneDrive
   \ "onedrive"
21 / OpenDrive
   \ "opendrive"
22 / Openstack Swift (Rackspace Cloud Files, Memset Memstore, OVH)
   \ "swift"
23 / Pcloud
   \ "pcloud"
24 / Put.io
   \ "putio"
25 / QingCloud Object Storage
   \ "qingstor"
26 / SSH/SFTP Connection
   \ "sftp"
27 / Union merges the contents of several remotes
   \ "union"
28 / Webdav
   \ "webdav"
29 / Yandex Disk
   \ "yandex"
30 / http Connection
   \ "http"
31 / premiumize.me
   \ "premiumizeme"

**Storage> 12**  #Select 12, Google Drive

**client_id> 850428**     #Fill in your Google Drive client ID
**client_secret> D72gPc**     #Fill in your Google Drive client key
Choose a number from below, or type in your own value
 1 / Full access all files, excluding Application Data Folder.
   \ "drive"
 2 / Read-only access to file metadata and file contents.
   \ "drive.readonly"
   / Access to files created by rclone only.
 3 | These are visible in the drive website.
   | File authorization is revoked when the user deauthorizes the app.
   \ "drive.file"
   / Allows read and write access to the Application Data folder.
 4 | This is not visible in the drive website.
   \ "drive.appfolder"
   / Allows read-only access to file metadata but
 5 | does not allow any access to read or download file content.
   \ "drive.metadata.readonly"
scope> 1
ID of the root folder
Leave blank normally.
Fill in to access "Computers" folders. (see docs).
Enter a string value. Press Enter for the default ("").
root_folder_id>
Service Account Credentials JSON file path
Leave blank normally.
Needed only if you want use SA instead of interactive login.
Enter a string value. Press Enter for the default ("").
service_account_file>
Edit advanced config? (y/n)
y) Yes
n) No
**y/n> n**  #Enter n
Remote config
Use auto config?
 * Say Y if not sure
 * Say N if you are working on a remote or headless machine
y) Yes
n) No
**y/n> n  #n input**
If your browser doesn't open automatically go to the following link: https://accounts.google.com/o / # open this address to get code
Log in and authorize rclone for access
Enter verification code>hjdd   #Enter the code you got
Configure this as a team drive?
y) Yes
n) No
**y/n> n  #Enter n**
--------------------
[Rats]
type = drive
client_id = 85042871
client_secret = D72gPc
scope = drive
**token = {"access_token":"y902Z"}  #Remember the refresh in it_ Token parameter**
--------------------
y) Yes this is OK
e) Edit this remote
d) Delete this remote
**y/e/d> y  #Enter y**
Current remotes:

Name                 Type
====                 ====
Rats                 drive

e) Edit existing remote
n) New remote
d) Delete remote
r) Rename remote
c) Copy remote
s) Set configuration password
q) Quit config
**e/n/d/r/c/s/q> q  #Enter q to save and exit**
At this point, we get refresh in the configuration process_ Token parameter. If you forget, you can view the configuration file.
If you don't know where the configuration file is, you can use the command:
rclone config file | grep rclone.conf 3. Get and modify Workers code Workers code can be viewed by clicking the address → portal. Copy the code first. For some modifications, please refer to the above. The difference is that you need to fill in your own api information, as follows:
Fill in your own api client, key and obtained refresh_token
"client_id": "20226481", "client_secret": "X4Z3ca8", "refresh_token": "", Finally, you can deploy the Workers code. For the method, refer to the above rapid deployment.
This article refers to Rat's Blog At present, the content that cannot be directly connected is modified according to the actual use
Copyright notice: This article is an original article, and the copyright belongs to Random blog All, please indicate this site for reprint Address: https://blog.laomoe.com/index.php/archives/7/