This article is a little long, I hope you guys will forgive me!!!
Required installation packages: jdk-8u162-linux-x64.tar.gz (extraction code: 6k1i) hadoop-3.1.3.tar.gz (extraction code: 07p6)
1. Cluster planning
Install VMware and use three Ubuntu 18 04 virtual machine cluster construction. The following is the planning of each virtual machine:
| host name | IP | user | HDFS | YARN |
|---|---|---|---|---|
| hadoopMaster | undetermined | rmc0924 | NameNode,DataNode | NodeManager,ResourceManager |
| hadoopSlave0 | undetermined | rmc0924 | DataNode,SecondaryNameNode | NodeManager |
| hadoopSlave1 | undetermined | rmc0924 | DataNode | NodeManager |
The above table is for standby. You also need to determine the IP address of each virtual machine
2 network configuration
First, create a new Ubuntu virtual machine with 4G memory (which will be modified later) and 20G hard disk space in VMware. After the new is completed, perform the following operations.
2.1 modify host name
sudo vim /etc/hostname
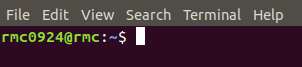
Execute the above command to open the file "/ etc/hostname", delete its contents and modify it to "Hadoop master", save it, exit vim editor and restart Linux to see the host name change. The following is the host name before modification:
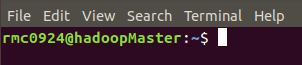
Here is the modified host name:
2.2 setting IP address of virtual machine
- View the virtual network editor for VMware virtual machines
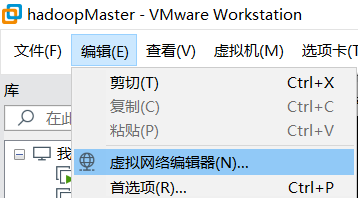
- Click VMnet8 network and NAT settings
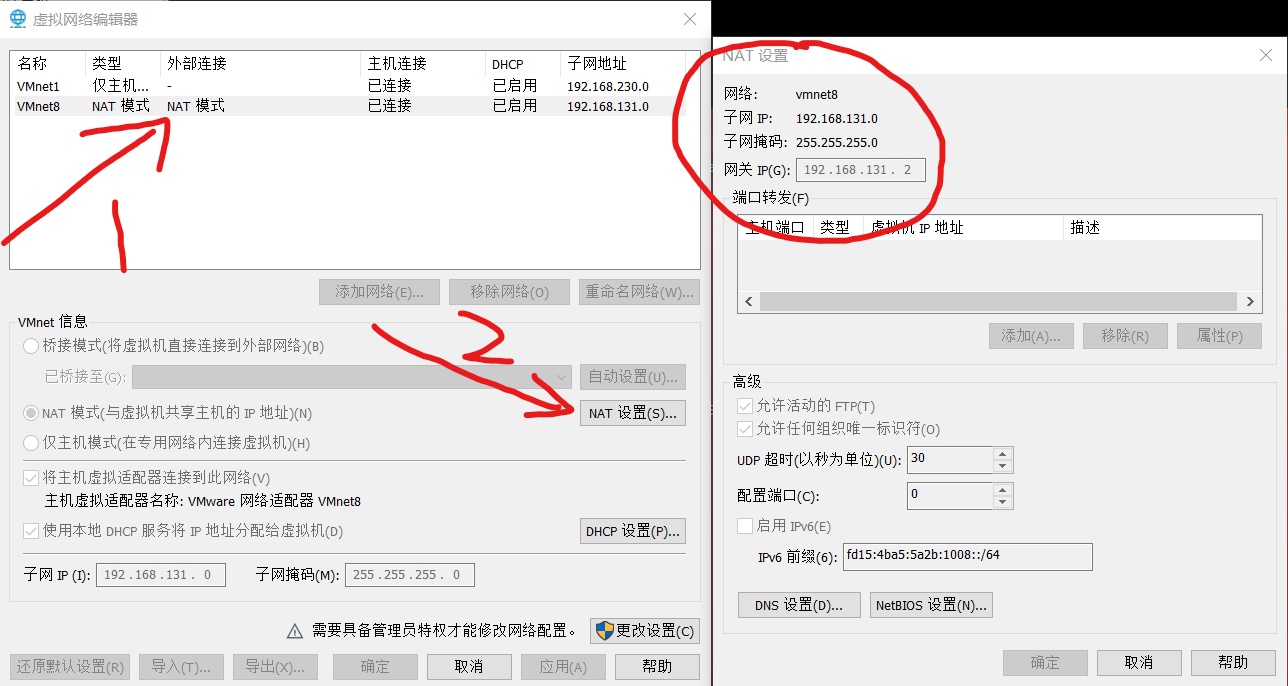
Record the three attributes of subnet IP, subnet mask and gateway in the figure above. These are useful in the next steps. Different computers will have different attributes.
- Get the network card number of Ubuntu virtual machine
ifconfig
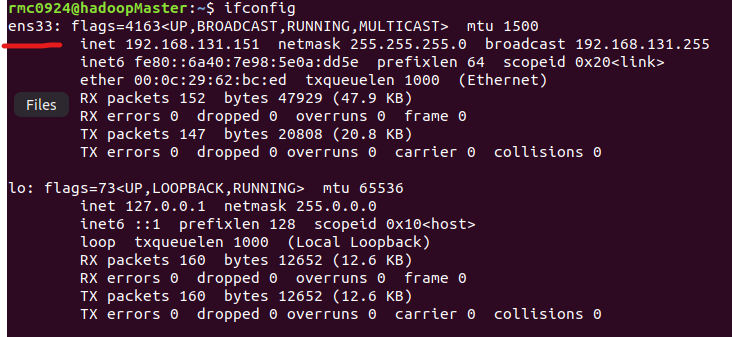
- Set up static network
sudo vim /etc/network/interfaces
Add to the original content
auto ens33				# Network card number, this is ens33
iface ens33 inet static	# Set to static IP
adrress 192.168.131.151	# The IP of the machine is selected according to the subnet IP of VMware we just obtained
netmask 255.255.255.0	# Subnet mask. Just got the subnet mask of VMware
gateway 192.168.131.2	# Gateway, which is also the gateway just obtained
dns-nameserver 192.168.131.2	# DNS, just like the gateway
The above contents are set according to their respective computers. They must be consistent with the subnet IP, subnet mask and gateway in VMware, otherwise they will not be available to the network. Save, exit vim editor and restart Ubuntu to take effect.
- Host IP mapping
sudo vim /etc/hosts
Open the hosts file and add three mapping relationships between IP and host:
192.168.131.151	hadoopMaster
192.168.131.152	hadoopSlave0
192.168.131.153	hadoopSlave1
The modification result is shown in the following figure:
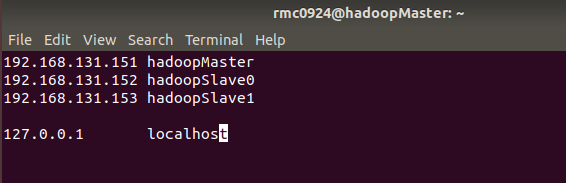
Generally, there is only one 127.0.0.1 in the hosts file, and its corresponding host name is localhost. If there is an extra 127.0.0.1, it should be deleted. At the same time, 127.0.0.1 cannot be mapped with a host name such as Hadoop master. Restart Ubuntu after modification.
2.3 turn off the firewall
Use the following command to check the firewall status. inactive is the firewall off status and active is the firewall on status.
sudo ufw status
Turn off the firewall with the following command:
sudo ufw disable
3 install SSH server
sudo apt-get install openssh-server
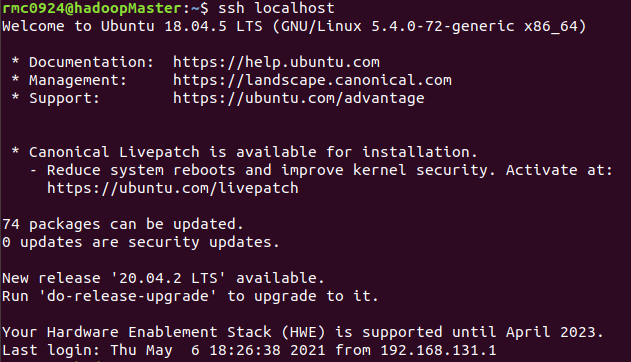
After installation, log in to this computer with the following command:
ssh localhost
When SSH logs in for the first time, there will be a prompt. Enter yes, and then enter the local password according to the prompt. But in this way, you need to enter the password every time you log in. Now set SSH to log in without password. First, exit SSH, use SSH keygen to generate the key, and add the key to the authorization.
exit	# Exit ssh localhost
cd ~/.ssh/
ssh-keygen -t rsa	# There will be a prompt. Just press enter
cat ./id_rsa.pub >> ./authorized_keys	Join authorization
Now use "ssh localhost" again to log in to ssh without entering a password
4. Install Java environment
Hadoop3.1.3 JDK version 1.8 and above is required, jdk-8u162-linux-x64.0 tar. GZ is given at the beginning of the article and can be downloaded. After putting the file in a directory, open a terminal and execute the following command.
cd /usr/lib
sudo mkdir jvm	# Create a directory to store JDK files
# Enter jdk-8u162-linux-x64 tar. GZ folder
sudo tar -zxvf ./jdk-8u162-linux-x64.tar.gz -C /usr/lib/jvm
After extracting the JDK file above, enter the / usr/lib/jvm directory and there will be a jdk1 8.0_ 162 documents
Let's start setting environment variables
sudo vim ~/.bashrc
Add the following to the header of the open file
export JAVA_HOME=/usr/lib/jvm/jdk1.8.0_162
export JRE_HOME=${JAVA_HOME}/jre
export CLASSPATH=.:${JAVA_HOME}/lib:${JRE_HOME}/lib
export PATH=${JAVA_HOME}/bin:$PATH
Save and exit vim editor, execute the following command The configuration of bashrc file takes effect:
source ~/.bashrc
Next, use the following command to check whether the installation is successful:
java -version
If the java version information is displayed, the installation is successful:

5. Install Hadoop 3 one point three
hadoop-3.1.3. tar. The GZ file is given at the beginning of the text. Download it and put it in the corresponding location. Use the following command to install it:
sudo tar -zxf ./hadoop-3.1.3.tar.gz -C /usr/local	# Unzip into / usr/local
cd mv ./hadoop-3.1.3/ ./hadoop	Change the file name to hadoop
sudo chown -R rmc0924 ./hadoop	# Modify the permission. Give the user permission according to the current user login
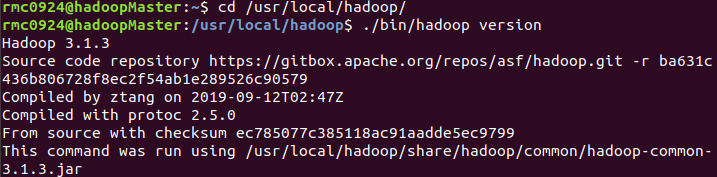
After decompression, use the following command to see if the installation is successful. If the installation is successful, the version information of Hadoop will be displayed.
cd /usr/local/hadoop
./bin/hadoop verison
6 clone virtual machine
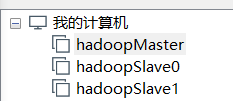
After the above steps, the Ubuntu named Hadoop master has been configured. Now exit the virtual machine. Clone the virtual machine into two other virtual machines, named Hadoop slave0 and Hadoop slave1 respectively.
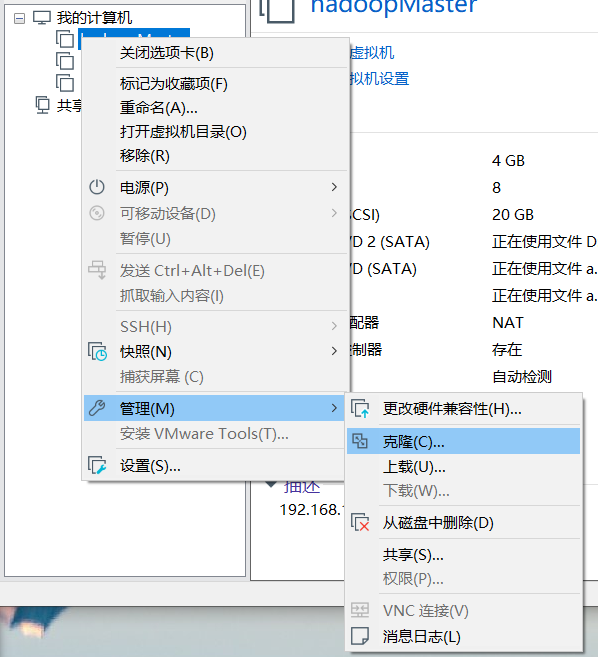
In the following prompt box, select "current state in virtual machine", "create full clone", name the cloned virtual machine, select the location, and wait for the cloning to complete. The final virtual machine is as follows:
Modify the host name and static IP of Hadoop slave0 and Hadoop slave1 virtual machines according to the steps in 2.1 and 2.2. Finally, we can complete the original table:
| host name | IP | user | HDFS | YARN |
|---|---|---|---|---|
| hadoopMaster | 192.168.131.151 | rmc0924 | NameNode,DataNode | NodeManager,ResourceManager |
| hadoopSlave0 | 192.168.131.152 | rmc0924 | DataNode,SecondaryNameNode | NodeManager |
| hadoopSlave1 | 192.168.131.153 | rmc0924 | DataNode | NodeManager |
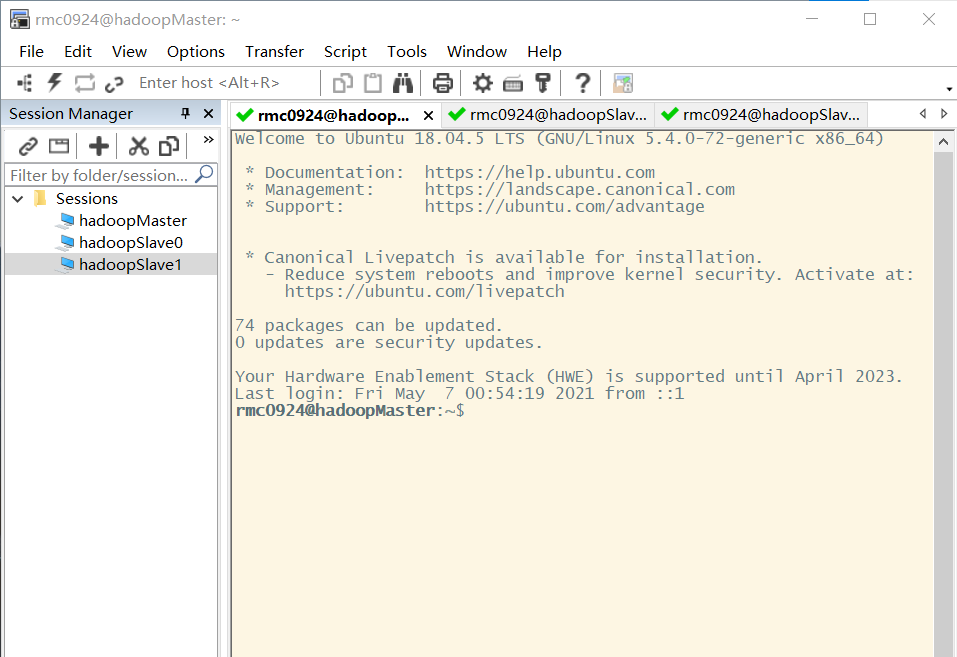
7 installing SecureCRT
Since one computer is used to build the cluster, the memory of the computer is 8G, and three virtual machines with graphical interface can not be moved. Therefore, SecureCRT is used for remote connection. The SecureCRT installation tutorial is available here mogul There are detailed tutorials in your blog. Just read them by yourself. I won't repeat them.
8. Cluster construction
Well, all that has been said above is foreshadowing. Now the Hadoop cluster is officially built. First of all, we still need to open the three virtual machines in VMware, but before opening, we need to modify their memory from 4G to 1.5G. For hardware reasons, instead of operating on the graphical interface of the three machines, SecureCRT is used to connect remotely and operate only on the terminal. After changing the memory size of the three virtual machines to 1.5G, you can open the three machines. Just open it. It's enough for the login interface to appear. You don't need to log in.

In this way, I have opened three, and the memory is still 1.5G. My memory has dried up to 85%, so I don't need to operate on the graphical interface. Three secure CRTs can be used to log in directly.
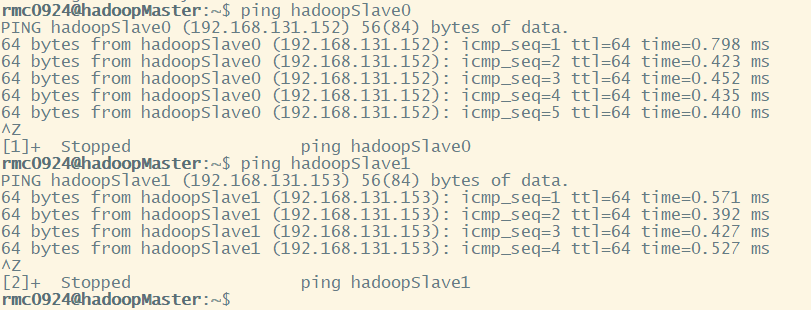
Ping the three machines to see if they can ping each other.
- SSH password less login node
The Hadoop master node must be able to log in to each Hadoop slave node through SSH without password. First, generate the Hadoop master node public key. If it has been generated before, it must be deleted and regenerated again. Perform the following operations on Hadoop master:
cd ~/.ssh
rm ./id_rsa*	# Delete previously generated public key
ssh-keygen -t rsa	# When you encounter information, just press enter
Then enable the Hadoop master node to log in to the machine without password SSH, and execute the following command on the Hadoop master node:
cat ./id_rsa.pub >> ./authorized_keys
Use the following command to test:
ssh hadoopMaster
Next, pass the public key on the Hadoop master to each Hadoop slave node:
scp ~/.ssh/id_rsa.pub hadoopSlave0:/home/rmc0924
scp is the abbreviation of secure copy, which is used for remote copy in Linux. When executing scp, you will be asked to enter the password of Hadoop slave1 user. After entering, the transmission will be displayed:

Then add the received public key to the authorization on the Hadoop slave 0 node:
mkdir ~/.ssh	# If the folder does not exist, create it first
cat ~/id_rsa.pub >> ~/.ssh/authorized_keys
rm ~/id_rsa.pub	# Delete after adding
The command on is also executed in the Hadoop slave1 node. After execution, you can log in to each Hadoop slave node without password on the Hadoop master node, and execute the following command on the Hadoop master node:
ssh hadoopSlave0
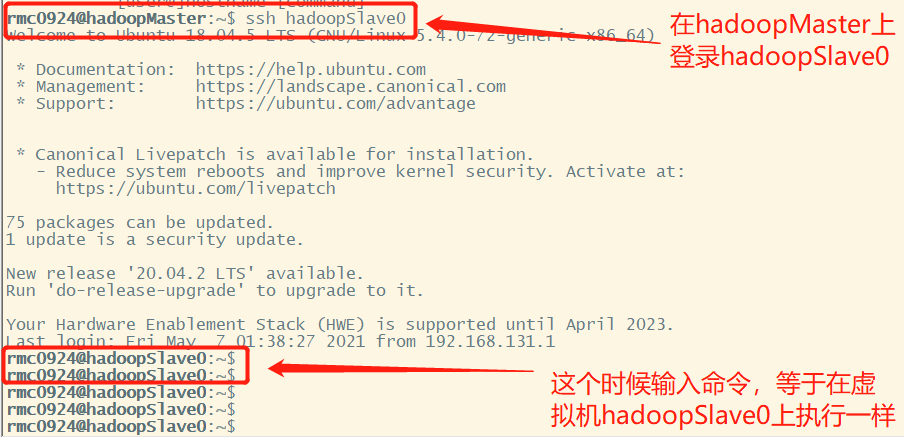
Enter exit to exit.
- Configure cluster environment
When configuring the cluster mode, you need to modify the configuration files in the "/ usr/local/hadoop/etc/hadoop" directory, including workers and core site xml,hdfs-site.xml,mapred-site.xml,yarn-site.xml.
A. Modify workers file
vim workers
The contents of this file can specify some nodes as data nodes. The default is localhost. We delete and modify them to Hadoop slave0 and Hadoop slave1 Of course, you can also add Hadoop master to make the Hadoop master node both a name node and a data node. This paper adds Hadoop master together as a data node.
hadoopMaster
hadoopSlave0
hadoopSlave1
B. Modify core site XML file
vim core-site.xml
fs.defaultFS: specify the file system communication address of namenode's hdfs protocol. You can specify a host + port
hadoop.tmp.dir: the directory where some temporary files stored in the Hadoop cluster are stored when working
<configuration>
        <property>
                <name>fs.defaultFS</name>
                <value>hdfs://hadoopMaster:9000</value>
        </property>
        <property>
                <name>hadoop.tmp.dir</name>
                <value>file:/usr/local/hadoop/tmp</value>
        </property>
</configuration>
C. Modify HDFS site XML file
vim hdfs-site.xml
dfs.namenode.name.dir: storage location of namenode data and metadata
dfs.datanode.data.dir: the storage location of datanode data and block block
dfs. Replication: set the number of copies of hdfs. The default value is 3
dfs.secondary.http.address: the information of the running node of the secondarynamenode should be stored in a different node from that of the namenode
<configuration>
        <property>
                <name>dfs.namenode.secondary.http-address</name>
                <value>hadoopSlave0:50090</value>
        </property>
        <property>
                <name>dfs.replication</name>
                <value>3</value>
        </property>
        <property>
                <name>dfs.namenode.name.dir</name>
                <value>file:/usr/local/hadoop/tmp/dfs/name</value>
        </property>
        <property>
                <name>dfs.datanode.data.dir</name>
                <value>file:/usr/local/hadoop/tmp/dfs/data</value>
        </property>
</configuration>
D. Modify mapred site XML file
vim mapred-site.xml
mapreduce.framework.name: specify the MapReduce framework as the yarn mode
mapreduce.jobhistory.address: Specifies the address and port of the history server
mapreduce.jobhistory.webapp.address: view the web address of the Mapreduce job record that the history server has run. You need to start the service
<configuration>
        <property>
                <name>mapreduce.framework.name</name>
                <value>yarn</value>
        </property>
        <property>
                <name>mapreduce.jobhistory.address</name>
                <value>hadoopMaster:10020</value>
        </property>
        <property>
                <name>mapreduce.jobhistory.webapp.address</name>
                <value>hadoopMaster:19888</value>
        </property>
        <property>
                <name>yarn.app.mapreduce.am.env</name>
                <value>HADOOP_MAPRED_HOME=/usr/local/hadoop</value>
        </property>
        <property>
                <name>mapreduce.map.env</name>
                <value>HADOOP_MAPRED_HOME=/usr/local/hadoop</value>
        </property>
        <property>
                <name>mapreduce.reduce.env</name>
                <value>HADOOP_MAPRED_HOME=/usr/local/hadoop</value>
        </property>
</configuration>
E. Modify Yard site XML file
vim yarn-site.xml
<configuration>
        <property>
                <name>yarn.resourcemanager.hostname</name>
                <value>hadoopSlave1</value>
        </property>
        <property>
                <name>yarn.nodemanager.aux-services</name>
                <value>mapreduce_shuffle</value>
        </property>
</configuration>
- Distribution of documents
After modifying the above five files, copy the hadoop files on the hadoop master node to each node. Execute the following command on the hadoop master node:
cd /usr/local
sudo rm -r ./hadoop/tmp     # Delete Hadoop temporary files
sudo rm -r ./hadoop/logs/*   # Delete log file
tar -zcf ~/hadoop.master.tar.gz ./hadoop   # Compress before copy
cd ~
scp ./hadoop.master.tar.gz hadoopSlave0:/home/hadoop

Decompress the received compressed files at other Hadoop slave nodes and grant permissions. The commands are as follows:
sudo rm -r /usr/local/hadoop    # Delete old (if any)
sudo tar -zxf ~/hadoop.master.tar.gz -C /usr/local
sudo chown -R rmc0924 /usr/local/hadoop
- Hadoop initialization
HDFS initialization can only be performed on the primary node
cd /usr/local/hadoop
./bin/hdfs namenode -format
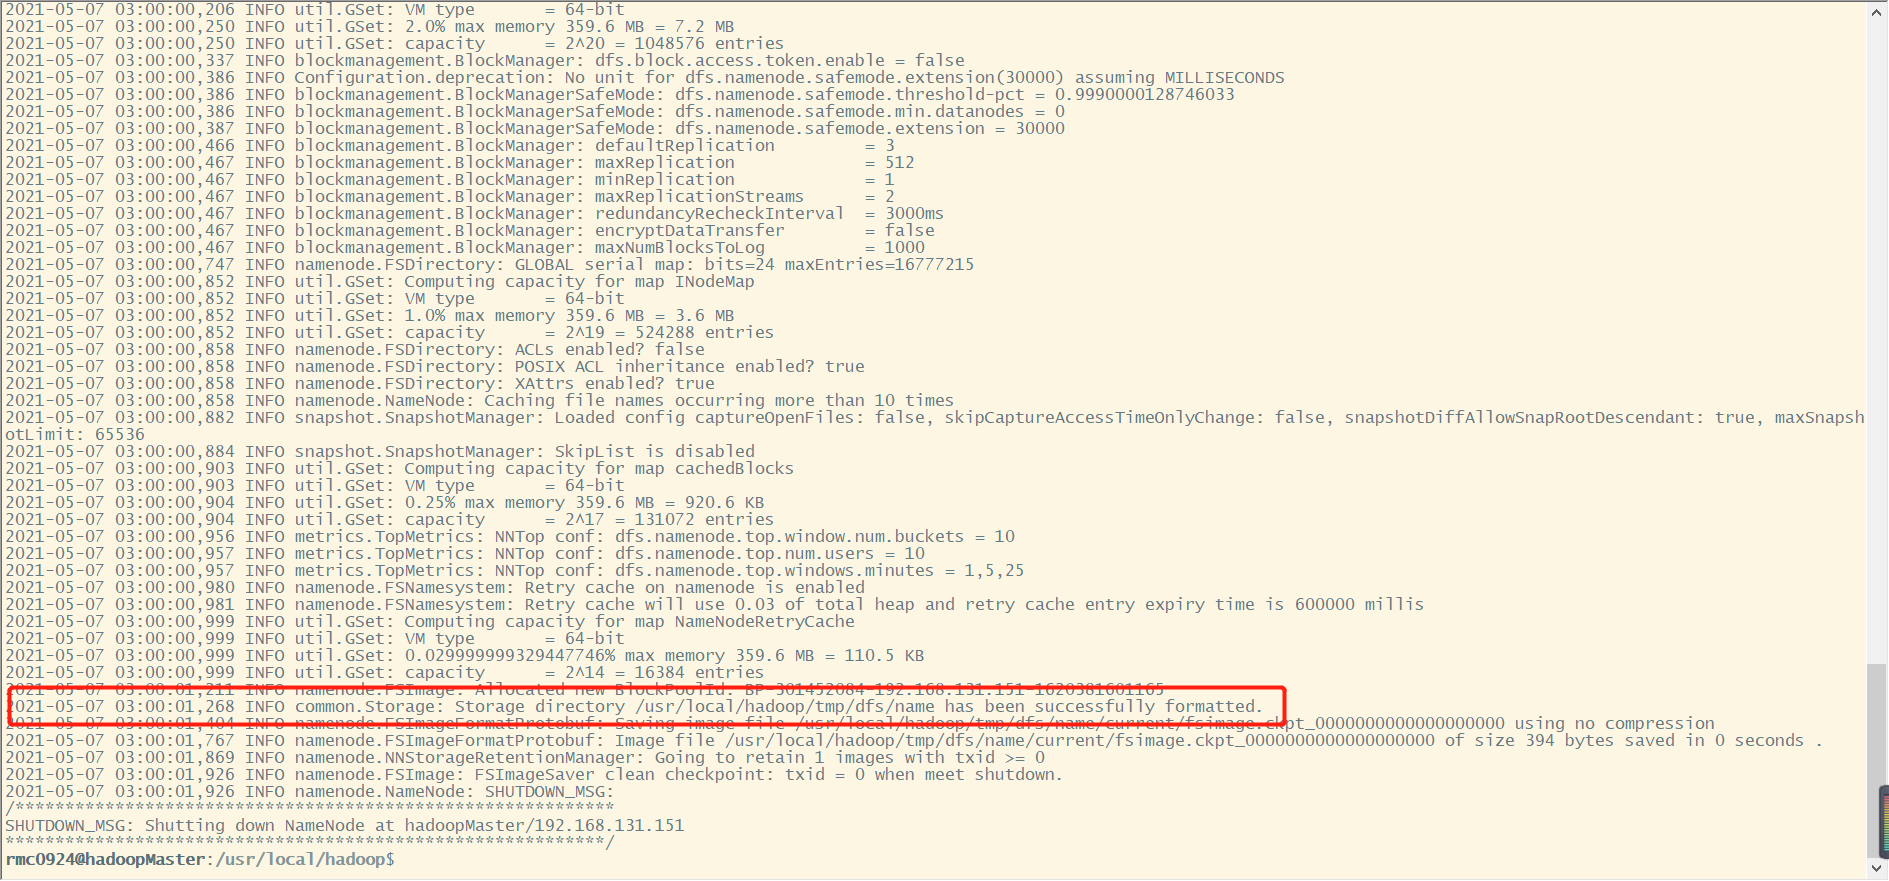
In the initialization process, as long as you see the information in the red box above, a successfully formatted indicates that the initialization is successful.
- Hadoop cluster startup
Execute the following command on the Hadoop master node:
cd /usr/local/hadoop
./sbin/start-dfs.sh
./sbin/start-yarn.sh
./sbin/mr-jobhistory-daemon.sh start historyserver
Through jps, you can view the processes started by each node. If you start correctly according to the settings in this article, you will see the following processes on the Hadoop master node:

Process of Hadoop slave 0 node:

Hadoop slave1 node process:

In addition, you can use the following command on the Hadoop master node to check whether the data node starts normally. In this article, three nodes are used as data nodes, so there will be the following information:
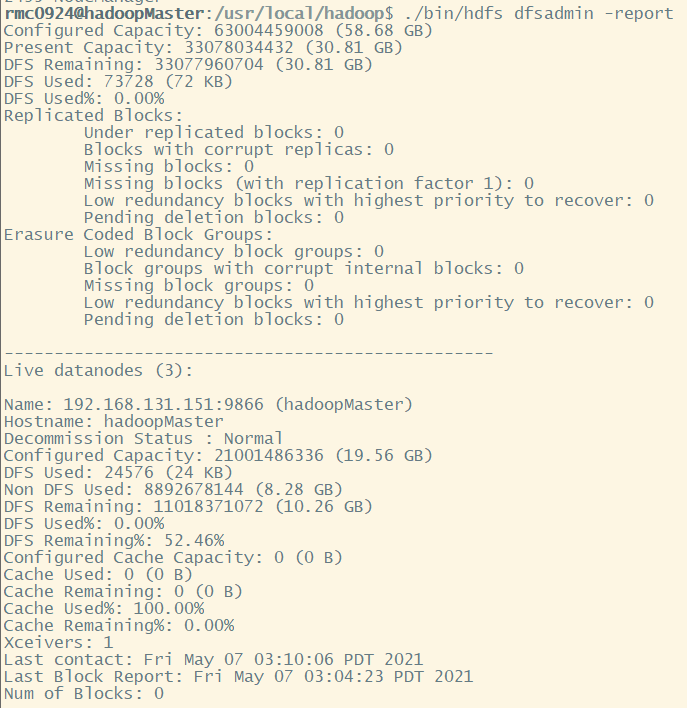
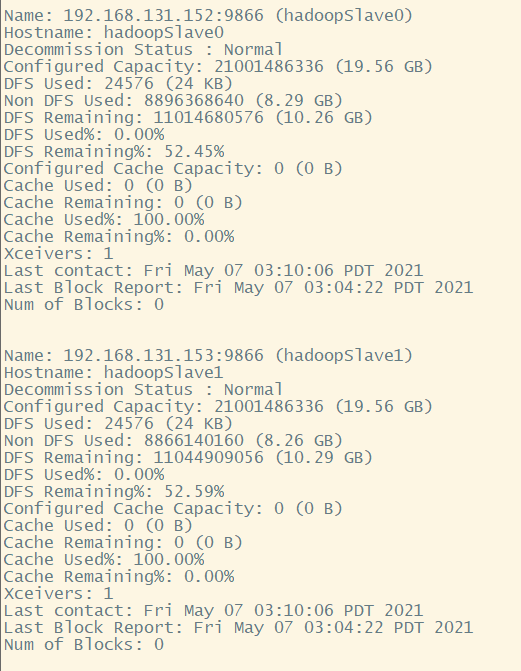
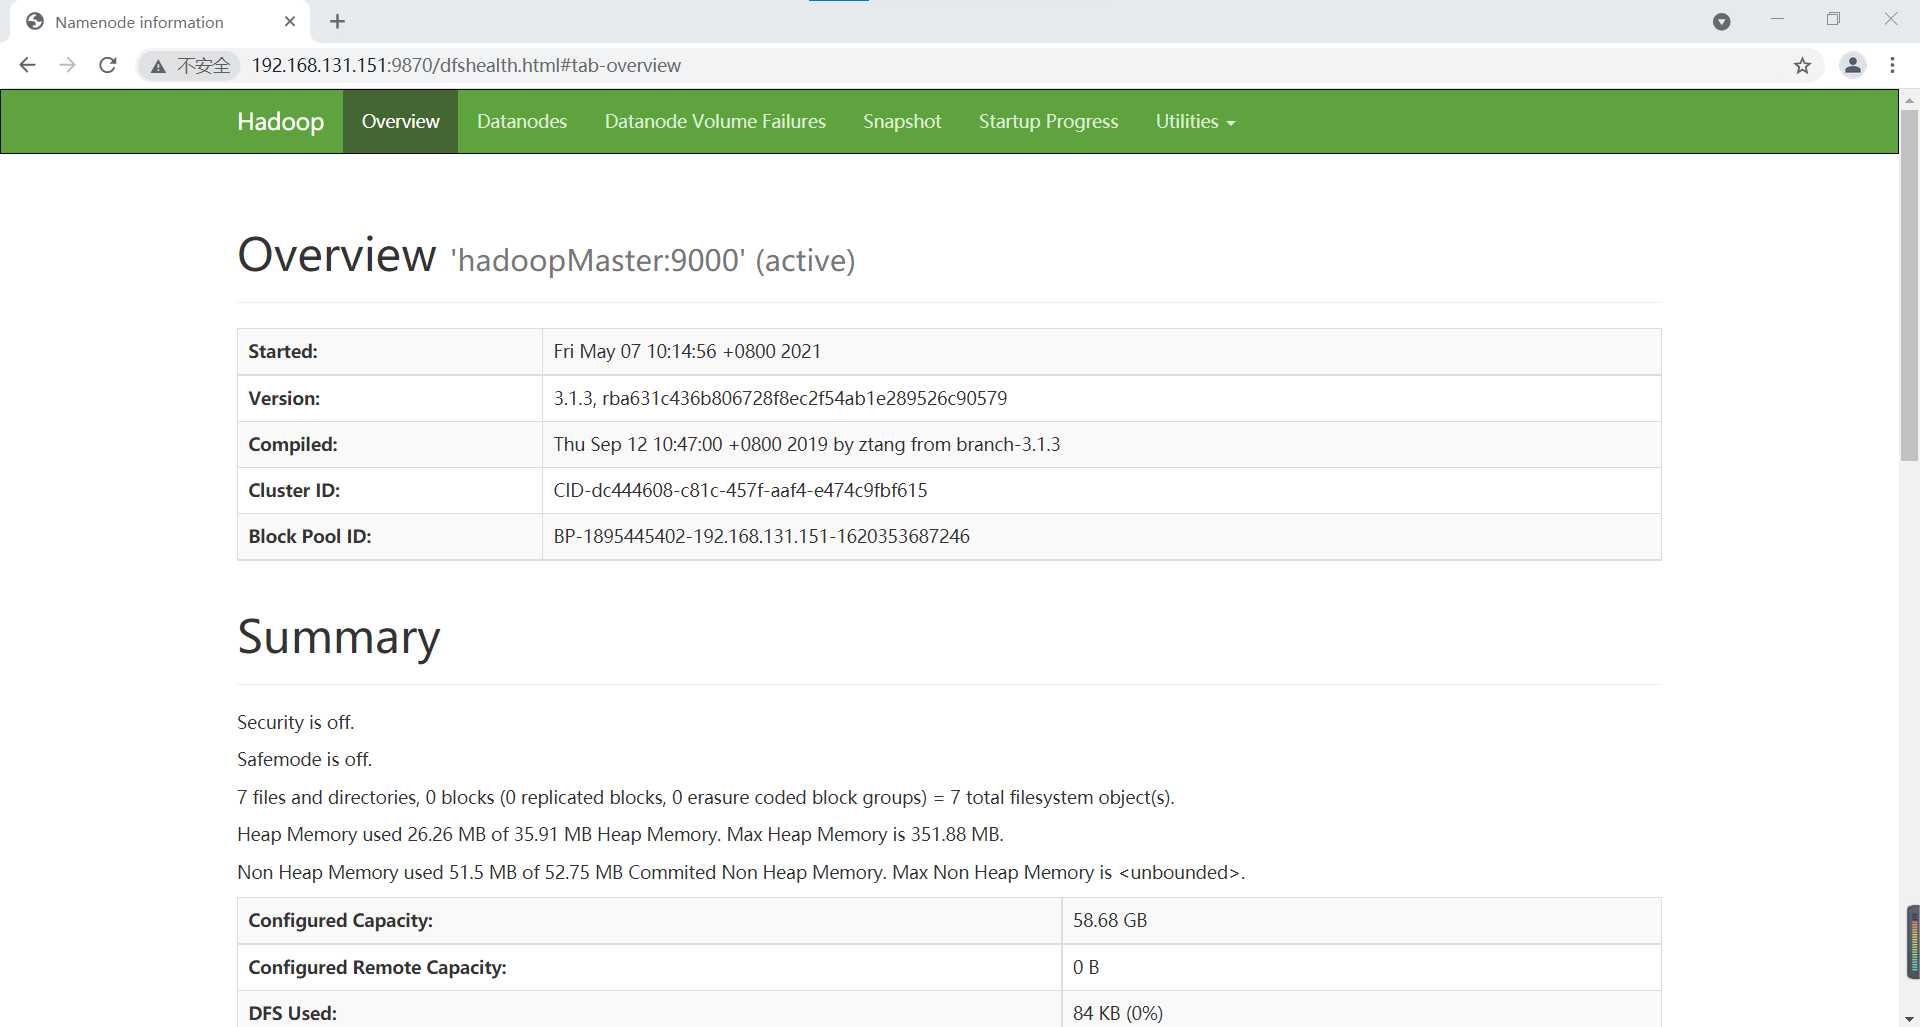
Of course, we can also view it in the browser:
HDFS: http://192.168.131.151:9870/
YARN: http://192.168.131.151:8088/cluster
HDFS interface
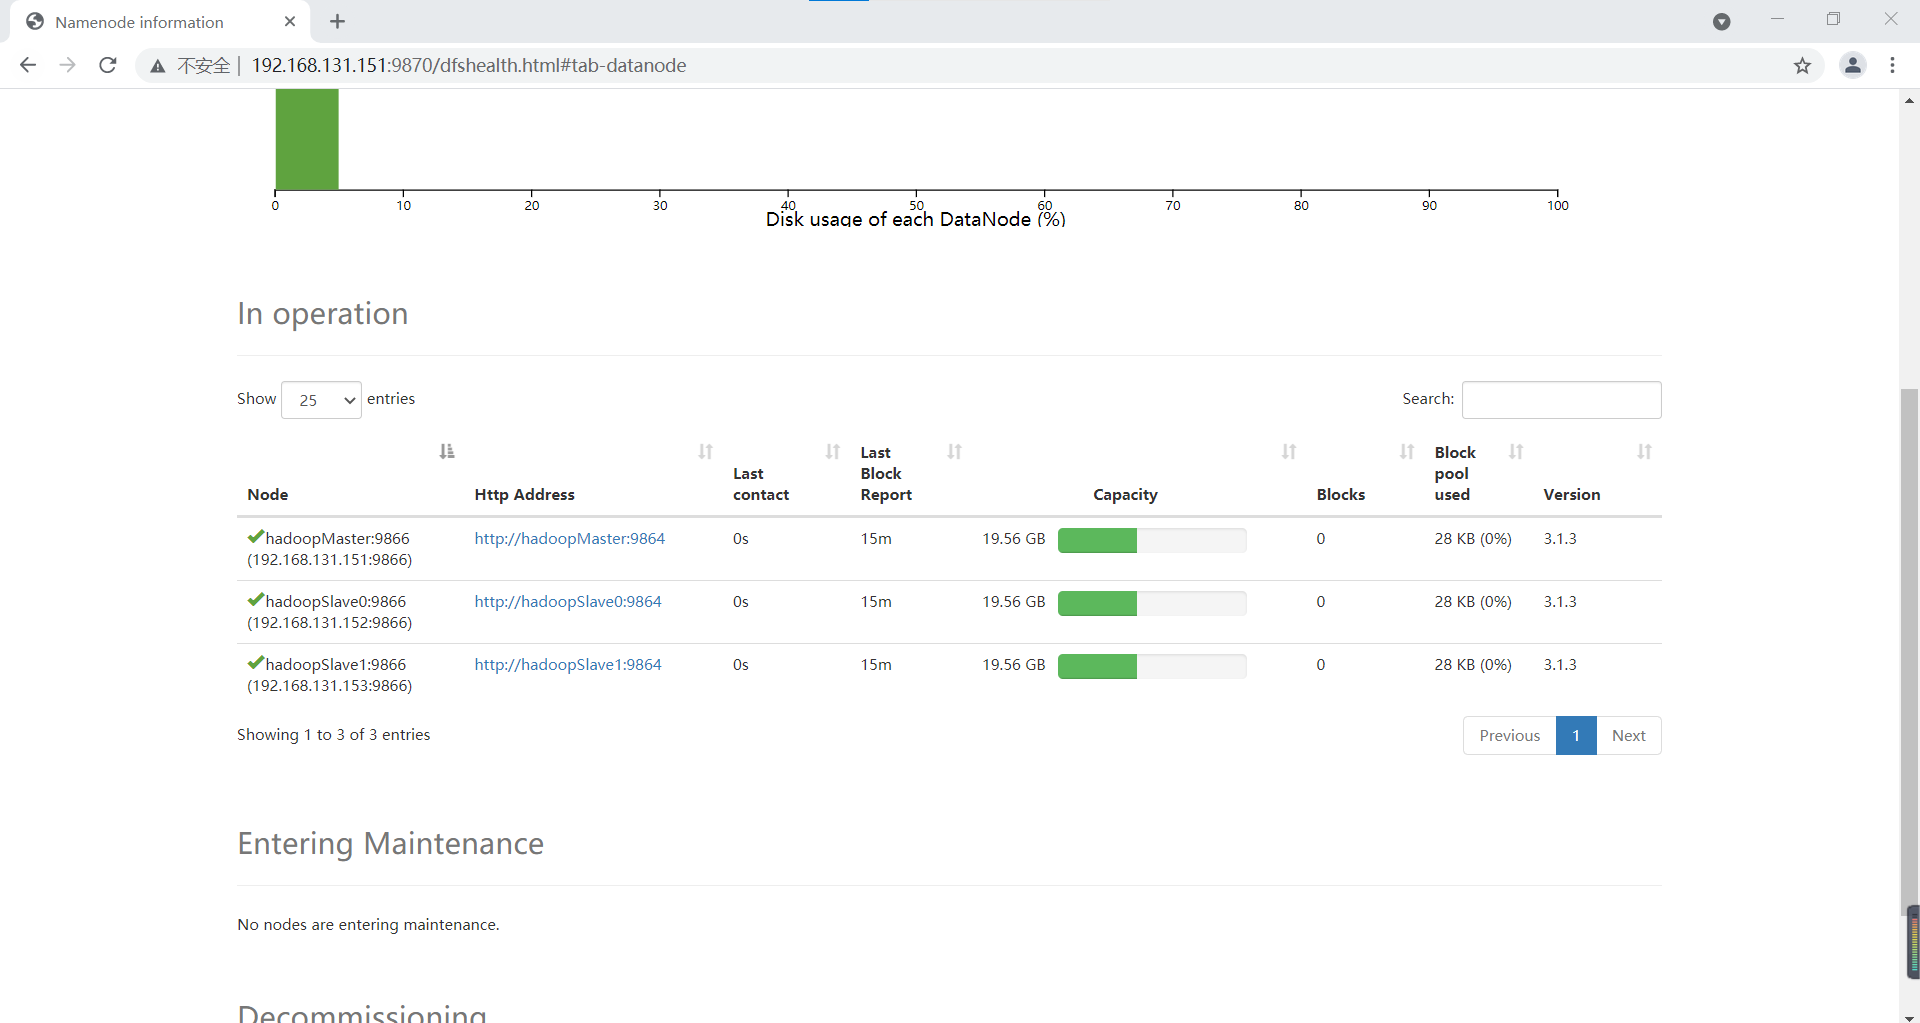
Click DataNodes to view three nodes:
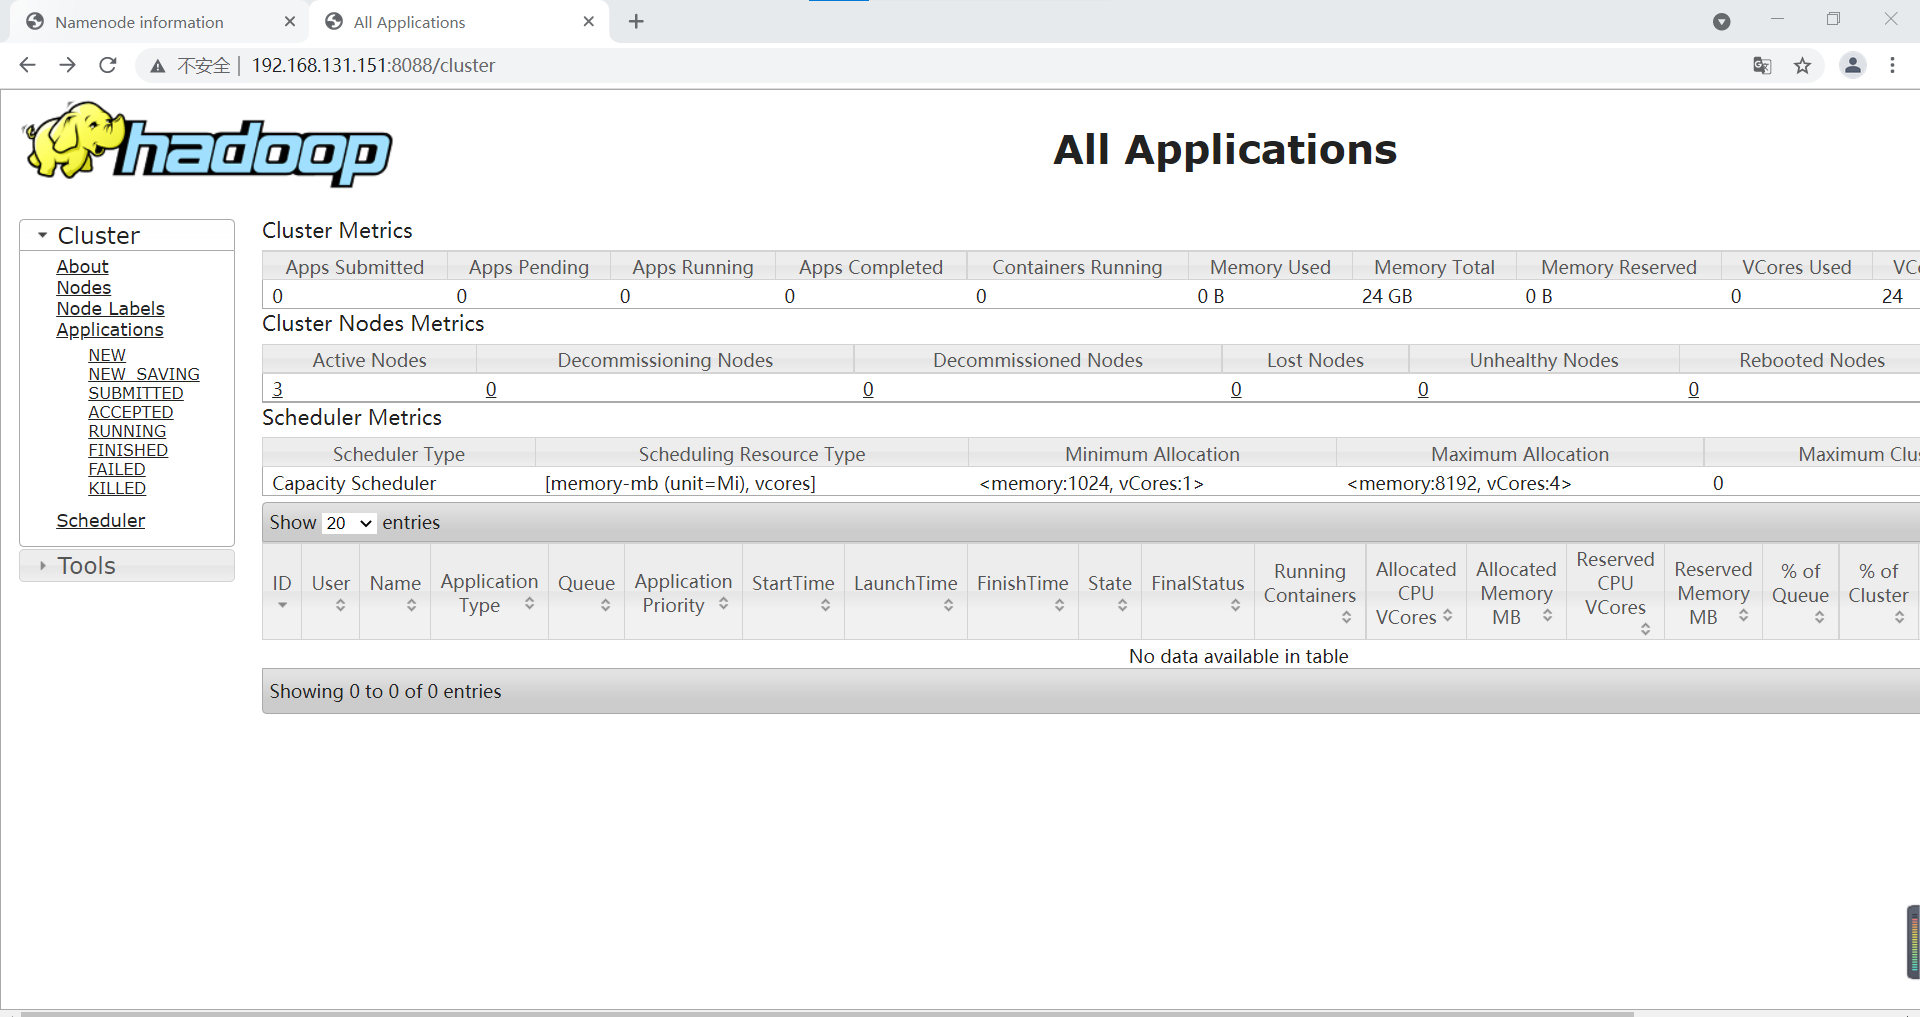
YARN interface
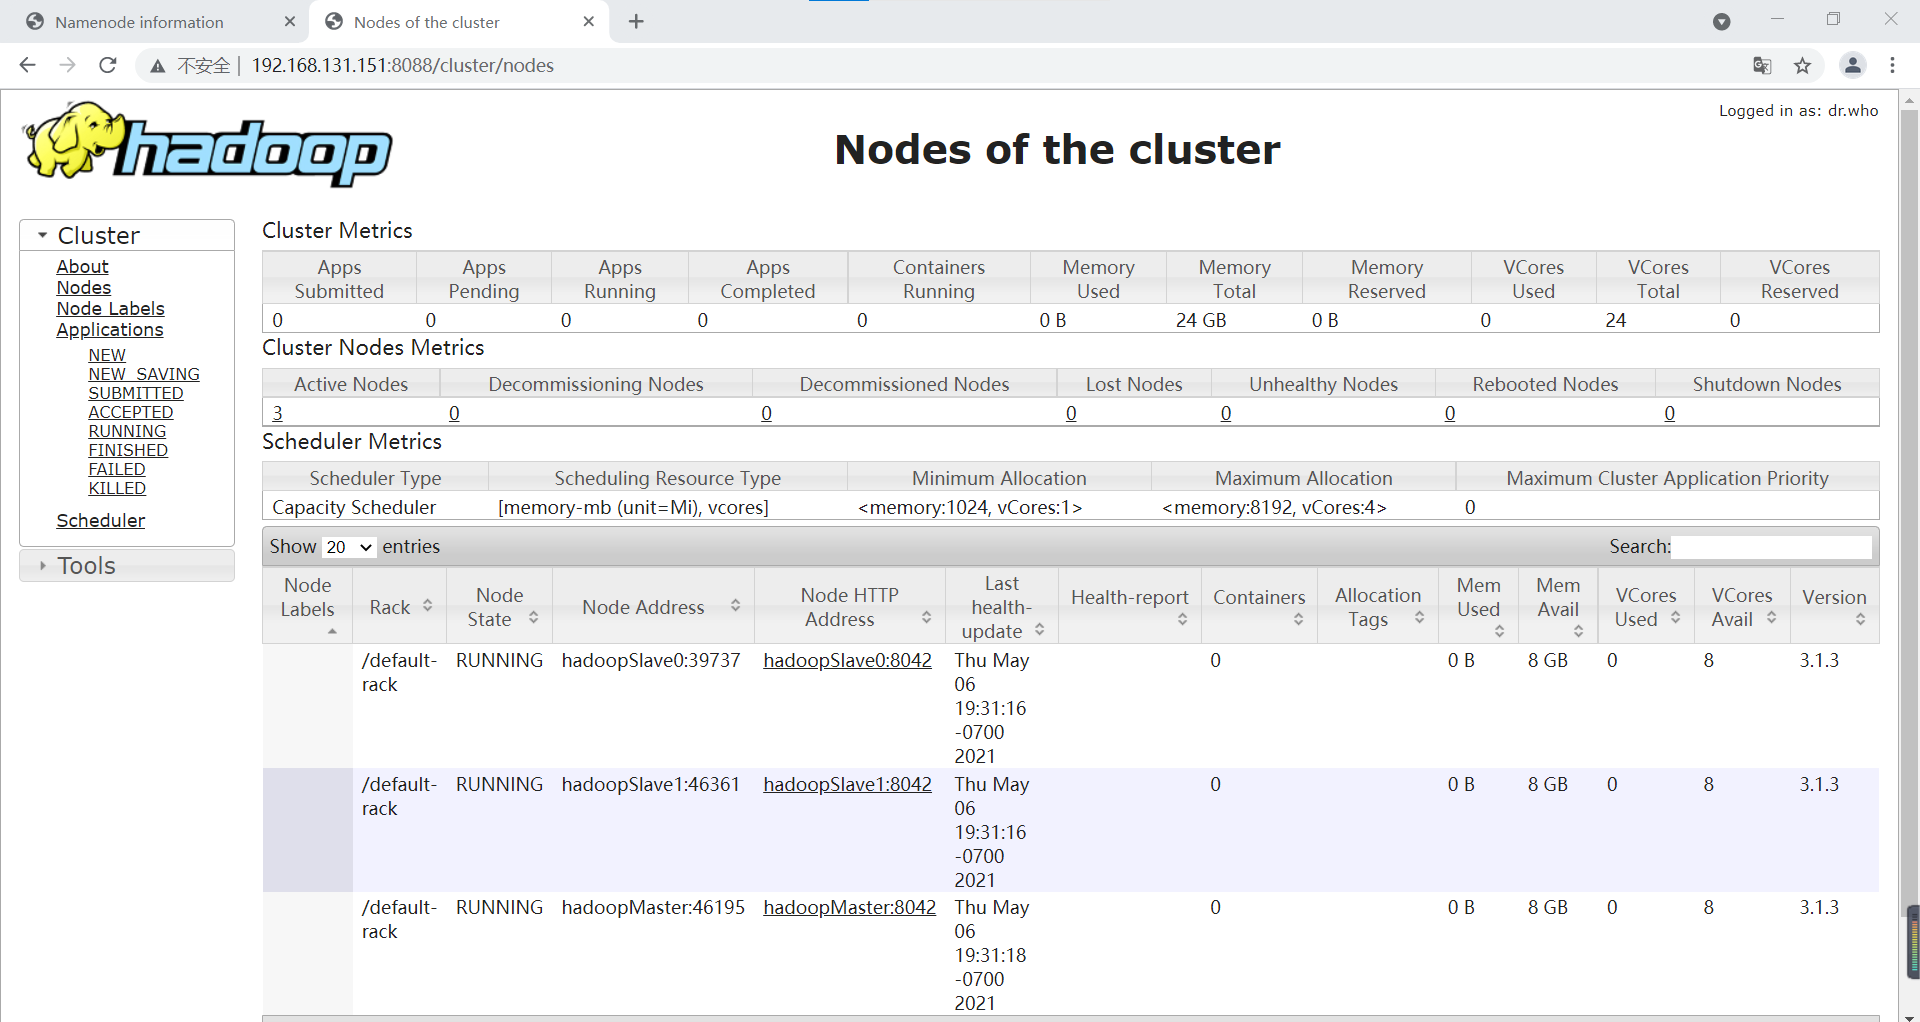
Click Nodes in the left navigation bar to view the Nodes
So far, the Hadoop cluster has been set up and flowers are scattered!!!!!
9 executing distributed instances
Create a folder / test/input on HDFS
cd /usr/local/hadoop
./bin/hdfs dfs -mkdir -p /test/input
View created folders
./bin/hdfs dfs -ls /

Create a word Txt test file
vim word.txt
Enter the following text (I extracted two paragraphs from Pride and Prejudice)
	Be not alarmed, madam, on receiving this letter, by the apprehension of its containing any repetition of those
sentiments or renewal of those offers which were last night so disgusting to you. I write without any intention of
paining you, or humbling myself, by dwelling on wishes which, for the happiness of both, cannot be too soon
forgotten; and the effort which the formation and the perusal of this letter must occasion, should have been spared,
had not my character required it to be written and read. You must, therefore, pardon the freedom with which I
demand your attention; your feelings, I know, will bestow it unwillingly, but I demand it of your justice.
	My objections to the marriage were not merely those which I last night acknowledged to have the utmost required
force of passion to put aside, in my own case; the want of connection could not be so great an evil to my friend as to
me. But there were other causes of repugnance; causes which, though still existing, and existing to an equal degree
in both instances, I had myself endeavored to forget, because they were not immediately before me. These causes
must be stated, though briefly. The situation of your mother's family, though objectionable, was nothing in
comparison to that total want of propriety so frequently, so almost uniformly betrayed by herself, by your three
younger sisters, and occasionally even by your father. Pardon me. It pains me to offend you. But amidst your
concern for the defects of your nearest relations, and your displeasure at this representation of them, let it give you
consolation to consider that, to have conducted yourselves so as to avoid any share of the like censure, is praise no
less generally bestowed on you and your eldersister, than it is honorable to the sense and disposition of both. I will
only say farther that from what passed that evening, my opinion of all parties was confirmed, and every inducement
heightened which could have led me before, to preserve my friend from what I esteemed a most unhappy
connection. He left Netherfield for London, on the day following, as you, I am certain, remember, with the design of
soon returning.
Add word Txt to the / test/input folder of HDFS
./bin/hdfs dfs -put ~/word.txt /test/input
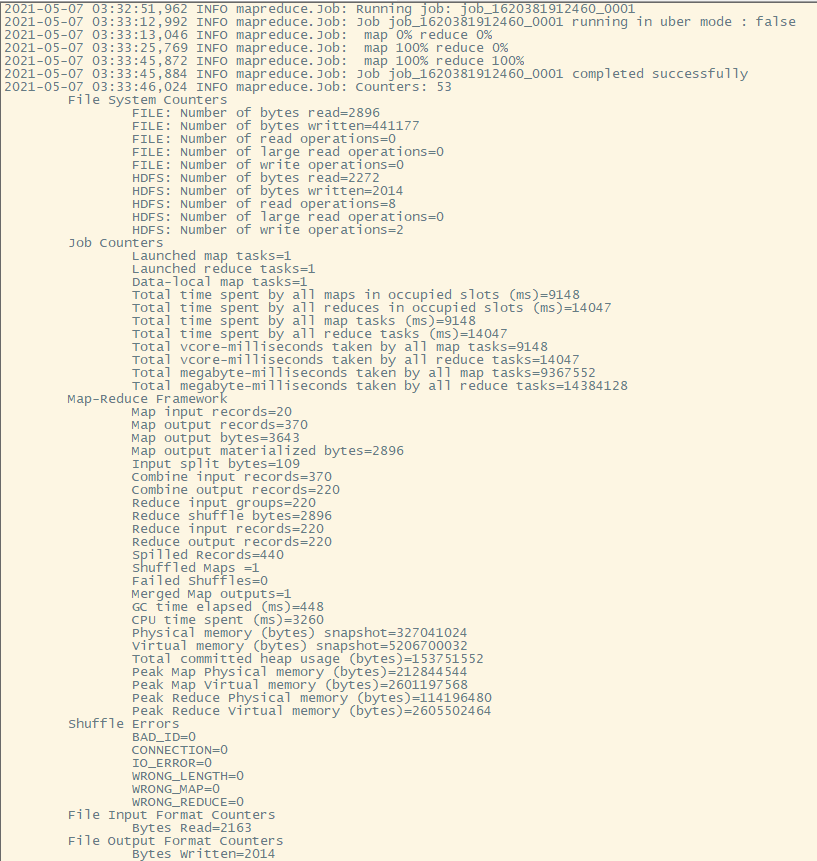
Run an example program of mapreduce: wordcount
./bin/hadoop jar /usr/local/hadoop/share/hadoop/mapreduce/hadoop-mapreduce-example-3.1.3.jar wordcount /test/input /test/output
After successful execution, relevant information is output as follows:
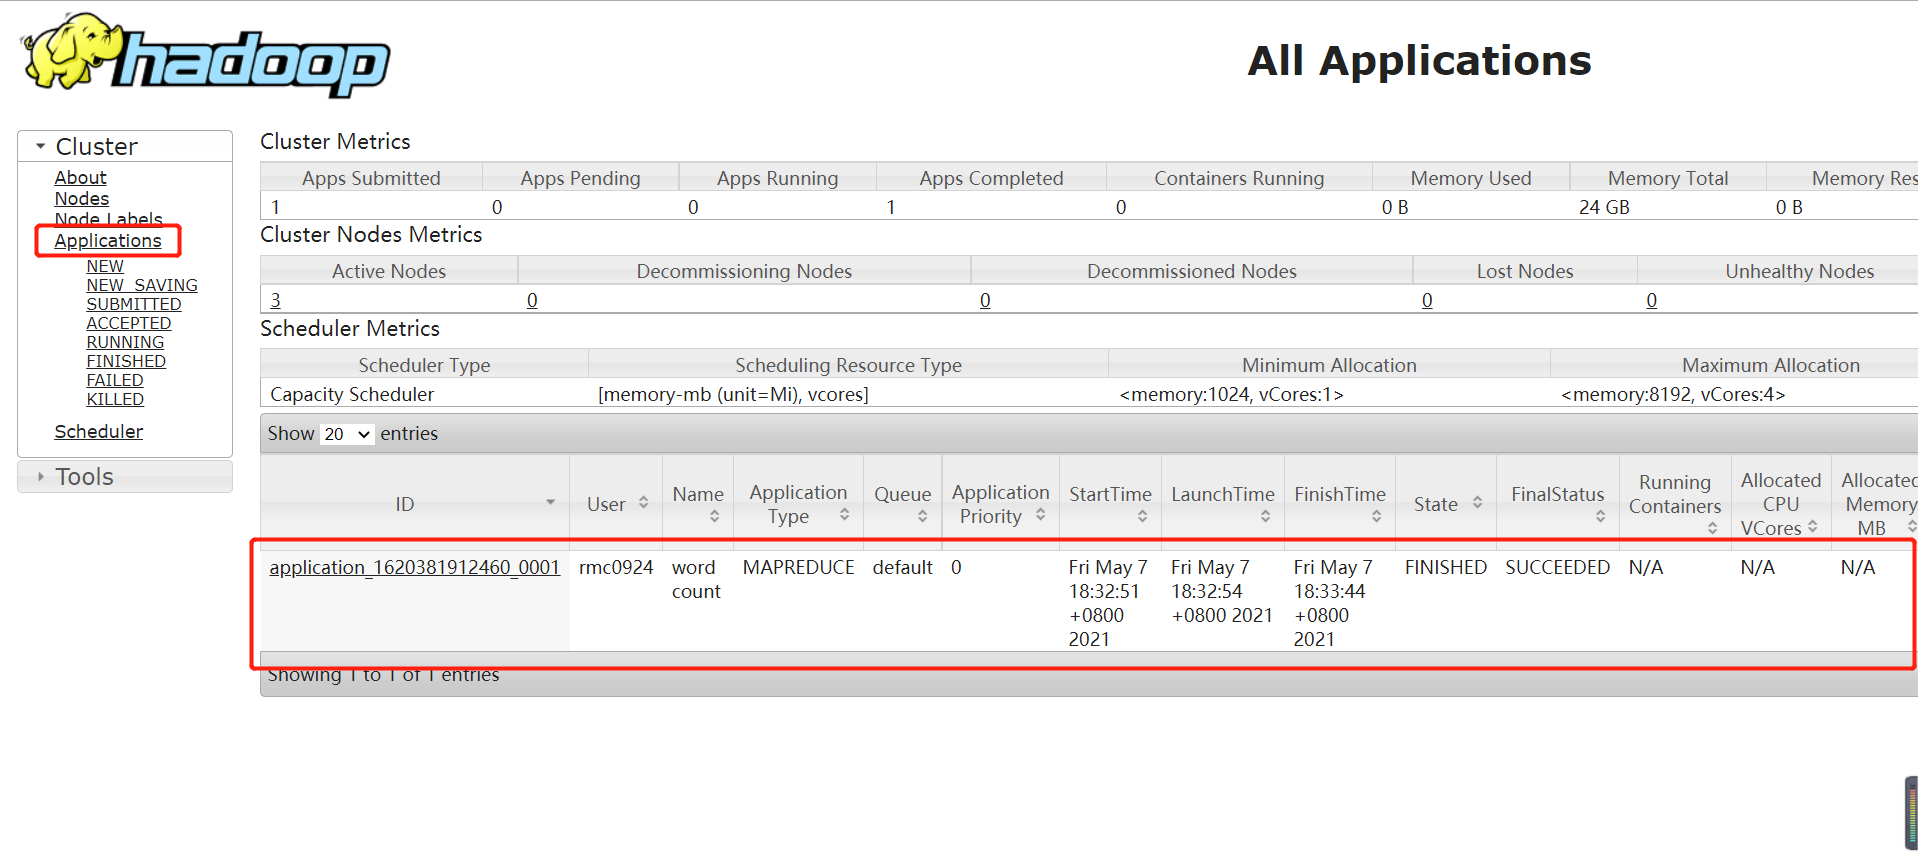
You can also view the following in the YARN Web interface:
View run results:
./bin/hdfs dfs -cat /test/output
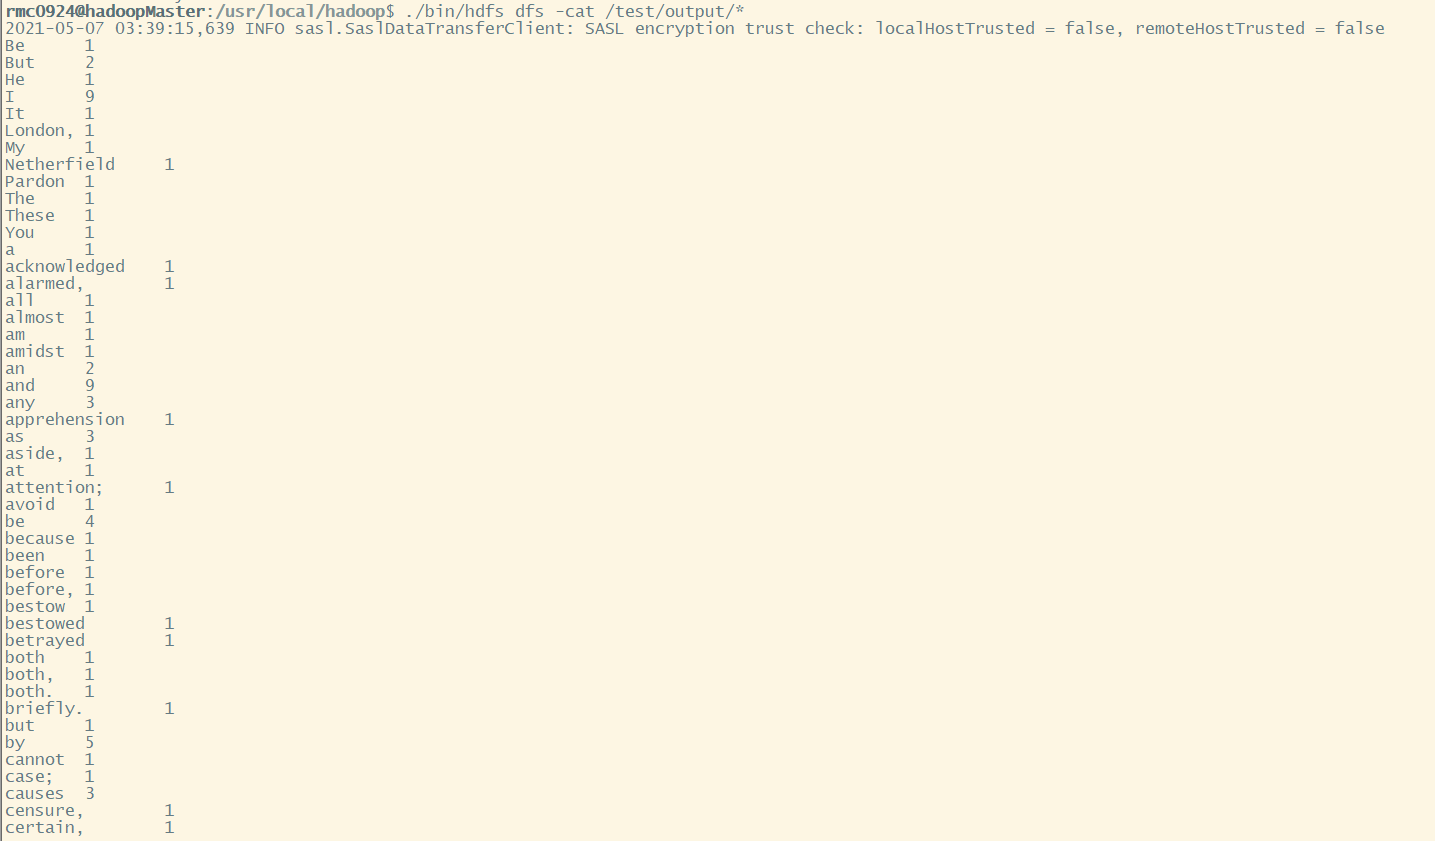
Because I only do word frequency statistics, I don't do other processing on the test data, so some words will bring commas. These are small things. The point is that the Hadoop cluster can run when it is built, which is comfortable, hee hee hee.
10 shut down the cluster
Next, shut down the cluster and enter the following command:
cd /usr/local/hadoop
./sbin/stop-yarn.sh
./sbin/stop-dfs.sh
./sbin/mr-jobhistory-daemon.sh stop historyserver