catalogue
II. SSH password free login configuration
Four pseudo distributed configurations
d.mapred-site.xml configuration
I. Homebrew installation
Homebrew is a package manager and a software installation management tool on Mac. It is similar to apt get in Linux. It has many practical functions, such as installation, uninstall, update, view and so on. A simple instruction can realize package management, which is very convenient
It can be installed through the following code:
ruby -e "$(curl -fsSL https://raw.githubusercontent.com/Homebrew/install/master/install)"
After successful installation, you can check whether the installation is successful through brew doctor.
II. SSH password free login configuration
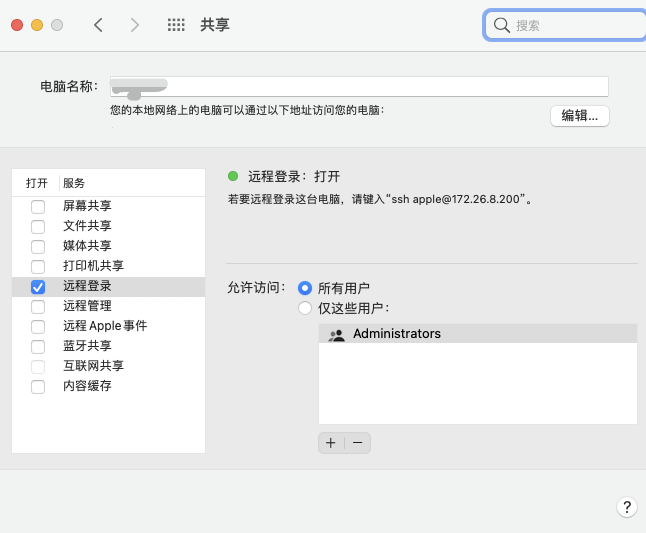
We will log in remotely, check all users, then open the terminal and enter:
ssh localhost
At this time, you will be asked to enter the password. After entering the password, the login success page will be displayed as follows:
Last login: Mon Jan 10 14:07:55 2021
However, secret free login is required in hadoop. For example, secret free login is required when starting datanode and namenode. If it is not set, an error prompt of Permission denied will appear, resulting in failure to start datanode, etc.
Use the following code to set ssh password free login:
ssh-keygen -t rsa -P '' -f ~/.ssh/id_rsa
cat ~/.ssh/id_rsa.pub >> ~/.ssh/authorized_keys
chmod 0600 ~/.ssh/authorized_keys
Next, when using the ssh localhost command, we will find that you can log in directly without entering a password.
III. Hadoop installation
Prerequisite preparation: before installing hadoop, make sure you have jdk on your computer. If not, you can install it through the following code:
brew install java
Here's a description of the java version: Hadoop 2.7 and subsequent versions need Java 7 or above. If the java version in your computer is lower than 7, please update it!
You can use java version to view the jdk version. My java version is as follows:
java -version

Of course, if you use brew to install, you don't have to worry about the version, because you use brew to install the latest version.
Use the following code to install hadoop:
brew install hadoop
Here's another explanation. If you don't have jdk on your computer, you will be prompted to install jdk first and then hadoop when you use brew install hadoop installation, so we don't have to worry about the java version.
I installed the latest version of hadoop, hadoop 3 3.1. After downloading, the default storage location is:
/opt/homebrew/Cellar/hadoop/3.3.1
Installing with brew is much faster than downloading on the official website. (if you don't want to install it, you can uninstall it through brew uninstall hadoop, which is also very clean.)
Four pseudo distributed configurations
After the installation of the previous step, Congratulations, you have installed the stand-alone mode of hadoop! You can enter hadoop in the terminal to view:
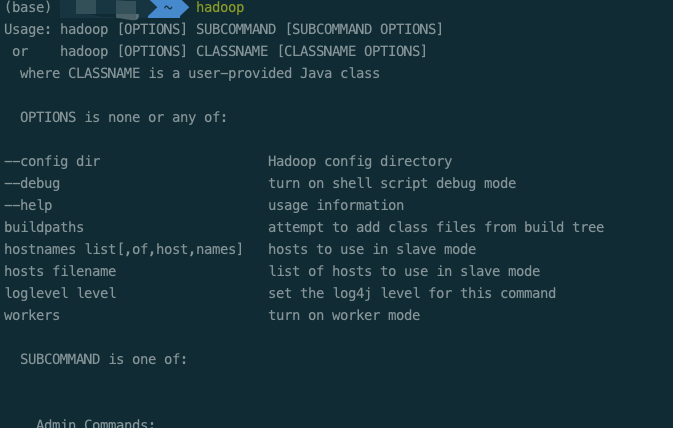
Stand alone mode is the simplest mode of hadoop. Instead of hdfs, it directly uses the file system of the local operating system and is not good at handling large amounts of data. Therefore, we need to build pseudo distributed!
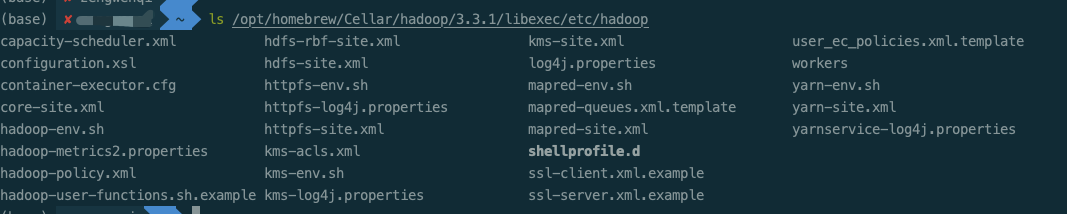
The pseudo distribution pattern requires us to configure the file. The following configuration files are in the / opt / homebrew / cell / Hadoop / 3.3.1/libexec/etc/hadoop path.
a.hadoop-env.sh configuration
When you open your Hadoop env SH, this part is annotated, that is, there is a #, so we need to remove #, and put our java position after =

Check your computer's java storage location. Use:

b.core-site.xml configuration
<configuration>
	<property>
 		<name>fs.defaultFS</name>
 		<value>hdfs://localhost:9000</value>
 	</property>
</configuration>
c.hdfs-site.xml configuration
<configuration>
	<property>
 		<name>dfs.replication</name>
 		<value>1</value>
 	</property>
</configuration>
d.mapred-site.xml configuration
<configuration>
    <property>
         <name>mapreduce.framework.name</name>
         <value>yarn</value>
     </property>
</configuration>
e.yarn-site.xml configuration
<configuration>
    <property>
        <name>yarn.nodemanager.aux-services</name>
        <value>mapreduce_shuffle</value>
    </property>
    <property>
        <name>yarn.nodemanager.env-whitelist</name>
                  <value>JAVA_HOME,HADOOP_COMMON_HOME,HADOOP_HDFS_HOME,HADOOP_CONF_DIR,CLASSPATH_PREPEND_DISTCACHE,HADOOP_YARN_HOME,HADOOP_MAPRED_HOME</value>
    </property>
</configuration>
V. startup and operation
1. First format the file system, enter the / opt / homebrew / cell / Hadoop / 3.3.1/libexec/bin path, and enter the code: hdfs namenode -format
2. Then start NameNode and datanode and go to / opt / homebrew / cell / Hadoop / 3.3.1/libexec/sbin
Input code: HDFS namenode - formatstart DFS SH, at this time, the namenode and DataNode have been started successfully. We can see the Overview page in the web page! NameNode - http://localhost:9870

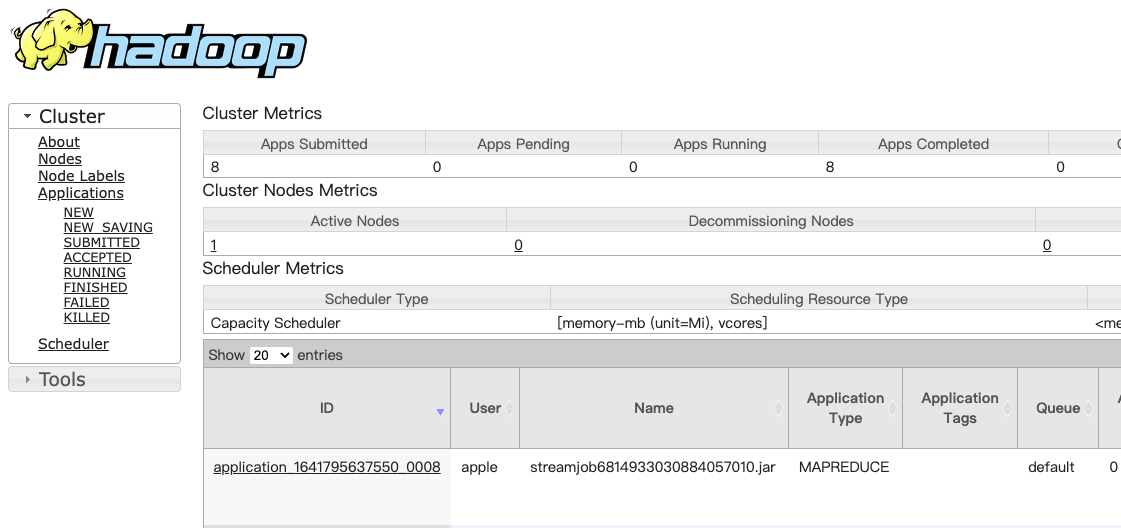
3. Next, start the {ResourceManager and NodeManager: in the} libexec/sbin path, enter start-yarn SH, you can view the All Applications interface in the browser after startup.
ResourceManager - http://localhost:8088
In this way, they can be started smoothly. We can view the process through jps:
When you no longer use hadoop, you can close it and enter sh stop - all in the libexec/sbin path SH can shut down all processes.
Six test WordCount
Enter the HDFS system, which is the native file system of hadoop. Next, we create an input directory in HDFS, which needs to use the HDFS command mode.
Now create this directory:
(1) hadoop fs -mkdir /input # create directory
(2) hadoop fs -ls / # query all directories under hadoop, as shown in the following figure:

(3) Python implements WordCount
- First, write mapper py, reducer. Py script:
#!/usr/bin/python
import sys

#mapper.py
for line in sys.stdin:
    line = line.strip()
    words = line.split(' ')
    for word in words:
        print('%s\t%s' % (word, 1))
#!/usr/bin/python
import sys
#reducer.py
current_count = 0
current_word = None
for line in sys.stdin:
line = line.strip()
word, count = line.split('\t', 1)
count = int(count)
if current_word == word:
current_count += count
else:
if current_word:
print("{}\t{}".format(current_word, current_count))
current_count = count
current_word = word2. It is recommended to test the correct running effect of the script when running MapReduce task


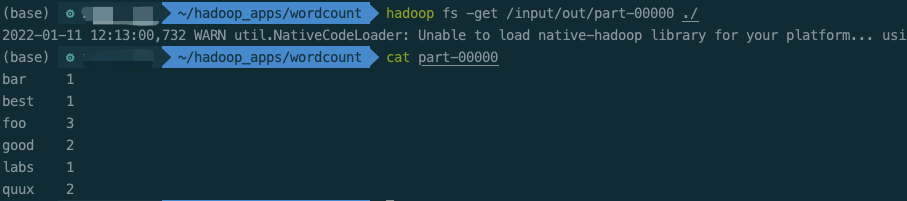
3. Run python script on Hadoop platform:
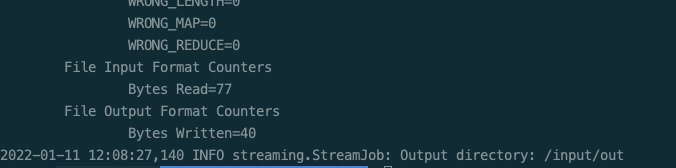
hadoop fs -rmr /input/out
hadoop jar /opt/homebrew/Cellar/hadoop/3.3.1/libexec/share/hadoop/tools/lib/hadoop-streaming-3.3.1.jar \
-D stream.non.zero.exit.is.failure=true \
-files '/Users/apple/hadoop_apps/wordcount/reducer.py,/Users/apple/hadoop_apps/wordcount/mapper.py' \
-input /input/wordcount.txt \
-output /input/out \
-mapper '/usr/local/bin/python3 mapper.py' \
-reducer '/usr/local/bin/python3 reducer.py'

reference resources:
Mac builds hadoop 3 1.1 the most detailed tutorial of pseudo distribution mode in the whole network_ Hairtail studio blog - CSDN blog_ Installing hadoop pseudo distributed macpython implements wordcount of Mapreduce_ Flying Dutchman z's blog - CSDN blog