Article catalogue
1, Download and configuration of cluster environment
2. Configure hadoop environment variables
Configure hadoop core environment
2, Clone virtual machines and their corresponding settings
2. Configure ssh password free login
preface
The previous section introduced the download of virtual machine and the construction of Java environment. This section mainly explained the construction of Hadoop cluster
1, Download and configuration of cluster environment
We need to configure hadoop on one machine and then copy it to other machines. Here I choose the master, that is, the machine to be named node
1. Download hadoop
Again, it is recommended to download and decompress on one machine before cloning, so that multiple machines can have it
download
Note: wget package needs to be installed in advance. Command: yum install wget
Official address:
wget https://archive.apache.org/dist/hadoop/common/hadoop-3.3.0/hadoop-3.3.0.tar.gz
Domestic mirror address (Tsinghua University recommended):
wget https://mirrors.tuna.tsinghua.edu.cn/apache/hadoop/common/stable/hadoop-3.3.0.tar.gz
decompression
After downloading, the next step is to unzip
I unzip it to the / usr/local/hadoop , directory, where the / hadoop , directory I created in advance
mkdir usr/local/hadoop
Quick decompression (refer to other bloggers):
tar -zxvf hadoop-3.3.0.tar.gz -C /usr/local/hadoop
If encountered tar: Error is not recoverable: exiting now Error, refer to https://stackoverflow.com/questions/3950839/tar-error-is-not-recoverable-exiting-now
In short, decompose the compression step, enter the directory / usr/local/hadoop, and gradually execute the following code
gunzip hadoop-3.3.0.tar.gz
tar xf hadoop-3.3.0.tar
2. Configure hadoop environment variables
vi /etc/profile
Add hadoop environment at the end
export HADOOP_HOME=/usr/local/hadoop/hadoop-3.3.0
export PATH=$PATH:$HADOOP_HOME/sbin:$HADOOP_HOME/bin
After refreshing the configuration, click OK
nmcli c reload
Check whether the variable is effective
hadoop version
The following information is correct

Configure hadoop core environment
Configure Hadoop env sh
First, look at JAVA_HOME address
echo $JAVA_HOME
Configure JAVA_HOME path
vi $HADOOP_HOME/etc/hadoop/hadoop-env.sh
Add the following code at the end
export JAVA_HOME=JAVA_HOME Address of
export JAVA_HOME=${JAVA_HOME}
As shown below

Configure core site xml
Create an HDFS data storage directory. My storage path is placed in $Hadoop_ / HDFS in home directory_ data/
mkdir /usr/local/hadoop/hadoop-3.3.0/hdfs_data
mkdir /usr/local/hadoop/hadoop-3.3.0/tmp
vi $HADOOP_HOME/etc/hadoop/core-site.xml
<configuration>
    <property>
        <!-- set up NameNode of ip And port, here ip You can also change it to the host name -->
        <name>fs.defaultFS</name>
        <value>hdfs://hadoop1:9000</value>
    </property>

    <property>
        <!-- The temporary directory for storing data. Note that the path here should be written in absolute path and should not be used ~ Equal symbol -->
        <name>hadoop.tmp.dir</name>
        <value>/usr/local/hadoop/hadoop-3.3.0/tmp</value>
    </property>

    <property>
        <!-- set up HDFS Storage of data on local file system -->
        <name>dfs.datanode.data.dir</name>
        <value>/usr/local/hadoop/hadoop-3.3.0/hdfs_data</value>
    </property>
</configuration>
Configure HDFS site xml
vi $HADOOP_HOME/etc/hadoop/hdfs-site.xml
<configuration>
    <property>
		<!-- set up SecondaryNameNode of ip And port, here ip You can also change it to the host name-->
        <name>dfs.namenode.secondary.http-address</name>
        <value>slaver001:9868</value>
    </property>
</configuration>
Configure mapred site xml
vi $HADOOP_HOME/etc/hadoop/mapred-site.xml
<configuration>
    <property>
        <!-- set up mapreduce use yarn frame -->
        <name>mapreduce.framework.name</name>
        <value>yarn</value>
    </property>
</configuration>
Configure yarn site xml
vi $HADOOP_HOME/etc/hadoop/yarn-site.xml
<configuration>
    <property>
        <!-- set up yarn The mixing washing method is mapreduce Default shuffle algorithm -->
        <name>yarn.nodemanager.aux-services</name>
        <value>mapreduce_shuffle</value>
    </property>

    <property>
        <!-- appoint ResourceManager Address of -->
        <name>yarn.resourcemanager.address</name>
        <value>slaver002</value>
    </property>
</configuration>
Configure workers
vi $HADOOP_HOME/etc/hadoop/workers
Delete the initial content and write the following host name
master
slaver001
slaver002
Disable firewall
Turn off the firewall
systemctl stop firewalld
Cancel startup
systemctl disable firewalld
So far, the environment configuration of a single machine is completed. Next, clone the virtual machine and configure ssh password free login
2, Clone virtual machines and their corresponding settings
1. Clone virtual machine
VMware Fusion shuts down the virtual machine, which is suspended by default. Click VMware Fusion - > preferences -- > on the navigation bar to turn off the virtual machine: change the suspend to turn off. Because the cloning of the virtual machine should be carried out under the condition of complete shutdown
Right click the virtual machine you just created and select create full clone

After two virtual machines are created and started, enter the following code to modify the default host name between them. Here are slaver001 and slaver002
hostnamectl set-hostname host name
Enter slaver001 and slaver002 respectively
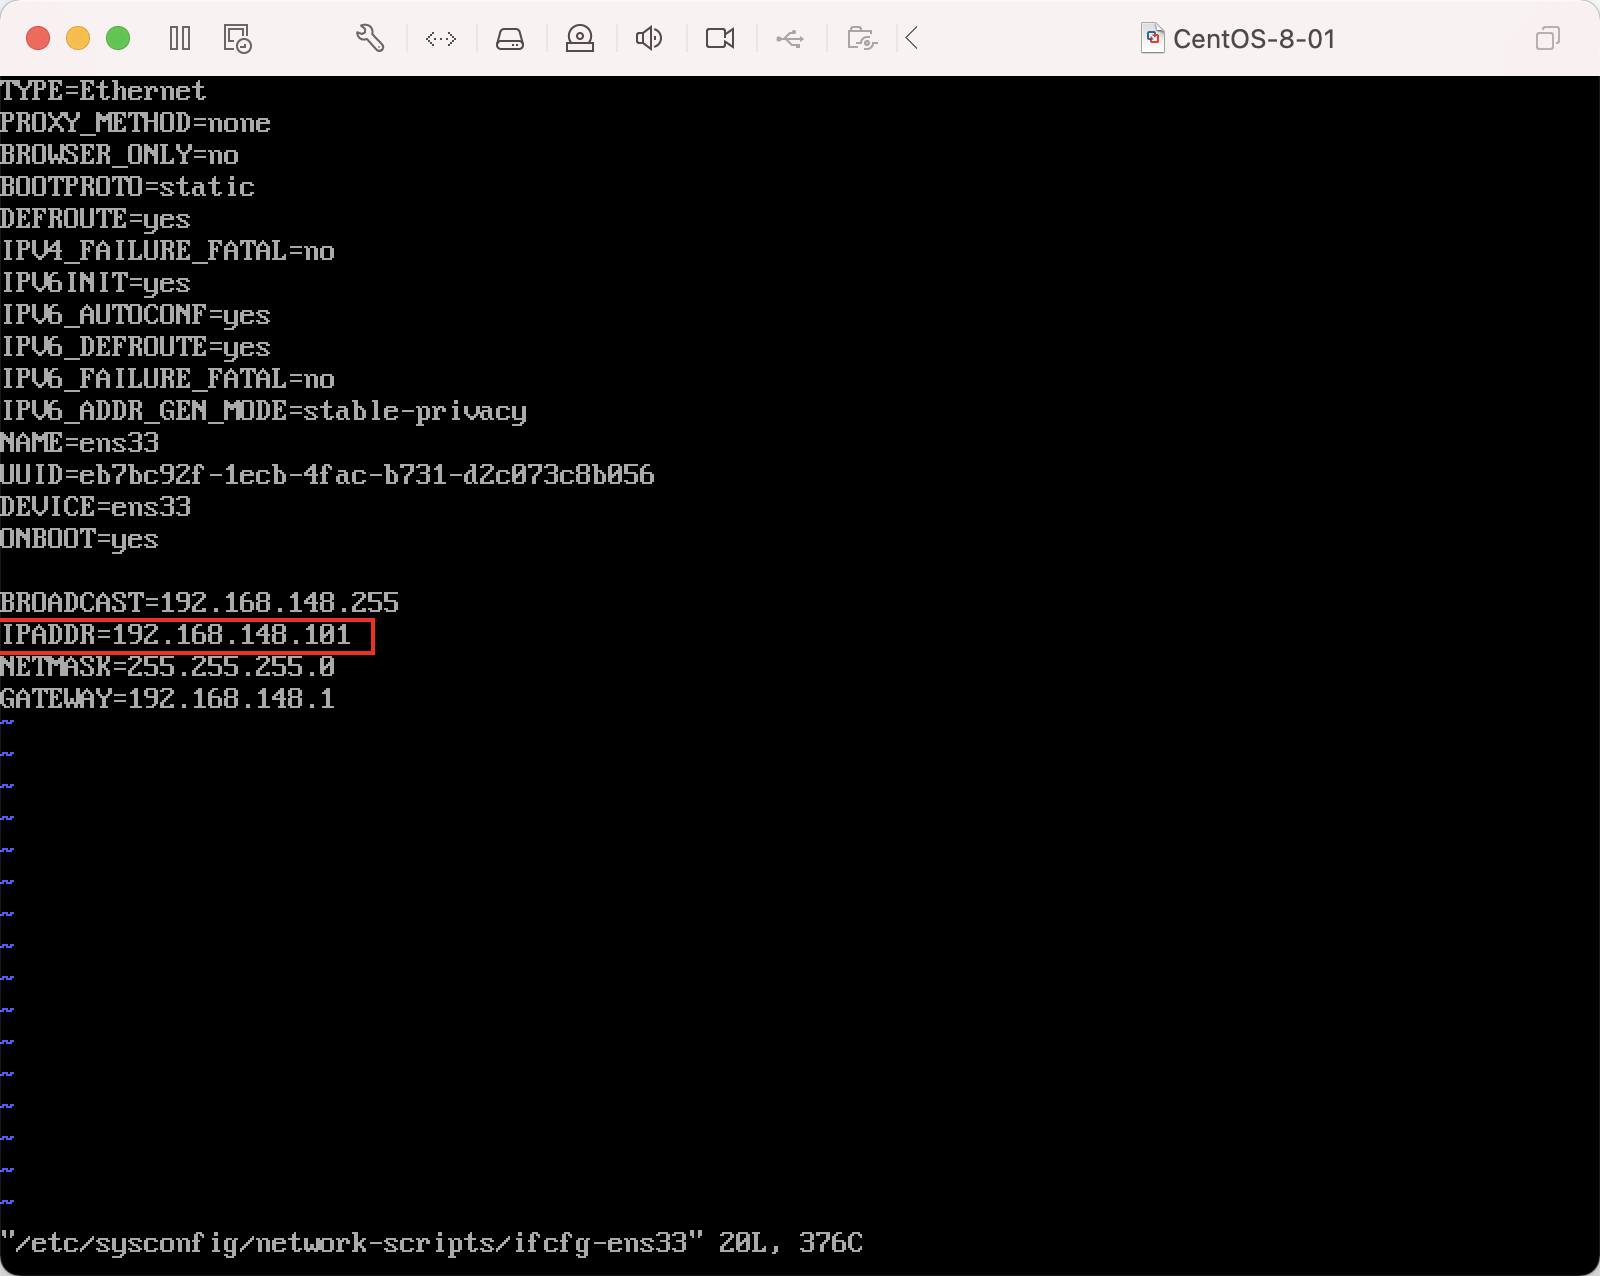
vi /etc/sysconfig/network-scripts/ifcfg-adapter name
Just modify the IPADDR item, and the corresponding host corresponds to the corresponding ip. Here, I have slaver001 = 192.168.148.102, slaver = 192.168.148.103
Test whether the virtual machines are unobstructed
ping ip Or set the host name
If a problem occurs, you need to check whether the previous ip, gateway and other settings are correct. Please refer to https://blog.csdn.net/qq_27283619/article/details/103706736
2. Configure ssh password free login
Configuring ssh password free login has two purposes
- Let nameNode issue a command to dataNode
- Ask the resourceManager to issue a command to nodeManager
In contrast, we also need to configure nameNode to log in without nameNode and resourceManager to log in without nodeManager.
According to the function division at the beginning of the article, i.e
- Configure master login free slaver001 and slaver002
- Configure slaver001 to login free master and slaver002
Linux password free login to another Linux
Suppose there are two Linux machines, machine 1 and machine 2. If we need to log machine 1 into machine 2 without secret, we need to do the following
Generate key pair
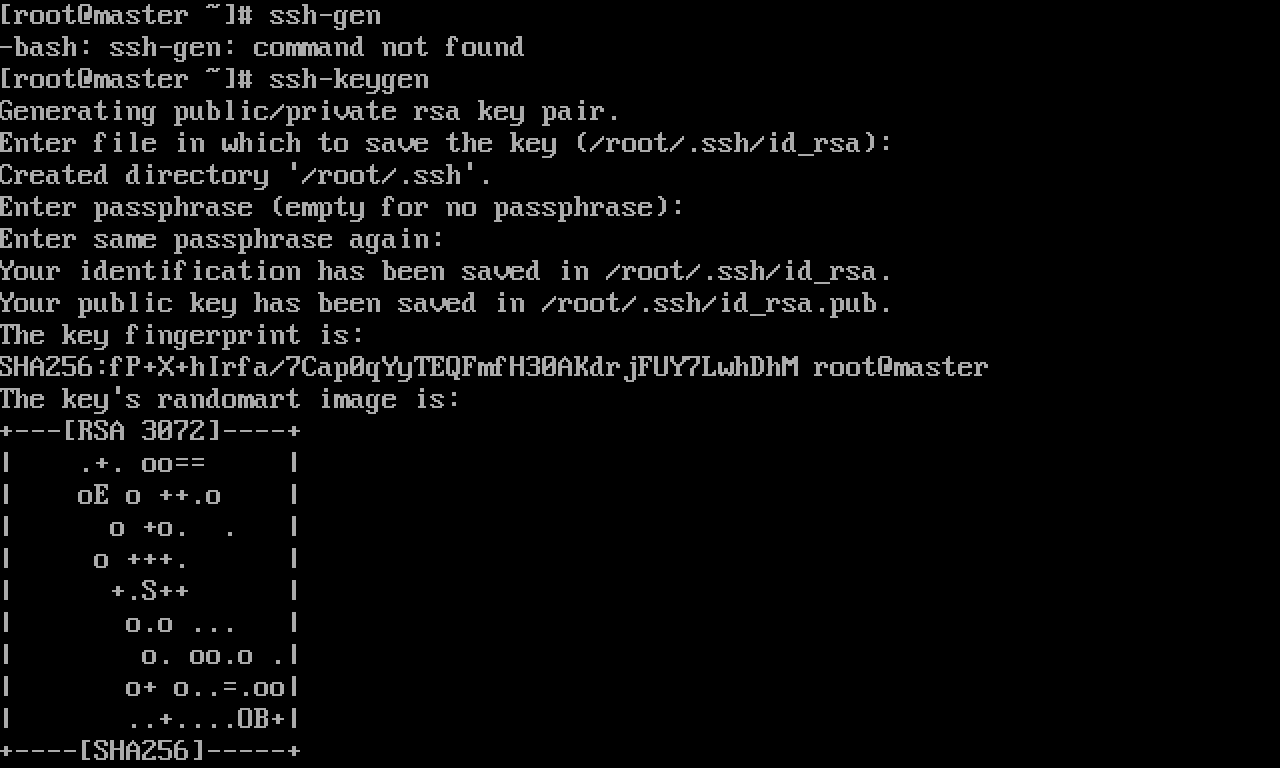
Generate a key pair under machine 1, and enter enter at each step (indicating that the private key password is not used)
ssh-keygen
as follows
View generated passwords
Note: tree needs to be installed in advance. Command: yum install tree
tree ~/.ssh -C -pf
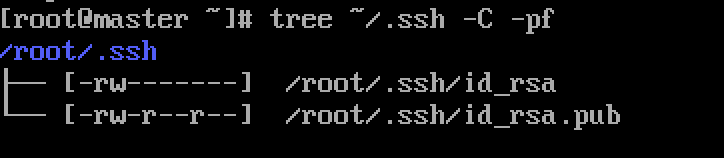
id_rsa is the private key, id_rsa.pub is the public key
Send public key to other machines
ssh-copy-id Of machine 2 ip
Password free login to other machines
After completing the above steps, machine 1 can log in to machine 2 without secret
On machine 1
ssh Of machine 2 ip
After entering the password of machine 2 for the first time, we can quickly switch the host, so that we can use multiple virtual machines in one shell
3, hadoop startup
Format HDFS (only need to be executed at the first startup)
$HADOOP_HOME/bin/hdfs namenode -format
If "has been successfully formatted" is displayed, it indicates that the formatting is successful
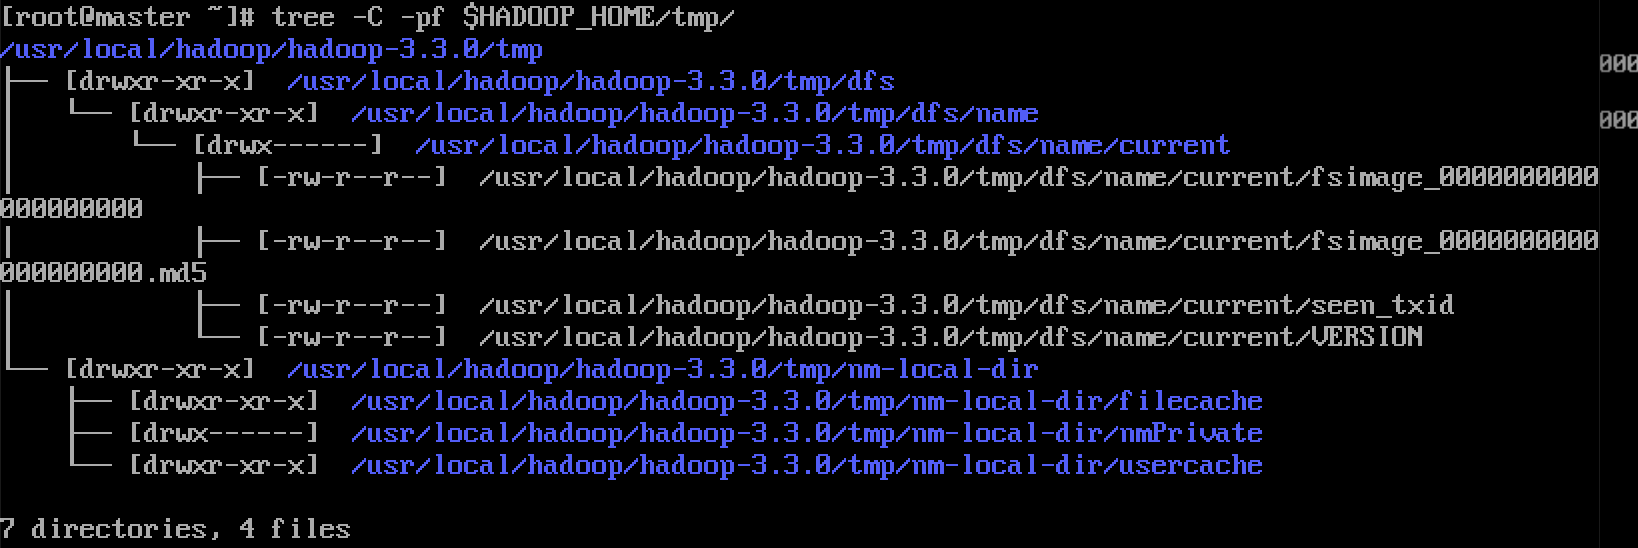
After the formatting is successful, view the # core site XML # Hadoop tmp. Dir: whether there is a dfs directory under the specified directory
tree -C -pf $HADOOP_HOME/tmp/
cat $HADOOP_HOME/tmp/dfs/name/current/VERSION

Start cluster
Execute the following command on the master
start-dfs.sh
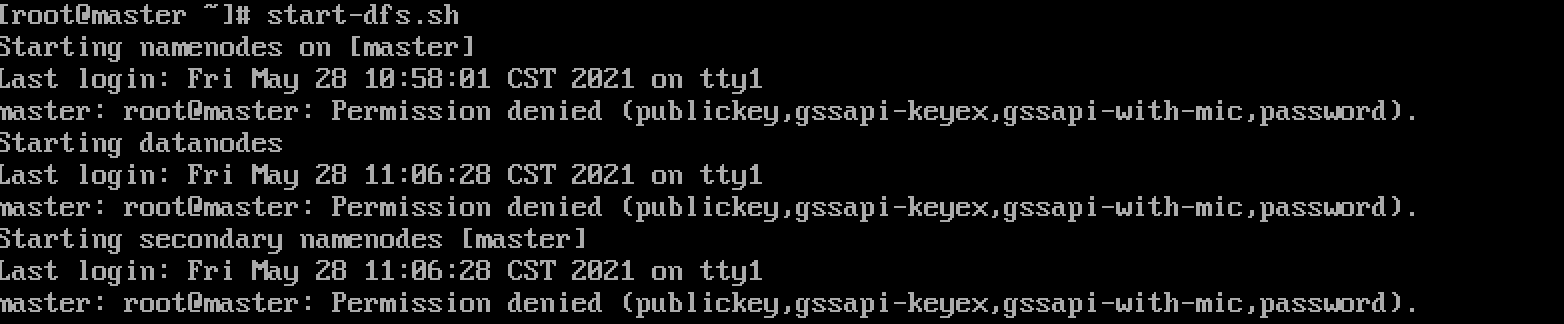
If encountered
Start DFS on all machines sh ,stop-dfs.sh# add the following content to the file header
HDFS_NAMENODE_USER=root
HDFS_DATANODE_USER=root
HDFS_SECONDARYNAMENODE_USER=root
At # start yarn sh ,stop-yarn. Add the following to the SH file header
YARN_RESOURCEMANAGER_USER=root
YARN_NODEMANAGER_USER=root
Restart after configuration
If [hadoop] / SBIN / start DFS sh Error: JAVA_ HOME is not set and could not be found. Can refer to https://blog.csdn.net/CGD_ProgramLife/article/details/82703073
Start yarn
ssh connects to the resource manager, slaver002, and executes
start-yarn.sh
Service validation
Execute on any host
jps

It starts successfully
summary
So far, the hadoop environment has been built. The next step is to deploy spark. Then we can start using spark for data analysis. Thank you