preface
it's best to recompile the source code when building Hadoop, because some functions of Hadoop must coordinate Java class files and library files generated by Native code through JNT. To run Native code in linux system, first compile Native into [. so] file of target CPU architecture. Different processor architectures need to compile the dynamic library [. so] file of the corresponding platform in order to be executed correctly. Therefore, it is best to recompile the Hadoop source code and make the [. so] file correspond to your processor.
if you want to directly install the official compiled version, you can operate according to another blog: Hadoop3. Fully distributed deployment of X on centos
1. Environmental preparation
- Three virtual machines, 192.168.68.111, 192.168.68.112, 192.168.68.113 Installing CentOS7 virtual machine on VMware 15 under win10
- JDK (self prepared)
- hadoop installation package (official website download address: https://hadoop.apache.org/releases.html)
- The installation package required for compilation and installation needs to be self fetched:
Link: https://pan.baidu.com/s/11adzPBvnq0louRr3qUhfoA
Extraction code: 6666
2. Create user
- Create a hadoop user and modify the password of the hadoop user
[root@localhost hadoop-3.3.1]# useradd hadoop
[root@localhost hadoop-3.3.1]# passwd hadoop
- vim /etc/sudoers configures the hadoop user to have root permission, so that sudo can execute the command with root permission later. Add a line below% wheeel, as shown below:
%wheel 	ALL=(ALL)	ALL
hadoop	ALL=(ALL) 	ALL
- Modify / data directory owner and group
chown -R hadoop:hadoop /data/
- Add address mapping to the three virtual machines in turn
vim /etc/hosts
 Add the following three lines to the end of the file
192.168.68.111 hadoop1
192.168.68.112 hadoop2
192.168.68.113 hadoop3
- Close the firewall (production can't do this, just open several designated ports)
firewall-cmd --state    #View firewall status
systemctl stop firewalld.service  #Stop firewalld service
systemctl disable firewalld.service  #Disable firewalld service at startup
3. Password free login
- To / home / hadoop / In SSH / directory, use hadoop user to execute SSH keygen - t RSA, and then press enter three times to generate two file IDs_ RSA (private key), id_rsa.pub (public key)
- Execute the following command to copy the public key to the machine to be logged in without secret, and repeat these two steps on the other two machines at one time
ssh-copy-id 192.168.68.111
ssh-copy-id 192.168.68.112
ssh-copy-id 192.168.68.113
- Now the hadoop users of the three machines can log in without secret. Add a 192.168.68.111 root user to log in to the other two machines without secret. Use the 192.168.68.111 root user to execute the following command
cd ~
cd .ssh
ssh-keygen -t rsa
ssh-copy-id 192.168.68.111
ssh-copy-id 192.168.68.112
ssh-copy-id 192.168.68.113
- Explanation of file functions in. ssh folder
| file name | function |
|---|---|
| known_hosts | Record the public key of the computer accessed by ssh |
| id_rsa | Generated private key |
| id_rsa.pub | Generated public key |
| authorized_keys | Store the authorized secret free login server public key |
4. Compile and install
- First, use root to install and compile related dependencies
yum install -y gcc gcc-c++
yum install -y make cmake
yum install -y autoconf automake libtool curl
yum install -y lzo-devel zlib-devel openssl openssl-devel ncurses-devel
yum install -y snappy snappy-devel bzip2 bzip2-devel lzo lzo-devel lzop libXtst
- Install cmake manually. The version of cmake installed by default is too low and the source code cannot be compiled. It is recommended to install cmake above version 3.6. I have version 3.13 here
# Uninstall installed cmake
yum erase cmake

# Upload the installation package and unzip it
tar -zxvf cmake-3.13.5.tar.gz -C /data/

# Compile and install
cd /data/cmake-3.13.5/
./configure
make && make install

# verification
[root@localhost cmake-3.13.5]# cmake -version
cmake version 3.13.5

#If the version is not displayed correctly, you can disconnect the ssh connection and log in again
- Manually install snappy
# Uninstall installed snappy
cd /usr/local/lib
rm -rf libsnappy*

# Upload and decompress
cd /data/soft/
tar -zxvf snappy-1.1.3.tar.gz -C /data/

# Compile and install
cd /data/snappy-1.1.3/
./configure
make && make install

# Verify installation
[root@localhost snappy-1.1.3]# ls -lh /usr/local/lib | grep snappy
-rw-r--r--. 1 root root 511K Jan 14 13:07 libsnappy.a
-rwxr-xr-x. 1 root root  955 Jan 14 13:07 libsnappy.la
lrwxrwxrwx. 1 root root   18 Jan 14 13:07 libsnappy.so -> libsnappy.so.1.3.0
lrwxrwxrwx. 1 root root   18 Jan 14 13:07 libsnappy.so.1 -> libsnappy.so.1.3.0
-rwxr-xr-x. 1 root root 253K Jan 14 13:07 libsnappy.so.1.3.0
- Installing and configuring maven
# Decompression installation
cd /data/soft/
tar -zxvf apache-maven-3.5.4-bin.tar.gz -C /data/

# Configure environment variables
vim /etc/profile
# MAVEN_HOME
export MAVEN_HOME=/data/apache-maven-3.5.4
export MAVEN_OPTS="-Xms4096m -Xmx4096m"
export PATH=:$MAVEN_HOME/bin:$PATH

# Verify that the installation was successful
[root@localhost apache-maven-3.5.4]# mvn -v
Apache Maven 3.5.4 (1edded0938998edf8bf061f1ceb3cfdeccf443fe; 2018-06-18T02:33:14+08:00)
Maven home: /data/apache-maven-3.5.4
Java version: 1.8.0_211, vendor: Oracle Corporation, runtime: /usr/java/jdk1.8.0_211/jre
Default locale: en_US, platform encoding: UTF-8
OS name: "linux", version: "3.10.0-957.el7.x86_64", arch: "amd64", family: "unix"

# Add maven alicloud warehouse address
vim /data/apache-maven-3.5.4/conf/settings.xml
<mirrors>
	<mirror>
		 <id>alimaven</id>
		 <name>aliyun maven</name>
		 <url>http://maven.aliyun.com/nexus/content/groups/public/</url>
		 <mirrorOf>central</mirrorOf>
	</mirror>
</mirrors>
- Installing ProtocolBuffer 2.5.0
# decompression
cd /data/soft/
tar -zxvf protobuf-2.5.0.tar.gz -C /data/

# Compile and install
cd /data/protobuf-2.5.0/
./configure
make && make install

# Verify that the installation was successful
[root@localhost protobuf-2.5.0]# protoc --version
libprotoc 2.5.0
- Upload the installation package to the virtual machine
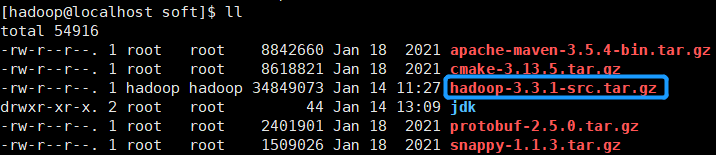
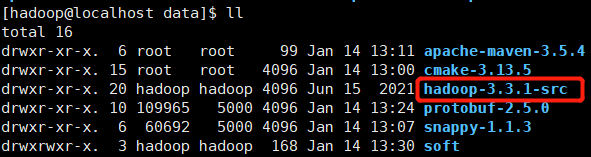
- Execute the command tar -zxvf hadoop-3.3.1 tar. GZ - C / data / extract to the / data directory
- Compile hadoop (compilation is very slow and takes about an hour)
cd /data/hadoop-3.3.1-src/
mvn clean package -Pdist,native -DskipTests -Dtar -Dbundle.snappy -Dsnappy.lib=/usr/local/lib

#Parameter Description:
Pdist,native : Recompile the generated hadoop Dynamic library;
DskipTests : Skip test
Dtar : Finally, put the document in tar pack
Dbundle.snappy : add to snappy Compression support [downloading from the official website by default is not supported]
Dsnappy.lib=/usr/local/lib : finger snappy The library path after installation on the compiling machine
- After successful compilation, the installation package path is as follows
[root@hadoop111 target]# pwd
/data/hadoop-3.3.1-src/hadoop-dist/target
[root@hadoop111 target]# ll
total 501664
drwxr-xr-x.  2 root root        28 Jan 14 16:56 antrun
drwxr-xr-x.  3 root root        22 Jan 14 16:56 classes
drwxr-xr-x. 10 root root       215 Jan 14 16:56 hadoop-3.3.1
-rw-r--r--.  1 root root 513703809 Jan 14 16:56 hadoop-3.3.1.tar.gz
drwxr-xr-x.  3 root root        22 Jan 14 16:56 maven-shared-archive-resources
drwxr-xr-x.  3 root root        22 Jan 14 16:56 test-classes
drwxr-xr-x.  2 root root         6 Jan 14 16:56 test-dir
- Unzip the compiled installation package
tar -zxvf hadoop-3.3.1.tar.gz -C /data/
- Enter the / data/hadoop-3.3.1/etc/hadoop path and execute the command VIM core site XML, edit the core configuration file and add the following content:
<?xml version="1.0" encoding="UTF-8"?>
<?xml-stylesheet type="text/xsl" href="configuration.xsl"?>

<configuration>
    <!-- to configure NameNode of URL -->
    <property>
        <name>fs.defaultFS</name>
        <value>hdfs://192.168.68.111:8020</value>
    </property>
    <!-- appoint hadoop Storage directory of data,yes hadoop Basic configuration of file system dependency,The default location is/tmp/{$user}It is a temporary directory. Once it is affected by external factors such as power failure,/tmp/${user}Everything under will be lost -->
    <property>
        <name>hadoop.tmp.dir</name>
        <value>/data/hadoop-3.3.1/data/tmp</value>
    </property>
    <!-- to configure HDFS The static user used for web page login is hadoop -->
    <property>
        <name>hadoop.http.staticuser.user</name>
        <value>hadoop</value>
    </property>
</configuration>
- Execute the command VIM HDFS site XML, edit the HDFS configuration file, and add the following content:
<?xml version="1.0" encoding="UTF-8"?>
<?xml-stylesheet type="text/xsl" href="configuration.xsl"?>
<configuration>
    <!-- NameNode Path on the local file system where the namespace and transaction logs are stored -->
    <property>
        <name>dfs.namenode.name.dir</name>
        <value>/data/hadoop-3.3.1/data/namenode</value>
    </property>
    <!-- DataNode Path on the local file system where the namespace and transaction logs are stored  -->
    <property>
        <name>dfs.datanode.data.dir</name>
        <value>/data/hadoop-3.3.1/data/datanode</value>
    </property>
    <!-- NameNode web End access address-->
    <property>
        <name>dfs.namenode.http-address</name>
        <value>192.168.68.111:9870</value>
    </property>
    <!-- SecondaryNameNode web End access address-->
    <property>
        <name>dfs.namenode.secondary.http-address</name>
        <value>192.168.68.113:9868</value>
    </property>
</configuration>
- Execute the command VIM YARN site XML edit the YARN configuration file and add the following:
<?xml version="1.0"?>

<configuration>
    <!-- appoint MR go shuffle -->
    <property>
        <name>yarn.nodemanager.aux-services</name>
        <value>mapreduce_shuffle</value>
    </property>
    <!-- appoint ResourceManager Address of-->
    <property>
        <name>yarn.resourcemanager.hostname</name>
        <value>192.168.68.112</value>
    </property>
    <!-- Minimum memory limit allocated for each container request resource manager (512) M) -->
    <property>
        <name>yarn.scheduler.minimum-allocation-mb</name>
        <value>512</value>
    </property>
    <!-- Maximum memory allocated per container request limit resource manager (4) G) -->
    <property>
        <name>yarn.scheduler.maximum-allocation-mb</name>
        <value>4096</value>
    </property>
    <!-- Virtual memory ratio, the default is 2.1,Set here to 4x -->
    <property>
        <name>yarn.nodemanager.vmem-pmem-ratio</name>
        <value>4</value>
    </property>
    <!-- Inheritance of environment variables -->
    <property>
        <name>yarn.nodemanager.env-whitelist</name>
        <value>JAVA_HOME,HADOOP_COMMON_HOME,HADOOP_HDFS_HOME,HADOOP_CONF_DIR,CLASSPATH_PREPEND_DISTCACHE,HADOOP_YARN_HOME,HADOOP_MAPRED_HOME</value>
    </property>
</configuration>
- Execute the command VIM mapred site XML edit MapReduce configuration file and add the following content:
<?xml version="1.0"?>
<?xml-stylesheet type="text/xsl" href="configuration.xsl"?>

<configuration>
    <!-- implement MapReduce How to: yarn/local -->
    <property>
        <name>mapreduce.framework.name</name>
        <value>yarn</value>
    </property>
</configuration>
- Under the / data/hadoop-3.3.1/etc/hadoop path, execute the command vim workers to configure workers (Note: no spaces are allowed at the end of the content added in the file, and no empty lines are allowed in the file)
192.168.68.111
192.168.68.112
192.168.68.113
- Create corresponding directory
mkdir /data/hadoop-3.3.1/data/datanode
mkdir /data/hadoop-3.3.1/data/tmp
- Change the user of hadoop installation package
chown -R hadoop:hadoop hadoop-3.3.1/
chown -R hadoop:hadoop hadoop-3.3.1/*
- Switch to the hadoop user and execute the following command to distribute the configured hadoop installation package to the other two machines (the other two machines check the user of the installation package and change to the hadoop user in installation step 10)
scp -r hadoop-3.3.1 root@192.168.68.112:/data/
scp -r hadoop-3.3.1 root@192.168.68.113:/data/
- Add environment variables to the three virtual machines in turn, edit the / etc/profile file, add the following contents, then save the source /etc/profile, and execute the hadoop version command to check whether the addition is successful
#HADOOP_HOME
export HADOOP_HOME=/data/hadoop-3.3.1
export PATH=$PATH:$HADOOP_HOME/bin
export PATH=$PATH:$HADOOP_HOME/sbin
- The cluster starts for the first time, The NameNode needs to be formatted on the primary node (both use hadoop users) (Note: formatting NameNode will generate a new cluster id, resulting in inconsistent cluster IDS between NameNode and datanode, and the cluster cannot find past data. If the cluster reports an error during operation and needs to reformat NameNode, be sure to stop the NameNode and datanode process, delete the data and logs directories of all machines, and then format it (chemical)
hdfs namenode -format
- Starting HDFS with hadoop users
sbin/start-dfs.sh
- Start YARN on 192.168.68.112
sbin/start-yarn.sh
- jps check whether the service processes of the three virtual machines are as shown in the following table
| 192.168.68.111 | 192.168.68.112 | 192.168.68.113 | |
|---|---|---|---|
| HDFS | NameNode DataNode | DataNode | SecondaryNameNode DataNode |
| Yarn | NodeManager | ResourceManager NodeManager | NodeManager |
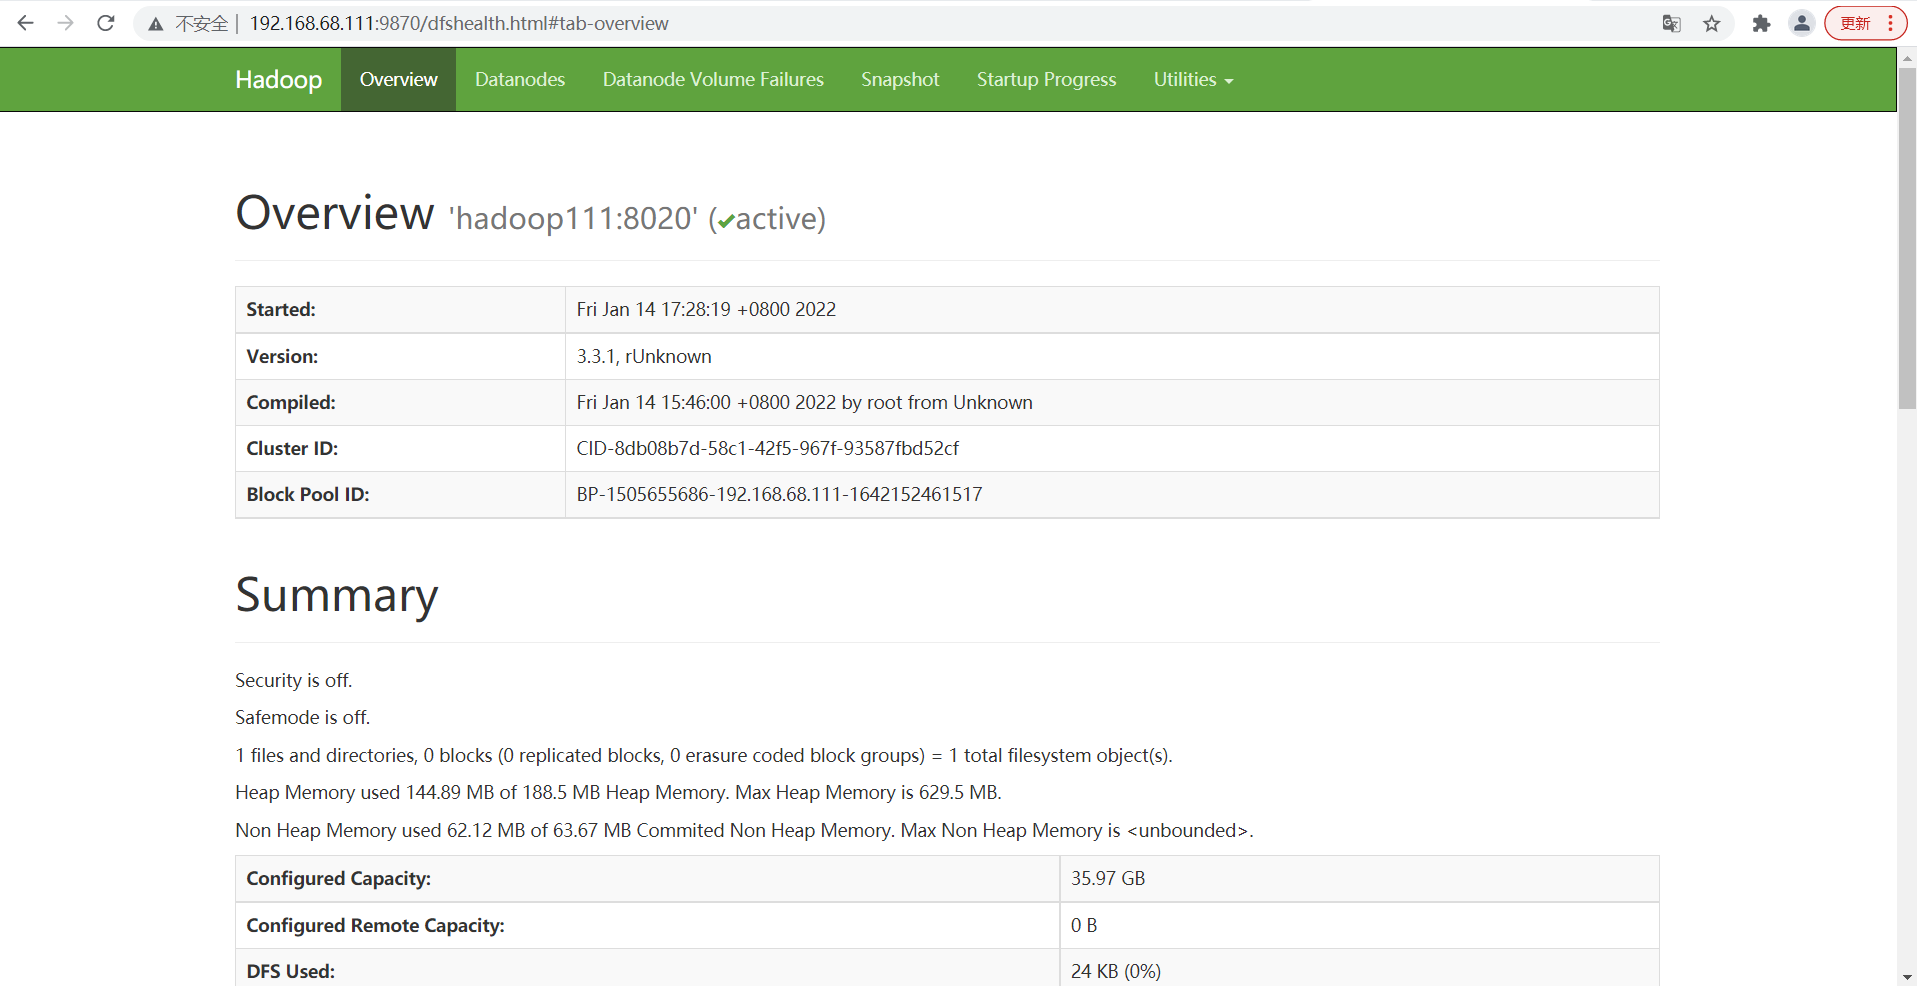
- View the HDFS NameNode on the Web (you can view the HDFS directory structure in utilities = > browse the file system)
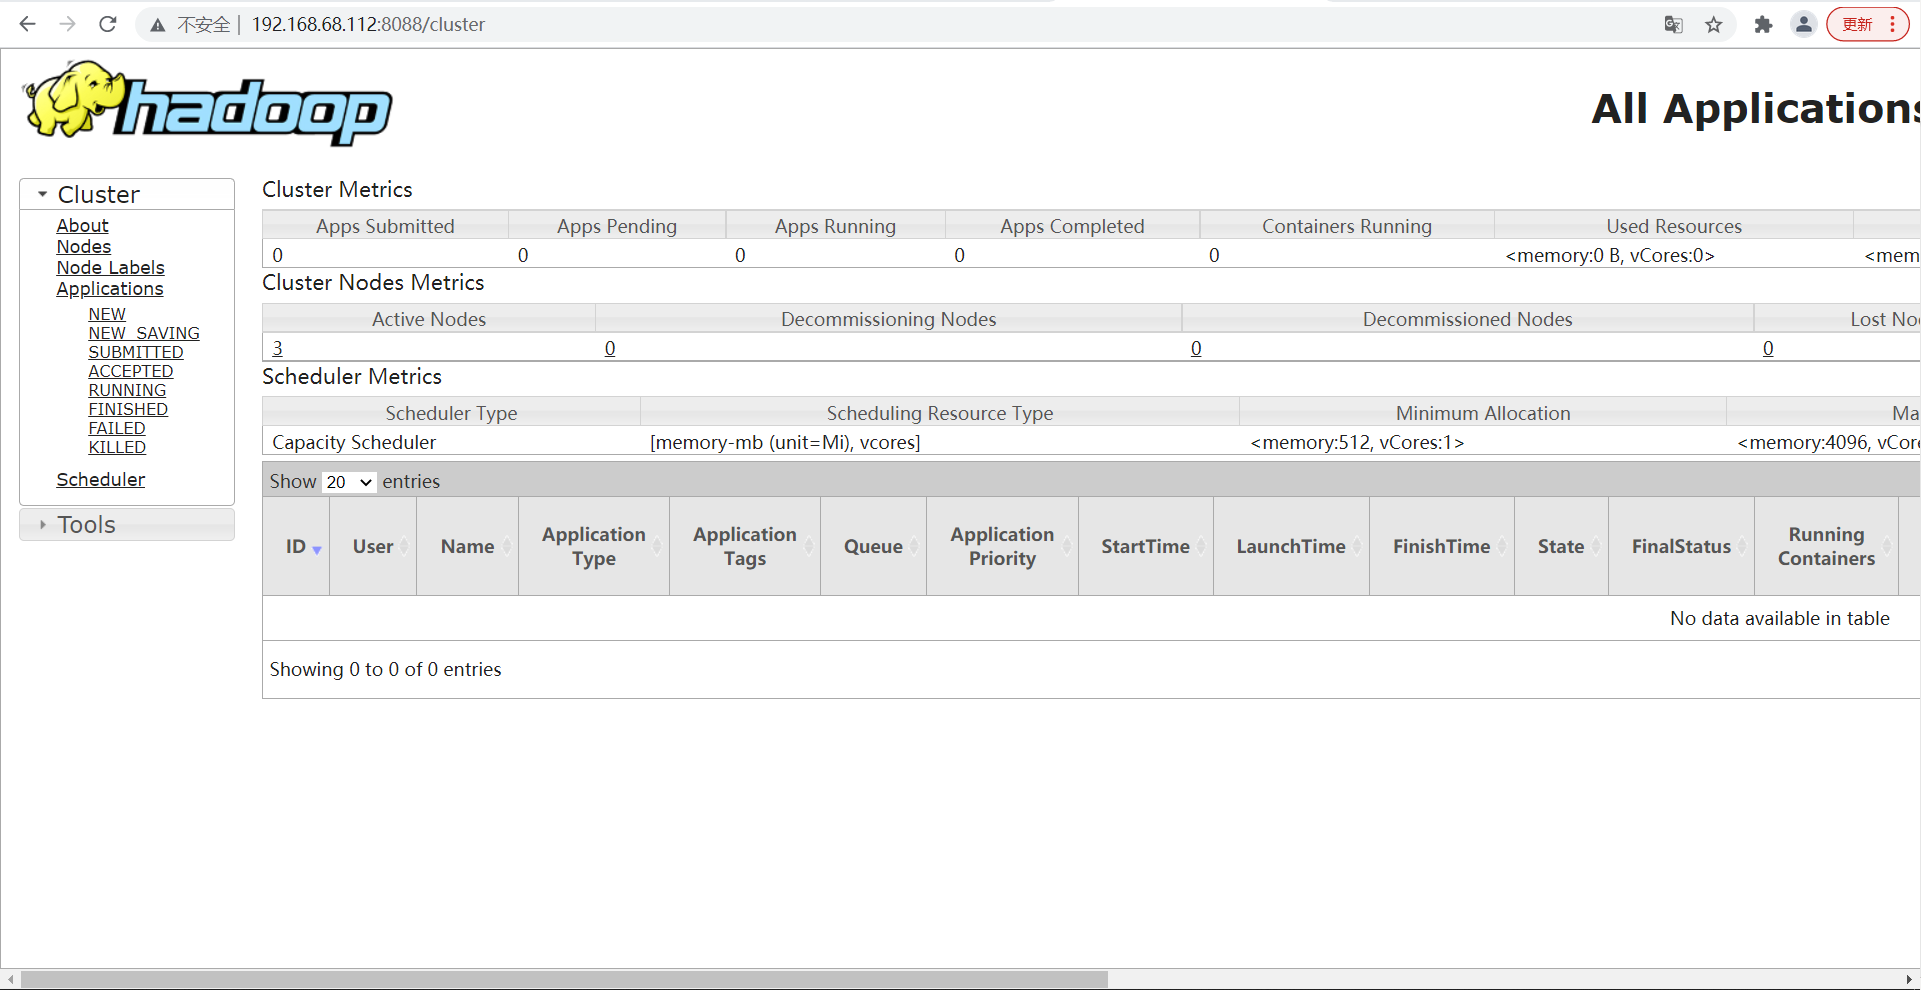
- View YARN's ResourceManager on the Web
5. Basic cluster test
- Upload files to cluster
[hadoop@localhost hadoop-3.3.1]$ hadoop fs -mkdir /input
[hadoop@localhost hadoop-3.3.1]$ hadoop fs -put /data/input/1.txt /input
- Go to the HDFS file storage path to view the contents of HDFS files stored on disk
[hadoop@localhost subdir0]$ pwd
/data/hadoop-3.3.1/data/dfs/data/current/BP-503073314-127.0.0.1-1641801366580/current/finalized/subdir0/subdir0
[hadoop@localhost subdir0]$ ls
blk_1073741825  blk_1073741825_1001.meta
[hadoop@localhost subdir0]$ cat blk_1073741825
hello hadoop
stream data
flink spark
- Download File
[hadoop@localhost hadoop-3.3.1]$ hadoop fs -get /input/1.txt /data/output/
[hadoop@localhost hadoop-3.3.1]$ ls /data/output/
1.txt
[hadoop@localhost hadoop-3.3.1]$ cat /data/output/1.txt
hello hadoop
stream data
flink spark
- Execute the wordcount program
hadoop jar share/hadoop/mapreduce/hadoop-mapreduce-examples-3.3.1.jar wordcount /input /output
-----------------------------------------------------------------------------------------------------------
see/output/File contents under( windows browser web When pulling files from the page to view, you need to C:\Windows\System32\drivers\etc\hosts Add 2 to.4 Address mapping described in section)
data	1
flink	1
hadoop	1
hello	1
spark	1
stream	1
- Calculate the PI (in the calculation command, 2 indicates the number of threads to be calculated and 50 indicates the number of investment points. The larger the value, the more accurate the calculated pi value is)
yarn jar share/hadoop/mapreduce/hadoop-mapreduce-examples-3.3.1.jar pi 2 50
-----------------------------------------------------------------------------------------------------------
Job Finished in 23.948 seconds
Estimated value of Pi is 3.20000000000000000000
6. Configure history server
in order to view the historical operation of the program, you need to configure the history server. The specific configuration steps are as follows:
- vim mapred-site.xml to edit the MapReduce configuration file and add the following contents (required for all three virtual machines):
<!-- Historical server address -->
<property>
    <name>mapreduce.jobhistory.address</name>
    <value>192.168.68.111:10020</value>
</property>
<!-- History server web End address -->
<property>
    <name>mapreduce.jobhistory.webapp.address</name>
    <value>192.168.68.111:19888</value>
</property>
- Start the history server at 192.168.68.111
On: mapred --daemon start historyserver
 close: mapred --daemon stop historyserver
-----------------------------------------------------------------------------------------------------------
#jps
15299 DataNode
15507 NodeManager
15829 Jps
15769 JobHistoryServer
15132 NameNode
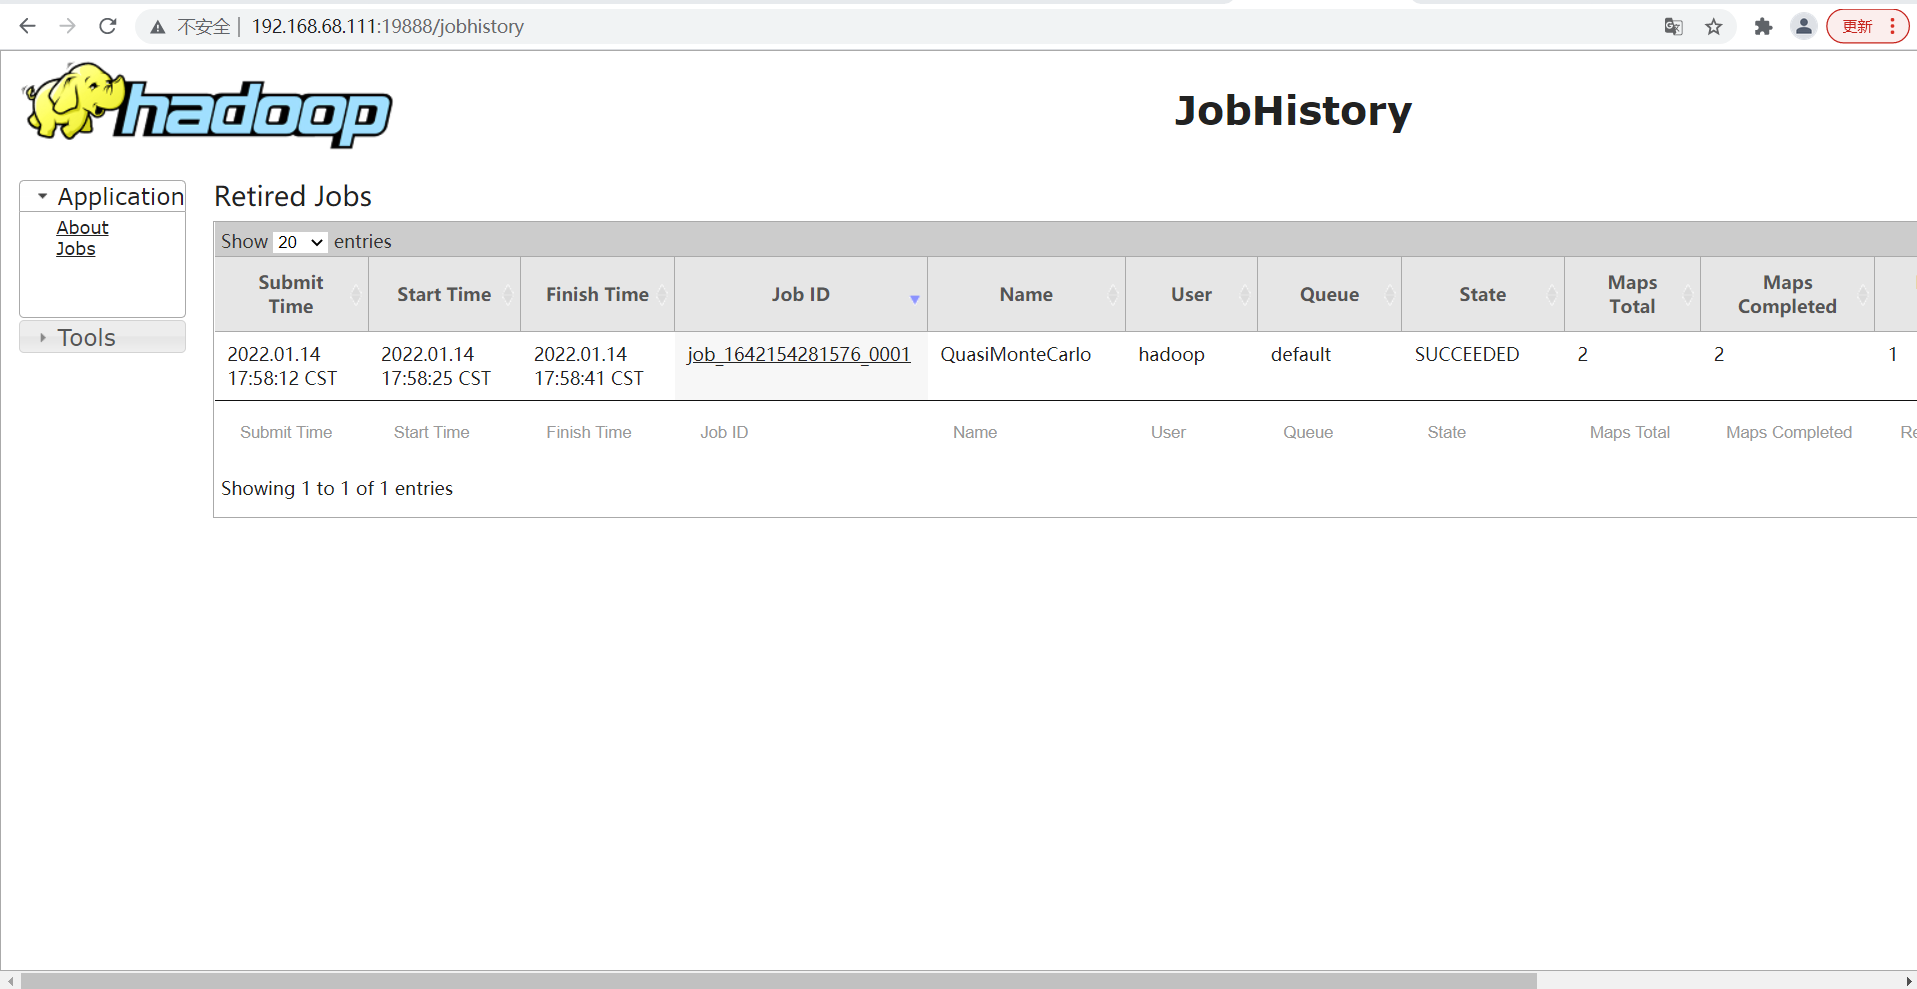
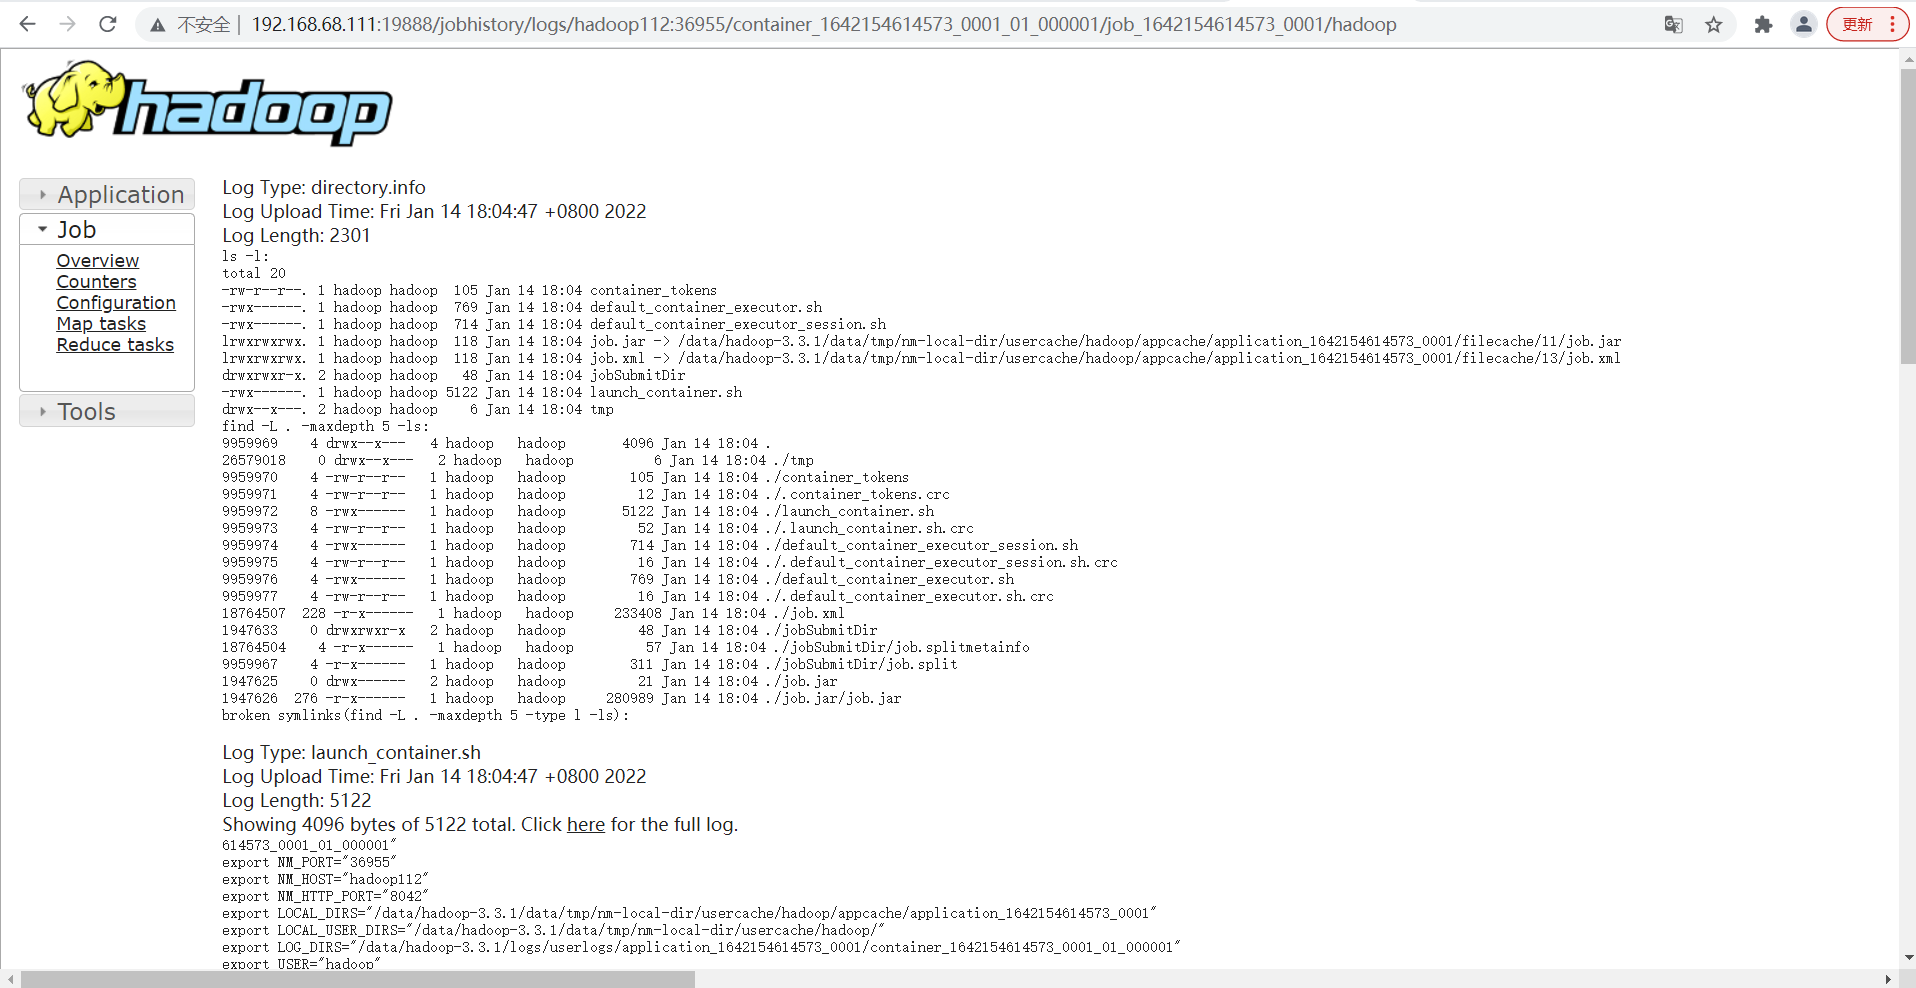
- View JobHistory
7. Configure log aggregation
log aggregation concept: after the application runs, upload the program running log information to the HDFS system.
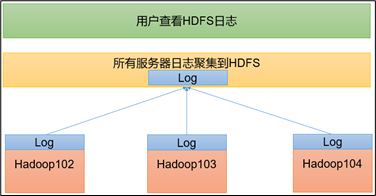
advantages of log aggregation function: you can easily view the details of program operation, which is convenient for development and debugging.
- vim yarn-site. Configure yarn site. XML XML, add the following content (required for all three sets):
<!-- Enable log aggregation -->
<property>
    <name>yarn.log-aggregation-enable</name>
    <value>true</value>
</property>
<!-- Set log aggregation server address -->
<property>
    <name>yarn.log.server.url</name>
    <value>http://192.168.68.111:19888/jobhistory/logs</value>
</property>
<!-- Set the log retention time to 7 days -->
<property>
    <name>yarn.log-aggregation.retain-seconds</name>
    <value>604800</value>
</property>
<!-- Configuring running logs hdfs Storage path on -->
<!--<property>
    <name>mapreduce.jobhistory.intermediate-done-dir</name>
    <value>/history/done_intermediate</value>
</property>-->
<!-- The configuration run logs are stored in the hdfs Storage path on -->
<!--<property>
    <name>mapreduce.jobhistory.done-dir</name>
    <value>/history/done</value>
</property>-->
- Restart the service and execute the wordcount program
hadoop jar share/hadoop/mapreduce/hadoop-mapreduce-examples-3.3.1.jar wordcount /input /output
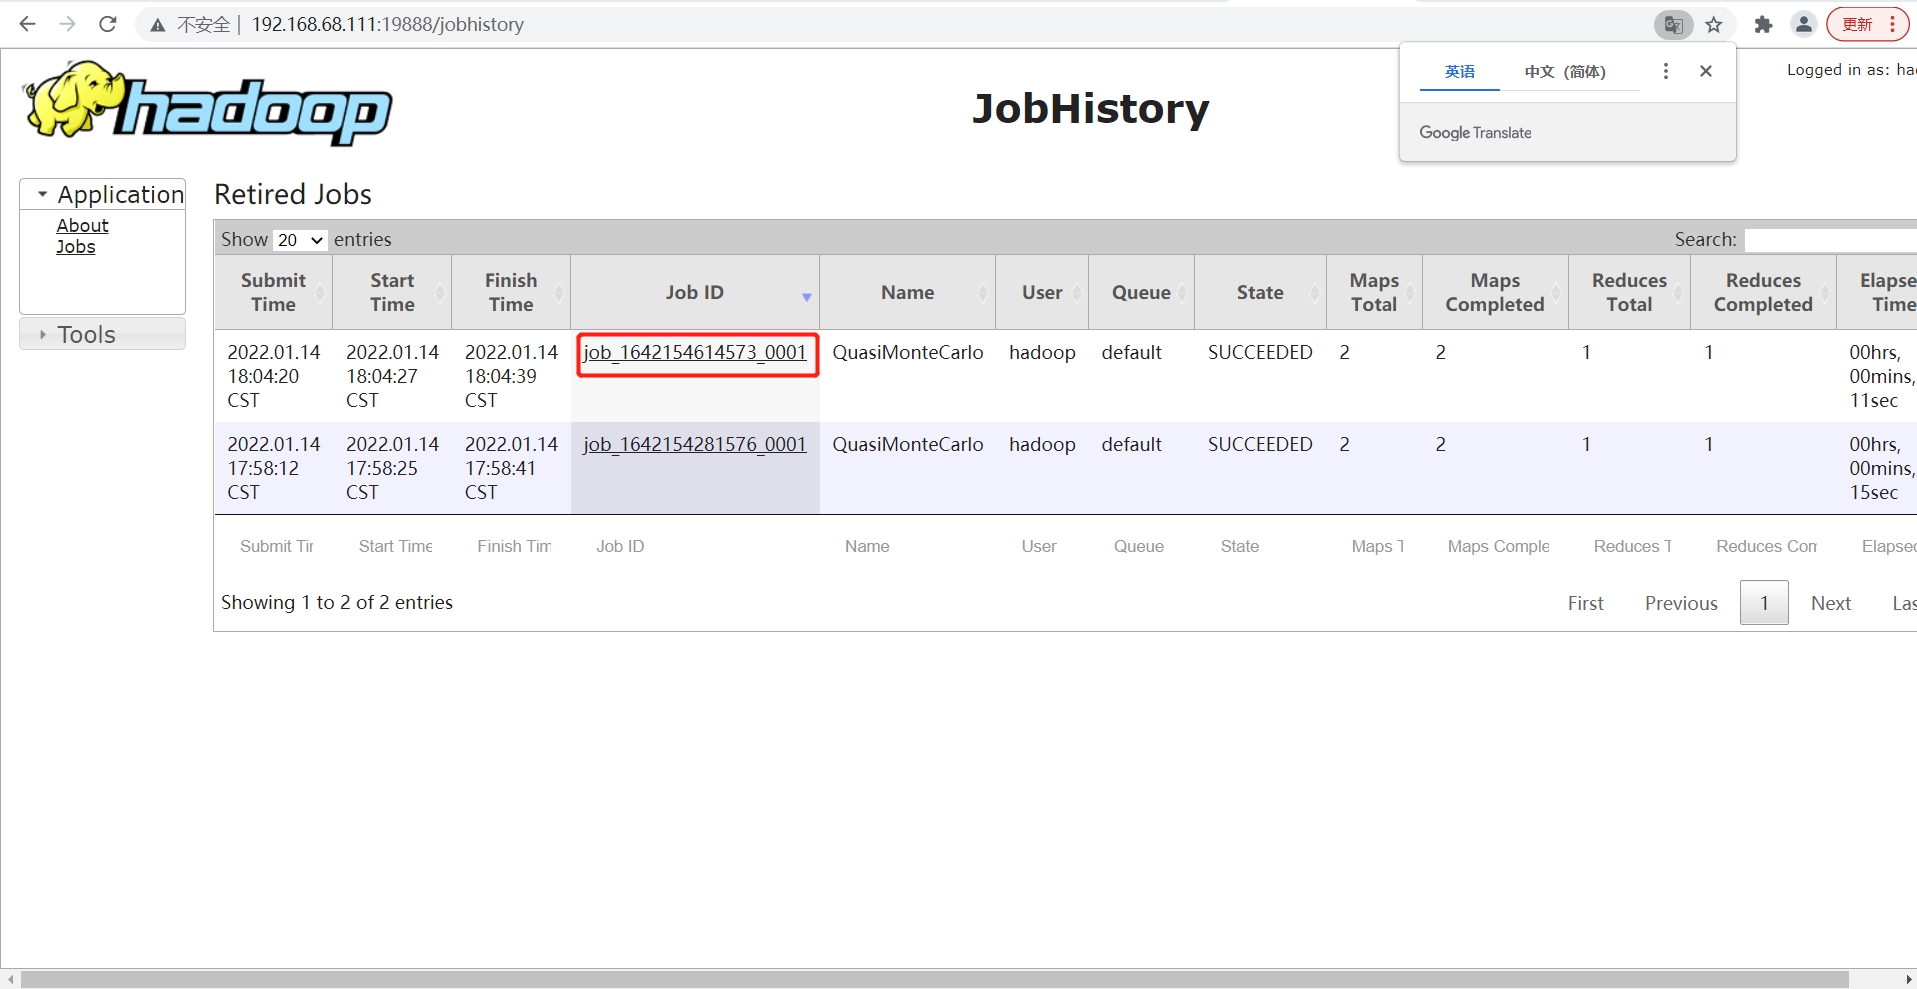
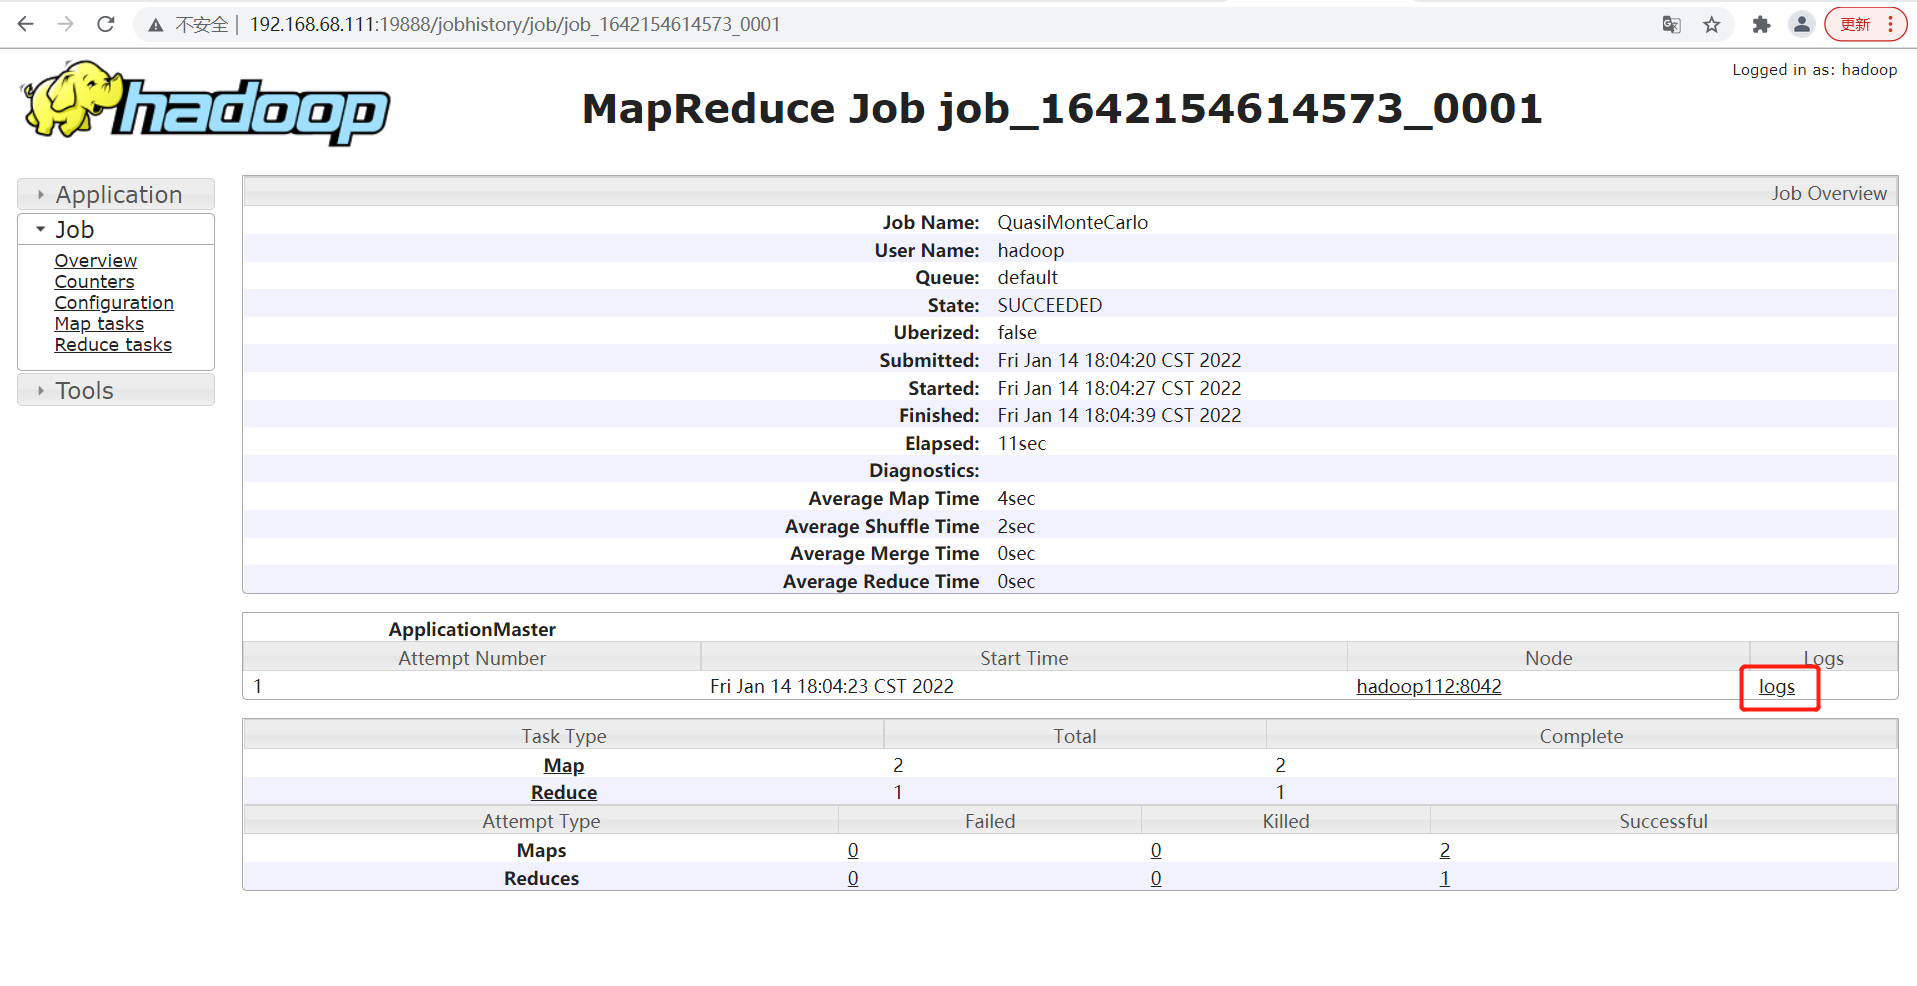
- view log
8. Summary of cluster start / stop commands
- Each module starts / stops separately (ssh is configured on the premise)
- Overall start / stop HDFS
start-dfs.sh/stop-dfs.sh
- Overall start / stop of YARN
start-yarn.sh/stop-yarn.sh
- Each service component starts / stops one by one
- Start / stop HDFS components separately
hdfs --daemon start/stop namenode/datanode/secondarynamenode
- Start / stop YARN
yarn --daemon start/stop resourcemanager/nodemanager
9. Cluster clustering script
- vim myhadoop.sh add the following and save
#!/bin/bash
if [ $# -lt 1 ]
then
echo "No Args Input..."
exit ;
fi
case $1 in
"start")
echo " =================== start-up hadoop colony ==================="
echo " --------------- start-up hdfs ---------------"
ssh 192.168.68.111 "/data/hadoop-3.3.1/sbin/start-dfs.sh"
echo " --------------- start-up yarn ---------------"
ssh 192.168.68.112 "/data/hadoop-3.3.1/sbin/start-yarn.sh"
echo " --------------- start-up historyserver ---------------"
ssh 192.168.68.111 "/data/hadoop-3.3.1/bin/mapred --daemon start historyserver"
;;
"stop")
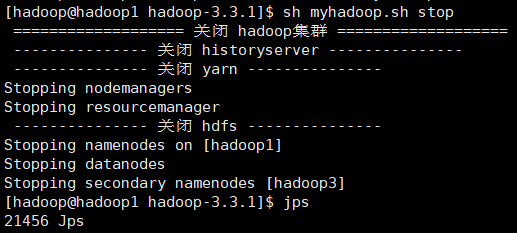
echo " =================== close hadoop colony ==================="
echo " --------------- close historyserver ---------------"
ssh 192.168.68.111 "/data/hadoop-3.3.1/bin/mapred --daemon stop historyserver"
echo " --------------- close yarn ---------------"
ssh 192.168.68.112 "/data/hadoop-3.3.1/sbin/stop-yarn.sh"
echo " --------------- close hdfs ---------------"
ssh 192.168.68.111 "/data/hadoop-3.3.1/sbin/stop-dfs.sh"
;;
*)
echo "Input Args Error..."
;;
esac
- chmod +x myhadoop.sh grant script execution permission
- Start / stop cluster

10. Description of common port numbers
| Port name | Hadoop2.x | Hadoop3.x |
|---|---|---|
| NameNode internal communication port | 8020 / 9000 | 8020 / 9000 / 9820 |
| NameNode HTTP UI | 50070 | 9870 |
| MapReduce view task execution port | 8088 | 8088 |
| History server communication port | 19888 | 19888 |