preface
In the last article, we implemented a general scaffolding tool for Web engineering to quickly build projects. In the actual development, especially the background management system, there are many similar code implementations. Therefore, we can continue to implement a tool to quickly generate web code templates, saying goodbye to copy / paste.
Basic process
The basic idea is actually very simple, that is, call the defined template through the command, and then generate the code file:

Project structure
xman-tcli
├─ bin
│  └─ xmant.js
├─ command
│  ├─ createFile.js
│  └─ createManyFiles.js
├─ config
│  └─ fileList.js
├─ templates
│  ├─ index.js
│  ├─ js
│  │  ├─ reactClassJSX.js
│  │  └─ reactFuncJSX.js
│  └─ ts
│     ├─ reactClassTSX.js
│     ├─ reactFuncTS.js
│     └─ reactFuncTSX.js
├─ utils
│  └─ index.js
├─ .gitignore
├─ LICENSE
├─ package.json
└─ README.md
Concrete implementation
The usefulness of many dependencies has been mentioned in the previous article, so this article will not introduce too much.
Initialize project
It can be created with npm init or modified according to the package.json listed below.
{
  "name": "xman-tcli",
  "version": "1.0.0",
  "description": "web-cli Tool, you can quickly create template",
  "bin": {
    "xmant": "bin/xmant.js"
  },
  "scripts": {
    "test": "echo \"Error: no test specified\" && exit 1"
  },
  "repository": {
    "type": "git",
    "url": "https://github.com/XmanLin/xman-tcli.git"
  },
  "keywords": [
    "cli"
  ],
  "author": "xmanlin",
  "license": "MIT",
  "dependencies": {
    "chalk": "^4.1.2",
    "clui": "^0.3.6",
    "commander": "^8.2.0",
    "figlet": "^1.5.2",
    "handlebars": "^4.7.7",
    "inquirer": "^8.1.5",
    "update-notifier": "^5.1.0"
  }
}
Write bin/xman.js
#!/usr/bin/env node

const { program } = require('commander');

program
    .version(require('../package').version, '-v, --version');

program.parse(process.argv); // This is necessary

if (!program.args.length) {
    program.help();
}
In the current xmant cli directory, after executing npm link, you can debug scaffold tools locally.
Then execute in the current directory:
xmant -v

It indicates that the preliminary construction of the project is successful.
Create a single code template quickly with the command
Write template
The code template can be extracted according to the actual project. Here we use several simple templates as examples.
templates/js/reactClassJSX.js
    return `
import * as React from 'react';

export class ${className} extends React.Component{
    constructor(props){
        super(props);

        this.state = {}
    }

    componentDidMount(){

    }

    render() {
        return (
            <div></div>
        )
    }
}
    `
}
templates/js/reactFuncJSX.js
module.exports = function (funcName) {
    return `
import React, {useEffect, useState} from 'react';

const ${funcName} = (props) => {

    return (
        <div></div>
    )
}

export default ${funcName};
    `
}
templates/ts/reactClassTSX.js
module.exports = function (className) {
    return `
import * as React from 'react';

interface Props {}
interface State {}

export class ${className} extends React.Component<Props, State>{
    constructor(props: Props){
        super(props);

        this.state = {}
    }

    componentDidMount(){

    }

    render() {
        return (
            <div></div>
        )
    }
}
    `
}
templates/ts/reactFuncTS.js
module.exports = function (funcName) {
    return `
export const ${funcName} = () => {

}
    `
}
templates/ts/reactFuncTSX.js
module.exports = function (funcName) {
    return `
import React, {useEffect, useState} from 'react';

const ${funcName} = (props: any) => {

    useEffect(() => {

    },[])

    return (
        <div></div>
    )
}

export default ${funcName};
    `
}
After the template is defined, it is exported uniformly through index.js.
templates/index.js
const reactClassJSX = require('./js/reactClassJSX');
const reactFuncJSX = require('./js/reactFuncJSX');
const reactClassTSX = require('./ts/reactClassTSX');
const reactFuncTSX = require('./ts/reactFuncTSX');
const reactFuncTS = require('./ts/reactFuncTS');
// Naming convention: name is linked by "-" followed by the template name and the suffix of the created file

module.exports = [
    {
        name: 'reactClass-jsx', src: reactClassJSX
    },
    {
        name: 'reactFunc-jsx', src: reactFuncJSX
    },
    {
        name: 'reactClass-tsx', src: reactClassTSX
    },
    {
        name: 'reactFunc-tsx', src: reactFuncTSX
    },
    {
        name: 'reactFunc-ts', src: reactFuncTS
    }
]
The purpose of "naming convention" here is to get the corresponding suffix when creating files later.
Create the tool function utils/index.js:
module.exports = {
    getFileSuffix: (name) => {
        if(typeof name === 'string') {
            return name.split('-')[1]
        }
    }
}
Write file creation logic
The preparation is ready. Next is the logical command/createFile.js for file creation:
// Create a single file
const templates = require('../templates/index');
const chalk = require('chalk');
const inquirer = require('inquirer');
const fs = require("fs");
const utils = require('../utils/index');


module.exports = () => {
    inquirer.prompt([
        {
            name: 'templateName',
            type:'list',
            message: 'Please select the code template you want to generate:',
            choices: templates
        },
        {
            name: 'filename',
            type:'input',
            message: 'Please enter the class name or method name in the code file:',
            validate: function (value) {
                if (value.length) {
                    return true;
                } else {
                    return 'Please enter the class name or method name in the code file';
                }
            },
        }
    ])
    .then(answers => {
        const templateName = answers.templateName;
        const filename = answers.filename;
        templates.forEach((item) => {
            if(item.name === templateName) {
                const suffix = utils.getFileSuffix(item.name)
                const file = `./index.${suffix}`
                // Check whether there are files with the same name in the current folder
                fs.access(file, function(err) {
                    if(!err) {
                        console.log('Creation failed:', chalk.yellow('file already exist'))
                    } else {
                        fs.writeFile(file, item.src(filename), function(err) {
                            if(err) {
                                console.log('Creation failed:', chalk.red(err))
                            } else {
                                console.log(chalk.green(`File created successfully! ${file}`));
                            }
                        })
                    }
                })
            }
        })
    })
}
Note here: if you do not check whether there is a file with the same name in the current folder before creating the file, the original file with the same name will be overwritten.
Write command
Finally, write the command bin/xman.js:
#!/usr/bin/env node

const { program } = require('commander');

...

program
    .command('create')
    .description("Create a file")
    .alias('c')
    .action(() => {
        require('../command/createFile')()
    });

...
debugging
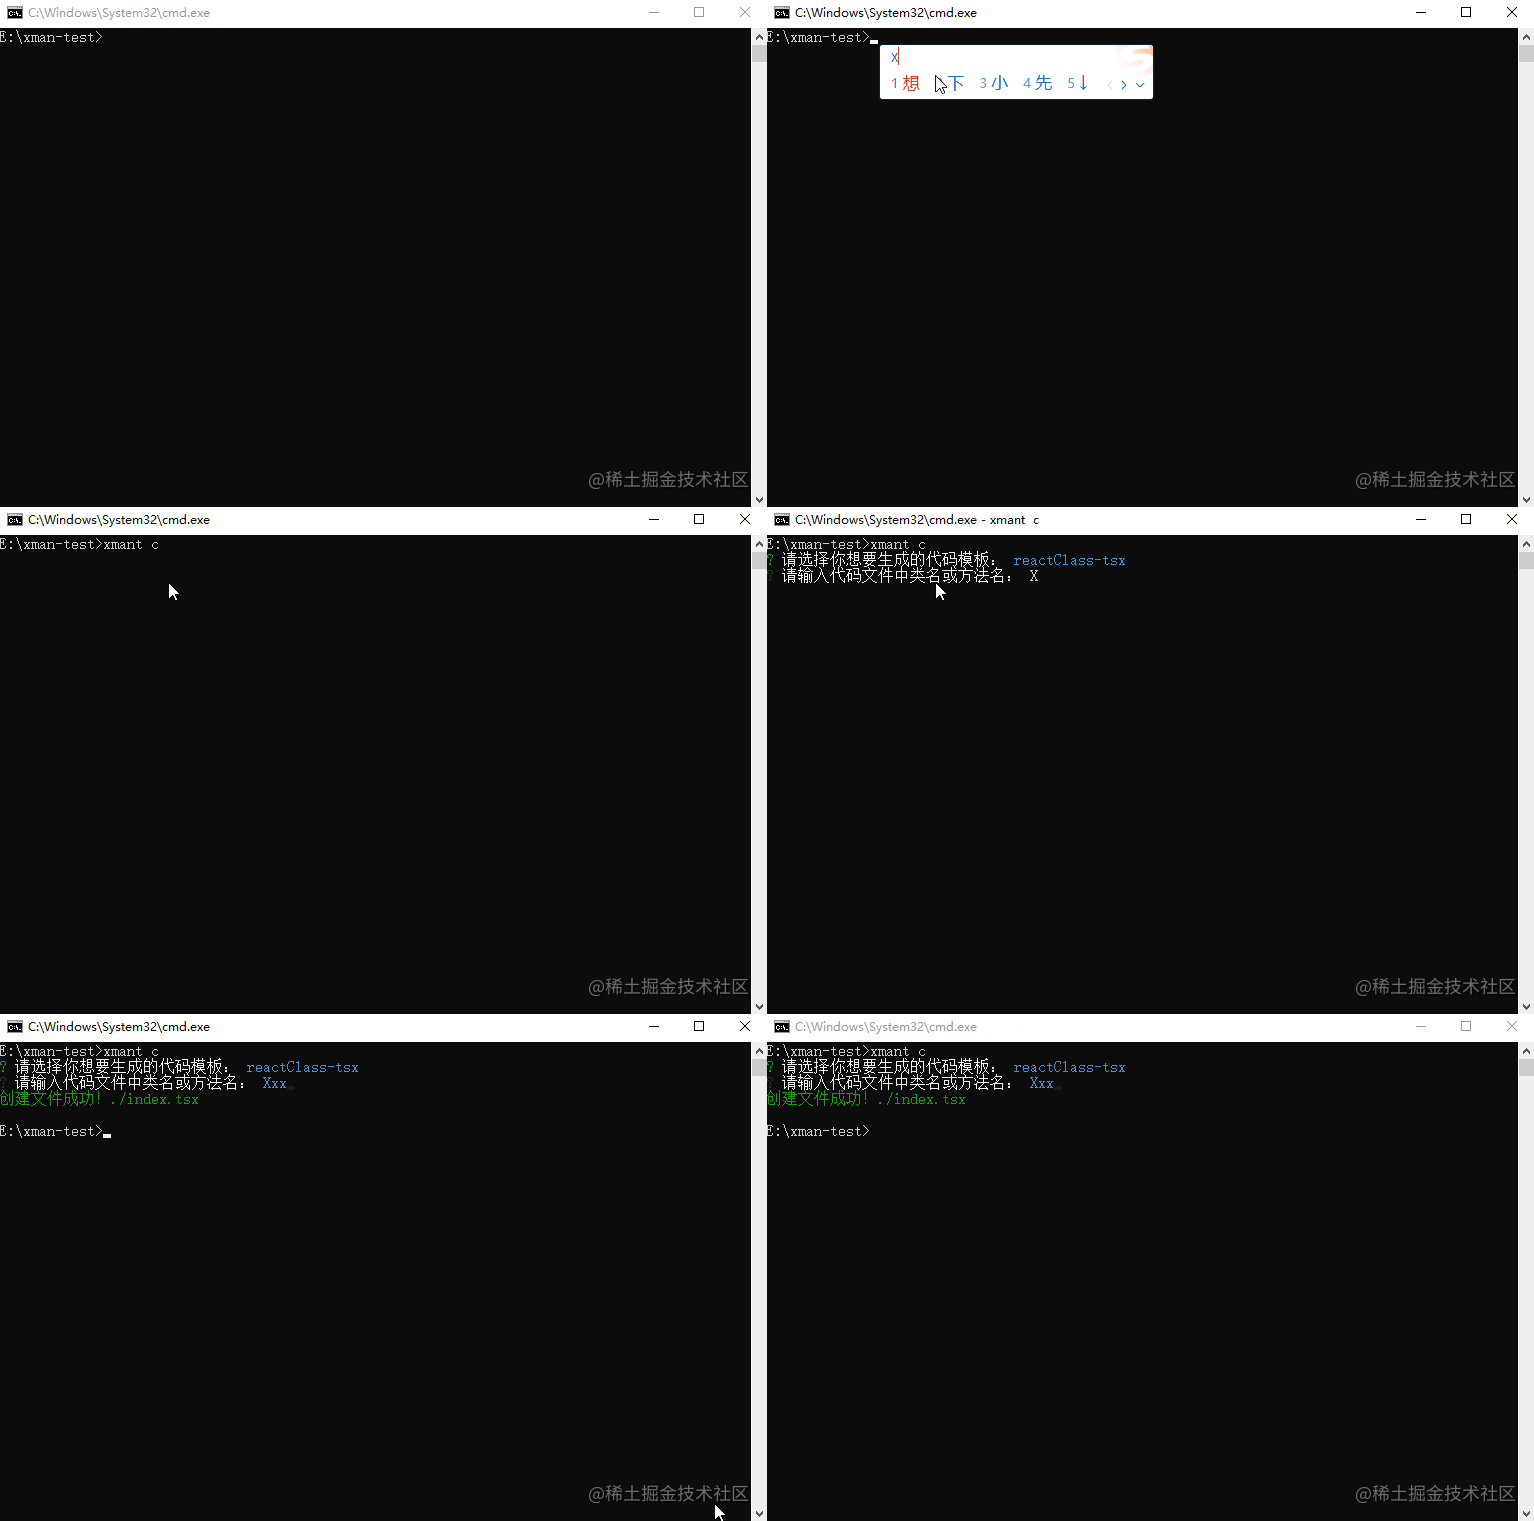
Execute npm link --force in the current project folder, and then execute xmant c:

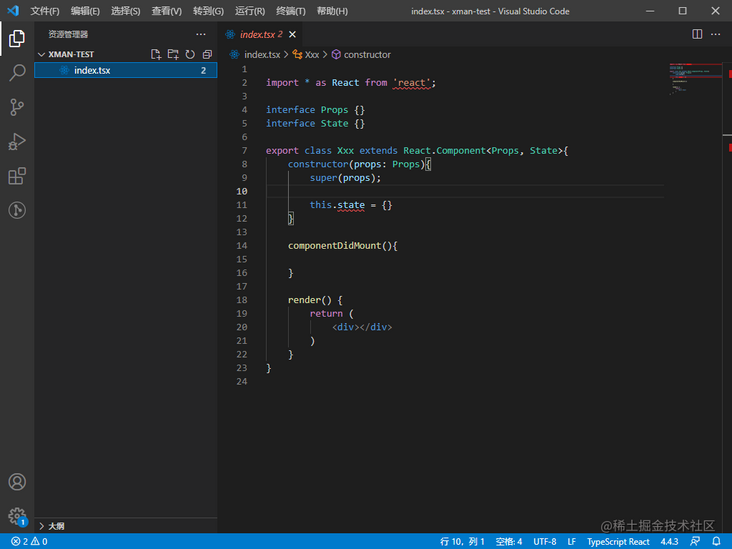
Open our newly created file to see:

You can also choose another template to create.
Quick batch creation of code templates through commands
What if we want to create a large number of code templates at one time? Of course, you can create files in batches through commands.
The idea here is to read the configuration file and then create it in batch.
Write configuration file
// explain:
// Folder: folder name, which can be nested and separated by "/"
// fileName: file name
// funcName: class name or function name
// Template: the file template used

module.exports = [
    {
        folder: './home',
        fileName: 'index',
        funcName: 'Home',
        template: 'reactFunc-tsx'
    },
    {
        folder: './home/compnent',
        fileName: 'index',
        funcName: 'Compnent',
        template: 'reactFunc-tsx'
    },
    {
        folder: './home/service',
        fileName: 'index',
        funcName: 'service',
        template: 'reactFunc-ts'
    },
    {
        folder: './news',
        fileName: 'index',
        funcName: 'News',
        template: 'reactFunc-tsx'
    },
    {
        folder: './news/service',
        fileName: 'index',
        funcName: 'service',
        template: 'reactFunc-ts'
    }
]
The file template used here is the template we wrote before.
Write batch file creation logic
Create folders and files in batches according to the configuration file command/createManyFiles.js:
// Batch create files

const chalk = require('chalk');
const inquirer = require('inquirer');
const fs = require('fs');
const path = require('path');
const utils = require('../utils/index');
const fileList = require('../config/fileList');
const templates = require('../templates/index');
const clui = require('clui');
const Spinner = clui.Spinner;
const status = new Spinner('Creating...');

// Create directory synchronization method recursively
function mkdirsSync(dirname) {
    if (fs.existsSync(dirname)) {
        return true;
    } else {
        if (mkdirsSync(path.dirname(dirname))) {
            fs.mkdirSync(dirname);
            console.log(chalk.green(`Directory created successfully-${dirname}`));
        }
    }
}

module.exports = () => {
    inquirer.prompt([
        {
            name: 'choices',
            type:'list',
            message: 'Please confirm that the template batch generation list is configured',
            choices: ['yes', 'no']
        }
    ])
    .then(answers => {
        const choices = answers.choices
        if(choices === 'yes') {
            // Batch create directory
            fileList.forEach(item => {
                if(item.folder) {
                    mkdirsSync(`${item.folder}`)
                }
            })
            // Batch create files
            fileList.forEach(item => {
                templates.forEach(tpl => {
                    if(item.template === tpl.name) {
                        const suffix = utils.getFileSuffix(item.template)
                        const fileName = `${item.fileName}.${suffix}`
                        fs.writeFile(`${item.folder}/${fileName}`, tpl.src(item.funcName), function(err) {
                            if(err) {
                                console.log('Creation failed:', chalk.red(err))
                            } else{
                                console.log(chalk.green(`File created successfully! ${fileName}`));
                            }
                        })
                    }
                })
            })
        }
    })
}
Write command
Finally, write bin/xman.js:
#!/usr/bin/env node

const { program } = require('commander');

...

program
    .command('create-many')
    .description("Create many folders and files")
    .alias('cm')
    .action(() => {
        require('../command/createManyFiles')()
    });

...
debugging
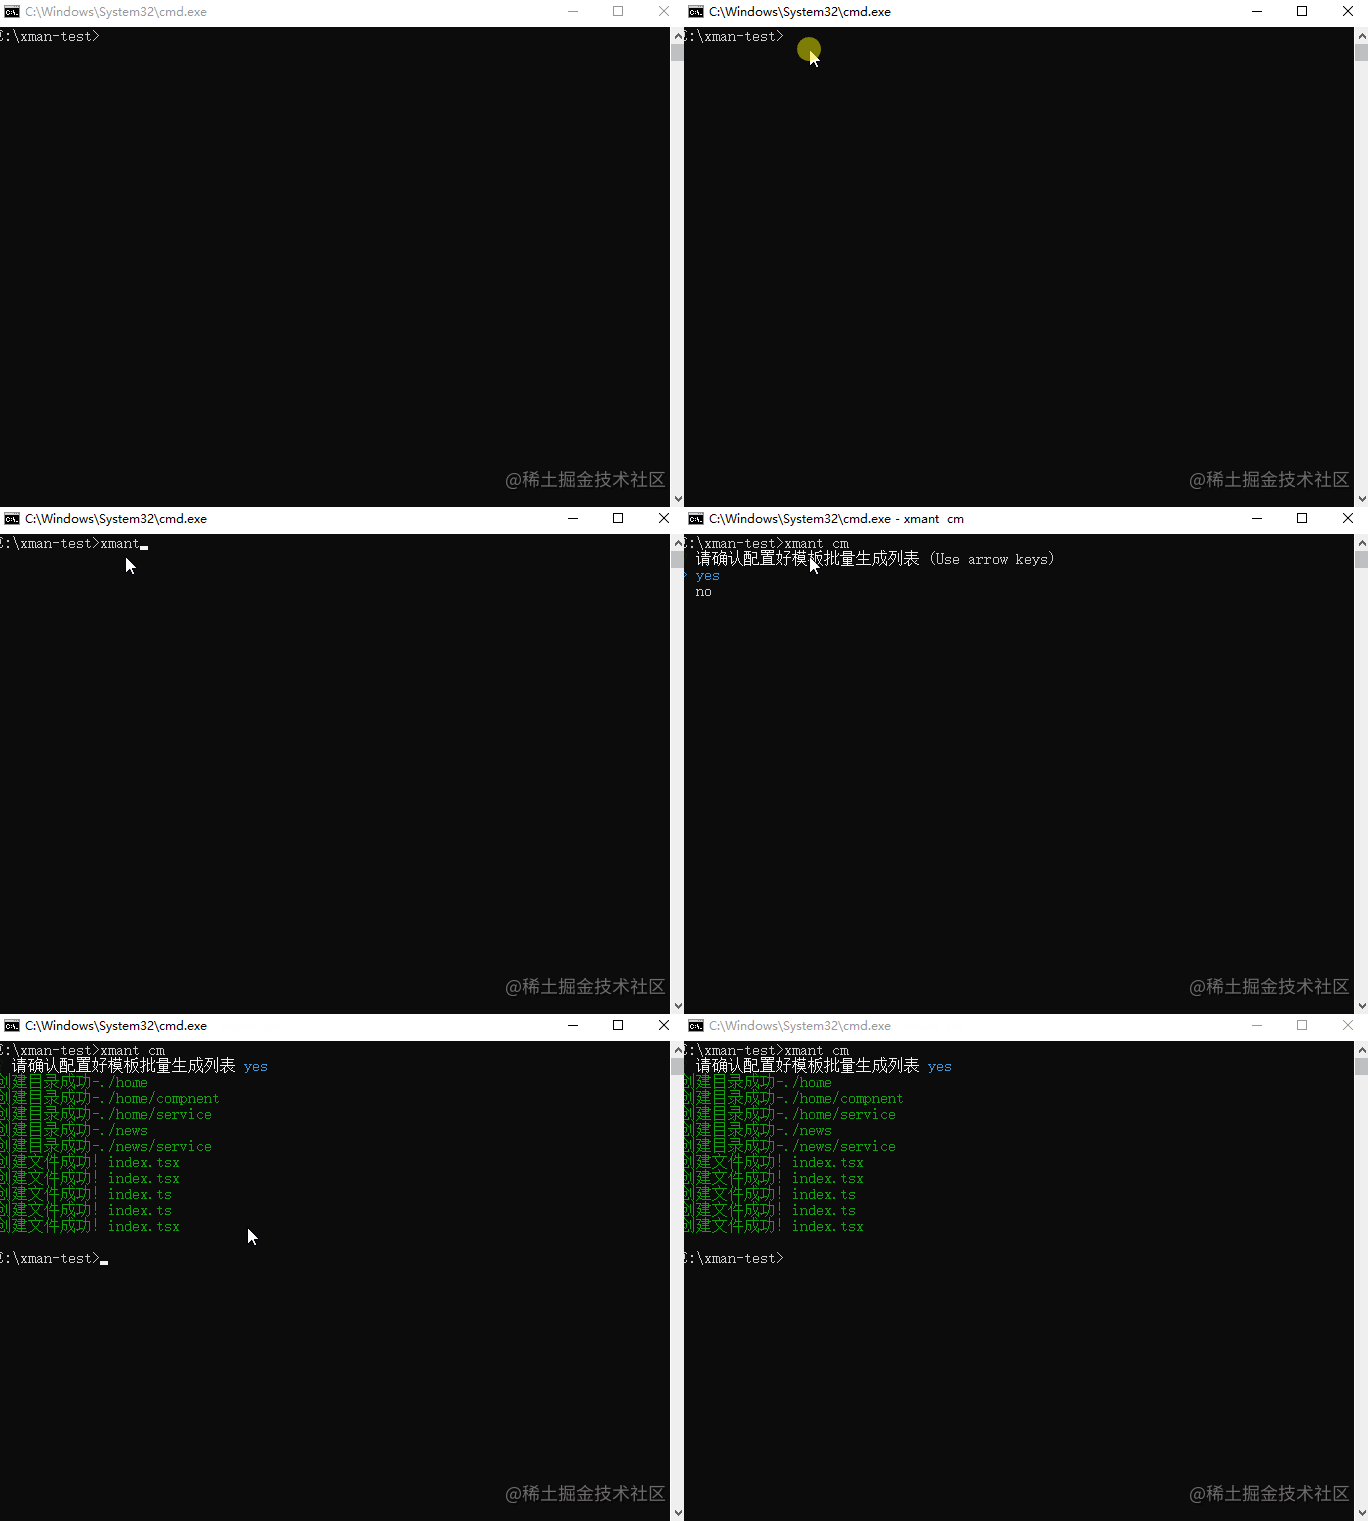
Execute npm link --force in the current project folder, and then execute xmant cm:

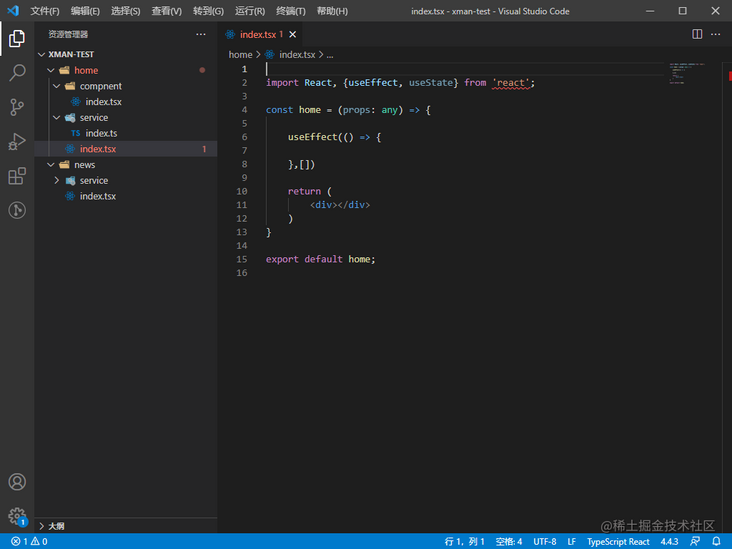
Take a look at the files and folders we created in batch:

summary
There are many ways to quickly create code templates, including VSCode plug-ins, CLI tools, and ways to make lowcode/nocode platforms. The advantage of this method in this paper is that it is flexible enough. We can make flexible transformation according to specific needs to make it more applicable.