✨ War Of Resistance Live: record the days and nights of the 14 year war of resistance against Japan
✨ Open source address: https://github.com/kokohuang/WarOfResistanceLive
✨ Preview address: https://kokohuang.github.io/WarOfResistanceLive
preface
In the current impetuous Internet environment, it is not difficult to do a good thing, but to do a meaningful thing for eight consecutive years.
There is such a blogger on the microblog. From July 7, 2012 to September 2, 2020, he recorded the history of the Chinese nation's all-round war of resistance against Japan from July 7, 1937 to August 15, 1945 in the form of graphics and text. 2980 days without interruption, with an average of 12 articles per day and a total of 35214 articles.
At 7:07 on September 18, 2020, the live broadcast that has been silent for half a month will be restored and updated. They will continue to record the six-year history of the Anti Japanese war from September 18, 1931 to July 7, 1937 in the form of graphics and text.
The next six years, they are already on the road.
History cannot be forgotten.
As a programmer, what can I do in the face of history?
In addition to admiring their persistence over the years, I want to do something meaningful within my ability.
War Of Resistance Live
├── . github/workflows # workflow profile
resources # microblog data
Source code of site # blog
└ - spider # microblog crawler
WarOfResistanceLive is an open source project mainly composed of Python crawler + Hexo blog + Github Actions continuous integration service. It is open source on GitHub and deployed on Github Pages. It currently includes the following functions:
-
Automatically synchronize and update data on a daily basis
-
View all current microblog data of bloggers
-
Support RSS subscription function
-
Continuous integration service based on Github Actions
-
...
Next, I will briefly introduce some core logic and implementation of the project.
Python crawler
The crawler used in this project is based on the simplified and modified implementation of Weibo crawler project (for research purposes only)
Implementation principle
By accessing the mobile version of microblog and bypassing its login verification, you can view most of the microblog data of a blogger, such as: https://m.weibo.cn/u/2896390104
It can be seen through the developer tool and through the json interface https://m.weibo.cn/api/container/getIndex You can get the microblog data list:
def get_json(self, params):
    """Get in web page json data"""
    url = 'https://m.weibo.cn/api/container/getIndex?'
    r = requests.get(url,
                     params=params,
                     headers=self.headers,
                     verify=False)
    return r.json()
How to use
Installation dependency:
pip3 install -r requirements.txt
use:
python weibo.py
matters needing attention
- Too fast speed is easy to be limited by the system: the risk of being limited by the system can be reduced by adding random waiting logic;
- Unable to obtain all microblog data: all data can be obtained by adding cookie logic;
See Weibo crawler for more information.
Hexo
After some choices, we finally chose the theme of Hexo + Next as the blog framework of this project.
Hexo is a node based JS static blog framework, less dependence, easy to install and use, can easily generate static web pages, hosted on GitHub Pages, and there are rich topics to choose from. For details on how to install and use hexo, please refer to the official documents: https://hexo.io/zh-cn/docs/ .
So, how to implement RSS subscription function?
Thanks to the rich plug-in functions of Hexo, Hexo generator feed can be easily implemented for us.
First, install the plug-in under the blog root directory:
$ npm install hexo-generator-feed --save
Then, in the blog root directory_ config. Add relevant configuration to YML file:
feed:
  enable: true # Enable plug-in
  type: atom # The type of Feed. It supports atom and rss2. The default is atom
  path: atom.xml # Path to the generated file
  limit: 30 # The maximum number of articles generated. If it is 0 or false, all articles will be generated
  content: true # If true, all contents of the article will be displayed
  content_limit: # The length of the content displayed in the article is valid only if the content is false
  order_by: -date # Sort by date
  template: # Custom template path
Finally, in the topic root directory_ config. Add RSS subscription entry to YML file:
menu:
  RSS: /atom.xml || fa fa-rss # atom.xml file path address and icon settings
In this way, we can add RSS subscription function to our blog. The subscription address of WarOfResistanceLive is:
https://kokohuang.github.io/WarOfResistanceLive/atom.xml
Github Actions continuous integration
Github Actions is a continuous integration service launched by Github in October 2018. Before that, we may use Travis CI more to realize continuous integration services. In my personal opinion, Github Actions is very powerful and more playable than Travis CI. Github Actions has a rich action market. By combining these actions, we can easily complete many interesting things.
Let's take a look at some basic concepts of Github Actions:
- Workflow: workflow. That is, the process of continuous integration into one operation. The document is stored in the warehouse github/workflows directory can contain multiple;
- job: task. A workflow can contain one or more jobs, that is, it represents an integrated operation and can complete one or more tasks;
- Step: step. A job consists of multiple steps, which represent the steps required to complete a task;
- Action: action. Each step can contain one or more actions, which means that multiple actions can be executed in one step.
After understanding the basic concepts of Github Actions, let's take a look at how WarOfResistanceLive's continuous integration service is implemented. The following is the complete implementation of workflow used in this project:
# Name of workflow
name: Spider Bot

# Set time zone
env:
  TZ: Asia/Shanghai

# Set workflow trigger method
on:
  # It is triggered regularly and updated every 2 hours from 8:00 to 24:00( https://crontab.guru)
  # Since the time set by cron is UTC time, + 8 is Beijing time
  schedule:
    - cron: "0 0-16/2 * * *"

  # Allow Actions to be triggered manually
  workflow_dispatch:

jobs:
  build:
    # Using Ubuntu latest as the running environment
    runs-on: ubuntu-latest

    # Task sequence to be executed
    steps:
      # Check out warehouse
      - name: Checkout Repository
        uses: actions/checkout@v2

      # Set up Python environment
      - name: Setup Python
        uses: actions/setup-python@v2
        with:
          python-version: "3.x"

      # Cache pip dependency
      - name: Cache Pip Dependencies
        id: pip-cache
        uses: actions/cache@v2
        with:
          path: ~/.cache/pip
          key: ${{ runner.os }}-pip-${{ hashFiles('./spider/requirements.txt') }}
          restore-keys: |
            ${{ runner.os }}-pip-

      # Install pip dependencies
      - name: Install Pip Dependencies
        working-directory: ./spider
        run: |
          python -m pip install --upgrade pip
          pip install flake8 pytest
          if [ -f requirements.txt ]; then pip install -r requirements.txt; fi

      # Run crawler script
      - name: Run Spider Bot
        working-directory: ./spider  # Specify the working directory, which is only effective for the run command
        run: python weibo.py

      # Get the current time of the system
      - name: Get Current Date
        id: date
        run: echo "::set-output name=date::$(date +'%Y-%m-%d %H:%M')"

      # Submit modification
      - name: Commit Changes
        uses: EndBug/add-and-commit@v5
        with:
          author_name: Koko Huang
          author_email: huangjianke@vip.163.com
          message: "Latest data synchronized(${{steps.date.outputs.date}})"
          add: "./"
        env:
          GITHUB_TOKEN: ${{ secrets.GITHUB_TOKEN }}

      # Push remote
      - name: Push Changes
        uses: ad-m/github-push-action@master
        with:
          branch: main
          github_token: ${{ secrets.GITHUB_TOKEN }}

      # Set node JS environment
      - name: Use Node.js 12.x
        uses: actions/setup-node@v1
        with:
          node-version: "12.x"

      # Cache NPM dependency
      - name: Cache NPM Dependencies
        id: npm-cache
        uses: actions/cache@v2
        with:
          path: ~/.npm
          key: ${{ runner.os }}-node-${{ hashFiles('./site/package-lock.json') }}
          restore-keys: |
            ${{ runner.os }}-node-

      # Install NPM dependencies
      - name: Install NPM Dependencies
        working-directory: ./site
        run: npm install

      # Build Hexo
      - name: Build Hexo
        working-directory: ./site # Specify the working directory, which is only effective for the run command
        run: npm run build

      # Publish Github Pages
      - name: Deploy Github Pages
        uses: peaceiris/actions-gh-pages@v3
        with:
          github_token: ${{ secrets.GITHUB_TOKEN }}
          publish_dir: ./site/public # Specify the path address to be published
          publish_branch: gh-pages # Specify remote branch name
There are many configuration fields in the workflow file, and detailed comments are also given in the configuration file. Next, let's focus on the following important configurations:
Trigger method of Workflow
# Set workflow trigger method
on:
  # It is triggered regularly and updated every 2 hours from 8:00 to 24:00( https://crontab.guru)
  # Since the time set by cron is UTC time, + 8 is Beijing time
  schedule:
    - cron: "0 0-16/2 * * *"

  # Allow workflow to be triggered manually
  workflow_dispatch:
We can use the on Workflow syntax to configure the workflow to run for one or more events. It supports automatic and manual triggering. The schedule event allows us to trigger the workflow at the scheduled time. We can use POSIX cron syntax to schedule the workflow to run at a specific time.
The planned task syntax has five fields separated by spaces. Each field represents a time unit:
┌───────────── minute (0 - 59)
│ ┌───────────── hour (0 - 23)
│ │ ┌───────────── day of the month (1 - 31)
│ │ │ ┌───────────── month (1 - 12 or JAN-DEC)
│ │ │ │ ┌───────────── day of the week (0 - 6 or SUN-SAT)
│ │ │ │ │
│ │ │ │ │
│ │ │ │ │
* * * * *
We can use https://crontab.guru To generate the scheduled task syntax, you can also see more examples of crontab guru.
In addition, we can configure workflow_dispatch and repository_ The dispatch field is used to trigger the workflow manually.
The on field can also be configured as push, that is, when there is a push operation in the warehouse, the execution of the workflow will be triggered. The detailed trigger workflow configuration can view the configured workflow events.
Step sequence
From the configuration file, we can see that a continuous integration run of the project includes the following steps:
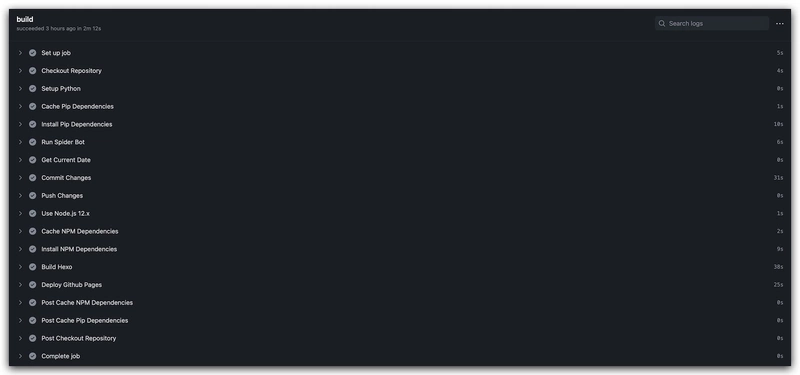
Check out warehouse -- > set Python environment -- > cache pip dependency -- > install pip dependency -- > Run crawler script -- > get current time -- > submit modification -- > push remote -- > set node JS environment -- > cache NPM dependencies -- > install NPM dependencies -- > build hexo -- > publish Github Pages
The workflow of this project mainly includes the following points:
- Running environment: the whole workflow runs in the virtual environment Ubuntu latest. You can also specify other virtual environments, such as Windows Server, macOS, etc;
- Cache dependency: by caching dependencies, you can improve the speed of installing related dependencies. Specific usage can be viewed: cache dependencies to speed up the workflow;
- Get the current time: the current time obtained in this step is used in the commit message in the subsequent submission and modification steps. Here, the step context is used
We can specify an ID for the step, and we can use steps in subsequent steps< step id>. outputs
To obtain the relevant information of the running steps; - Build Hexo: execute the hexo generate command to generate static web pages;
- Authentication in workflow: authentication is required for submitting push and publishing steps. GitHub provides a token that can be used to represent GitHub Actions
Authenticate. All we need to do is create one named GitHub_ Token of token. The specific steps are as follows: settings -- > developer settings -- > personal access tokens -- > generate new token, named GitHub_ Token and check the permissions you need, and then you can authenticate in step by using ${{secrets.GITHUB_TOKEN} `.
More actions can be viewed in Github's official market. There are also friends who want to learn software testing can join our group (785128166). There are free learning resources in the group (interview questions, PDF documents, video tutorials) and big coffee Q & A
epilogue
Finally, a quote from the blogger:
"Our live broadcast of the war of resistance against Japan is not to encourage negative emotions such as hatred, but to moderately arouse forgetfulness. When we always remember the suffering, fear and humiliation suffered by our grandparents; when we appreciate how our grandparents abandoned their past grievances and achieved national reconciliation when the country and nation are in danger, when we see how our grandparents calmly and generously went to death and took their body as this When a country sacrifices, I believe we will have more mature and rational thinking about reality. "
Remember history and forge ahead.
Don't forget national humiliation, and we will strengthen ourselves.