What is firewall D
"firewalld" is the firewall daemon. It provides a dynamically managed firewall with a very powerful filtering system called Netfilter, which is provided by the Linux kernel.
Firewall D uses the concepts of zones and services, while iptables uses chain s and rules. Compared with iptables, "firewall D" provides a very flexible way to deal with firewall management.
Each zone can be configured according to the specified standards to accept or reject certain services or ports according to your requirements, and it can be associated with one or more network interfaces. The default area is public. The following command lists the zones provided by firewall D. Run the following command to list zones:
[root@server1 ~]# firewall-cmd --get-zones
block dmz drop external home internal public trusted work
- block: for IPv4, any incoming connection will be rejected by ICMP host prohibited message, and for IPv6, icmp6 ADM prohibited message.
- DMZ: computers that apply to your DMZ zone. These computers have public access, but access to the internal network is limited. Only the selected incoming connections are accepted.
- drop: any incoming connections will be discarded without any notification. Only outgoing connections are allowed.
- External: an external network used to enable NAT camouflage when acting as a router in the system. Only the selected incoming connections are allowed.
- Home: for home networking. Only the selected incoming connections are accepted.
- Internal: used for internal network. Other systems on the network are usually trusted. Only the selected incoming connections are accepted.
- Public: used for public areas. Only the selected incoming connections are accepted.
- trusted: accept all network connections.
- Work: used in the work area. Most other computers on the same network are trusted. Only the selected incoming connections are accepted.
Firewalld services
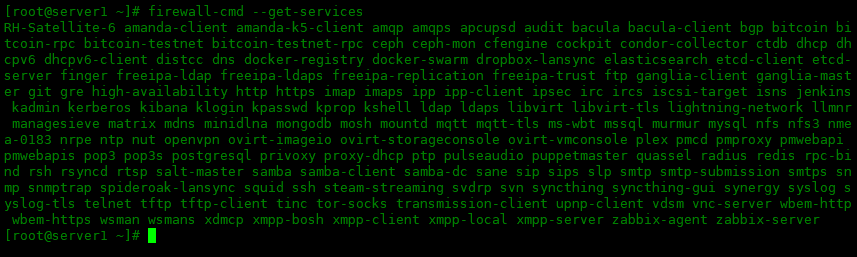
Firewall's service configuration is a predefined service. To list the available service modules, run the following command:
[root@server1 ~]# firewall-cmd --get-services
Temporary and permanent settings for firewall
Firewall uses two separate configurations, temporary and permanent:
- Temporary settings: temporary settings will not remain unchanged when the system is restarted. This means that temporary settings are not automatically saved to permanent settings.
- Permanent settings: permanent settings are stored in the configuration file and will be loaded and become new temporary settings each time you restart.
Enable and disable firewall
Firewall is installed on by default Centos In 7 / 8, how to enable or disable firewalld when using the following command:
# Enable firewall
[root@server1 ~]# systemctl start firewalld
# Disable firewall
[root@server1 ~]# systemctl stop firewalld
# Power on
[root@server1 ~]# systemctl enable firewlald
# Prohibit startup
[root@server1 ~]# systemctl disable firewalld
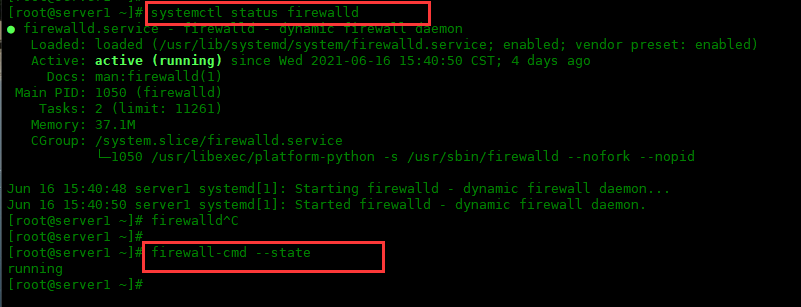
To view the status of firewlald:
[root@server1 ~]# systemctl status firewalld
 perhaps
[root@server1 ~]# firewall-cmd --state
running
zone Management
Firewall provides different levels of security for each zone, and the public zone is set as the default zone. Use the following command to view the default area:
[root@server1 ~]# firewall-cmd --get-default-zone
public
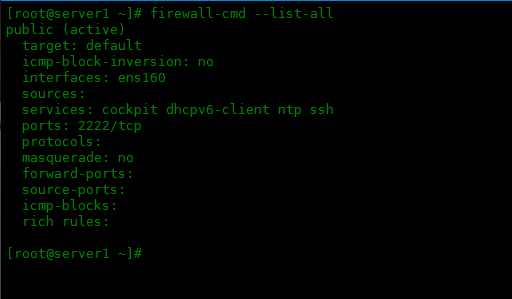
Use the following command to view the configuration of the default area:
[root@server1 ~]# firewall-cmd --list-all
public (active)
  target: default
  icmp-block-inversion: no
  interfaces: ens160
  sources:
  services: cockpit dhcpv6-client ntp ssh
  ports: 2222/tcp
  protocols:
  masquerade: no
  forward-ports:
  source-ports:
  icmp-blocks:
  rich rules:
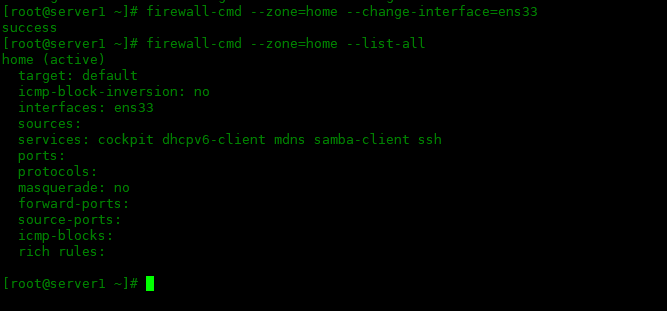
You can easily change the interface in the zone by using the combination of options "-- zone" and "-- change interface". For example, to assign the "ens33" interface to the "home" area, run the following command:
[root@server1 ~]# firewall-cmd --zone=home --change-interface=ens33
success
[root@server1 ~]# firewall-cmd --zone=home --list-all
home (active)
  target: default
  icmp-block-inversion: no
  interfaces: ens33
  sources:
  services: cockpit dhcpv6-client mdns samba-client ssh
  ports:
  protocols:
  masquerade: no
  forward-ports:
  source-ports:
  icmp-blocks:
  rich rules:
To view all active zone s, run the following command:
[root@server1 ~]# firewall-cmd --get-active-zones
home
  interfaces: ens33
public
  interfaces: ens160

To change the default zone, use the following command. For example, to change the default zone to home, run the following command:
[root@server1 ~]# firewall-cmd --set-default-zone=home
To find the area associated with the ens160 interface, run the following command:
[root@server1 ~]# firewall-cmd --get-zone-of-interface=ens160
public
To create a new zone, use the following command. For example, to create a new zone named "test" and take effect permanently, run:
[root@server1 ~]# firewall-cmd --permanent --new-zone=test
success
[root@server1 ~]# firewall-cmd --reload
success
Opening and closing ports
Opening a specific port allows users to access the system from the outside, which represents a security risk. Therefore, only open the required ports for some services when necessary.
To get a list of open ports in the current zone, run the following command:
[root@server1 ~]# firewall-cmd --list-ports
2222/tcp
The following example Permanently adds a specific port to the list:
[root@server1 ~]# firewall-cmd --permanent --add-port=8080/tcp
success
[root@server1 ~]# firewall-cmd --reload
success
Similarly, to delete a specific port, run the following command:
[root@server1 ~]# firewall-cmd --remove-port=8080/tcp
success
You can use the following command to confirm whether a port has been added or deleted each time:
[root@server1 ~]# firewall-cmd --list-ports
If you want to open ports for a specific region, for example, the following command will open port 80 for the home region:
[root@server1 ~]# firewall-cmd --permanent --zone=home --add-port=80/tcp
success
[root@server1 ~]# firewall-cmd --reload
success

Similarly, to delete a specific port for a specific area from an open port, run:
[root@server1 ~]# firewall-cmd --zone=home --remove-port=80/tcp
success
Add and remove service types
Firewall service configuration is a predefined service that will be loaded automatically if it is enabled. Using predefined services makes it easier for users to enable and disable access to services.
The predefined service configuration files are located in the / usr/lib/firewalld/services directory.
Firewall's service, you don't need to remember any ports, and you can allow all ports at one time.
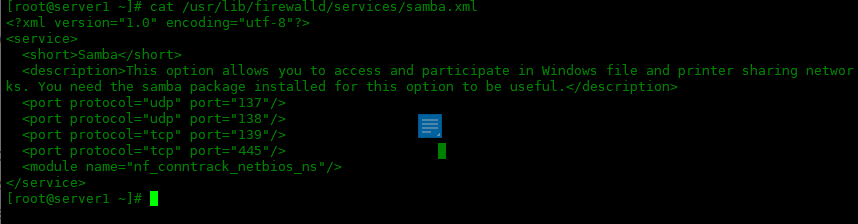
For example, execute the following command to allow the samba service. The samba service needs to enable the following set of ports: "139/tcp and 445/tcp" and "137/udp and 138/udp".
After adding the 'Samba' service, all ports will be activated at the same time, because all port information is in the samba service configuration. The following is the service configuration file of samba predefined in firewall:
[root@server1 ~]# cat /usr/lib/firewalld/services/samba.xml
The following is how to release samba services in the home area:
[root@server1 ~]# firewall-cmd --permanent --zone=home --add-service=samba
success
[root@server1 ~]# firewall-cmd --reload
success
To get more information about samba services, run the following command:
[root@server1 ~]# firewall-cmd --info-service=samba
samba
  ports: 137/udp 138/udp 139/tcp 445/tcp
  protocols:
  source-ports:
  modules: netbios-ns
  destination:
To add more than one service at a time, execute the following command. For example, to add http and https services, run the following command:
[root@server1 ~]# firewall-cmd --permanent --zone=home --add-service={http,https}
success
[root@server1 ~]# firewall-cmd --reload
success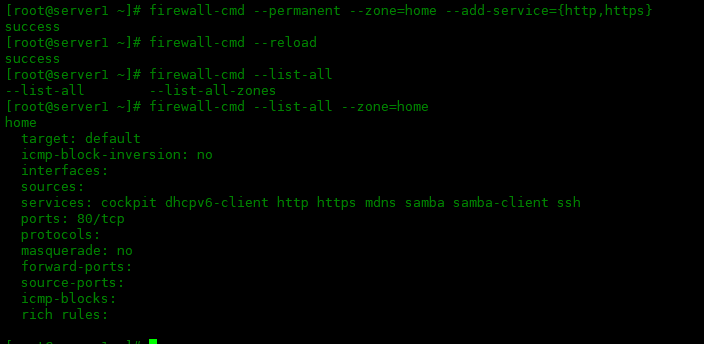
Set port forwarding
Port forwarding is a method of forwarding any incoming network traffic from one port to another internal port or an external port on another machine.
Note: IP camouflage must be enabled for port forwarding. Use the command shown below to enable camouflage for the external area.
[root@server1 ~]# firewall-cmd --permanent --zone=external --add-masquerade
To check whether IP camouflage is enabled for the zone, run the following command:
[root@server1 ~]# firewall-cmd --zone=external --query-masquerade
yes
yes is displayed, indicating that the camouflage has been turned on.
To redirect a port to another port on the same system, for example, redirect all packets from port 80 to port 8080:
[root@server1 ~]# firewall-cmd --permanent --zone=external --add-forward-port=port=80:proto=tcp:toport=8080
success
If you want to forward traffic to another server, for example, redirect all packets on port 80 to port 8080 on the server with IP 10.0.0.75:
[root@server1 ~]# firewall-cmd --permanent --zone=external --add-forward-port=port=80:proto=tcp:toport=8080:toaddr=10.0.0.75
success
For example, to allow traffic from a specific source address and only connect to the server from a specific subnet, run the following command:
[root@server1 ~]# firewall-cmd --permanent --zone=home --add-source=192.168.1.0/24
success
Rich rule settings
Rich rules allow you to create more complex firewall rules with easy to understand commands, but rich rules are difficult to remember. You can check the manual man firewalld.richlanguage and find examples.
The general rule structure of rich rules is as follows:
rule
  [source]
  [destination]
  service|port|protocol|icmp-block|icmp-type|masquerade|forward-port|source-port
  [log]
  [audit]
  [accept|reject|drop|mark]
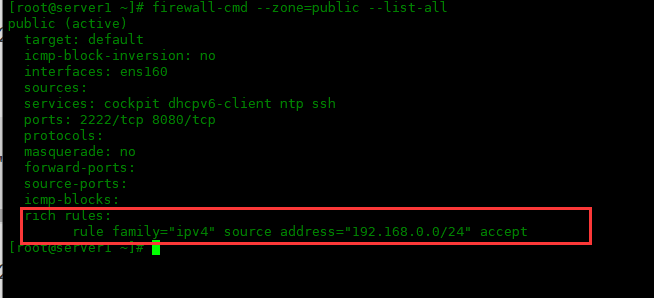
To allow access from address 192.168.0.0/24, run the following command:
[root@server1 ~]# firewall-cmd --zone=public --add-rich-rule='rule family="ipv4" source address="192.168.0.0/24" accept'
success
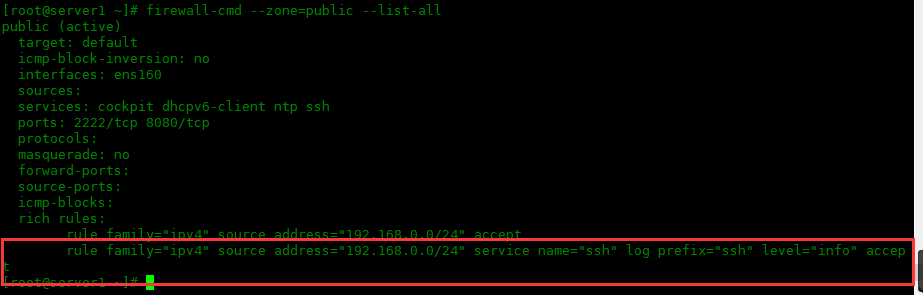
To allow a connection from address 192.168.0.0/24 to access the ssh service, run the following command:
[root@server1 ~]# firewall-cmd --zone=public --add-rich-rule='rule family="ipv4" source address="192.168.0.0/24" service name="ssh" log prefix="ssh" level="info" accept'
success
To deny traffic from 192.168.10.0/24 access to ssh service, run the following command:
[root@server1 ~]# firewall-cmd --zone=public --add-rich-rule='rule family="ipv4" source address="192.168.10.0/24" port port=22 protocol=tcp reject'
success

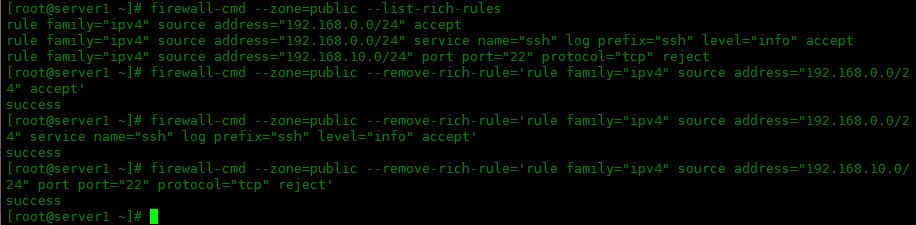
To delete any rich rules, use the -- remove rich rule option, list the rich rules with -- List rich rules, and then delete the rich rules:
[root@server1 ~]# firewall-cmd --zone=public --list-rich-rules
rule family="ipv4" source address="192.168.0.0/24" accept
rule family="ipv4" source address="192.168.0.0/24" service name="ssh" log prefix="ssh" level="info" accept
rule family="ipv4" source address="192.168.10.0/24" port port="22" protocol="tcp" reject
[root@server1 ~]# firewall-cmd --zone=public --remove-rich-rule='rule family="ipv4" source address="192.168.0.0/24" accept'
success
[root@server1 ~]# firewall-cmd --zone=public --remove-rich-rule='rule family="ipv4" source address="192.168.0.0/24" service name="ssh" log prefix="ssh" level="info" accept'
success
[root@server1 ~]# firewall-cmd --zone=public --remove-rich-rule='rule family="ipv4" source address="192.168.10.0/24" port port="22" protocol="tcp" reject'
success
Firewall's Direct rules
Direct rules are similar to iptables commands and are useful for users familiar with iptables commands. Alternatively, you can edit the rules in the / etc/firewalld/direct.xml file and reload the firewall to activate them. Direct rules are mainly used by services or applications to add specific firewall rules.
The following Direct rules will open port 8080 on the server:
[root@server1 ~]# firewall-cmd --permanent --direct --add-rule ipv4 filter INPUT 0 -p tcp --dport 8081 -j ACCEPT
success
[root@server1 ~]# firewall-cmd --reload
success
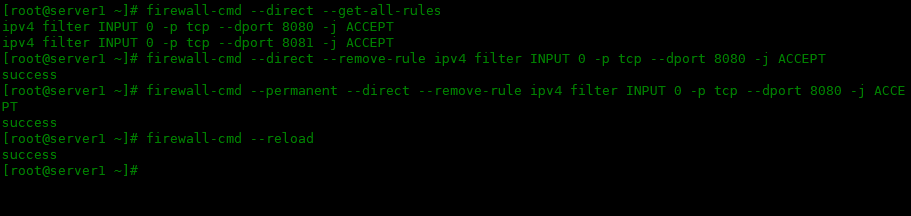
To list Direct rules in the current zone, run:
[root@server1 ~]# firewall-cmd --direct --get-all-rules
ipv4 filter INPUT 0 -p tcp --dport 8080 -j ACCEPT
ipv4 filter INPUT 0 -p tcp --dport 8081 -j ACCEPT

Use the following command to delete a Direct rule:
[root@server1 ~]# firewall-cmd --direct --get-all-rules
ipv4 filter INPUT 0 -p tcp --dport 8080 -j ACCEPT
ipv4 filter INPUT 0 -p tcp --dport 8081 -j ACCEPT
[root@server1 ~]# firewall-cmd --permanent --direct --remove-rule ipv4 filter INPUT 0 -p tcp --dport 8080 -j ACCEPT
success
[root@server1 ~]# firewall-cmd --reload
success
How to clear the chain of a table? Here are the syntax and examples:
firewall-cmd --direct --remove-rules ipv4 [table] [chain]
[root@server1 ~]# firewall-cmd --permanent --direct --remove-rules ipv4 filter INPUT
success
[root@server1 ~]# firewall-cmd --reload
success
[root@server1 ~]# firewall-cmd --direct --get-all-rules

summary
This article takes you through the complete usage of firewalld, such as zones, allow / deny service and ports, port forwarding, Rich Rules, Direct rules, etc.