introduce
Hypertext Transfer Protocol HTTP protocol is used to transfer information between Web browser and Web server. HTTP protocol sends content in clear text without providing any way of data encryption. If an attacker intercepts the transmission message between Web browser and Web server, he can directly read the information. In order to solve this defect of HTTP protocol, You need to add a certificate to HTTP to upgrade it to: Secure Socket Layer hypertext transmission protocol HTTPS. For the security of data transmission, HTTPS adds SSL Protocol on the basis of HTTP. SSL relies on the certificate to verify the identity of the server and encrypt the communication between the browser and the server.
How can the information between ourselves and users be overheard by others? So we need to add a layer of "protective cover" (SSL/TSL) to our website

At this time, you can choose the solution provided by Jianmu CI: use acme SSL node to quickly add a "protective cover" to your website!

at present acme-ssl The node supports Alibaba cloud as a DNS service resolver to create domain name certificates. Huawei cloud and Tencent cloud will be added later.
Apply for domain name
To apply for a certificate from a ca, we must first have our own domain name. At present, Alibaba cloud is supported as a DNS resolver, so we have to buy a domain name from Alibaba cloud
Apply for a certificate for your domain name
Use Jianmu Ci to arrange the acme SSL node to apply for a certificate for your domain name. An introduction to how to install, use Jianmu Ci and related concepts of Jianmu CI is written in detail in this blog: Deploy maven project based on Jianmu CI , welcome to the crowd

Define pipeline to apply for certificate,
name: acme-ssl
description: acme-ssl of pip
pipeline:
acme_sh:
type: "acme_ssl_aliyun:1.0.2"
param:
# For which domain name do you apply for a certificate
domain: "*.huangxi.asia"
# Fill in your email
email: "1014231151@qq.com"
# Alibaba cloud's AccessKey. Please refer to Alibaba cloud's official website for specific access methods
ali_key: ((ali.key))
# Please refer to Alibaba cloud's official website for specific access methods
ali_secret: ((ali.secret))
# Check through public dns If true, wait 20 seconds, acme SH will use cloudflare public dns or google dns to check whether the record is valid.
# If the parameter is false, acme SH will wait for 10 seconds and do nothing. In the test phase, we set this value to false, so we don't have to check the public dns
dns_check: false
# Select a CA organization. The supported CA can be letsencrypt or letsencrypt_test,buypass,buypass_test,zerossl,sslcom.
# The default is zerossl, and buypass, buypass_test and sslcom are charging CA institutions
ca: "zerossl"
# The following two nodes are replication data nodes. The purpose is to send the generated private key and certificate to our server
scp_cert:
type: scp_resouce:1.1.0
param:
# Host ip of the target server
ssh_ip: xxx.xxx.xxx.xxx
# Server private key
ssh_private_key: ((xxx.server_private_key))
# Which folder to synchronize to the target server. If the target server does not have this folder, it will be automatically created and synchronized
remote_file: /tmp/hx/fullchain.cer
# Which file will be synchronized to the server? Here, the certificate will be synchronized to the server
local_file: ${acme_sh.cer_path}
scp_key:
type: scp_resouce:1.1.0
param:
ssh_ip: xxx.xxx.xxx.xxx
ssh_private_key: ((xxx.server_private_key))
# Here, the private key is synchronized to the server
remote_file: /tmp/hx/*.huangxi.asia.key
local_file: ${acme_sh.key_path}
Copy the process dsl to Jianmu CI and start running the process. Let's wait for the acme SSL node to apply for a certificate for us
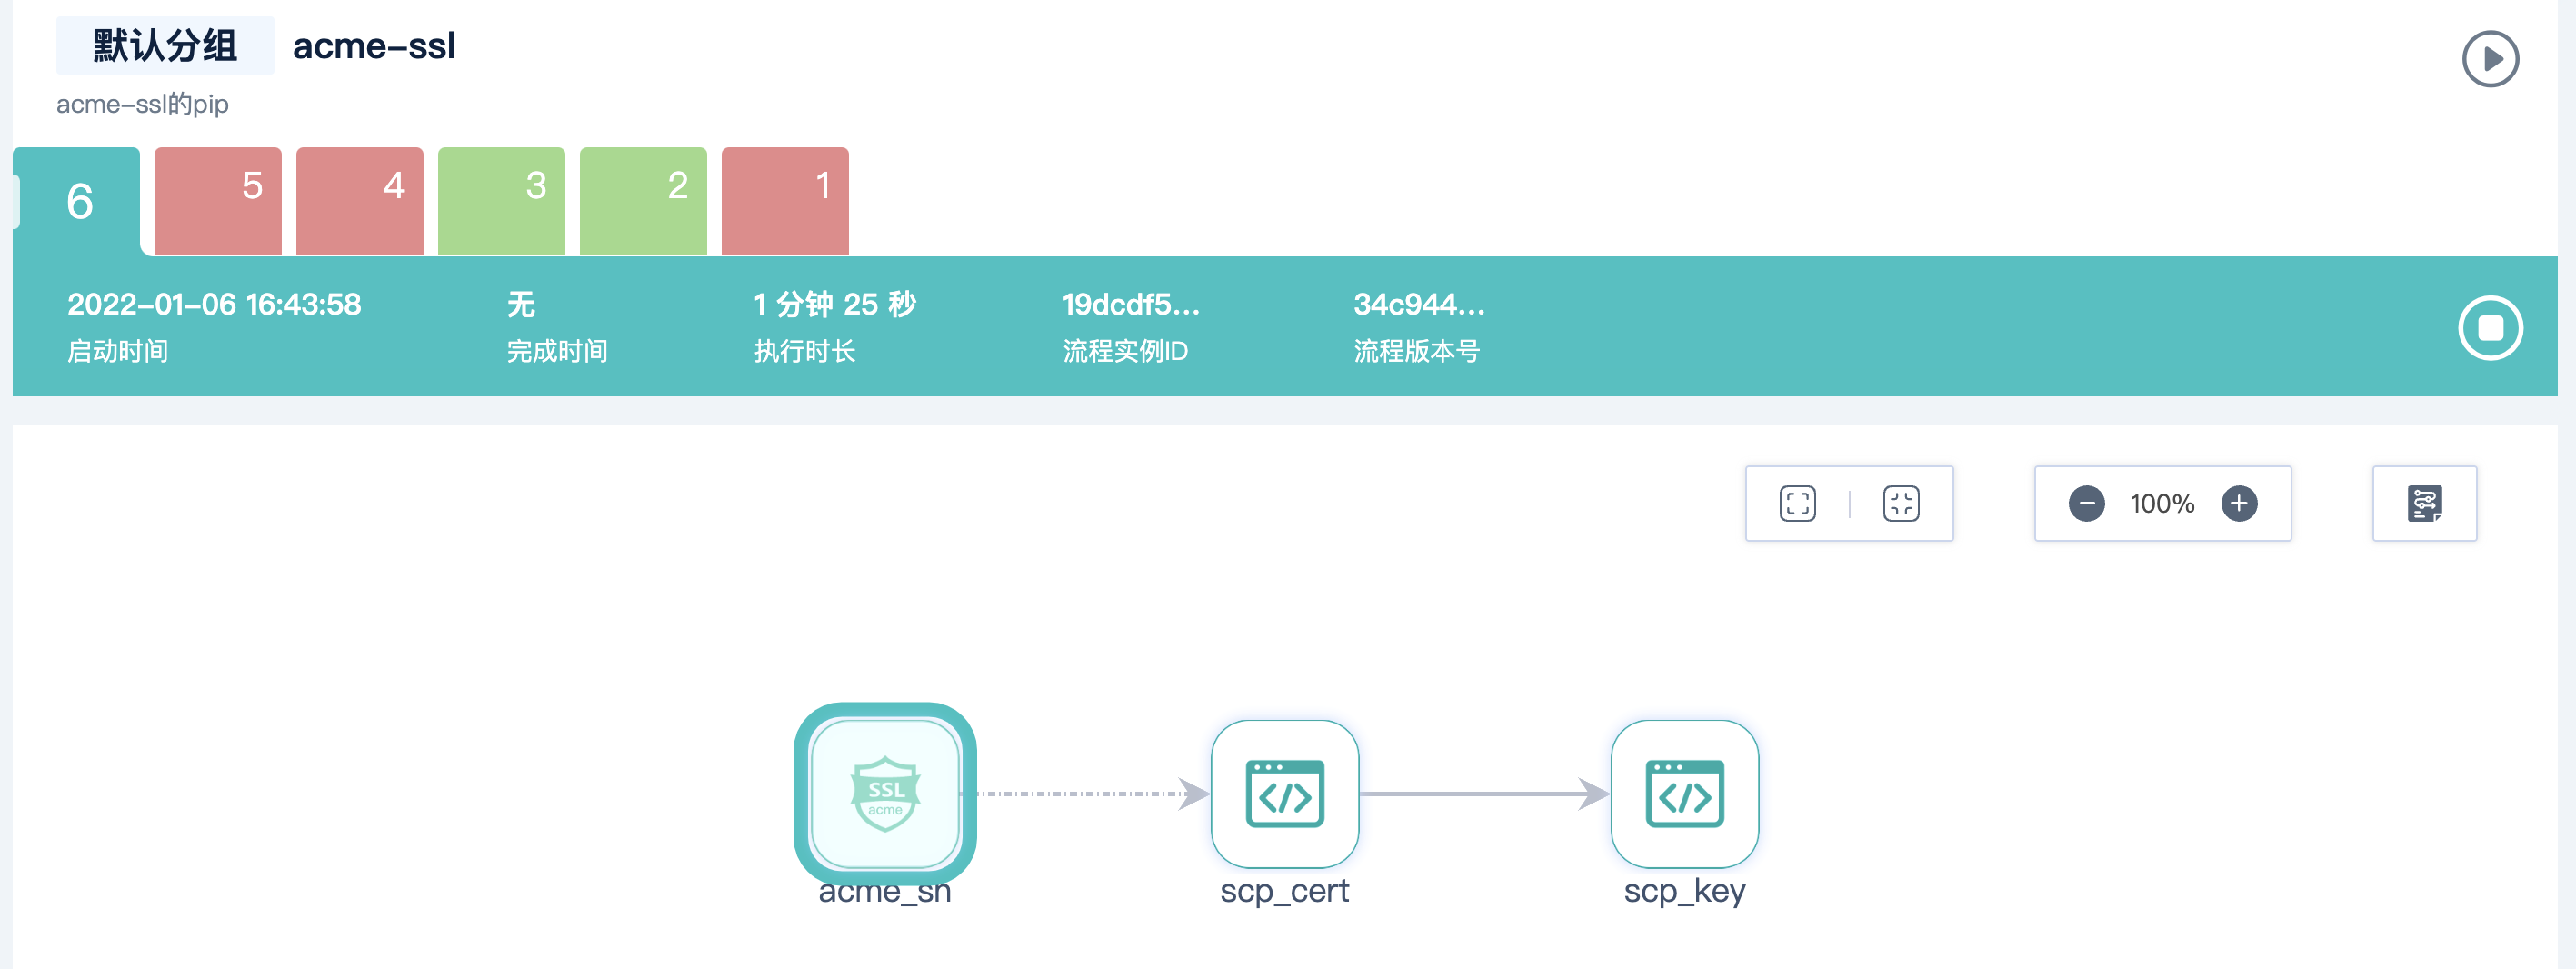
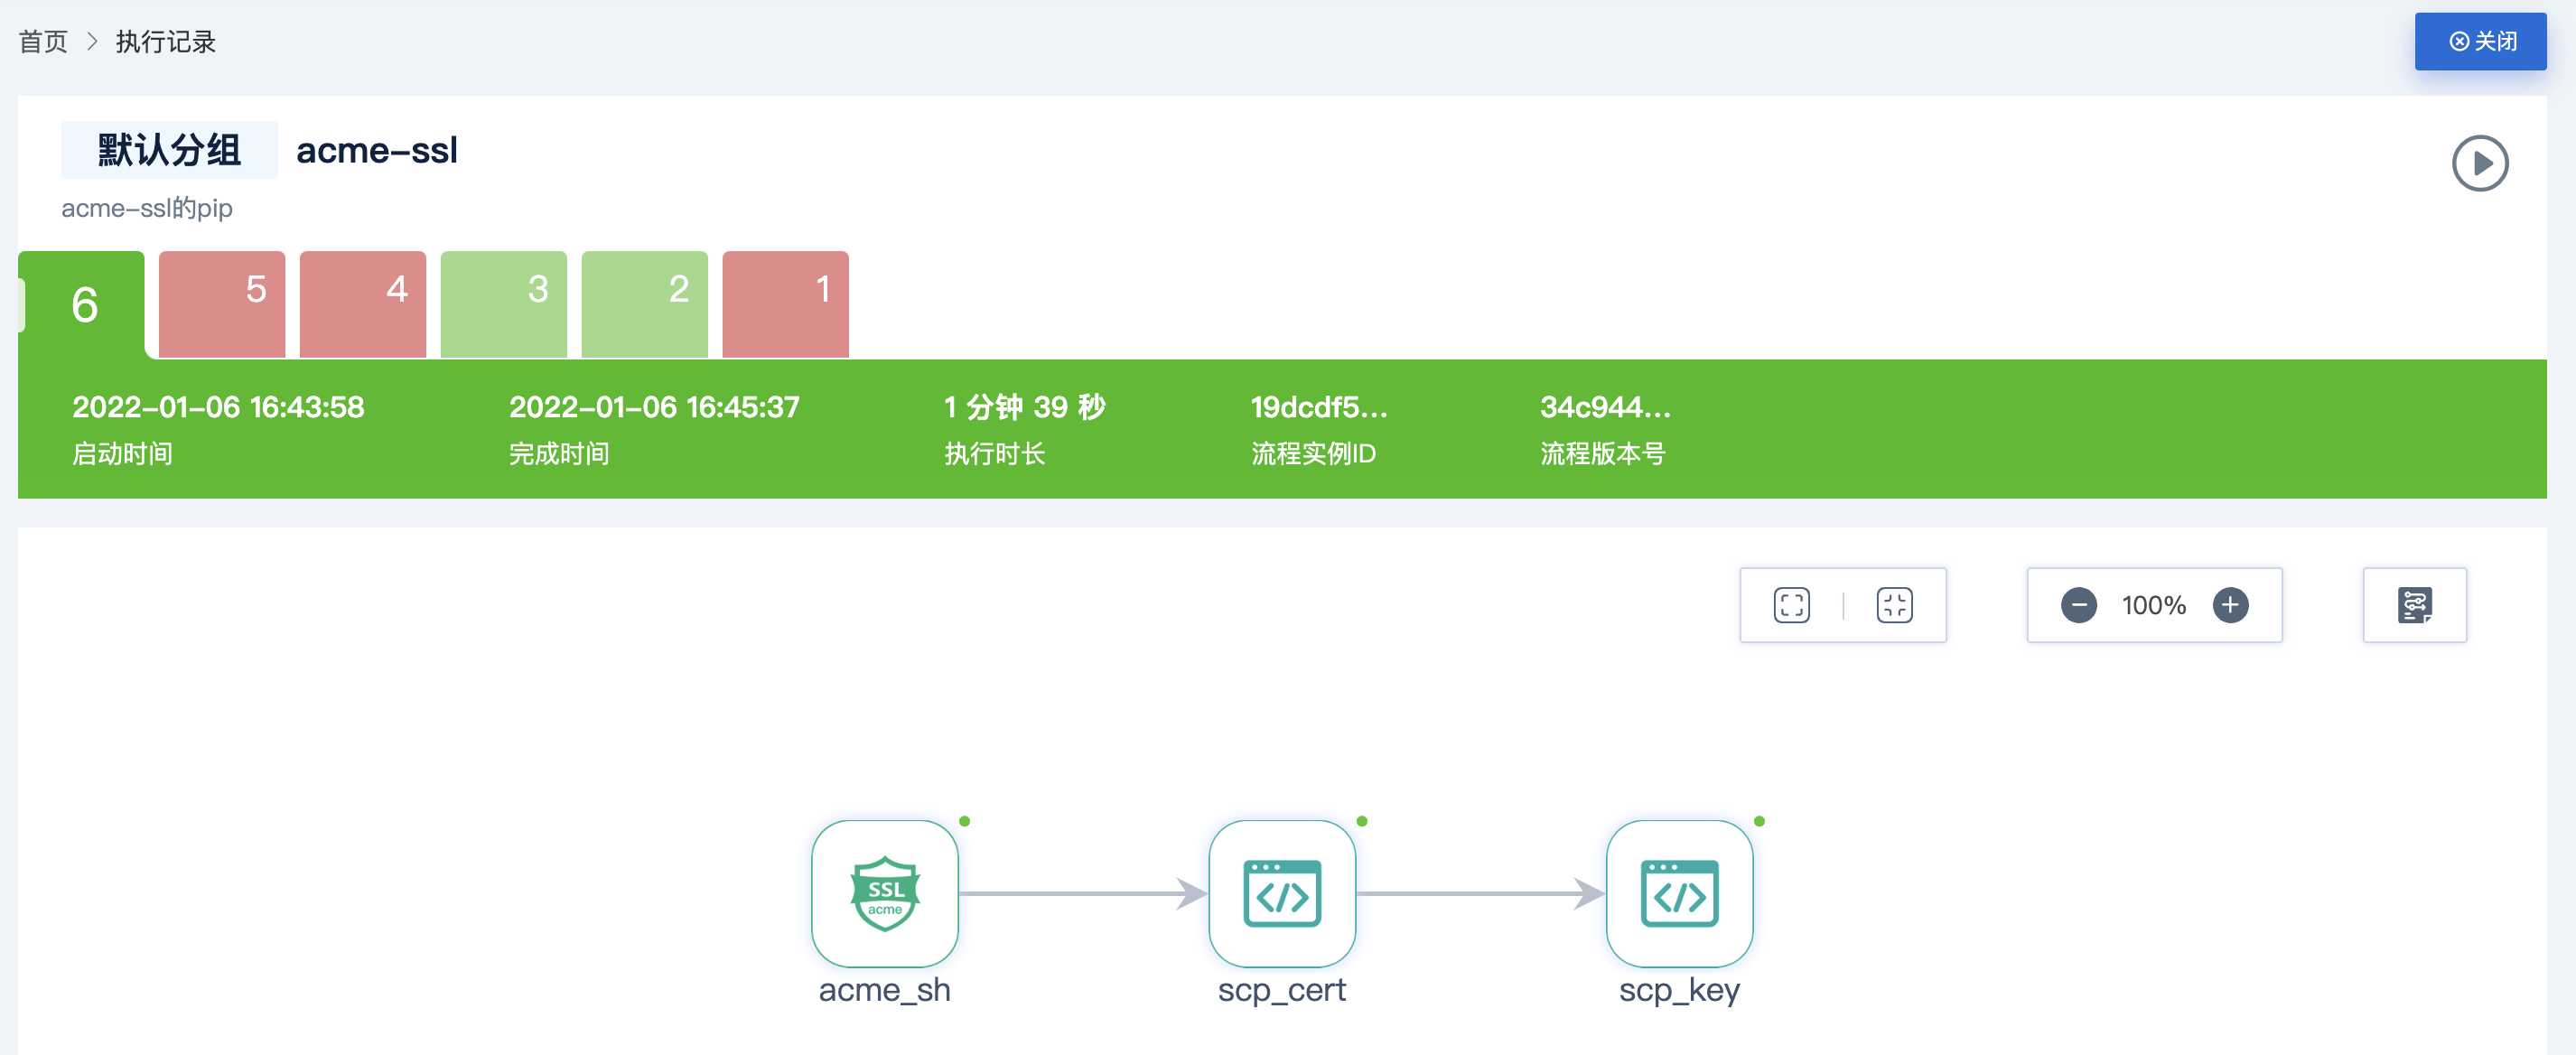
After waiting, the process has all run through
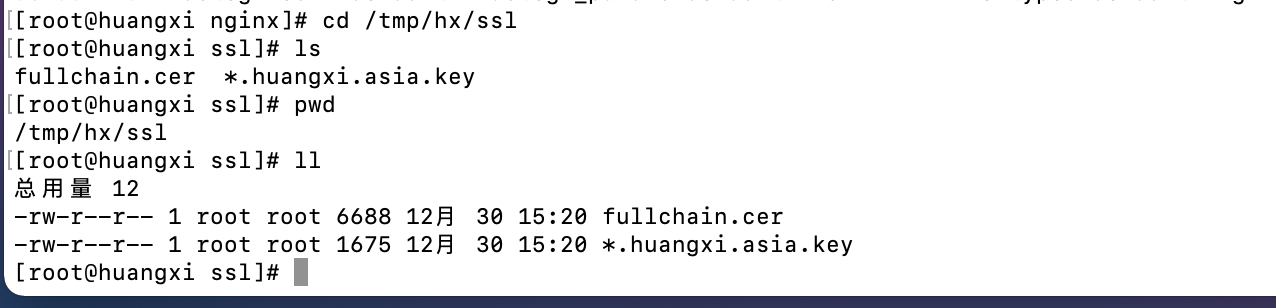
Come to the virtual machine and check the copied certificate and private key. The mood at this time is one word, refreshing ~

Deploy the certificate private key to the server
After we get the certificate and private key, we can deploy them to our server. Here, nginx is used as our web container
-
Installing nginx
[root@huangxi ssl]# yum -y install nginx
-
Check the location of nginx. The binary file of nginx startup is located in / usr/sbin/nginx, and the configuration file is located in / etc / nginx / nginx conf
[root@huangxi ssl]# whereis nginx
nginx: /usr/sbin/nginx /usr/lib64/nginx /etc/nginx /usr/share/nginx /usr/share/man/man3/nginx.3pm.gz /usr/share/man/man8/nginx.8.gz
-
start nginx
[root@huangxi ssl]# nginx
-
Modify the configuration file of nginx
# Add the following configuration to the http cache server { # Enable ssl 443 port listening listen 443 ssl; # Corresponding domain name, put * huangxi. Just change Asia to your own domain name server_name *.huangxi.asia; # Configure the path to get the certificate from the acme SSL node ssl_certificate /tmp/hx/ssl/fullchain.cer; # Configure the path to get the private key from the acme SSL node ssl_certificate_key /tmp/hx/ssl/*.huangxi.asia.key; ssl_session_cache shared:SSL:1m; ssl_session_timeout 5m; ssl_ciphers HIGH:!aNULL:!MD5; ssl_prefer_server_ciphers on; location / { root html; index index.html index.htm; } } server{ listen 80; server_name huangxi.asia; # Even if you visit port 80, redirect him to port 443 rewrite ^/(.*)$ https://*.huangxu.asia:443/$1 permanent; } -
Verify that the nginx configuration file is configured correctly
[root@huangxi nginx]# nginx -t
nginx: the configuration file /etc/nginx/nginx.conf syntax is ok
nginx: configuration file /etc/nginx/nginx.conf test is successful
-
Reload nginx configuration file
[root@huangxi nginx]# nginx -s reload
Is the test certificate valid
Open our browser and enter www.huangxi.asia (enter your own domain name here)
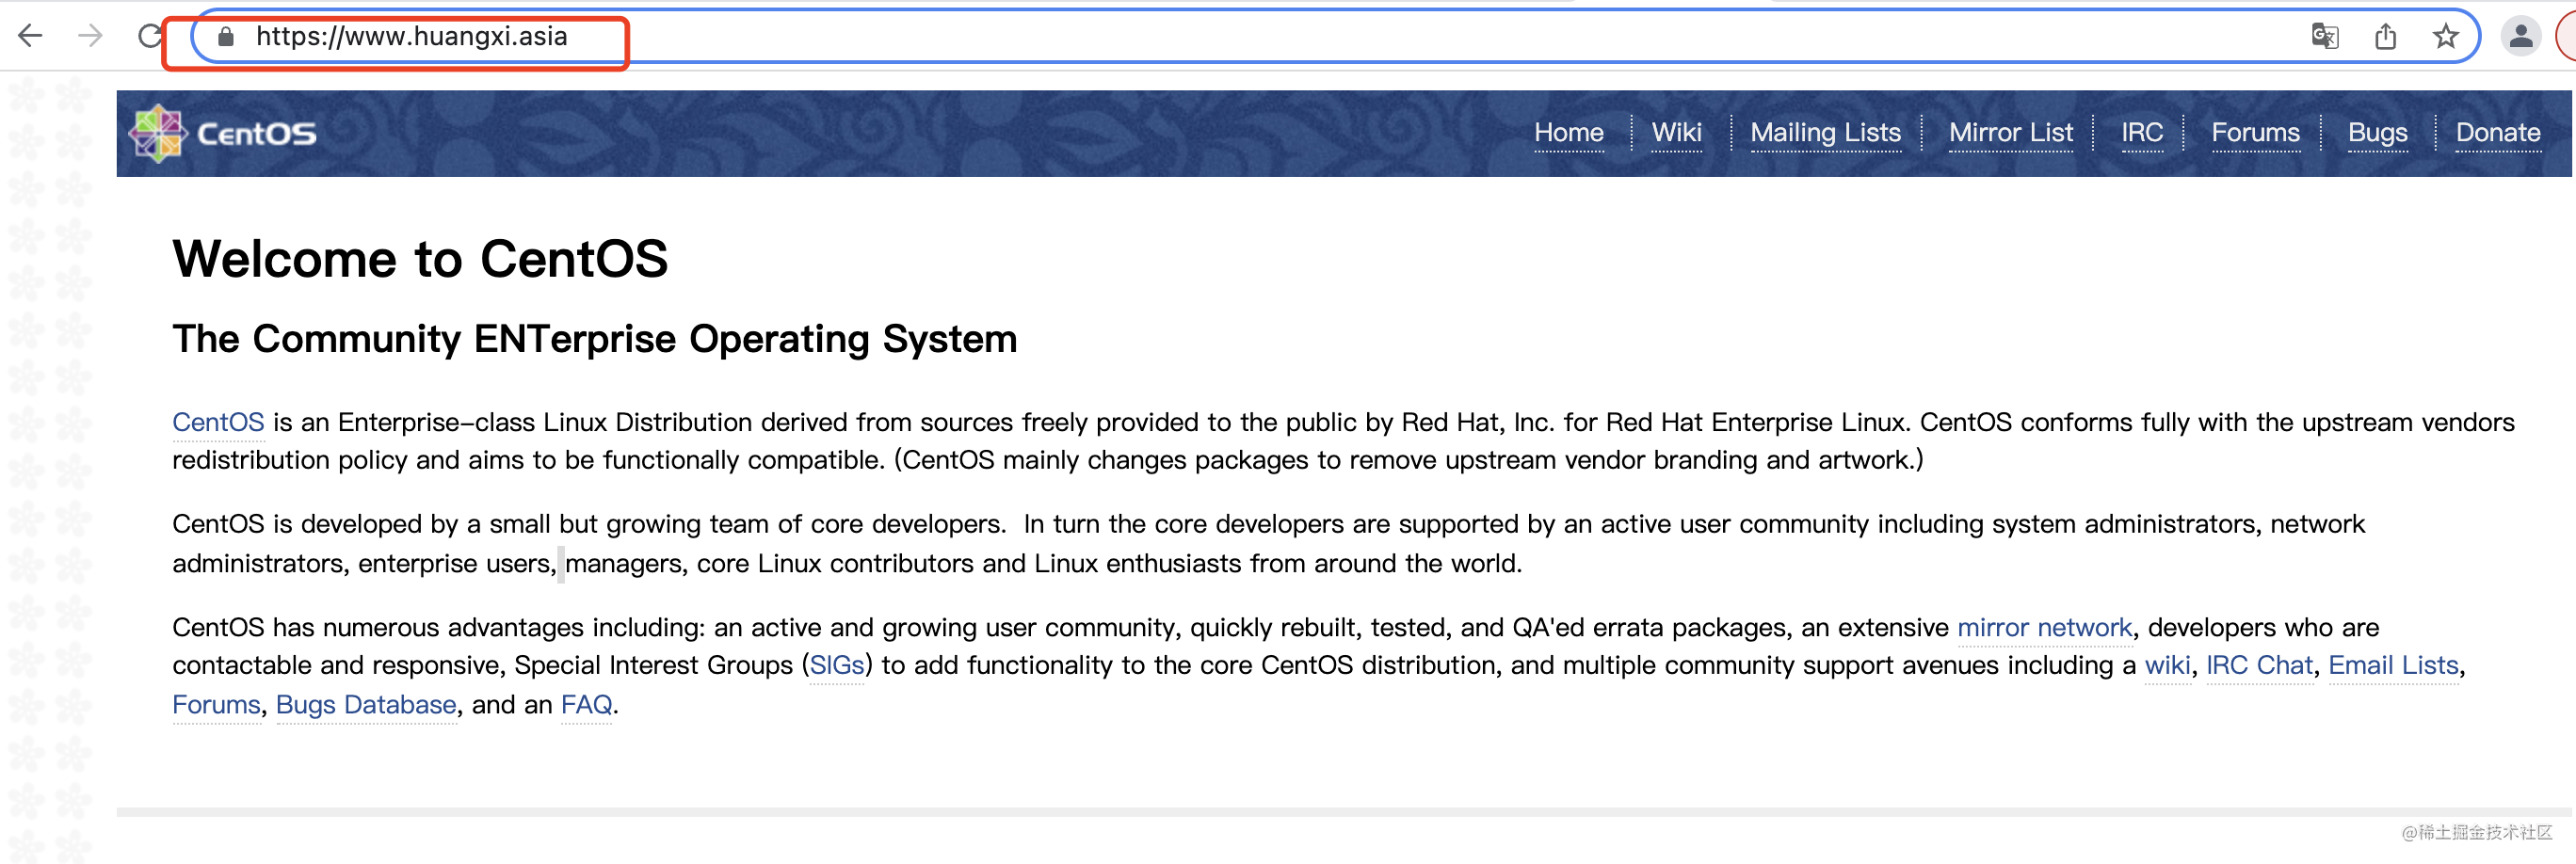

As shown in the figure above, we visited the default welcome page of nginx. We can see that we use https protocol to access and the certificate is valid. So far, we have successfully added a layer of "protective cover" to our website

This article is the original contribution of Jianmu blogger "Freedom". Please contact the authorized person for reprint.
Xiang (official): https://jianmu.dev
Item (Hosting: https://gitee.com/jianmu-dev
Item (document: https://docs.jianmu.dev
Online experience: https://ci.jianmu.dev