| Reading guide | In some cases, moving volume groups from one system to another may be what we need most. Here's how to move a volume group containing multiple disks from one server to another without losing any files. |
environment
Two sets Centos 8 virtual machine
The first is server1, and the second is server2
The first Centos8 adds four additional hard disks. After configuring the logical volume, it is used to move it to another Centos8 system.
First Centos8 IP: 192.168.43.131
Second Centos8 IP: 192.168.43.137
Create pv, vg and lv, mount them, and copy the data to the volume
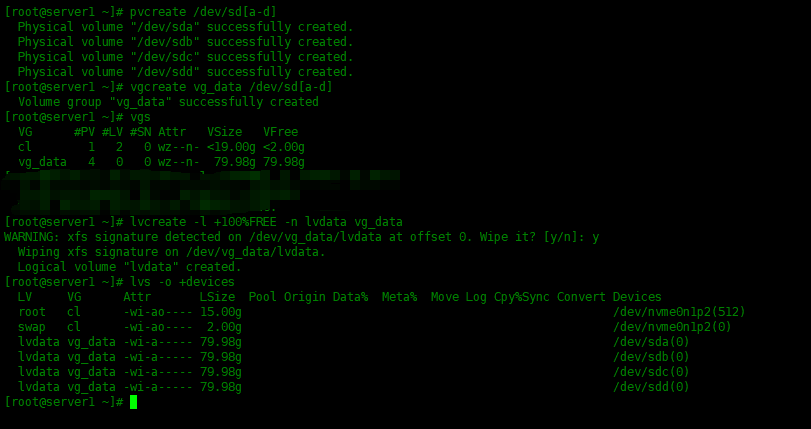
The following four hard disks are created as physical volumes
[root@server1 ~]# fdisk -l|grep sd
Disk /dev/sda: 20 GiB, 21474836480 bytes, 41943040 sectors
Disk /dev/sdb: 20 GiB, 21474836480 bytes, 41943040 sectors
Disk /dev/sdc: 20 GiB, 21474836480 bytes, 41943040 sectors
Disk /dev/sdd: 20 GiB, 21474836480 bytes, 41943040 sectors
[root@server1 ~]# pvcreate /dev/sd[a-d]
  Physical volume "/dev/sda" successfully created.
  Physical volume "/dev/sdb" successfully created.
  Physical volume "/dev/sdc" successfully created.
  Physical volume "/dev/sdd" successfully created.
Create a volume group named vg_data
[root@server1 ~]# vgcreate vg_data /dev/sd[a-d]
  Volume group "vg_data" successfully created
[root@server1 ~]# vgs
  VG      #PV #LV #SN Attr   VSize   VFree
  cl        1   2   0 wz--n- <19.00g <2.00g
  vg_data   4   0   0 wz--n-  79.98g 79.98g
Next, create a logical volume. The name of the volume is lvdata, and the space capacity uses all
[root@server1 ~]# lvcreate -l +100%FREE -n lvdata vg_data
WARNING: xfs signature detected on /dev/vg_data/lvdata at offset 0. Wipe it? [y/n]: y
  Wiping xfs signature on /dev/vg_data/lvdata.
  Logical volume "lvdata" created.
[root@server1 ~]# lvs -o +devices
  LV     VG      Attr       LSize  Pool Origin Data%  Meta%  Move Log Cpy%Sync Convert Devices
  root   cl      -wi-ao---- 15.00g                                                     /dev/nvme0n1p2(512)
  swap   cl      -wi-ao----  2.00g                                                     /dev/nvme0n1p2(0)
  lvdata vg_data -wi-a----- 79.98g                                                     /dev/sda(0)
  lvdata vg_data -wi-a----- 79.98g                                                     /dev/sdb(0)
  lvdata vg_data -wi-a----- 79.98g                                                     /dev/sdc(0)
  lvdata vg_data -wi-a----- 79.98g                                                     /dev/sdd(0)
Create mount point, format partition, Mount partition and write data:
[root@server1 ~]# mkdir /data
[root@server1 ~]# mkfs.xfs /dev/vg_data/lvdata
meta-data=/dev/vg_data/lvdata    isize=512    agcount=4, agsize=5241856 blks
         =                       sectsz=512   attr=2, projid32bit=1
         =                       crc=1        finobt=1, sparse=1, rmapbt=0
         =                       reflink=1
data     =                       bsize=4096   blocks=20967424, imaxpct=25
         =                       sunit=0      swidth=0 blks
naming   =version 2              bsize=4096   ascii-ci=0, ftype=1
log      =internal log           bsize=4096   blocks=10238, version=2
         =                       sectsz=512   sunit=0 blks, lazy-count=1
realtime =none                   extsz=4096   blocks=0, rtextents=0
[root@server1 ~]# mount /dev/vg_data/lvdata /data
[root@server1 ~]# df -h /data
Filesystem                  Size  Used Avail Use% Mounted on
/dev/mapper/vg_data-lvdata   80G  604M   80G   1% /data
[root@server1 ~]# dd if=/dev/zero of=/data/disk.img bs=1M count=1024
1024+0 records in
1024+0 records out
1073741824 bytes (1.1 GB, 1.0 GiB) copied, 4.63086 s, 232 MB/s
[root@server1 ~]# touch /data/file{1..10}.txt

Unmount, deactivate logical volumes and volume groups
Next, uninstall the partition
[root@server1 ~]# umount /data
Deactivate logical volumes and volume groups:
[root@server1 ~]# lvchange -an /dev/vg_data/lvdata
[root@server1 ~]# vgchange -an vg_data
  0 logical volume(s) in volume group "vg_data" now active
[root@server1 ~]# lvs
  LV     VG      Attr       LSize  Pool Origin Data%  Meta%  Move Log Cpy%Sync Convert
  root   cl      -wi-ao---- 15.00g
  swap   cl      -wi-ao----  2.00g
  lvdata vg_data -wi------- 79.98g
After deactivating a logical volume, use lvs command Looking at the logical volume, you can see that the a attribute in the lvdata volume attribute is missing, indicating that it is not activated.
Export volume group
Exporting volume groups in server1
[root@server1 ~]# vgexport vg_data
  Volume group "vg_data" successfully exported
After exporting, we need to shut down the server1 system. Then copy its disk to server2.
Copy the disk of server1 to the server2 directory
Copy the four disks of server1 to the directory of server2 virtual machine. Below you can see the text with * - 00000 2 Vmdk file, this is because I took a snapshot. It needs to be copied to server2 together.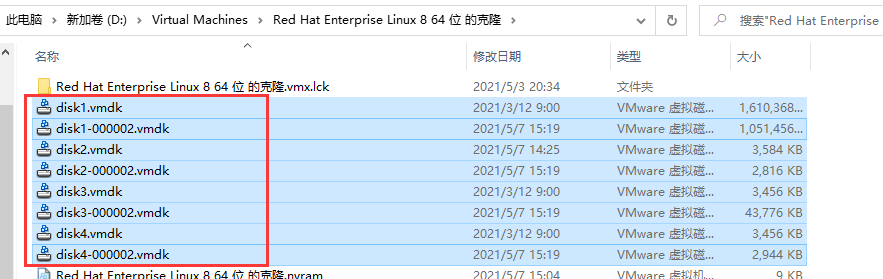
Copy to server2 Directory: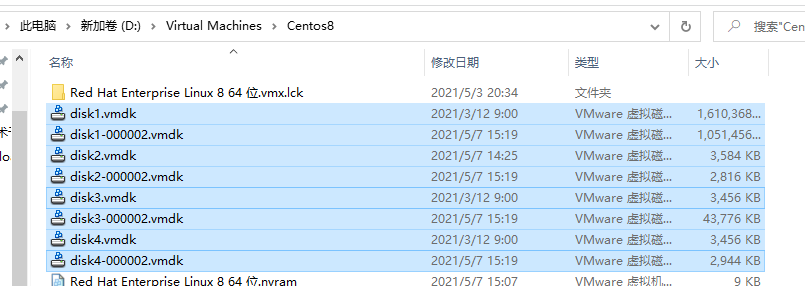
Open edit virtual machine settings for server2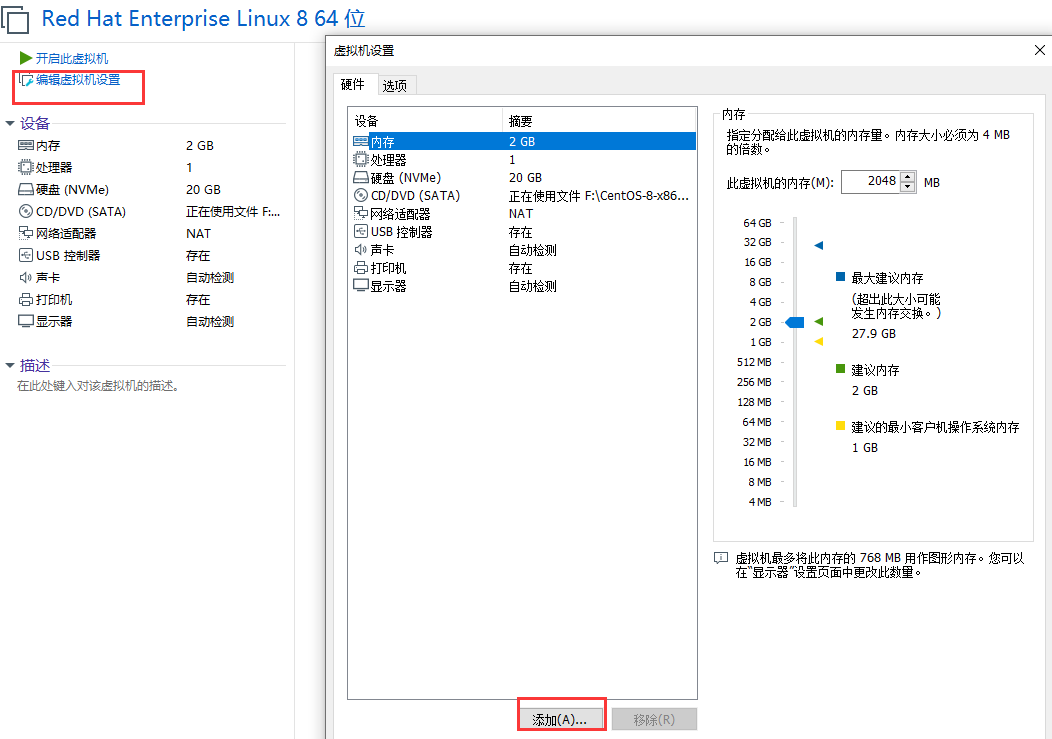
Add an existing virtual disk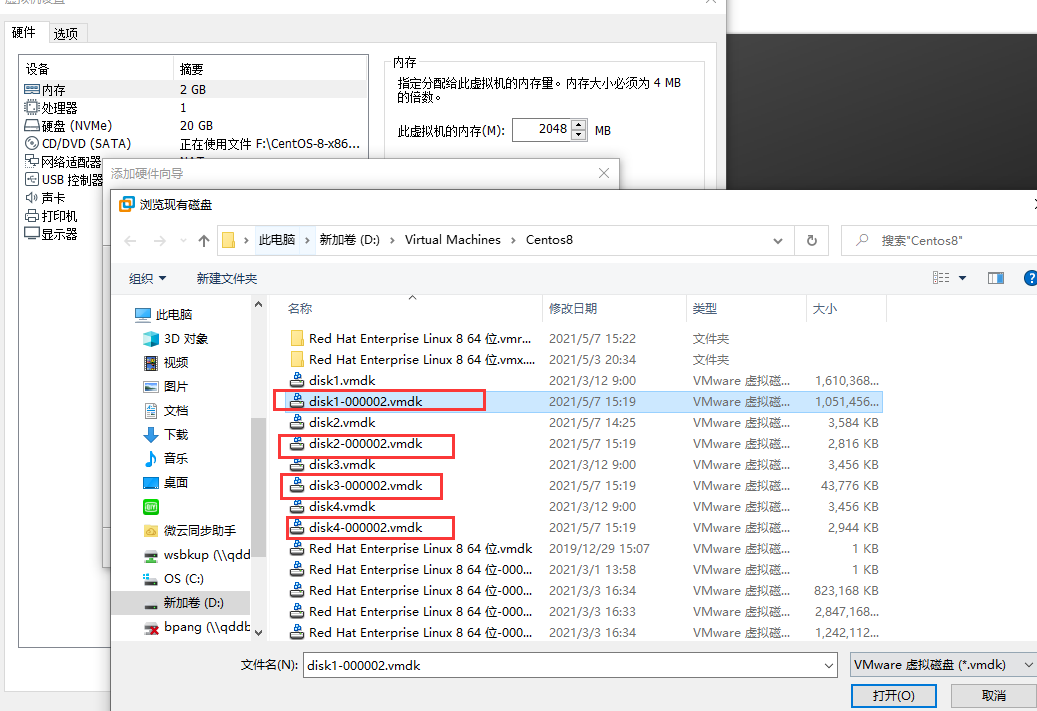
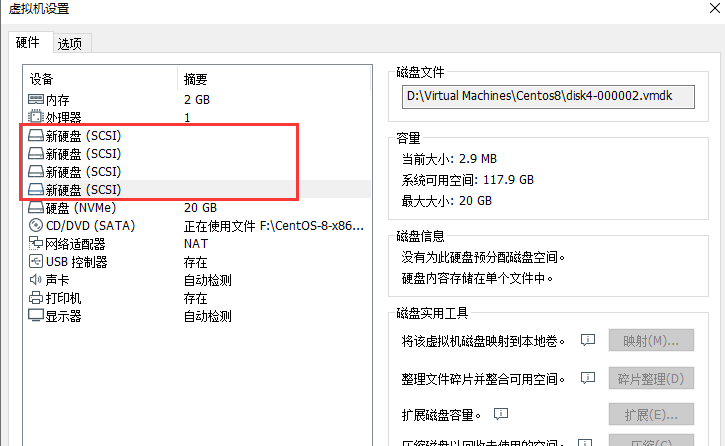
Turn on server2. If it is found that the system cannot be booted after startup, press f2 to enter the bios, set the startup item, and adjust the disk sequence of the existing system to the top.
Import volume group
After server2 starts up, use pvscan to scan whether the newly added disk can detect:
[root@server2 ~]# pvscan
  PV /dev/nvme0n1p2   VG cl              lvm2 [<19.00 GiB / 0    free]
  PV /dev/sda          is in exported VG vg_data [<20.00 GiB / 0    free]
  PV /dev/sdb          is in exported VG vg_data [<20.00 GiB / 0    free]
  PV /dev/sdc          is in exported VG vg_data [<20.00 GiB / 0    free]
  PV /dev/sdd          is in exported VG vg_data [<20.00 GiB / 0    free]
  Total: 5 [98.98 GiB] / in use: 5 [98.98 GiB] / in no VG: 0 [0   ]

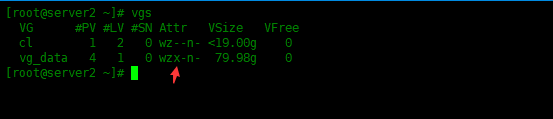
Next, use vgs command Take a look and you can see vg_data volume group, but you can see the attribute. There is an x attribute, which represents an external volume group.
[root@server2 ~]# vgs
  VG      #PV #LV #SN Attr   VSize   VFree
  cl        1   2   0 wz--n- <19.00g    0
  vg_data   4   1   0 wzx-n-  79.98g    0
[root@server2 ~]#
Next, use the vgimport command to import vg_data volume group:
[root@server2 ~]# vgimport vg_data
  Volume group "vg_data" successfully imported
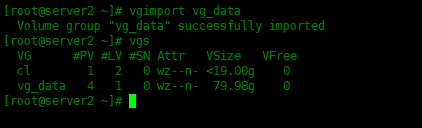
You can see that the x attribute has disappeared.
Activate volume group
Next, use the lvs command to view the properties of the lvdata logical volume:
[root@server2 ~]# lvs
  LV     VG      Attr       LSize   Pool Origin Data%  Meta%  Move Log Cpy%Sync Convert
  root   cl      -wi-ao---- <17.00g
  swap   cl      -wi-ao----   2.00g
  lvdata vg_data -wi-------  79.98g

The two attributes a and o are not found. A indicates activation and O indicates whether to mount.
Activate the volume group below:
[root@server2 ~]# vgchange -ay vg_data
  1 logical volume(s) in volume group "vg_data" now active
[root@server2 ~]# lvs
  LV     VG      Attr       LSize   Pool Origin Data%  Meta%  Move Log Cpy%Sync Convert
  root   cl      -wi-ao---- <17.00g
  swap   cl      -wi-ao----   2.00g
  lvdata vg_data -wi-a-----  79.98g

You can see that the a attribute is displayed.
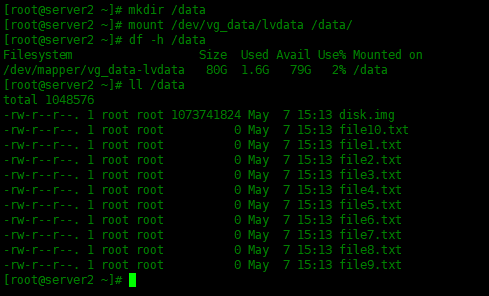
Mount file system
First create a mount point, and then mount the file system:
[root@server2 ~]# mkdir /data
[root@server2 ~]# mount /dev/vg_data/lvdata /data/
[root@server2 ~]# df -h /data
Filesystem                  Size  Used Avail Use% Mounted on
/dev/mapper/vg_data-lvdata   80G  1.6G   79G   2% /data
Use the lvs command to check again and find that the o attribute of lvdata logical volume is also displayed.
[root@server2 ~]# lvs
  LV     VG      Attr       LSize   Pool Origin Data%  Meta%  Move Log Cpy%Sync Convert
  root   cl      -wi-ao---- <17.00g
  swap   cl      -wi-ao----   2.00g
  lvdata vg_data -wi-ao----  79.98g
The following are the contents of physical volume, volume group and logical volume after import: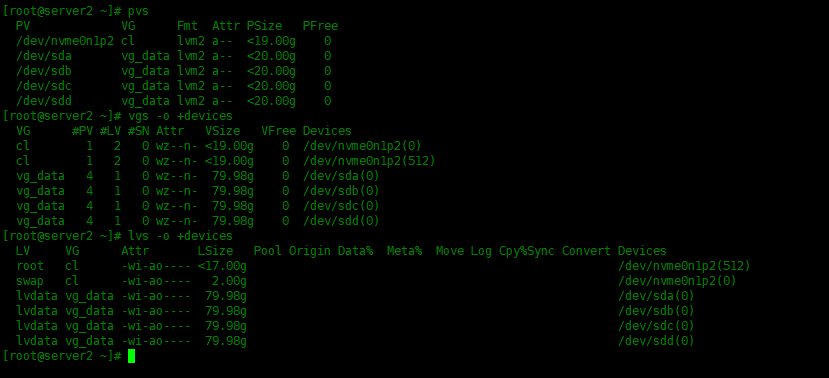
summary
In this way, we have successfully completed the work of moving the volume group from one system to another. That's how Linux should learn