I believe that the first stumbling block many friends encounter when learning K8s is to install and deploy kubernetes. There are many and miscellaneous tutorials on the network, and because of the different equipment environment and many other problems, many friends, even if they follow the tutorial step by step, still don't know how to report an error, leading to the failure of previous achievements. The author also suffered from it.
In order to help you to solve the problem quickly because of the installation of k8s, and to record the pit I stepped on on the way to the entry-level operation and maintenance, the author specially wrote this tutorial based on the installation and deployment of k8s cluster in Kubeadm, and recorded the error reporting and solutions I encountered in detail.
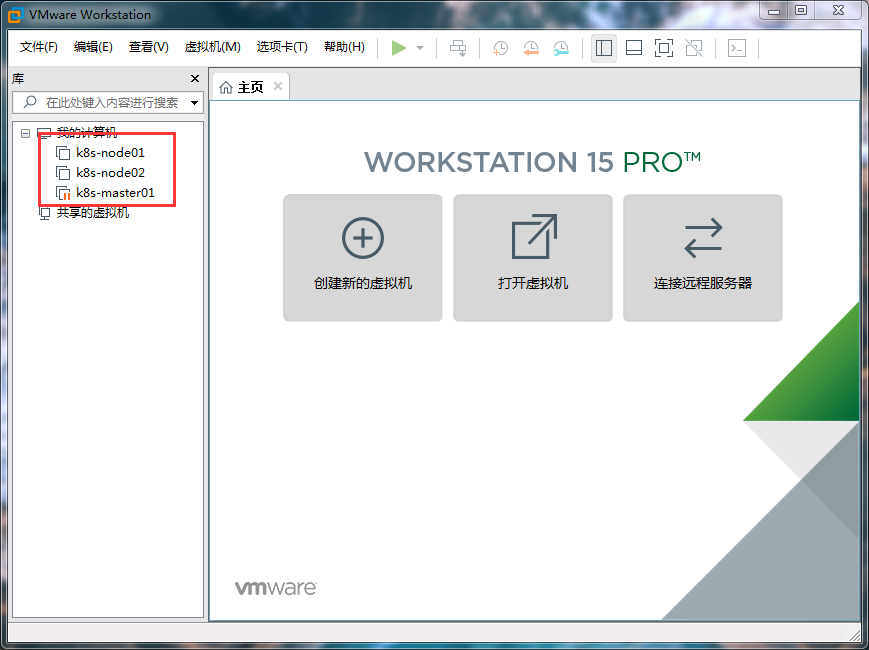
1, Prepare virtual machine
First, we need to prepare three virtual machines. One is the Master Node, and two are the Node nodes. The completion effect is shown in the figure below. (for the convenience of demonstration, this example only demonstrates the deployment of one Master and one Node)
1.1 configure Master node
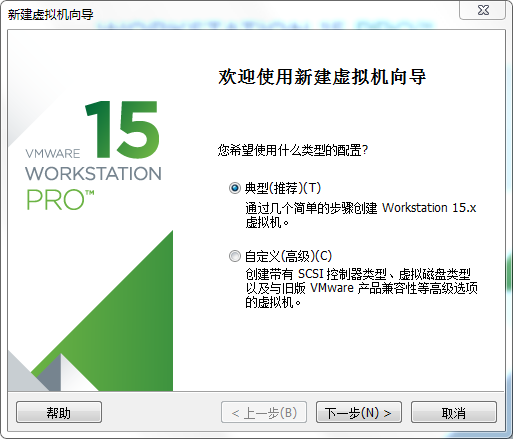
First, we open "create a new virtual machine" on the homepage to create a Master node. Select "typical (recommended)" here.
Set the user name and password. Just set it up.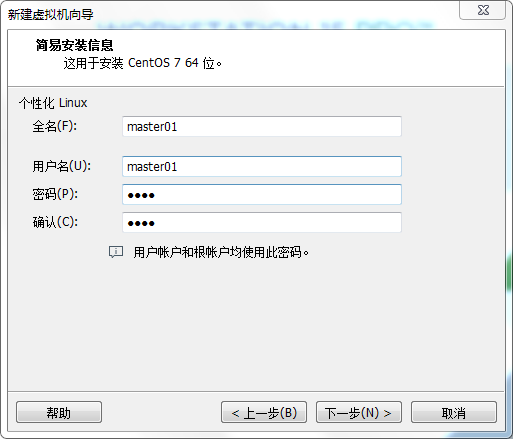
Set the virtual host name. Just feel free. Here we set it to "Master01".
Remember to save this disk as a single file "for quick opening.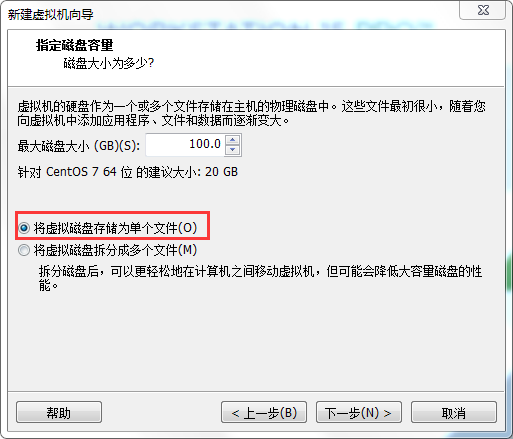 Note here that although we have basically set up the account information of this master node, we still have a lot to solve in the hardware part. Click "custom hardware" below.
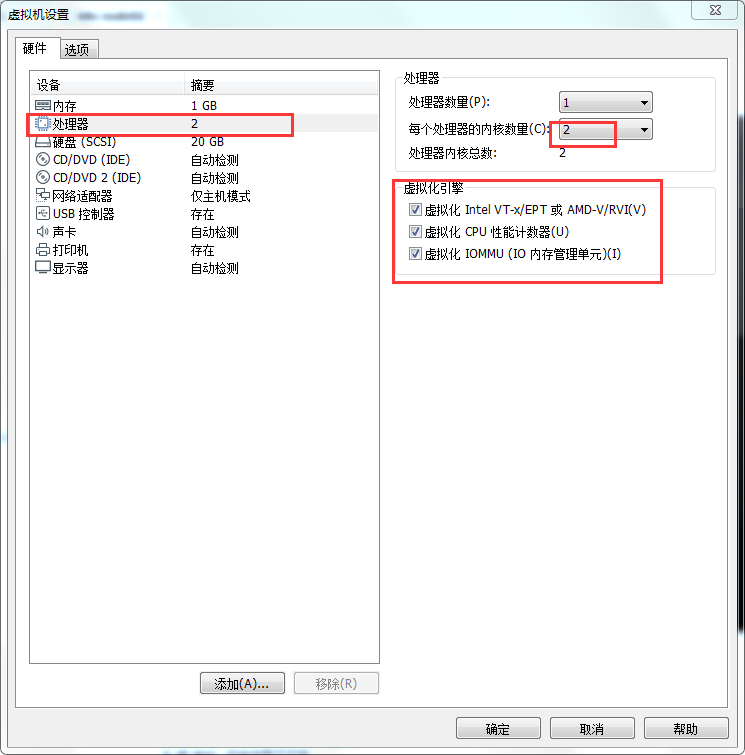
First of all, we need to make sure that the CPU of the Master node is two-core, otherwise an error will be reported at startup. And it's better to turn on all the virtualization engines, which will greatly reduce our startup time.
After that, we need to add a network adapter.
One is set to bridge mode and the other is set to custom (VMnet1). The final effect is shown in the figure below.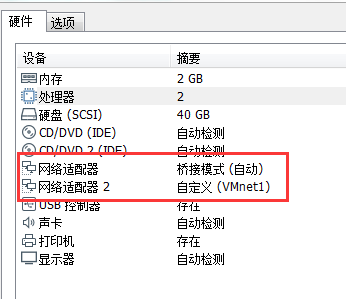
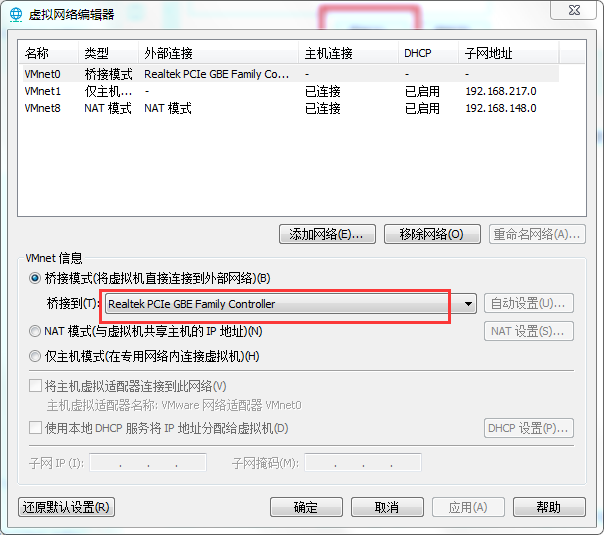
Then, we need to open "virtual network editor" in "Edit", select "Realtek PCIe GBE Family Controller" in bridging mode, and finally click "OK" to save and exit.
Click finish. At this point, we finally took a small step to install k8s. In the next 10 minutes, we will wait for CentOS system initialization.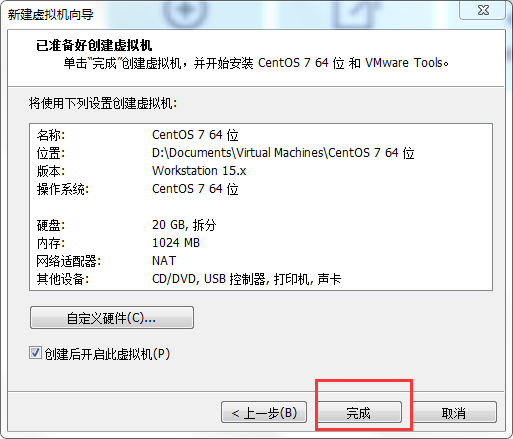
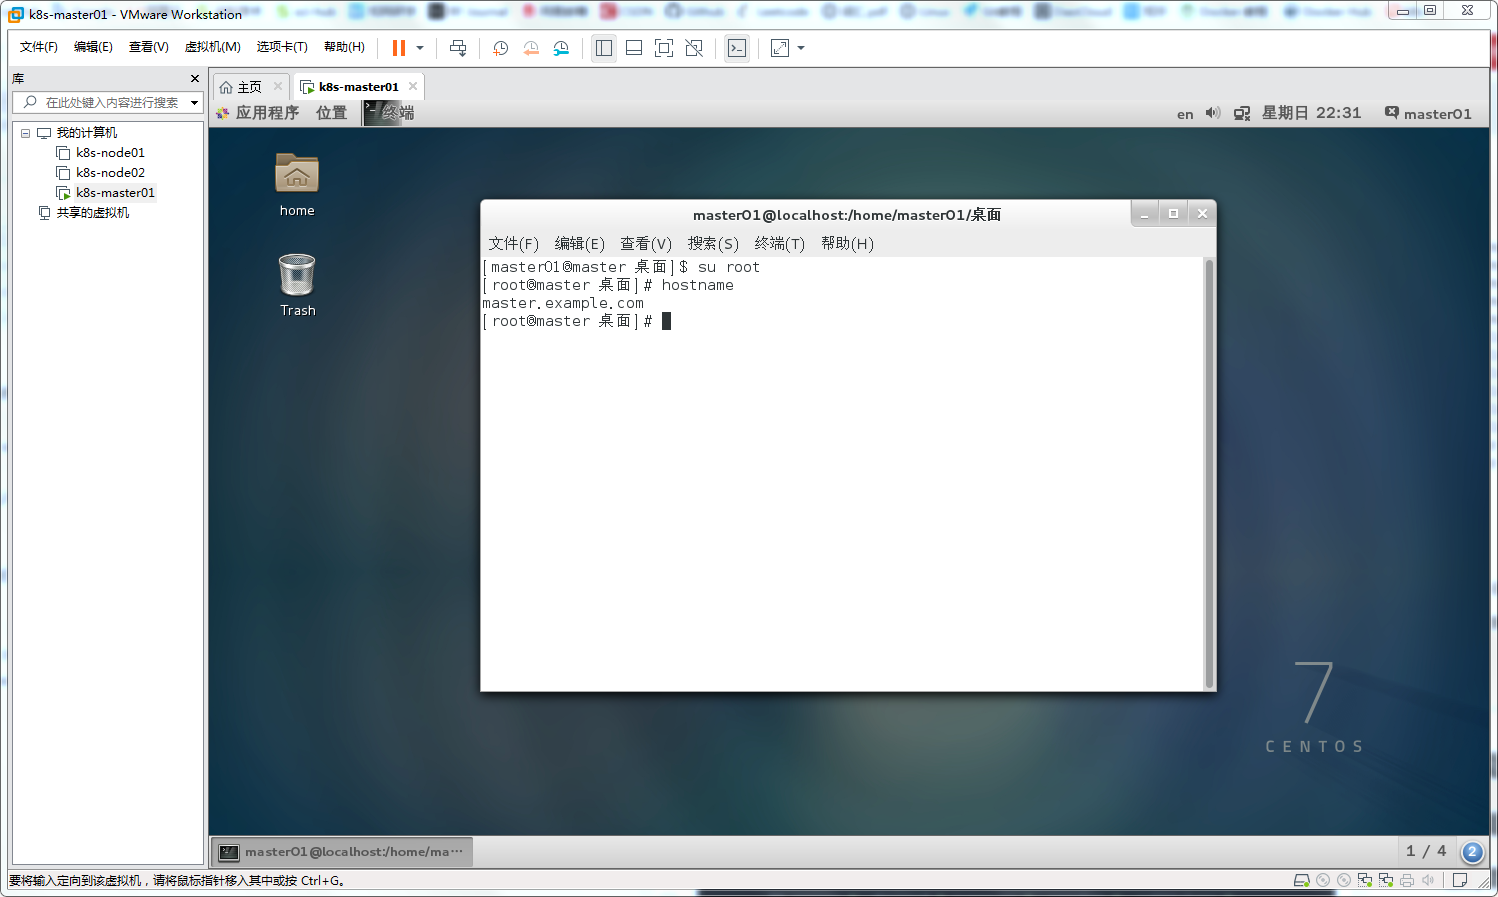
The system is finally installed. First let's change our host name.
# sudo hostnamectl set-hostname master.example.com
Enter hostname to have a look. If it is like this, it means that we have successfully changed the hostname.
We open the terminal, input: ifconfig, to see if our network can connect normally.
# ifconfig
eno16777736: flags=4163<UP,BROADCAST,RUNNING,MULTICAST>  mtu 1500
        inet 192.168.1.108  netmask 255.255.255.0  broadcast 192.168.1.255
        inet6 fe80::20c:29ff:feef:fb27  prefixlen 64  scopeid 0x20<link>
        ether 00:0c:29:ef:fb:27  txqueuelen 1000  (Ethernet)
        RX packets 862161  bytes 1266491294 (1.1 GiB)
        RX errors 0  dropped 0  overruns 0  frame 0
        TX packets 396136  bytes 27828165 (26.5 MiB)
        TX errors 0  dropped 0 overruns 0  carrier 0  collisions 0

eno33554960: flags=4163<UP,BROADCAST,RUNNING,MULTICAST>  mtu 1500
        inet 192.168.217.142  netmask 255.255.255.0  broadcast 192.168.217.255
        inet6 fe80::20c:29ff:feef:fb31  prefixlen 64  scopeid 0x20<link>
        ether 00:0c:29:ef:fb:31  txqueuelen 1000  (Ethernet)
        RX packets 215  bytes 35054 (34.2 KiB)
        RX errors 0  dropped 0  overruns 0  frame 0
        TX packets 94  bytes 16812 (16.4 KiB)
        TX errors 0  dropped 0 overruns 0  carrier 0  collisions 0

lo: flags=73<UP,LOOPBACK,RUNNING>  mtu 65536
        inet 127.0.0.1  netmask 255.0.0.0
        inet6 ::1  prefixlen 128  scopeid 0x10<host>
        loop  txqueuelen 0  (Local Loopback)
        RX packets 570  bytes 49266 (48.1 KiB)
        RX errors 0  dropped 0  overruns 0  frame 0
        TX packets 570  bytes 49266 (48.1 KiB)
        TX errors 0  dropped 0 overruns 0  carrier 0  collisions 0
We can see that the normal connection state is like this. We need to remember that the IP address of our Master node is 192.168.1.108 (not the lower 192.168.217.142! Only one IP is wrong!). This IP address will be used frequently next.
Then we need to test whether our network is connected to the outside world.
# ping www.baidu.com
Successfully connected to the Internet.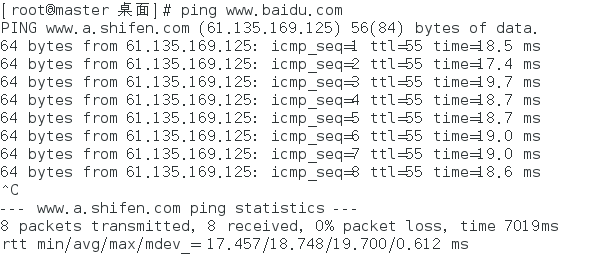
So far, we have finished the physical configuration of the first Master node.
(the configuration mode of the other two Node nodes is basically the same as that in this section, which will not be discussed here.)
Pit 1: network configuration
There was a problem with the network configuration before you had friends. It's probably that you didn't follow the steps. It's recommended to check step by step.
resolvent:
# dhclient
Then restart the virtual machine and input ifconfig again to check the network status.
2, Kubeadm configuration Master node
- First we need to disable the firewall.
# systemctl stop firewalld
# systemctl disable firewalld
- Then we will disable SELINUX.
# vim /etc/sysconfig/selinux
We can disable selinux by changing the selinux configuration file. As shown in the figure, change the enforcer to disabled.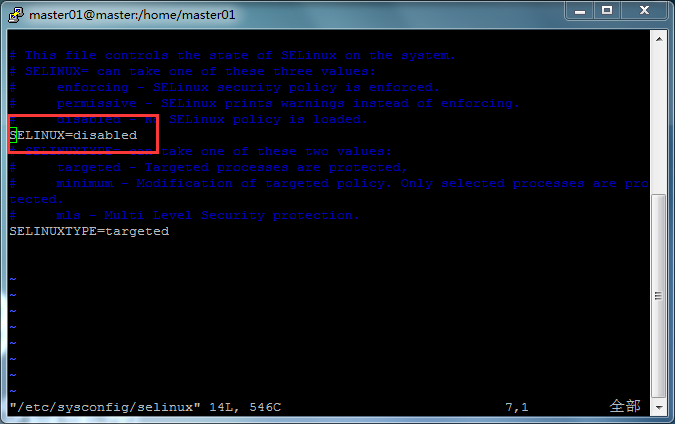
Don't forget to make it work.
# setenforce 0
- Create the / etc/sysctl.d/k8s.conf file and add the following
net.bridge.bridge-nf-call-ip6tables = 1
net.bridge.bridge-nf-call-iptables = 1
vm.swappiness=0
net.ipv4.ip_forward = 1
Execute sysctl -p /etc/sysctl.d/k8s.conf for the changes to take effect.
Execute the order to effect the modification
# modprobe br_netfilter
# sysctl -p /etc/sysctl.d/k8s.conf
- Disable swap, and shut down the system as follows:
# swapoff -a
Modify the / etc/fstab file to comment out the automatic mount of SWAP
UUID=37417d9b-de8d-4d91-bd86-4dfd46e89128 /                       xfs     defaults        1 1
UUID=db9ade39-3952-4ff1-9aeb-3d95ea4dac59 /boot                   xfs     defaults        1 2
UUID=4ee6483c-6a9a-43f8-be86-70046c996a96 /home                   xfs     defaults        1 2
#UUID=6072c1ae-6d61-45dc-9d24-c4ad78ec4445 swap                    swap    defaults        0 0
- Add host name
# vim /etc/hosts
Take the author for example, if you want to add a host and a node, then add these two lines in k8s.conf. Where, IP address is the address obtained by ifconfig.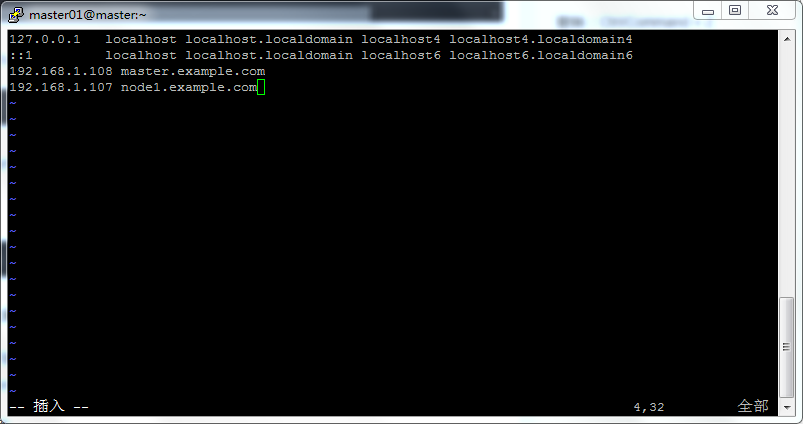
Install Docker in each node
Kubernetes has been using the CRI(Container Runtime Interface) container runtime interface since 1.6. The default container runtime is still Docker, using the built-in dockershim CRI implementation in kubelet. I have recorded how to install Docker. If you have any problems, please move My blog.
yum source to install docker:
# yum install -y xfsprogs yum-utils device-mapper-persistent-data lvm2
# yum-config-manager --add-repo https://download.docker.com/linux/centos/docker-ce.repo
To view the latest Docker version:
[root@master01~]# yum list docker-ce.x86_64  --showduplicates |sort -r
//Loaded plug-in: fastestmirror, langpacks
//Installed packages
//Installable packages
 * updates: ftp.cuhk.edu.hk
Loading mirror speeds from cached hostfile
 * extras: ftp.cuhk.edu.hk
docker-ce.x86_64            3:18.09.0-3.el7                    docker-ce-stable
docker-ce.x86_64            18.06.1.ce-3.el7                   docker-ce-stable
docker-ce.x86_64            18.06.1.ce-3.el7                   @docker-ce-stable
docker-ce.x86_64            18.06.0.ce-3.el7                   docker-ce-stable
docker-ce.x86_64            18.03.1.ce-1.el7.centos            docker-ce-stable
docker-ce.x86_64            18.03.0.ce-1.el7.centos            docker-ce-stable
docker-ce.x86_64            17.12.1.ce-1.el7.centos            docker-ce-stable
docker-ce.x86_64            17.12.0.ce-1.el7.centos            docker-ce-stable
docker-ce.x86_64            17.09.1.ce-1.el7.centos            docker-ce-stable
docker-ce.x86_64            17.09.0.ce-1.el7.centos            docker-ce-stable
docker-ce.x86_64            17.06.2.ce-1.el7.centos            docker-ce-stable
docker-ce.x86_64            17.06.1.ce-1.el7.centos            docker-ce-stable
docker-ce.x86_64            17.06.0.ce-1.el7.centos            docker-ce-stable
docker-ce.x86_64            17.03.3.ce-1.el7                   docker-ce-stable
docker-ce.x86_64            17.03.2.ce-1.el7.centos            docker-ce-stable
docker-ce.x86_64            17.03.1.ce-1.el7.centos            docker-ce-stable
docker-ce.x86_64            17.03.0.ce-1.el7.centos            docker-ce-stable
Install version 18.06.1 of docker in each node
# yum makecache fast

# yum install -y --setopt=obsoletes=0 docker-ce-18.06.1.ce-3.el7

# systemctl start docker
# systemctl enable docker
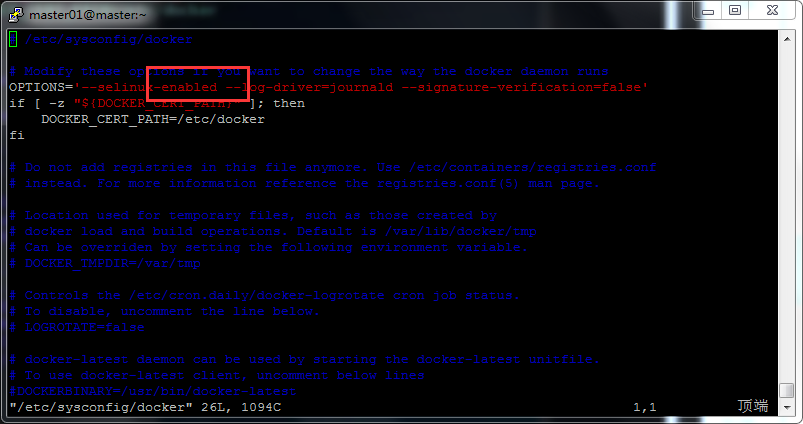
Pit 3. Docker startup error
This may be because Docker is enabled by selinux by default. We can modify it in the configuration file.
# vim /etc/hosts
Deploying Kubernetes using kubeadm
Install kubeadm and kubelet in each node
Install kubeadm and kubelet in each node as follows:
cat <<EOF > /etc/yum.repos.d/kubernetes.repo
[kubernetes]
name=Kubernetes
baseurl=https://packages.cloud.google.com/yum/repos/kubernetes-el7-x86_64
enabled=1
gpgcheck=1
repo_gpgcheck=1
gpgkey=https://packages.cloud.google.com/yum/doc/yum-key.gpg
        https://packages.cloud.google.com/yum/doc/rpm-package-key.gpg
EOF
Test whether the network is available
curl https://packages.cloud.google.com/yum/repos/kubernetes-el7-x86_64
Update source
yum makecache fast
yum install -y kubelet kubeadm kubectl
...
Installed:
  kubeadm.x86_64 0:1.13.0-0  kubectl.x86_64 0:1.13.0-0    kubelet.x86_64 0:1.13.0-0
//Installed as a dependency:
  cri-tools.x86_64 0:1.12.0-0  kubernetes-cni.x86_64 0:0.6.0-0  socat.x86_64 0:1.7.3.2-2.el7
Complete!
From the installation results, we can see that CRI tools, kubernetes CNI and socat are also installed
    The official upgrade of cni dependency to version 0.6.0 since Kubernetes 1.9 is still the current version in 1.13
    socat is a dependency of kubelet. CRI tools is the command line tool of the CRI(Container Runtime Interface) container runtime interface
Initializing a cluster using kubeadm init
Start the kubelet service at each node:
systemctl enable kubelet.service
Next, use kubeadm to initialize the cluster, select k8s-node1 as the Master Node, and execute the following command on node1:
kubeadm init --kubernetes-version=v1.13.0 --pod-network-cidr=10.244.0.0/16 --apiserver-advertise-address=192.168.112.38
Because we chose flannel as the Pod network plug-in, the above command specifies - Pod network CIDR = 10.244.0.0/16.
The results are as follows.
[init] Using Kubernetes version: v1.13.0
[preflight] Running pre-flight checks
[preflight] Pulling images required for setting up a Kubernetes cluster
[preflight] This might take a minute or two, depending on the speed of your internet connection
[preflight] You can also perform this action in beforehand using 'kubeadm config images pull'
[kubelet-start] Writing kubelet environment file with flags to file "/var/lib/kubelet/kubeadm-flags.env"
[kubelet-start] Writing kubelet configuration to file "/var/lib/kubelet/config.yaml"
[kubelet-start] Activating the kubelet service
[certs] Using certificateDir folder "/etc/kubernetes/pki"
[certs] Generating "front-proxy-ca" certificate and key
[certs] Generating "front-proxy-client" certificate and key
[certs] Generating "etcd/ca" certificate and key
[certs] Generating "etcd/server" certificate and key
[certs] etcd/server serving cert is signed for DNS names [k8s-node1 localhost] and IPs [192.168.112.38 127.0.0.1 ::1]
[certs] Generating "etcd/peer" certificate and key
[certs] etcd/peer serving cert is signed for DNS names [k8s-node1 localhost] and IPs [192.168.112.38 127.0.0.1 ::1]
[certs] Generating "etcd/healthcheck-client" certificate and key
[certs] Generating "apiserver-etcd-client" certificate and key
[certs] Generating "ca" certificate and key
[certs] Generating "apiserver" certificate and key
[certs] apiserver serving cert is signed for DNS names [k8s-node1 kubernetes kubernetes.default kubernetes.default.svc kubernetes.default.svc.cluster.local] and IPs [10.96.0.1 192.168.112.38]
[certs] Generating "apiserver-kubelet-client" certificate and key
[certs] Generating "sa" key and public key
[kubeconfig] Using kubeconfig folder "/etc/kubernetes"
[kubeconfig] Writing "admin.conf" kubeconfig file
[kubeconfig] Writing "kubelet.conf" kubeconfig file
[kubeconfig] Writing "controller-manager.conf" kubeconfig file
[kubeconfig] Writing "scheduler.conf" kubeconfig file
[control-plane] Using manifest folder "/etc/kubernetes/manifests"
[control-plane] Creating static Pod manifest for "kube-apiserver"
[control-plane] Creating static Pod manifest for "kube-controller-manager"
[control-plane] Creating static Pod manifest for "kube-scheduler"
[etcd] Creating static Pod manifest for local etcd in "/etc/kubernetes/manifests"
[wait-control-plane] Waiting for the kubelet to boot up the control plane as static Pods from directory "/etc/kubernetes/manifests". This can take up to 4m0s
[apiclient] All control plane components are healthy after 28.002313 seconds
[uploadconfig] storing the configuration used in ConfigMap "kubeadm-config" in the "kube-system" Namespace
[kubelet] Creating a ConfigMap "kubelet-config-1.13" in namespace kube-system with the configuration for the kubelets in the cluster
[patchnode] Uploading the CRI Socket information "/var/run/dockershim.sock" to the Node API object "k8s-node1" as an annotation
[mark-control-plane] Marking the node k8s-node1 as control-plane by adding the label "node-role.kubernetes.io/master=''"
[mark-control-plane] Marking the node k8s-node1 as control-plane by adding the taints [node-role.kubernetes.io/master:NoSchedule]
[bootstrap-token] Using token: lauqjh.zhdjhnwldjnjd2qm
[bootstrap-token] Configuring bootstrap tokens, cluster-info ConfigMap, RBAC Roles
[bootstraptoken] configured RBAC rules to allow Node Bootstrap tokens to post CSRs in order for nodes to get long term certificate credentials
[bootstraptoken] configured RBAC rules to allow the csrapprover controller automatically approve CSRs from a Node Bootstrap Token
[bootstraptoken] configured RBAC rules to allow certificate rotation for all node client certificates in the cluster
[bootstraptoken] creating the "cluster-info" ConfigMap in the "kube-public" namespace
[addons] Applied essential addon: CoreDNS
[addons] Applied essential addon: kube-proxy

Your Kubernetes master has initialized successfully!

To start using your cluster, you need to run the following as a regular user:

  mkdir -p $HOME/.kube
  sudo cp -i /etc/kubernetes/admin.conf $HOME/.kube/config
  sudo chown $(id -u):$(id -g) $HOME/.kube/config

You should now deploy a pod network to the cluster.
Run "kubectl apply -f [podnetwork].yaml" with one of the options listed at:
  https://kubernetes.io/docs/concepts/cluster-administration/addons/

You can now join any number of machines by running the following on each node
as root:

  kubeadm join 192.168.1.108:6443 --token vgghhv.qjsvzv1wjbm1k631 --discovery-token-ca-cert-hash sha256:0688289f3b27978cd7ac91290d822d837c93595de09bad7ba4b99b24a8f56f0c
If such a result occurs, it means that we have successfully completed the deployment of the master node. Then we need to remember the following command to add nodes to the cluster, which will be used later.
kubeadm join 192.168.1.108:6443 --token vgghhv.qjsvzv1wjbm1k631 --discovery-token-ca-cert-hash sha256:0688289f3b27978cd7ac91290d822d837c93595de09bad7ba4b99b24a8f56f0c
PS: View cluster status
# kubectl get nodes -n namespace
# kubectl get cs
NAME                 STATUS    MESSAGE              ERROR
scheduler            Healthy   ok
controller-manager   Healthy   ok
etcd-0               Healthy   {"health": "true"}
Add node node
So far, the master node has been preliminarily deployed. Next, we will add node1
The previous steps are the same as the master node, so we can use scripts to complete them, saving time
#Stop firewalld service
systemctl stop firewalld && systemctl disable firewalld

#Turn off selinux
sed -i 's/^SELINUX=enforing$/SELINUX=disabled' /etc/selinux/config && setenforce 0

#Turn off swap settings
swapoff -a
yes | cp /etc/fstab /etc/fstab_bak
cat /etc/fstab_bak |grep -v swap > /etc/fstab

#Solve the problem of incorrect flow path
cat <<EOF > /etc/sysctl.d/k8s.conf
vm.swappiness = 0
net.bridge.bridge-nf-call-ip6tables = 1
net.bridge.bridge-nf-call-iptables = 1
net.ipv4.ip_forward = 1
EOF
#Make configuration effective
modprobe br_netfilter
sysctl -p /etc/sysctl.d/k8s.conf

#Change hosts file
cat >> /etc/hosts <<EOF
192.168.1.108 master.example.com
192.168.1.107 node1.example.com
EOF

#Install docker
yum -y install docker
systemctl enable docker && systemctl start docker

//Configure ali k8s source
cat >> /etc/yum.repos.d/k8s.repo <<EOF
[kubernetes]
name=kubernetes repo
baseurl=https://mirrors.aliyun.com/kubernetes/yum/repos/kubernetes-el7-x86_64/
gpgcheck=0
EOF

#Install kubelet/kubeadm/kubectl
#Note here that if you run the command yum directly -y install kubelet kubeadm kubectl,We will download the latest version for you automatically, and we will adopt the lower version to keep consistent with the video tutorial(1.13.0)Install (because the subsequent image pull is a lower version image)
yum -y install kubelet-1.13.0 kubeadm-1.13.0 kubernetes-cni-0.6.0 kubectl-1.13.0
systemctl enable kubelet && systemctl start kubelet
Write the above code to an init.sh file, and then run the script.
Then pull the Docker image (the same operation as the master node).
After pulling the image, we can input the previous token to make the node join the cluster.
# kubeadm join 192.168.1.108:6443 --token vgghhv.qjsvzv1wjbm1k631 --discovery-token-ca-cert-hash sha256:0688289f3b27978cd7ac91290d822d837c93595de09bad7ba4b99b24a8f56f0c`
(if you forget, you can enter kubeadm token list in the master terminal to view)
kubeadm token list
TOKEN                     TTL       EXPIRES                     USAGES                   DESCRIPTION                                                EXTRA GROUPS
ifq7qv.3beevw9jgs73c049   22h       2019-07-26T14:27:56+08:00   authentication,signing   The default bootstrap token generated by 'kubeadm init'.   system:bootstrappers:kubeadm:default-node-token
Then install Kube flannel and restart docker (consistent with the master node operation)
In this way, when you view it in the master node, you have finished adding it
# kubectl get nodes
NAME                 STATUS   ROLES    AGE     VERSION
master.example.com   Ready    master   91m     v1.13.0
node1.example.com    Ready    <none>   7m55s   v1.13.0
So far, our deployment has been preliminarily completed.

