preface
Hello, I'm zero one. Recently, I'm going to talk about code in the group, so I sorted out the business code before the next project. In the process of combing, I saw a progress bar component written very well, which reminds me of the progress bar code I wrote when I first started preschool. Compared with this, it's really too far away (most beginners should not think of it, and so is the mentor I brought with me in my first internship company).
Therefore, I want to share with you the excellent progress bar component of this idea. At the same time, it also has very serious performance problems. At the end of this article, I will also explain the problems and optimization methods
Application scenario of progress bar
The general progress bar components appear in such scenes as the tiktok video, as shown in the arrow at the bottom of the picture.

The progress bar grows with the length of the video. When the video pauses, the animation of the progress bar will also pause
Next, let's take a look at how most people write it and why they say that the idea and performance are not good. Take React as an example. Vue developers don't have to be afraid of not understanding it. They mainly look at ideas
Main functions:
- Support playback, pause and replay
- At the end of playback, the number of playback is + 1 and playback is restarted
Not recommended
Component part
// index.tsx
import { useState } from 'react'
import './index.css'

let timer = null  //  Timer for incremental progress
let totalTime = 3000  // Suppose the video playback is 3s

function App() {
    const [progress, setProgress] = useState(0)  // speed of progress
    const [isPlay, setIsPlay] = useState(false)  // Play

    // Incremental logic of setProgress
    const handlerProgress = pre => {
        if(pre < 100) return pre + 1;
        else {
          alert('End of playback')
          return 0   // Playback is over, restart playback
        }
    }

    // Start playback & & pause playback
    const handleVideo = () => {
        setIsPlay(!isPlay)
        isPlay
        ? clearInterval(timer)
        : timer = setInterval(() => setProgress(handlerProgress), totalTime / 100)
    }

    // to replay
    const replay = () => {
        setIsPlay(true)
        if(timer) clearInterval(timer);
        setProgress(0)
        timer = setInterval(() => setProgress(handlerProgress), totalTime / 100)
    }

    return (
        <div id="root">
            <button onClick={handleVideo}>{ isPlay ? 'suspend' : 'play' }</button>
            <button onClick={replay}>to replay</button>
            <div className="container">
                <div className="progress" style={{ width: `${progress}%` }}/>
            </div>
        </div>
    )
}
Style part
.container {
    height: 10px;
    border-radius: 5px;
    border: 1px solid black;
}

.progress {
    height: 100%;
    width: 0;
    background-color: red;
}
Let's briefly demonstrate what this progress bar looks like
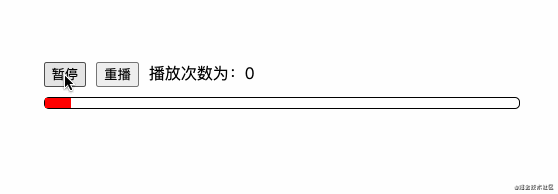
Why is this writing not very good? Because we use the timer to quickly increase the variable progress to increase the progress. Each change of the variable will drive the view to recalculate and render, which must be of poor performance (to be honest, when I experience this demo, I can see the little Caton with the naked eye)
What else? In fact, there is another reason for Caton. You might as well guess. Let's talk about it at the end. If you want to know the answer, you can slide directly below
Recommended writing
What I recommend here is the excellent scheme I saw when reading the code. Next, I'll share it with you
Component part
// index.jsx
import { useState } from 'react'
import './index.css'

let totalTime = 3000  // Suppose the video playback is 3s

function App() {
    const [isPlay, setIsPlay] = useState(false)  // Play
    const [count, setCount] = useState(0)  // Playback times
    const [type, setType] = useState(0)   // Which animation to use. 0: @keyframes play; 1: @keyframes replay;

    // Pause & & playback
    const handleVideo = () => setIsPlay(!isPlay);

    // to replay
    const replay = () => {
        setIsPlay(true)
        setType(type ? 0 : 1)
    }

    // Event triggered at the end of the animation
    const end = () => {
        setCount(count + 1)  // Playback times + 1
        replay()   // Restart playback
    }

    return (
        <div id="root">
            <button onClick={handleVideo}>{ isPlay ? 'suspend' : 'play' }</button>
            <button onClick={replay}>to replay</button>
            <span>{ `Playback times: ${count}` }</span>
            <div className="container">
                <div
                    className={`progress ${isPlay ? 'play' : 'pause'}`}
                    style={{
                        animationDuration: `${totalTime}ms`,
                        animationName: `${type ? 'replay' : 'play'}`
                    }}
                    onAnimationEnd={end}  // Event at the end of the animation
                />
            </div>
        </div>
    )
}
Style part
@keyframes play {
    to {
        width: 100%;
    }
}

@keyframes replay {
    to {
        width: 100%;
    }
}

.container {
    height: 10px;
    border-radius: 5px;
    border: 1px solid black;
}

.progress {
    height: 100%;
    width: 0;
    background-color: red;
    animation-timing-function: linear;
}

.progress.play {     /* Start animation */
    animation-play-state: running;
}

.progress.pause {    /* Pause animation */
    animation-play-state: paused;
}
We set up two @ keyframes animations so that we can make a switch when the progress bar is replayed, that is, when clicking "replay", we can directly switch to another animation, and the progress bar can be incremented from 0
At the same time, we also set the style of two class names, which are used to control the playback and pause of animation respectively
When the playback is completed, the function of playback times + 1 can be monitored through the event animation
As like as two peas, see the effect of the scheme (exactly the same as the previous one).
Compared with the previous scheme, you can know that this writing method does not need to constantly modify the data to drive the change of the view, which reduces a lot of calculation in the framework and improves a lot of performance
defect
Although the performance of the second scheme is very good, like the first scheme, there is another hidden performance problem, which I found when checking the code performance problems of my former colleagues.
Defect: both schemes will cause frequent rearrangement and redrawing
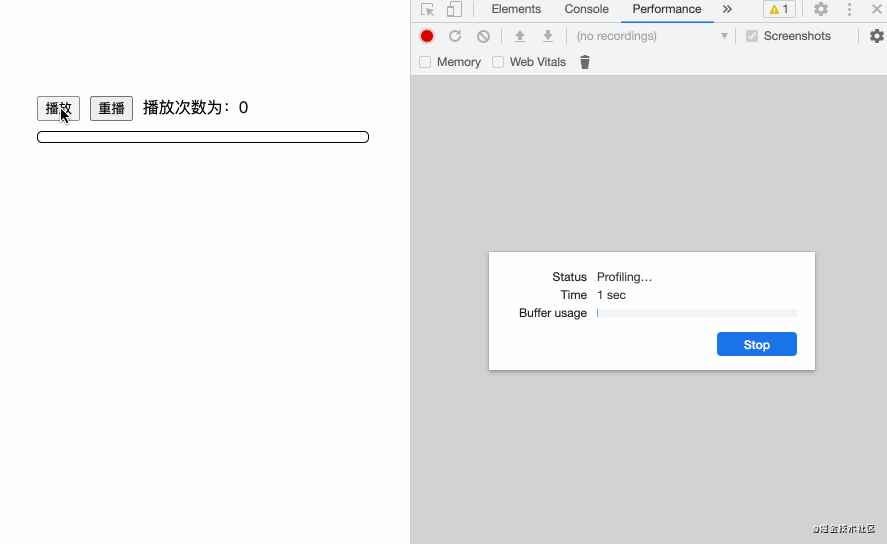
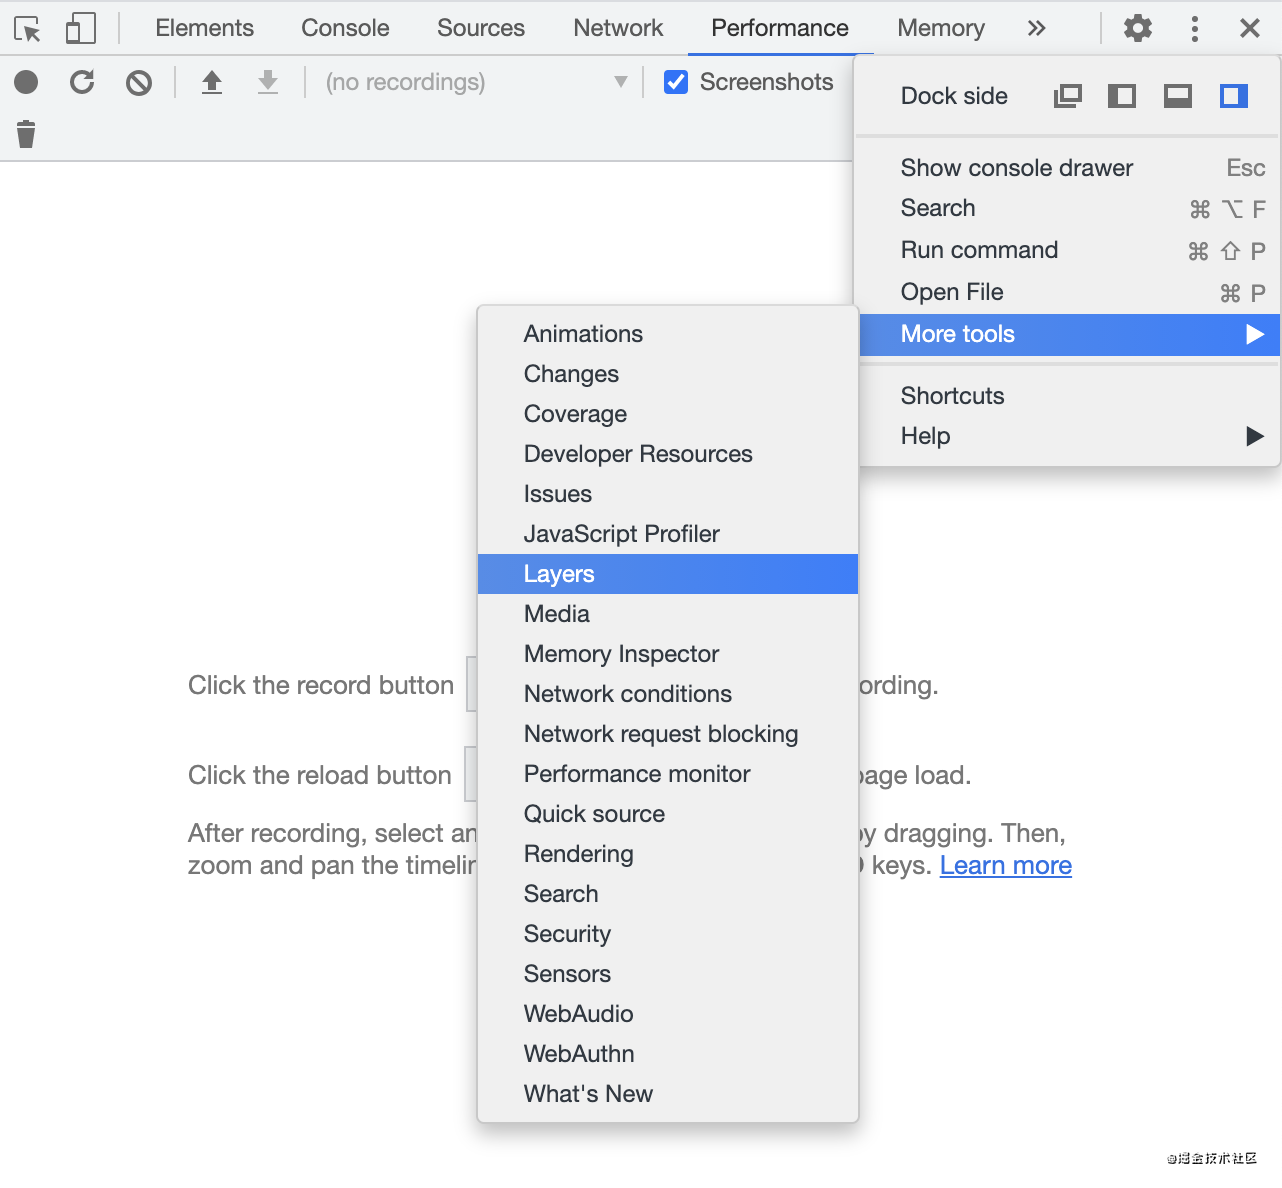
You can verify the page with the help of chrome devtools performance
A small progress bar triggered so many rearrangements and redraws, so what impact does it have? Let's briefly review the impact of rearrangement and redrawing
Rearrangement: the browser needs to recalculate the geometric attributes of elements, and the geometric attributes or positions of other elements may be affected by this change.
Redraw: not all DOM changes affect the geometric properties of the element. If you change the background color of the element, it does not affect its width and height. In this case, only one redraw will occur, not rearrangement, because the layout of the element has not changed
Therefore, after knowing the serious problems caused by rearrangement and redrawing, we immediately analyze and optimize them
Ultimate optimization
Let's take a look at a very common diagram

Page rendering generally follows these five processes. Of course, there are ways to skip some of the intermediate steps, such as avoiding Layout and Paint
Let's review what methods can cause rearrangement and redrawing
Factors that trigger rearrangement: add or delete visible DOM elements, change the position of elements, change the size of elements (including outer margin, inner margin, border, height, etc.), change the content (such as text change or picture replaced by another picture of different size), change the size of browser window, hide a DOM node through display: none, etc
Factors triggering redrawing: rearrangement must trigger redrawing (important), hiding a DOM node through visibility: hidden, modifying element background color, modifying font color, etc
So where in the code we wrote earlier triggered rearrangement and redrawing? After a simple check, it is not difficult to find that both schemes are constantly changing the width of the element. Once the width of the element is changed, it will inevitably lead to rearrangement and redrawing, not to mention ultra frequent changes!
Solution: enable GPU acceleration, avoid rearrangement and redrawing, and promote the progress bar to a single layer, that is, it will not affect other elements
Let's optimize the second scheme separately ~ we only need to change its css content (mark it as the change)
@keyframes play {     /* Enable GPU acceleration through transform and skip the rearrangement and redraw phase */
    0% {
        transform: translateX(-50%) scaleX(0);  /* Replace width with scaleX */
    }

    to {
        transform: translateX(0) scaleX(1);
    }
}

@keyframes replay {
    0% {
        transform: translateX(-50%) scaleX(0);
    }

    to {
        transform: translateX(0) scaleX(1);
    }
}

.container {
    height: 10px;
    border-radius: 5px;
    border: 1px solid black;
}

.progress {
    height: 100%;
    width: 100%;   /* The initial width is 100% because we want to scale it */
    background-color: red;
    will-change: transform;   /* Tell the browser to prepare for optimization in advance through will change */
    animation-timing-function: linear;
}

.progress.play {
    animation-play-state: running;
}

.progress.pause {
    animation-play-state: paused;
}
Here is a brief explanation of the numerical settings of translateX and scaleX. Set the progress bar width: 100%. We can scale it by half through scaleX(0.5). We can find that the progress bar is half the length of the container and centered. At this time, we need to translate it to the leftmost end through translateX(-25%). Why - 25%? Because the progress bar accounts for half of the container and is centered, it indicates that the left and right margins are exactly (100% - 50%) / 2 = 25%, so it is not difficult to know that when the initial state is scaleX(0), the value of translateX is - (100% - 0%) / 2 = - 50%
After doing so, let's check with performance again
It is obvious that the number of page rearrangement and redrawing has been greatly reduced, and the rest are basically the most basic page rearrangement and redrawing.
Someone wants to say that I'm the title party. Next, I'll show you how much performance has been optimized
First, run performance with the one just optimized
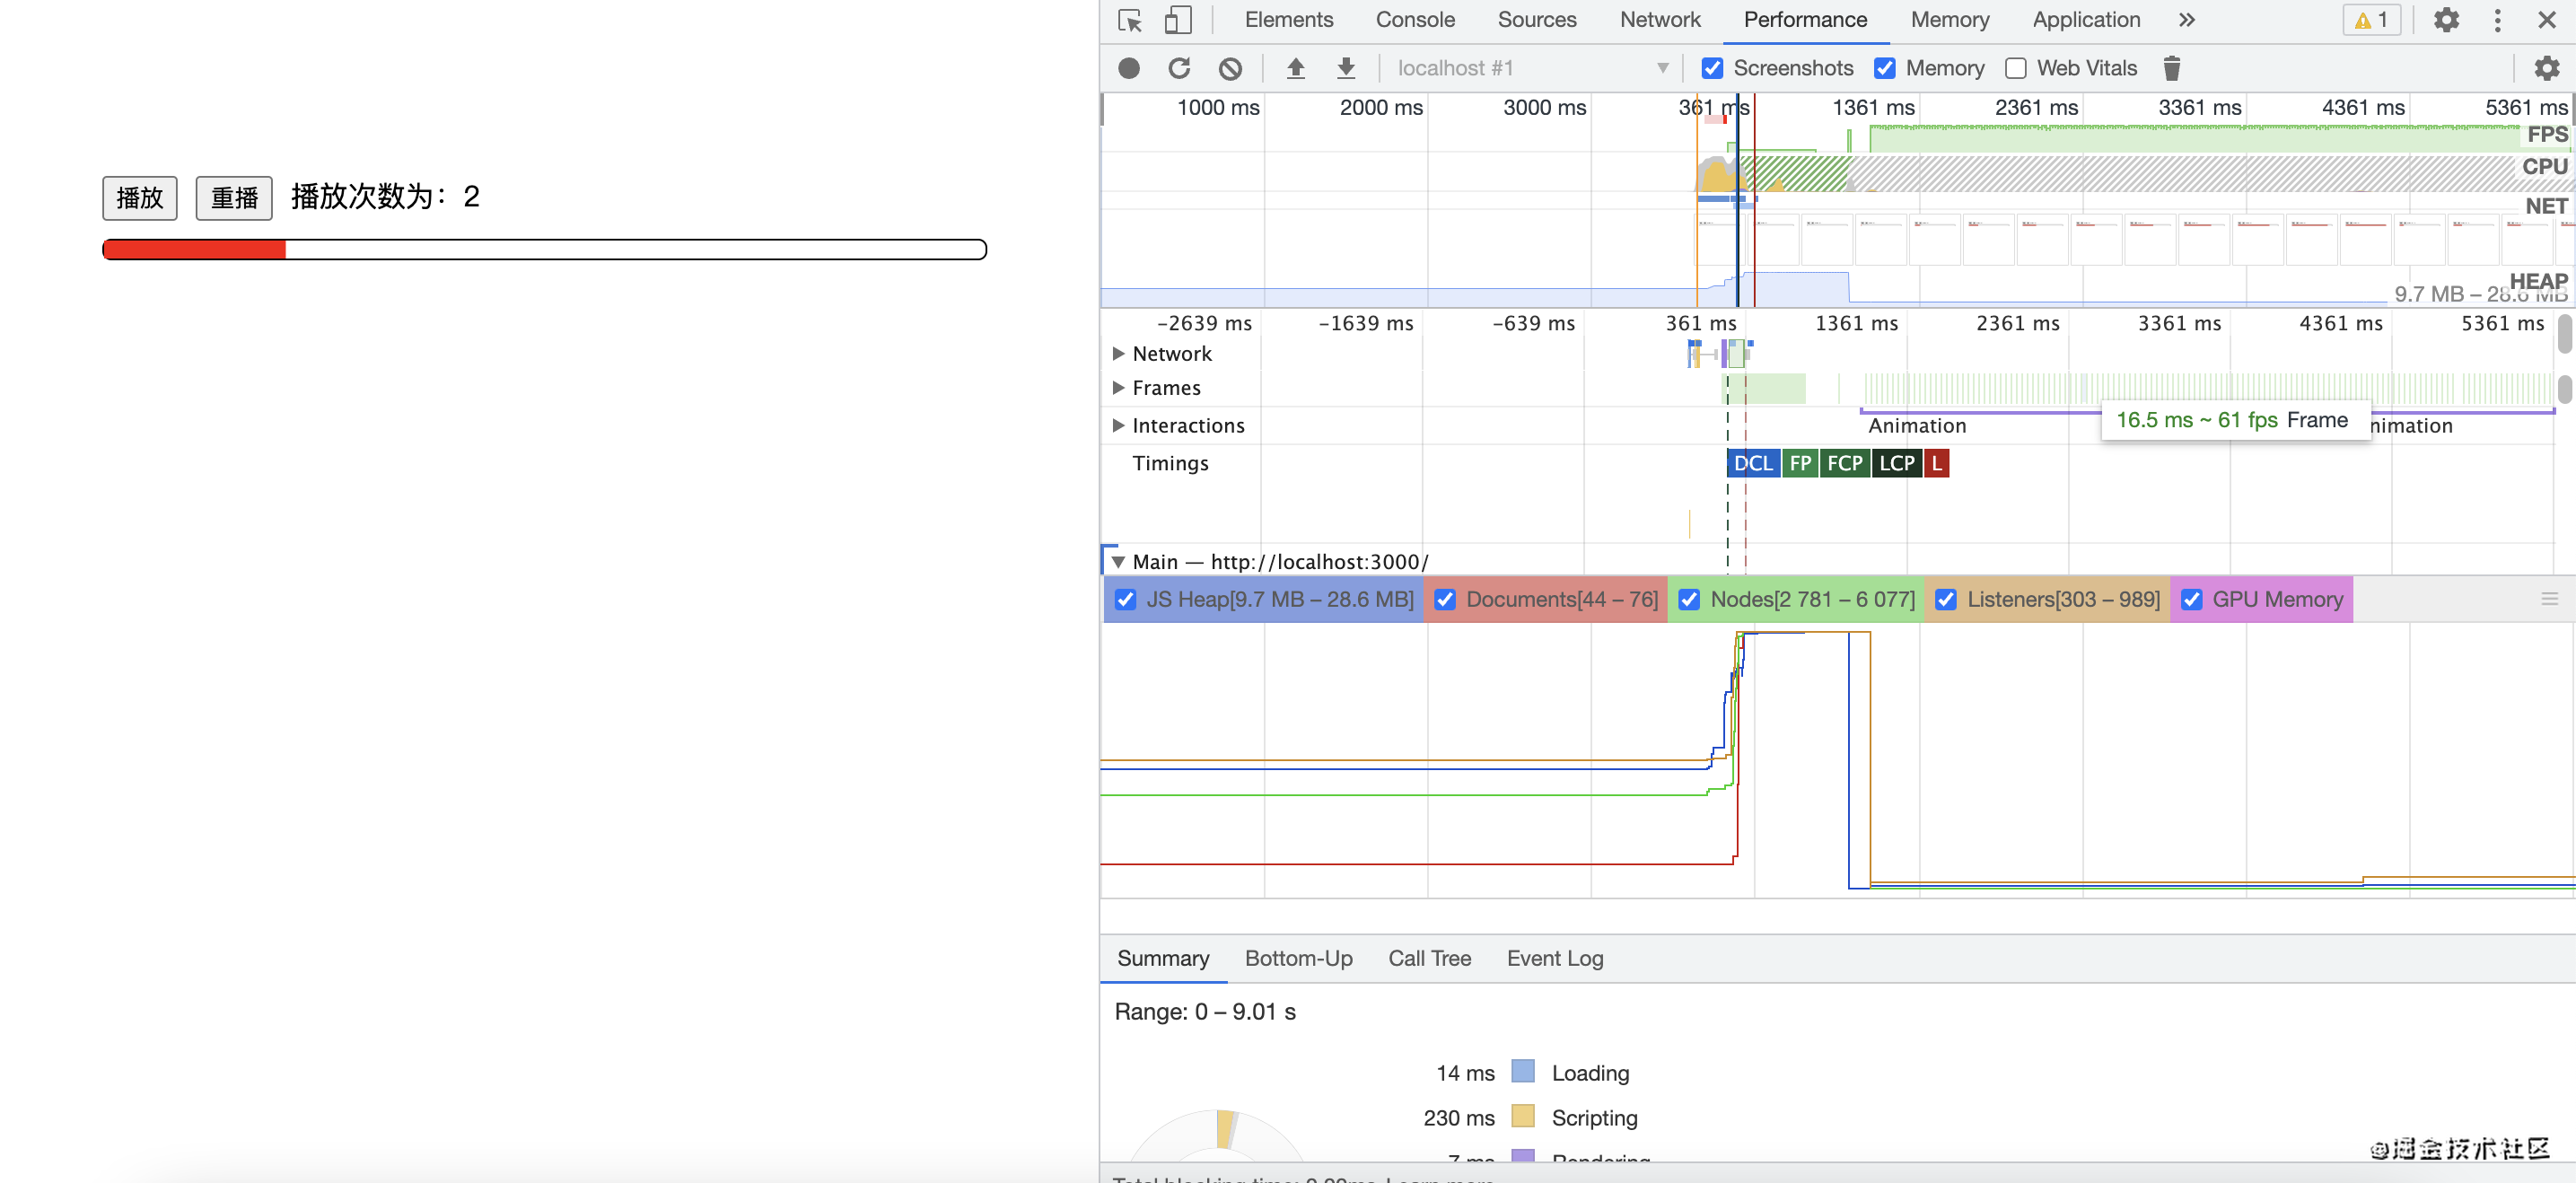
On the right side of the figure, FPS is basically stable between 55 and 70
Let's take a look at the performance score of the first scheme at the beginning of the article
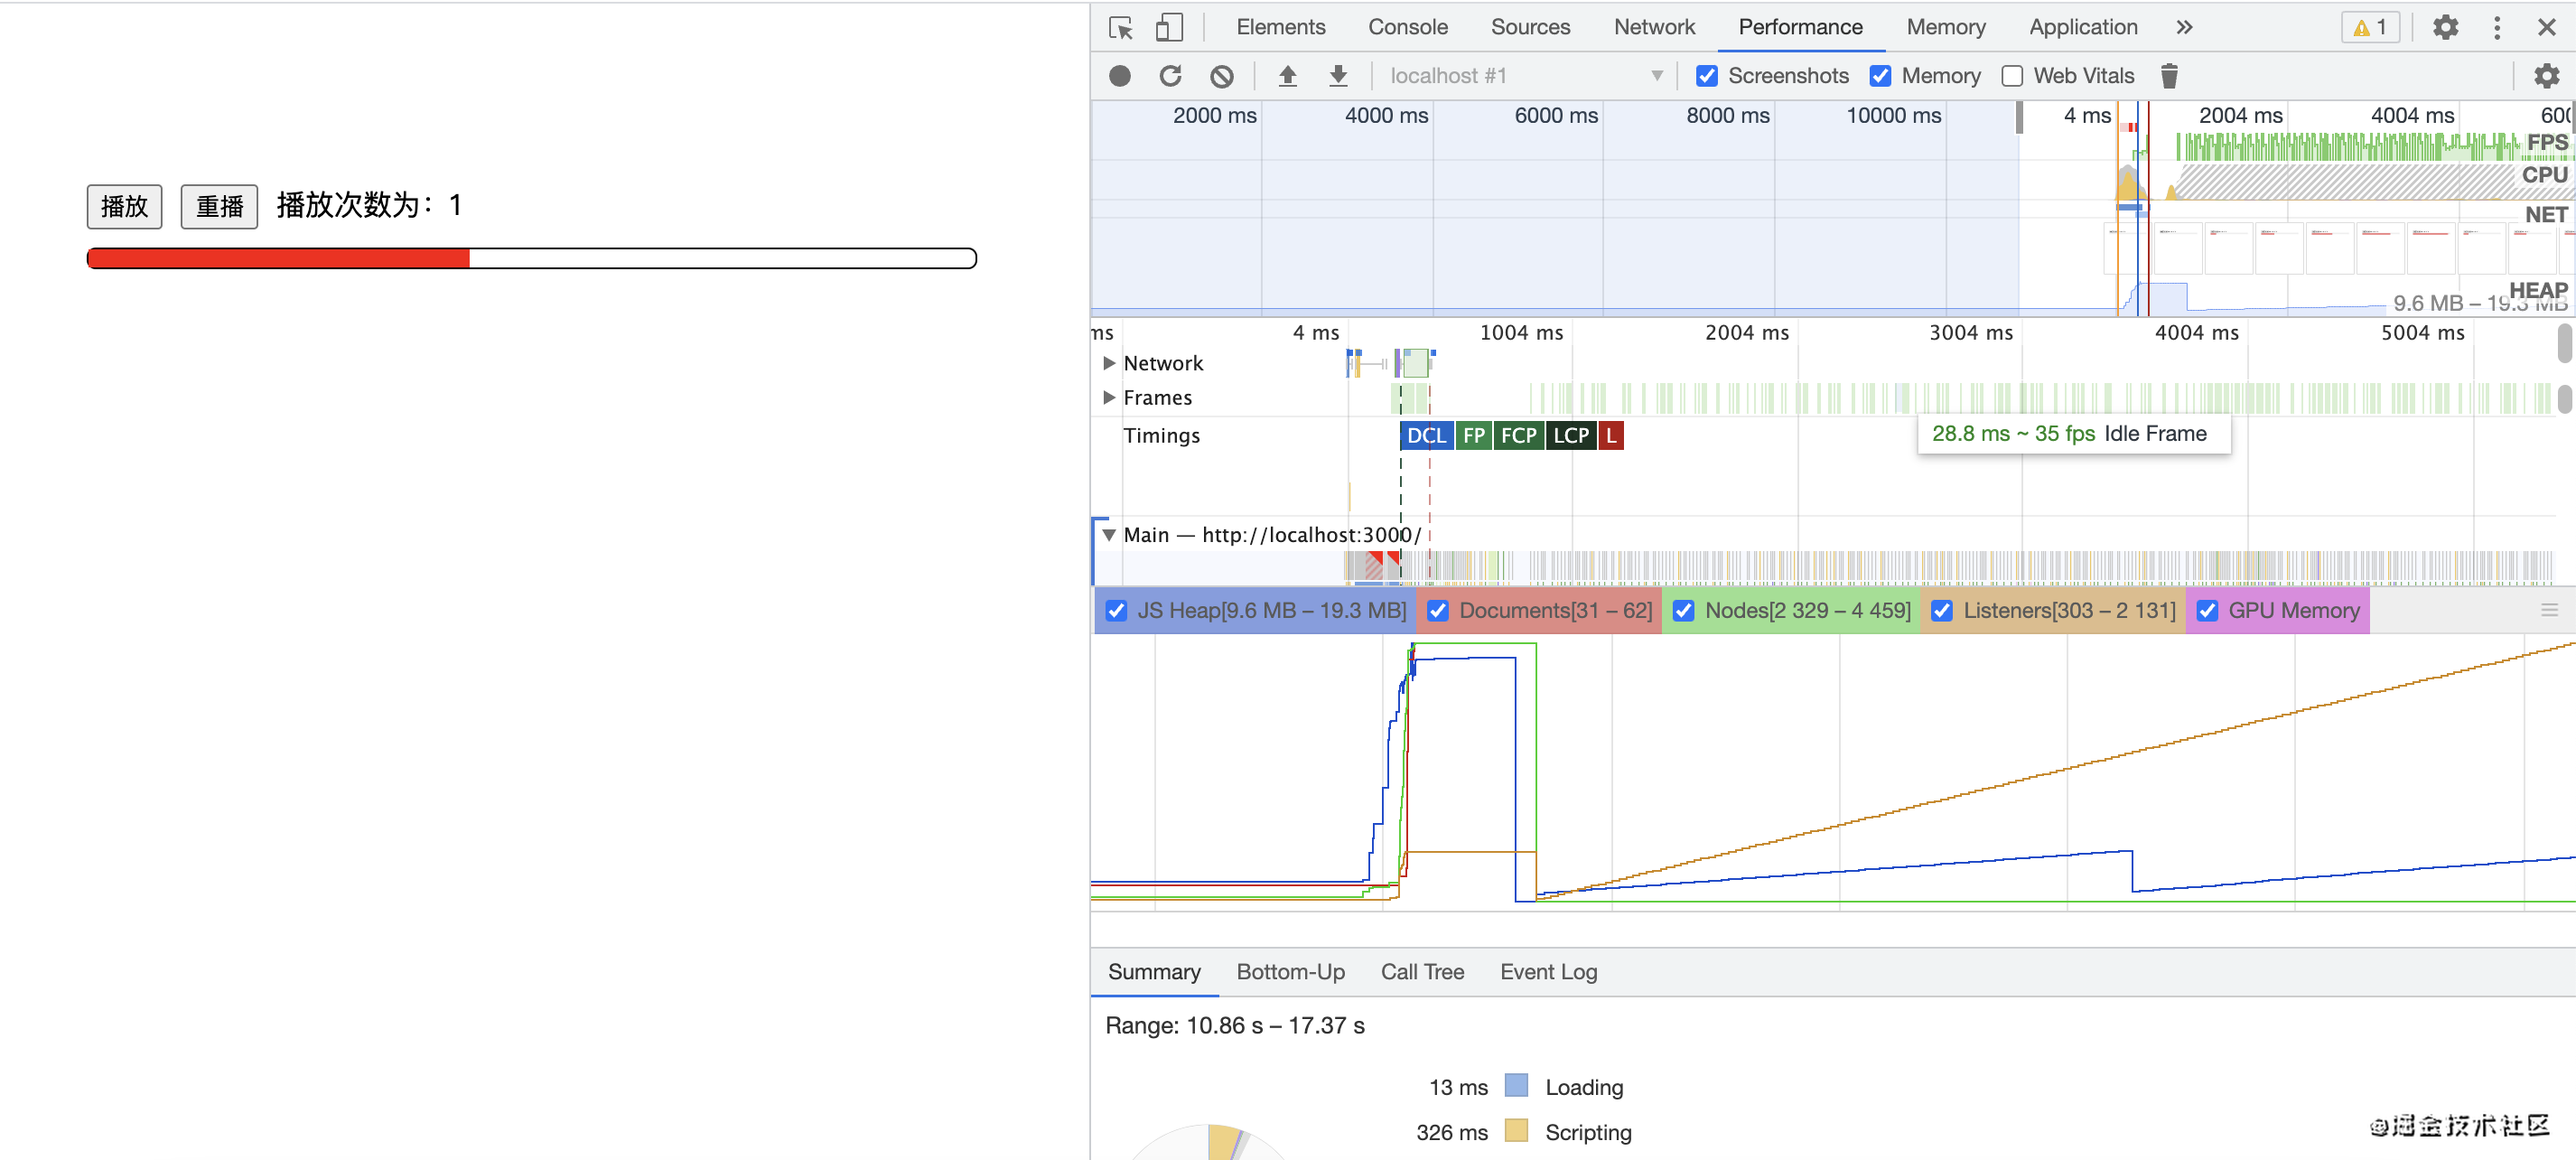
On the right side of the figure, FPS is basically stable between 32 and 50
It can be clearly seen that the FPS fluctuation before optimization is very serious, that is, it is not stable enough, so it is easy to get stuck; The change of the optimized FPS is small, and the overall change trend is relatively flat, almost a straight line
In such a minimalist page, our optimized performance is improved by about 40% - 54%
Then, in a normal project, considering the complexity of the page, our optimized scheme not only avoids the repeated calculation and rendering of the page, but also avoids the backflow of redrawing. It can be imagined that in that case, the performance improvement should be far more than 40% - 54%, emmmmmm mm, so I say that the performance improvement of 70% should not be too much HHH
Small colored egg
Enabling GPU acceleration will promote elements to a separate layer, which can be viewed through chrome devtools layers
Here we show the page layering before and after optimization
"Before optimization"
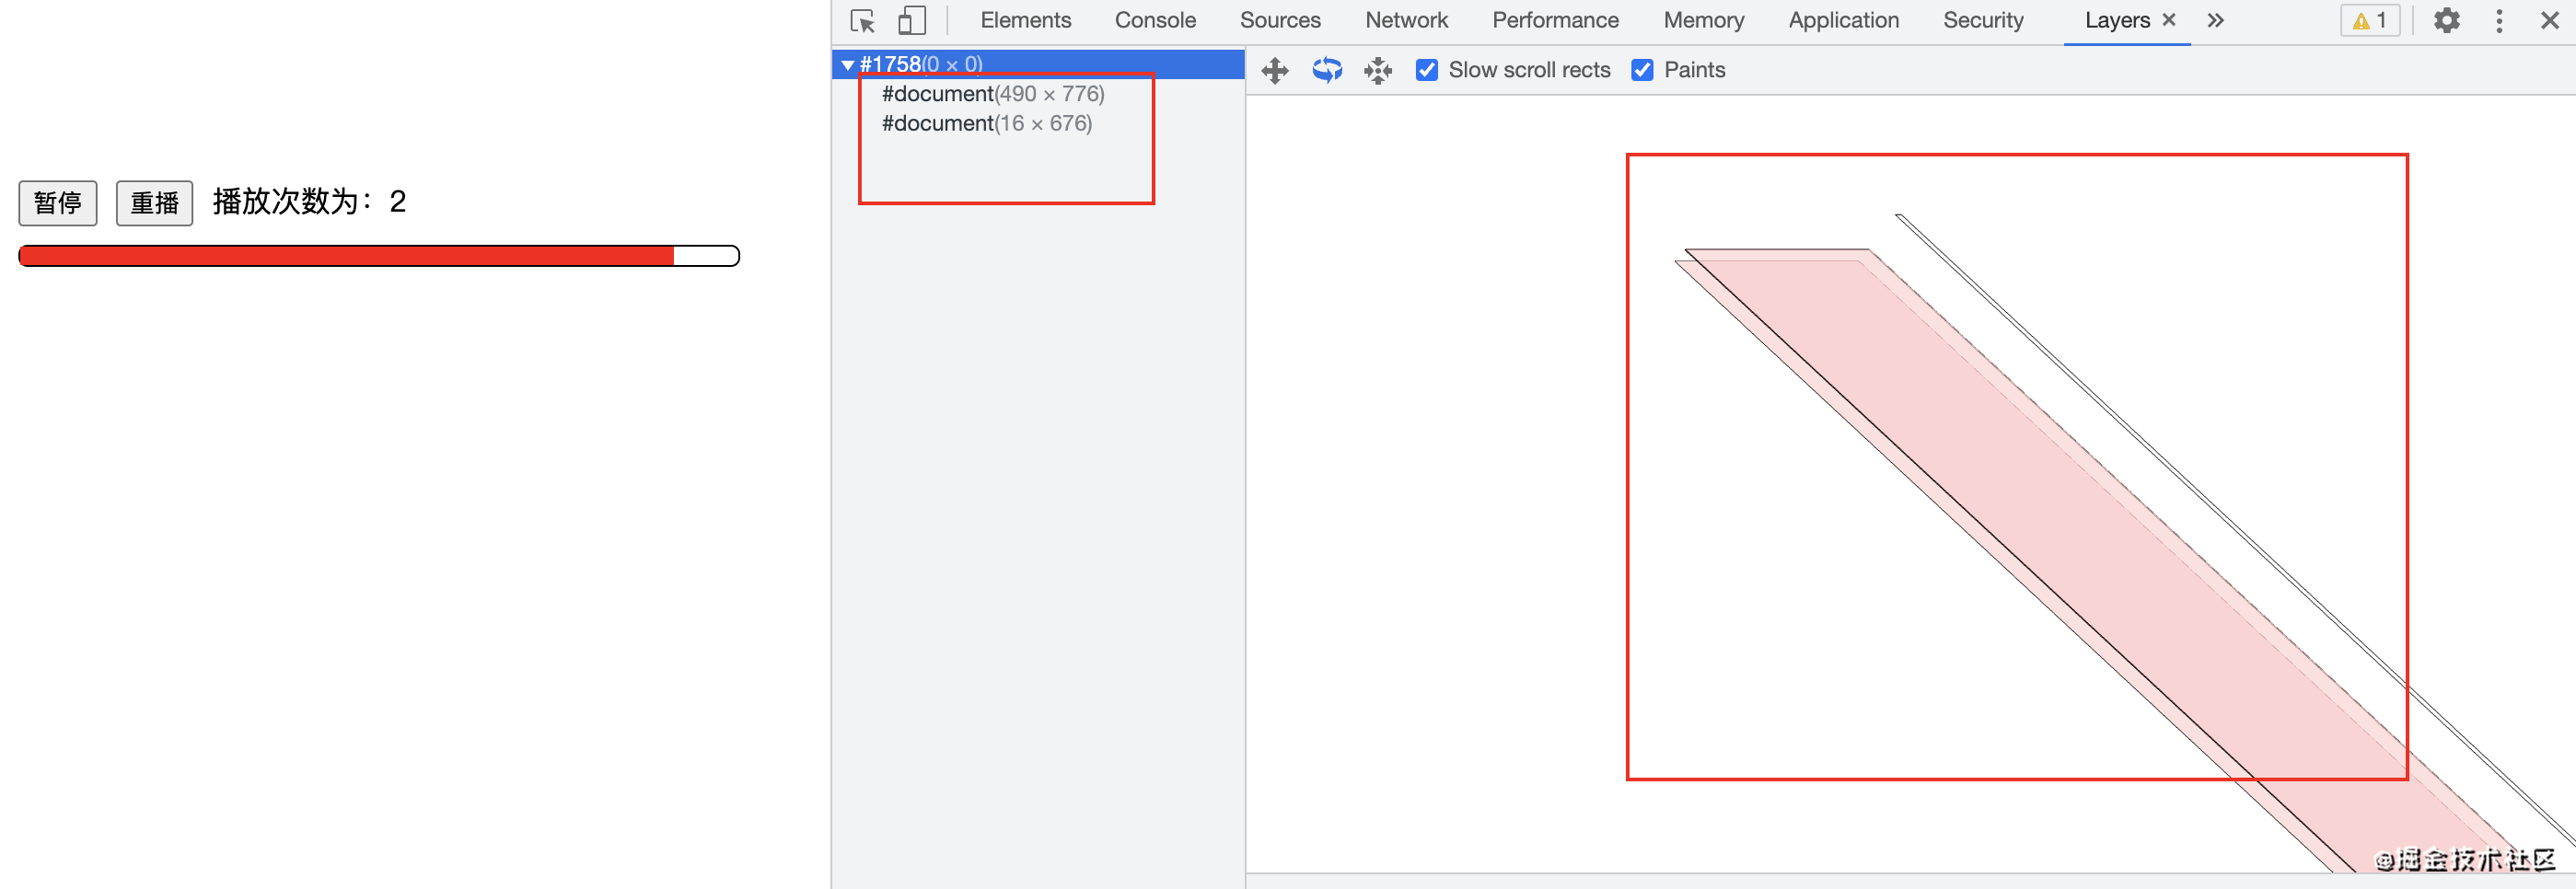
Obviously, the whole page has only the document layer, that is, the progress bar is not layered
"After optimization"
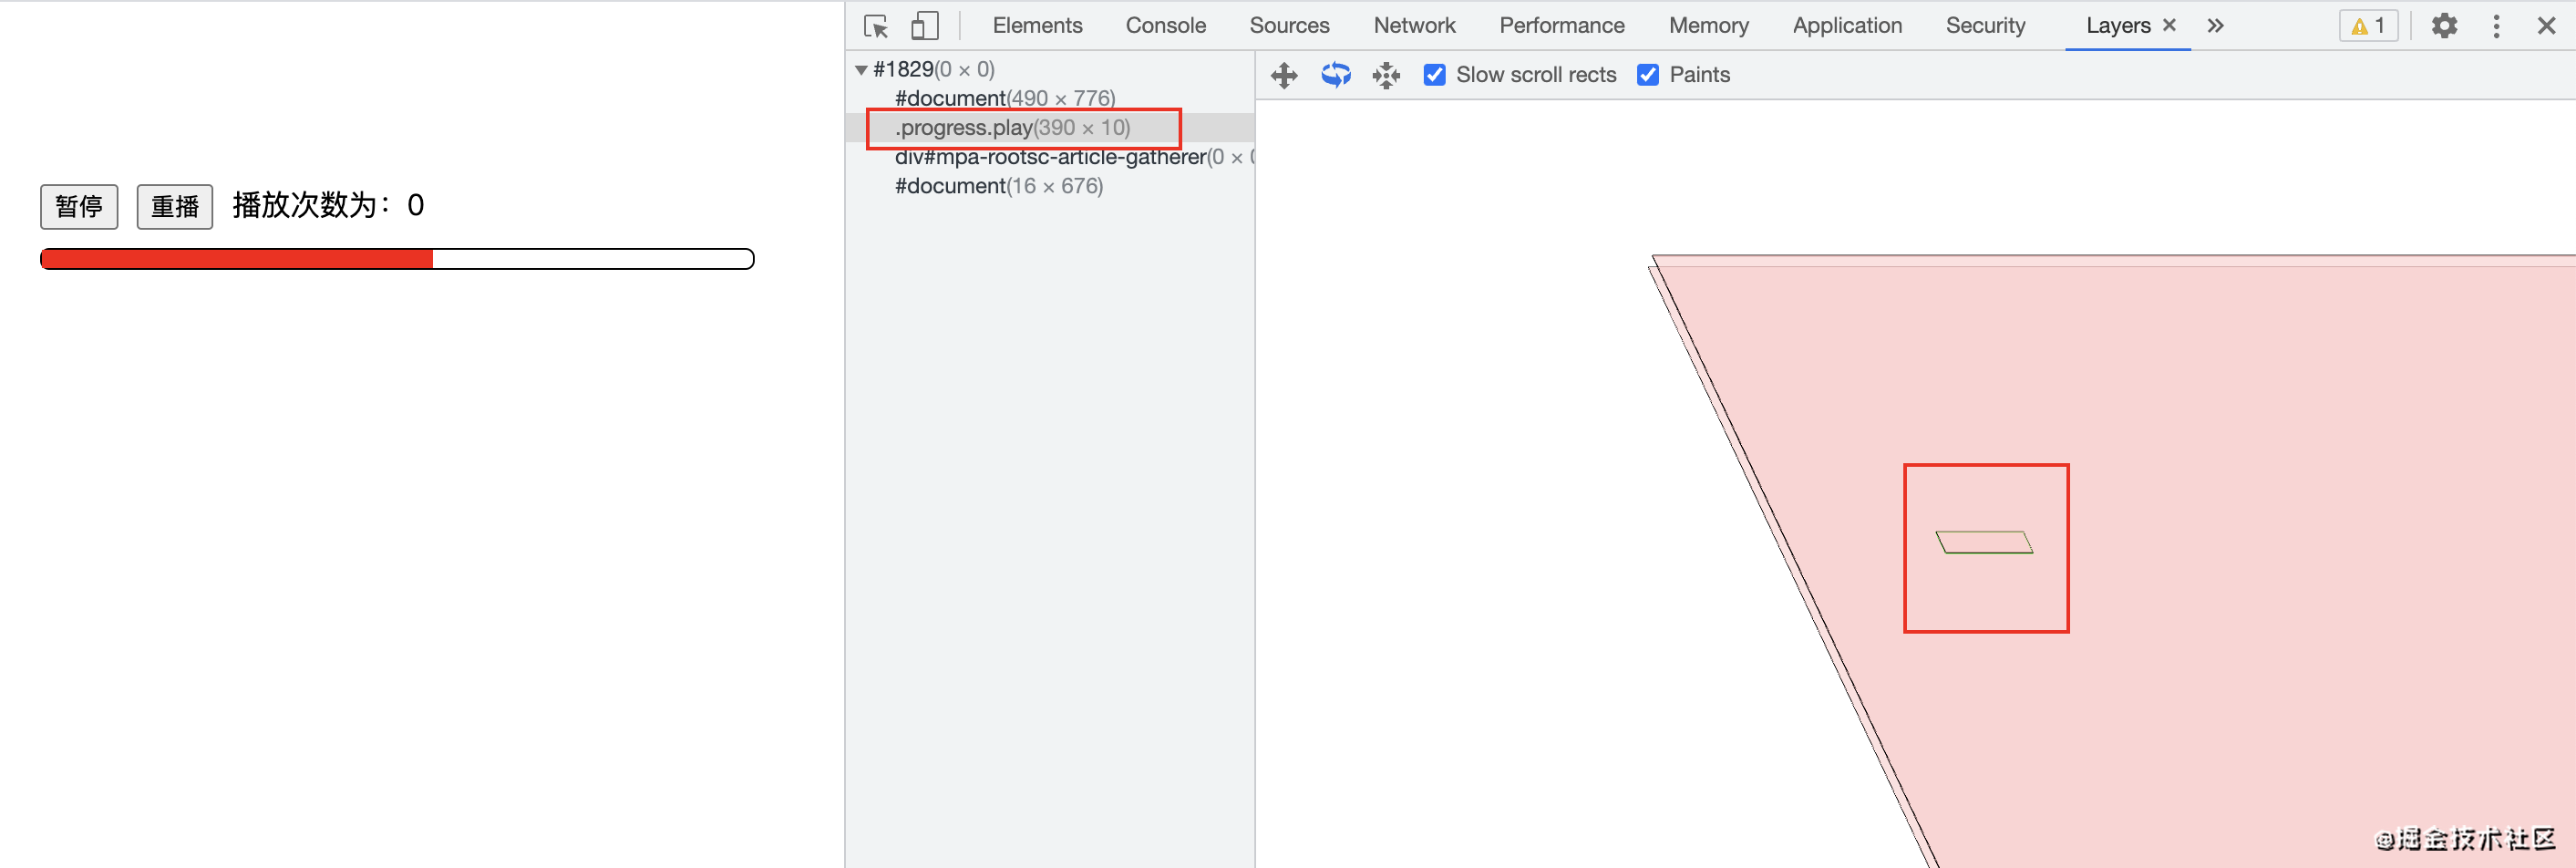
It is also obvious that the progress bar is separated into a single layer
ending
I'm zero one. If my article is helpful to you, please like it??? Support me