Idea—Tomcat
- preparation in advance
- Install the applicable JDK version of Tomcat
- In the doc window, test Tomcat to ensure that it can be executed normally.
- Step 1: New Project (I'm used to creating an Empty Project first, and then creating a Module under the Empty Project. This is not necessary, but a habit. You can directly create a non Empty Project). This Empty Project is named javaweb (it's not necessary. It's just a name. Generally, the name of the New Project should be the same as the name of the directory.)
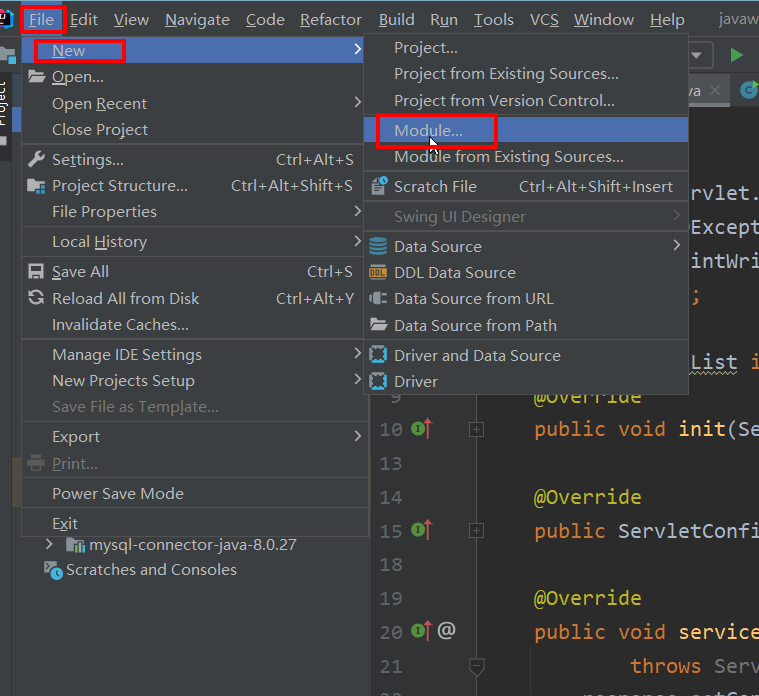
- Step 2: create a new module (file -- > New -- > module...)
- What is newly created here is a common Java se module
- The Module is automatically placed under the Java Web project.
- The Module is named servlet02
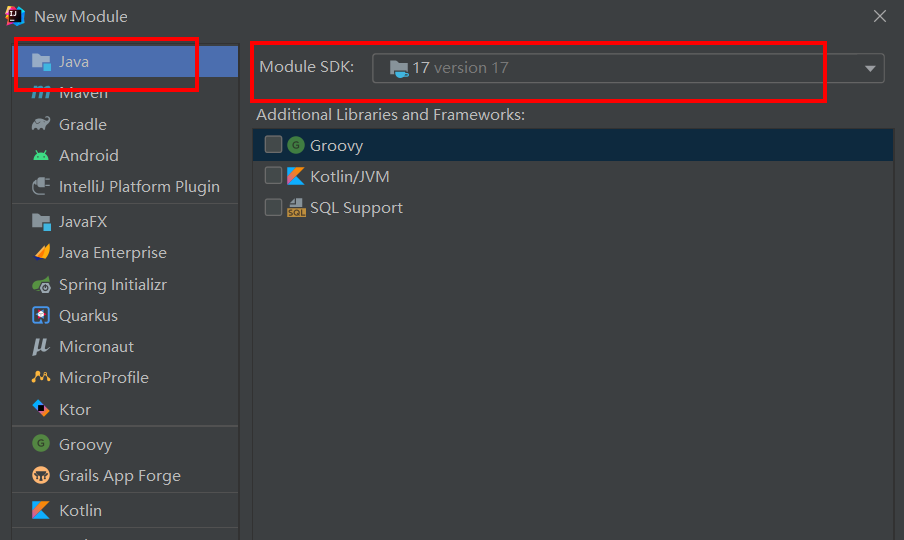 Click next to enter module naming
 Then click finish.
-
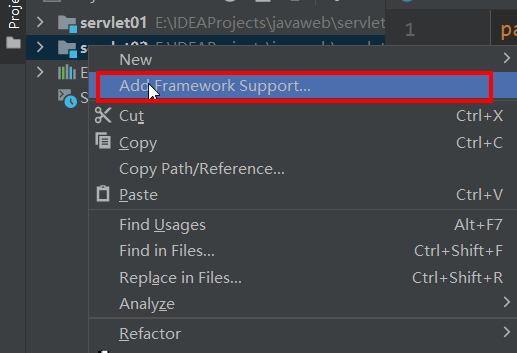
Step 3: turn the Module into a Java EE Module (turn the Module into a webapp Module. Comply with webapp specification. Comply with Servlet specification)
- Right click on the Module: Add Framework Support
- In the pop-up window, select Web Application (webapp support is selected)
- After selecting the webapp support, IDEA will automatically generate a webpp directory structure that conforms to the Servlet specification.
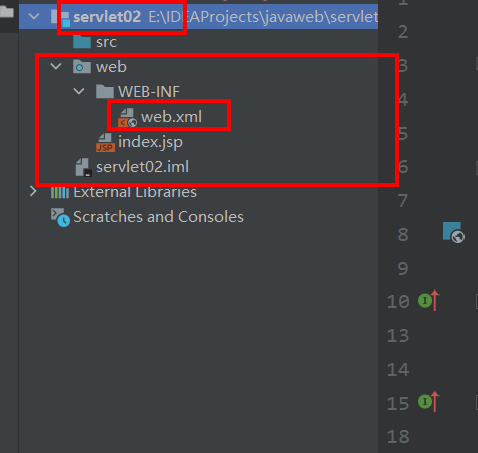
- Key points: in the IDEA tool, there is a web directory in the directory generated according to the Web Application template, which represents the root of webapp
 Click OK. At this time, open the module servlet02 and you will find a web folder.
-
Here is an explanation of the servlet structure
- Java EE has 13 different specifications. The two core specifications of servlet and JSP in web server Java EE. As for why you need to implement the servlet specification, please refer to the previous article: Implementation principle of analog Servlet
- The web folder generated above is the embodiment of the specification.
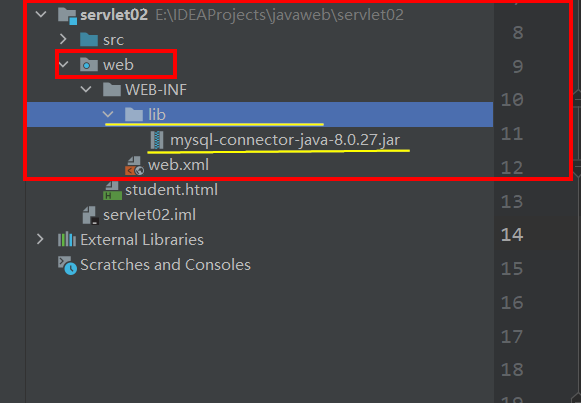
- A legal webapp directory structure: WEB-INF
 		 |------WEB-INF
         		  |------classes(Store bytecode, the programmer writes the program, and the bytecode file generated by the program is stored)
         		  |------lib(Third party jar Package, connection JDBC When needed mysql connect java of jar,Here is jar Storage of bags)
         		  |------web.xml(register Servlet,User provided URL When accessing the program, ensure the user's URL And backend java The one-to-one mapping relationship of the program is stored here)
         |------html (Page code)
         |------css
         |------javascript
         |------image
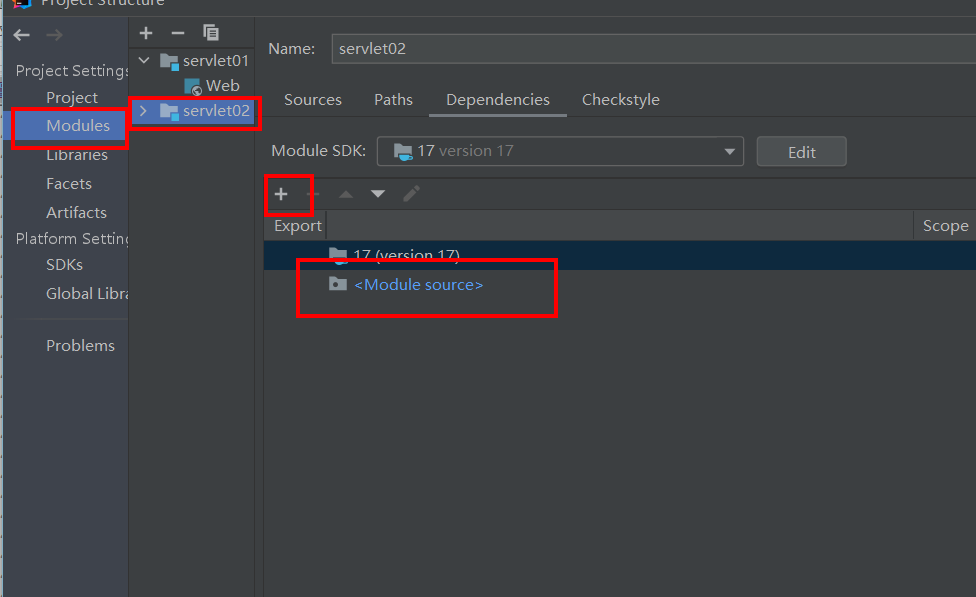
- Step 5: import the jar package of the Servlet
- According to the servlet principle, the XXXservlet class written needs to implement the servlet interface. At this time, if the jar package corresponding to the servlet is not imported, it is found that the Servlet.class file is not found.
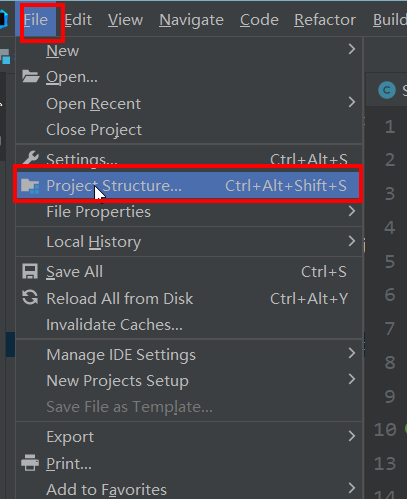
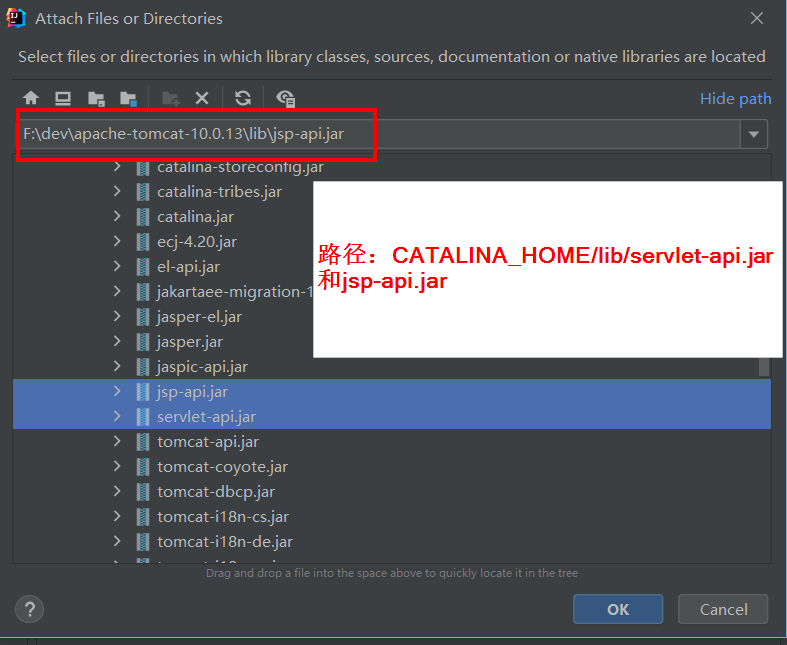
- Solution: File -- > Project structrue -- > modules -- > + plus sign -- > Add jars... -- > Catalina_ Home / lib / servlet-api.jar and jsp-api.jar are added to the dependency
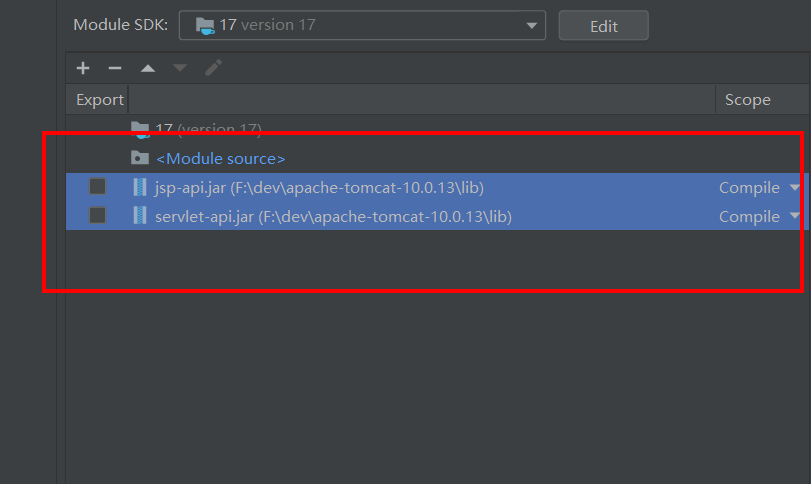 Click Apply.
- Step 6: write business code in the service method in the Servlet
- Create a StudentServlet class under the servletTest package of src to inherit the Servlet. The code is later
- StudentServlet is equivalent to a web applet that users need to access.
- Create a StudentServlet class under the servletTest package of src to inherit the Servlet. The code is later
- Step 7: complete the registration of StudentServlet class in the web.xml file. (the request path corresponds to the Servlet)
<?xml version="1.0" encoding="UTF-8"?>
<web-app xmlns="https://jakarta.ee/xml/ns/jakartaee"
         xmlns:xsi="http://www.w3.org/2001/XMLSchema-instance"
         xsi:schemaLocation="https://jakarta.ee/xml/ns/jakartaee https://jakarta.ee/xml/ns/jakartaee/web-app_5_0.xsd"
         version="5.0">
    <servlet>
        <servlet-name>MyFirstServlet</servlet-name>
        <!--This location must be a fully qualified class name with a package name-->
        <servlet-class>servletTest.StudentServlet</servlet-class>
    </servlet>
    <!--servlet Mapping information-->
    <servlet-mapping>
        <!--This is also casual, but the content here should be the same as that above.-->
        <servlet-name>MyFirstServlet</servlet-name>
        <!--You need a path here-->
        <!--The only requirement for this path is that it must be / start-->
        <!--The current path can be written freely,yes url Part of the request path for-->
        <url-pattern>/servlet/student</url-pattern>
    </servlet-mapping>
</web-app>
- Step 8: give an HTML page and write a hyperlink in the HTML page. The user clicks the hyperlink and sends a request. Tomcat executes the background StudentServlet.
- student.html
- This file cannot be placed inside the WEB-INF directory, but outside the WEB-INF directory—— Same as the above template conforming to the specification
- Note the correspondence between < URL pattern > / servlet / student < / url pattern > in web.xml and < a href = "/ Web / servlet / student" > student page < / a > in html. There is one more root in html. Step 9: you can set the root
- Contents of student.html file
<!DOCTYPE html>
<html lang="en">
<head>
    <meta charset="UTF-8">
    <title>Student  Page</title>
</head>
<body>
    <!--The project name here is /test ,Unable to get dynamically. Write to death first-->
    <a href="/test/servlet/student">student page</a>

</body>
</html>
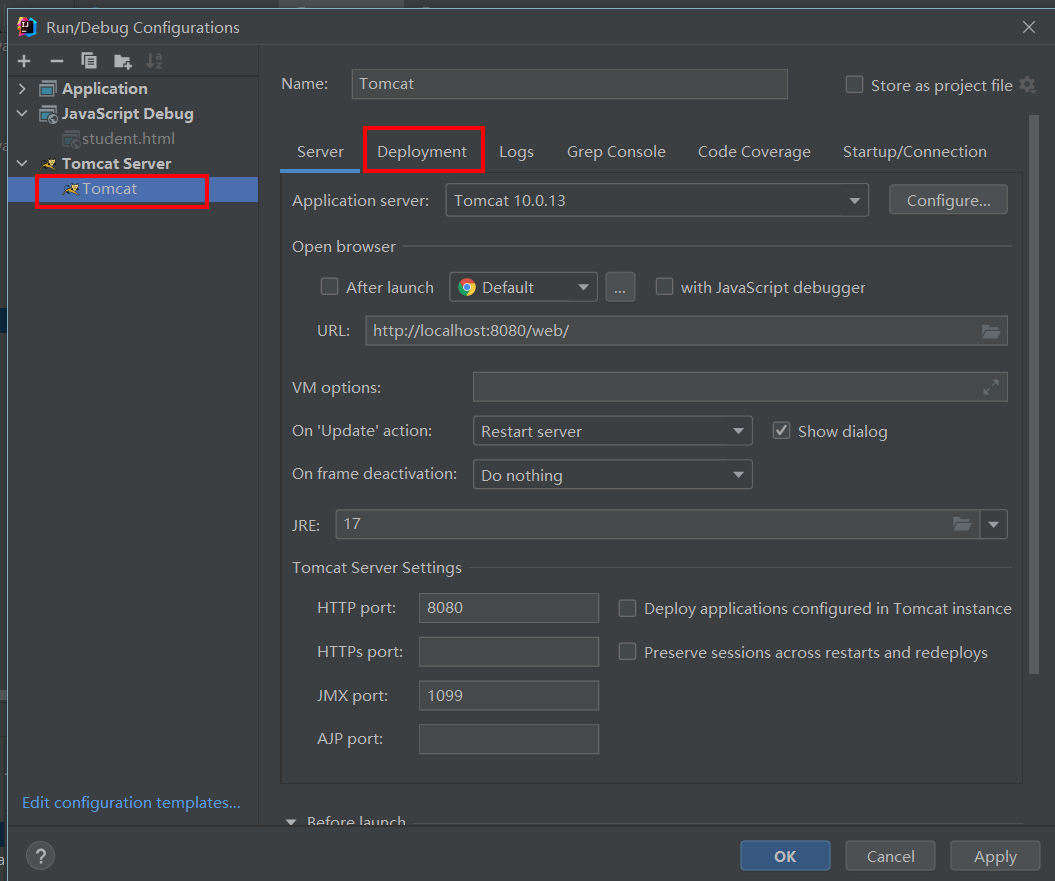
- Step 9: let the IDEA tool associate the Tomcat server. In the process of association, webapp is deployed to Tomcat server.
- In the upper right corner of the IDEA tool, there is an Add Configuration on the right of the small green hammer
- The plus sign in the upper left corner, click Tomcat server -- > local
- Set the parameters of the Server in the pop-up interface (basically do not move)
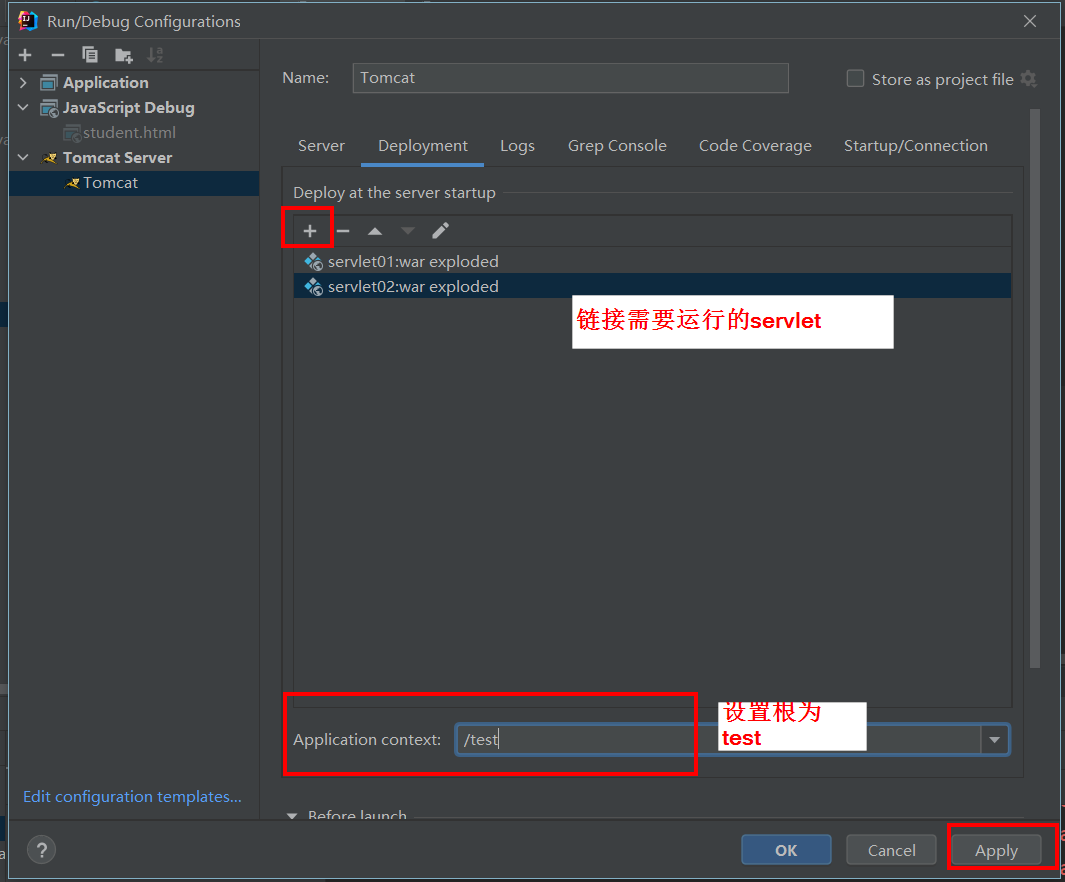
- There is a Deployment in the current window (click this to deploy webapp). Continue to click the plus sign to deploy.
- Modify the Application context to: / test - this is the root of the setting and can be set to other. If it is set to other, the < a href = "/ Web / servlet / student" > student page < / a > in html also needs to be changed.
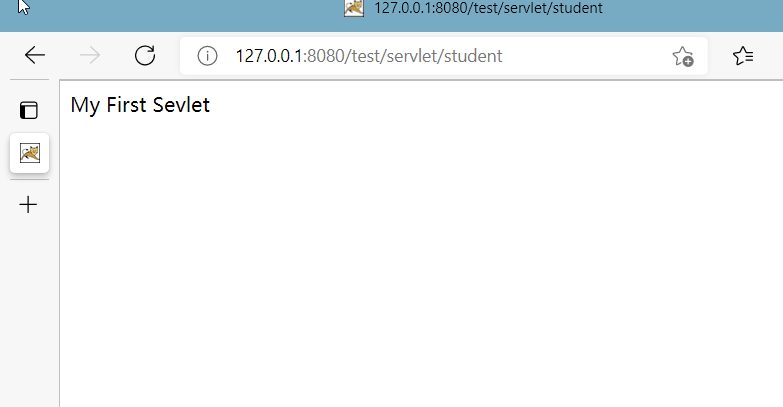
- Step 10: start Tomcat server
- There is a green arrow or a green bug in the upper right corner. Click the green bug to start the Tomcat server in the debug mode.
- In our development, it is recommended to use the debug mode to start Tomcat
- -Step 12: open the browser and enter in the browser address bar: http://localhost:8080/test/student.html
package servletTest;

import jakarta.servlet.*;
import java.io.IOException;
import java.io.PrintWriter;

public class StudentServlet implements Servlet
{
        @Override
        public void init(ServletConfig servletConfig) throws ServletException {

        }

        @Override
        public ServletConfig getServletConfig() {
            return null;
        }

        @Override
        public void service(ServletRequest request, ServletResponse response)
                throws ServletException, IOException {

            //Output to console
            System.out.println("My First Sevlet!");
            /**
             * Set the content type of response: normal text, html
             * This enables html to be output within the method
             * And this setting needs to be set before obtaining the stream
             */
            response.setContentType("text/html");

            /**
             * Output information to browser
             *  response using ServletResponse interface
             *  response : Response, sending data from the server to the browser is called response
             */
            PrintWriter out =response.getWriter();
            out.println("My First Sevlet");
            /**
             * If the browser can recognize HTML code, can you write HTML code directly in the service method?
             */

        }

        @Override
        public String getServletInfo() {
            return null;
        }

        @Override
        public void destroy() {

        }
}
Link JDBC
- A legal webapp directory structure: WEB-INF
 		 |------WEB-INF
         		  |------classes(Store bytecode, the programmer writes the program, and the bytecode file generated by the program is stored)
         		  |------lib(Third party jar Package, connection JDBC When needed mysql connect java of jar,Here is jar Storage of bags)
         		  |------web.xml(register Servlet,User provided URL When accessing the program, ensure the user's URL And backend java The one-to-one mapping relationship of the program is stored here)
         |------html (Page code)
         |------css
         |------javascript
         |------image
- It can be seen that you only need to create a lib folder under the WEB-INF folder and import the JDBC jar package.