This article is about how Anaconda configures the tensorflow GPU environment. It will be through the command line and anaconda. Readers can choose by themselves. let's go!
The contents of chapters 1 and 2 in the following table of contents are the same, but the methods are different. Choose one of them.
1, Creating tensorflow virtual environment in anaconda
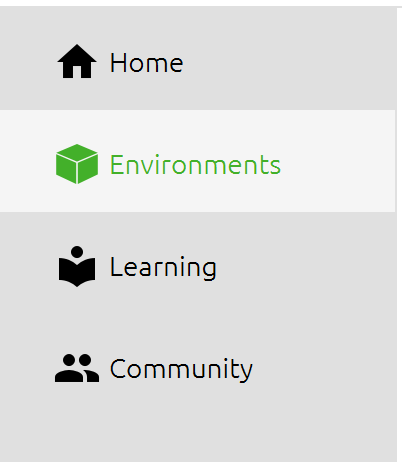
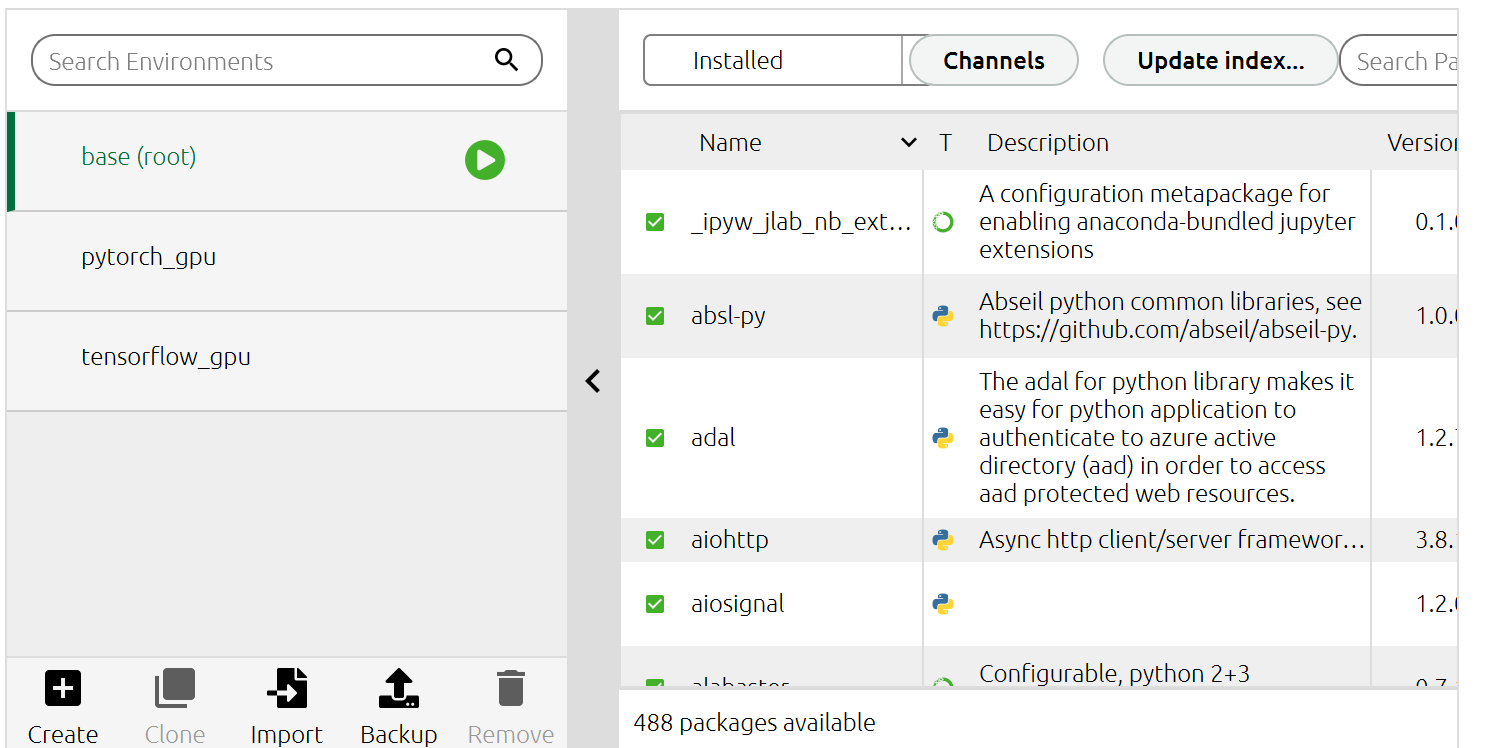
1. Create environment: open anaconda, select environments on the left, and click create at the bottom left of the page (see the figure below)
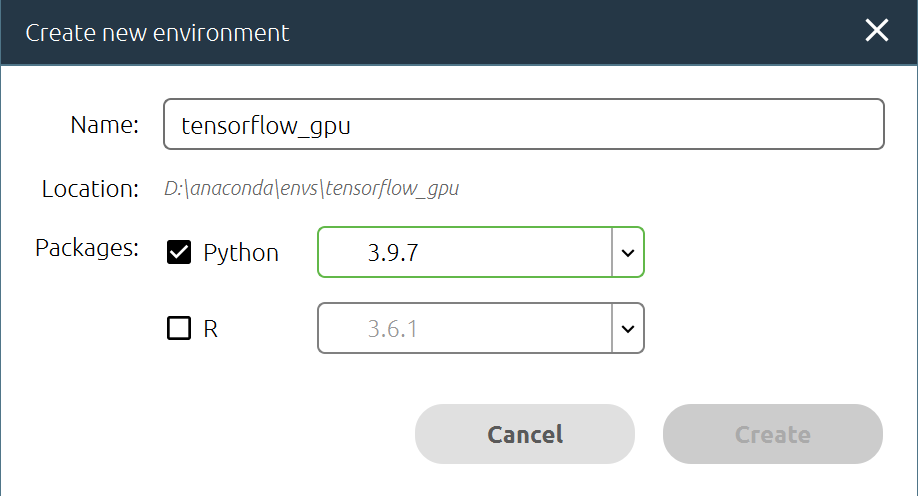
2. On the creation page: enter name: tensorflow_ GPU (it can be made by yourself, but it must be understood by yourself), choose the python version, and select and determine it according to the needs.
Success will be displayed as shown in the figure below

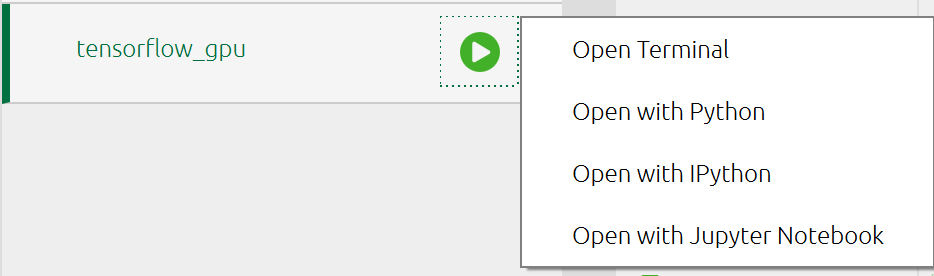
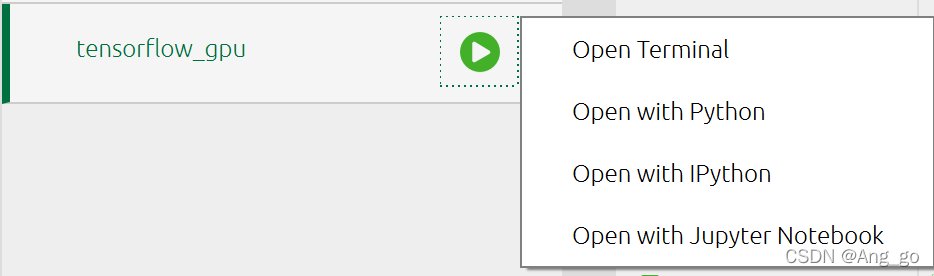
3. Install relevant python third-party libraries: Click tensorflow_gpu (green triangle key in the figure below), select open terminal
Command line input:
`pip install numpy matplotlib Pillow scikit-learn pandas -i https://pypi.tuna.tsinghua.edu.cn/simple`

Success Icon:

4. Install tensorflow and tensorflow GPU: the same as the command line window installation in step 3
Install tensorflow:
(please choose whether to install the latest version by default or the specified version by yourself)
Latest version (default):
pip install tensorflow -i https://pypi.tuna.tsinghua.edu.cn/simple
Specify version:
pip install tensorflow==2.3.0 -i https://pypi.tuna.tsinghua.edu.cn/simple

Install tensorflow GPU:
Latest version (default):
pip install tensorflow-gpu -i https://pypi.tuna.tsinghua.edu.cn/simple
Specify version:
pip install tensorflow-gpu==2.3.0 -i https://pypi.tuna.tsinghua.edu.cn/simple
At this point, the environment configuration is completed!
5. Test tensorflow_ Whether the GPU environment is installed successfully: after the configuration is completed, determine the configuration through the following tests.
First, check tensorflow, tensorflow_ Whether the GPU installation is successful is still the above command line input
pip list
Query the library. If you can find tensorflow,tensorflow_gpu is success.
Secondly, check whether the tensorflow GPU environment is successful. In the same position as the third step above, (the figure below) click Open with Python
Run the following statements to observe whether an error is reported. Failure to report an error is success.
import tensorflow as tf
So far, we have only completed the configuration of the environment, but we still haven't used the gpu in the computer to work.
6. Install CUDA: the blogger's previous article has a detailed introduction, and the link is here https://blog.csdn.net/Ang_go/article/details/122329715
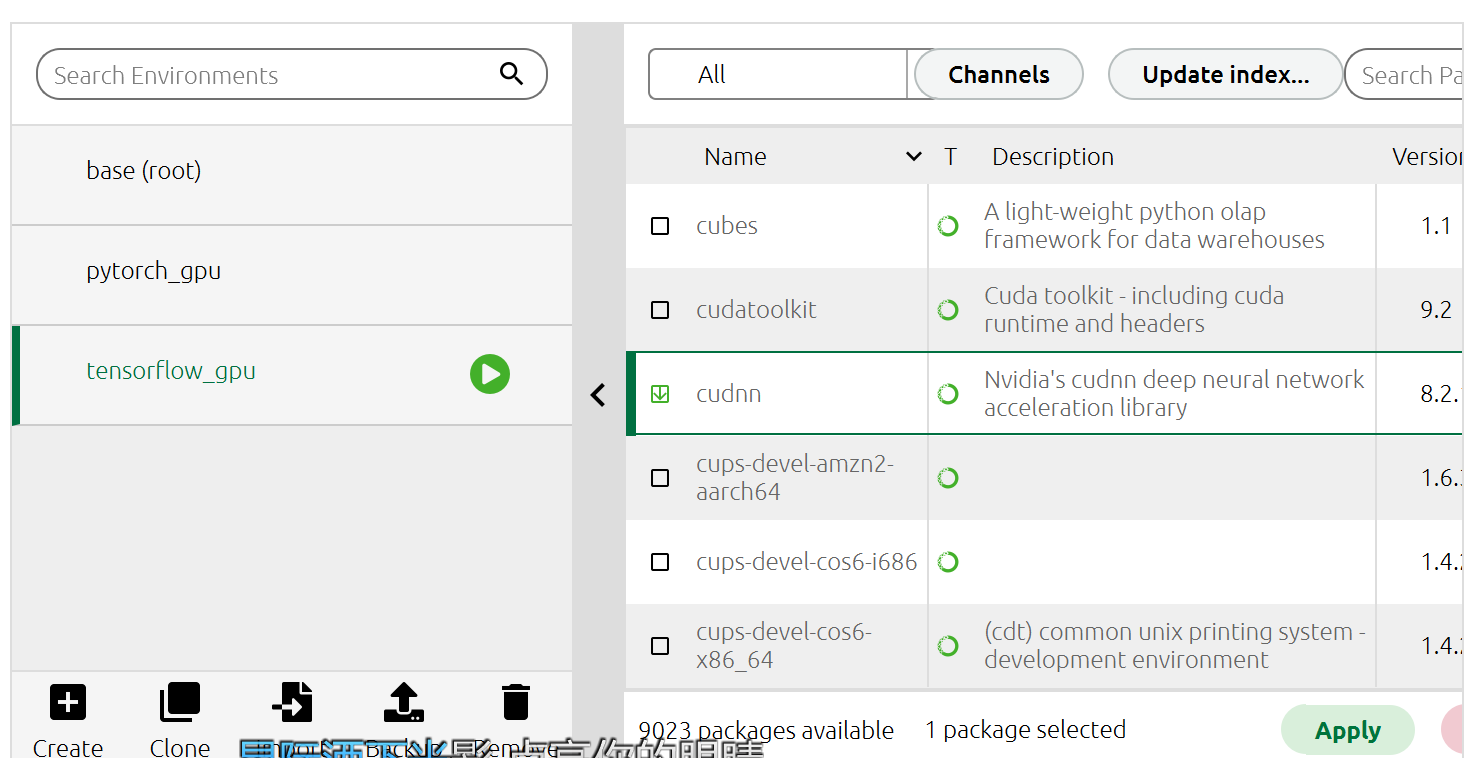
**7. Install cudnn: * * click tensorflow_gpu environment, select all from the drop-down bar on the upper right, find cudnn and CUDA toolkit, and click apply
At this point, the configuration is complete
8. Used in jupyter:
Input in open terminal
python -m ipykernel install --user --name=tensorflow_gpu #After the equal sign is the name of the environment. Fill in your own settings
Download jupyter notebook in anaconda
It is also recommended to create environment shortcuts on the desktop / start menu
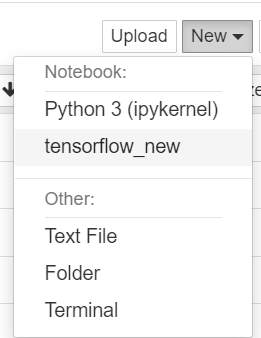
**9. Test: * * open jupyter, create a new notebook,
new->tensorflow_ GPU (environment name) (Note: the picture and text here are inconsistent with mine. Please don't mix it up. It's the one you set yourself)
Enter the following code:
import tensorflow as tf
import numpy as np
import os
import matplotlib.pyplot as plt

print("TensorFlow version is :",tf.__version__)
print("Keras version is :",tf.keras.__version__)
print("GPU is","available" if tf.test.is_gpu_available()else "NOT AVAILABLE")
If GPU is available is displayed, it is successful!
2, Command line terminal (Anaconda Prompt) creates tensorflow virtual environment
1. Open Anaconda Prompt and create tensorflow_ GPU (environment name can be taken by yourself, please use the name set by yourself for the following related operations) environment, and enter it on the command line
conda create -n Environment name python=Version number
Example:
conda create -n tensorflow_gpu python=3.8
Until installation is complete

2. Enter tensorflow_gpu environment: importing
activate tensorflow_gpu
And install the following libraries (all related modules, and errors will be reported later if they are not installed):
conda install ipython
conda install jupyter
ipython kernelspec install-self --user
3. Install CUDA: the blogger's previous article has a detailed introduction, and the link is here https://blog.csdn.net/Ang_go/article/details/122329715
4. Installation cudnn: https://developer.nvidia.com/cudnn Download cudnn from the official website

Extract the cudnn installation package and copy the folder to C: \ program files \ NVIDIA GPU computing toolkit \ cuda \ v10 2 (cuda installation path)
5. Install tensorflow GPU:
Open Anaconda Prompt, enter the environment and install
activate tensorflow_gpu#Enter the environment, tensorflow_gpu is the environment name (set it yourself)
conda install tensorflow-gpu #Install tensorflow GPU
Installation is complete!
6. Used in jupyter:
Download jupyter notebook in anaconda
It is also recommended to create environment shortcuts on the desktop / start menu
**7. Test: * * open jupyter, create a new notebook,
new->tensorflow_ GPU (environment name) (Note: the picture and text here are inconsistent with mine. Please don't mix it up. It's the one you set yourself)
Enter the following code:
import tensorflow as tf
import numpy as np
import os
import matplotlib.pyplot as plt

print("TensorFlow version is :",tf.__version__)
print("Keras version is :",tf.keras.__version__)
print("GPU is","available" if tf.test.is_gpu_available()else "NOT AVAILABLE")
If GPU is available is displayed, it is successful!