Install MySQL 5 in Centos7 system 7(RPM)
In work, the actual production environment is generally not connected to the Internet, so MySQL is installed offline. Obviously, yum installation is not appropriate. Because Yum installation needs to be connected to the network, this article introduces the offline installation of MySQL
1. Uninstall Mariadb from Centos and MySQL previously installed
1.1 unload the Mariadb of the system
Why uninstall the built-in Mariadb
 because CentOS Your default database is no longer MySQL Yes, but MariaDB,If we do not uninstall, there will be conflicts during the installation process
MariaDB Database management system is MySQL A branch of, mainly maintained by the open source community
 One of the reasons for developing this branch is that Oracle acquired MySQL After that, there will be MySQL The potential risk of closed source, so the community adopts the branch method to avoid this risk.
MariaDB The aim is full compatibility MySQL,Make it easy to become MySQL A substitute for.
# Querying the built-in MariaDB QA can be understood as quary all listing all installation packages. grep represents search
rpm -qa | grep mariadb

# Uninstall the built-in Mariadb (vh displays the progress of uninstallation -- nodeps only uninstalls itself, not its related dependencies)
rpm -evh --nodeps mariadb-libs-5.5.64-1.el7.x86_64

# Check if Mariadb has been uninstalled
rpm -qa | greap mariadb

#The figure below shows that the unloading is clean

1.2 query and write in the old version of MySQL in the system
#Because I haven't installed mysql in centos before, if I have installed mysql before, I can use the following command to uninstall it
#Query mysql related installation packages
rpm -qa | grep mysql
#uninstall
rpm -e --nodeps file name
2. Download MySQL installation package
2.1 download address
https://www.mysql.com/downloads/
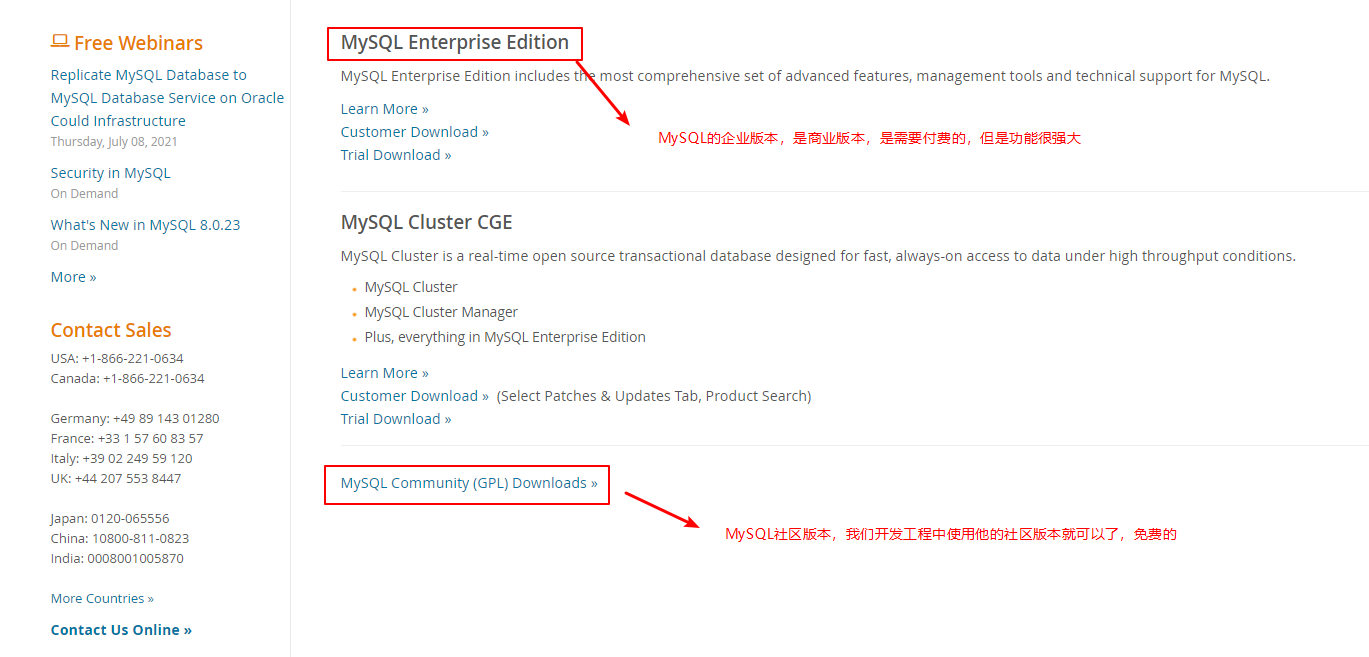
2.2 select your own version
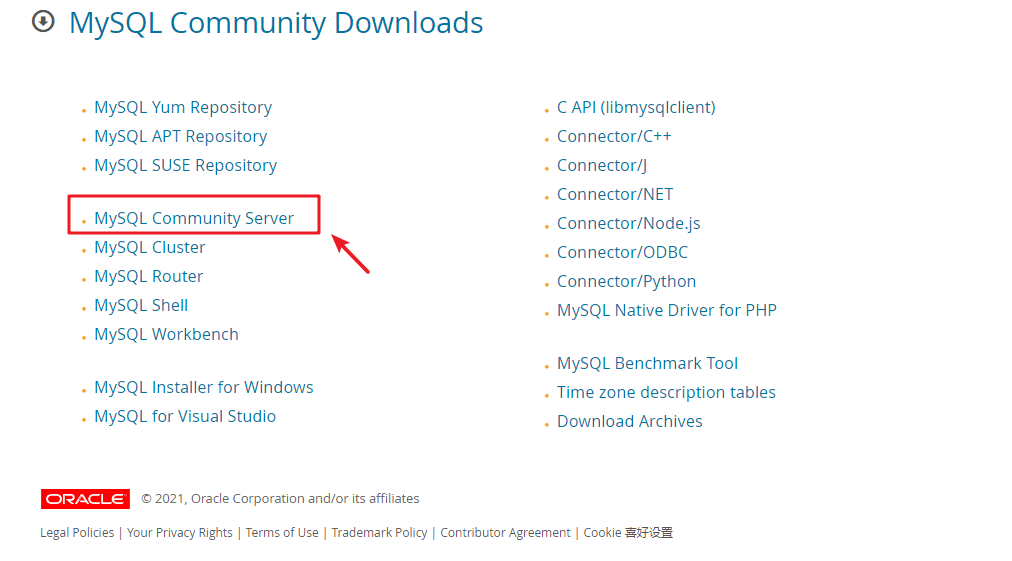
We choose the community version
We click the Looking for previous GA version button to download the stable version of 5.7 recommended on the official website
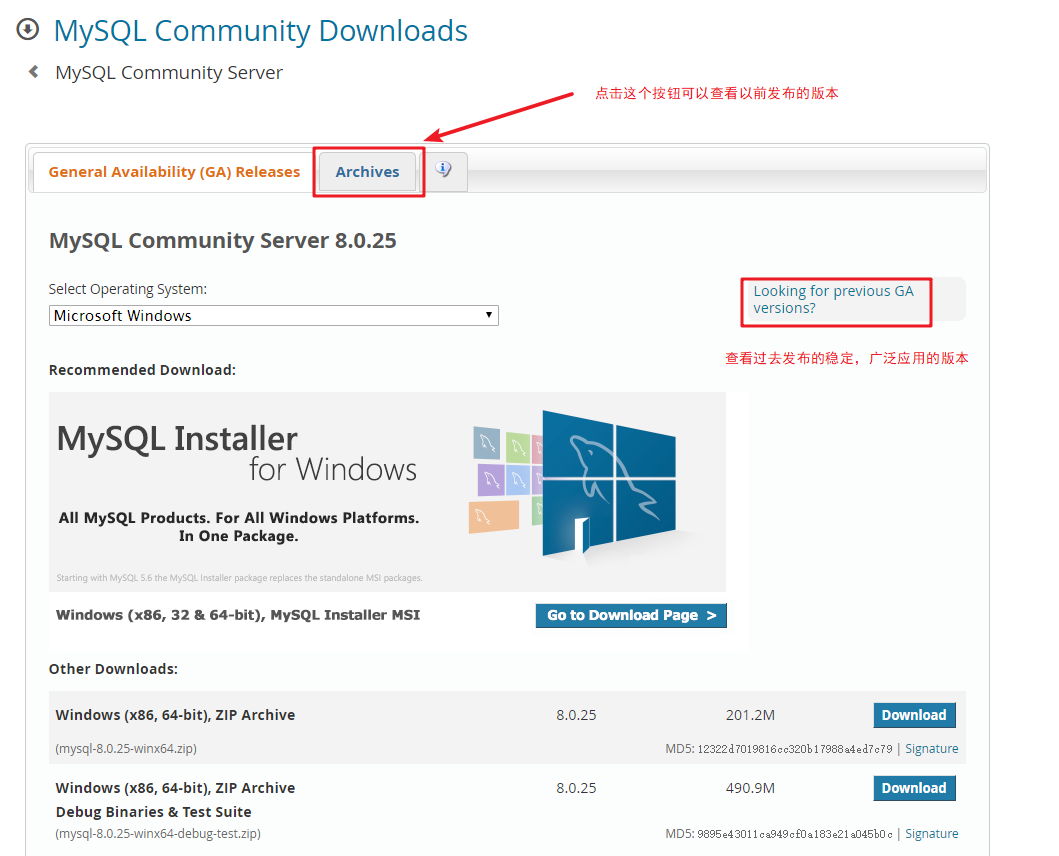
Select the version we need to download
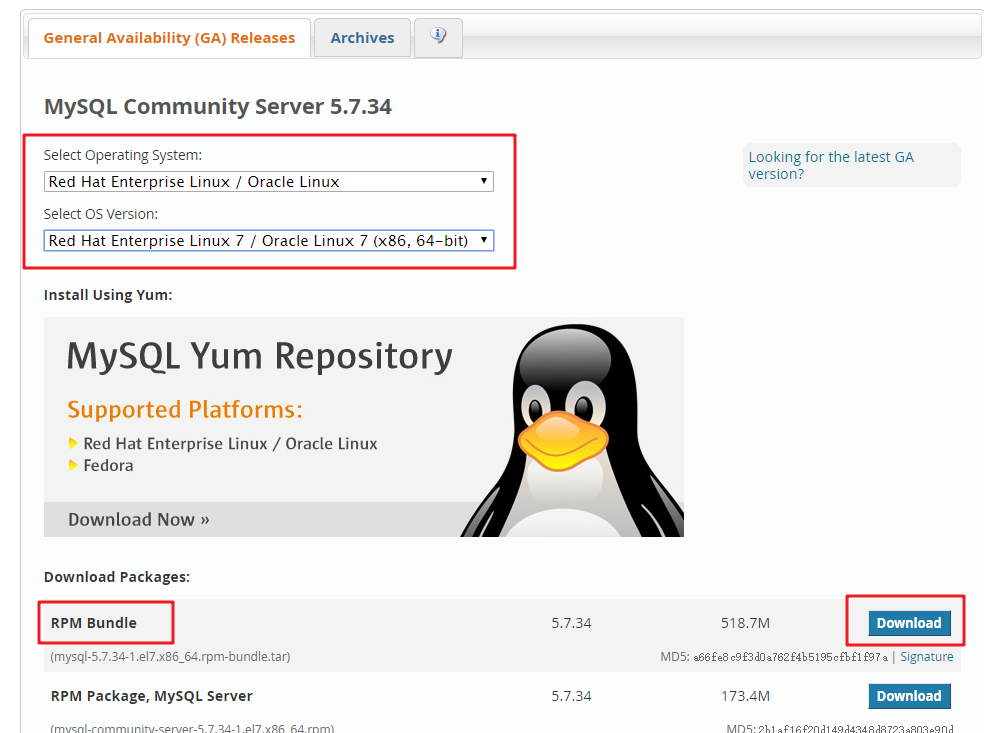
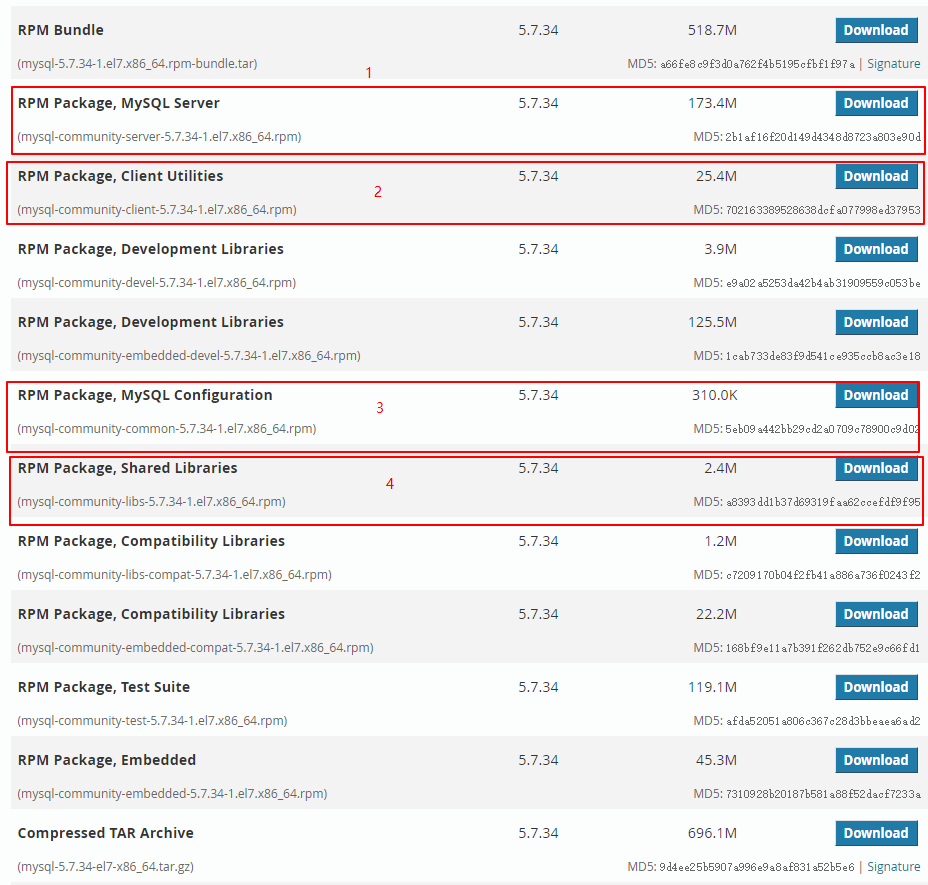
In fact, we only need to download the four rpm packages, but in order to facilitate us to download the RPM Bundle (this package contains the following four packages, which we don't need to download one by one), if the download is slow on the official website, you can access my baidu cloud disk directly
Link: https://pan.baidu.com/s/1Tr3oPmOKCqUiHU6Riuf6KQ
Extraction code: zcc2
We choose to package and download

3. Unzip the installation package
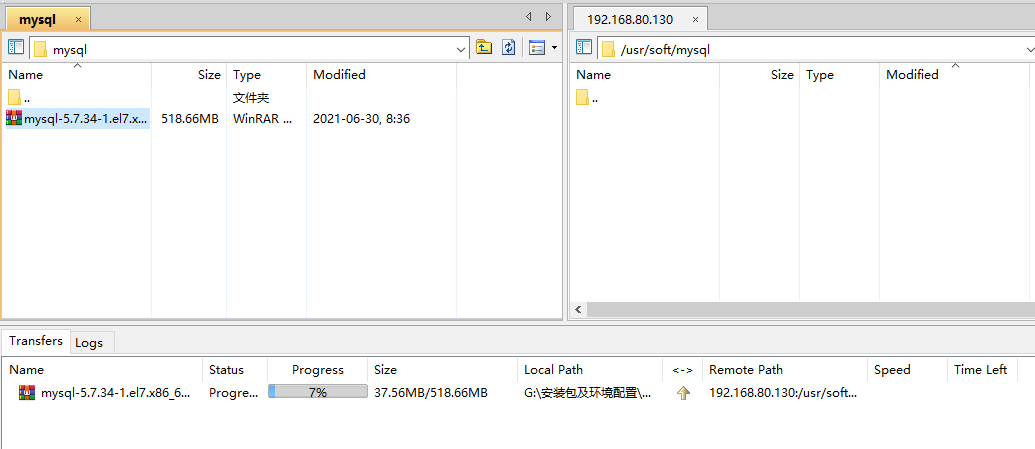
3.1 create a directory to store mysql installation packages
mkdir -p /usr/soft/mysq

3.2 use xshell to upload our compressed package to / usr/soft/mysql directory

3.2 decompression
#decompression
tar -xvf mysql-5.7.34-1.el7.x86_64.rpm-bundle.tar
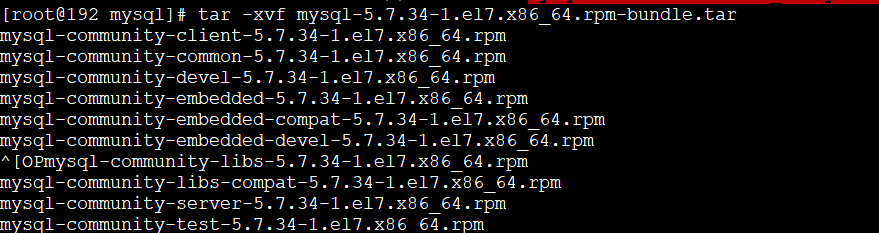
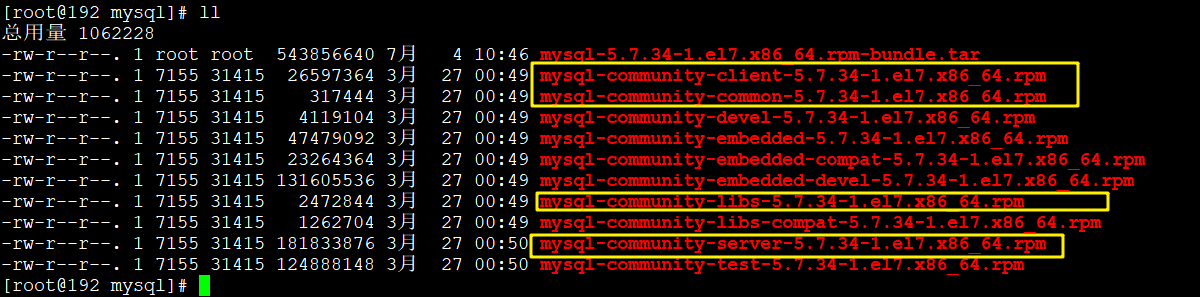
See which files are in this directory
4. Install MySQL
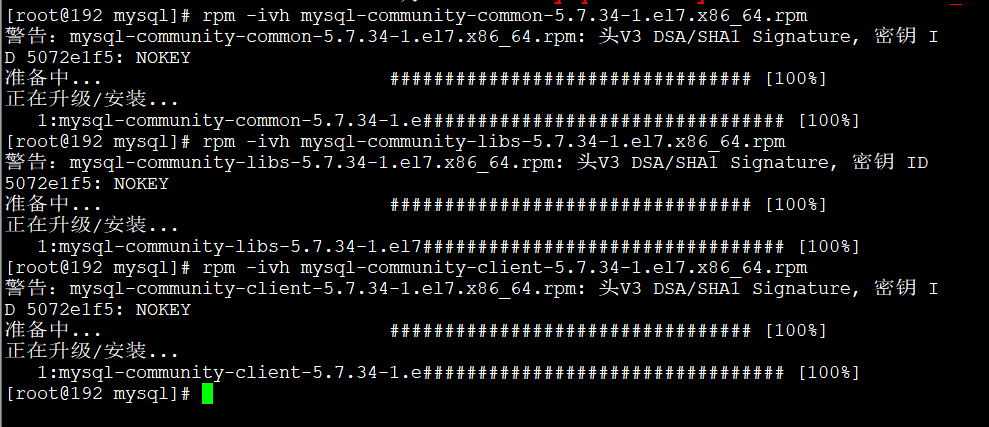
Because there is a dependency between the installation package and the installation package, we will install it in the following order
rpm -ivh mysql-community-common-5.7.34-1.el7.x86_64.rpm
rpm -ivh mysql-community-libs-5.7.34-1.el7.x86_64.rpm
rpm -ivh mysql-community-client-5.7.34-1.el7.x86_64.rpm
rpm -ivh mysql-community-server-5.7.34-1.el7.x86_64.rpm
rpm -ivh mysql-community-devel-5.7.34-1.el7.x86_64.rpm
5. Start MySQL service
The above mysql installation is successful. After successful installation, a mysql D service will be formed locally
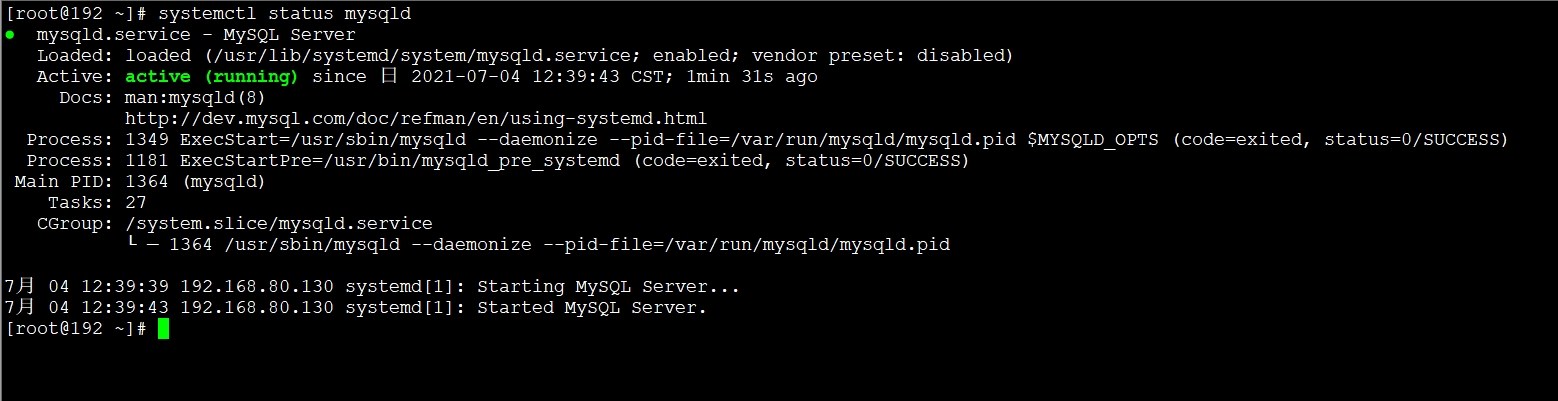
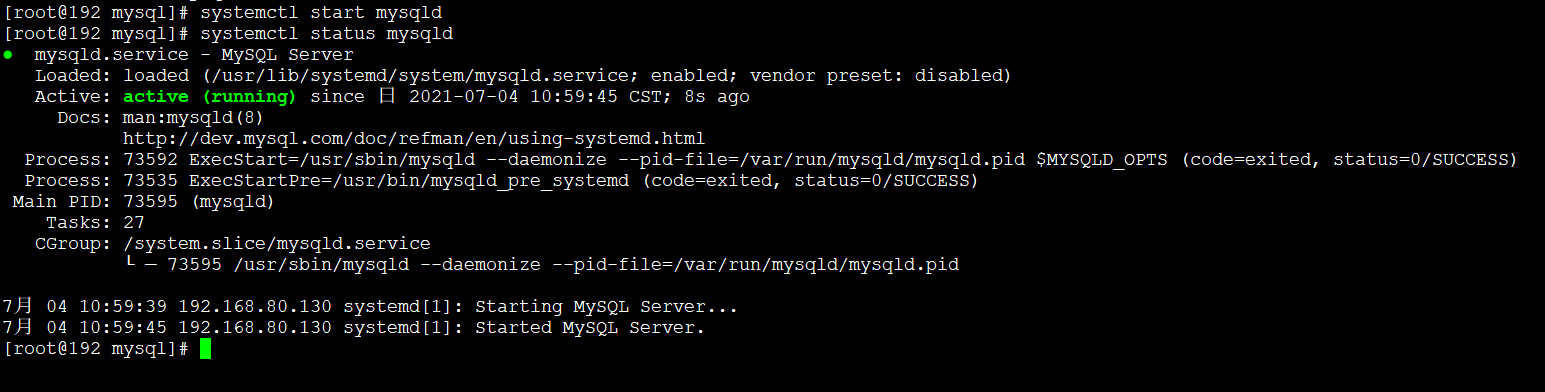
Let's first check the status of mysql
systemctl status mysqld

Start mysql service
systemctl start mysqld
6. Change password
MySQL5.7. After installation, there will be a root user by default. At the same time, a random password will be generated for the root user instead of the empty password of the previous version
The temporary password is placed in / var / log / mysqld Log file
6.1 query temporary password
We use the following command to query the temporary password
grep 'temporary password' /var/log/mysqld.log


If the temporary password cannot be found after executing the command
Delete / var/lib/mysql first
rm -rf /var/lib/mysql
Restart mysql service
systemctl restart mysqld
Then go to get the temporary password
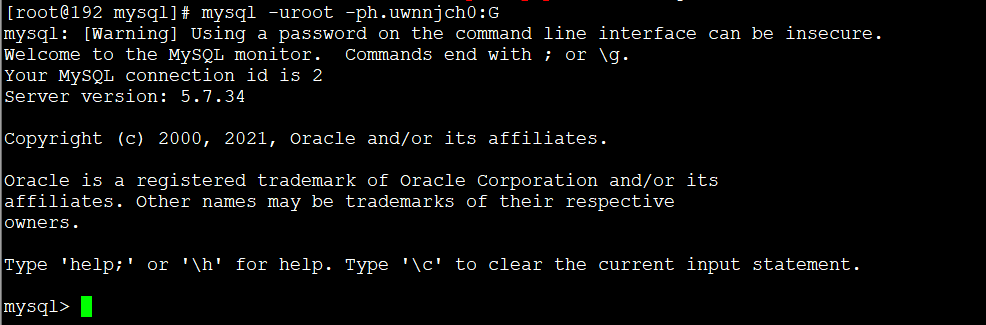
6.2 login to MySQL
mysql -uroot -ph.uwnnjch0:G
6.3 password modification
Change the password after entering
#root is your new password
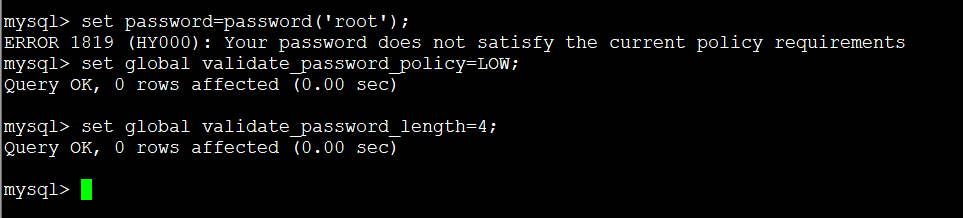
set password=password('root');

As shown in the figure above, it will be reported that your password does not meet the security policy. The default security policy password is longer than 8 digits, including numbers and case
Therefore, we should either change the password to meet the default policy or change the default configuration of mysql
We change the default configuration of mysql
Set password authentication strength
set global validate_password_policy=LOW;
Set the password length to 4, with 8 digits by default
set global validate_password_length=4;
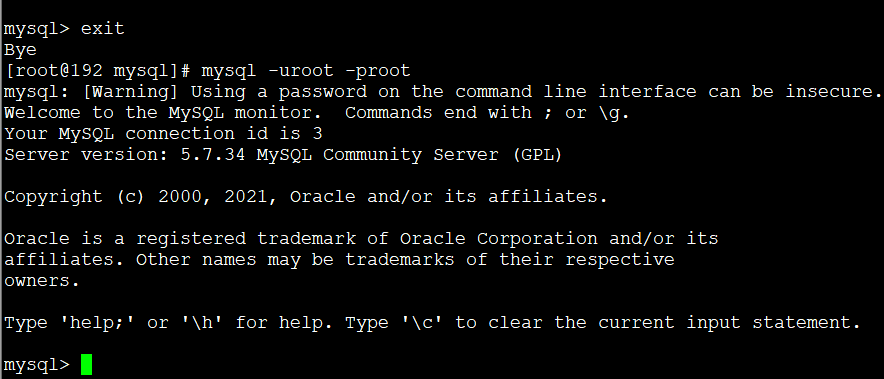
Then we're resetting the password

Then we quit and log in again with the new password we set
mysql -uroot -proot
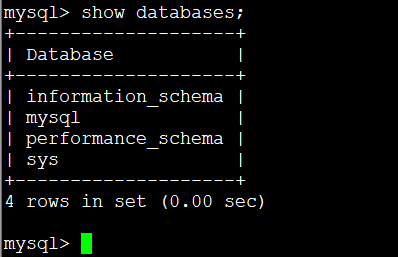
We can see which libraries are available in mysql
show databases
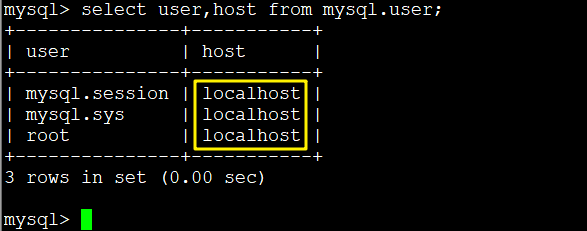
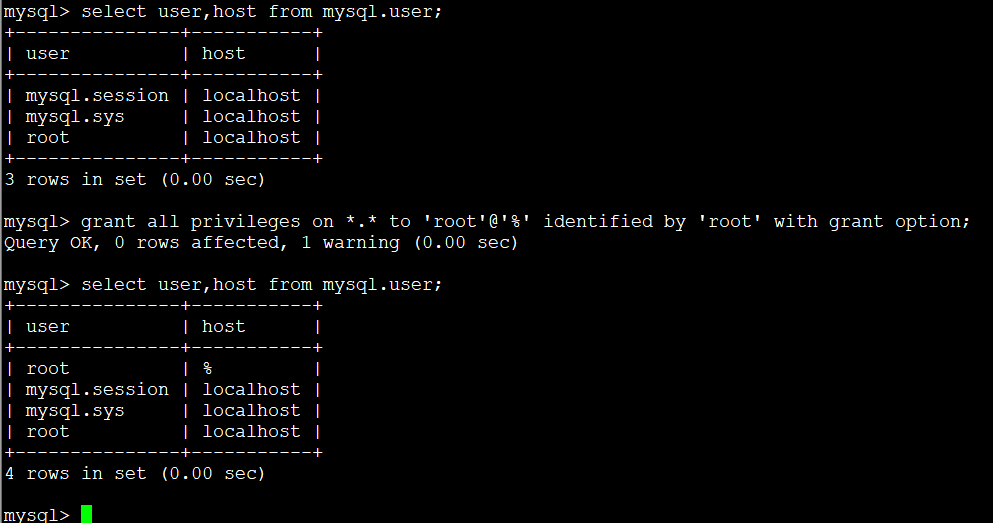
7. Authorize remote login
The mysql service installed by default does not enable remote connection
We check the user table in the mysql library and find that they are all localhost, which can only be accessed locally. We just need to change the localhost to%%, so that all clients can connect
7.1 execute command
grant all privileges on *.* to 'root'@'%' identified by 'root' with grant option;
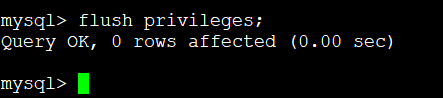
7.2 refresh permission
flush privileges;
7.3 opening 3306 ports
View firewall status
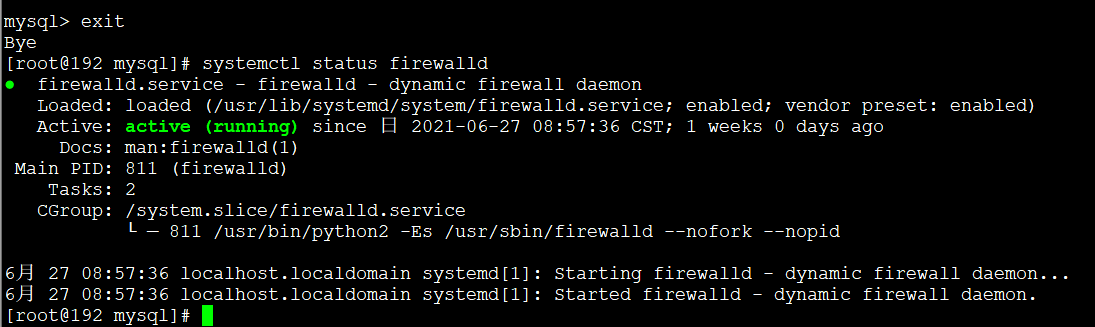
Enable external access to mysql 3306 port of firewall
firewall-cmd --add-port=3306/tcp --permanent

firewall-cmd --reload

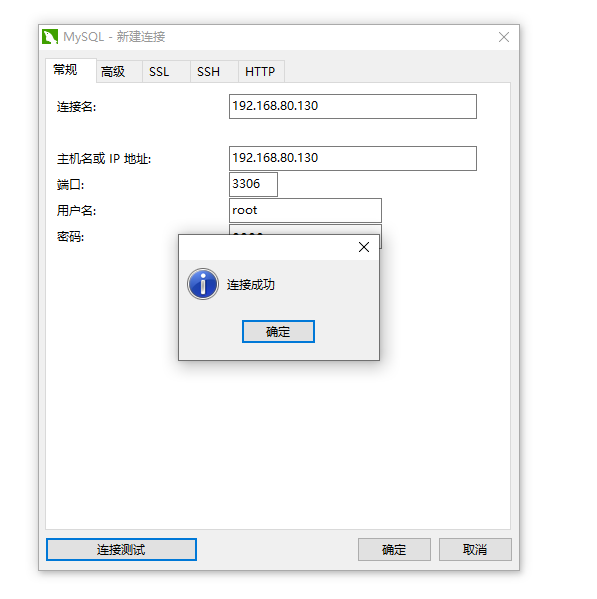
7.4 remote connection using Navicat

8. Set it to start automatically
systemctl enable mysqld.service
Restart the virtual machine and check the status of mysql