Download Mysql
I use 64-bit MySQL 5.7.20 to execute the following commands
wget https://dev.mysql.com/get/Downloads/MySQL-5.7/mysql-5.7.20-linux-glibc2.12-x86_64.tar.gzEncounter problems
1,wget commond not found
If you sign up for wget commond not found ation, you have not installed wget configuration for centos.
This command needs to be executed at this time.
yum -y install wgetWait for your centos to install the wget configuration. When you see this, the installation is successful. 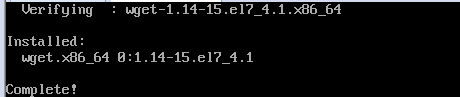
2,404 not found
Unexpectedly, the wget command adds http://leading to 404 in front of your link. At this time, let's modify it (remove the HTTP protocol header) and execute the following command to connect and download successfully.
wget dev.mysql.com/get/Downloads/MySQL-5.7/mysql-5.7.20-linux-glibc2.12-x86_64.tar.gzAt this time, I was wondering why not use the xshell to connect my virtual machine. xshell is much more comfortable to use. The following operations are all done in the xshell.
Decompression Mysql
Because I'm downloading the installation package in the / root directory, I now execute the following command to copy it to / usr/local (don't copy it blindly, you have to follow your own actual directory).
cp mysql-5.7.20-linux-glibc2.12-x86_64.tar.gz ../usr/localThen enter the / usr/local directory to decompress and get the folder mysql-5.7.20-linux-glibc2.12-x86_64.
Rename it mysql with the following specific commands
cd ../usr/local
tar -zxvf mysql-5.7.20-linux-glibc2.12-x86_64.tar.gz
mv mysql-5.7.20-linux-glibc2.12-x86_64 mysql
Install Mysql
1. New User Groups and Users
Execute the following commands
cd mysql
groupadd mysql
useradd -r -g mysql mysql
Explain it.
The useradd-r parameter indicates that the mysql user is a system user and cannot be used to log in to the system.
The useradd-g parameter indicates that the mysql user is added to the mysql user group.
2. Create directories and authorize
mkdir data mysql-files
chown -R mysql .
chgrp -R mysql .
3. Initialization of Mysql
Execute the following commands
bin/mysqld --initialize --user=mysqlError reporting
If you make the following mistake, it means that you lack the installation packages libaio and libaio-devel.
bin/mysqld: error while loading shared libraries: libaio.so.1: cannot open shared object file: No such file or directorySolution
At this point you need to execute the following command to install
yum install libaio*After installation, execute again
bin/mysqld --initialize --user=mysqlError reporting
If you report the following mistake
2017-12-17T13:30:25.171173Z 0 [Warning] TIMESTAMP with implicit DEFAULT value is deprecated. Please use --explicit_defaults_for_timestamp server option (see documentation for more details).
2017-12-17T13:30:25.173048Z 0 [ERROR] --initialize specified but the data directory has files in it. Aborting.
Cause explanation
When mysql is initialized, it detects whether the data directory exists.
If it does not exist, mysql will create it.
If it exists and there is data in this directory, mysql will report an error and terminate initialization.
Solution
Delete or rename the data directory. If the data is important, rename it and import it later. My directory is in / var/lib/mysql./
Delete directly
rm -rf /var/lib/mysqlExecute the order again
bin/mysqld --initialize --user=mysqlIt's not easy to succeed at last. I hope you can initialize it quickly and successfully.
4. Mysql Temporary Key
After success, the following will appear
The temporary password generated by mysql is root@localhost:the following string VBsA6h.:Y5Iq
2017-12-17T13:32:39.695323Z 0 [Warning] TIMESTAMP with implicit DEFAULT value is deprecated. Please use --explicit_defaults_for_timestamp server option (see documentation for more details).
2017-12-17T13:32:41.207504Z 0 [Warning] InnoDB: New log files created, LSN=45790
2017-12-17T13:32:41.572597Z 0 [Warning] InnoDB: Creating foreign key constraint system tables.
2017-12-17T13:32:41.648447Z 0 [Warning] No existing UUID has been found, so we assume that this is the first time that this server has been started. Generating a new UUID: c1bd1420-e32e-11e7-9ff3-000c29fcc852.
2017-12-17T13:32:41.650409Z 0 [Warning] Gtid table is not ready to be used. Table 'mysql.gtid_executed' cannot be opened.
2017-12-17T13:32:41.652045Z 1 [Note] A temporary password is generated for root@localhost: VBsA6h.:Y5Iq
5. Generating RSA Private Key
Execute the following commands
bin/mysql_ssl_rsa_setup6. Granting Read and Write Rights
Execute the following commands
chown -R root .
chown -R mysql data mysql-files
7. Add Mysql startup script to system service
Execute the following commands
cp support-files/mysql.server /etc/init.d/mysql.serverStart the Mysql service
Finally, it's exciting time to exit to the root directory / below
Executive order
service mysql.server startperhaps
/usr/local/mysql/support-files/mysql.server startIf you still report this mistake
Starting MySQL.2017-12-17T13:59:15.498616Z mysqld_safe error: log-error set to '/var/log/mariadb/mariadb.log', however file don't exists. Create writable for user 'mysql'.
 ERROR! The server quit without updating PID file (/var/lib/mysql/chenyu.server.pid).
You need to grant read and write permission to the day directory
[root@chenyu /]# mkdir /var/log/mariadb
[root@chenyu /]# touch /var/log/mariadb/mariadb.log
[root@chenyu /]# chowm -R mysql:mysql /var/log/mariadb
-bash: chowm: No command found
[root@chenyu /]# chown -R mysql:mysql /var/log/mariadb
I made an awkward mistake here. Don't learn.
Login Mysql
The password is the password of step 4 above, but the following error is reported.
[root@chenyu /]# /usr/local/mysql/bin/mysql -uroot -p
Enter password:
ERROR 2002 (HY000): Can't connect to local MySQL server through socket '/tmp/mysql.sock' (2)
[root@chenyu /]#
Solution modification/etc/my.cnf
I commented it out, then added a line / tmp/mysql.sock to save and restart Mysql service after exiting. See below for the specific operation command.
[root@chenyu /]# more /etc/my.cnf | grep sock
socket=/var/lib/mysql/mysql.sock
[root@chenyu /]# vi /etc/my.cnf
[root@chenyu /]# service mysql.server start
[root@chenyu /]# vi /etc/my.cnf
[root@chenyu /]# service mysql.server start
Starting MySQL.. SUCCESS!
[root@chenyu /]#
The modified / etc/my.cnf looks like the following
[mysqld]
datadir=/var/lib/mysql
#socket=/var/lib/mysql/mysql.sock
socket=/tmp/mysql.sock
Log in again
Password or Step 4 Password
/usr/local/mysql/bin/mysql -uroot -pSetting Mysql password
mysql> set password=password('123456');Refresh permission and exit. See below for details.
mysql> set password=password('123456');
Query OK, 0 rows affected, 1 warning (0.00 sec)

mysql> flush privileges;
Query OK, 0 rows affected (0.01 sec)

mysql> exit;
Bye
[root@chenyu /]#
Log in again with a new password
[root@chenyu /]# /usr/local/mysql/bin/mysql -uroot -p
Enter password:
Welcome to the MySQL monitor.  Commands end with ; or \g.
Your MySQL connection id is 4
Server version: 5.7.20 MySQL Community Server (GPL)

Copyright (c) 2000, 2017, Oracle and/or its affiliates. All rights reserved.

Oracle is a registered trademark of Oracle Corporation and/or its
affiliates. Other names may be trademarks of their respective
owners.

Type 'help;' or '\h' for help. Type '\c' to clear the current input statement.

mysql>
So far, the entire installation of Mysql has been completed.