Building PXC cluster under CentOS8 This paper introduces how to build Percona Server cluster. In fact, the installation package of PXC has been bundled with Percona Server, so some details of Percona Server will be masked during installation. But sometimes you may use Percona Server alone, so this article introduces the installation of Percona Server separately. Note: Percona Server only supports Linux system and cannot be installed on other operating systems.
There are two simple ways to install Percona Server. One is to download the installation package for local installation, and the other is to install it online through the rpm source link provided by the official.
First go to the official installation documentation:
Environment Version Description:
- CentOS 8
- Percona Server for MySQL 8.0.18
Local installation
For local installation, you need to download the installation package to the system. The download address of Percona Server's official website is as follows:
Open the above website, select the corresponding version and operating system, and copy the download link of the installation package: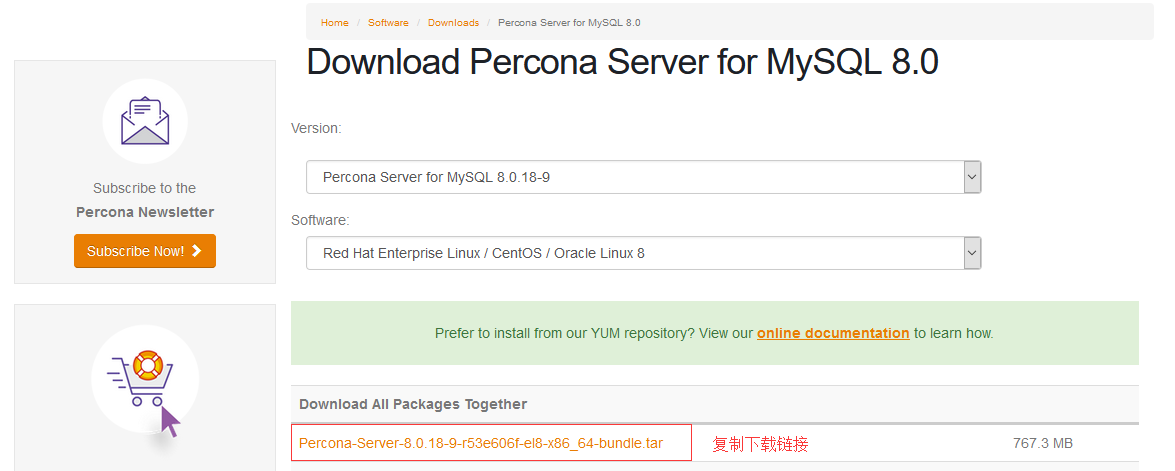
Then download it on the command line through the wget command:
[root@localhost ~]# cd /usr/local/src
[root@localhost /usr/local/src]# wget https://www.percona.com/downloads/Percona-Server-LATEST/Percona-Server-8.0.18-9/binary/redhat/8/x86_64/Percona-Server-8.0.18-9-r53e606f-el8-x86_64-bundle.tar
Decompress the compressed package of Percona Server according to the following command:
[root@localhost /usr/local/src]# mkdir Percona-Server  # Create a new directory to store the extracted files
[root@localhost /usr/local/src]# tar -xvf Percona-Server-8.0.18-9-r53e606f-el8-x86_64-bundle.tar -C Percona-Server  # Unzip and store the unzipped file in the percona server directory
[root@localhost /usr/local/src]# ls Percona-Server # After decompression, it is a pile of. rpm files
percona-mysql-router-8.0.18-9.1.el8.x86_64.rpm
percona-mysql-router-debuginfo-8.0.18-9.1.el8.x86_64.rpm
percona-server-client-8.0.18-9.1.el8.x86_64.rpm
percona-server-client-debuginfo-8.0.18-9.1.el8.x86_64.rpm
percona-server-debuginfo-8.0.18-9.1.el8.x86_64.rpm
percona-server-debugsource-8.0.18-9.1.el8.x86_64.rpm
percona-server-devel-8.0.18-9.1.el8.x86_64.rpm
percona-server-rocksdb-8.0.18-9.1.el8.x86_64.rpm
percona-server-rocksdb-debuginfo-8.0.18-9.1.el8.x86_64.rpm
percona-server-server-8.0.18-9.1.el8.x86_64.rpm
percona-server-server-debuginfo-8.0.18-9.1.el8.x86_64.rpm
percona-server-shared-8.0.18-9.1.el8.x86_64.rpm
percona-server-shared-compat-8.0.18-9.1.el8.x86_64.rpm
percona-server-shared-debuginfo-8.0.18-9.1.el8.x86_64.rpm
percona-server-test-8.0.18-9.1.el8.x86_64.rpm
percona-server-test-debuginfo-8.0.18-9.1.el8.x86_64.rpm
percona-server-tokudb-8.0.18-9.1.el8.x86_64.rpm
percona-server-tokudb-debuginfo-8.0.18-9.1.el8.x86_64.rpm
[root@localhost /usr/local/src]#
The installation of Percona Server depends on jemalloc, so before installing Percona Server, we must prepare the rpm package of jemalloc. Download links are available at:
Enter the new percona server directory and download the rpm package of jemalloc:
[root@localhost /usr/local/src]# cd Percona-Server
[root@localhost /usr/local/src/Percona-Server]# wget http://rpms.remirepo.net/enterprise/8/remi/x86_64//jemalloc-5.1.0-3.el8.remi.x86_64.rpm
After completing the above steps, you can now install Percona Server locally through the yum command:
[root@localhost /usr/local/src/Percona-Server]# yum localinstall -y *.rpm
Wait for a moment, and then start Percona Server. The start command is the same as starting MySQL:
[root@localhost ~]# systemctl start mysqld
The 3306 port is monitored normally, which means the startup is successful:
[root@localhost ~]# netstat -lntp |grep mysql
tcp6       0      0 :::33060                :::*       LISTEN      21964/mysqld
tcp6       0      0 :::3306                 :::*       LISTEN      21964/mysqld
[root@localhost ~]#
Online installation
The online installation is simpler than the local installation. It only needs a few commands to complete the installation. First install the official yum warehouse:
[root@localhost ~]# yum install -y https://repo.percona.com/yum/percona-release-latest.noarch.rpm
Then enable the warehouse:
[root@localhost ~]# percona-release setup ps80
Now you can install Percona Server directly through the yum command:
[root@localhost ~]# yum install -y percona-server-server
- Tips: online installation has certain requirements for the network, otherwise it will be very slow
Also, wait for a while for the installation to complete and start the Percona Server:
[root@localhost ~]# systemctl start mysqld
The 3306 port is monitored normally, which means the startup is successful:
[root@localhost ~]# netstat -lntp |grep mysql
tcp6       0      0 :::33060                :::*       LISTEN      12549/mysqld
tcp6       0      0 :::3306                 :::*       LISTEN      12549/mysqld
[root@localhost ~]#
System setup
Disable power on self start of Percona Server:
[root@localhost ~]# systemctl disable mysqld
Removed /etc/systemd/system/multi-user.target.wants/mysqld.service.
Removed /etc/systemd/system/mysql.service.
[root@localhost ~]#
- Tips: the reason to disable booting is that in PXC cluster, when a node is down and restarted, it will randomly synchronize data with a PXC node. If the downtime of this node is too long, the amount of data to be synchronized will be large. When a large number of data synchronization occurs, PXC cluster will restrict other write operations until all data synchronization succeeds. So after a long outage, the correct way is not to start the node immediately, but to copy data files from other nodes to the node, and then start it. In this way, there will be a lot less data to be synchronized, which will not cause a long time speed limit.
If the system has a firewall, you need to open port 3306:
[root@localhost ~]# firewall-cmd --zone=public --add-port=3306/tcp --permanent
success
[root@localhost ~]# firewall-cmd --reload
success
[root@localhost ~]#
Modify database configuration
To modify a profile:
[root@localhost ~]# vim /etc/my.cnf
[mysqld]
# Set character set
character_set_server=utf8
# Set listening ip
bind-address=0.0.0.0
# Skip DNS resolution
skip-name-resolve
Restart Percona Server:
[root@localhost ~]# systemctl restart mysqld
Then change the default password of the root account. We can find the initial default password in the mysql log file. The following red box indicates the default password:
Then use the MySQL? Secure? Installation command to change the password of the root account:
[root@localhost ~]# mysql_secure_installation
For security, the root account is generally not allowed to log in remotely, so we need to create a database account for remote access separately:
[root@localhost ~]# mysql -uroot -p
mysql> create user 'admin'@'%' identified by 'A123456a.';
mysql> grant all privileges on *.* to 'admin'@'%';
mysql> flush privileges;
Finally, use the connection tool to test the remote connection: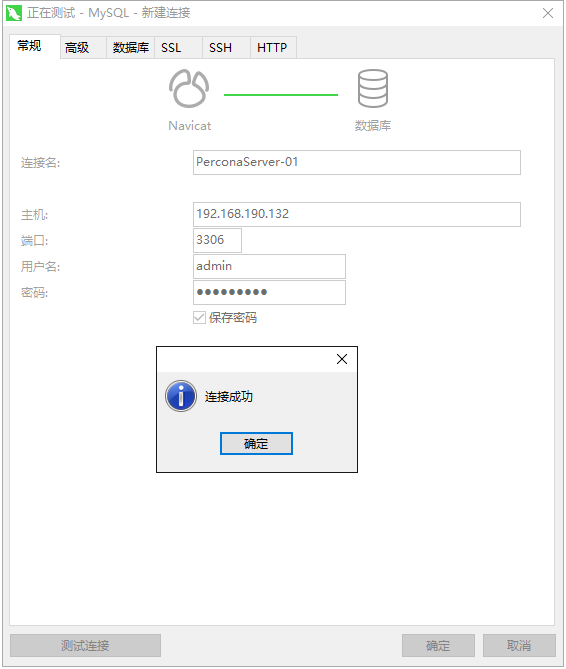
So far, we have successfully installed Percona Server on CentOS 8. Since Percona Server and MySQL are basically compatible, all aspects of operation are the same as mysql. You only need to use it as mysql, which is just a little more.