1, Task structure
2, Test purpose and requirements
1. Experimental purpose
1. Installation and verification of high availability fully distributed mode of HBase
2. Complete the installation of high availability full distribution mode of HBase
3. The related service processes of HBase can be started normally
4. HBase console can be used normally
5. Database operations such as table creation and data query can be carried out normally
2. Experimental requirements
Master the installation of high availability full distribution mode of HBase in the integration platform of full distribution mode
3, Test environment
1. Test environment
There is an effective network connection between five independent PC s or virtual machine hosts
Each host has more than 2G memory and 50G disk
CentOS 7.4 is installed on all hosts_ 64. All hosts of the operating system have completed the network attribute configuration
All hosts have JDK installed
The installation and deployment of Zookeeper cluster have been completed, and the installation and deployment of Hadoop cluster have been completed
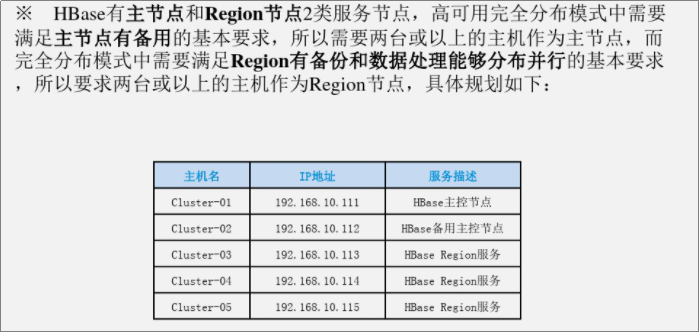
2. Cluster planning

4, Test content
Task 1 Basic HBase installation configuration
Note: all operation steps of this item are carried out with the user admin specially used for the cluster.
This item is only operated on one host, and then synchronously installed and configured in the next step.
1. First, we have uploaded the HBase package "hbase-1.2.3-bin.tar.gz" to the "setups" directory of the user's home directory. Then decompress and set environment variables.
Create a directory for storing Hbase related files
$mkdir ~/hbase

Enter this directory
$cd ~/hbase

2. Unzip the package to the hbase directory
$tar -xzf ~/setups/hbase-1.2.3-bin.tar.gz

3. Configure HBase related environment variables
$vi ~/.bash_profile

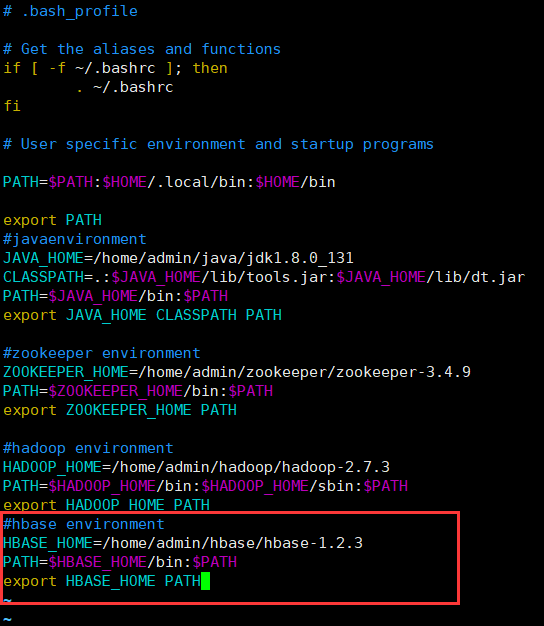
Add the following at the end of the file:
#hbase environment
HBASE_HOME=/home/admin/hbase/hbase-1.2.3
PATH=$HBASE_HOME/bin:$PATH
export HBASE_HOME PATH
Make the newly configured environment variables take effect immediately
$source ~/.bash_profile
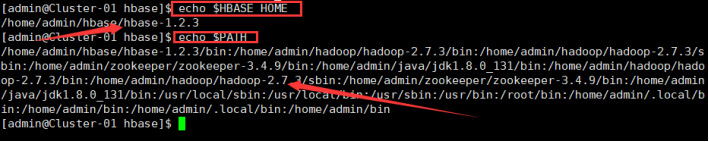
 Check whether the newly added and modified environment variables are set successfully and whether the values of environment variables are correct.
$echo $HBASE_HOME
$echo $PATH
Verify that the installation configuration of Hbase is successful
$hbase version

Task 2 HBase high availability fully distributed mode configuration
1. Enter the directory of Hbase related files
$cd ~/hbase

2. Create the metadata file directory "tmp" of HBase and the log file directory "logs" of HDFS respectively.
$mkdir tmp logs

3. Enter the directory where the configuration file of Hbase is located
$cd ~/hbase/hbase-1.2.3/conf

4. Modify the configuration file
$vi hbase-env.sh

4.1 find the configuration item "JAVA_HOME" and change its value to the following: (remove the comments #, pay attention to the top grid)
export JAVA_HOME=/home/admin/java/jdk1.8.0_131(The path is in JDK (the actual unpacking path of the software package shall prevail)

4.2 find the configuration item "HBASE_CLASSPATH", which is used to specify the path where the Hadoop configuration file is located, and change its value to the following:
export HBASE_CLASSPATH=/home/admin/hadoop/hadoop-2.7.3/etc/hadoop(#This path is subject to the actual decompression and unpacking path of Hadoop software package)

4.3 find the configuration item "HBASE_LOG_DIR", which is used to specify the local storage path of HBase log files, and change its value to the following:
Export HBASE_LOG_DIR=/home/admin/hbase/logs

4.4 find the configuration item "hbase_managers_zk", which is used to close the Zookeeper component of HBase and change its value to the following:
export HBASE_MANAGES_ZK=false

5. Modify the configuration file
$vi hbase-site.xml

<!— The access path of HDFS varies according to the configured Hadoop cluster mode. The common cluster is the host name or address of the primary node, such as "Cluster-O1", and the HA cluster is the logical name of the namespace, such as "Hadoop ha" –
Find the location of label '',
Add the following contents to it:
<configuration>
<property>
<name>hbase.rootdir</name><value>hdfs://Cluster-
01:9000/userladmin/hbase</value></property>
<property>
<name>hbase.tmp.dir</name>
<value>/home/admin/hbase/tmp</value></property>
<property>
<name>hbase.cluster.distributed</name><value>true</value>
</property>
<property>
<name>hbase.zookeeper.quorum</name>
<value>Cluster-01:2181,Cluster-02:2181,Cluster-03:2181,Cluster-04:2181,Cluster-
05:2181</value>
</property><property>
<name>hbase.master.maxclockskew</name><value>60000</value>
/property>
</configuration>

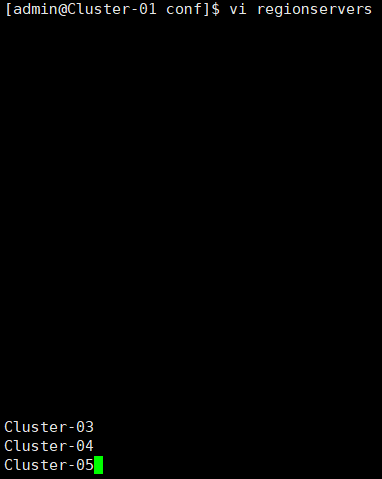
6. Modify the configuration file
$vi regionservers

Delete all the original contents in the file, and then add the host names of all RegionServer nodes in the cluster, one host name per line. The configuration format is as follows:
Cluster-03
Cluster-04
Cluster-05
7. Create configuration file "backup masters"
$touch backup-masters

$vi backup-masters
#Modify the configuration file

Note: add the host names of all standby primary nodes in the cluster, one host name per line, and the configuration format is as follows:
Cluster-02
Task 3: synchronize installation configuration and system time
Note: all operation steps of this item are carried out with the user admin specially used for the cluster.
Send the "hbase" directory and ". bash_profile" file to all hosts in the cluster, and the sending target user is dedicated to the cluster
1. User admin, that is, the user with the same name as the current login user, and the sending target path is "/ home/admin", that is, the home directory of the cluster dedicated user admin.
$scp -r ~/hbase ~/.bash_profile admin@Cluster-O2:/home/admin


2. Each host in the cluster performs the following commands:
Make the newly configured environment variables take effect immediately
$source ~/.bash_profile


#Check whether the newly added and modified environment variables are set successfully and whether the values of environment variables are correct.
$echo $HBASE_HOME
$echo $PATH


Verify that the installation configuration of Hbase is successful
$hbase version


Note: all operation steps of time synchronization item need to be performed by root user.
Use the command "date - s' yyyy MM DD" on all hosts in the cluster
HH:mm:ss (year month day hour: minute: Second) "set the system time, and use the command" hwlock - W "to synchronize the set time to the hardware clock.
※ this operation shall be carried out on all hosts at the same time as far as possible, so as to ensure that the time error between hosts is within the set "hbase.master.maxclockskew".
3. Set the system time. The time is your current time
#date -s '2021-05-19 15:40:00'
#Synchronize the set time to the hardware clock
#hwclock -w


Note: if it is installed on the VMware Workstation Pro simulation platform, you need to turn on time synchronization.
Select virtual machine node - > right click - > Settings - > options to enable time synchronization.

Task 4 launch and verification of HBase high availability fully distributed mode
Note: all operation steps of this item are carried out with the user admin specially used for the cluster.
Before starting the HBase cluster, first ensure that the Zookeeper cluster is turned on. (experimental 5 sets) the Zookeeper needs to be started manually on the node of each computer. If an error is reported during startup in the home directory, you need to enter the zookeeper/bin directory to execute the startup command. Enlighten
Before moving the HBase cluster, first ensure that the Hadoop cluster has been turned on. (experimental 5 sets) Hadoop only needs to execute the start command on the master node.
1. Enter the zookeeper/bin directory and execute the startup command
cd ~/zookeeper/zookeeper-3.4.9/conf
zkServer.sh start


2. At master node
start-all.sh

3. Standby node: yarn daemon sh start resourcemanager

4. Confirm that the Hadoop cluster has been started, and then start the HBase cluster on the primary node
$start-hbase.sh

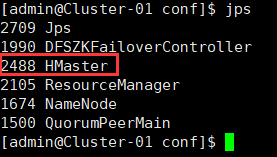
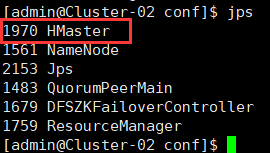
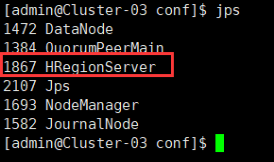
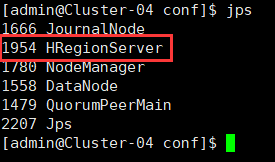
Enter jps to verify on each host

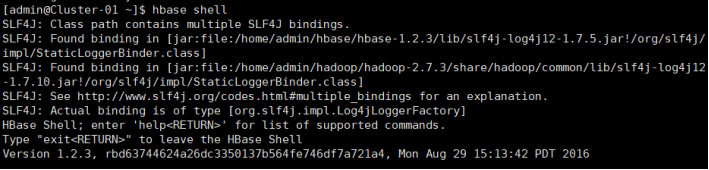
5. Enter HBase console
$hbase shell
Use the command "create 'table name'; column name 1 ',' column name 2 ',..." to create a table in the console.
>create 'tab2','id','name'

Use the command "exit" in the console to exit the console and return to the system command interface.
>exit