Recently, a single node K8S was built based on Hyper-V virtual machine, and the process was not recorded
This practice starts from scratch to build a K8S Slave node
Installation process of Slave node in K8S cluster from zero
Practice environment
This experiment is based on Hyper-V to build a virtual machine
| index | To configure |
|---|---|
| host system | Win10 Professional 1909 (18363.535) |
| Hyper-V version | 10.0.18362.1 |
| CPU | i7-8700 6C12T |
| Memory | DDR4 2666MHz 16G x 2 |
Install Linux system
Linux distribution selection
I choose Ubuntu Server 18.04.4 LTS as server system.
The image size of Ubuntu Server is less than 900M, the system is relatively clean, and the installation process is relatively simple.
Hyper-V create virtual machine
Create a virtual machine quickly and choose a downloaded image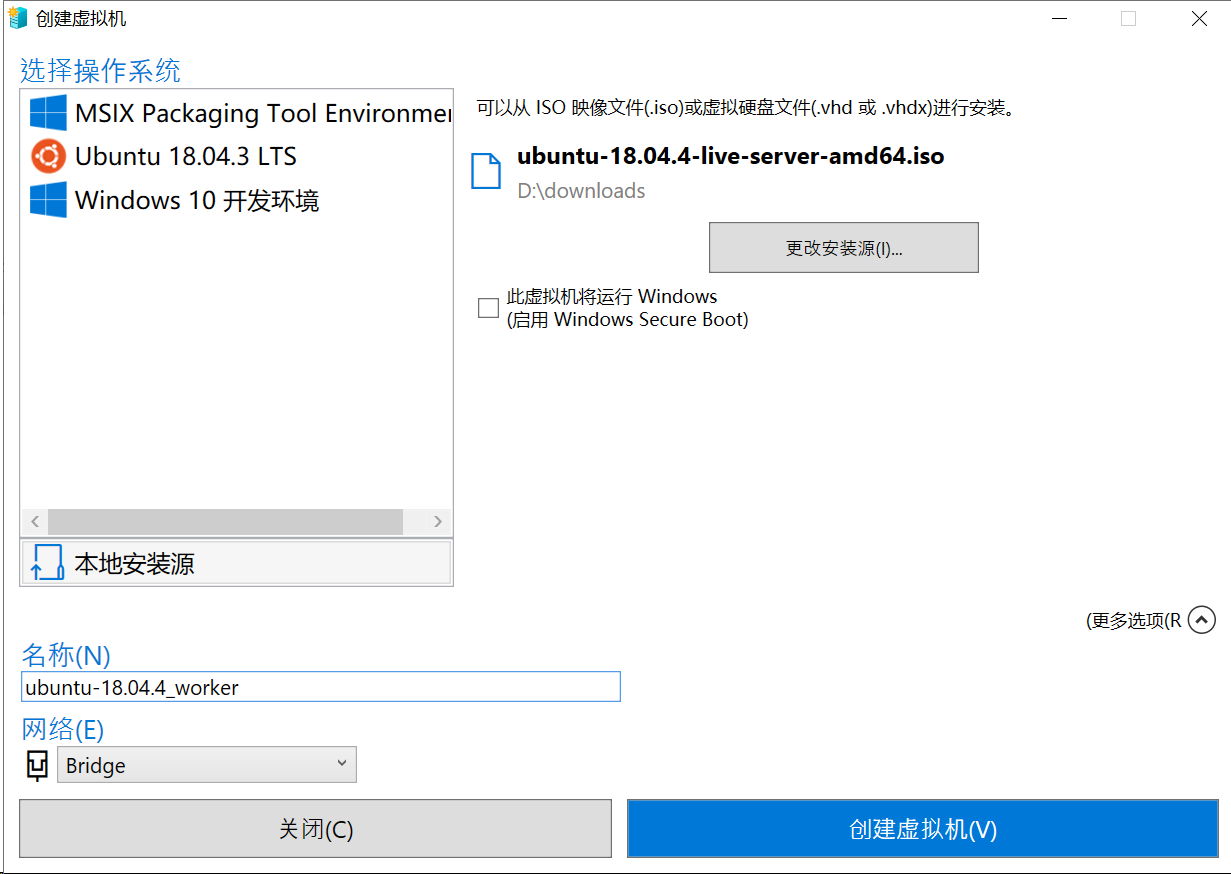
(optional, for intranet access) create and bridge a virtual switch for the physical network card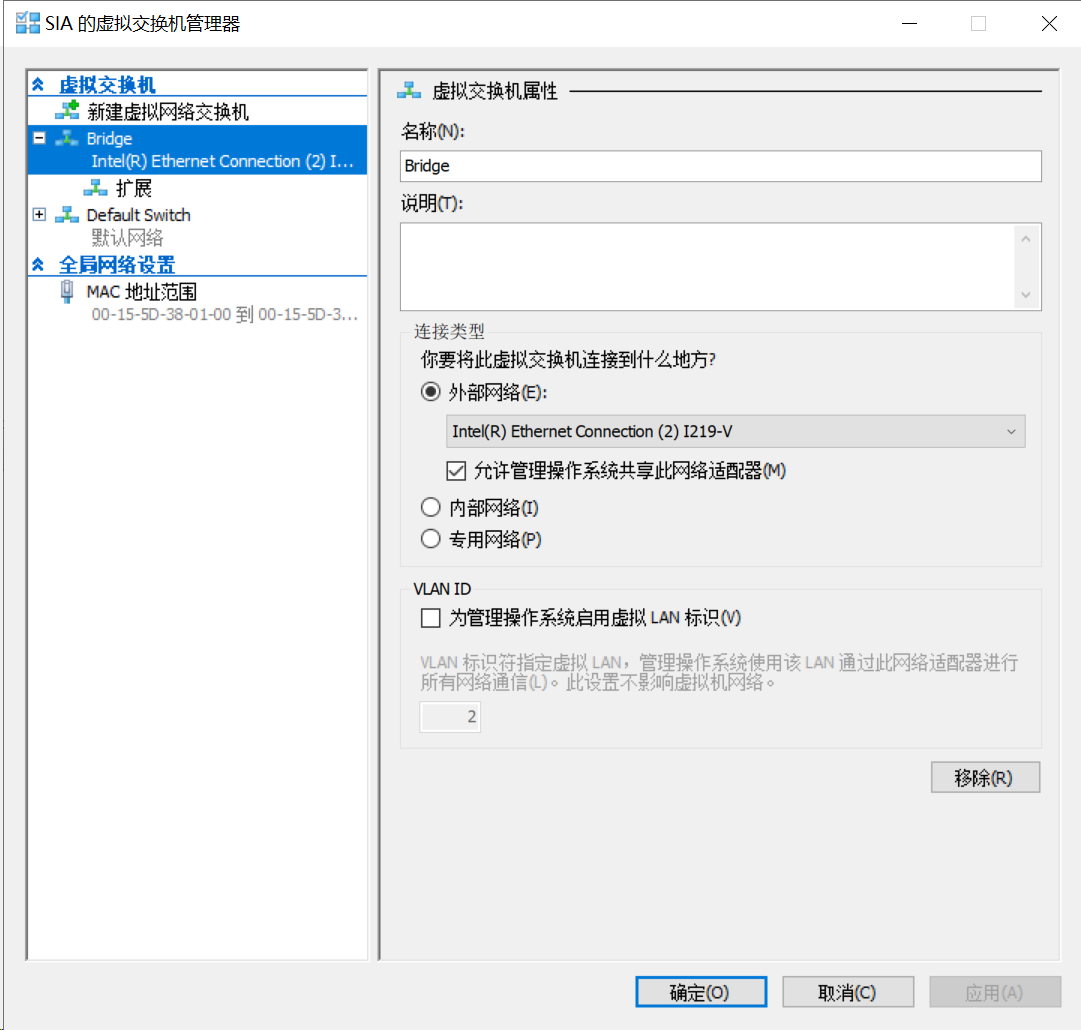
Edit virtual machine settings, adjust CPU, memory, network, etc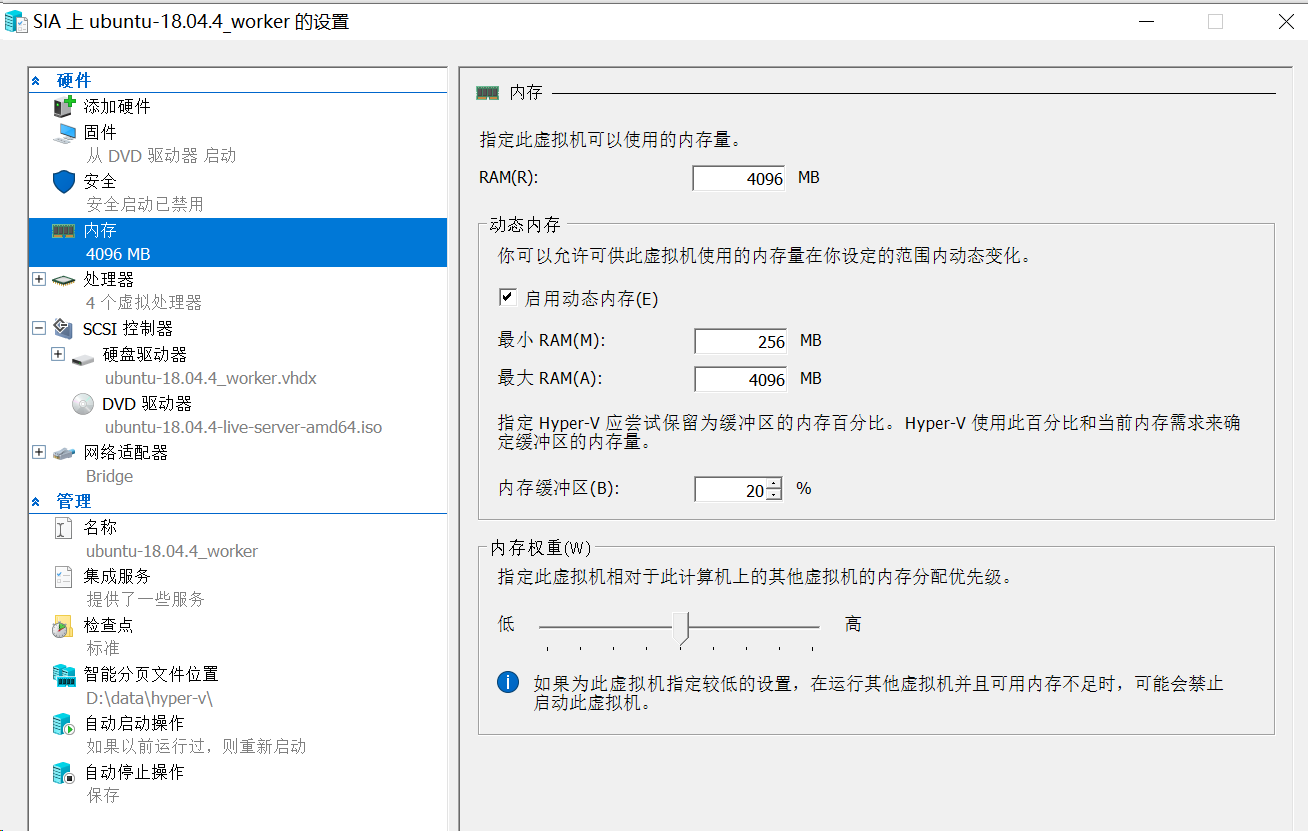
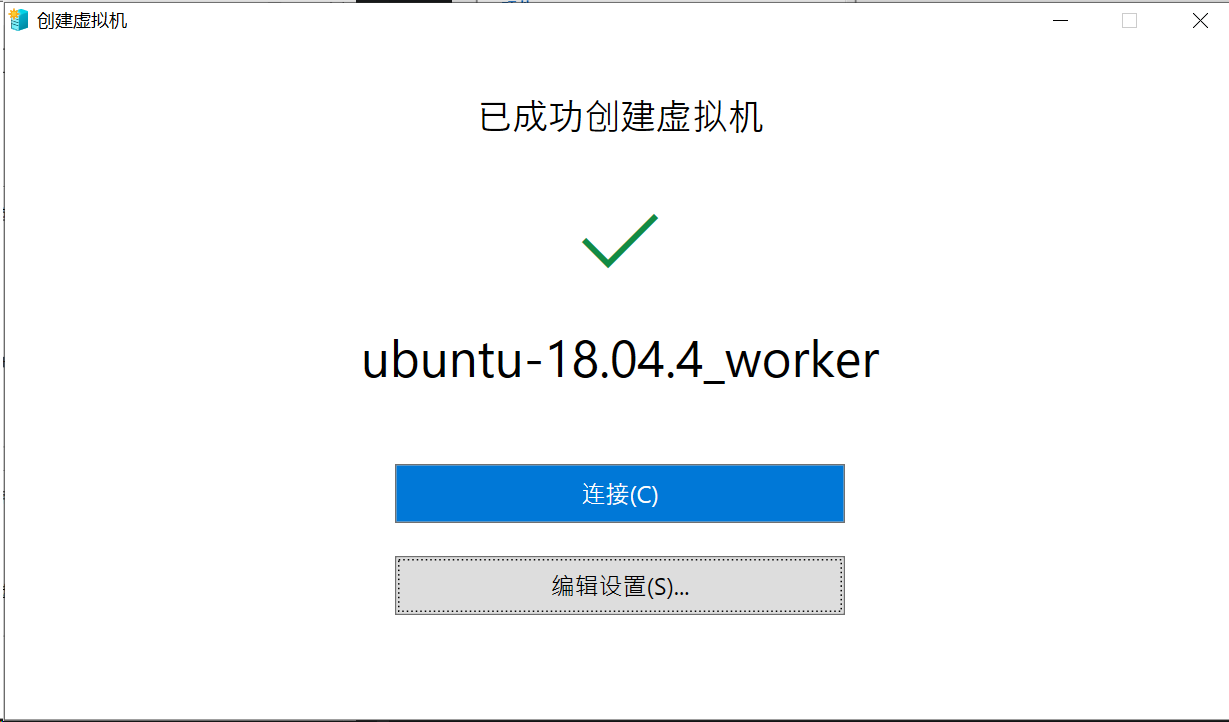
At this point, the virtual machine configuration is complete.
Linux Installation Process
Start the virtual machine and start the system installation process
Ubuntu software source is recommended to be adjusted according to the current network environment
According to the network environment, I choose Open source image source of South China Agricultural University,
Adjust Mirror address to https://mirrors.scau.edu.cn/ubuntu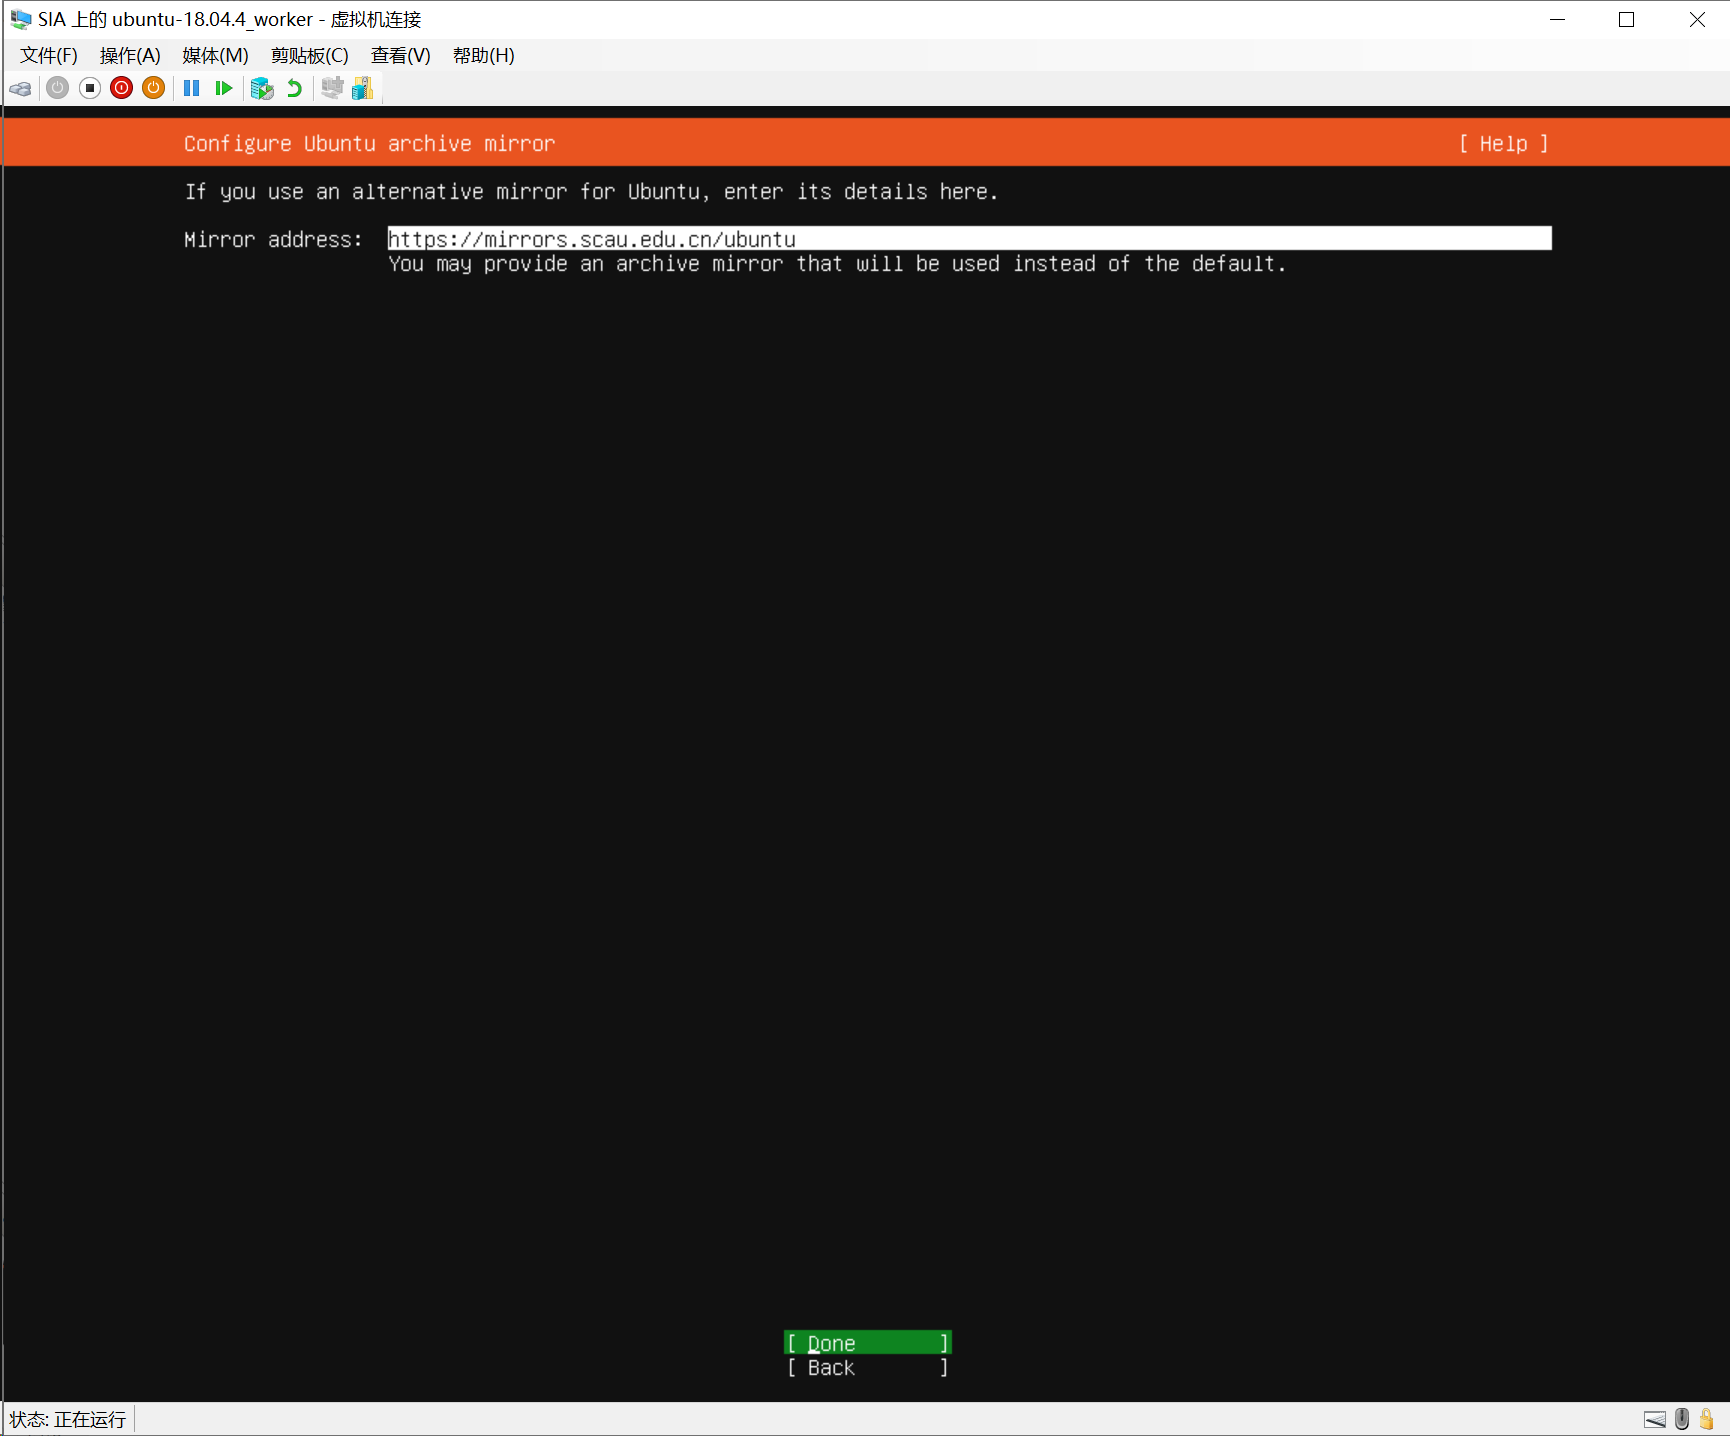
OpenSSH server can be checked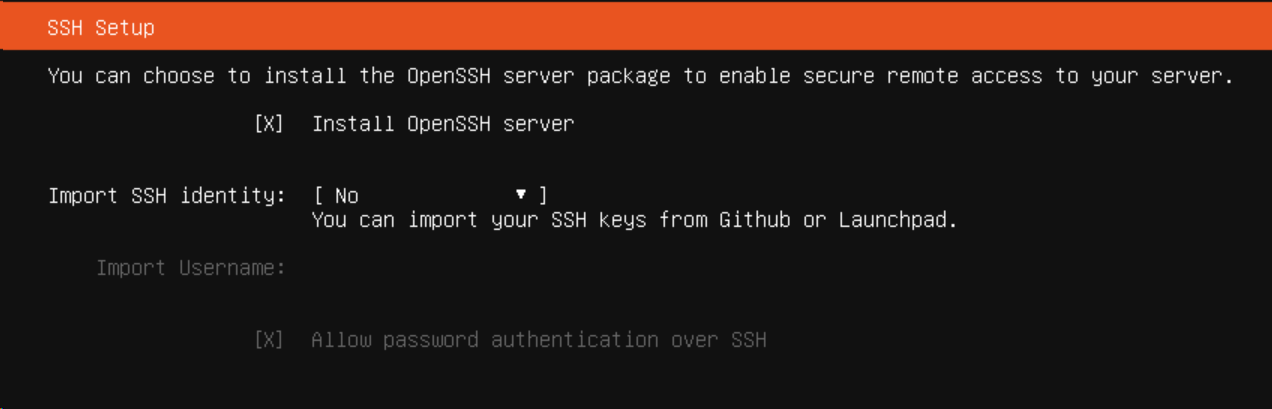
Wait for the installation to complete and restart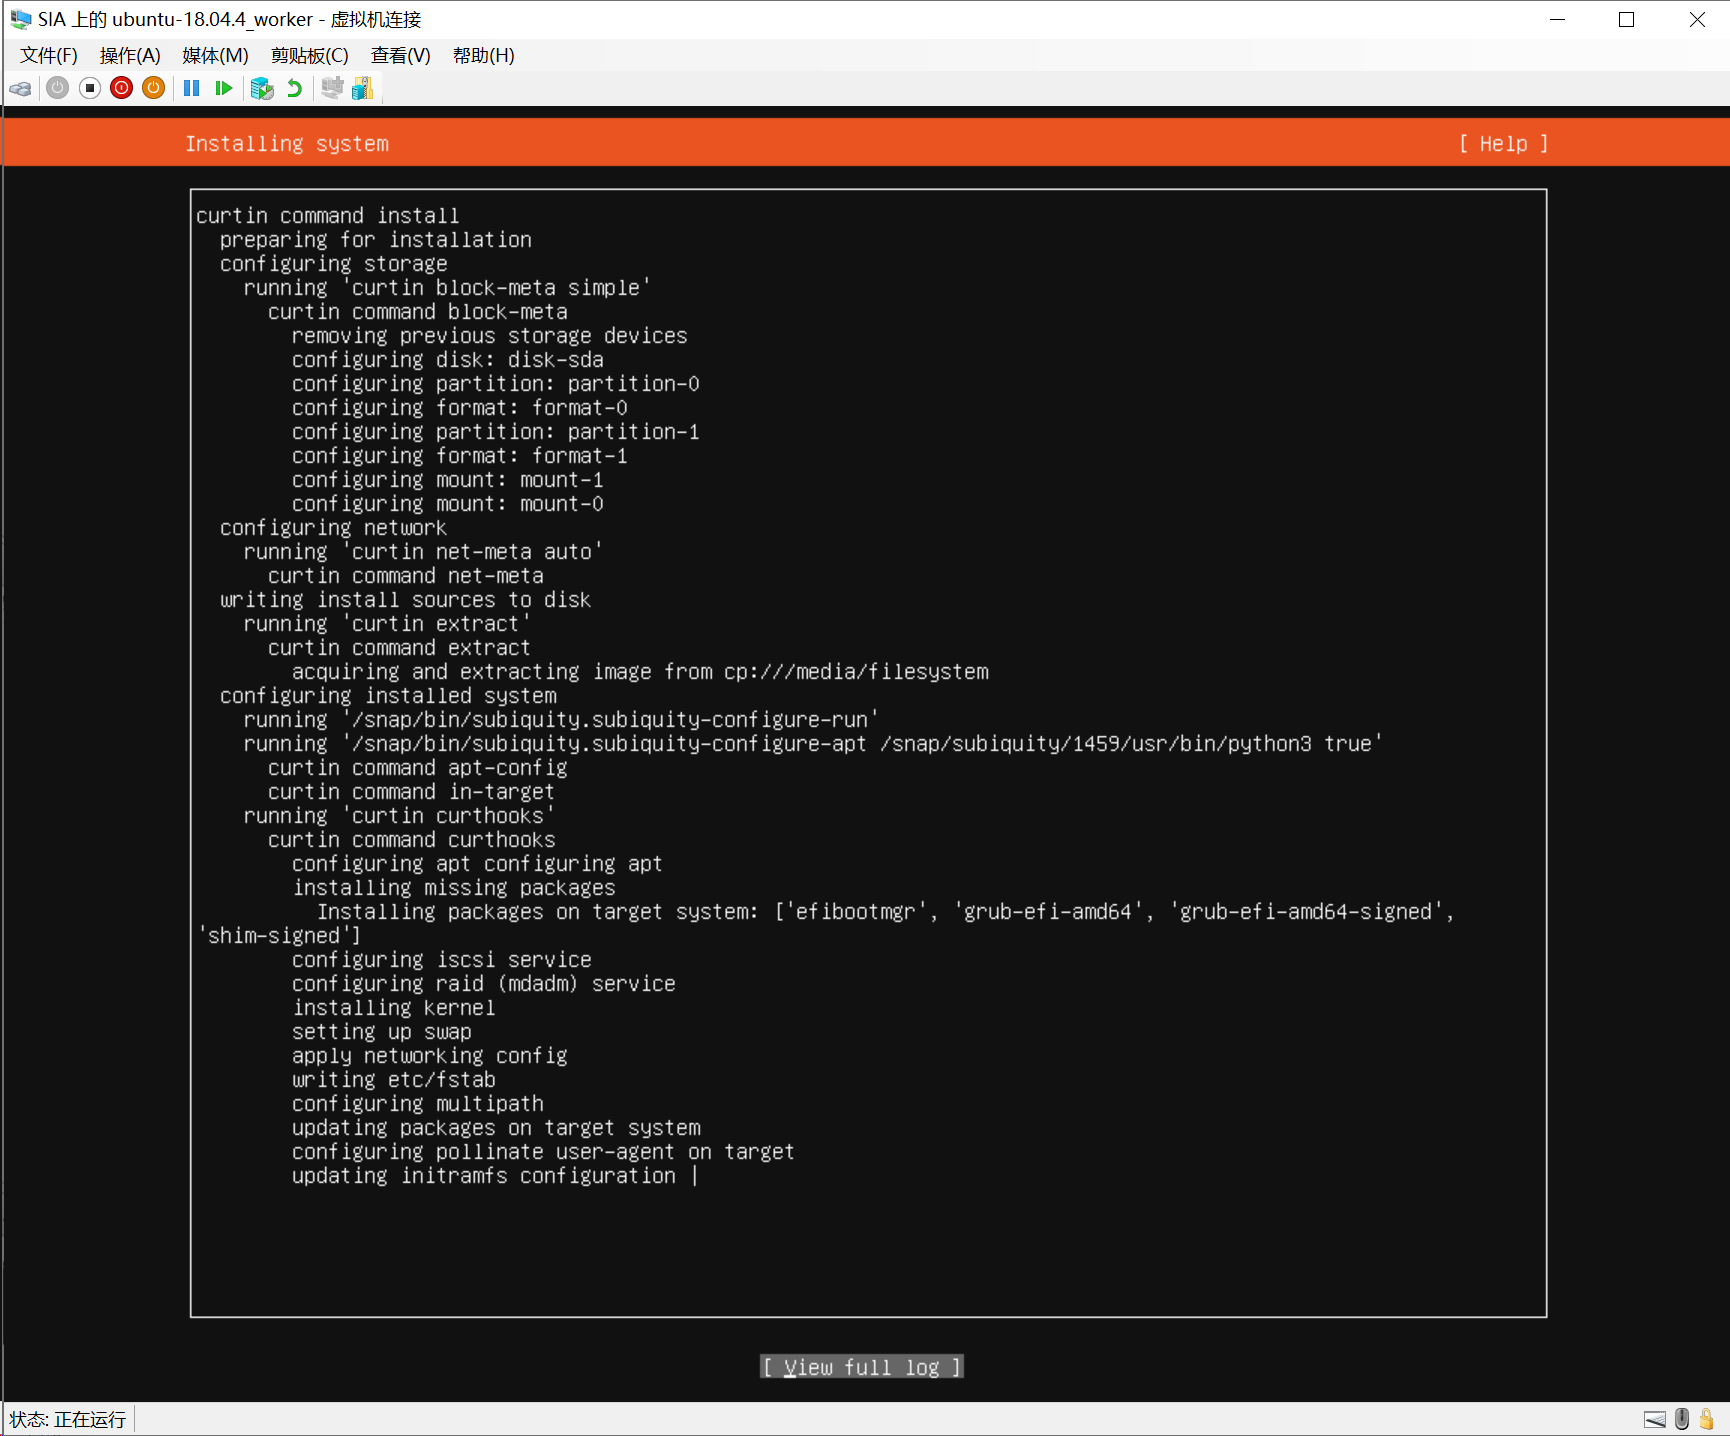
System installation completed
Docker installation and configuration
Install via script
One click installation script selection DaoCloud Script provided
Executive order
curl -sSL https://get.daocloud.io/docker | sh
setup script
tesla@hyper-tesla:~$ curl -sSL https://get.daocloud.io/docker | sh

# Executing docker install script, commit: f45d7c11389849ff46a6b4d94e0dd1ffebca32c1
+ sudo -E sh -c apt-get update -qq >/dev/null
[sudo] password for tesla:
+ sudo -E sh -c DEBIAN_FRONTEND=noninteractive apt-get install -y -qq apt-transport-https ca-certificates curl >/dev/null
+ sudo -E sh -c curl -fsSL "https://download.docker.com/linux/ubuntu/gpg" | apt-key add -qq - >/dev/null
Warning: apt-key output should not be parsed (stdout is not a terminal)
+ sudo -E sh -c echo "deb [arch=amd64] https://download.docker.com/linux/ubuntu bionic stable" > /etc/apt/sources.list.d/docker.list
+ sudo -E sh -c apt-get update -qq >/dev/null
+ [ -n  ]
+ sudo -E sh -c apt-get install -y -qq --no-install-recommends docker-ce >/dev/null
+ sudo -E sh -c docker version
Client: Docker Engine - Community
 Version:           19.03.7
 API version:       1.40
 Go version:        go1.12.17
 Git commit:        7141c199a2
 Built:             Wed Mar  4 01:22:36 2020
 OS/Arch:           linux/amd64
 Experimental:      false

Server: Docker Engine - Community
 Engine:
  Version:          19.03.7
  API version:      1.40 (minimum version 1.12)
  Go version:       go1.12.17
  Git commit:       7141c199a2
  Built:            Wed Mar  4 01:21:08 2020
  OS/Arch:          linux/amd64
  Experimental:     false
 containerd:
  Version:          1.2.13
  GitCommit:        7ad184331fa3e55e52b890ea95e65ba581ae3429
 runc:
  Version:          1.0.0-rc10
  GitCommit:        dc9208a3303feef5b3839f4323d9beb36df0a9dd
 docker-init:
  Version:          0.18.0
  GitCommit:        fec3683
If you would like to use Docker as a non-root user, you should now consider
adding your user to the "docker" group with something like:

  sudo usermod -aG docker tesla

Remember that you will have to log out and back in for this to take effect!

WARNING: Adding a user to the "docker" group will grant the ability to run
         containers which can be used to obtain root privileges on the
         docker host.
         Refer to https://docs.docker.com/engine/security/security/#docker-daemon-attack-surface
         for more information.
After the above script is installed, add the current user to the docker user group
sudo usermod -aG docker $USER
Configure domestic image
There are many options for domestic image, continue to choose here DaoCloud The provided image source and restart Docker
curl -sSL https://get.daocloud.io/daotools/set_mirror.sh | sh -s http://f1361db2.m.daocloud.io
sudo systemctl restart docker
hello, world
After everything is ready, run a hello and world to verify the installation result of Docker
docker run hello-world
Output results:
tesla@hyper-tesla:~$ docker run hello-world
Unable to find image 'hello-world:latest' locally
latest: Pulling from library/hello-world
1b930d010525: Pulling fs layer
latest: Pulling from library/hello-world
1b930d010525: Pull complete
Digest: sha256:fc6a51919cfeb2e6763f62b6d9e8815acbf7cd2e476ea353743570610737b752
Status: Downloaded newer image for hello-world:latest

Hello from Docker!
This message shows that your installation appears to be working correctly.

To generate this message, Docker took the following steps:
 1. The Docker client contacted the Docker daemon.
 2. The Docker daemon pulled the "hello-world" image from the Docker Hub.
    (amd64)
 3. The Docker daemon created a new container from that image which runs the
    executable that produces the output you are currently reading.
 4. The Docker daemon streamed that output to the Docker client, which sent it
    to your terminal.

To try something more ambitious, you can run an Ubuntu container with:
 $ docker run -it ubuntu bash

Share images, automate workflows, and more with a free Docker ID:
 https://hub.docker.com/

For more examples and ideas, visit:
 https://docs.docker.com/get-started/
Docker installation completed
(optional) Docker configuration item
Adjust Max concurrent Downloads
According to the network environment, you can adjust the number of concurrent downloads when Docker pulls the image to make full use of the network
Example of configuration file daemon.json
{
    "max-concurrent-downloads": 20
}
Restart Docker service to take effect after adjustment
Modify the Cgroup Driver of Docker
Systemd is recommended for the later version of K8S. If the Docker uses cgroupfs, you can adjust it in daemon.json
{
    "exec-opts": ["native.cgroupdriver=systemd"]
}
Restart Docker service to take effect after adjustment
K8S installation and configuration
Add source and install
Choose aliyuan to install K8S in combination with domestic network environment
Execute the following command
curl https://mirrors.aliyun.com/kubernetes/apt/doc/apt-key.gpg | sudo apt-key add -
Add apt source, create / etc/apt/sources.list.d/kubernetes.list and write the following
deb https://mirrors.aliyun.com/kubernetes/apt/ kubernetes-xenial main
Execute installation command
sudo apt update && sudo apt install -y kubelet kubeadm kubectl
setup script
tesla@hyper-tesla:~$ sudo apt update && sudo apt install -y kubelet kubeadm kubectl
Get:1 https://mirrors.aliyun.com/kubernetes/apt kubernetes-xenial InRelease [8,993 B]
Hit:2 https://mirrors.scau.edu.cn/ubuntu bionic InRelease
Hit:3 https://mirrors.scau.edu.cn/ubuntu bionic-updates InRelease
Hit:4 https://mirrors.scau.edu.cn/ubuntu bionic-backports InRelease
Hit:5 https://mirrors.scau.edu.cn/ubuntu bionic-security InRelease
Ign:6 https://mirrors.aliyun.com/kubernetes/apt kubernetes-xenial/main amd64 Packages
Get:6 https://mirrors.aliyun.com/kubernetes/apt kubernetes-xenial/main amd64 Packages [33.9 kB]
Hit:7 https://download.docker.com/linux/ubuntu bionic InRelease
Fetched 42.9 kB in 1s (85.5 kB/s)
Reading package lists... Done
Building dependency tree
Reading state information... Done
14 packages can be upgraded. Run 'apt list --upgradable' to see them.
Reading package lists... Done
Building dependency tree
Reading state information... Done
The following additional packages will be installed:
  conntrack cri-tools kubernetes-cni socat
The following NEW packages will be installed:
  conntrack cri-tools kubeadm kubectl kubelet kubernetes-cni socat
0 upgraded, 7 newly installed, 0 to remove and 14 not upgraded.
Need to get 51.6 MB of archives.
After this operation, 272 MB of additional disk space will be used.
Get:1 https://mirrors.scau.edu.cn/ubuntu bionic/main amd64 conntrack amd64 1:1.4.4+snapshot20161117-6ubuntu2 [30.6 kB]
Get:2 https://mirrors.scau.edu.cn/ubuntu bionic/main amd64 socat amd64 1.7.3.2-2ubuntu2 [342 kB]
Get:3 https://mirrors.aliyun.com/kubernetes/apt kubernetes-xenial/main amd64 cri-tools amd64 1.13.0-00 [8,776 kB]
Get:4 https://mirrors.aliyun.com/kubernetes/apt kubernetes-xenial/main amd64 kubernetes-cni amd64 0.7.5-00 [6,473 kB]
Get:5 https://mirrors.aliyun.com/kubernetes/apt kubernetes-xenial/main amd64 kubelet amd64 1.17.3-00 [19.2 MB]
Get:6 https://mirrors.aliyun.com/kubernetes/apt kubernetes-xenial/main amd64 kubectl amd64 1.17.3-00 [8,740 kB]
Get:7 https://mirrors.aliyun.com/kubernetes/apt kubernetes-xenial/main amd64 kubeadm amd64 1.17.3-00 [8,066 kB]
Fetched 51.6 MB in 3s (17.9 MB/s)
Selecting previously unselected package conntrack.
(Reading database ... 67250 files and directories currently installed.)
Preparing to unpack .../0-conntrack_1%3a1.4.4+snapshot20161117-6ubuntu2_amd64.deb ...
Unpacking conntrack (1:1.4.4+snapshot20161117-6ubuntu2) ...
Selecting previously unselected package cri-tools.
Preparing to unpack .../1-cri-tools_1.13.0-00_amd64.deb ...
Unpacking cri-tools (1.13.0-00) ...
Selecting previously unselected package kubernetes-cni.
Preparing to unpack .../2-kubernetes-cni_0.7.5-00_amd64.deb ...
Unpacking kubernetes-cni (0.7.5-00) ...
Selecting previously unselected package socat.
Preparing to unpack .../3-socat_1.7.3.2-2ubuntu2_amd64.deb ...
Unpacking socat (1.7.3.2-2ubuntu2) ...
Selecting previously unselected package kubelet.
Preparing to unpack .../4-kubelet_1.17.3-00_amd64.deb ...
Unpacking kubelet (1.17.3-00) ...
Selecting previously unselected package kubectl.
Preparing to unpack .../5-kubectl_1.17.3-00_amd64.deb ...
Unpacking kubectl (1.17.3-00) ...
Selecting previously unselected package kubeadm.
Preparing to unpack .../6-kubeadm_1.17.3-00_amd64.deb ...
Unpacking kubeadm (1.17.3-00) ...
Setting up conntrack (1:1.4.4+snapshot20161117-6ubuntu2) ...
Setting up kubernetes-cni (0.7.5-00) ...
Setting up cri-tools (1.13.0-00) ...
Setting up socat (1.7.3.2-2ubuntu2) ...
Setting up kubelet (1.17.3-00) ...
Created symlink /etc/systemd/system/multi-user.target.wants/kubelet.service → /lib/systemd/system/kubelet.service.
Setting up kubectl (1.17.3-00) ...
Setting up kubeadm (1.17.3-00) ...
Processing triggers for man-db (2.8.3-2ubuntu0.1) ...
Nodes join the cluster
The K8S cluster Master is already running. The current node joins the cluster through the following command
Command parameters are subject to their own environment
sudo kubeadm join 192.168.3.200:6443 --token n54f1g.sy6gfae598zgos2s \
    --discovery-token-ca-cert-hash sha256:ffcca8c63cea1f94bd92c935e1d71c0a5360a1989990c981692c30f6cf5d8a1c
Operation error:
W0306 06:38:41.660720    7834 join.go:346] [preflight] WARNING: JoinControlPane.controlPlane settings will be ignored when control-plane flag is not set.
[preflight] Running pre-flight checks
error execution phase preflight: [preflight] Some fatal errors occurred:
        [ERROR Swap]: running with swap on is not supported. Please disable swap
[preflight] If you know what you are doing, you can make a check non-fatal with `--ignore-preflight-errors=...`
To see the stack trace of this error execute with --v=5 or higher
Need to turn off swap
Close swap
swapoff
Executive order
sudo swapoff -a
View results
tesla@hyper-tesla:~$ free -h
              total        used        free      shared  buff/cache   available
Mem:           3.9G        2.6G        233M        840K        1.0G        1.0G
Swap:            0B          0B          0B
As you can see, swap has been turned off, but auto mount has not been turned off
Modify / etc/fstab
Comment the swap related lines in the / etc/fstab file
# /etc/fstab: static file system information.
#
# Use 'blkid' to print the universally unique identifier for a
# device; this may be used with UUID= as a more robust way to name devices
# that works even if disks are added and removed. See fstab(5).
#
# <file system> <mount point>   <type>  <options>       <dump>  <pass>
# / was on /dev/sda2 during curtin installation
/dev/disk/by-uuid/673d4dfb-f949-4c72-846e-aa29d469f939 / ext4 defaults 0 0
# /boot/efi was on /dev/sda1 during curtin installation
/dev/disk/by-uuid/204C-9129 /boot/efi vfat defaults 0 0
# /swap.img     none    swap    sw      0       0
retry kubeadm join cluster command
results of enforcement
tesla@hyper-tesla:~$ sudo kubeadm join 192.168.3.200:6443 --token n54f1g.sy6gfae598zgos2s     --discovery-token-ca-cert-hash sha256:ffcca8c63cea1f94bd92c935e1d71c0a5360a1989990c981692c30f6cf5d8a1c
W0306 06:46:35.722265    9243 join.go:346] [preflight] WARNING: JoinControlPane.controlPlane settings will be ignored when control-plane flag is not set.
[preflight] Running pre-flight checks
[preflight] Reading configuration from the cluster...
[preflight] FYI: You can look at this config file with 'kubectl -n kube-system get cm kubeadm-config -oyaml'
[kubelet-start] Downloading configuration for the kubelet from the "kubelet-config-1.17" ConfigMap in the kube-system namespace
[kubelet-start] Writing kubelet configuration to file "/var/lib/kubelet/config.yaml"
[kubelet-start] Writing kubelet environment file with flags to file "/var/lib/kubelet/kubeadm-flags.env"
[kubelet-start] Starting the kubelet
[kubelet-start] Waiting for the kubelet to perform the TLS Bootstrap...

This node has joined the cluster:
* Certificate signing request was sent to apiserver and a response was received.
* The Kubelet was informed of the new secure connection details.

Run 'kubectl get nodes' on the control-plane to see this node join the cluster.
At this time, execute the command on the Master node machine
kubectl get nodes
After a short period of NotReady, you can see that the current node (hyper Tesla) has joined the K8S cluster
sia@hyper-sia:~$ kubectl get nodes
NAME          STATUS     ROLES    AGE   VERSION
hyper-sia     Ready      master   17h   v1.17.3
hyper-tesla   NotReady   <none>   23s   v1.17.3

sia@hyper-sia:~$ kubectl get nodes
NAME          STATUS   ROLES    AGE   VERSION
hyper-sia     Ready    master   17h   v1.17.3
hyper-tesla   Ready    <none>   83s   v1.17.3
All pods are working
sia@hyper-sia:~$ kubectl get pods --all-namespaces
NAMESPACE              NAME                                         READY   STATUS    RESTARTS   AGE
kube-system            coredns-9d85f5447-ggt84                      1/1     Running   0          17h
kube-system            coredns-9d85f5447-pnfcm                      1/1     Running   0          17h
kube-system            etcd-hyper-sia                               1/1     Running   4          17h
kube-system            kube-apiserver-hyper-sia                     1/1     Running   4          17h
kube-system            kube-controller-manager-hyper-sia            1/1     Running   5          17h
kube-system            kube-flannel-ds-amd64-czzpr                  1/1     Running   1          5m34s
kube-system            kube-flannel-ds-amd64-rx8p7                  1/1     Running   0          14h
kube-system            kube-proxy-7khrt                             1/1     Running   0          5m34s
kube-system            kube-proxy-89flh                             1/1     Running   4          17h
kube-system            kube-scheduler-hyper-sia                     1/1     Running   4          17h
kubernetes-dashboard   dashboard-metrics-scraper-76585494d8-pxpd5   1/1     Running   0          14h
kubernetes-dashboard   kubernetes-dashboard-5996555fd8-7vz88        1/1     Running   0          14h
This is the process of a machine from zero to join K8S cluster and become a Worker node

