1, Centos6 X version of yum image installation
1. If you are using a simplified version of CentOS, you need to install yum first
Note: if you have no problem with yum, please skip this step to install Yum by yourself
2. If there is a problem with yum, you need to execute these five lines of commands
Note: five lines of commands, five steps, step by step copy operation
[root@master ~]# sed -i "s|enabled=1|enabled=0|g" /etc/yum/pluginconf.d/fastestmirror.conf
[root@master ~]# mv /etc/yum.repos.d/CentOS-Base.repo /etc/yum.repos.d/CentOS-Base.repo.backup
[root@master ~]# curl -o /etc/yum.repos.d/CentOS-Base.repo https://www.xmpan.com/Centos-6-Vault-Aliyun.repo
[root@master ~]# yum clean all
[root@master ~]# yum makecache
Note: Alibaba cloud, that is, the domestic agent, is used here. If the server is overseas, replace the third command with the official Vault source (for overseas servers)
curl -o /etc/yum.repos.d/CentOS-Base.repo https://www.xmpan.com/Centos-6-Vault-Official.repo`
2, Install MySQL online using yum or up2date
(1) Direct installation
1. Check whether mysql has been installed
[root@master ~]# rpm -qa|grep mysql #No output indicates no installation
rpm -e mysql        // Normal delete mode
rpm -e --nodeps mysql  // Strong deletion mode: if you use the above command to delete and prompt other dependent files, you can use this command to delete them
2. Install mysql using yum or up2date
Note: only mysql5 can be installed in this way X version, the latest version of MySQL cannot be installed
(1) Search mysql installation package and find mysql server x86_ sixty-four
[root@master ~]# yum search mysql
(2) Install MySQL server x86_ sixty-four
[root@master ~]# yum -y install mysql-server.x86_64
(3) Start mysql service
[root@master ~]# service mysqld start & chkconfig mysqld on
(4) Start mysql and directly enter "mysql" on the terminal
[root@master ~]# mysql
(5) Execute the following command to set permissions for the root user
use mysql;
delete from user where 1=1;
GRANT ALL PRIVILEGES ON *.* TO 'root'@'%' IDENTIFIED BY '123456' WITH GRANT OPTION;
FLUSH PRIVILEGES;
Note: mysql operation instructions
GRANT: Empowerment command
ALL PRIVILEGES: All permissions of the current user
ON: preposition
*.*: The corresponding operation permissions of the current user on all databases and tables
TO: preposition
'root'@'%': Assign permissions to root User, all ip Can be connected
IDENTIFIED BY '123456': Enter the password when connecting. The password is 123456
WITH GRANT OPTION: Allow cascading weighting
(2) Indirect installation
1. There are two mainstream PMS tools for Linux.
For Red Hat based distributions, the PMS tool is rpm and the corresponding installation command is yum. For Debian based distributions, PMS
The tool is dpkg and the corresponding installation command is aptitude. The author's operating system CentOS release 6.5 belongs to Red
Hat, the installation package with the suffix rpm will be used. If the operating system used by the reader is Ubuntu, you need to choose the suffix deb
Installation package for. If the reader doesn't know how to distinguish, you can enter the following command to verify: yum
[root@master ~]# yum
If you enter yum, a large string of descriptive text appears indicating that the installation package with the suffix rpm should be used. If you are prompted that the yum command does not exist, you should use the installation package with the suffix deb.
2. Check your Linux system version, find the corresponding Linux version and download it
[root@master ~]# cat /etc/redhat-release
CentOS release 6.5 (Final)
3.MySQL download address:
Official website of MySQL: https://www.mysql.com/
MySQL version selection address: https://downloads.mysql.com/archives/community/
Download address of MySQL rpm file: https://dev.mysql.com/downloads/repo/yum/
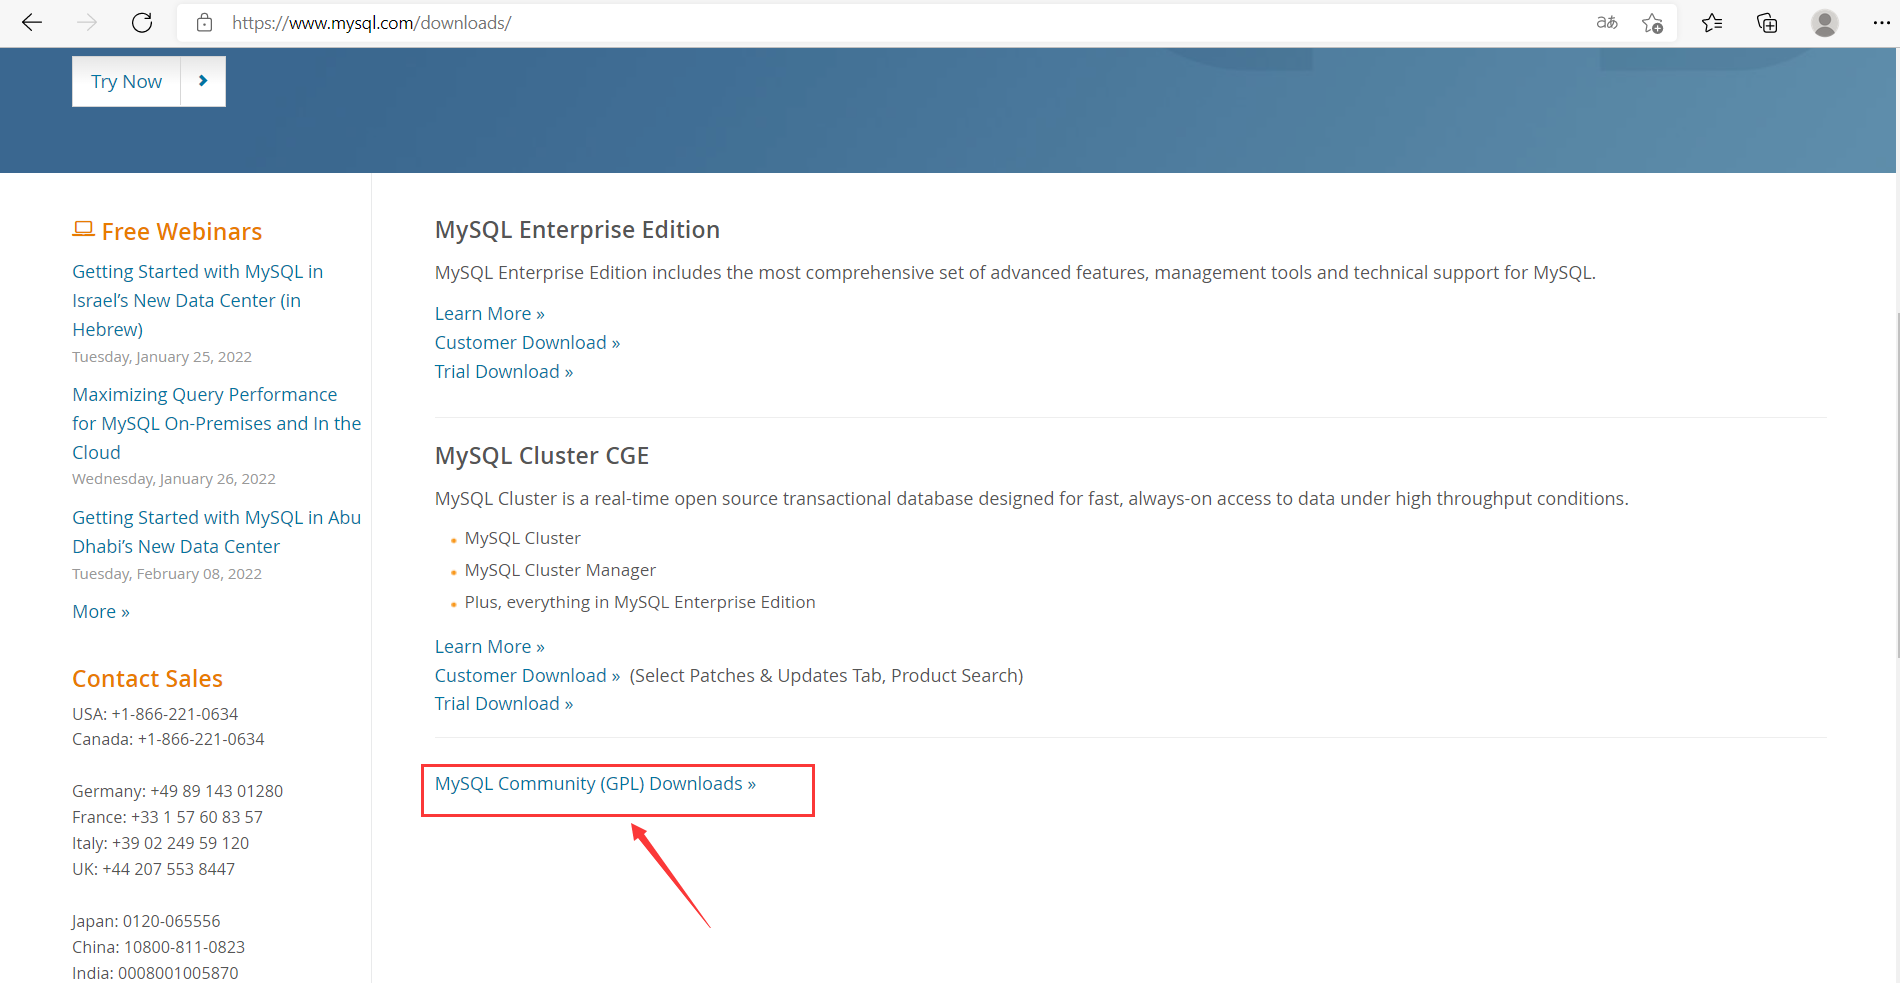
4. Enter the MySQL official website and select Downloads

5. Select MySQL Community (GPL) Downloads
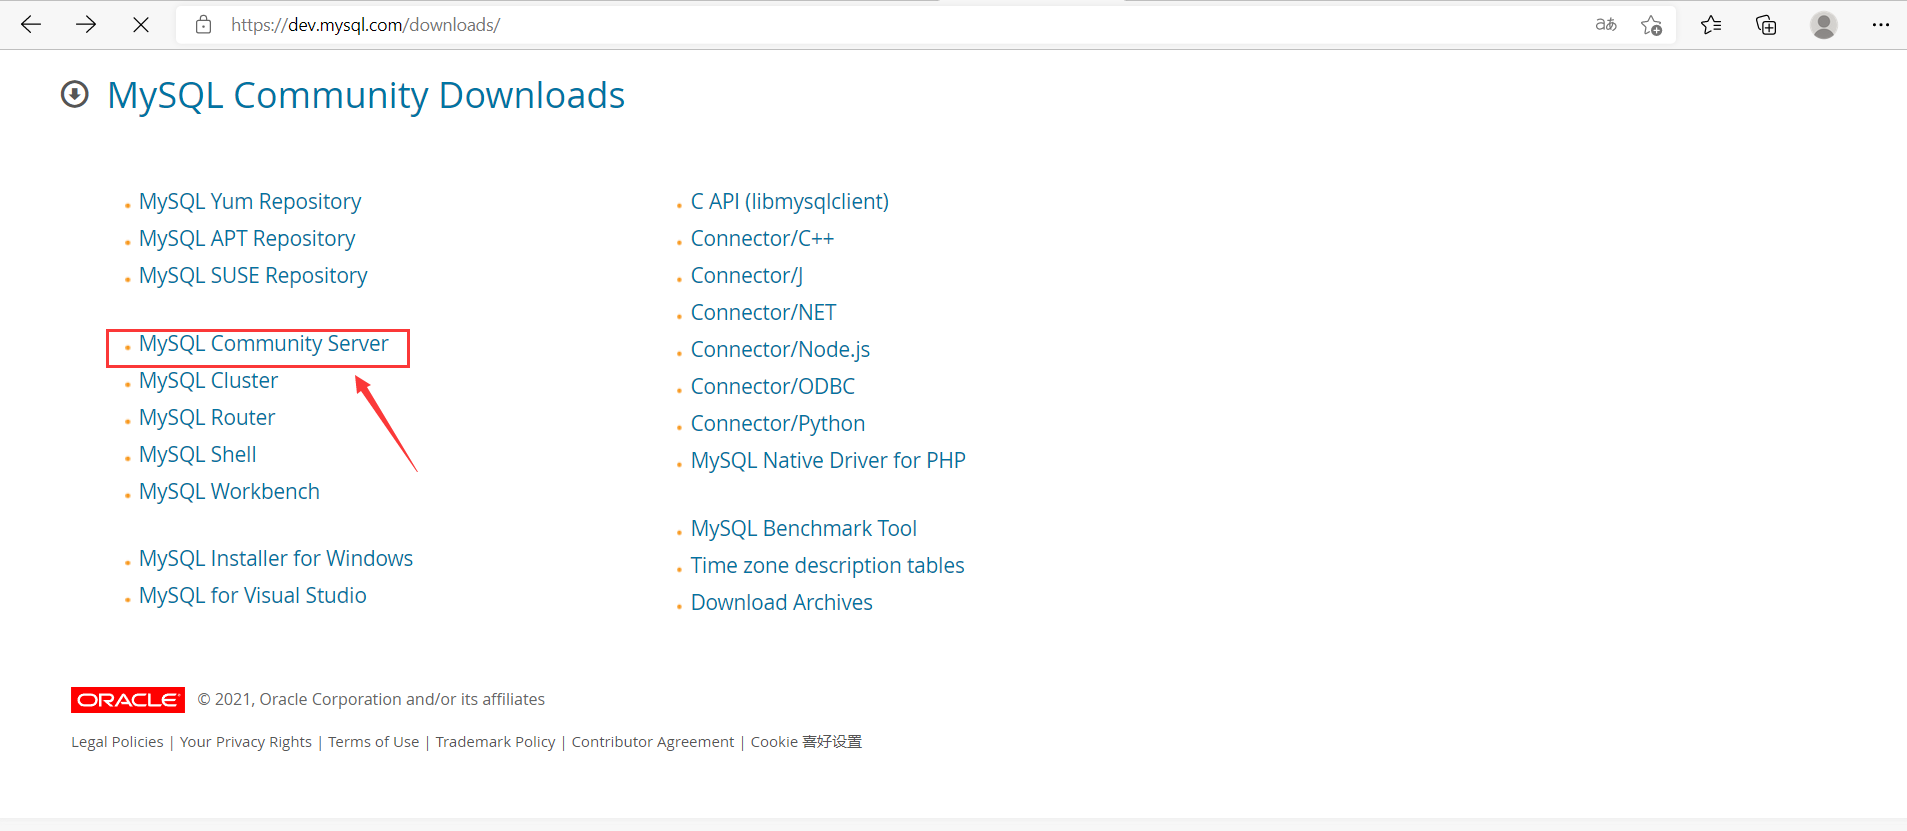
 6. Select MySQL Community Server
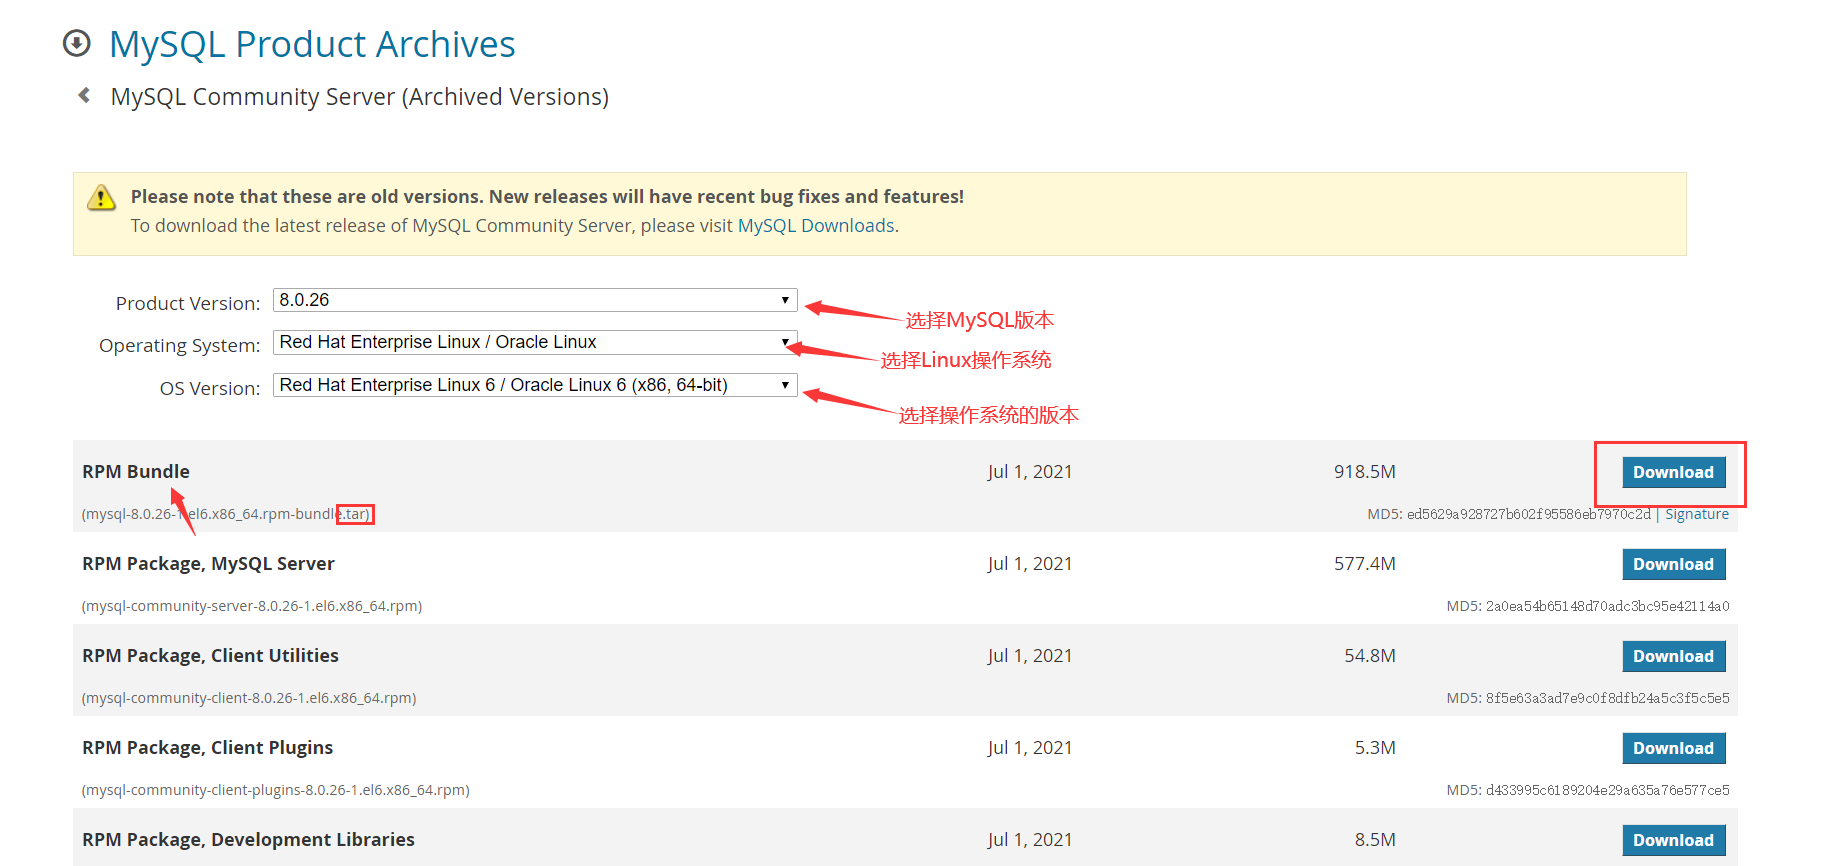
7. Select operating system, system version and MySQL version
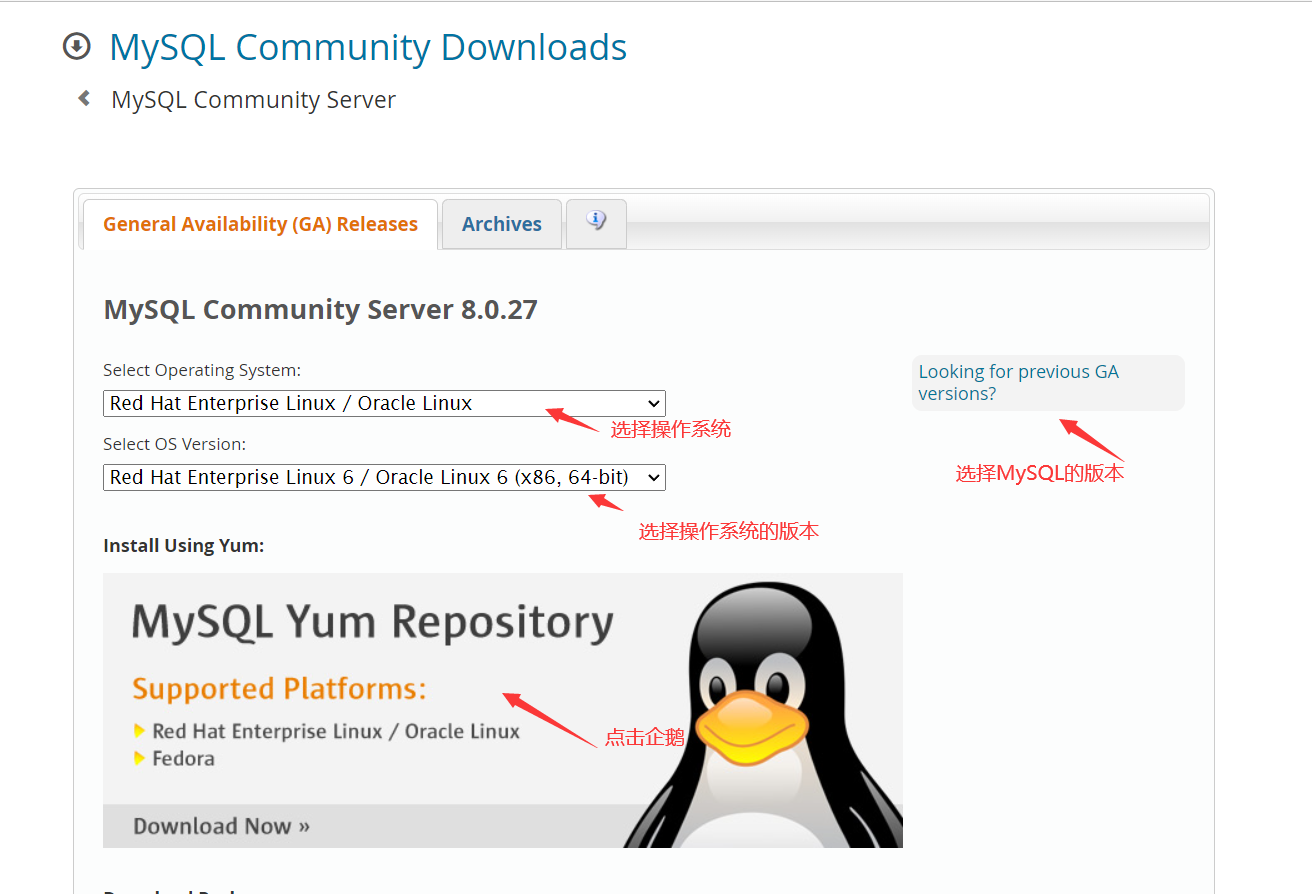
8. Select the rpm package that yum can install
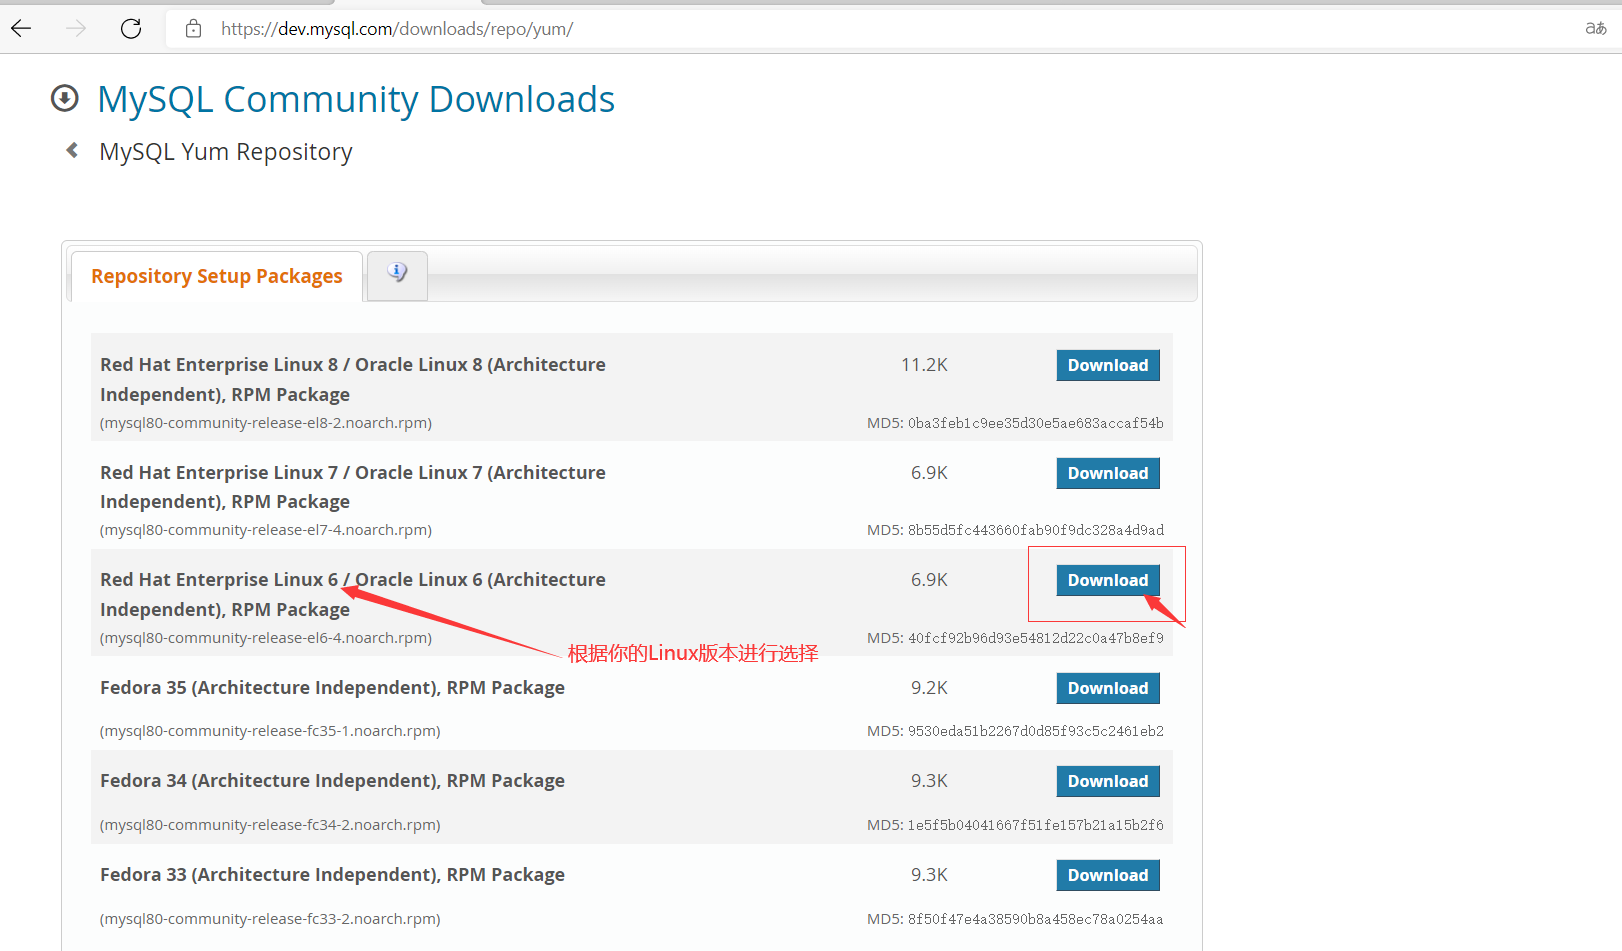
9. Enter the download interface
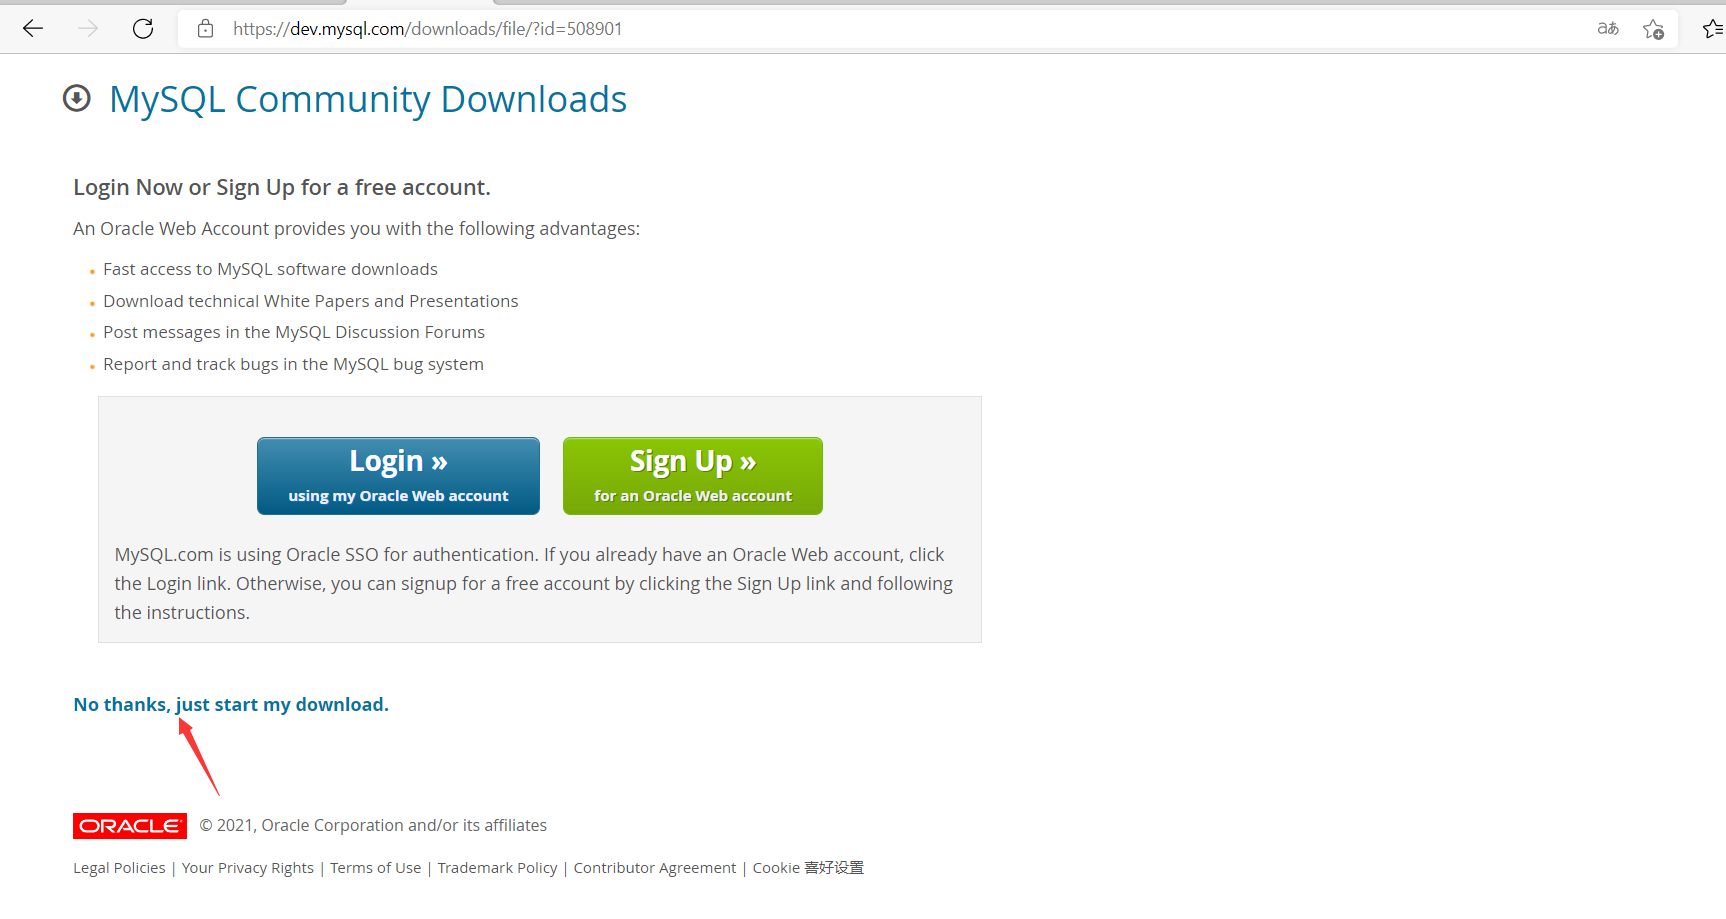
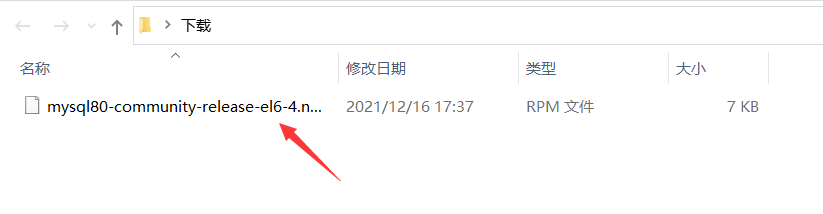
10. After downloading, get the suffix RPM file, copy the full name of the downloaded file: mysql80-community-release-el6-4 noarch. rpm
11. Download MySQL source
[root@master ~]# wget https://dev.mysql.com/get/mysql80-community-release-el6-4.noarch.rpm
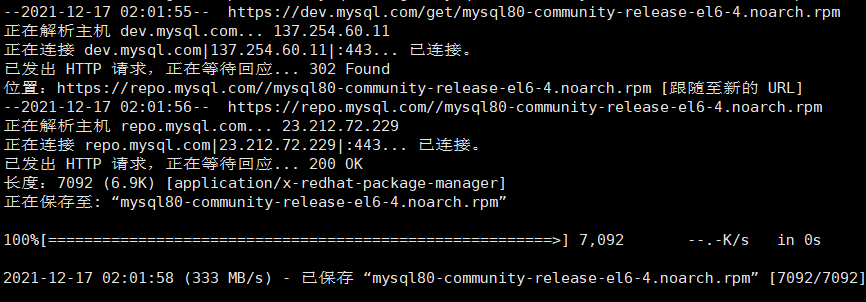
Note: if the command wget is not found, you need to install wget: yum -y install wget first, and then execute the above command again
12. Install MySQL source
[root@master ~]# rpm -Uvh mysql80-community-release-el6-4.noarch.rpm
warning: mysql80-community-release-el6-4.noarch.rpm: Header V3 DSA/SHA256 Signature, key ID 5072e1f5: NOKEY
Preparing...                ########################################### [100%]
   1:mysql80-community-relea########################################### [100%]
Check for successful installation:
After successful execution, it will be displayed in / etc / yum repos. D / directory to generate two repo files MySQL community Repo and MySQL community source repo
[root@master ~]# cd /etc/yum.repos.d/
[root@master yum.repos.d]# ll
 Total consumption 28
-rw-r--r--. 1 root root 1749 4 May 14, 2021 CentOS-Base.repo
-rw-r--r--. 1 root root 1926 11 July 27, 2013 CentOS-Base.repo.backup
-rw-r--r--. 1 root root  638 11 July 27, 2013 CentOS-Debuginfo.repo
-rw-r--r--. 1 root root  630 11 July 27, 2013 CentOS-Media.repo
-rw-r--r--. 1 root root 3664 11 July 27, 2013 CentOS-Vault.repo
-rw-r--r--  1 root root 1628 11 January 2:24 mysql-community.repo
-rw-r--r--  1 root root 1700 11 January 2:24 mysql-community-source.repo
View mysql related resources:
[root@master yum.repos.d]# yum repolist enabled | grep "mysql.*-community.*"
mysql-connectors-community   MySQL Connectors Community                     185
mysql-tools-community        MySQL Tools Community                          111
mysql80-community            MySQL 8.0 Community Server                     265
13. Select the installation version
When you use this method to install mysql, the latest stable version of MySQL will be installed by default. If this is what you want to install, you can ignore this step. If you want to install a previous version, such as 5.6 or 5.5, you can configure it with the following method.
First, let's check which MySQL sources are disabled or enabled.
[root@master yum.repos.d]# yum repolist all | grep mysql
mysql-cluster-7.5-community        MySQL Cluster 7.5 Community    disabled
mysql-cluster-7.5-community-source MySQL Cluster 7.5 Community -  disabled
mysql-cluster-7.6-community        MySQL Cluster 7.6 Community    disabled
mysql-cluster-7.6-community-source MySQL Cluster 7.6 Community -  disabled
mysql-cluster-8.0-community        MySQL Cluster 8.0 Community    disabled
mysql-cluster-8.0-community-source MySQL Cluster 8.0 Community -  disabled
mysql-connectors-community         MySQL Connectors Community     enabled:   185
mysql-connectors-community-source  MySQL Connectors Community - S disabled
mysql-tools-community              MySQL Tools Community          enabled:   111
mysql-tools-community-source       MySQL Tools Community - Source disabled
mysql-tools-preview                MySQL Tools Preview            disabled
mysql-tools-preview-source         MySQL Tools Preview - Source   disabled
mysql57-community                  MySQL 5.7 Community Server     disabled
mysql57-community-source           MySQL 5.7 Community Server - S disabled
mysql80-community                  MySQL 8.0 Community Server     enabled:   265
mysql80-community-source           MySQL 8.0 Community Server - S disabled
For example, we can see that the 8.0 series is now enabled. What we need to install is 5 X series. Then we can execute the following command:
[root@master ~] # yum-config-manager --disable mysql80-community
[root@master ~]#  yum-config-manager --enable mysql57-community
Note: if Yum config Manager: command not found appears, you need to execute Yum - y install Yum utils
After the enable and disable commands are executed successfully, check which MySQL sources are disabled again:
[root@master ~]# yum repolist all | grep mysql
mysql-cluster-7.5-community        MySQL Cluster 7.5 Community       Disable
mysql-cluster-7.5-community-source MySQL Cluster 7.5 Community - Sou Disable
mysql-cluster-7.6-community        MySQL Cluster 7.6 Community       Disable
mysql-cluster-7.6-community-source MySQL Cluster 7.6 Community - Sou Disable
mysql-cluster-8.0-community        MySQL Cluster 8.0 Community       Disable
mysql-cluster-8.0-community-source MySQL Cluster 8.0 Community - Sou Disable
mysql-connectors-community         MySQL Connectors Community        Enable:   185
mysql-connectors-community-source  MySQL Connectors Community - Sour Disable
mysql-tools-community              MySQL Tools Community             Enable:   111
mysql-tools-community-source       MySQL Tools Community - Source    Disable
mysql-tools-preview                MySQL Tools Preview               Disable
mysql-tools-preview-source         MySQL Tools Preview - Source      Disable
mysql57-community                  MySQL 5.7 Community Server        Enable:   504
mysql57-community-source           MySQL 5.7 Community Server - Sour Disable
mysql80-community                  MySQL 8.0 Community Server        Disable
mysql80-community-source           MySQL 8.0 Community Server - Sour Disable
At this point, we found that MySQL version 5.7 has been enabled.
At this time, we view the current system configuration and only display the MySQL enabled command: yum repolist enabled | grep "mysql.*-community. *"
[root@master ~]# yum repolist enabled | grep "mysql.*-community.*"
mysql-connectors-community   MySQL Connectors Community                      185
mysql-tools-community        MySQL Tools Community                           111
mysql57-community            MySQL 5.7 Community Server                      504
14. Install MySQL
[root@master ~]# yum install mysql-community-server
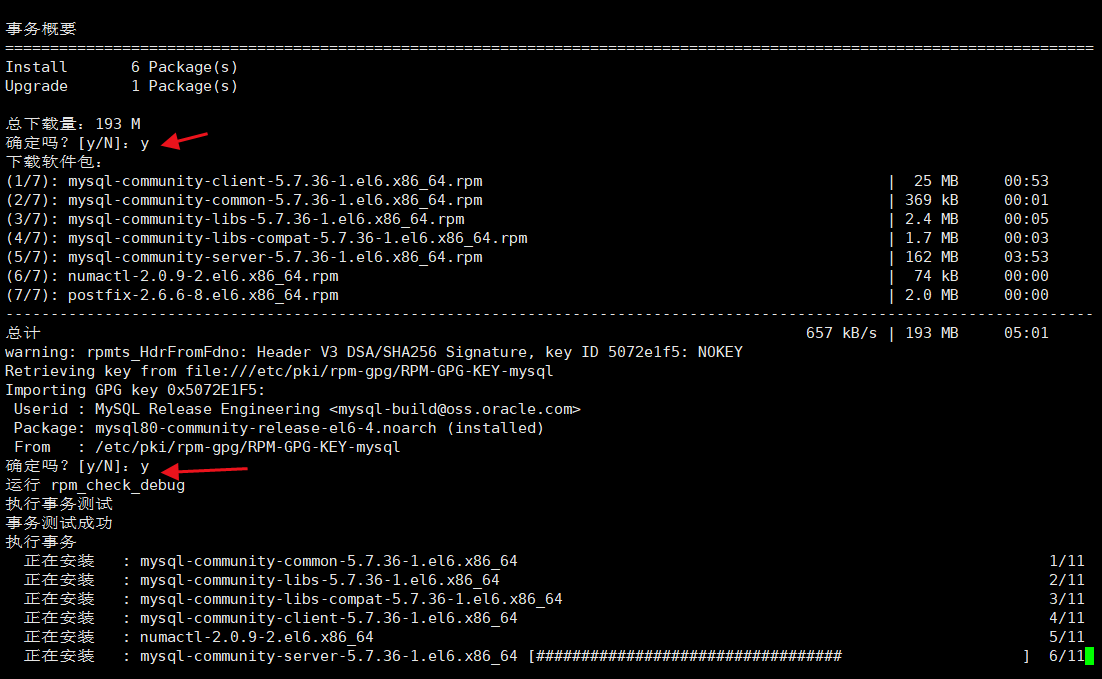
This command will install MySQL community server
And its required dependencies and related components, including MySQL community client, MySQL community common, MySQL community LIBS, etc.
15. Start up
service mysqld start        #Start MySQL service
service mysqld stop         #Close MySQL service
service mysqld restart       #Restart MySQL service
service mysqld status        #View service status
If startup fails, an error is reported

Note: it means MySQL configuration file my No files are allowed in the / var/lib/mysql folder in CNF. Delete all files rm -rf /var/lib/mysql / *, and manually initialize the database mysqld --initialize --user=mysql. Restart the service mysqld start again. Success!!
16. Change password and login
After MySQL is started for the first time, a super administrator account will be created root@master , the initial password is stored in the log file:
Method 1:[ root@master ~]# grep ‘temporary password’ /var/log/mysqld. log2021-12-16T20:30:20.772336Z 1 [Note] A temporary password is generatedfor root@localhost : J0FSEl./ DLP
[root@slave1 ~]# mysql -uroot -pJ0FSEl./DLP
Method 2: use the editor to open / etc / my CNF files are in my Add skip grant tables to the last line of CNF file, save and exit, restart MySQL server service mysqld restart, and skip password login verification. (the writer uses method 2 and can use it successfully)
mysql> use mysql;
Reading table information for completion of table and column names
You can turn off this feature to get a quicker startup with -A
Database changed
mysql> select User from user;
+---------------+
| User          |
+---------------+
| mysql.session |
| mysql.sys     |
| root          |
+---------------+
3 rows in set (0.00 sec)
mysql>  update mysql.user set authentication_string=password('123456') where user='root';
Query OK, 1 row affected, 1 warning (0.10 sec)
Rows matched: 1  Changed: 1  Warnings: 1
mysql> flush privileges;
Query OK, 0 rows affected (0.00 sec)
mysql> exit;
Bye
After exiting mysql, use the editor to open / etc / my CNF files are in my Comment out the last line of the previous step in the CNF file, add skip grant tables, save and exit, and restart the MySQL server service mysqld restart.
If you use MySQL after entering mysql
mysql> use mysql;
ERROR 1820 (HY000): You must reset your password using ALTER USER statement before executing this statement.
resolvent:
MySQL Version 5.7.6 Before version, users can use the following commands:
mysql> SET PASSWORD = PASSWORD('root2021');
MySQL Version 5.7.6 Users starting with version can use the following commands:
mysql> ALTER USER USER() IDENTIFIED BY 'root2021';
mysql> flush privileges;
3, Download Install MySQL from tar file
1. Select MySQL version
Official download address: https://downloads.mysql.com/archives/community/
You can also enter linux and download it with a command
wget https://cdn.mysql.com/archives/mysql-8.0/mysql-8.0.26-1.el6.x86_64.rpm-bundle.tar
2. Environment configuration
Linux connection tool: Xshell
File management tool: Xftp
System version: CentOS 6.5 64 bit
Installation source file version: mysql-8.0.0 26-1. el6. x86_ 64.rpm-bundle. tar
3. Download and install MySQL
First, enter the / opt directory for online download. You can also transfer the downloaded files to the / opt directory through xftp
cd /opt
wget https://cdn.mysql.com/archives/mysql-8.0/mysql-8.0.26-1.el6.x86_64.rpm-bundle.tar
After downloading, you will find mysql-8.0.0 in the / opt directory 26-1. el6. x86_ 64.rpm-bundle. Tar file, extract it and install it in the / usr/local directory
tar -zxvf mysql-8.0.26-1.el6.x86_64.rpm-bundle.tar /usr/local
rename
mv mysql-8.0.26-1.el6.x86_64 mysql-8.0.26
4. Add system mysql group and mysql user
First, check whether the mysql group and user exist. If not, create them
cat /etc/group | grep mysql
#similar
mysql:x:490: cat /etc/passwd | grep mysql
#similar
mysql:x:496:490::/home/mysql:/bin/bash
The above conditions exist. If not, execute the add command:
groupadd mysql
useradd -r -g mysql mysql
Note: the useradd -r parameter indicates that the mysql user is a system user and cannot be used to log in to the system
5. Install database
(1) Create data directory
cd /usr/local/mysql-8.0.26
mkdir data
(2) Add / usr / local / mysql-8.0 Change the owner and group of 26 to MySQL
chown -R mysql.mysql /usr/local/mysql-8.0.26
(3) At / usr / local / mysql-8.0 26 / support files directory_ default. cnf
[mysqld]
sql_mode=NO_ENGINE_SUBSTITUTION,STRICT_TRANS_TABLES
basedir = /usr/local/mysql-8.0.26
datadir = /usr/local/mysql-8.0.26/data
port = 3306
socket = /tmp/mysql.sock
character-set-server=utf8
log-error = /usr/local/mysql-8.0.26/data/mysqld.log
pid-file = /usr/local/mysql-8.0.26/data/mysqld.pid
(4) Copy, if prompted whether to overwrite, y
cp support-files/my_default.cnf /etc/my.cnf
(5) Initialize mysqld
cd /usr/local/mysql-8.0.26
./bin/mysqld --initialize --user=mysql --basedir=/usr/local/mysql-8.0.26/ --datadir=/usr/local/mysql-8.0.26/data/
(6) After initialization, view the log
/usr/local/mysql-8.0.26/data/mysqld.log
(7) Temporary password
2021-04-08T06:14:29.790033Z 1 [Note] A temporary password is generated for root@localhost: a8?DQir=T+k+
(8) Put the startup script in the startup initialization directory
cp support-files/mysql.server /etc/init.d/mysql
(9) Start mysql service
service mysql start
# Log in to mysql with the initial password
cd /usr/local/mysql-8.0.26
./bin/mysql -u root -p
(10) Change password
mysql> ALTER USER USER() IDENTIFIED BY 'root2021';
mysql> grant all privileges on *.* to root@'%' identified by 'root2021';
mysql> flush privileges;
(11) Add remote access
mysql> use mysql;
mysql> update user set host='%' where user = 'root';
mysql> flush privileges;
(12) Restart mysql to take effect
service mysql stop
service mysql start
 or
service mysql restart
4, Uninstall MySQL
For some reasons, you may have installed MySQL on your computer before installing MySQL this time, This may cause various problems in the following MySQL installation (such as unable to initialize the password, MySQL execution failure, etc.), so first, you need to completely clear any files related to MySQL in the computer. In addition, if some small partners need to install the old version of MySQL and want to uninstall the old version and reinstall the new version of MySQL, you also need to know how to uninstall.
1. First check whether MySQL is installed in the computer. Enter the following command to view MySQL related installation information on your computer.
yum list installed mysql*
2. If the output of the command is nothing, there is no need to uninstall. If so, enter the following command to uninstall:
yum erase mysql*
Uninstallation is usually not a panacea. You also need to manually delete MySQL related files. Enter the following command to find such a file:
sudo find / -name 'mysql*'
Enter the following command to delete these files in the directories / var /, / usr /, / etc /.
sudo find /var /usr /etc -name "mysql*" -exec rm -r {} \;
After deletion, use the search command above to see if these files can be found.
sudo find / -name 'mysql*'