preface
In the above tutorial, I} introduced you to the Hazelcast framework. Next, we will use the framework to realize the distributed cache function.
I Implementation steps of distributed cache code
1. Create a Web project
According to our previous experience, we create a Web program and transform it into a Spring Boot project. The specific process is omitted.
2. Add dependent packages
In POM Add the core dependency package of Hazelcast to the XML file.
<dependency>
    <groupId>com.hazelcast</groupId>
    <artifactId>hazelcast</artifactId>
</dependency>

<dependency>
    <groupId>com.hazelcast</groupId>
    <artifactId>hazelcast-spring</artifactId>
</dependency>
3. Create application YML profile
Create application YML configuration file, where you can set the server port number.
server:
  port: 8081
4. Add Hazelcast configuration class
Create a configuration class of Hazelcast and configure Hazelcast as necessary.
package com.yyg.boot.config;

import com.hazelcast.config.*;
import com.hazelcast.core.Hazelcast;
import com.hazelcast.core.HazelcastInstance;
import com.hazelcast.core.IMap;
import com.hazelcast.core.ITopic;
import com.yyg.boot.interceptor.IMapInterceptor;
import com.yyg.boot.interceptor.MapListener;
import com.yyg.boot.interceptor.TopicListener;
import org.springframework.context.annotation.Bean;
import org.springframework.context.annotation.Configuration;

/**
 * @Author One brother Sun
 * @Date Created in 2020/4/23
 * @Description Description
 */
@Configuration
public class HazelcastConfiguration {

    @Bean
    public Config hazelCastConfig() {
        Config config = new Config();
        //Solve different library projects in the same network segment
        GroupConfig gc=new GroupConfig("hazelGroup");
        config.setInstanceName("hazelcast-instance")
                .addMapConfig(new MapConfig()
                                .setName("configuration")
                                // The maximum value of the stored entry in the Map [0~Integer.MAX_VALUE]. The default value is 0.
                                .setMaxSizeConfig(new MaxSizeConfig(200, MaxSizeConfig.MaxSizePolicy.FREE_HEAP_SIZE))
                                 //Data release strategy [NONE|LRU|LFU]. This is a parameter of Map as cache, which is used to specify the data recycling algorithm. The default is NONE. LRU: "least recently used" policy.
                                .setEvictionPolicy(EvictionPolicy.LRU)
                                //Data retention time [0~Integer.MAX_VALUE]. Cache related parameters, in seconds, default to 0.
                                .setTimeToLiveSeconds(-1))
                                .setGroupConfig(gc);
        return config;
    }
}
5. Configuration description
5.1 eviction-policy
Data release strategy [NONE|LRU|LFU]. This is a parameter of Map as cache, which is used to specify the data recycling algorithm. The default is NONE.
-
NONE: when set to NONE, data recycling will not occur, and max size will become invalid. However, you can still use the time to live seconds and Max idle seconds parameters to control the data retention time.
-
LRU: "least recently used" policy.
-
LFU: "least commonly used" strategy.
5.2 time-to-live-seconds(TTL)
Data retention time [0~Integer.MAX_VALUE]. Cache related parameters, in seconds, default to 0. This parameter determines the residence time of a piece of data in the map. When the data remains in the map for more than this time and is not updated, it will be removed from the map according to the specified recycling policy. When the value is 0, it means that it is not required to be large.
Fengfan mall project learned to scan the code for free to get it

6. Create Controller interface method
We create a Controller and define several test interface methods in it.
package com.yyg.boot.web;

import com.hazelcast.core.HazelcastInstance;
import com.hazelcast.core.IList;
import lombok.extern.slf4j.Slf4j;
import org.springframework.beans.factory.annotation.Autowired;
import org.springframework.web.bind.annotation.*;

import java.util.Map;
import java.util.Queue;

/**
 * @Author One brother Sun
 * @Date Created in 2020/4/23
 * @Description Description
 */
@Slf4j
@RestController
@RequestMapping("/hazelcast")
public class HazelcastController {

    @Autowired
    private HazelcastInstance hazelcastInstance;

    @PostMapping(value = "/save")
    public String saveMapData(@RequestParam String key, @RequestParam String value) {
        Map<String, String> hazelcastMap = hazelcastInstance.getMap("hazelcastMap");
        hazelcastMap.put(key, value);
        return "success";
    }

    @GetMapping(value = "/get")
    public String getMapData(@RequestParam String key) {
        Map<String, String> hazelcastMap = hazelcastInstance.getMap("hazelcastMap");
        return hazelcastMap.get(key);
    }

    @GetMapping(value = "/all")
    public Map<String, String> readAllDataFromHazelcast() {
        return hazelcastInstance.getMap("hazelcastMap");
    }

    @GetMapping(value = "/list")
    public String saveList(@RequestParam(required = false) String value) {
        //Create cluster List
        IList<Object> clusterList = hazelcastInstance.getList("myList");
        clusterList.add(value);
        return "success";
    }

    @GetMapping(value = "/showList")
    public IList<Object> showList() {
        return hazelcastInstance.getList("myList");
    }

    @GetMapping(value = "/clearList")
    public String clearList() {
        IList<Object> clusterList = hazelcastInstance.getList("myList");
        clusterList.clear();
        return "success";
    }

    @GetMapping(value = "/queue")
    public String saveQueue(@RequestParam String value) {
        //Create cluster Queue
        Queue<String> clusterQueue = hazelcastInstance.getQueue("myQueue");
        clusterQueue.offer(value);
        return "success";
    }

    @GetMapping(value = "/showQueue")
    public Queue<String> showQueue() {
        Queue<String> clusterQueue = hazelcastInstance.getQueue("myQueue");
        for (String obj : clusterQueue) {
            log.warn("value=" + obj);
        }
        return clusterQueue;
    }

    @GetMapping(value = "/clearQueue")
    public String clearQueue() {
        Queue<String> clusterQueue = hazelcastInstance.getQueue("myQueue");
        clusterQueue.clear();
        return "success";
    }

}
7. Create an entry class
Finally, create the entry class of the project.
package com.yyg.boot;

import org.springframework.boot.SpringApplication;
import org.springframework.boot.autoconfigure.SpringBootApplication;

/**
 * @Author One brother Sun
 * @Date Created in 2020/4/23
 * @Description Description
 */
@SpringBootApplication
public class HazelcastApplication {

    public static void main(String[] args){
        SpringApplication.run(HazelcastApplication.class,args);
    }

}
II Start the project for testing
After the code is written, we start the project for testing.
1. Start the project cluster
When the program starts, the console will output the following information:
[hazelGroup] [3.12.6] Prefer IPv4 stack is true, prefer IPv6 addresses is false
2020-04-24 11:37:45.790  INFO 5820 --- com.hazelcast.instance.AddressPicker
[hazelGroup] [3.12.6] Picked [192.168.87.102]:5702, using socket ServerSocket[addr=/0:0:0:0:0:0:0:0,localport=5702], bind any local is true
This output describes the current network environment of Hazelcast. The first is to detect that IPv4 is available and that the current IPv4 address is 192.168.87.102. Then use IPv6 to enable socket. In some environments where IPv6 cannot be used, it is necessary to force IPv4 to be used, and increase the jvm startup parameter: - DJava net. Preferipv4stack = true.
 [192.168.87.102]:5702 [hazelGroup] [3.12.6] Hazelcast 3.12.6 (20200130 - be02cc5) starting at [192.168.87.102]:5702
com.hazelcast.system                     : [192.168.87.102]:5702 [hazelGroup] [3.12.6] Copyright (c) 2008-2020, Hazelcast, Inc. All Rights Reserved.
This output indicates that the initialization port number of the current instance is 5701. Hazelcast uses 5701 port by default. If the port is found to be occupied, it will + 1 check whether 5702 is available. If it is still unavailable, it will continue to probe backward until 5800. Hazelcast uses 5700 to 5800 ports by default. If it cannot be used, it will throw a startup exception.
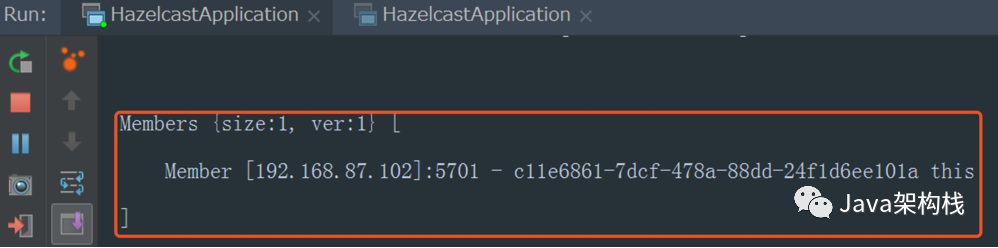
Let's start on port 8081 first. On the console, we will find that the number of Members is only 1, and Hazelcast runs on port 5701.
Then we start the second process again on port 8082. At this time, on the console, you will find that the number of Members has changed to 2, which means that a new Hazelcast instance has been added to the cluster.
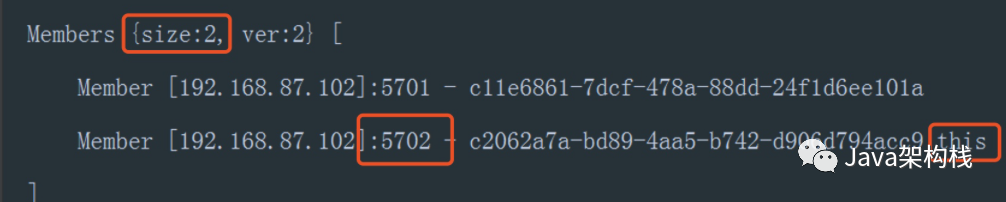
Members[2] indicates that there are only two nodes in the current cluster. Both nodes are on the device with ip 192.168.87.102. The two nodes occupy port 5701 and port 5702 respectively. This after the port indicates that this is the current node, while other nodes connected to the cluster are not marked with this.
It can be seen that Hazelcast is very simple to implement clustering, and will automatically add different processes to the cluster.
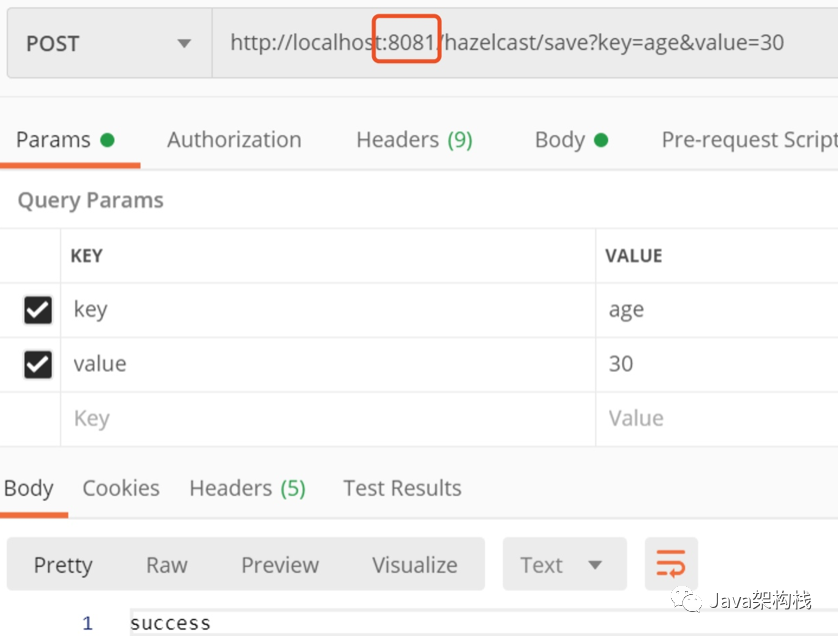
2. Test map structure
We first store a data in the map on the process on port 8081.

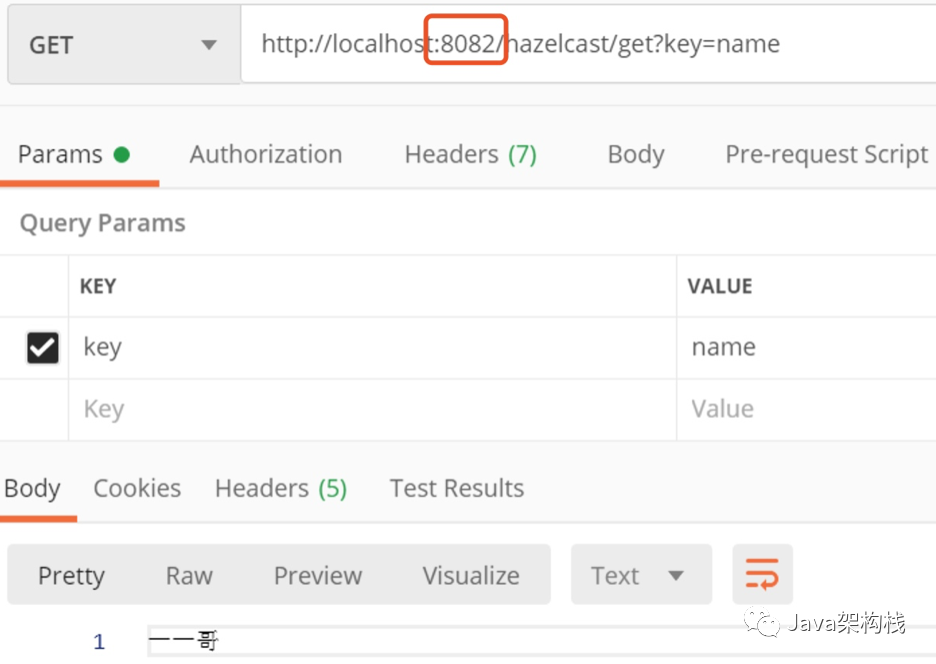
Then we get the data on 8081, and we will find that the data has been obtained.
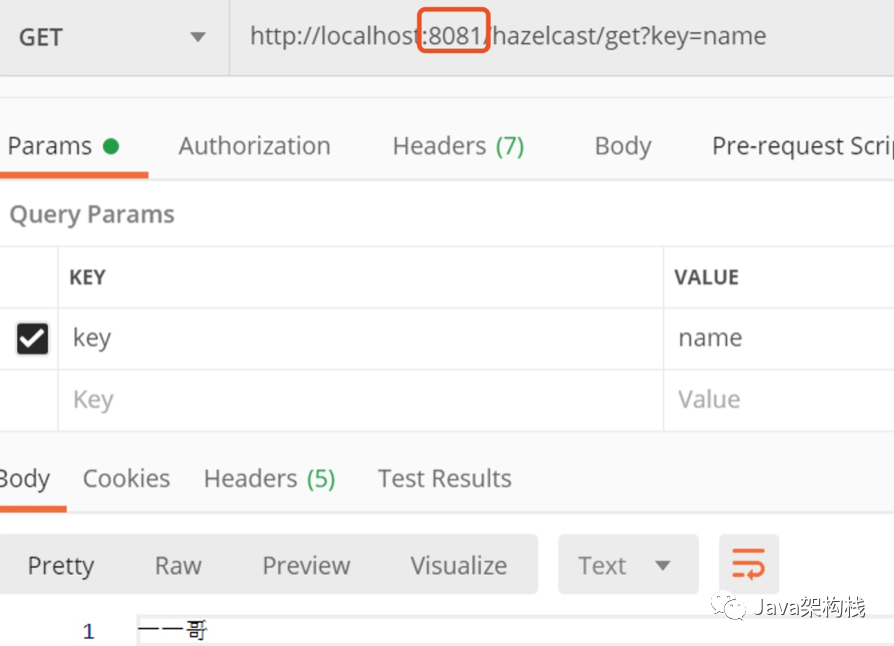
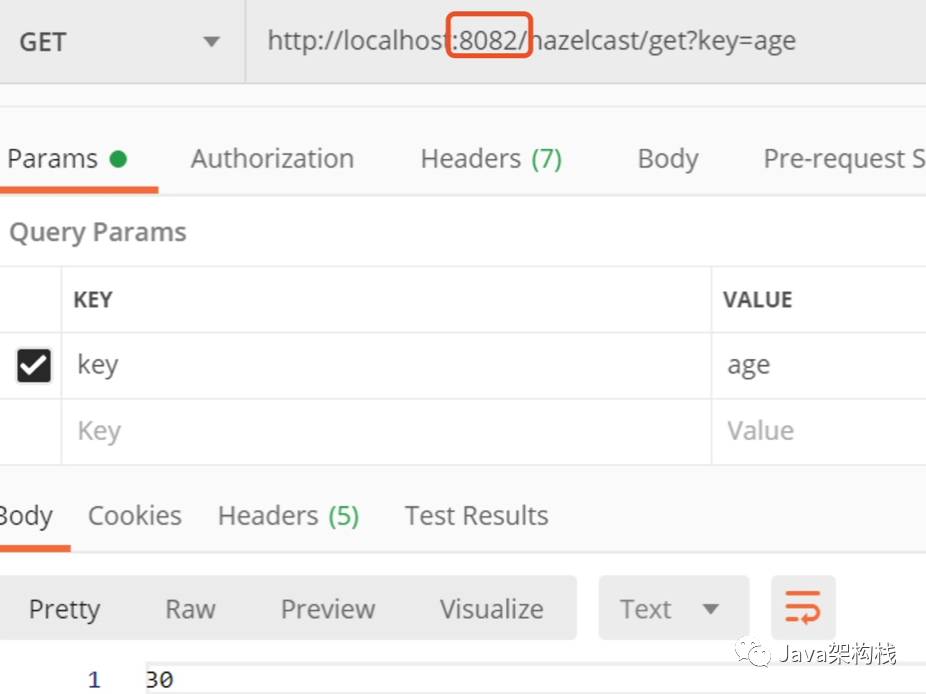
Then we get the data from the process on port 8082 and find that the previously stored data can also be obtained. It shows that in Hazelcast, as long as the data is stored on one server node, it can automatically obtain the data stored in another node from other cluster nodes.
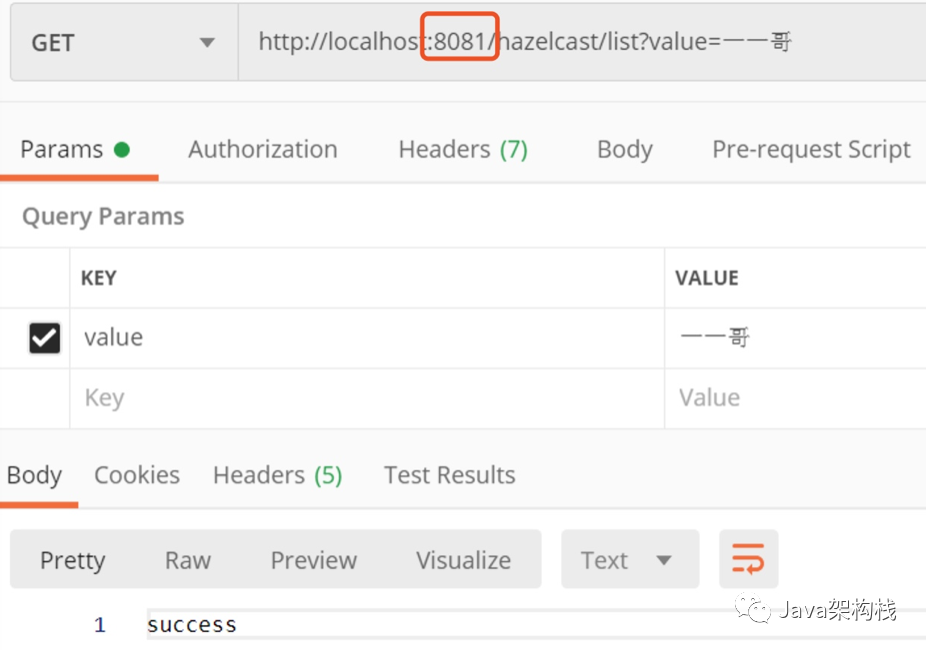
3. Test structure
We first store a data in the list on the process on port 8081.
Then we get the data on 8082, and we will find that the data has been obtained.
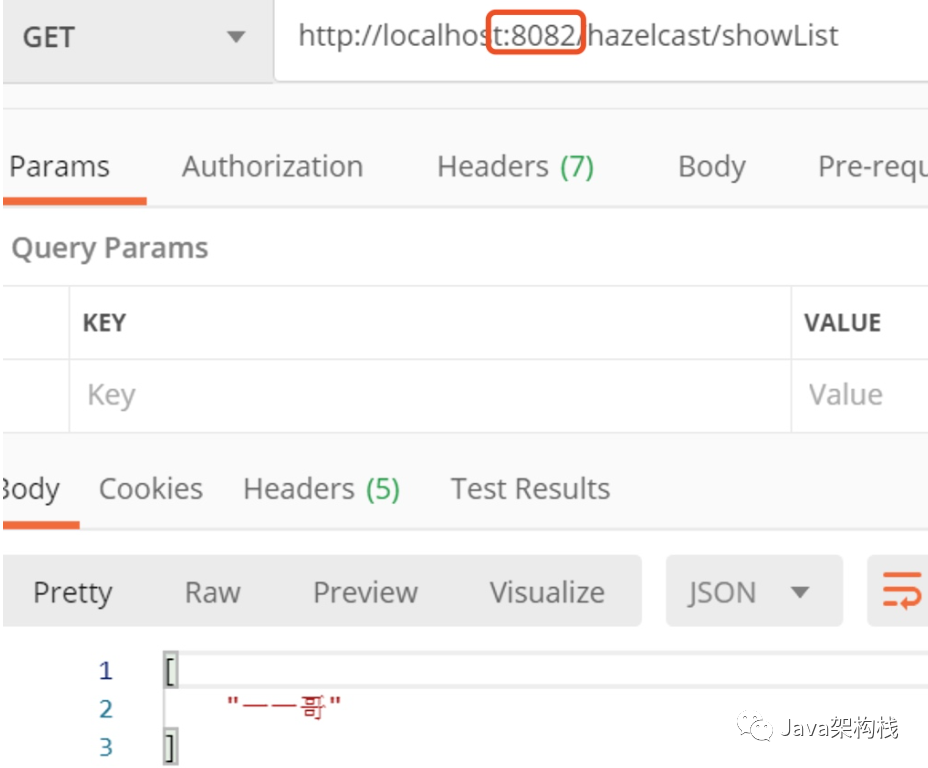
Similarly, cluster data sharing is realized.
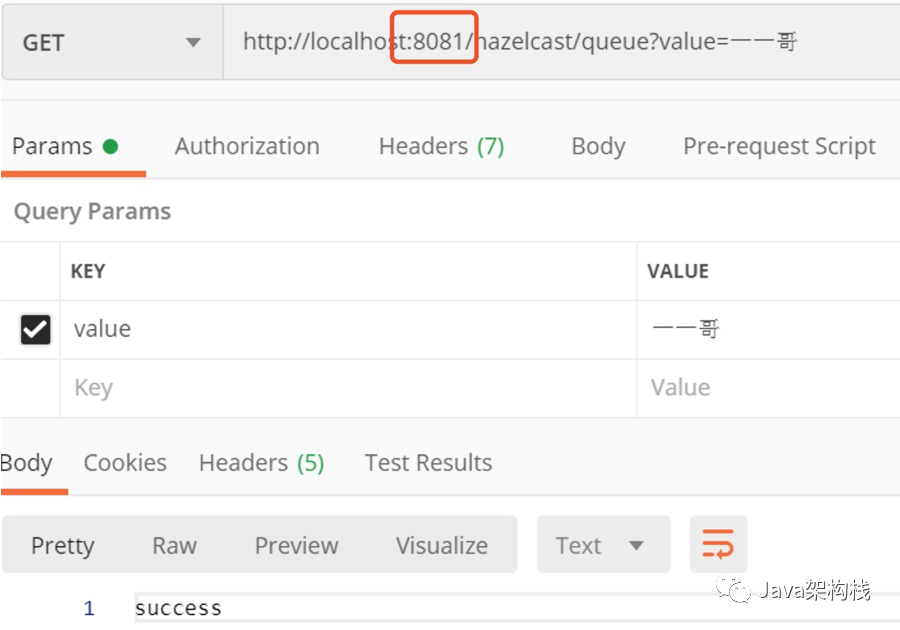
4. Test queue structure
We first store a data in the queue on the process on port 8081.
Then we get the data on 8082, and we will find that the data has been obtained.
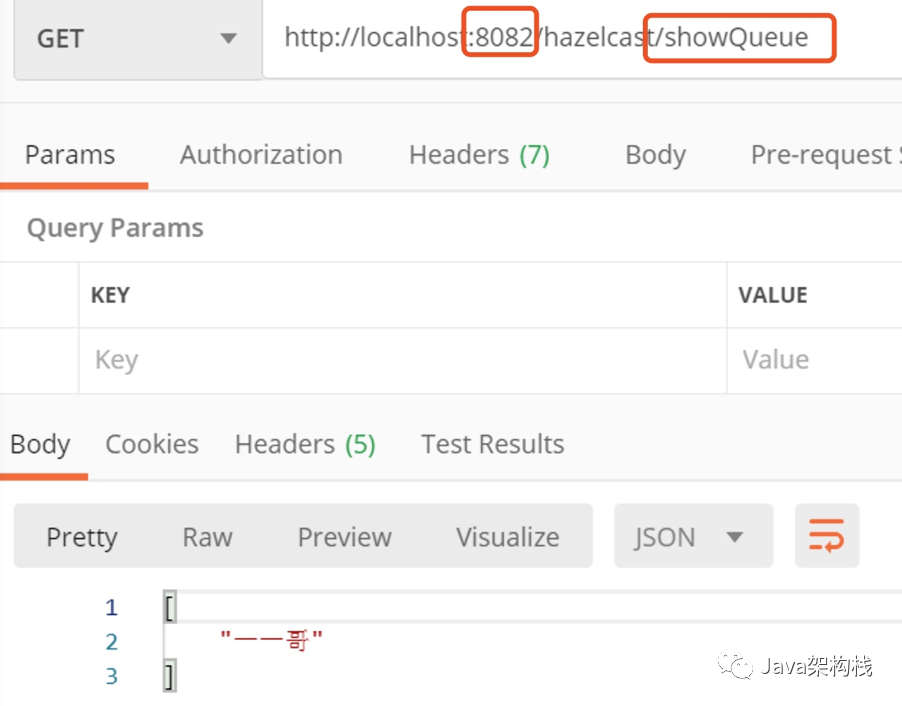
Similarly, cluster data sharing is realized.
Fengfan mall project learned to scan the code for free to get it
III Advanced configuration of Hazelcast
1. Add Hazelcast listener configuration
We added some listener classes to the HazelcastConfiguration configuration class above.
@Bean
public HazelcastInstance hazelcastInstance(Config config) {
    HazelcastInstance hzInstance = Hazelcast.newHazelcastInstance(config);
    //Distributed map monitoring
    IMap<Object, Object> imap = hzInstance.getMap("hazelcastMap");
    imap.addLocalEntryListener(new MapListener());
    //Interceptor (nothing written)
    imap.addInterceptor(new IMapInterceptor());
    //Publish / subscribe mode
    ITopic<String> topic = hzInstance.getTopic("hazelcastTopic");
    topic.addMessageListener(new TopicListener());

    return hzInstance;
}
At this time, the complete HazelcastConfiguration class code is:
package com.yyg.boot.config;

import com.hazelcast.config.*;
import com.hazelcast.core.Hazelcast;
import com.hazelcast.core.HazelcastInstance;
import com.hazelcast.core.IMap;
import com.hazelcast.core.ITopic;
import com.yyg.boot.interceptor.IMapInterceptor;
import com.yyg.boot.interceptor.MapListener;
import com.yyg.boot.interceptor.TopicListener;
import org.springframework.context.annotation.Bean;
import org.springframework.context.annotation.Configuration;

/**
 * @Author One brother Sun
 * @Date Created in 2020/4/23
 * @Description Description
 */
@Configuration
public class HazelcastConfiguration {

    @Bean
    public Config hazelCastConfig() {
        Config config = new Config();
        //Solve different library projects in the same network segment
        GroupConfig gc=new GroupConfig("hazelGroup");
        config.setInstanceName("hazelcast-instance")
                .addMapConfig(new MapConfig()
                                .setName("configuration")
                                // The maximum value of the stored entry in the Map [0~Integer.MAX_VALUE]. The default value is 0.
                                .setMaxSizeConfig(new MaxSizeConfig(200, MaxSizeConfig.MaxSizePolicy.FREE_HEAP_SIZE))
                                 //Data release strategy [NONE|LRU|LFU]. This is a parameter of Map as cache, which is used to specify the data recycling algorithm. The default is NONE. LRU: "least recently used" policy.
                                .setEvictionPolicy(EvictionPolicy.LRU)
                                //Data retention time [0~Integer.MAX_VALUE]. Cache related parameters, in seconds, default to 0.
                                .setTimeToLiveSeconds(-1))
                                .setGroupConfig(gc);
        return config;
    }

    @Bean
    public HazelcastInstance hazelcastInstance(Config config) {
        HazelcastInstance hzInstance = Hazelcast.newHazelcastInstance(config);
        //Distributed map monitoring
        IMap<Object, Object> imap = hzInstance.getMap("hazelcastMap");
        imap.addLocalEntryListener(new MapListener());
        //Interceptor (nothing written)
        imap.addInterceptor(new IMapInterceptor());
        //Publish / subscribe mode
        ITopic<String> topic = hzInstance.getTopic("hazelcastTopic");
        topic.addMessageListener(new TopicListener());

        return hzInstance;
    }

}
2. Restart the 8081 and 8082 project process test
At this point, we can add a new key and value to the map structure of 8081 process, as shown below:
Then on the console, you can see the listener class of our previous Map structure, and the printed log output is as follows:

That means our IMap interceptor is working. Moreover, the stored age value is also obtained in the 8082 process.
Because Hazelcast is clustered, data can be shared among many application instances.
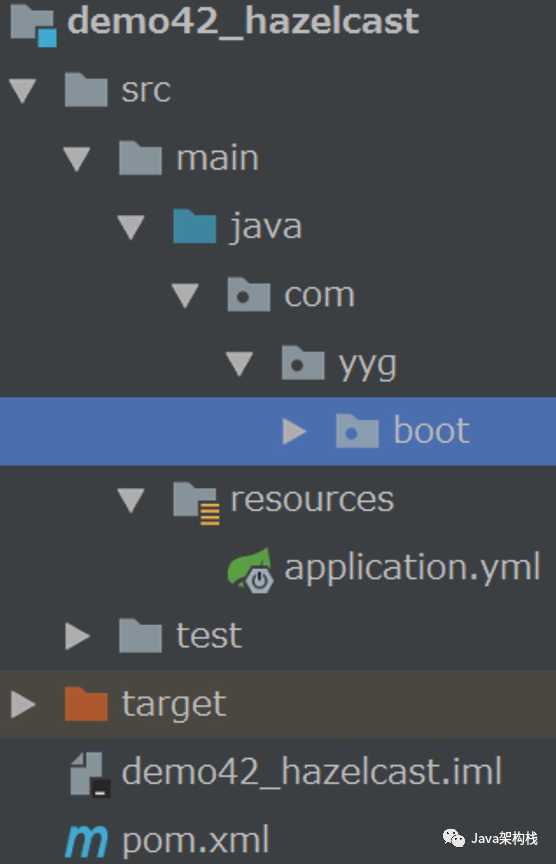
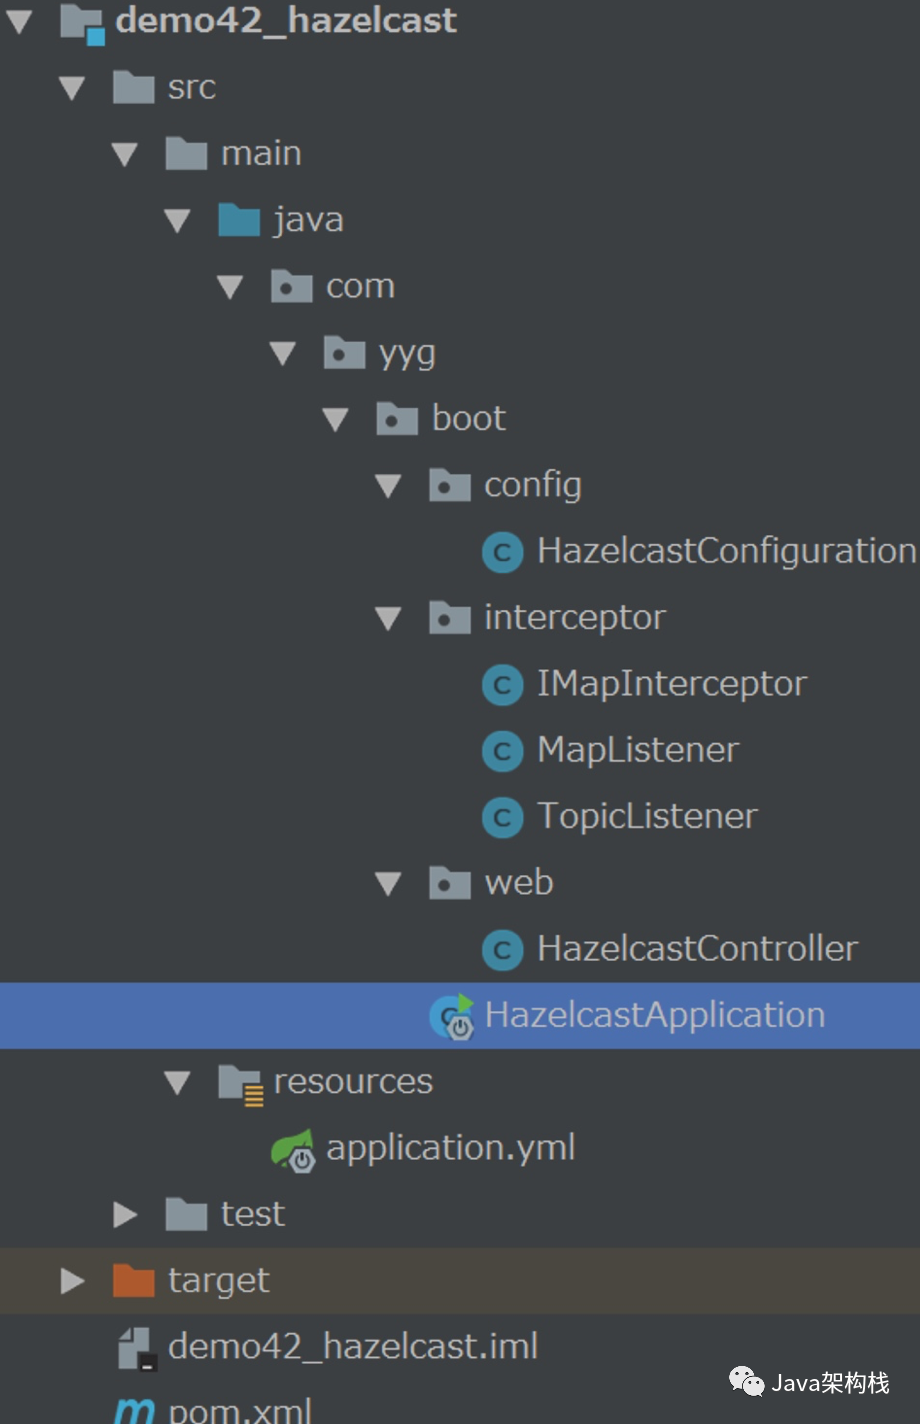
3. Complete project structure
The final complete project structure is shown in the figure below. You can create it by reference:
IV hazelcast management terminal
Hazelcast actually provides us with a management center program to help us view the cached data in hazelcast. Of course, this management center does not need to be installed. It is just a tool to help us view the cache status.
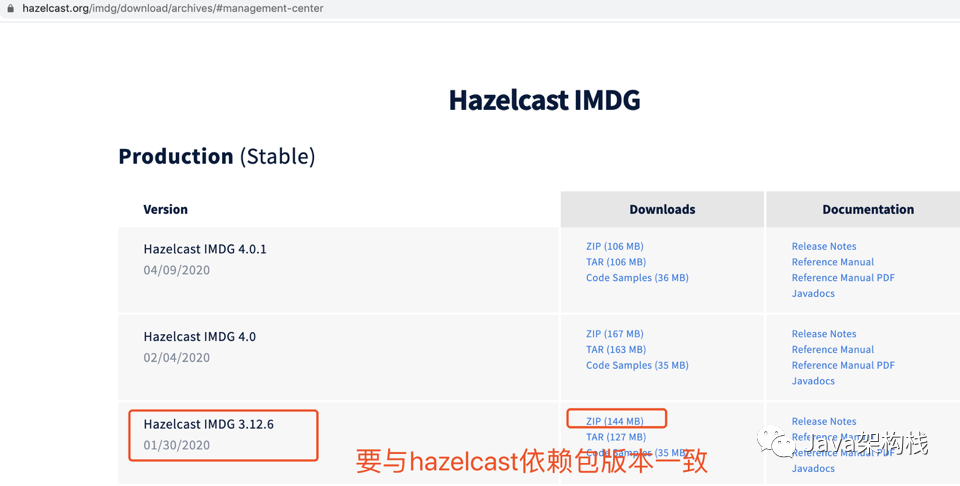
1. Download hazelcast Management Center
https://hazelcast.org/download/archives/#management-center
2. After decompression, enter the root directory for startup
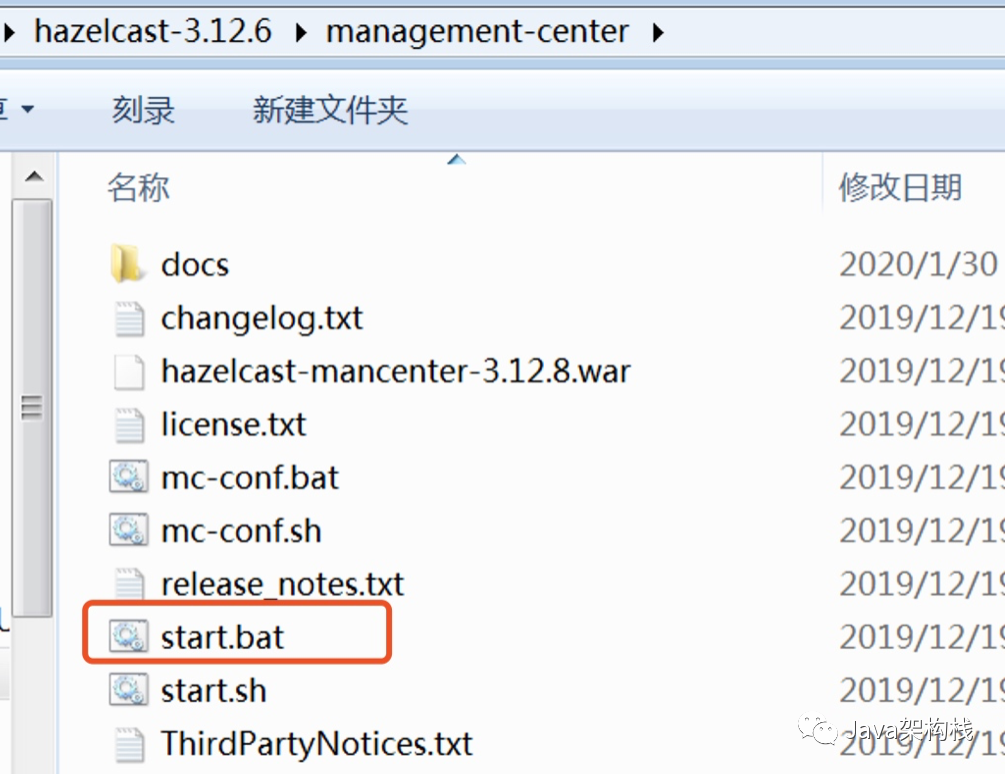
3. Start Bat command
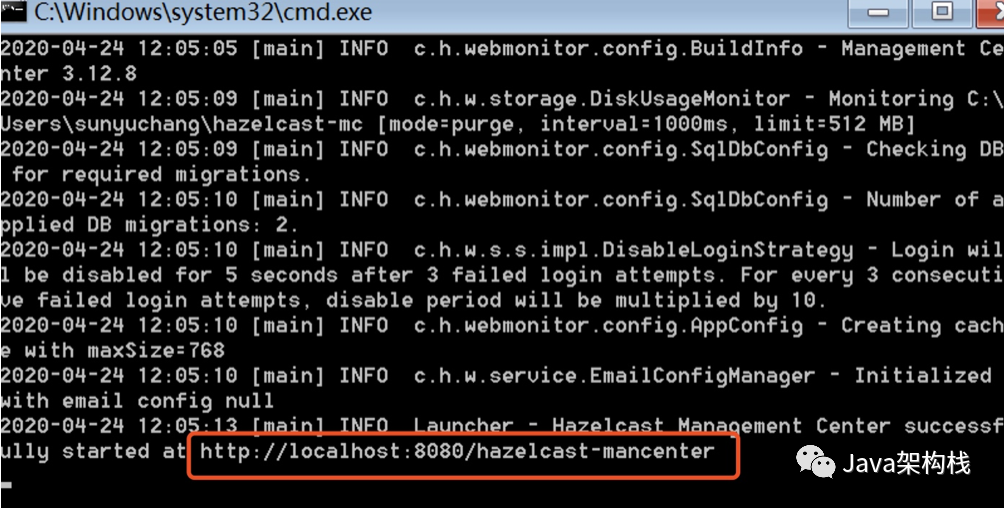
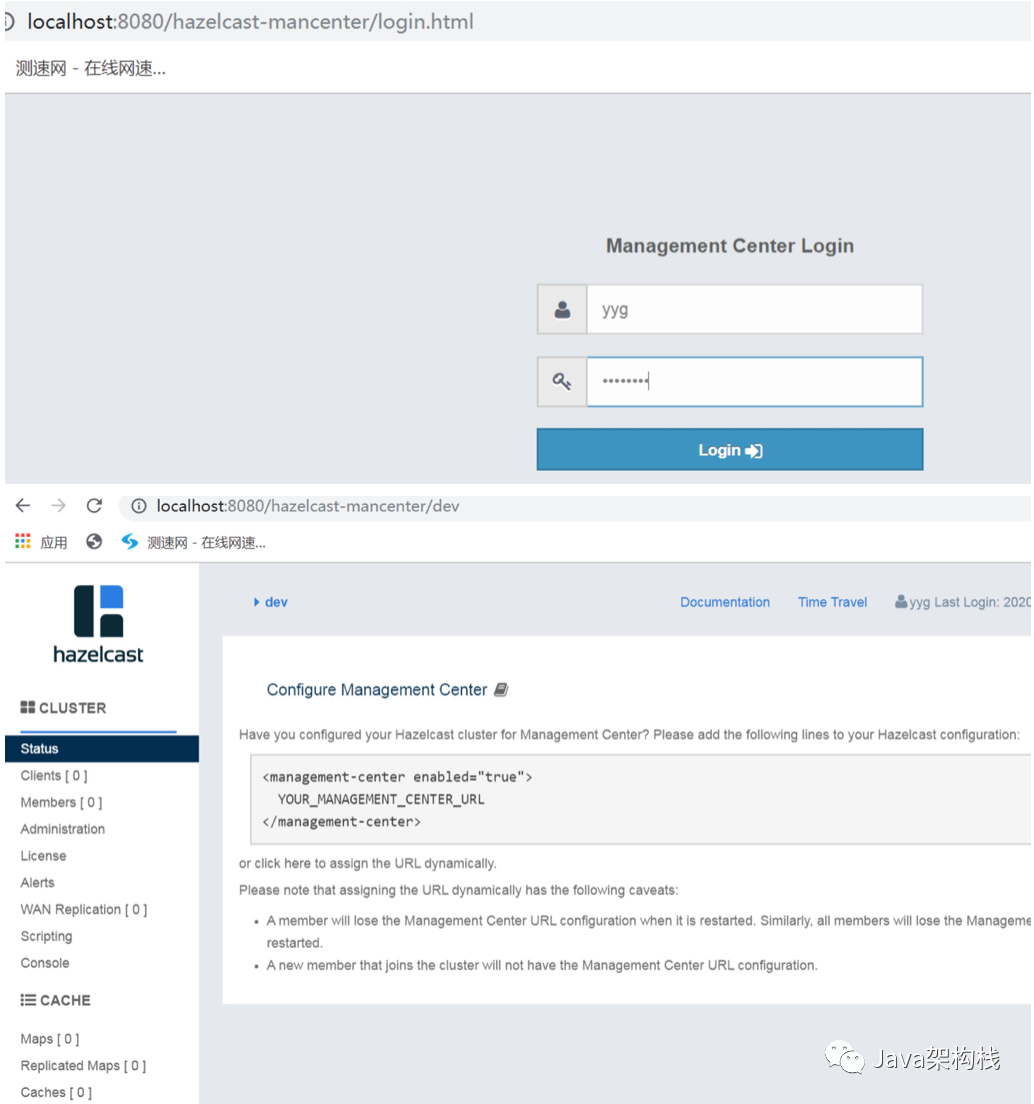
4. Open the management center mancenter
At the beginning, it is required to register an administrator user with a password of more than 8 characters, and then log in.
epilogue
So far, let's take you to realize the distributed cache effect by using Hazelcast framework. We will find that using this framework to realize distributed cache is more convenient and powerful.
Fengfan mall project learned to scan the code for free to get it