1. Preface
In recent years, the Internet of things has developed very rapidly, and various peripheral devices have been connected to the Internet for remote integrated control. For example: intelligent transportation, forest fire prevention, intelligent community, intelligent parking lot, intelligent animal husbandry, intelligent agriculture, etc. In order to reduce the cost and threshold of users, major manufacturers' platforms have also developed their own IOT cloud platform to facilitate users' access and quickly build their own application scenarios.
2. Introduction to equipment hardware and functions
This article introduces how to use Huawei's Internet of things cloud platform to realize the application scenario construction of intelligent lock. The hardware is realized by STM32F103ZET6 + ESP8266 + stepping motor. Build an intelligent lock project on the Huawei cloud IOT IOT platform, configure the cloud, and connect the device to the Huawei IOT platform through ESP8266 to realize data reporting and interaction, and realize the functions of remote unlocking, locking and obtaining the status of the lock. There is no need to worry about forgetting to go out and lock, or forgetting to bring the key and being unable to open the door.
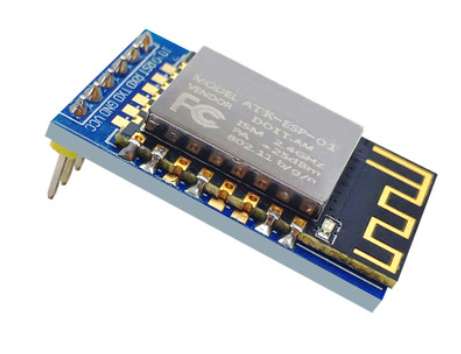
ESP8266 is a popular WIFI device in the Internet of things solution. It supports serial port + AT command control. Any single chip microcomputer supporting serial port can use ESP8266 to quickly realize networking.
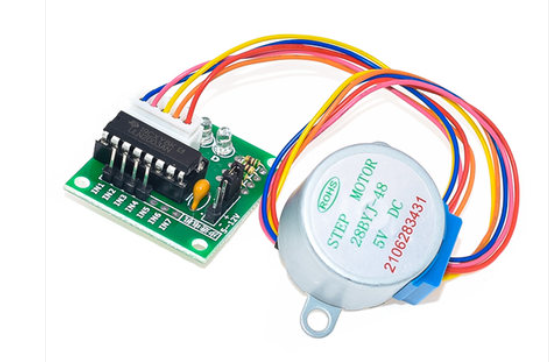
The stepping motor adopts the conventional 28BYJ-48 to simulate the motor used as the door lock, and the drive board adopts ULN2003.
3. Create cloud devices
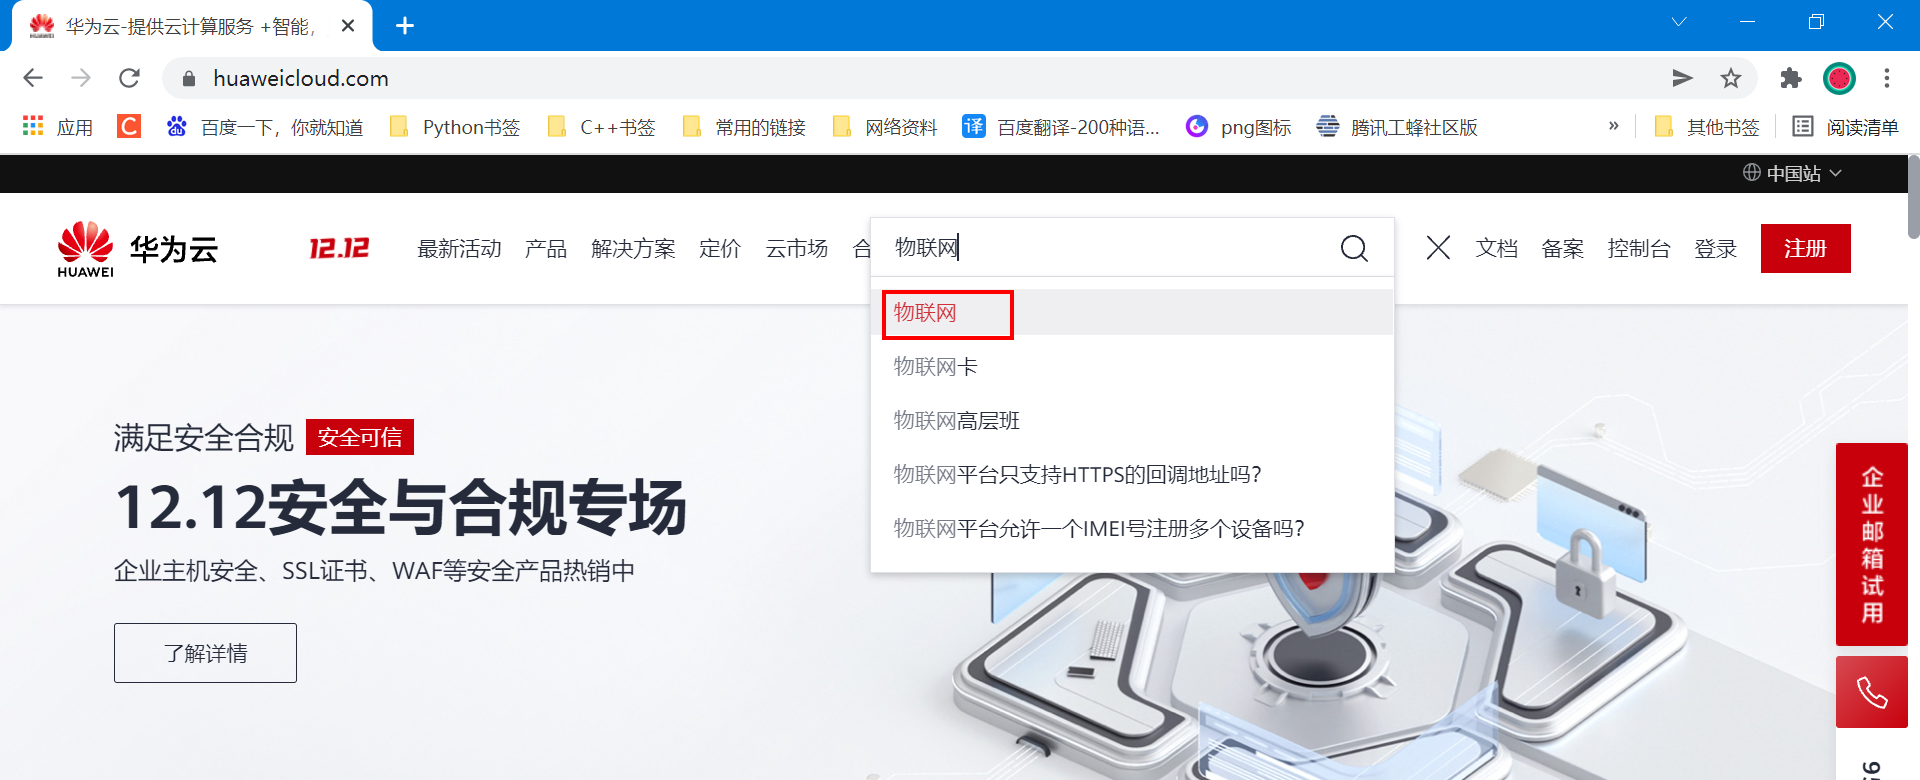
Log in to the official website: https://www.huaweicloud.com/
Search the Internet of things directly and open the page.
Select device access:
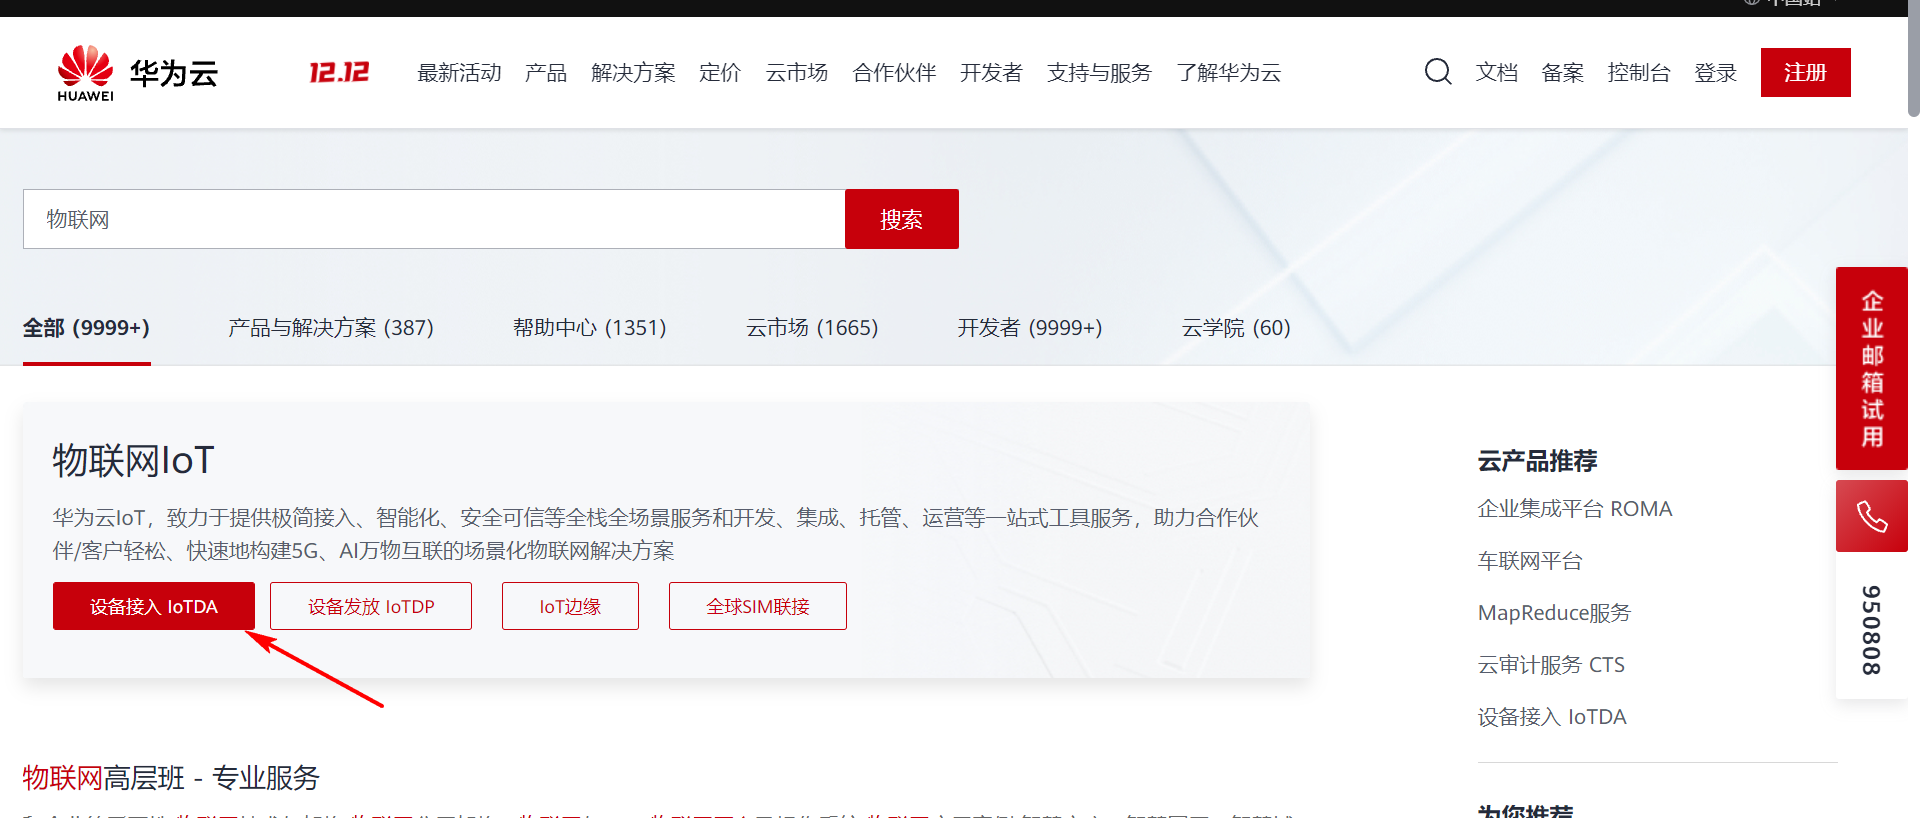
Choose a free trial:
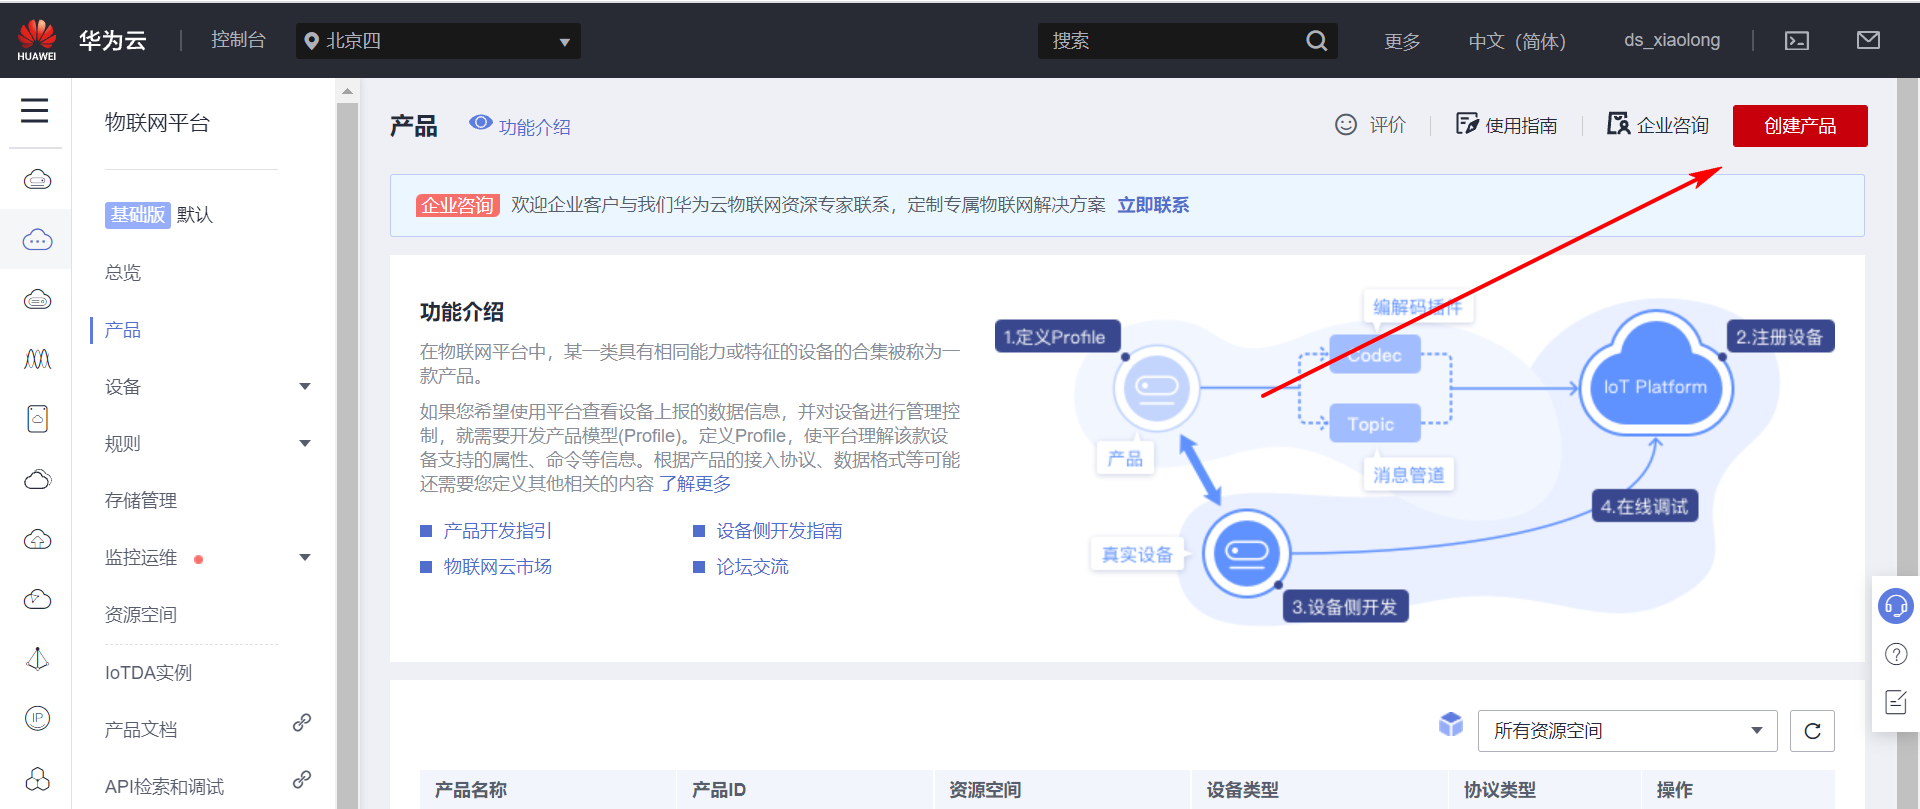
On the product page, click the upper right corner to create a product:
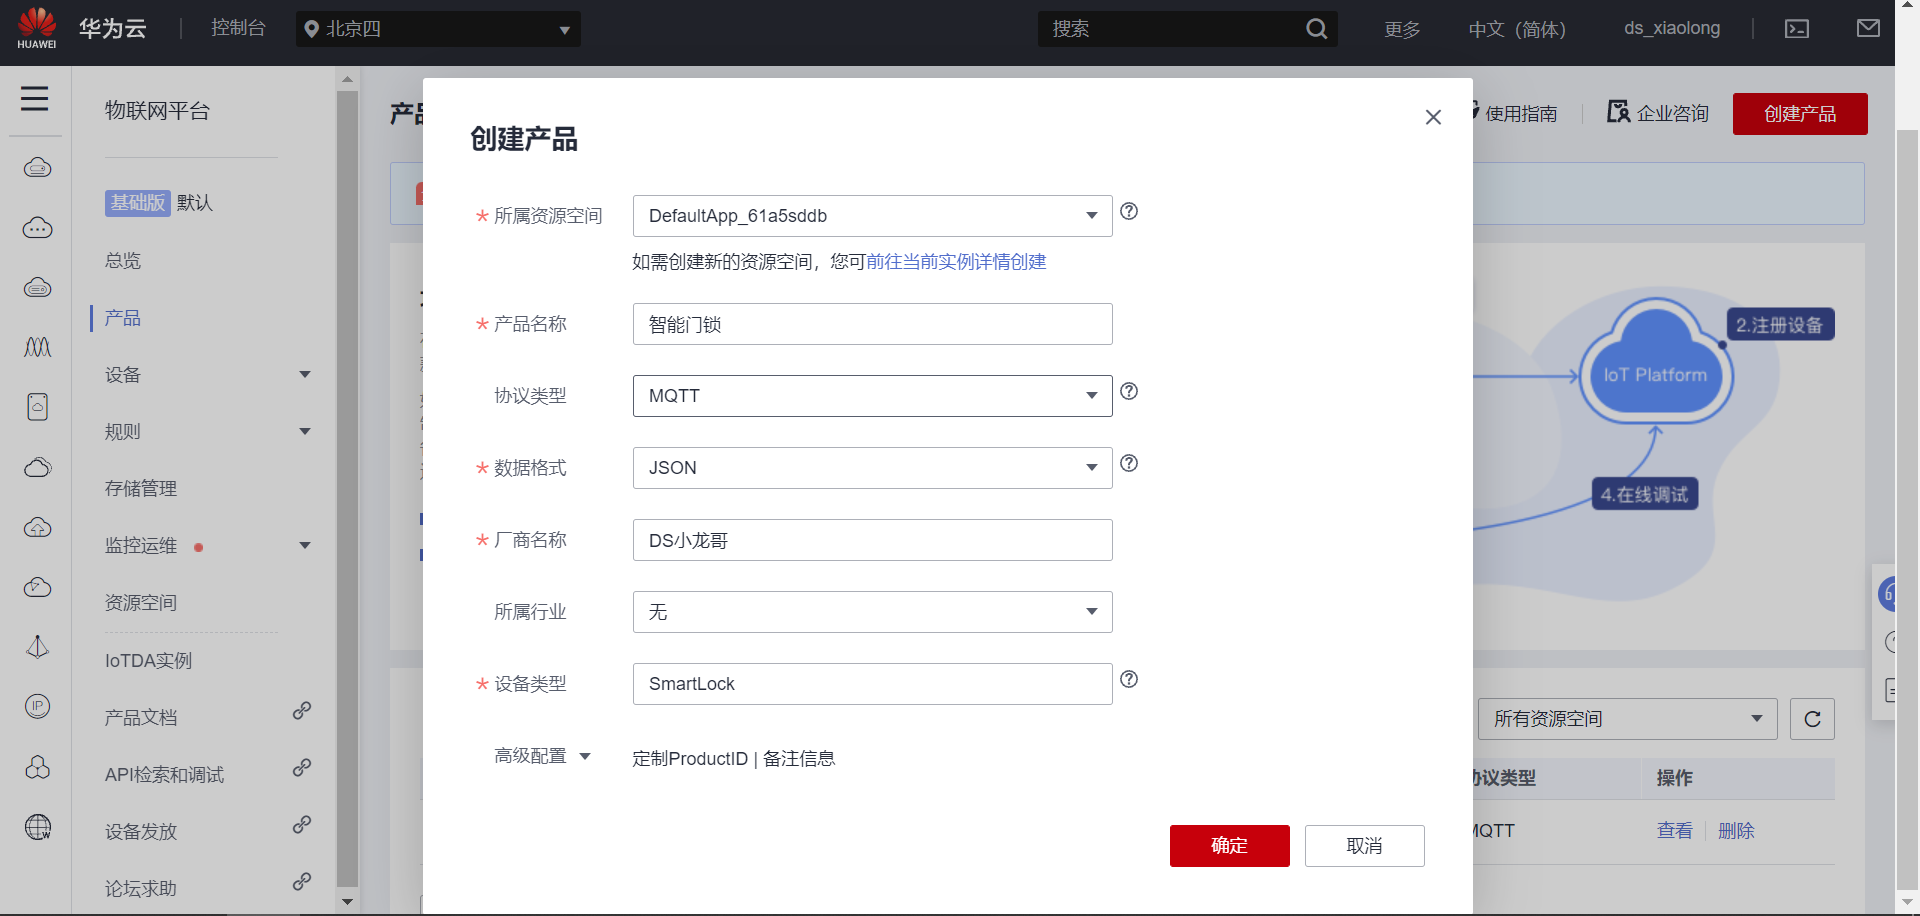
Fill in the product information:
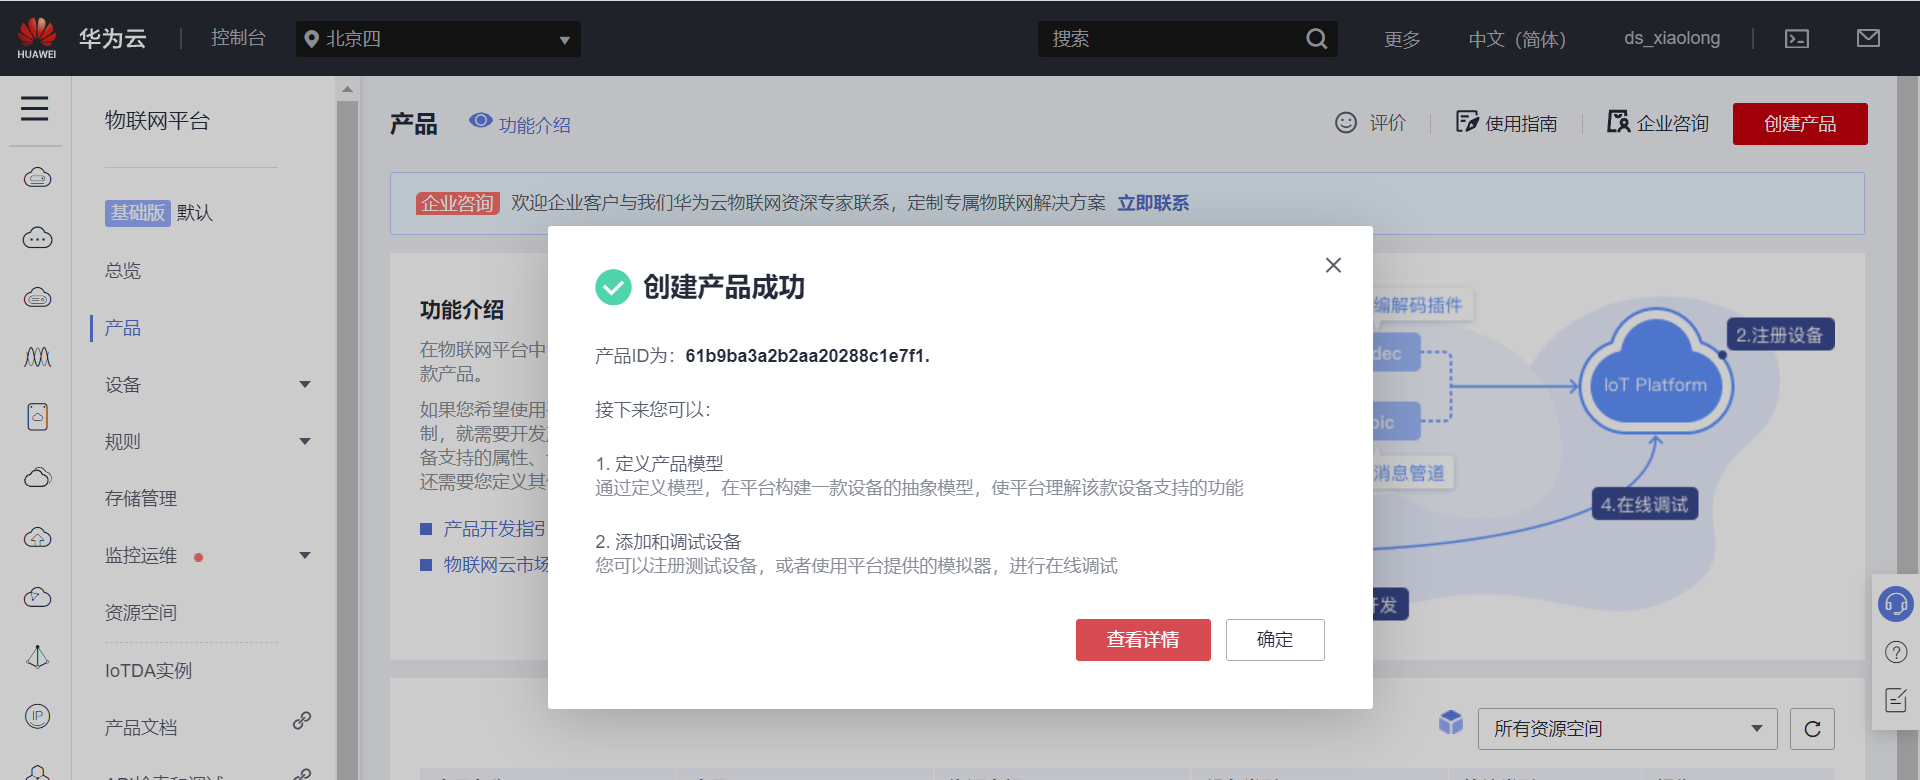
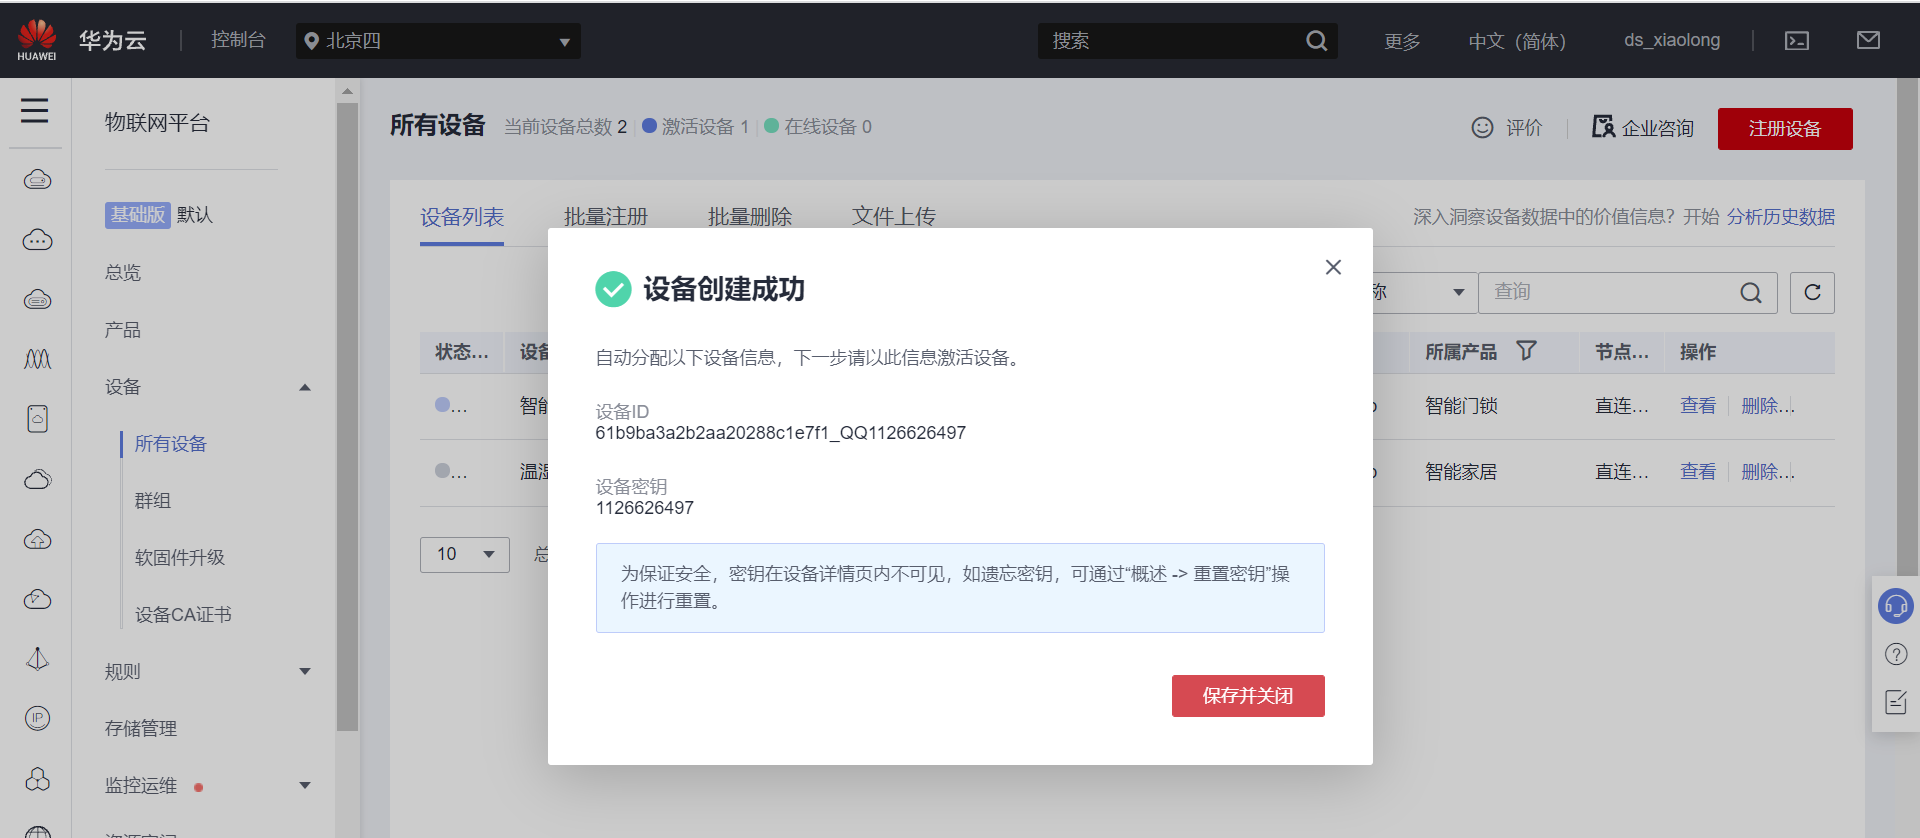
Get the product ID, save the ID, and click to view the details:
product ID Is: 61 b9ba3a2b2aa20288c1e7f1.
Click the device page to register the device:
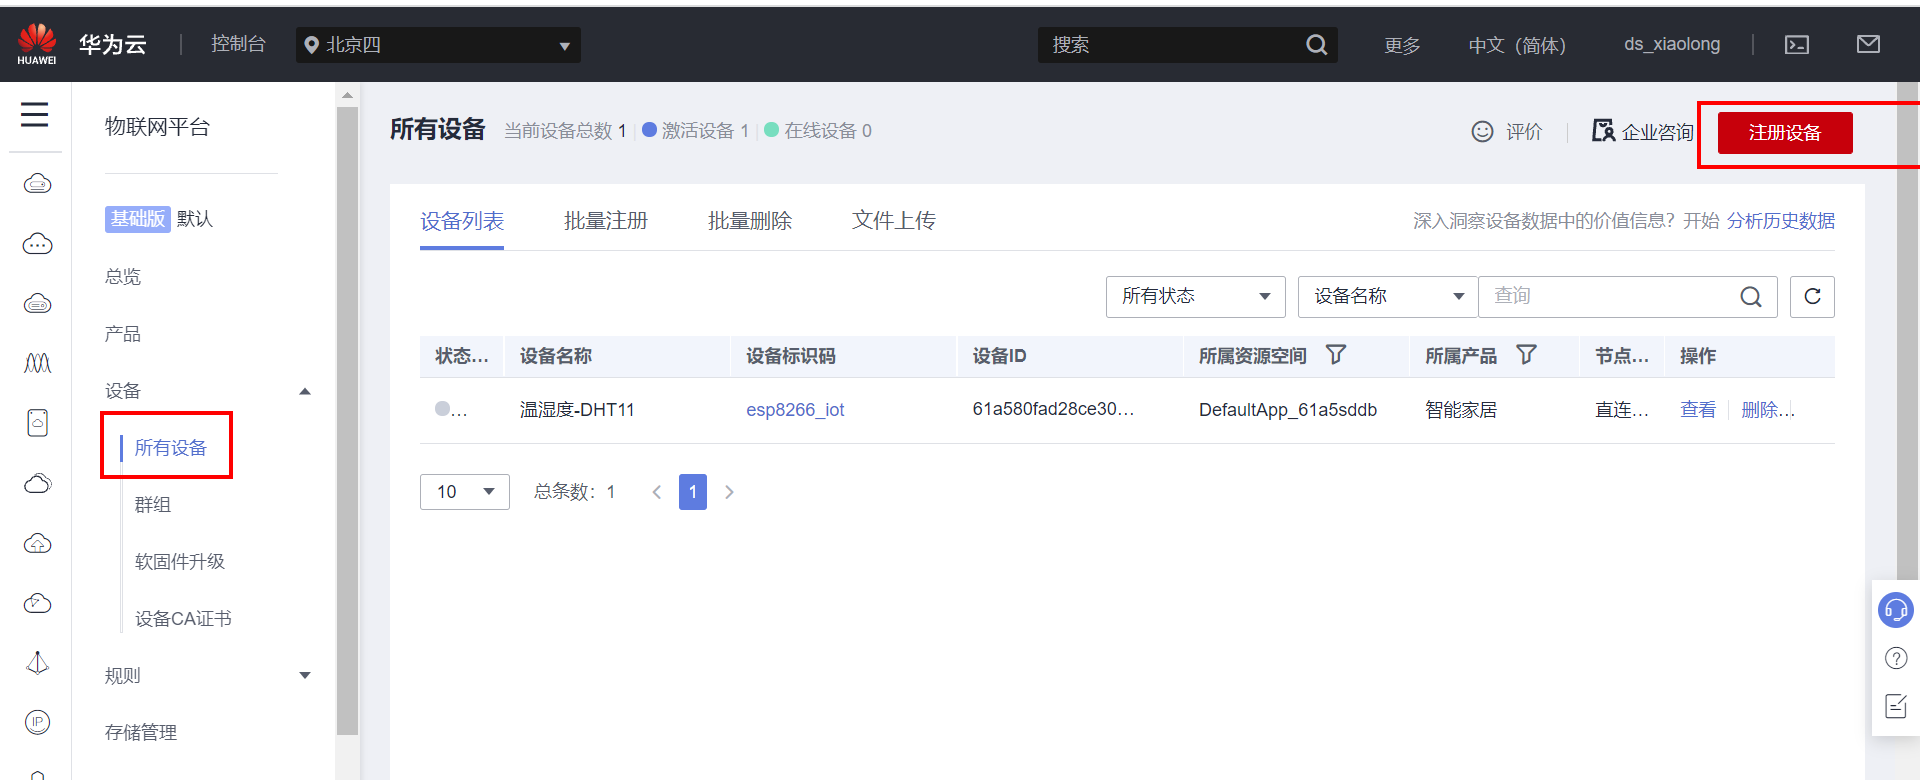
Fill in the information to register:
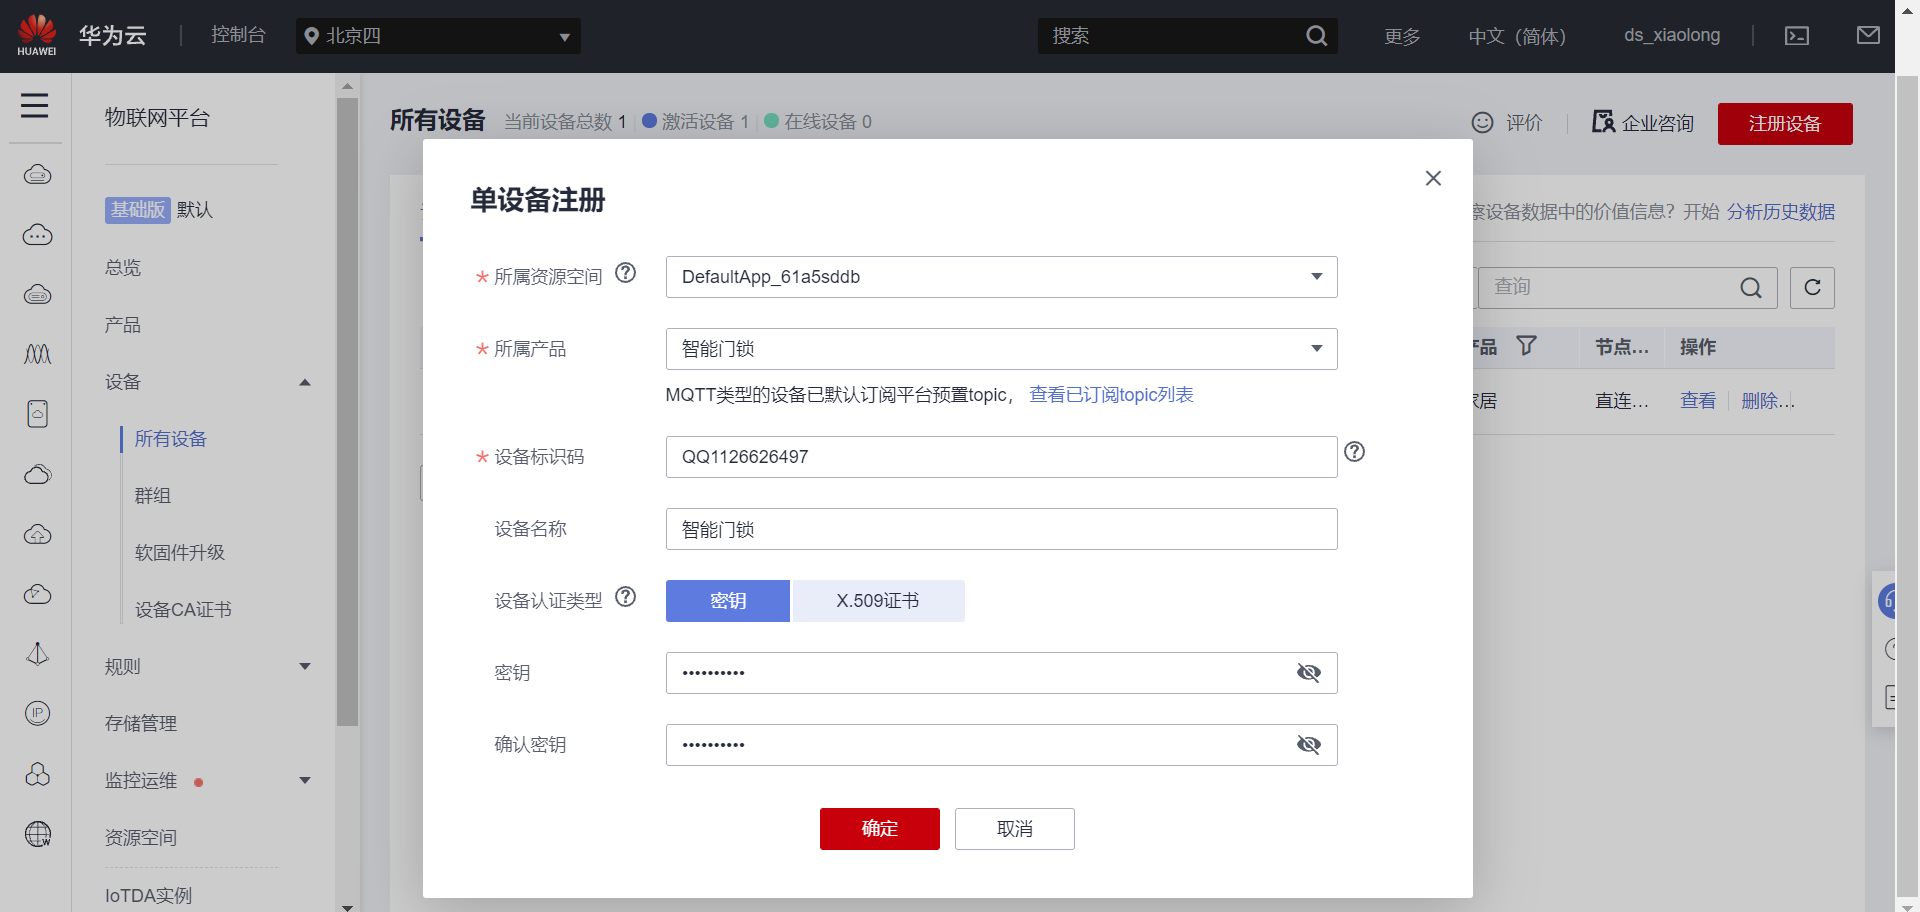
Save the device key and device ID, click Save to close, the file will be automatically downloaded and saved, and the password and login account generated later need to be used
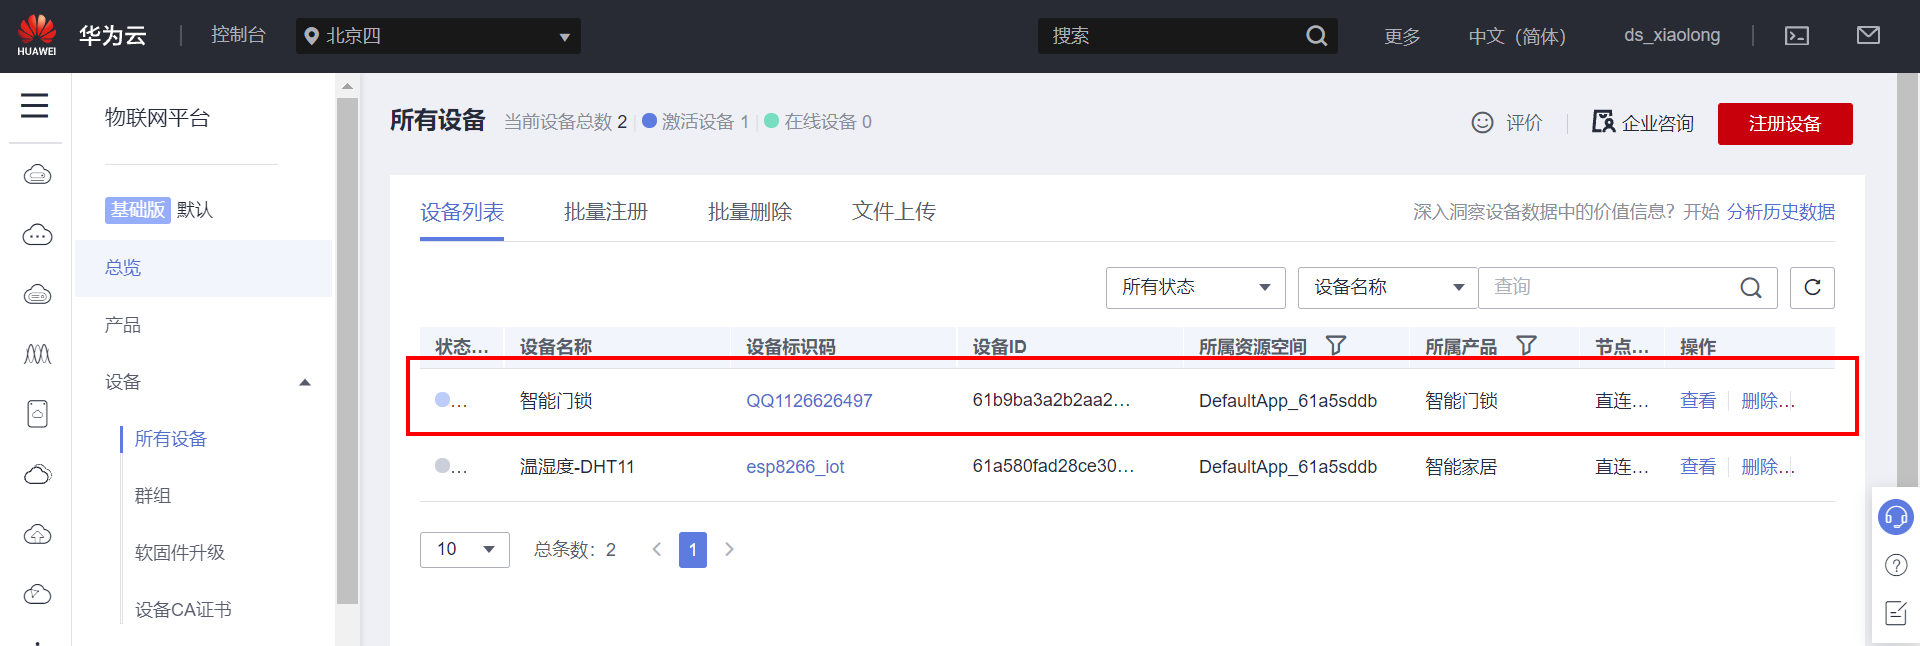
After closing, you will see the created device:
Click the product page and select the product just created:

Select custom model - create data model service:

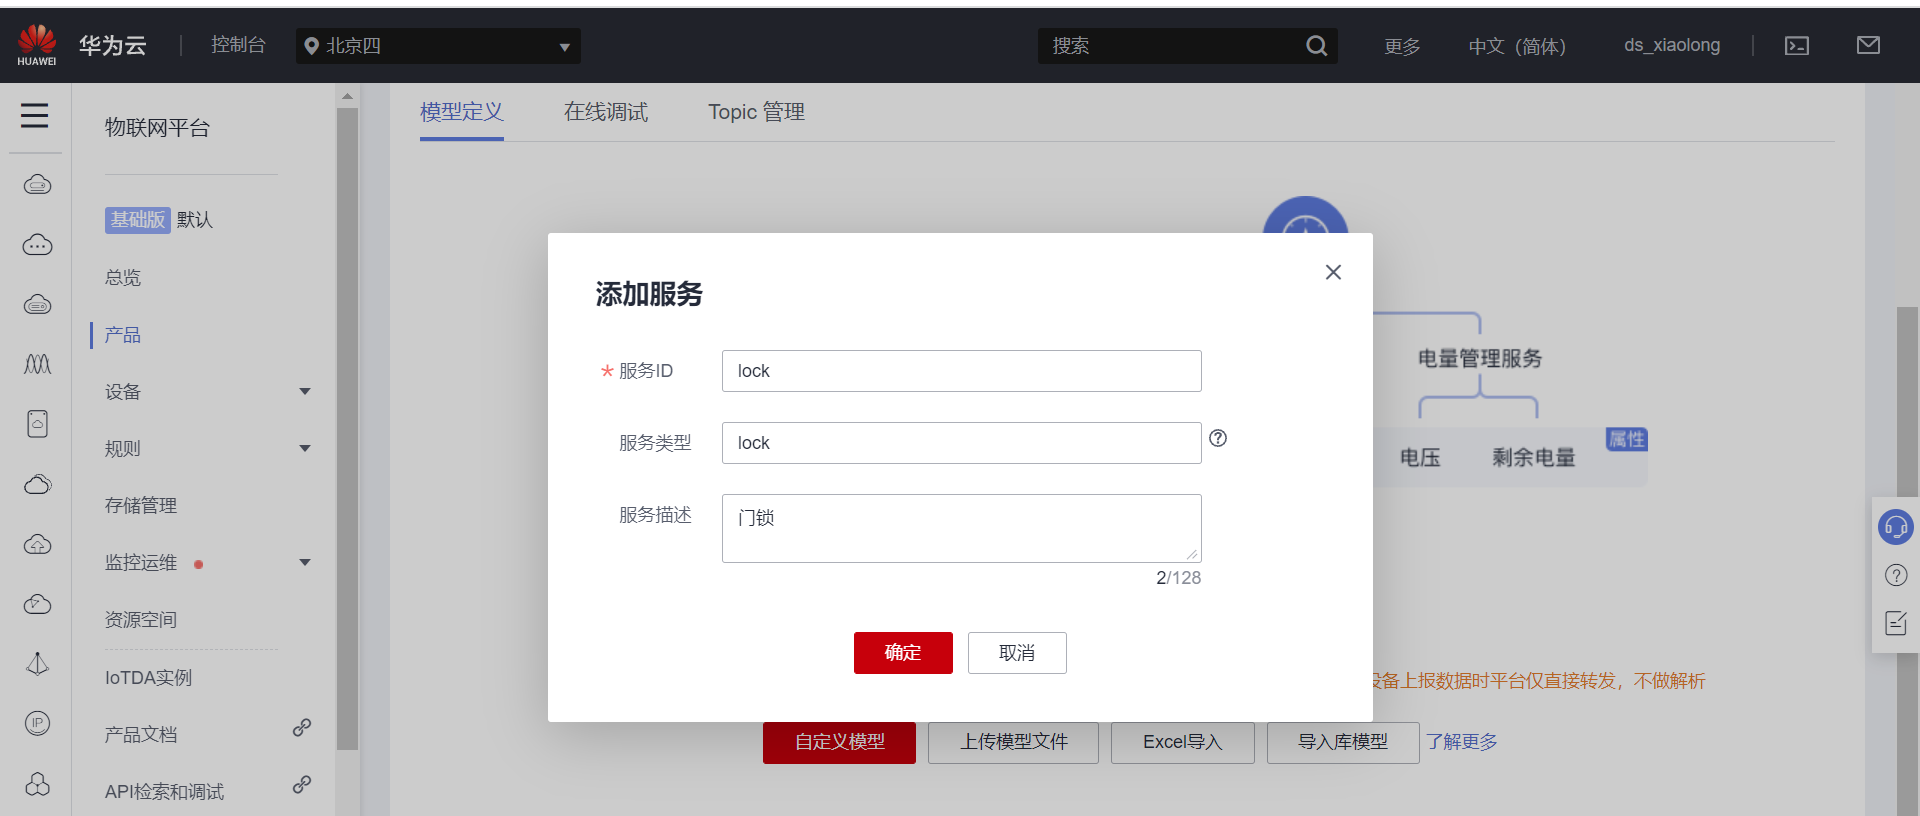
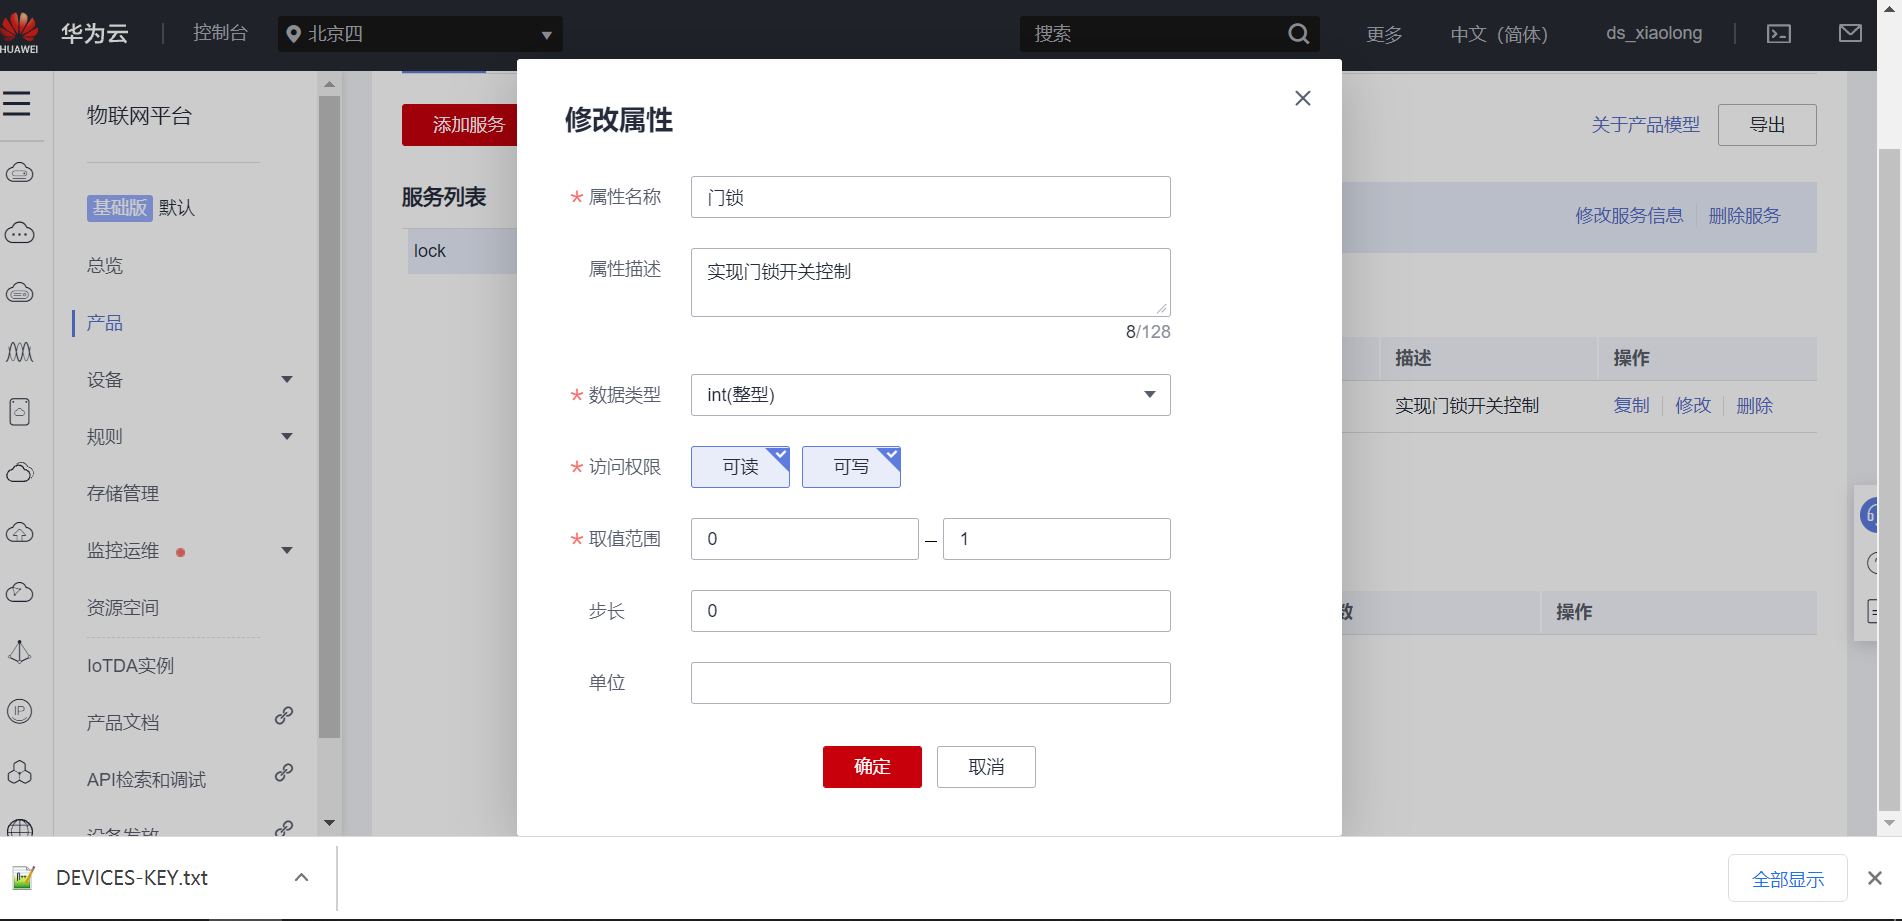
Select add attribute to create the attribute of the device
4. Create MQTT login account and key
After the device is created, the MQTT login account and key are generated to facilitate the device to log in to the cloud platform.
Official website tool address: https://iot-tool.obs-website.cn-north-4.myhuaweicloud.com/
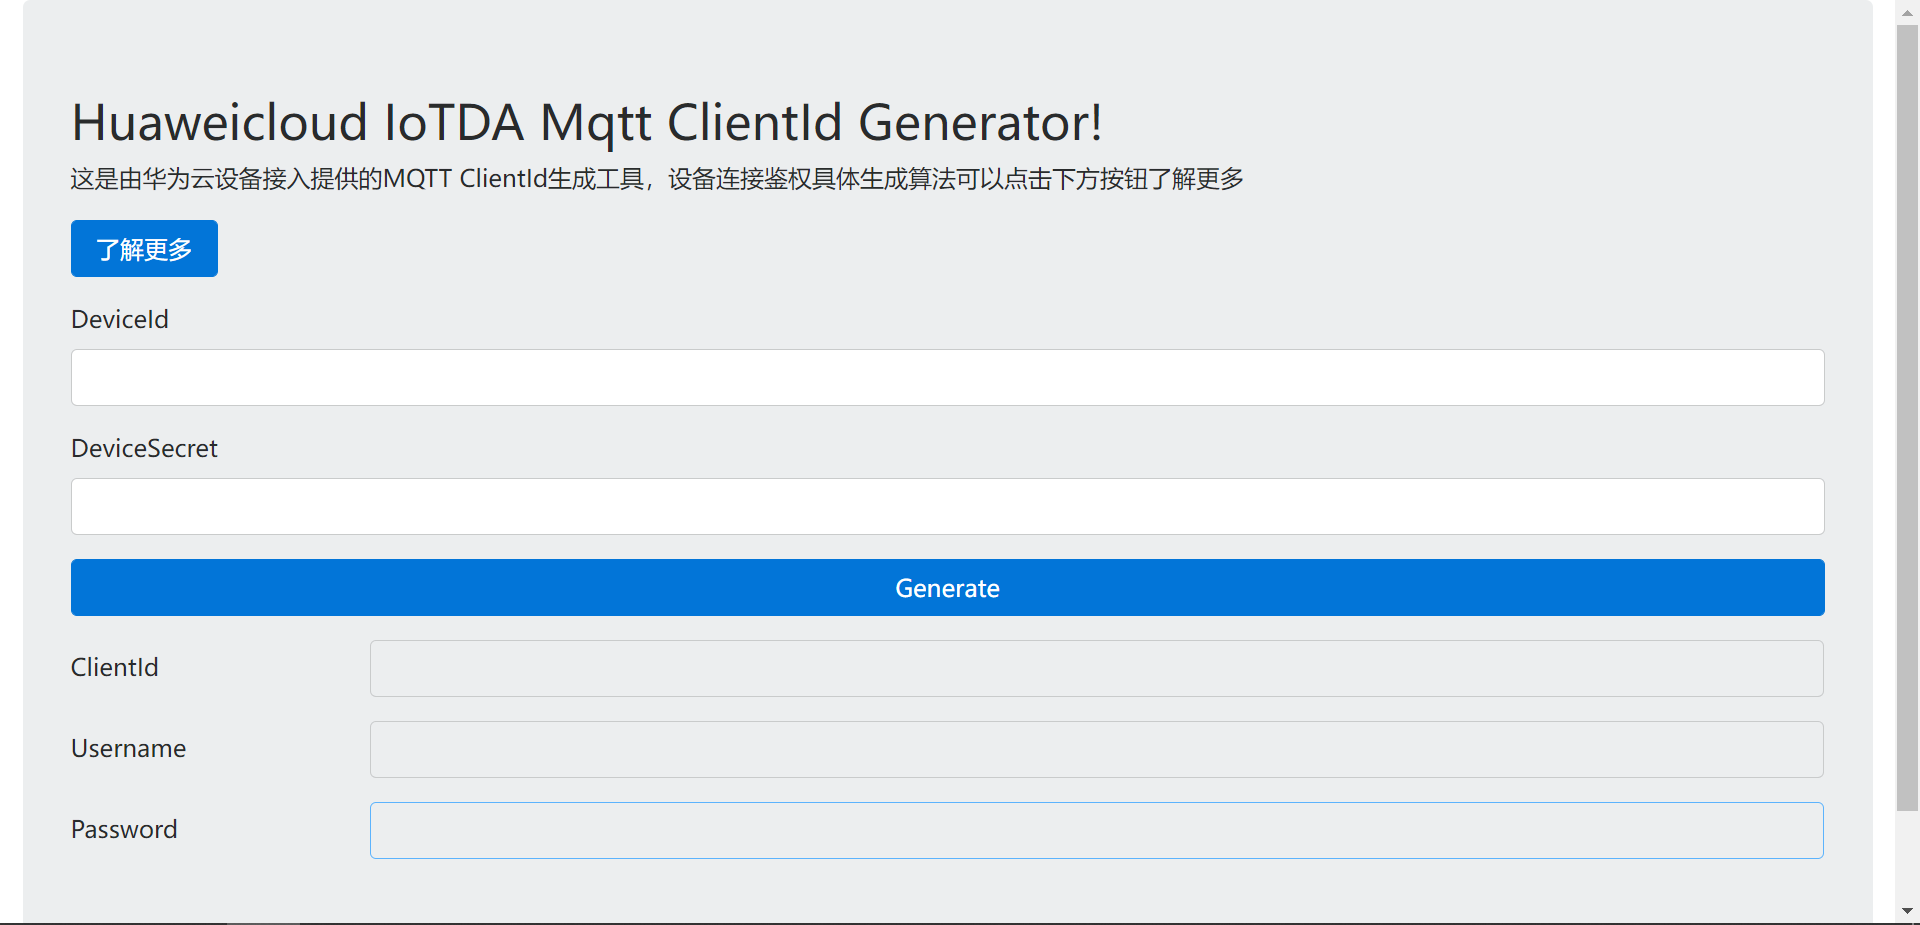
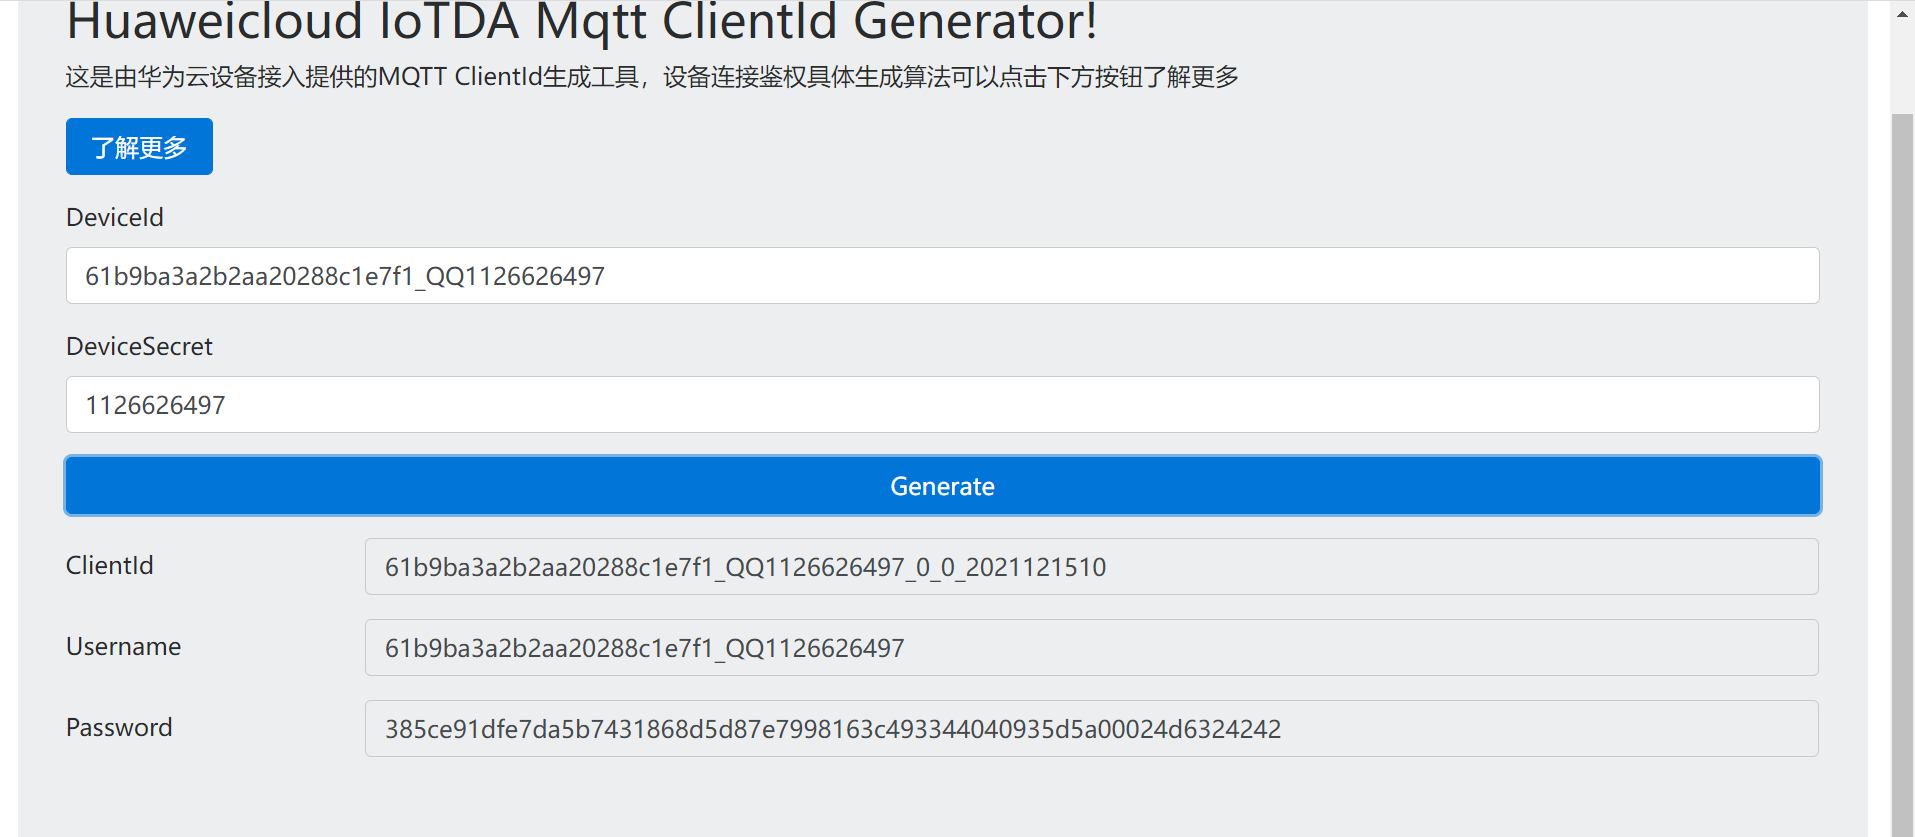
Open the key file downloaded when the device was just created, copy the content, fill in the corresponding, and generate it.
5. Format of splicing topic subscription and publication
Introduction to official documents: https://support.huaweicloud.com/devg-iothub/iot_01_2127.html

On the product page, you can see all the formats of the theme:
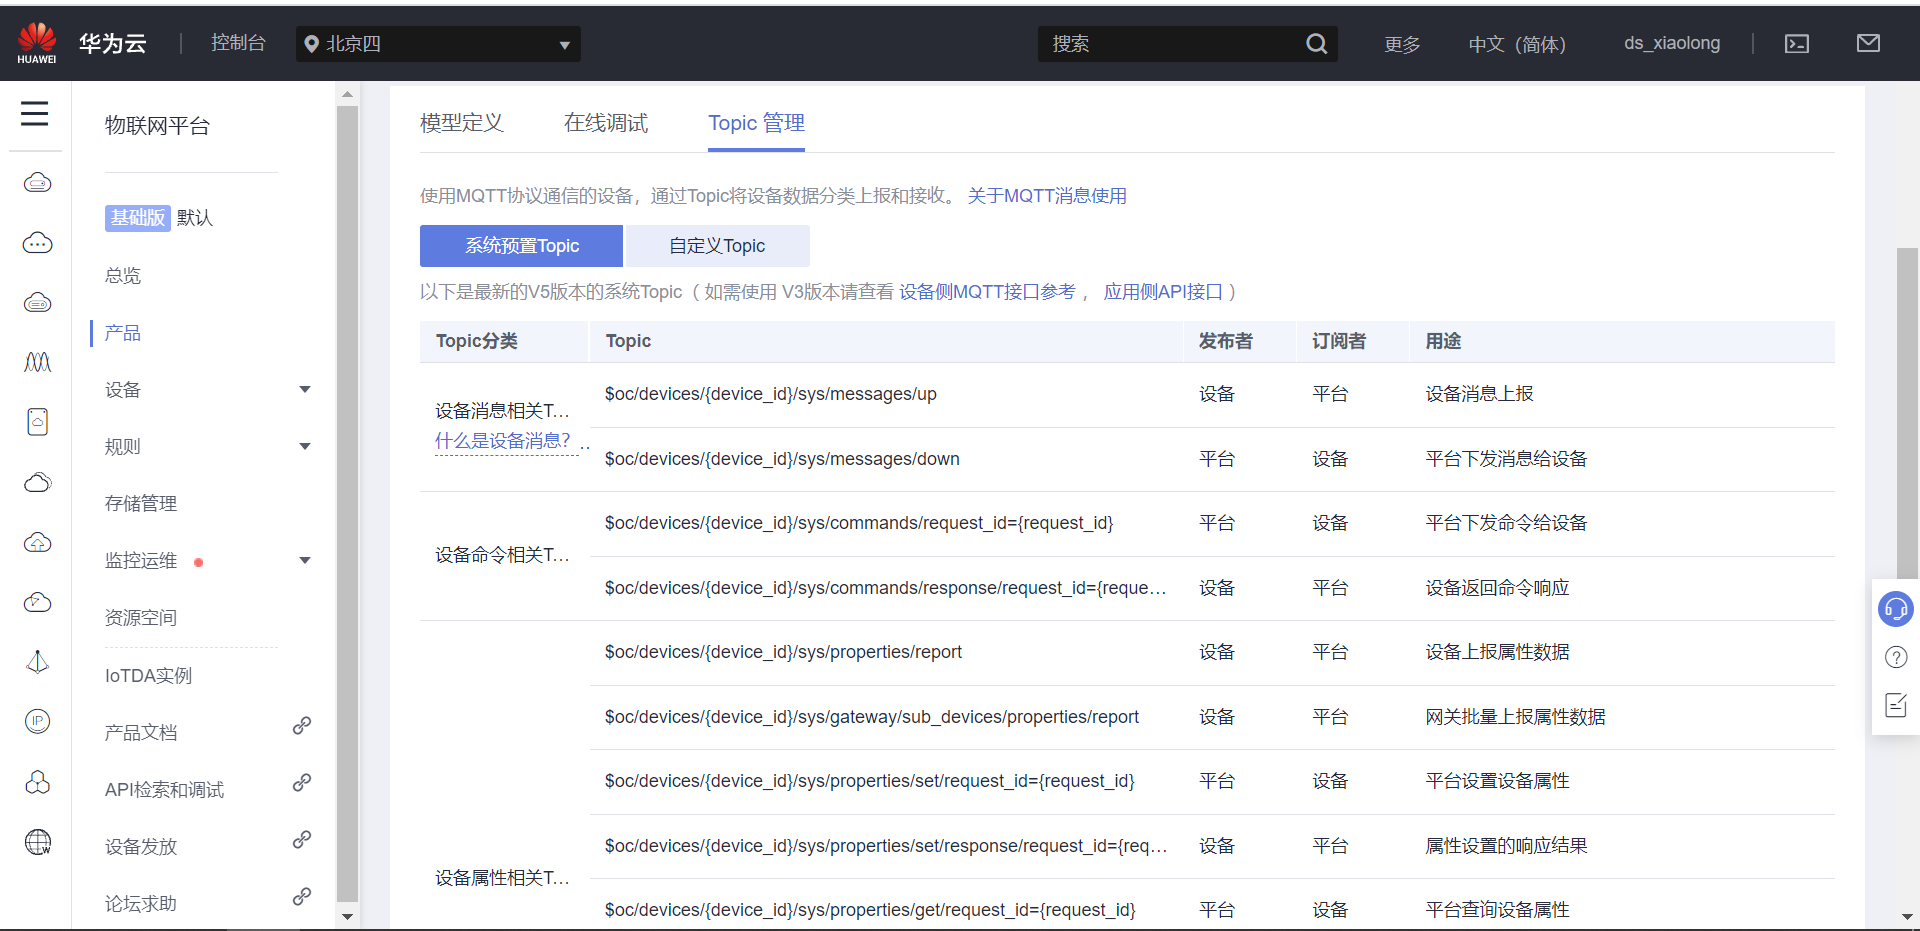
The format of the summary is as follows:
format: $oc/devices/{device_id}/sys/messages/down
//Subscription subject: the platform sends messages to devices
$oc/devices/61b9ba3a2b2aa20288c1e7f1_QQ1126626497_0_0_2021121510/sys/messages/down
format: $oc/devices/{device_id}/sys/properties/report
//Equipment reporting data
$oc/devices/61b9ba3a2b2aa20288c1e7f1_QQ1126626497_0_0_2021121510/sys/properties/report
Data format for properties on:
//Reported attribute message (multiple attributes can be reported at a time, just add them in json)
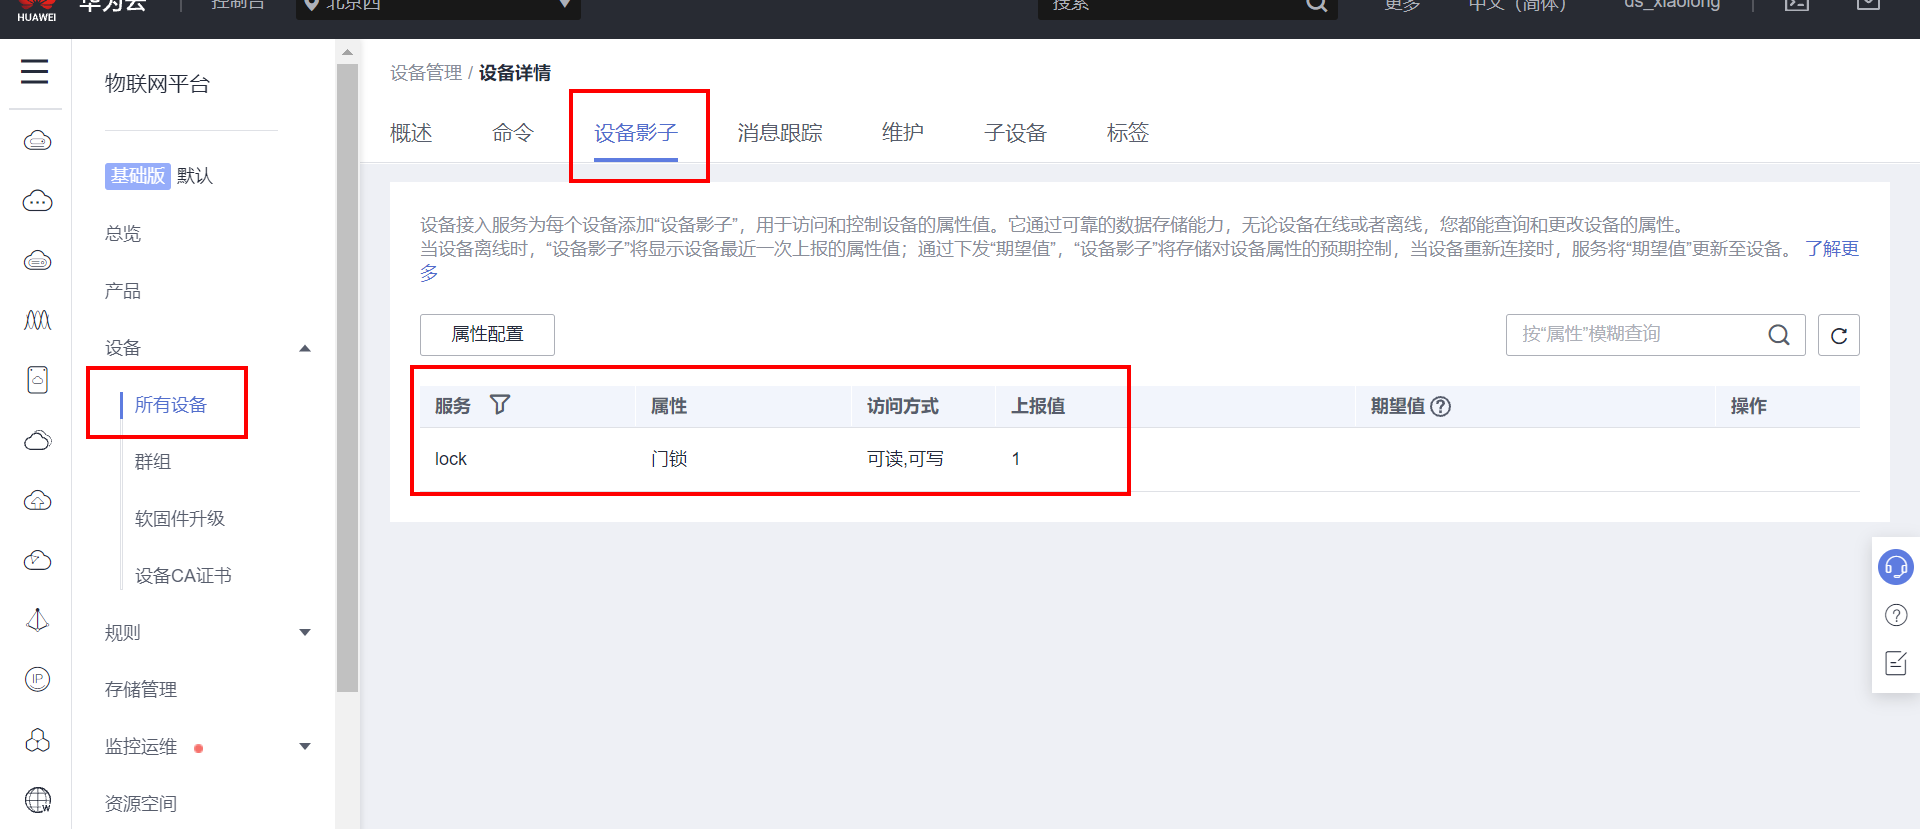
{"services": [{"service_id": "lock","properties":{"Door lock":1}}]}
The service ID in the above attribute and the name in the attribute can be viewed on the device page and the shadow device page.
6. The mqtt client simulates the device to log in to the cloud
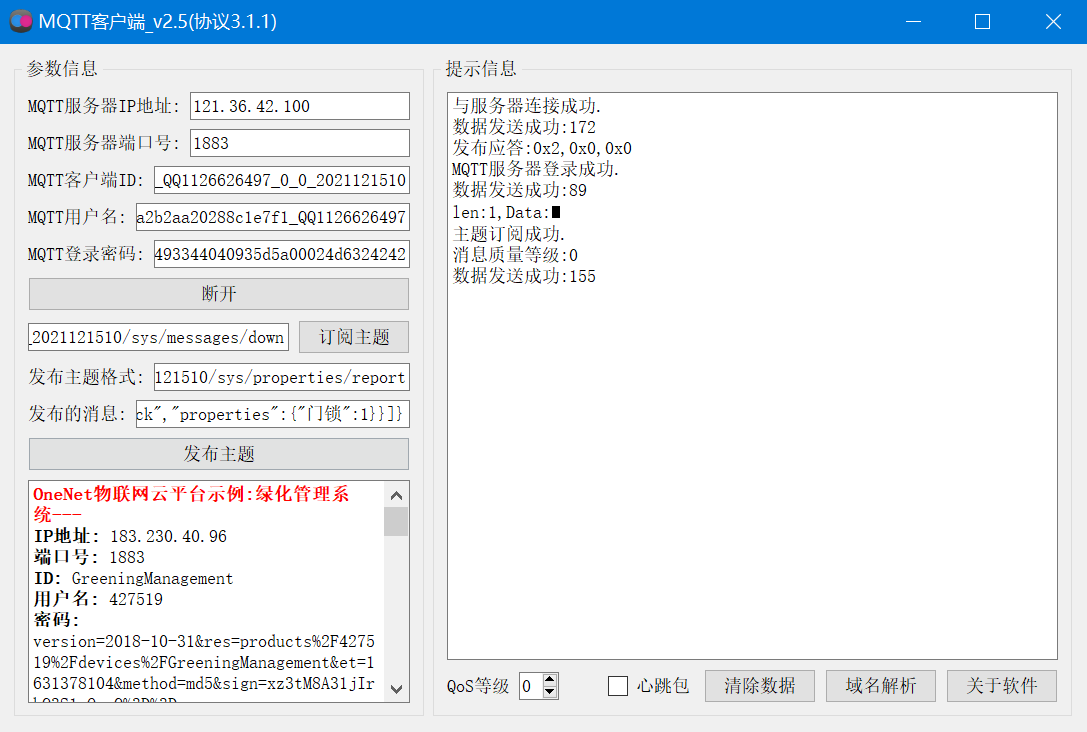
Next, use the MQTT client to simulate the device login server test to see if the device creation is OK.
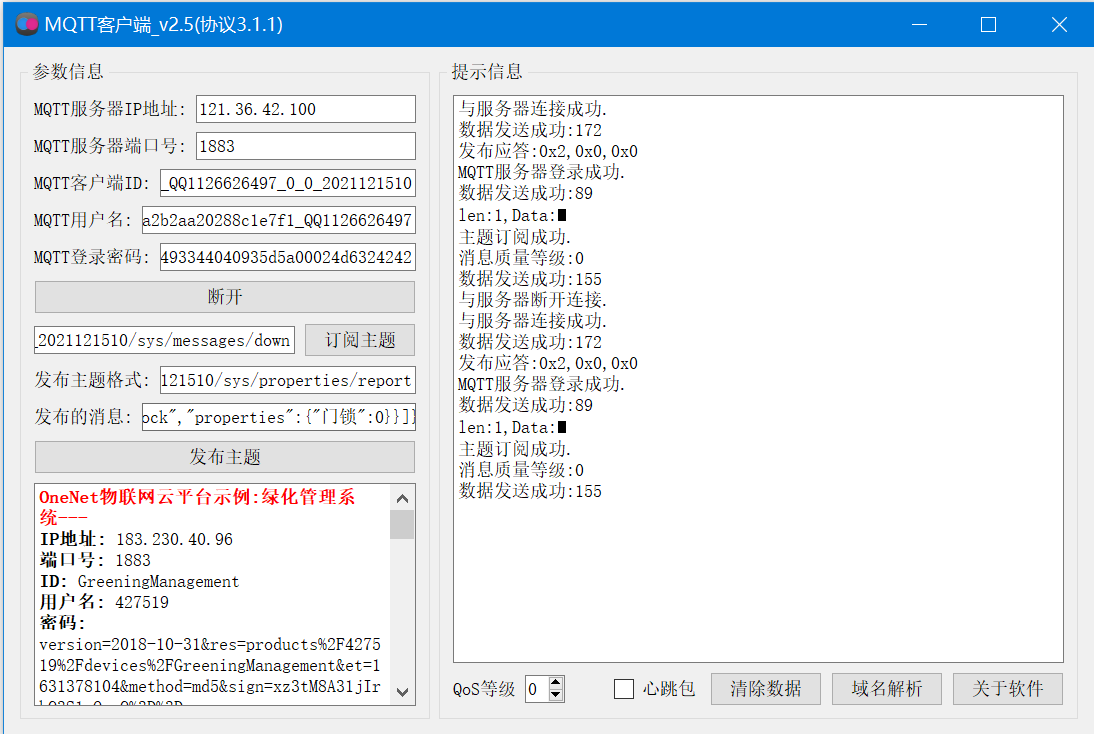
The IP address of the server is 121.36 forty-two point one zero zero
The port number is 1883
Open the MQTT client software, follow the prompts, enter relevant parameters, click Connect, and then click subscribe topic to publish the topic:
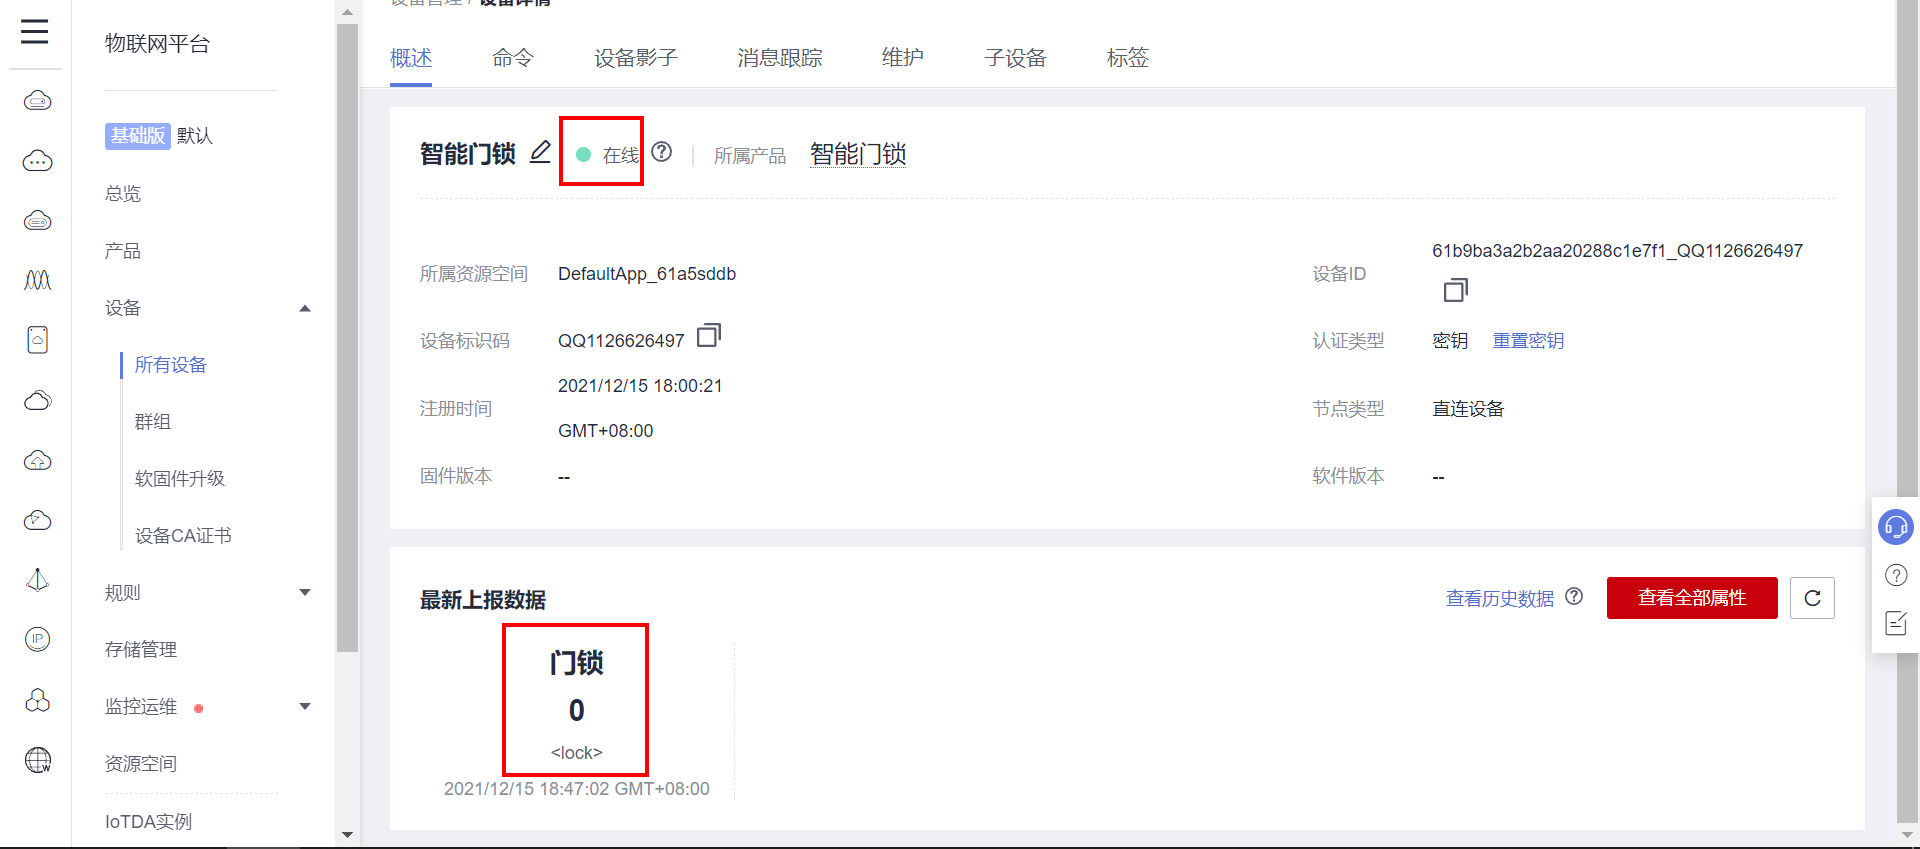
Check the cloud server: you can see that the device is online and receives the uploaded data.
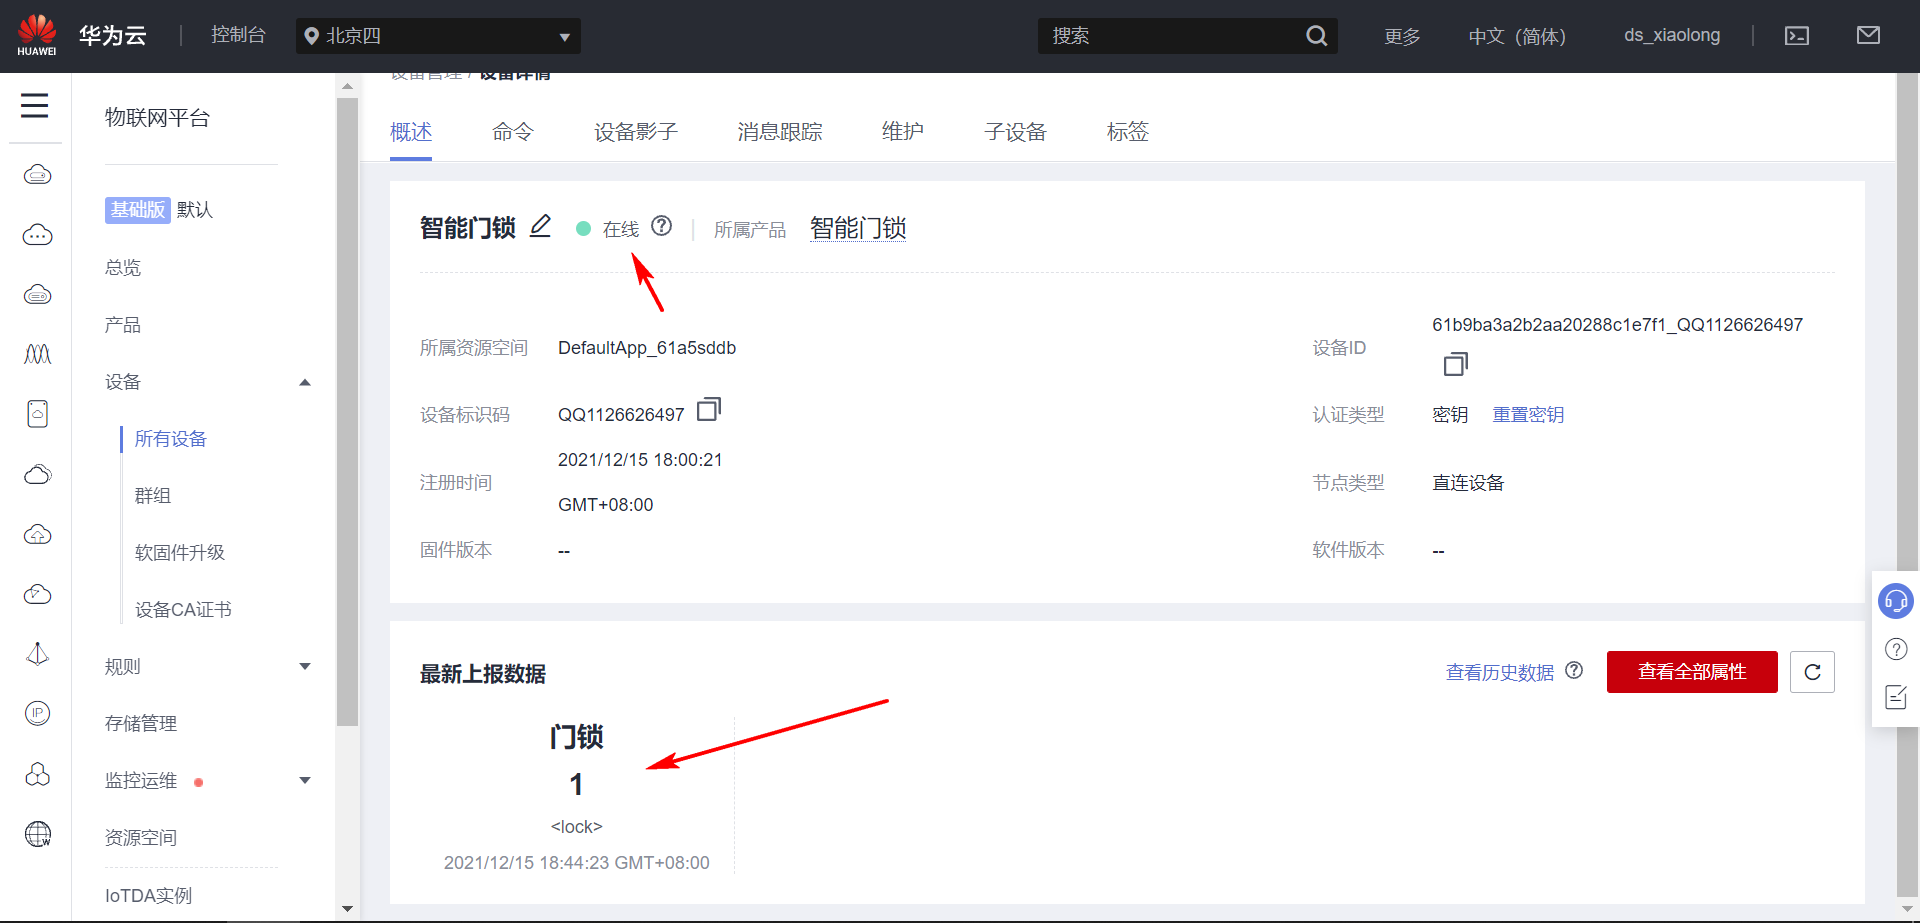
Modify the lock status, report the attribute, and then view it:
It is found that the status of the cloud has also changed, and now the device reporting is OK.
Next, the test command is issued to realize the function of remote unlocking and locking:
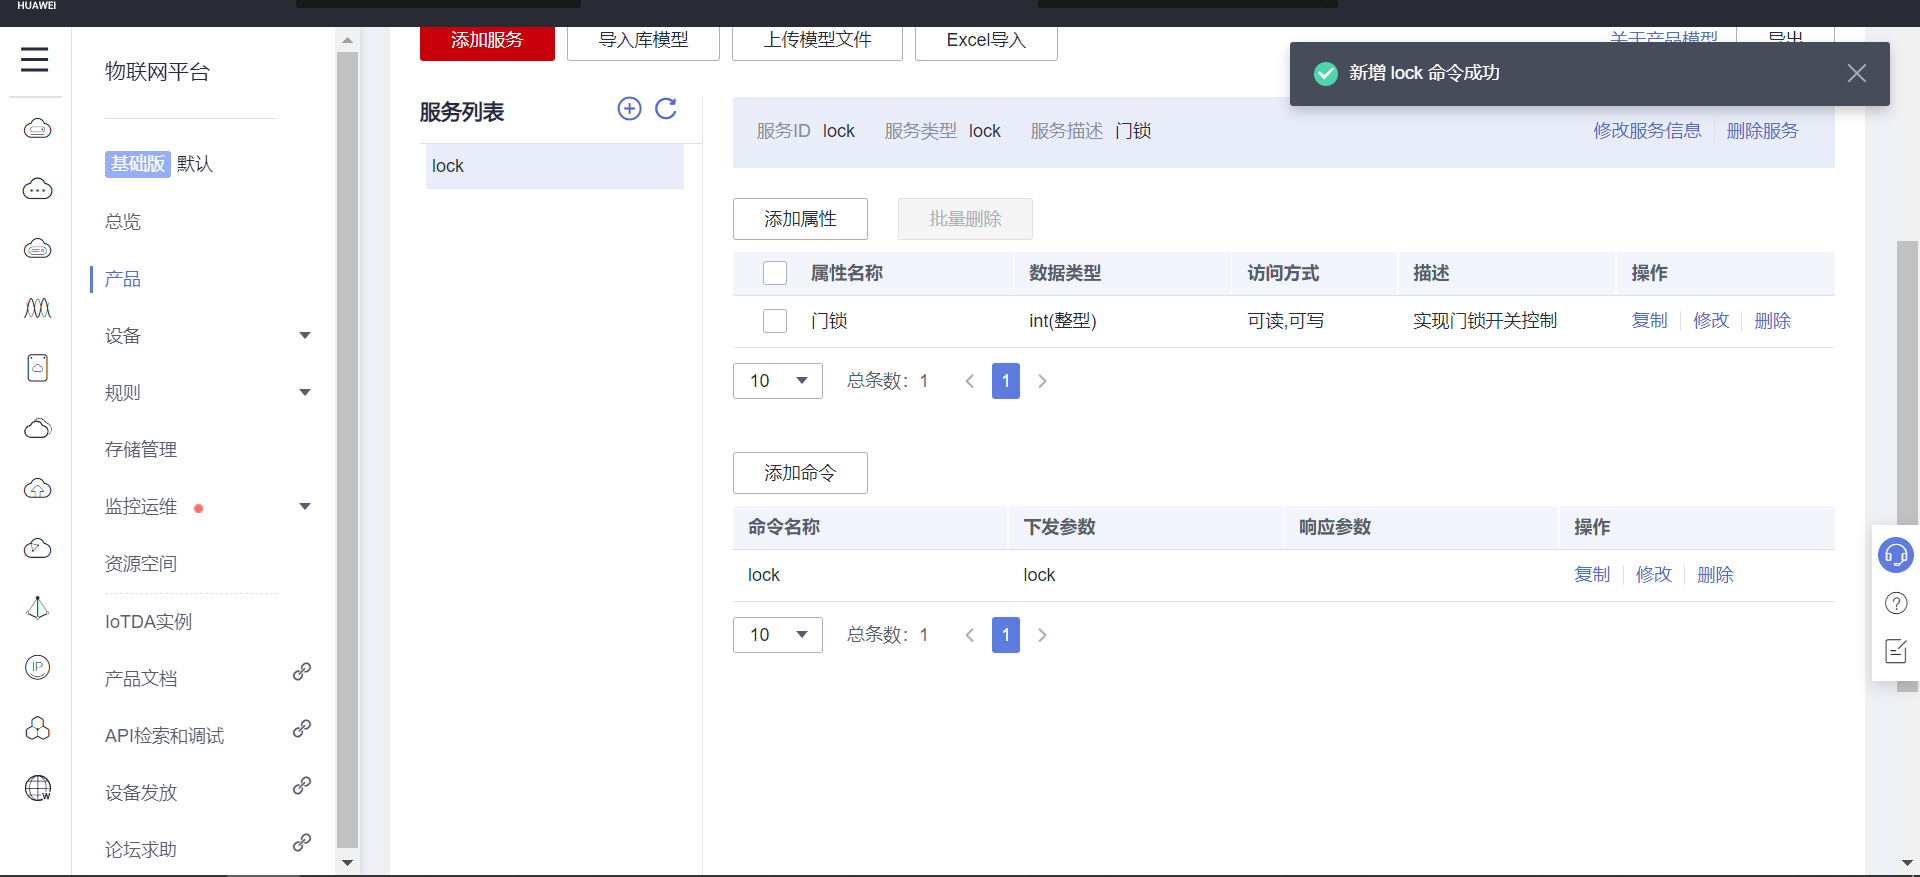
Open the product page and add a new command:
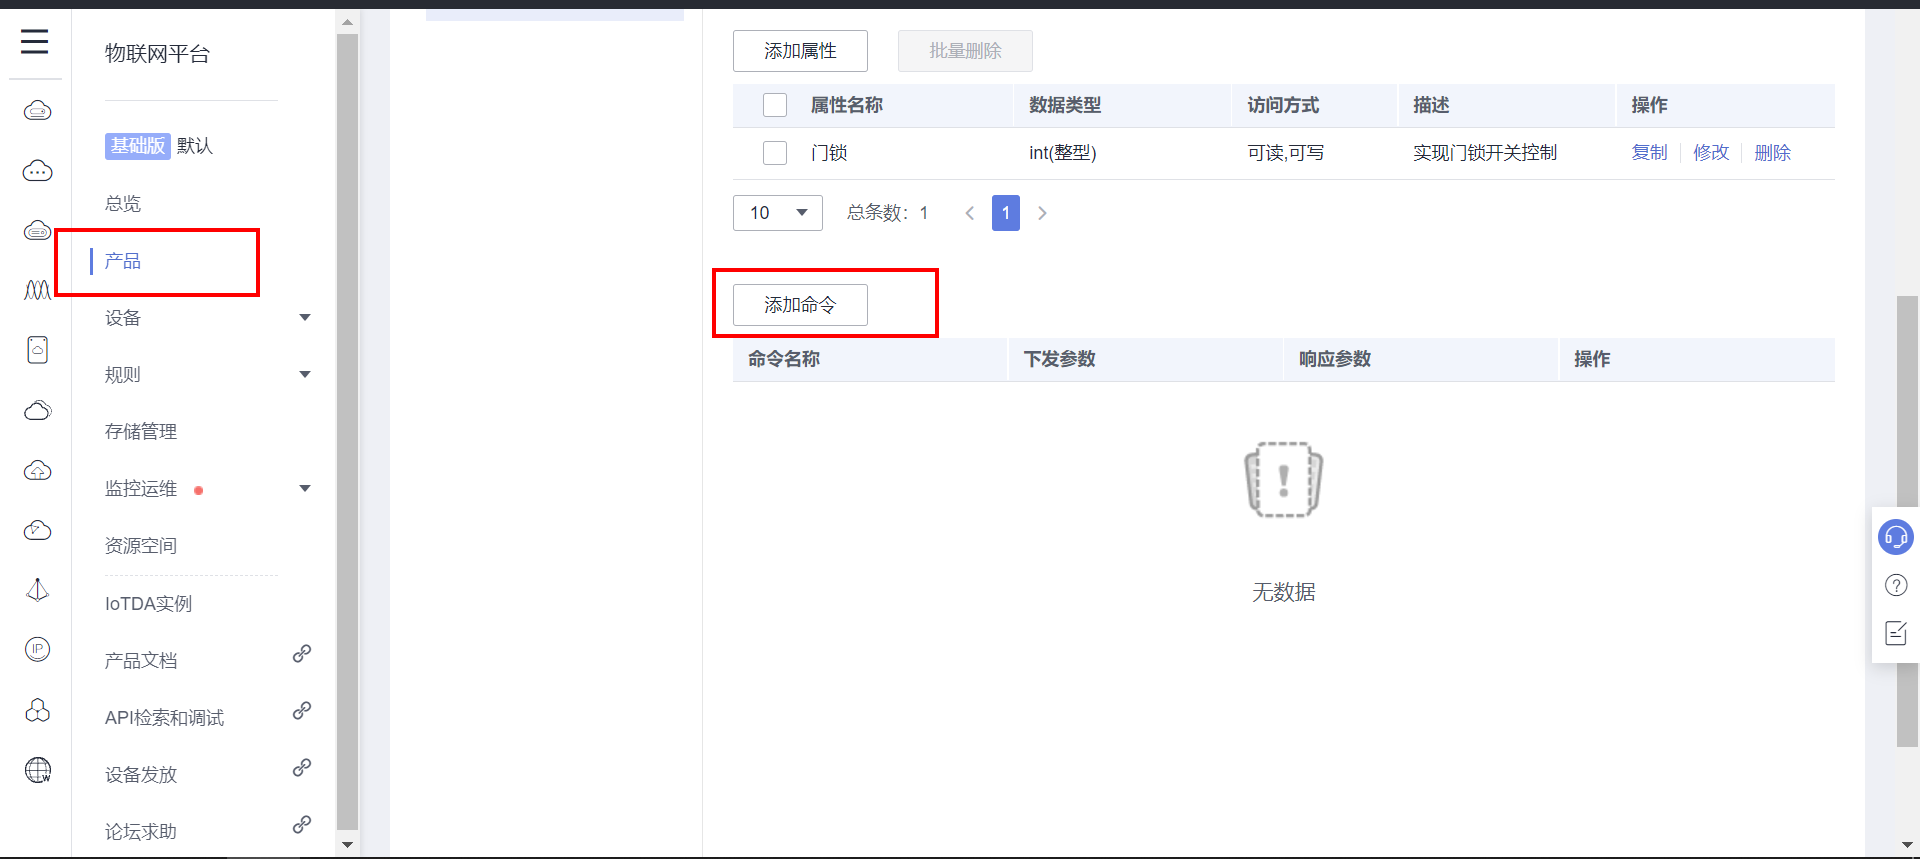
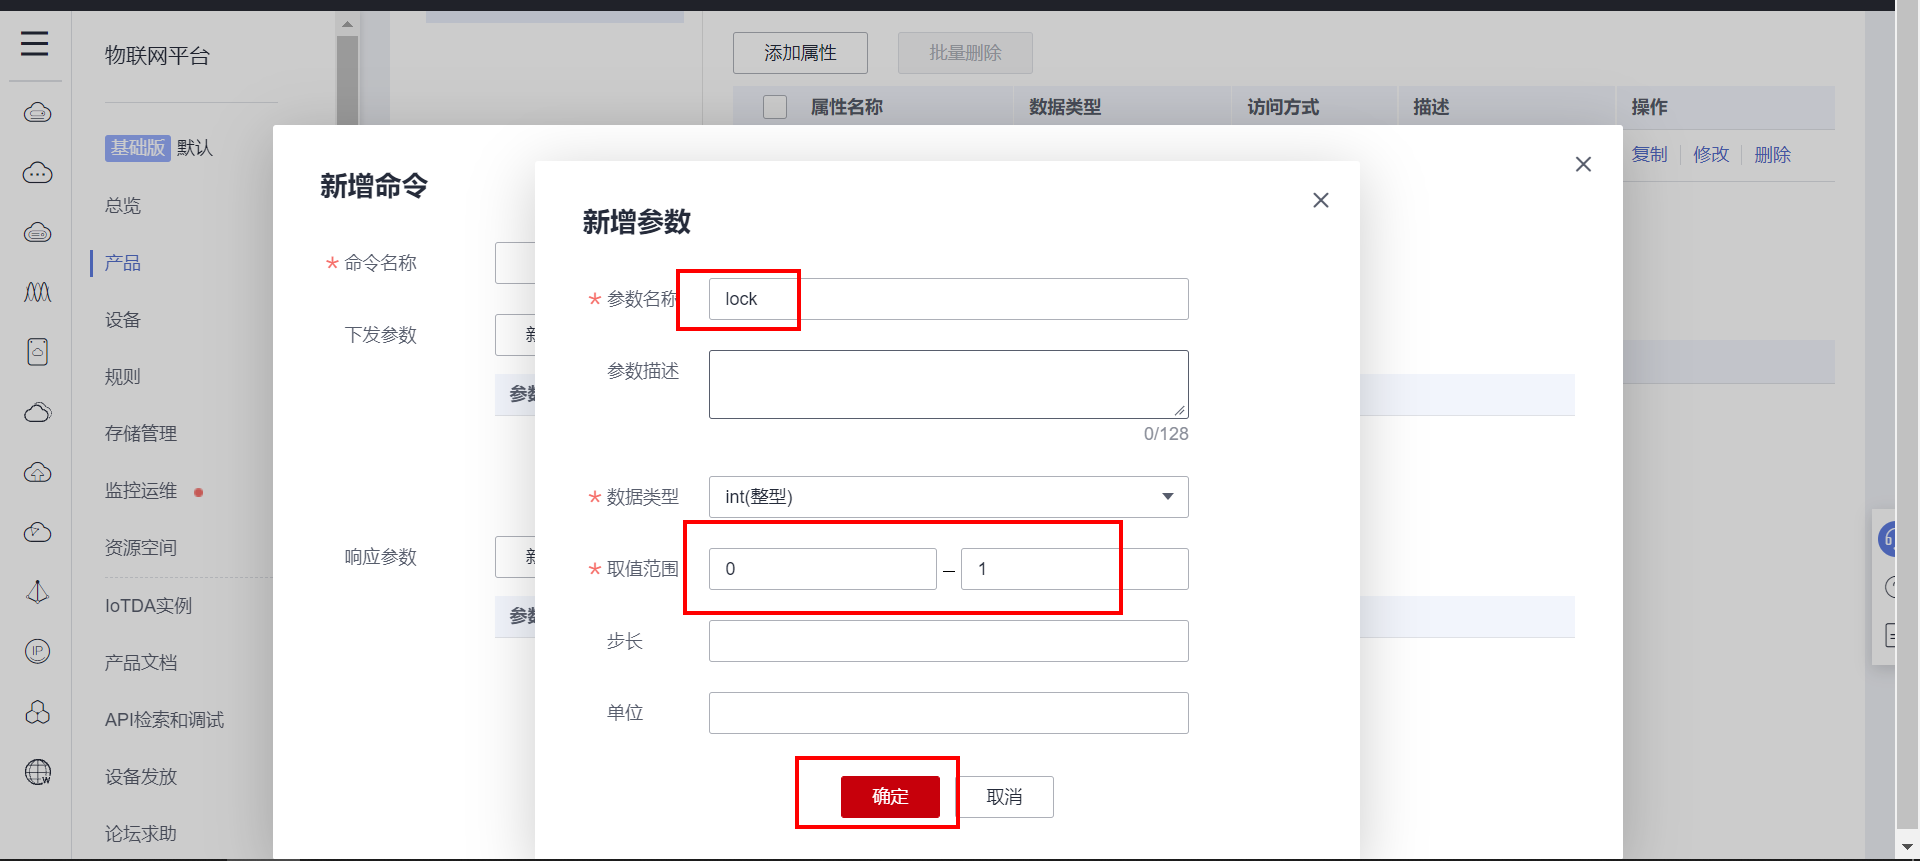
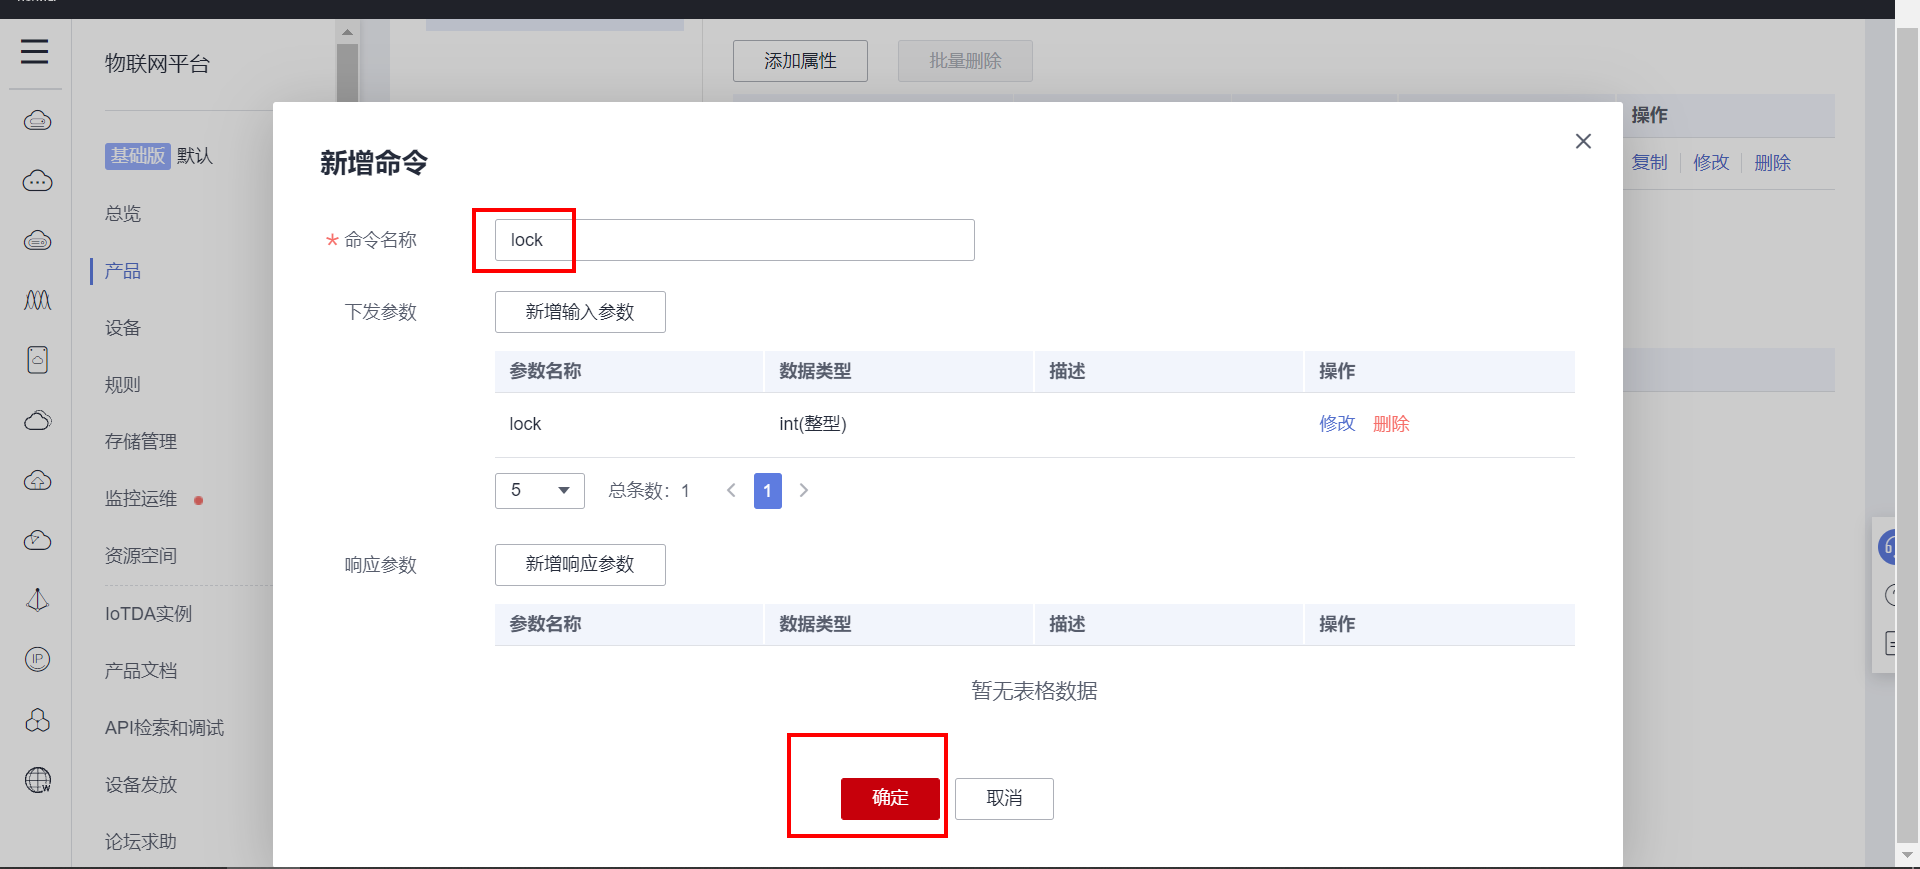
Command added successfully:
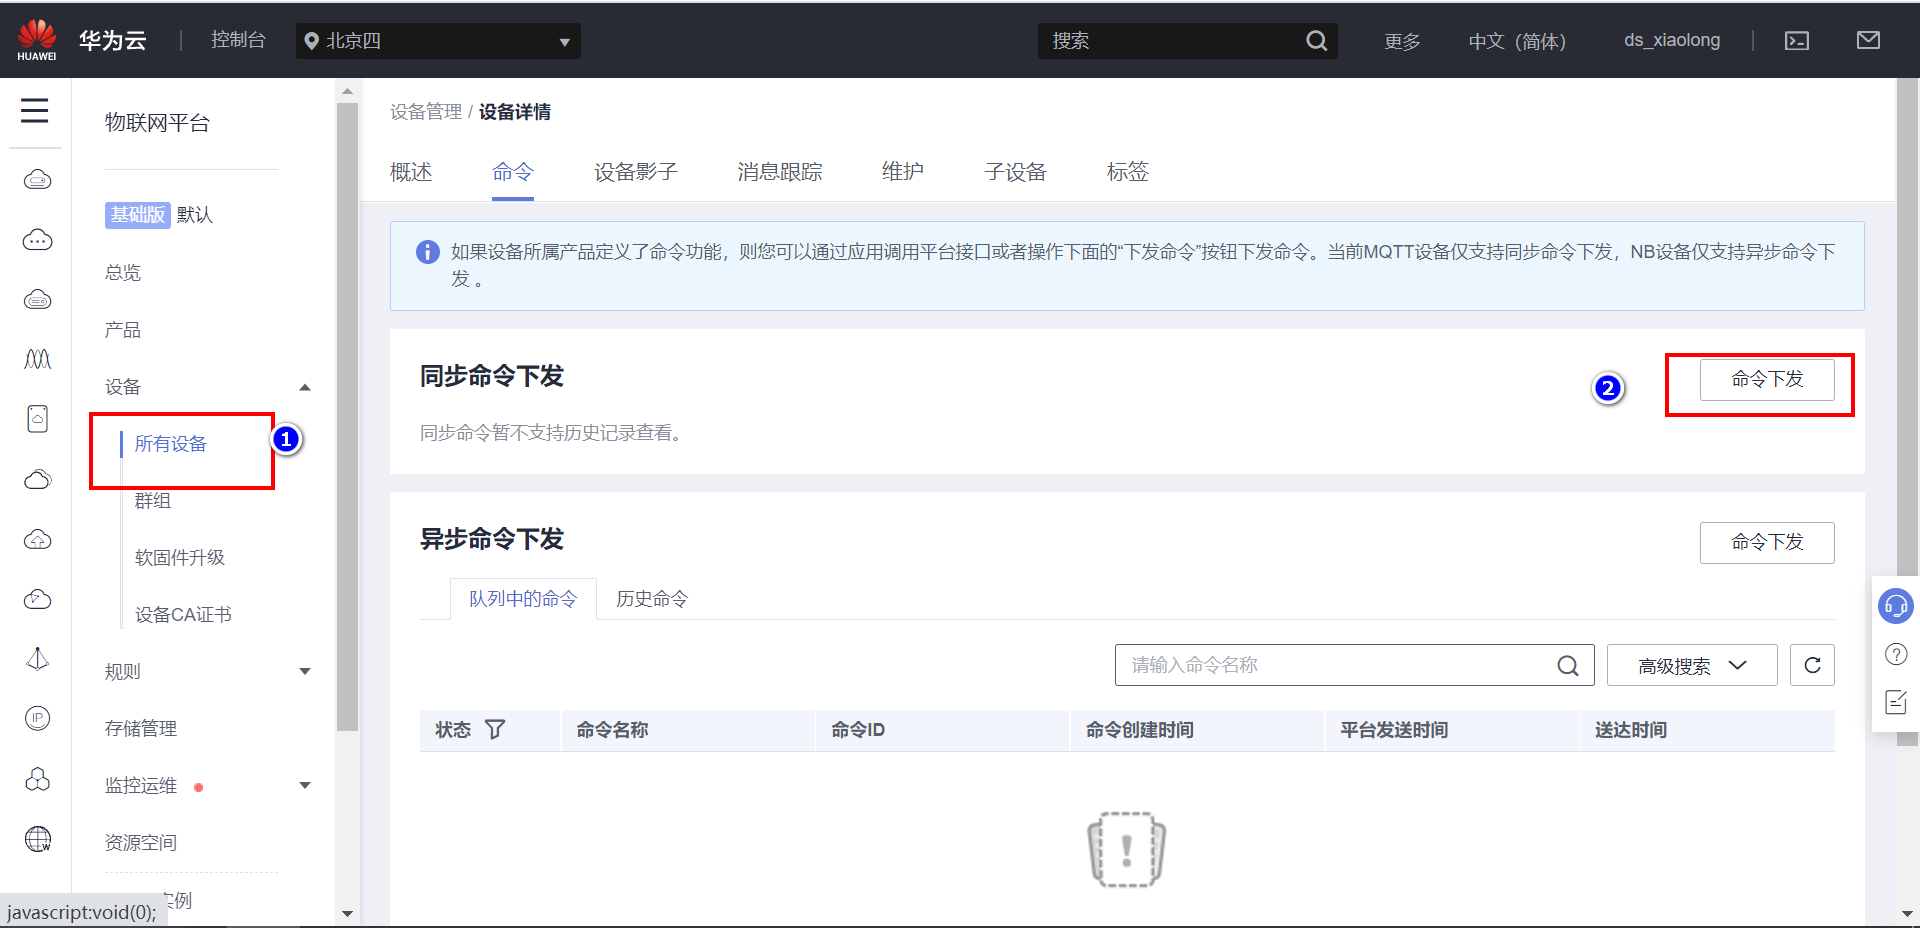
On the device page, select the synchronization command and issue:
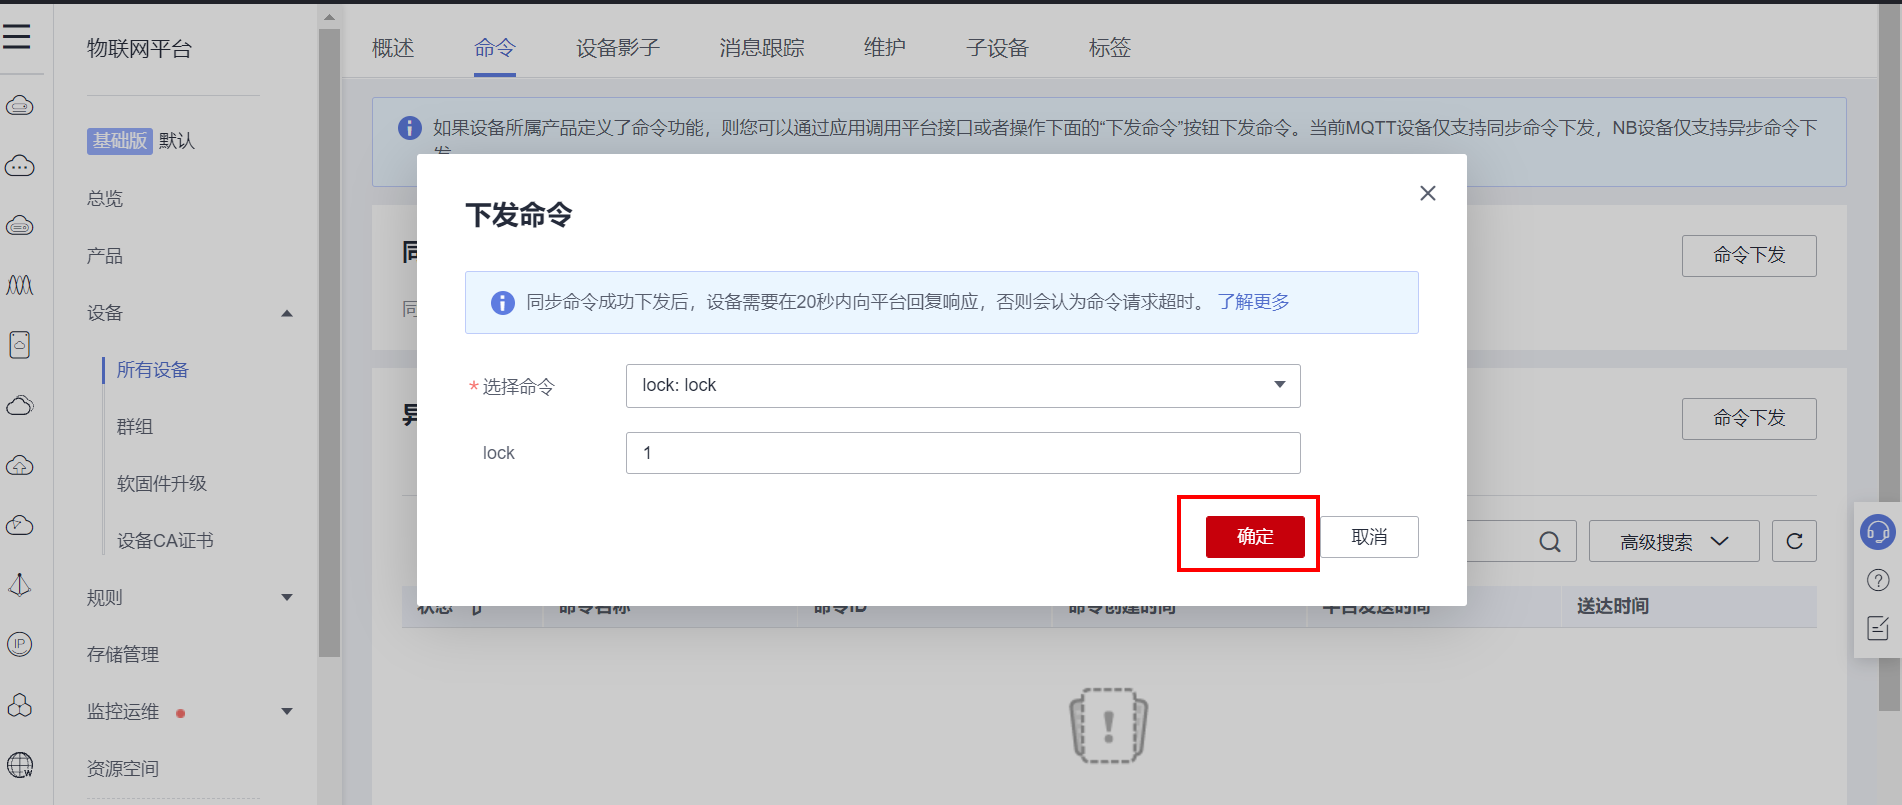
Click OK to view the MQTT client and find that the data has been received:
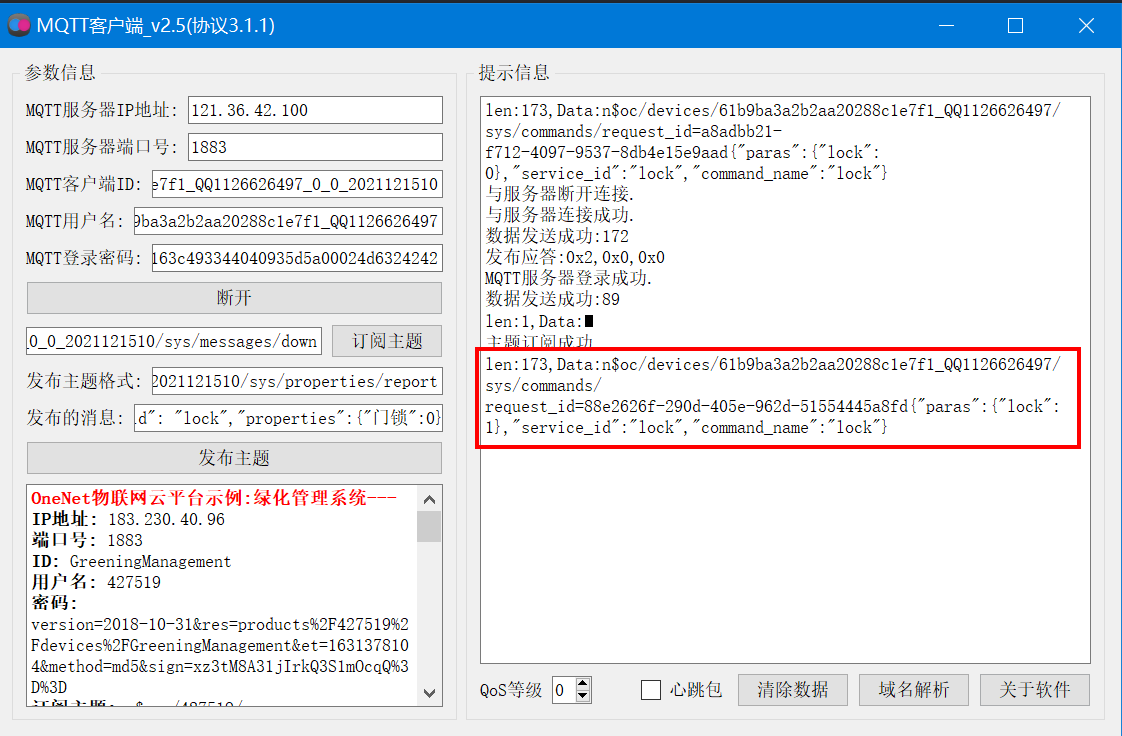
$oc/devices/61b9ba3a2b2aa20288c1e7f1_QQ1126626497/sys/commands/request_id=88e2626f-290d-405e-962d-51554445a8fd{"paras":{"lock":1},"service_id":"lock","command_name":"lock"}
By analyzing the received data, the equipment can complete the control of multi-step motor and unlock and lock.
7. STM32+ESP8266 connect to the cloud

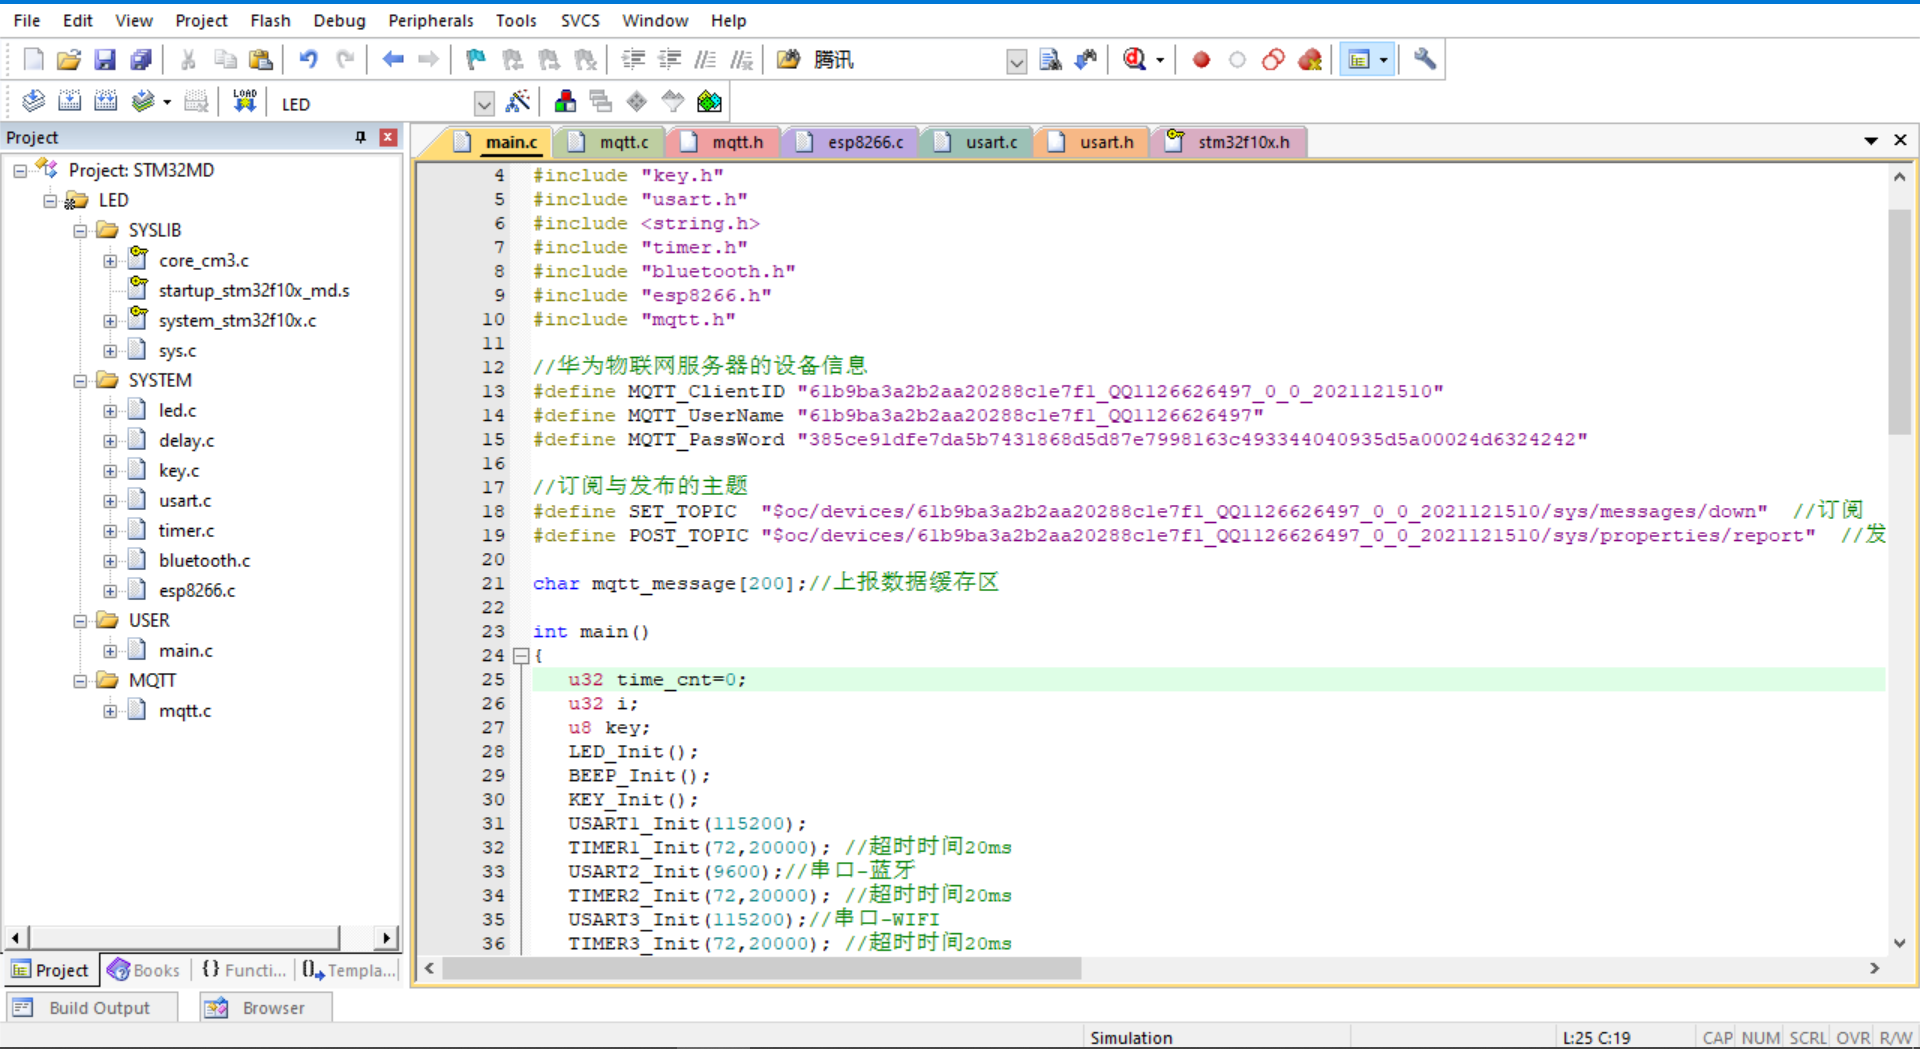
The project is a keil5 project with a lot of code. Only the code in the main function is posted below. If you need a complete code, leave a message in the comment area below.
The main function code is as follows:
#include "stm32f10x.h"
#include "led.h"
#include "delay.h"
#include "key.h"
#include "usart.h"
#include <string.h>
#include "timer.h"
#include "bluetooth.h"
#include "esp8266.h"
#include "mqtt.h"

//Equipment information of Huawei Internet of things server
#define MQTT_ClientID "61b9ba3a2b2aa20288c1e7f1_QQ1126626497_0_0_2021121510"
#define MQTT_UserName "61b9ba3a2b2aa20288c1e7f1_QQ1126626497"
#define MQTT_PassWord "385ce91dfe7da5b7431868d5d87e7998163c493344040935d5a00024d6324242"

//Topics for subscriptions and publications
#define SET_ Topic "$OC / devices / 61b9ba3a2b2aa220288c1e7f1_qq112626497_0_2021121510 / sys / messages / down" / / subscribe
#define POST_ Topic "$OC / devices / 61b9ba3a2b2aa20288c1e7f1_qq112626497_0_2021121510 / sys / properties / report" / / publish

char mqtt_message[200];//Report data buffer

int main()
{
   u32 time_cnt=0;
   u32 i;
   u8 key;
   LED_Init();
   BEEP_Init();
   KEY_Init();
   USART1_Init(115200);
   TIMER1_Init(72,20000); //Timeout 20ms
   USART2_Init(9600);//Serial port - Bluetooth
   TIMER2_Init(72,20000); //Timeout 20ms
   USART3_Init(115200);//Serial WIFI
   TIMER3_Init(72,20000); //Timeout 20ms
   USART1_Printf("Initializing WIFI One moment please.\n");
   if(ESP8266_Init())
   {
      USART1_Printf("ESP8266 Hardware detection error.\n");
   }
   else
   {
      //Unencrypted port
      USART1_Printf("WIFI:%d\n",ESP8266_STA_TCP_Client_Mode("CMCC-Cqvn","99pu58cb","121.36.42.100",1883,1));

   }

    //2. MQTT protocol initialization
    MQTT_Init();
    //3. Connect Huawei server
    while(MQTT_Connect(MQTT_ClientID,MQTT_UserName,MQTT_PassWord))
    {
        USART1_Printf("Server connection failed,Retrying...\n");
        delay_ms(500);
    }
    USART1_Printf("Server connection succeeded.\n");

    //3. Subscribe to topics
    if(MQTT_SubscribeTopic(SET_TOPIC,0,1))
    {
        USART1_Printf("Topic subscription failed.\n");
    }
    else
    {
        USART1_Printf("Topic subscription succeeded.\n");
    }

    while(1)
    {
        key=KEY_Scan(0);
        if(key==2)
        {
            time_cnt=0;
            sprintf(mqtt_message,"{\"services\": [{\"service_id\": \"lock\",\"properties\":{\"Door lock\":1}}]}");
            MQTT_PublishData(POST_TOPIC,mqtt_message,0);
            USART1_Printf("Send status 1\r\n");
        }
        else if(key==3)
        {
            time_cnt=0;
            sprintf(mqtt_message,"{\"services\": [{\"service_id\": \"lock\",\"properties\":{\"Door lock\":0}}]}");
            MQTT_PublishData(POST_TOPIC,mqtt_message,0);
            USART1_Printf("Send status 0\r\n");
        }

        if(USART3_RX_FLAG)
        {
            USART3_RX_BUFFER[USART3_RX_CNT]='\0';
            for(i=0;i<USART3_RX_CNT;i++)
            {
                USART1_Printf("%c",USART3_RX_BUFFER[i]);
            }
            USART3_RX_CNT=0;
            USART3_RX_FLAG=0;
        }

        //Send heartbeat packets regularly and keep connected
        delay_ms(10);
        time_cnt++;
        if(time_cnt==500)
        {
            MQTT_SentHeart();//Send heartbeat packet
            time_cnt=0;
        }
    }
}