Configuration of OpenLayer Library
Call in HTML
Openlayers is an open source Javascript library used to display maps in Web browsers. Official website( https://openlayers.org/ )The download package and use case of OpenLayer are provided; The most commonly used reference methods are as follows:
1. Online call
<!doctype html>
<html lang="en">
  <head>
    <meta charset="utf-8">
    <link rel="stylesheet" href="https://cdn.jsdelivr.net/gh/openlayers/openlayers.github.io@master/en/v6.9.0/css/ol.css" type="text/css">
    <script src="https://cdn.jsdelivr.net/gh/openlayers/openlayers.github.io@master/en/v6.9.0/build/ol.js"></script>
    <title>OpenLayers example</title>
  </head>
2. Call local installation package
<!doctype html>
<html lang="en">
  <head>
    <meta charset="utf-8">
    <link href="Installation path\v5.3.0\css\ol.css" rel="stylesheet" type="text/css"/>
    <script src="Installation path\v5.3.0\build\ol.js" type="text/javascript" ></script>
    <title>OpenLayers example</title>
  </head>
(reference article link: https://blog.csdn.net/lijie45655/article/details/93314512 )
Invoke in JavaScript file
Some examples are also given on the official website( https://openlayers.org/en/latest/examples/ )Therefore, there will be some problems. How to write functions in JS files like example and then reference them in Html files;
3. Referring to the video of an author on Youtube, there are also reprinted videos on station B, but not all of them;
Link: https://www.youtube.com/watch?v=VazsQsjx3Fo&list=PLzHdTn7Pdxs4YoYM4v8OBvEgMgI3Kx101
4. Installing OL libraries using Npm
npm is the package manager of NodeJS. For details, please refer to what is npm (original link: https://blog.csdn.net/qq_35732147/article/details/80980124?ops_request_misc=&request_id=&biz_id=102&utm_term=npm&utm_medium=distribute.pc_search_result.none -task-blog-2allsobaiduweb~default-3-80980124. pc_ search_ mgc_ flag&spm=1018.2226. 3001.4187)
Without using npm, I can't use OL in javscript as an example with different editors (VS, WebStorm, Dreamweaver, etc.), so I tried this method. My method of configuring the environment is as follows (reference books:
Comprehensive analysis of OpenLayer of WebGIS (Second Edition), edited by Guo Mingqiang and Huang Ying
):
First, create a new project folder and open the path in the cmd console
H:\>cd H:\WebGIS\OL_Homework
H:\WebGIS\OL_Homework>
Step 2: initialize the project directory
Before that, confirm that NodeJS and NPM plug-ins have been installed (the new version of NodeJS has integrated NPM and does not need to be installed separately). Determine the method to install NPM: enter npm -v on the console and return the version number to indicate that the installation is successful;
C:\Users\admin>npm -v
6.14.15
After confirming to install NPM, execute the "npm init -y" command under the project file
H:\WebGIS\OL_Homework>npm init -y
After successful initialization, a package. XML file will be generated in the project directory JSON configuration file
Step 3: install the Parcel plug-in, which is used for application packaging; Still run the command "NPM install -- save dev Parcel bundler" in the project directory
H:\WebGIS\OL_Homework>npm install --save-dev parcel-bundler
This step generates nodes_ Modules folder and package lock JSON file;
Step 4: install the OpenLayer library and run the command "npm install ol" in the project directory
H:\WebGIS\OL_Homework>npm install ol
After running successfully, it will be displayed in package JSON file:
"dependencies": {
    "ol": "^6.9.0"
  }
Step 5: create a new HTML file and a JS file in package Add the following code to JSON
"scripts": {
    "test": "echo \"Error: no test specified\" && exit 1",
    "start": "parcel index.html",
    "build": "parcel build --public-url . index.html"
  },
Here is index Html is my new HTML file
Step 6: start the application and run the command "npm start" in the project directory
H:\WebGIS\OL_Homework>npm start

> OL_Homework@1.0.0 start H:\WebGIS\OL_Homework
> parcel index.html

Server running at http://localhost:1234
√  Built in 14.59s.
Enter "localhost:1234" in the browser to view the web page you created. After you modify the content, the page will refresh automatically. If you don't refresh, you can directly press enter in the cmd interface; If you need to package the application, you can run the "npm run build" command
H:\WebGIS\OL_Homework>npm run build
OpenLayer basic operation
The best way is to refer to the cases on the official website, which gives more basic cases
https://openlayers.org/en/latest/examples/
Display map (sky map API)
index.html
<body>
<header>

<article>
    <div id="Tian" class="tdt"></div>
    <script src="./Vector.js" ></script>

</article>

</body>
JavaScript file
import 'ol/ol.css';
import Map from 'ol/Map';
import View from 'ol/View';
import {OSM, Vector as VectorSource} from 'ol/source';
import {Tile as TileLayer, Vector as VectorLayer} from 'ol/layer';
import {XYZ} from "ol/source";
import {fromLonLat} from "ol/proj";
import {Feature} from "ol";
import {Point} from "ol/geom";
import {Overlay} from "ol";
//Sky map
var vector2 = new TileLayer({
    title: "Sky map",
    source: new XYZ({
        url: "http://t0.tianditu.gov.cn/img_w/wmts?SERVICE=WMTS&REQUEST=GetTile" +
            "&VERSION=1.0.0&LAYER=img&STYLE=default&TILEMATRIXSET=w&FORMAT=tiles&TILEMATRIX={z}&TILEROW={x}&TILECOL={y}" +
            "&tk=Own key",
        wrapX: false
    })
});

//Sky map container
const TDTmap=new Map({
    layers:[vector2,
        new TileLayer({
            source: new OSM(),
        }),
    ],
    target: 'Tian',//Map container, corresponding to "id='Tian 'in HTML"
    view: new View({
        center: [13514200,3663000],
        zoom: 11,
    }),
})
Baidu map API and sky map API
Both Baidu map and tianmap provide their own map services, and both need to apply to become developers and create applications to obtain keys;
The API call and function implementation of Baidu map can refer to the official website
https://lbsyun.baidu.com/index.php?title=jspopularGL
Sky map provides more image services, including vector, image, 3D terrain, etc
http://lbs.tianditu.gov.cn/server/MapService.html
Baidu map is simpler to use than sky map. The following path planning can be easily called:
Web page controls:
<button id="car" onclick="carRoute()">Search route</button>
        <button id="walk" onclick="walkRoute()">Search for pedestrian routes</button>
        <div id="driving_way">
            <select id="bus_select">
                <option value="0">Recommended scheme</option>
                <option value="1">Minimum time</option>
                <option value="2">Minimum transfer</option>
                <option value="3">Minimum walk</option>
                <option value="4">No subway</option>
                <option value='5'>Priority subway</option>
            </select>
            <button id='search' onclick="busRoute()">Query bus/metro</button>
            <p id='routeresult'></p>
        </div>
Functional part
//Path planning
        //Driving route
        function carRoute(){
            var output = "Driving needs";
            var searchComplete = function (results){
                if (transit.getStatus() != BMAP_STATUS_SUCCESS){
                    return ;
                }
                var plan = results.getPlan(0);
                output += plan.getDuration(true) + "\n";                //Get time
                output += "The total distance is:" ;
                output += plan.getDistance(true) + "\n";             //Get distance
            }
            var transit = new BMapGL.DrivingRoute(map, {renderOptions: {map: map},
                onSearchComplete: searchComplete,
                onPolylinesSet: function(){
                    setTimeout(function(){
                        document.getElementById("routeresult").innerText="";
                        document.getElementById("routeresult").innerText=output;
                    },"1000");
                }});
            transit.search(startPoint, desPoint);

        }
        //Pedestrian Route
        function walkRoute(){
            var walking = new BMapGL.WalkingRoute(map, {renderOptions:{map: map, autoViewport: true}});
            walking.search(startPoint, desPoint);
        }
        //Bus and subway scheme
        function busRoute(){
            var routePolicy = [BMAP_TRANSIT_POLICY_RECOMMEND,BMAP_TRANSIT_POLICY_LEAST_TIME,BMAP_TRANSIT_POLICY_LEAST_TRANSFER,BMAP_TRANSIT_POLICY_LEAST_WALKING,BMAP_TRANSIT_POLICY_AVOID_SUBWAYS,BMAP_TRANSIT_POLICY_FIRST_SUBWAYS];
            var transit = new BMapGL.TransitRoute(map, {
                renderOptions: {map: map, panel: 'routeresult'},
                policy: 0,

            });
            var obj = document.getElementById("bus_select");
            var index = obj.selectedIndex;
            var i = obj.options[index].value;

            transit.setPolicy(routePolicy[i]);
            transit.search(startPoint, desPoint);
        }
Baidu map of coordinate system transformation
When using the API service of Baidu maps, it can be found that its coordinate system has certain changes compared with WGS84 (sky map seems to have); the official website gives some methods of terrain conversion. When I use it, I add constant terms (in longitude and latitude) to reduce the difference. This method is only applicable to the case where the accuracy requirement is not high;
Sky map of coordinate system transformation
The sky map involves the mutual conversion between WGS84 coordinate system and Mercator projection. In the example, you can also see that the center of the map is [135142003663000], not longitude and latitude
Reference article: https://blog.csdn.net/qq_33356563/article/details/83795419?ops_request_misc=%257B%2522request%255Fid%2522%253A%2522164027031216780261933673%2522%252C%2522scm%2522%253A%252220140713.130102334.pc%255Fall.%2522%257D&request_id=164027031216780261933673&biz_id=0&utm_medium=distribute.pc_search_result.none -task-blog-2allfirst_ rank_ ecpm_ v1~rank_ v31_ ecpm-1-83795419. pc_ search_ mgc_ flag&utm_ term=%E5%A2%A8%E5%8D%A1%E6%89%98%E6%8A%95%E5%BD%B1%E8%BD%AC%E4%B8%BAWGS&spm=1018.2226. three thousand and one point four one eight seven
There are two methods for WGS84 to Mercator projection
var x= lng*20037508.34/180;
var y=Math.log(Math.tan((90+lat)*Math.PI/360))/(Math.PI/360)*20037508.34/360;
map.setView(new View({
        center: [x,y],
        zoom: 17,
    }));
perhaps
var point=fromLonLat([120,30]);
map.setView(new View({
        center: [point[0],point[1]],
        zoom: 17,
    }));
Mercator projection to WGS84 (there is a conflict with the original text, I suggest you look for other materials)
var x=e.point.lng;
var y=e.point.lat;
var lon= x/20037508.34*180;
var lat=y/20037508.34*180;
lat= 180/Math.PI*(2*Math.atan(Math.exp(lat*Math.PI/180))-Math.PI/2);
Here is an online tool for Mercator projection to WGS84
http://www.site-digger.com/tools/mct2latlng.html
View conversion
In a map, we need to change from one view to another. The most basic method is to change the display range of the map
map.centerAndZoom(point, 17);
The exploration function in Google Earth rotates from the earth to the target and around the target. The implementation process is as follows:
import 'ol/ol.css';
import Map from 'ol/Map';
import View from 'ol/View';
import {OSM, Vector as VectorSource} from 'ol/source';
import {Tile as TileLayer, Vector as VectorLayer} from 'ol/layer';
import {XYZ,TileImage} from "ol/source";
import {fromLonLat} from "ol/proj";
import {Feature} from "ol";
import {Point} from "ol/geom";
import {easeIn, easeOut} from "ol/easing"; //Progressive and fading
const Rmap=new Map({
    target:'Map_container',
    layers:[
        new TileLayer({
            title:"Image base map",
            source: new XYZ({
                url: "http://mt3.google.cn/vt/lyrs=s&hl=zh-CN&gl=cn&x={x}&y={y}&z={z}",
                wrapX: false
            })
        })
    ],
    loadTilesWhileAnimating: true, //Turn on animation
    view:flyView  //view
});
//Fly to the building and rotate around the building
document.getElementById("fly").onclick=function (){
    //Get building index
    var obj = document.getElementById("build_select");
    var index = obj.selectedIndex;
    var i = obj.options[index].value;
    //Add tag
    var  buildFea = new Feature({
        geometry: new Point(buildings[i]),
    });

    var vectorSource = new VectorSource({
        features: [buildFea],
    });

    var makerLayer = new VectorLayer({
        source: vectorSource,
    });

    Rmap.addLayer(makerLayer);
    //Add comments
    document.getElementById("result").innerHTML=content[i];

    var center=flyView.getCenter();
    var roa=flyView.getRotation();
    flyView.animate({
        duration:3000,
        center:[
        ],
        rotation: Math.PI,  //Rotation angle
        zoom: 18,
        easing:easeIn      //effect
    },
        {
            duration:6000,  //Rotation time in milliseconds
            center:buildings[i],
            rotation:Math.PI*2,
            easing:easeOut
        },
        //Rotate around the target
        {
            rotation:roa+Math.PI,
            duration:16000,
            anchor:buildings[i],   //Center point
        },
        {
            duration:16000,
            rotation:roa+2*Math.PI,
            anchor:buildings[i],
        });
}
Since the loaded layer is a plane layer, the loading effect is not as good as Google Earth. It is recommended that you use it with caution. The spin effect of 3D model will be involved in the following;
Problems encountered in the use of Geoserver
There are many tutorials about the installation and configuration of GeoServer on the network. I won't introduce them in detail here. The main problems focus on the pits I've stepped on
Cross domain problem
Modification of Geoserver configuration (1): open Geoserver\webapps\geoserver\web.xml file, find the location of filter level, and add the following contents:
<filter>
      <filter-name>cross-origin</filter-name>
      <filter-class>org.eclipse.jetty.servlets.CrossOriginFilter</filter-class>
      <init-param>
        <param-name>allowedOrigins</param-name>
        <param-value>*</param-value>
      </init-param>
      <init-param>
        <param-name>allowedMethods</param-name>
        <param-value>GET,POST</param-value>
      </init-param>
      <init-param>
        <param-name>allowedHeaders</param-name>
        <param-value>x-requested-with,content-type</param-value>
      </init-param>
    </filter>
(2) Find the location of filter mapping level and add the following:
<filter-mapping>
      <filter-name>cross-origin</filter-name>
      <url-pattern>/*</url-pattern>
    </filter-mapping>
(3) Find the location of the context param level and modify it as follows:
<context-param>
    <param-name>ENABLE_JSONP</param-name>
    <param-value>true</param-value>
  </context-param>
The above code may be included in the configuration file, or you can cancel the comment;
Note: this cross domain visit is more metaphysical. Many of my classmates seem to have failed in this method, but I only carried out the first two steps, as if I could cross domain; I suggest you check other solutions or use local files;
Call the service of Geoserver
WMS: it is recommended that all workspace and layer names should be in English
import 'ol/ol.css';
import Map from 'ol/Map';
import View from 'ol/View';
import {OSM, ImageWMS} from 'ol/source';
import {Image} from "ol/layer";
import TileLayer from "ol/layer/Tile";
import {ZoomSlider,ZoomToExtent} from "ol/control";
import Projection from 'ol/proj/Projection';


const map = new Map({
    layers: [
        new TileLayer({
            source: new OSM(),
        }),
    ],
    target: 'js-map',
    view: new View({
        center: [0, 0],
        zoom: 2,
    }),
});

const extent4214 = [73.62, 18.11, 134.77, 53.56];  //colour range
var projection4214 = new Projection({
    code: 'EPSG:4214',
    extent: extent4214,
    units: 'degree'
});

var myLayer = new Image({
    extent: extent4214,
    source: new ImageWMS({
        url: 'http://localhost:8084/geoserver/wms',
        params: {'LAYERS': 'TJ2021Test:Border_Nation', 'VERSION': '1.1.1'}, //Workspaces: layer names
        serverType: 'geoserver'
    })
});

const map = new Map({
    view: new View({
        projection: projection4214,
        center: [103.5, 35.835],
        zoom: 1
    }),
    layers:[
        myLayer
    ],
    target: 'js-map',
    pixelRatio: 1
});
json file: you need to import the json plug-in in Geoserver
import 'ol/ol.css';
import ExtentInteraction from 'ol/interaction/Extent';
import GeoJSON from 'ol/format/GeoJSON';
import Map from 'ol/Map';
import View from 'ol/View';
import {OSM, Vector as VectorSource} from 'ol/source';
import {Tile as TileLayer, Vector as VectorLayer} from 'ol/layer';
import {XYZ} from "ol/source";
import {fromLonLat} from "ol/proj";
import {Feature} from "ol";
import {Point} from "ol/geom";

const vectorSource = new VectorSource({
    url:"http://localhost:8084/geoserver/TJ2021Test/ows?service=WFS&version=1.0.0" +
        "&request=GetFeature&typeName=TJ2021Test%3ABorder_Nation" +
        "&outputFormat=application%2Fjson",
    // url:"/data/border_nation.xml",

    format: new GeoJSON()
});
// console.log(vectorSource);
const map = new Map({
    layers: [
        new TileLayer({
            source: new OSM(),
        }),
        new VectorLayer({
            source: vectorSource,
        }),
    ],
    target: 'js-map',
    view: new View({
        center: [0,0],
        zoom: 2,
    }),
});
It is also metaphysical here. I have been unable to call the local json file, but it can be published on Geoserver; Therefore, it is recommended that you try different methods when you encounter problems. You will indeed encounter many strange problems that you can't find.
Configuration and basic operation of Cesium
Configuration of Cesium
Reference articles
Cesium installation and environment configuration: https://blog.csdn.net/u013044828/article/details/87001951
Similar to OpenLayer, Cesium is a world-class JavaScript open source product for 3D Earth and map. It provides a development package based on JavaScript language, which is convenient for users to quickly build a zero plug-in Virtual Earth Web application, and has high quality assurance in performance, accuracy, rendering quality, multi platform and ease of use.
Similarly, Cesium also provides a large group of cases, which can be viewed on the official website.
https://cesium.com/platform/cesiumjs/
However, the configuration process is not as smooth as OpenLayer. First, the NPM installation method can be successfully installed or called, but errors will be reported on the web page. There are many and strange error types; Therefore, I chose to use Tomcat to set up Cesium local server. The advantage is that it is easy to use. The disadvantage is that it seems that the OpenLayer library cannot be configured and used according to the above method in this environment, so I have to place the project files in two folders.
For Tomcat installation and configuration, please refer to the following links:
https://blog.csdn.net/qq_40881680/article/details/83582484?ops_request_misc=%257B%2522request%255Fid%2522%253A%2522164068545116780264098730%2522%252C%2522scm%2522%253A%252220140713.130102334...%2522%257D&request_id=164068545116780264098730&biz_id=0&utm_medium=distribute.pc_search_result.none-task-blog-2alltop_positive~default-1-83582484.pc_search_mgc_flag&utm_term=tomcat%E5%AE%89%E8%A3%85%E5%8F%8A%E9%85%8D%E7%BD%AE%E6%95%99%E7%A8%8B&spm=1018.2226.3001.4187
I use Tomcat 10 0, the port number is the default (8080)
Cesium downloads the zip file from the official website and unzips it to the Tomcat web apps folder. The version I use here is cesium 1.0 eighty-eight
https://cesium.com/downloads/
Basic operation of Cesium
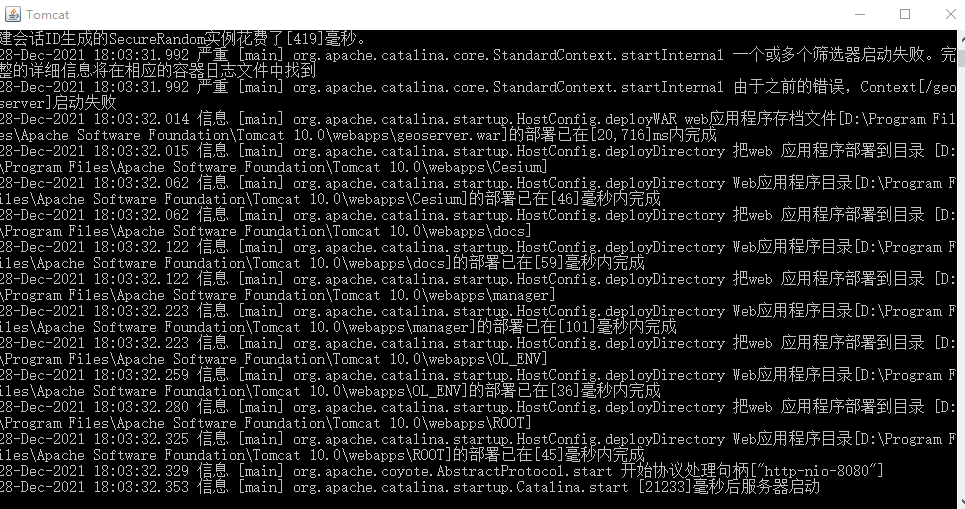
Start the cmd console and run startup.exe in the bin folder under the Tomcat directory bat
D:\>cd D:\Program Files\Apache Software Foundation\Tomcat 10.0\bin

D:\Program Files\Apache Software Foundation\Tomcat 10.0\bin>startup.bat
Using CATALINA_BASE:   "D:\Program Files\Apache Software Foundation\Tomcat 10.0"
Using CATALINA_HOME:   "D:\Program Files\Apache Software Foundation\Tomcat 10.0"
Using CATALINA_TMPDIR: "D:\Program Files\Apache Software Foundation\Tomcat 10.0\temp"
Using JRE_HOME:        "C:\Program Files\Java\jre1.8.0_311"
Using CLASSPATH:       "D:\Program Files\Apache Software Foundation\Tomcat 10.0\bin\bootstrap.jar;D:\Program Files\Apache Software Foundation\Tomcat 10.0\bin\tomcat-juli.jar"
Using CATALINA_OPTS:   ""
The Tomcat service will be started. Do not close the interface during use
Enter in the browser
http://localhost:8080/Cesium/
See the following page:
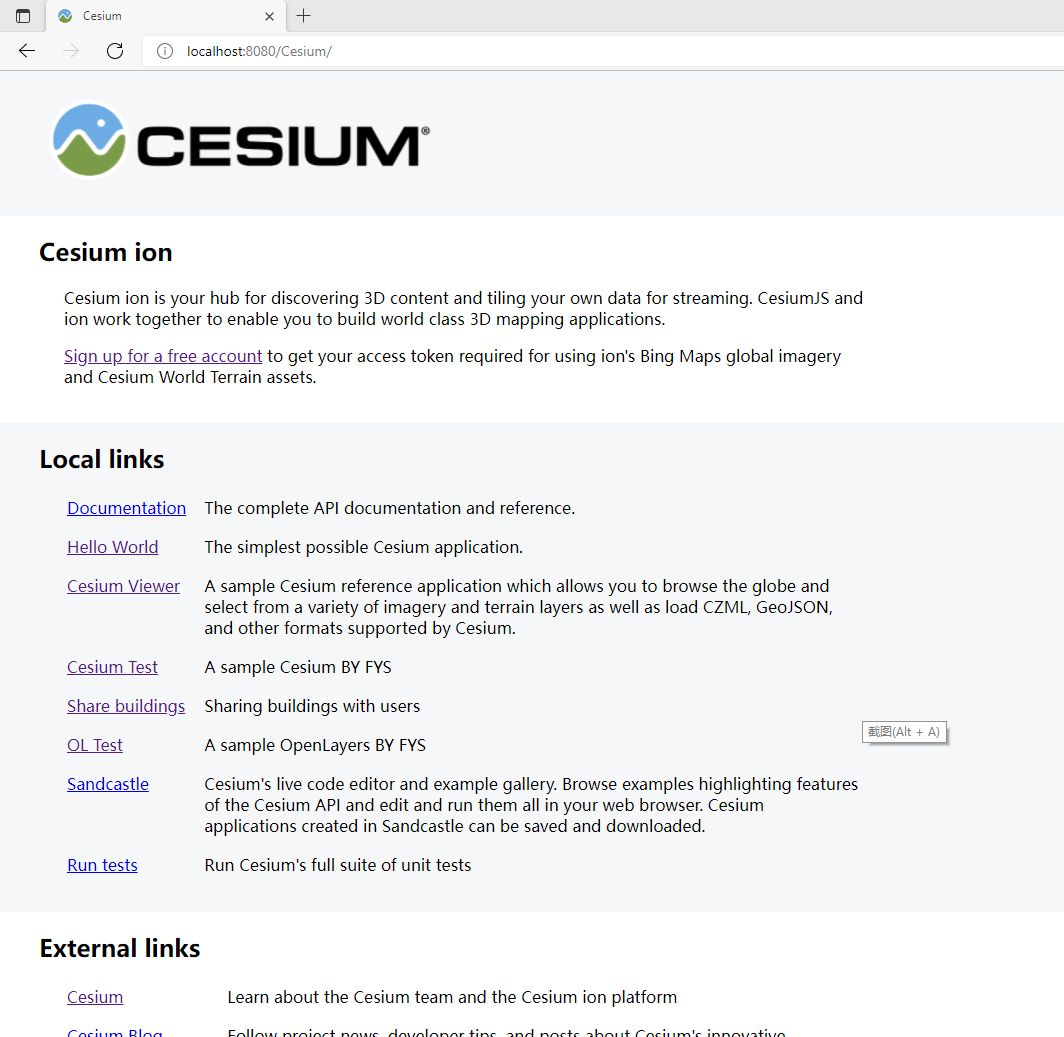
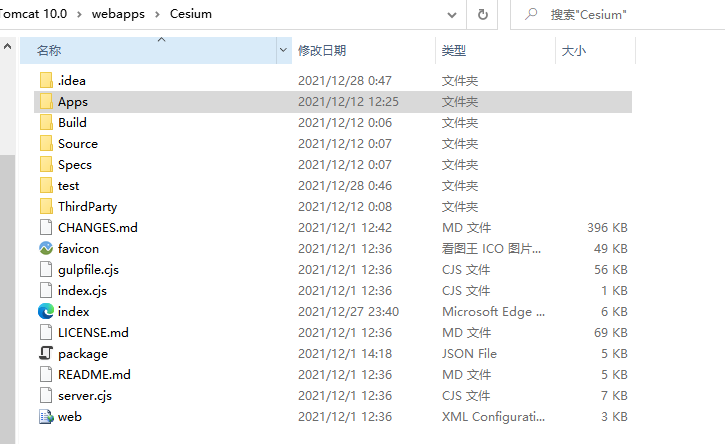
Among them, Cesium test, share Buildings and OL test are my own pages, and the project directory needs to be placed in the same level directory of the lower level address
Installation path \ Tomcat
10.0\webapps\Cesium\Apps
As shown in the figure below, the test folder is the directory where I put my own projects, and the apps folder is the official example
In index Add code to HTML
<tr>
              <td><a href="test/Cesium_test.html">Cesium Test</a></td>
              <td>
	                A sample Cesium BY Author
              </td>
            </tr>
            <tr>
              <td><a href="test/share_building.html">Share buildings</a></td>
              <td>
                Sharing buildings with users
              </td>
            </tr>
            <tr>
              <td><a href="OL_ENV/index.html">OL Test</a></td>
              <td>
                A sample OpenLayers BY Author
              </td>
            </tr>
Call map
<div id="cesiumContainer"></div>
var viewer = new Cesium.Viewer('cesiumContainer',{
            animation:true,       //Show animation controls
            homeButton:true,       //Show home key
            //geocoder:false, / / whether to display the place name lookup control. If it is set to true, it cannot be queried
            baseLayerPicker:false, //Show layer selection controls
            timeline:true,        //Show timeline controls
            fullscreenButton:true, //Full screen display
            scene3DOnly:true,     //If set to true, all geometry is drawn in 3D mode to save GPU resources
            infoBox:true,         //Display the information displayed after clicking the element
            sceneModePicker:false,  //Display projection control 3D / 2D
            navigationInstructionsInitiallyVisible:false,
            navigationHelpButton:false,     //Show help information control
            selectionIndicator:false,        //Display indicator assembly
            //Load google satellite images
            imageryProvider : new Cesium.UrlTemplateImageryProvider({url:"http://mt1.google.cn/vt/lyrs=s&hl=zh-CN&x={x}&y={y}&z={z}&s=Gali"})

        });
Load 3D model (b3dm file with json)
        var osmBuildingsTileset = new Cesium.Cesium3DTileset({ url: './DATA/tileset.json' });
        var tileset = viewer.scene.primitives.add(osmBuildingsTileset);
        viewer.scene.primitives.add(tileset);
        viewer.flyTo(tileset);
three-dimensional animation
After loading the three-dimensional model of the campus, we need to load some simple animation effects
The first is to move the perspective to the real angle after the user clicks
var handler = new Cesium.ScreenSpaceEventHandler(viewer.canvas);
handler.setInputAction(function (event) {
        var earthPosition = viewer.camera.pickEllipsoid(event.position, viewer.scene.globe.ellipsoid); //Returns the coordinates of the point above the ellipsoid
        if (Cesium.defined(earthPosition)) {
          var point = viewer.entities.add({
            position: earthPosition,
            point: {
              color: Cesium.Color.WHITE,
              pixelSize: 5
            }
          });
          var offset = new Cesium.HeadingPitchRange(
                  Cesium.Math.toRadians(290), // Horizontal rotation angle 0-360 degrees
                  -Cesium.Math.toRadians(5),// Vertical plane pitch angle / / 0-90 degrees
                  100 // The distance from the camera to the center of the earth
          );
          viewer.zoomTo(point, offset);   //Move perspective to real perspective

        }
      }, Cesium.ScreenSpaceEventType.LEFT_CLICK);
        //Create point
        function createPoint(worldPosition) {
            var point = viewer.entities.add({
                position: worldPosition,
                point: {
                    color: Cesium.Color.WHITE,
                    pixelSize: 5
                }
            });
            return point;
        }
The second is to rotate around the target building, which is basically similar to the above functions. The main idea is to add steps to the horizontal perspective and rotate gradually
 handler.setInputAction(function (event) {
            var earthPosition = viewer.camera.pickEllipsoid(event.position, viewer.scene.globe.ellipsoid); //Returns the coordinates of the point above the ellipsoid
            if (Cesium.defined(earthPosition)) {
                // createPoint(earthPosition); // Add a point where you click
                var point = viewer.entities.add({
                    position: earthPosition,
                    point: {
                        color: Cesium.Color.WHITE,
                        pixelSize: 5
                    }
                });

                let initialHeading = 0; //Initial horizontal angle
                let step = 0.05;    //step
                let setIntervalID = setInterval(function(){
                    if (initialHeading > 360) {
                        initialHeading = 0;
                    }
                    var offset = new Cesium.HeadingPitchRange(
                        Cesium.Math.toRadians(initialHeading), // Horizontal rotation angle 0-360 degrees
                        -Cesium.Math.toRadians(12),// Vertical plane pitch angle / / 0-90 degrees
                        150  // The distance from the camera to the center of the earth
                    );
                    viewer.zoomTo(point, offset);
                    initialHeading += step;

                }, step * 1000);

            }
        }, Cesium.ScreenSpaceEventType.LEFT_CLICK);
Reference link
https://blog.csdn.net/qq_30100043/article/details/86646714?ops_request_misc=%257B%2522request%255Fid%2522%253A%2522164060059716780265464689%2522%252C%2522scm%2522%253A%252220140713.130102334...%2522%257D&request_id=164060059716780265464689&biz_id=0&utm_medium=distribute.pc_search_result.none-task-blog-2allbaidu_landing_v2~default-1-86646714.pc_search_mgc_flag&utm_term=cesium%E8%8E%B7%E5%8F%96%E7%82%B9%E7%9A%84%E5%9D%90%E6%A0%87&spm=1018.2226.3001.4187
https://blog.csdn.net/popstarqq/article/details/118155872?ops_request_misc=%257B%2522request%255Fid%2522%253A%2522164060041116780271945257%2522%252C%2522scm%2522%253A%252220140713.130102334.pc%255Fall.%2522%257D&request_id=164060041116780271945257&biz_id=0&utm_medium=distribute.pc_search_result.none-task-blog-2allfirst_rank_ecpm_v1~rank_v31_ecpm-8-118155872.pc_search_mgc_flag&utm_term=cesium%E5%AE%9E%E7%8E%B0%E5%8A%A8%E7%94%BB%E6%95%88%E6%9E%9C&spm=1018.2226.3001.4187
Campus map service
major function
- Campus location display
- Campus plane map
- Transportation to campus
- Campus 3D guide
- Building exploration / introduction to specific buildings
Take advantage of OpenLayer's capabilities
Display campus plan location
The main step is to add annotations and comments. Here, you need to add controls in HTML files
 <div id="splabel" style="display: none;">
        <div id="smarker" class="marker" title="Marker">
            <a class="adress" id="address" target="_blank" href="intro_siping.html">
                *****campus
            </a>
        </div>
    </div>
var point=fromLonLat([*,*]);
var Marker=new Overlay({
    position:point,
    positioning:"center-center",
    element:document.getElementById("smarker"),
    stopEvent:false
});
TDTmap.addOverlay(Marker);
Marker.getElement().title="*****campus";
var Text= new Overlay({
    position:point,
    element:document.getElementById("address"),
})
Navigate to campus
Obtain the starting point position: because there is no external GPS, the starting point position is obtained by point selection or input (there is the coordinate system problem mentioned above)
function showInfo(e) {
            var x=e.point.lng;
            var y=e.point.lat;
            var lon= x/20037508.34*180;
            var lat=y/20037508.34*180;
            lat= 180/Math.PI*(2*Math.atan(Math.exp(lat*Math.PI/180))-Math.PI/2);

            document.getElementById('lng').value =  lon;
            document.getElementById('lat').value =  lat;
            var startMarker = new BMapGL.Marker(new BMapGL.Point(lon-0.002,lat+0.172)); //A constant term is added here to correct
            startPoint= new BMapGL.Point(lon-0.002,lat+0.172);
            markersArray.push(startMarker);
            clearOL(markersArray);//There is only one starting point. Remove other marks
            map.addOverlay(startMarker);
        }
The navigation mode is to call the path planning function of Baidu map.
Zoom to the school to display the flat map
Button control in HTML file, used to select
<div id="part">
        <select id="select">
            <option value="0">***campus</option>
            <option value="1">**campus</option>
            <option value="2">**campus</option>
            <option value="3">**campus</option>
        </select>
        <button id='search'>Show campus map</button>
    </div>
var btn1=document.getElementById("search");
btn1.addEventListener("click",function (){
    var obj = document.getElementById("select");
    var index = obj.selectedIndex; // Select index
    var i = obj.options[index].value; // Selected value
    var lng=[x1,x2,x3,x4];
    var lat=[y1,y2,y3,y4];
    var x= lng[i]*20037508.34/180;
    var y=Math.log(Math.tan((90+lat[i])*Math.PI/360))/(Math.PI/360)*20037508.34/360;

    TDTmap.setView(new View({
        center: [x,y],
        zoom: 17,
    }));

})
Introduction to specific buildings
Focus on specific buildings in the form of animation. See "view conversion" above for details
Leverage the capabilities of Cesium
3D navigation
See basic operation of Cesium for details of loading and importing animation
Get the building model and extract attribute information (right click)
var handler = new Cesium.ScreenSpaceEventHandler(viewer.canvas);
        //
        handler.setInputAction(function (movement) {
            var pick = viewer.scene.pick(movement.position);
            if (Cesium.defined(pick)) {
                alert('id:'+pick.id.id+', name:'+pick.id.name);
            }
        }, Cesium.ScreenSpaceEventType.RIGHT_CLICK);
summary
In the official website, OpenLayer and Cesium provide rich cases, and the API s of Baidu map and sky map also provide basic code; The campus map service website in this paper simply integrates some functions. For WebGIS development, data acquisition and processing are very key. For example, the loaded campus 3D model is still not handled well by BlenderGIS, QGIS and some conversion tools; Secondly, in web page development, some user interaction parts and database connection are also very important, and need high programming ability. Most importantly, WebGIS is just a tool. We need to constantly improve ourselves and observe life, and use this tool to make projects with higher practical significance. I hope we can make persistent efforts in the next development.